P-47D Bubbletop Hasegawa 1/32
Hi Guys,
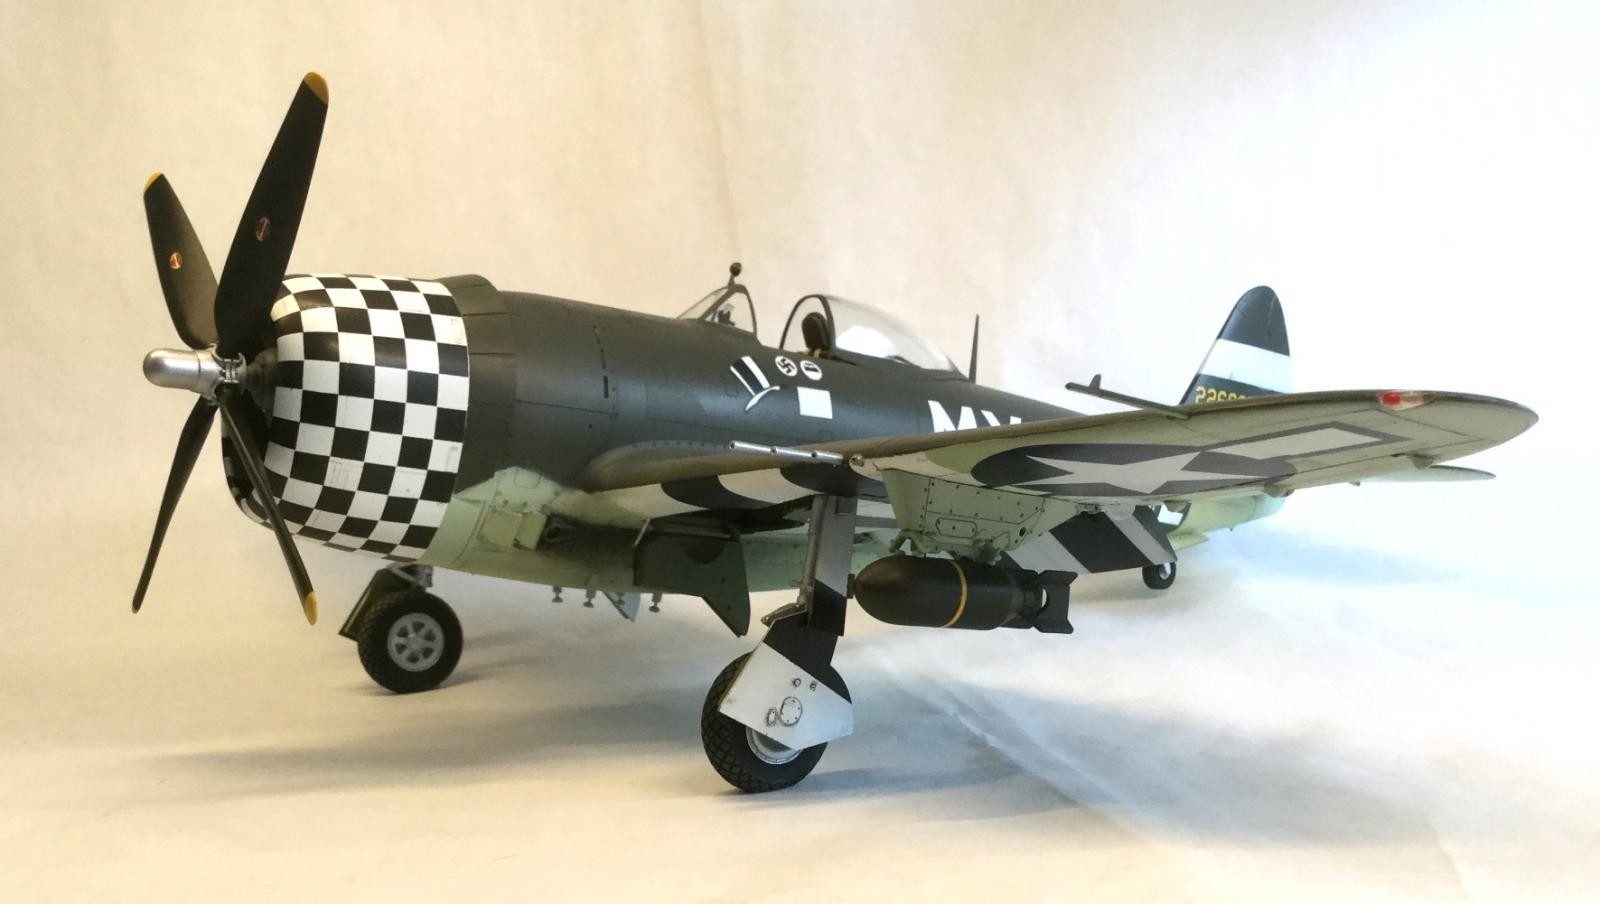
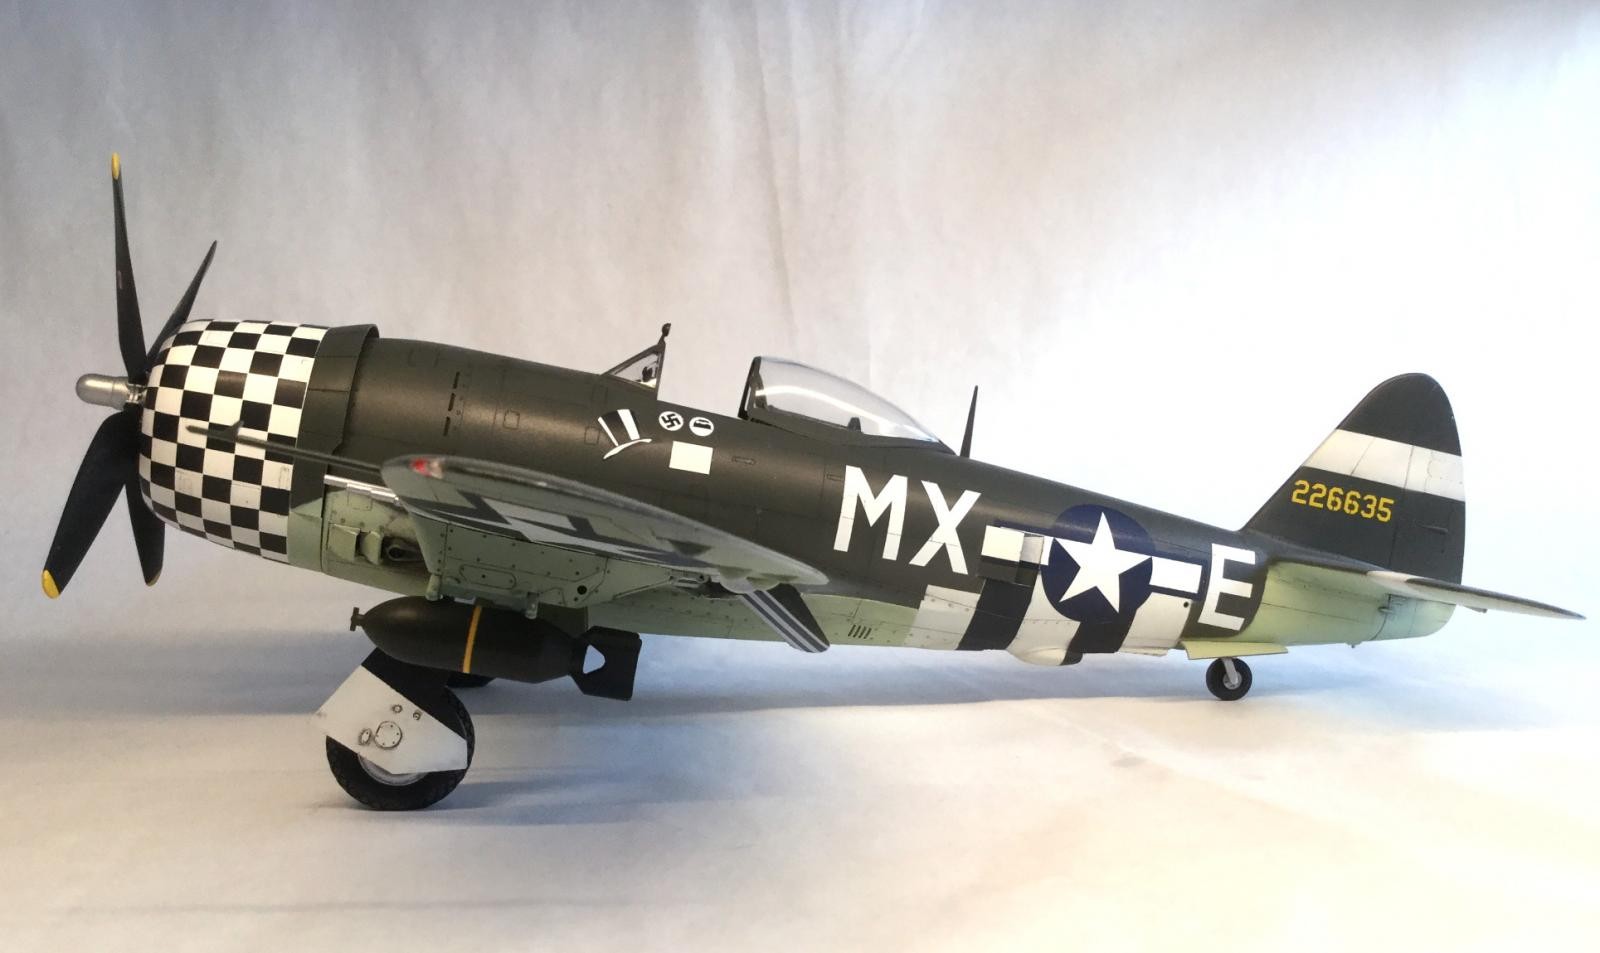
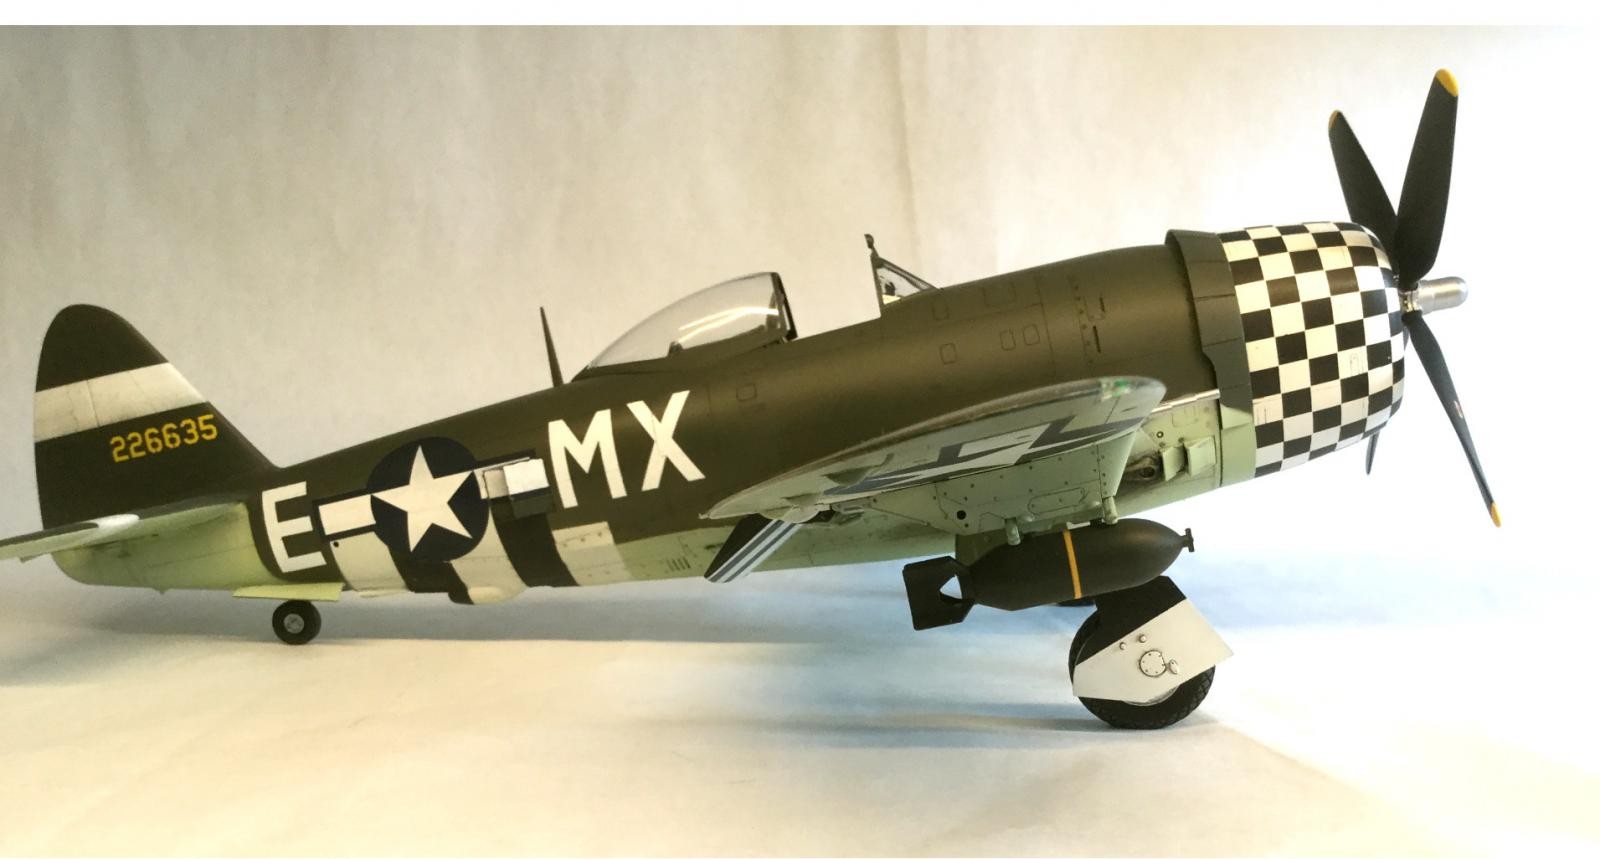
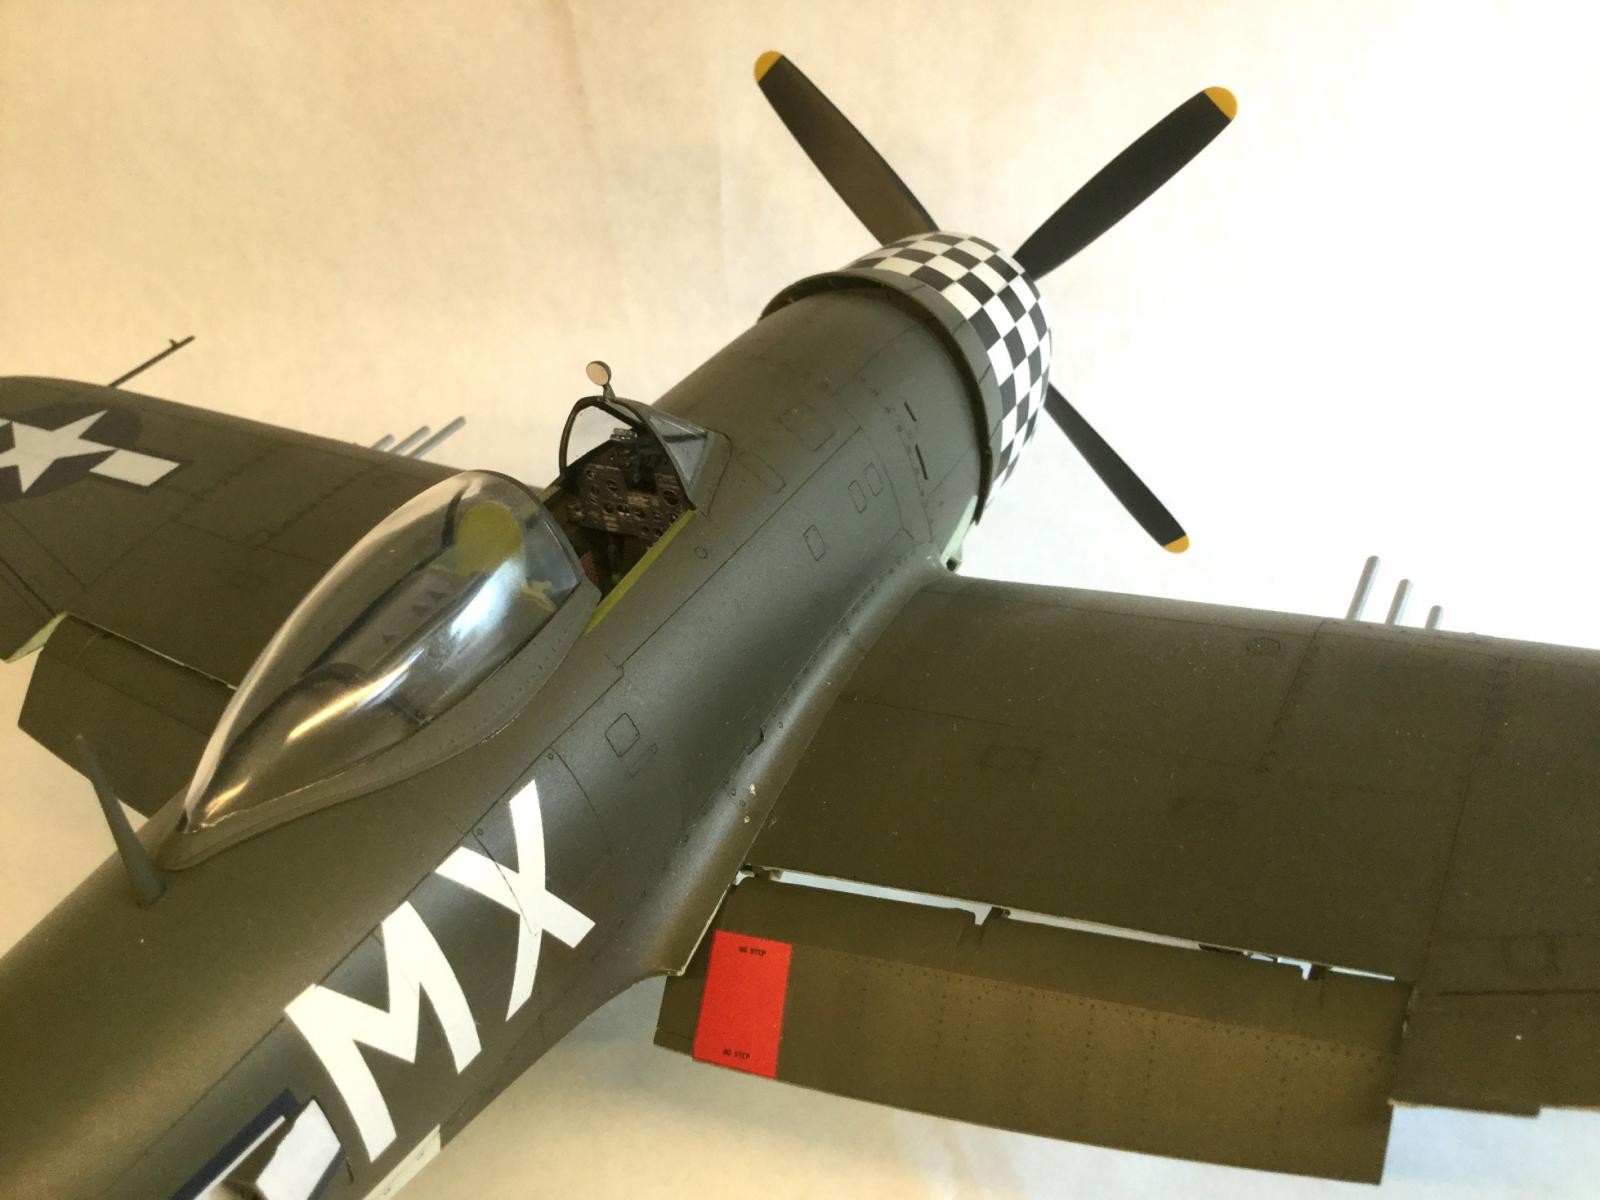
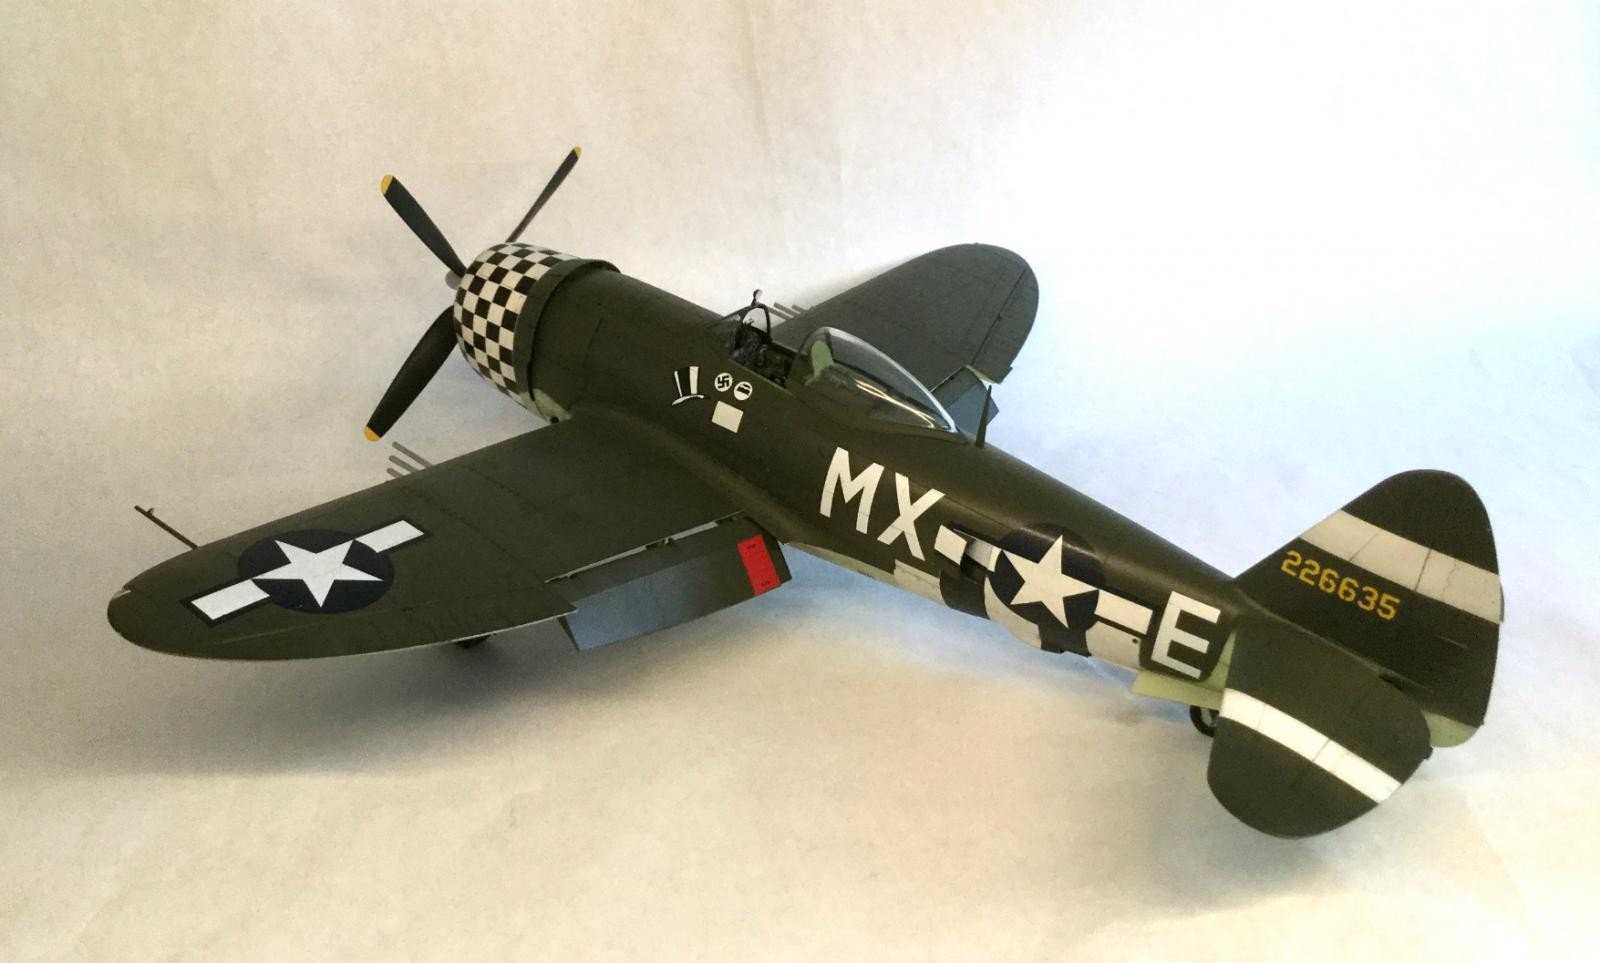
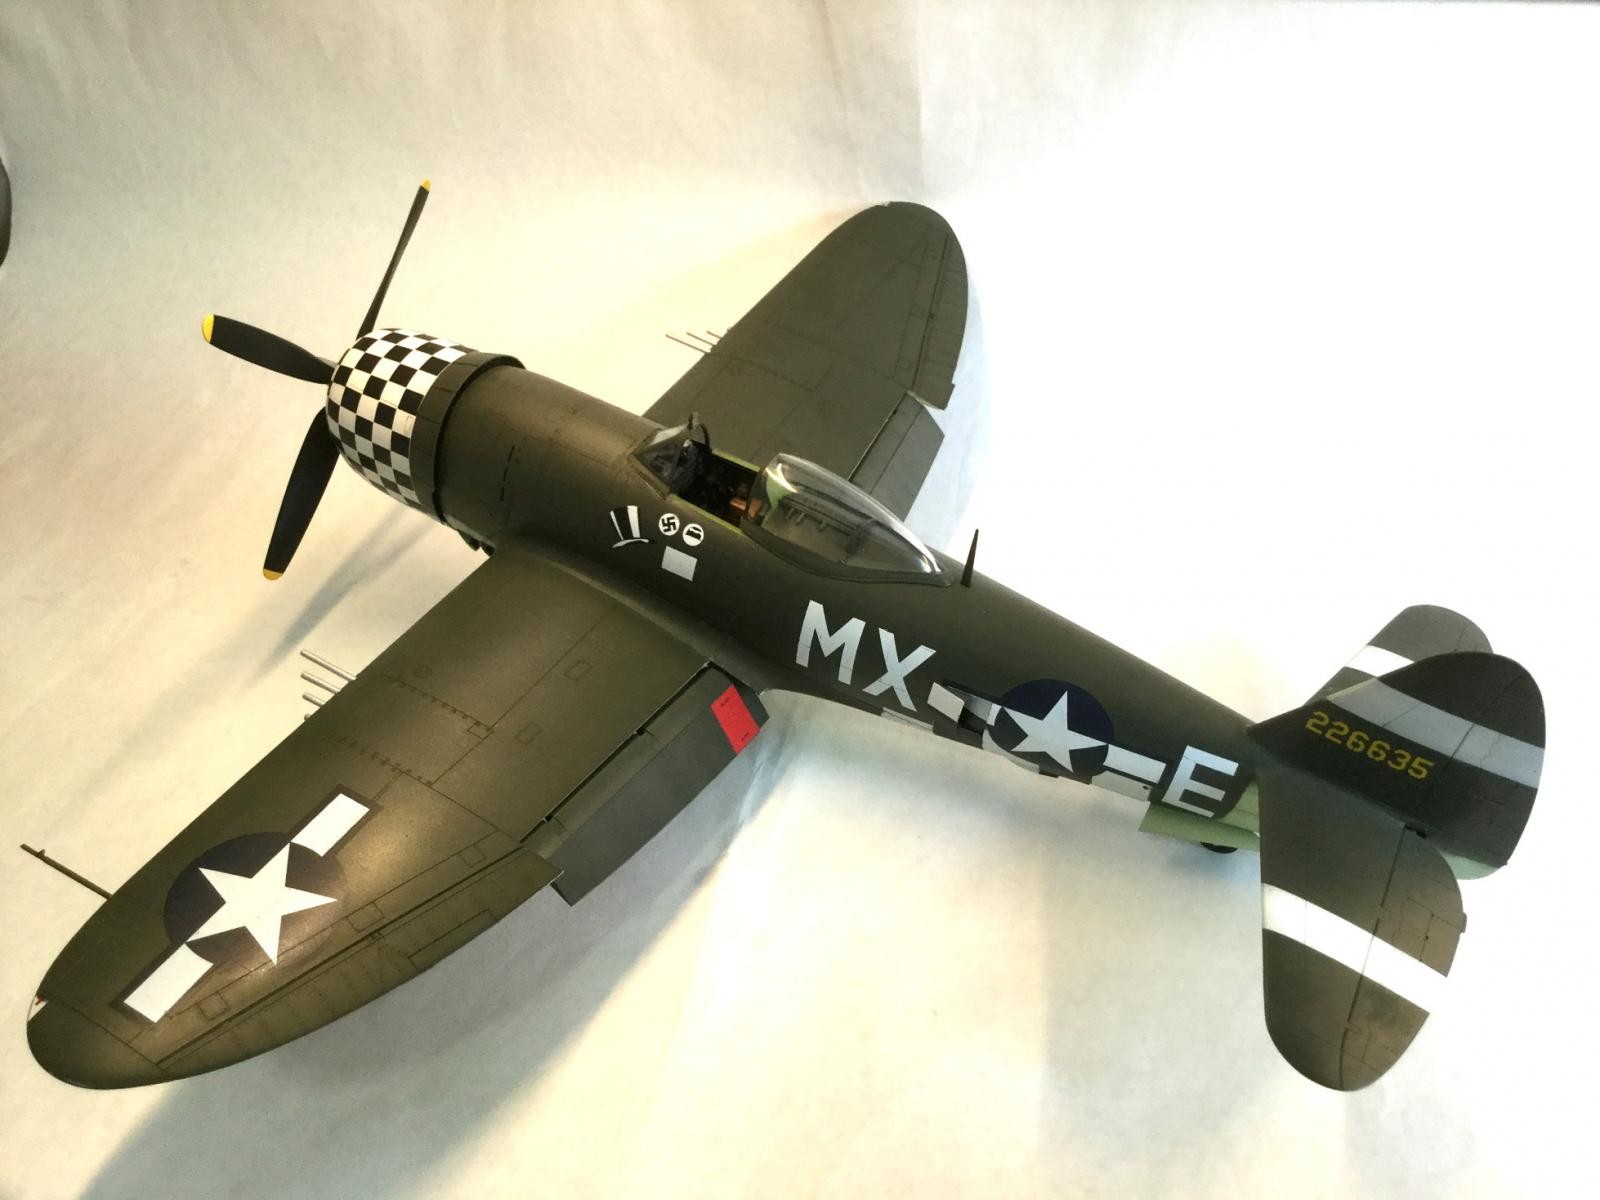
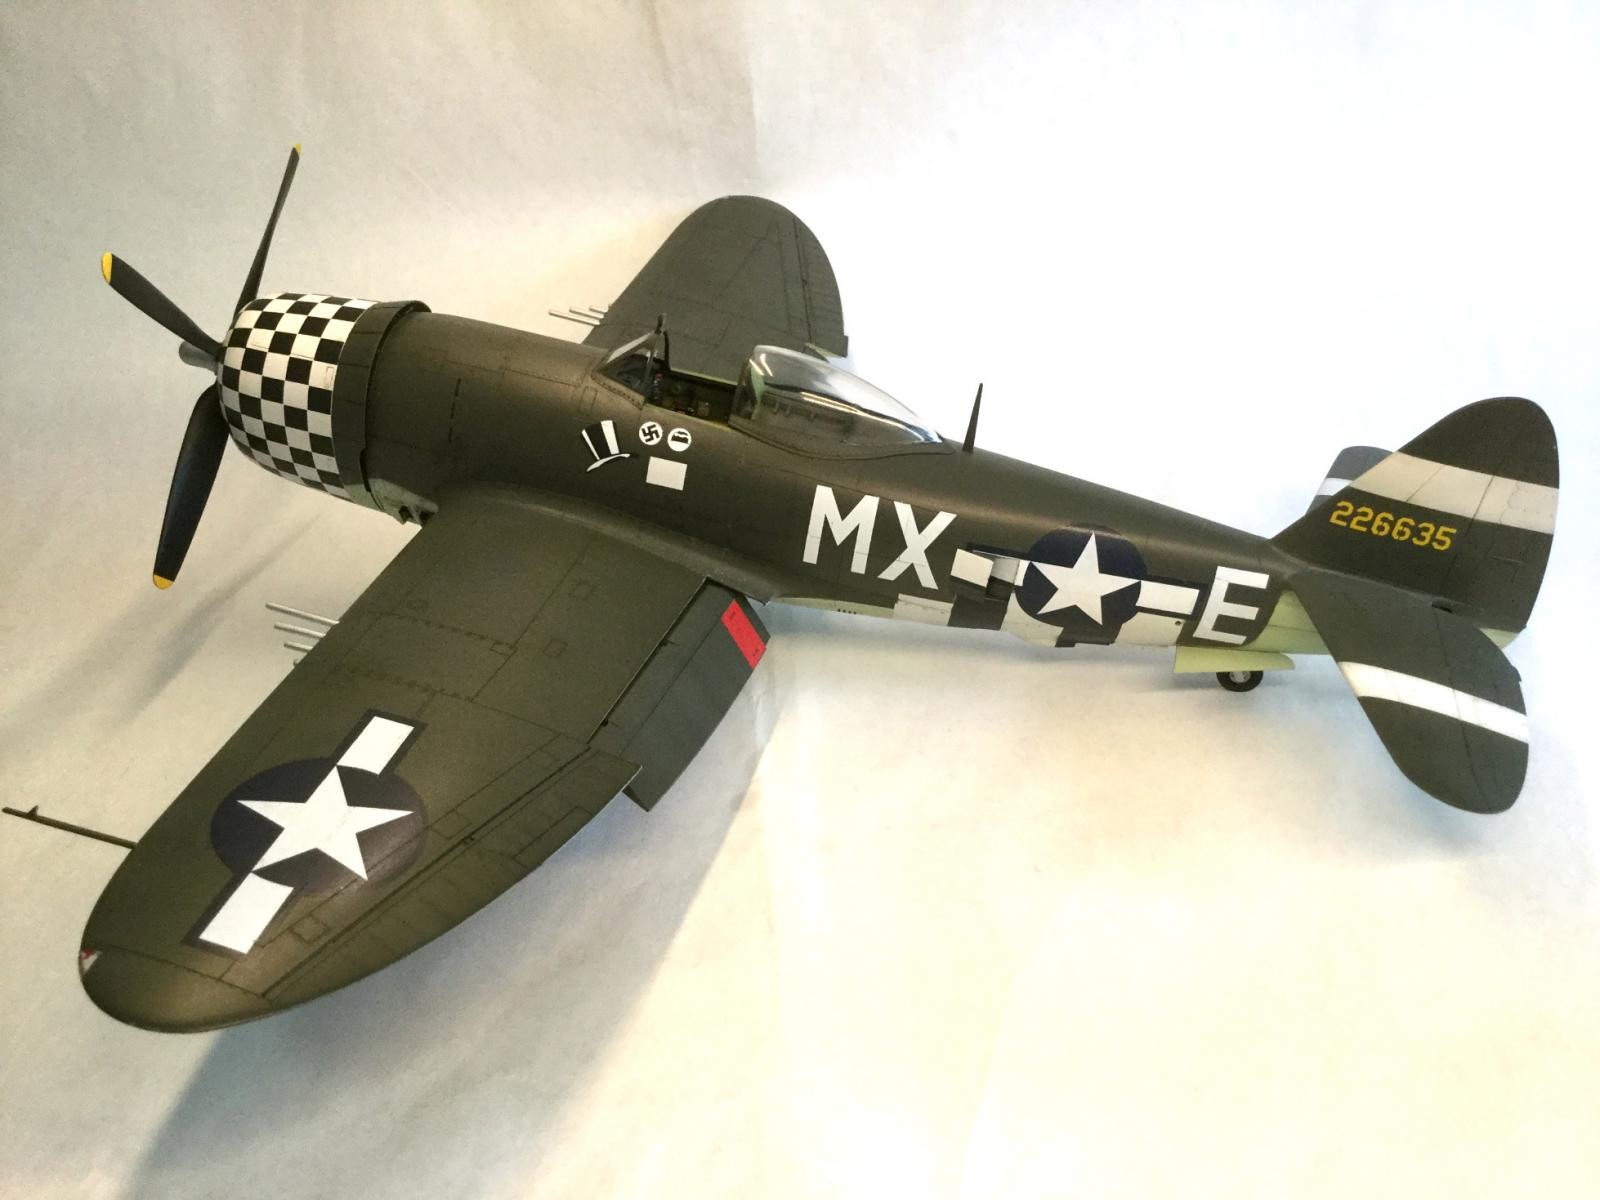
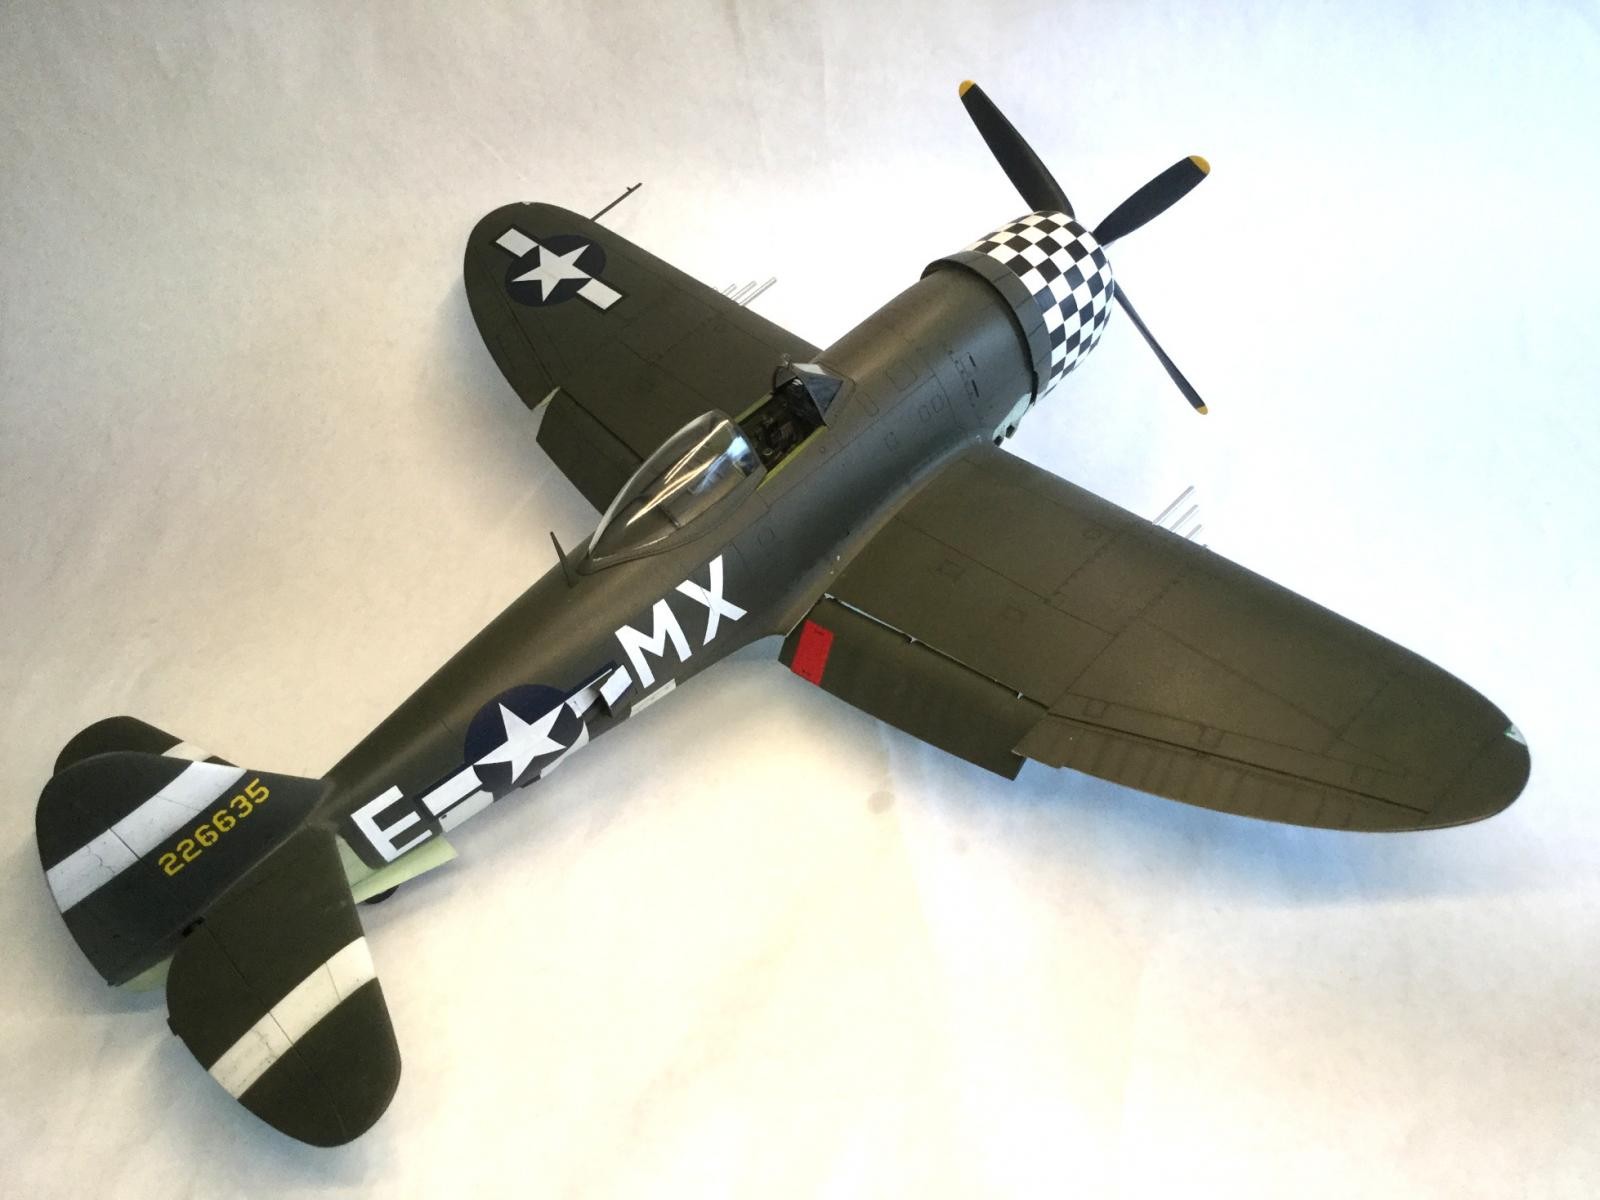
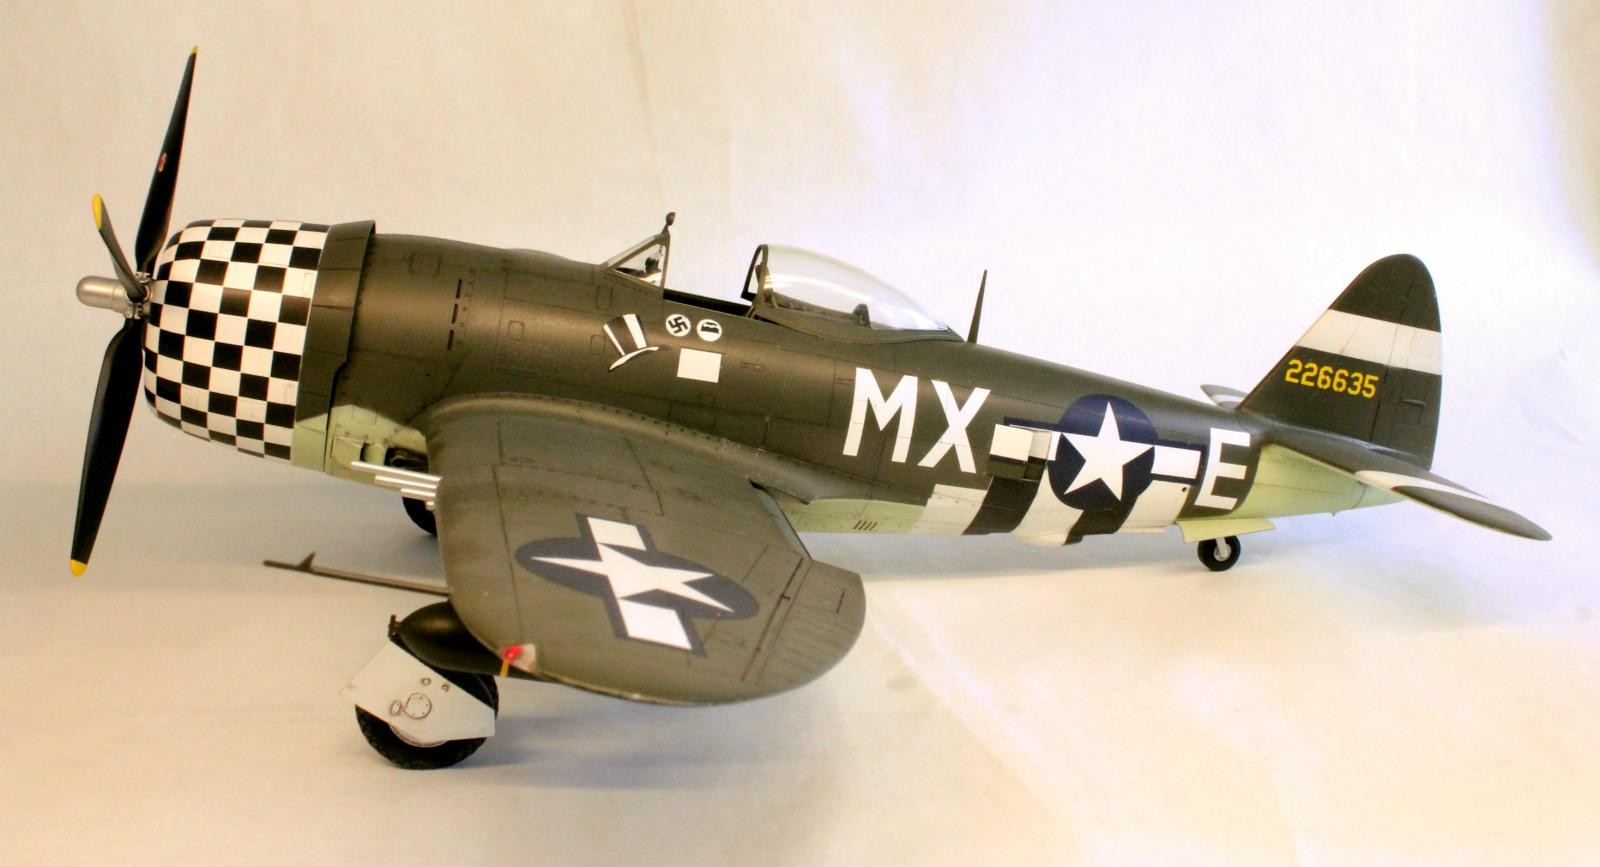
This is my Hasegawa P-47D in 1/32nd scale. It represents the aircraft flown at one point by Richard “Dick” Hewitt of the 82nd FS, 78th FG, 8th AF, USAAF. The scheme of RAF Dark Green topsides and Sky undersides is based on an interview with Hewitt himself, who explained how this particular a/c was painted in the field. He also mentions that MX-E was not his personal machine, but I still wanted to do it – especially with the nice color scheme. The decals are a mix of old Superscale and newer Cutting Edge. The cowl checks were mostly applied one at a time (!) from the Superscale generic P-47 cowl pieces. This was because I accidentally crumpled up the Cutting Edge solid decal. The D-Day stripes were painted – actually several times over until I got them the right width and sequence (overall, this was a slow build due mostly to my own errors and subsequent saves).
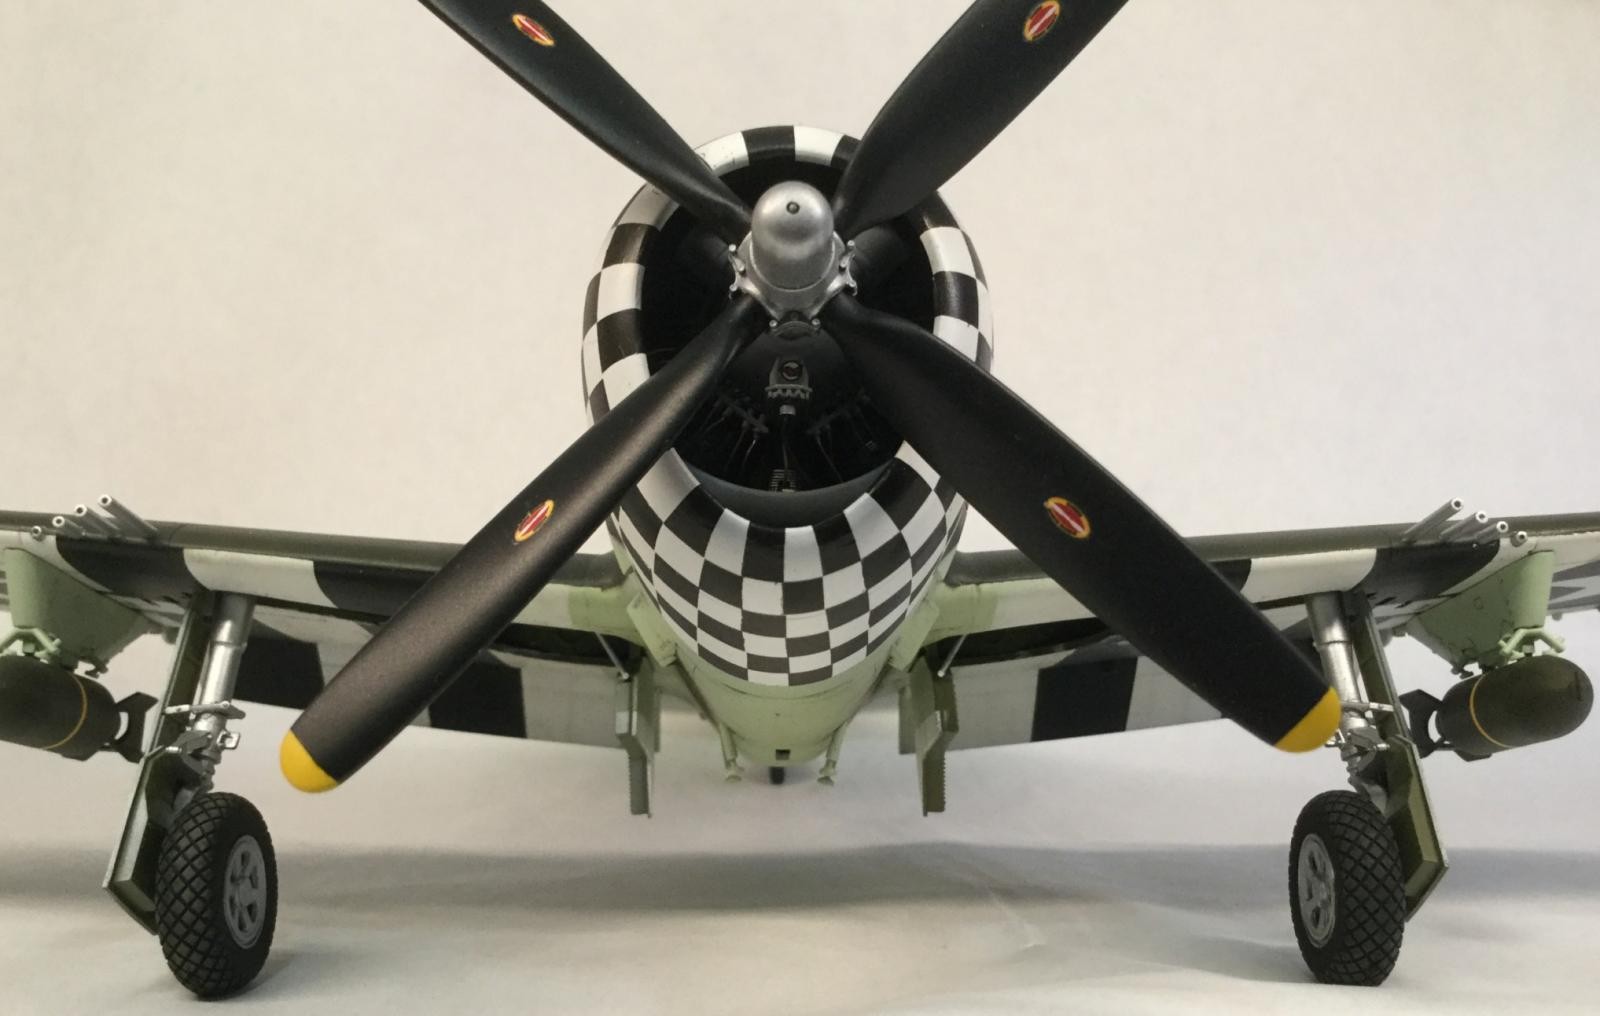
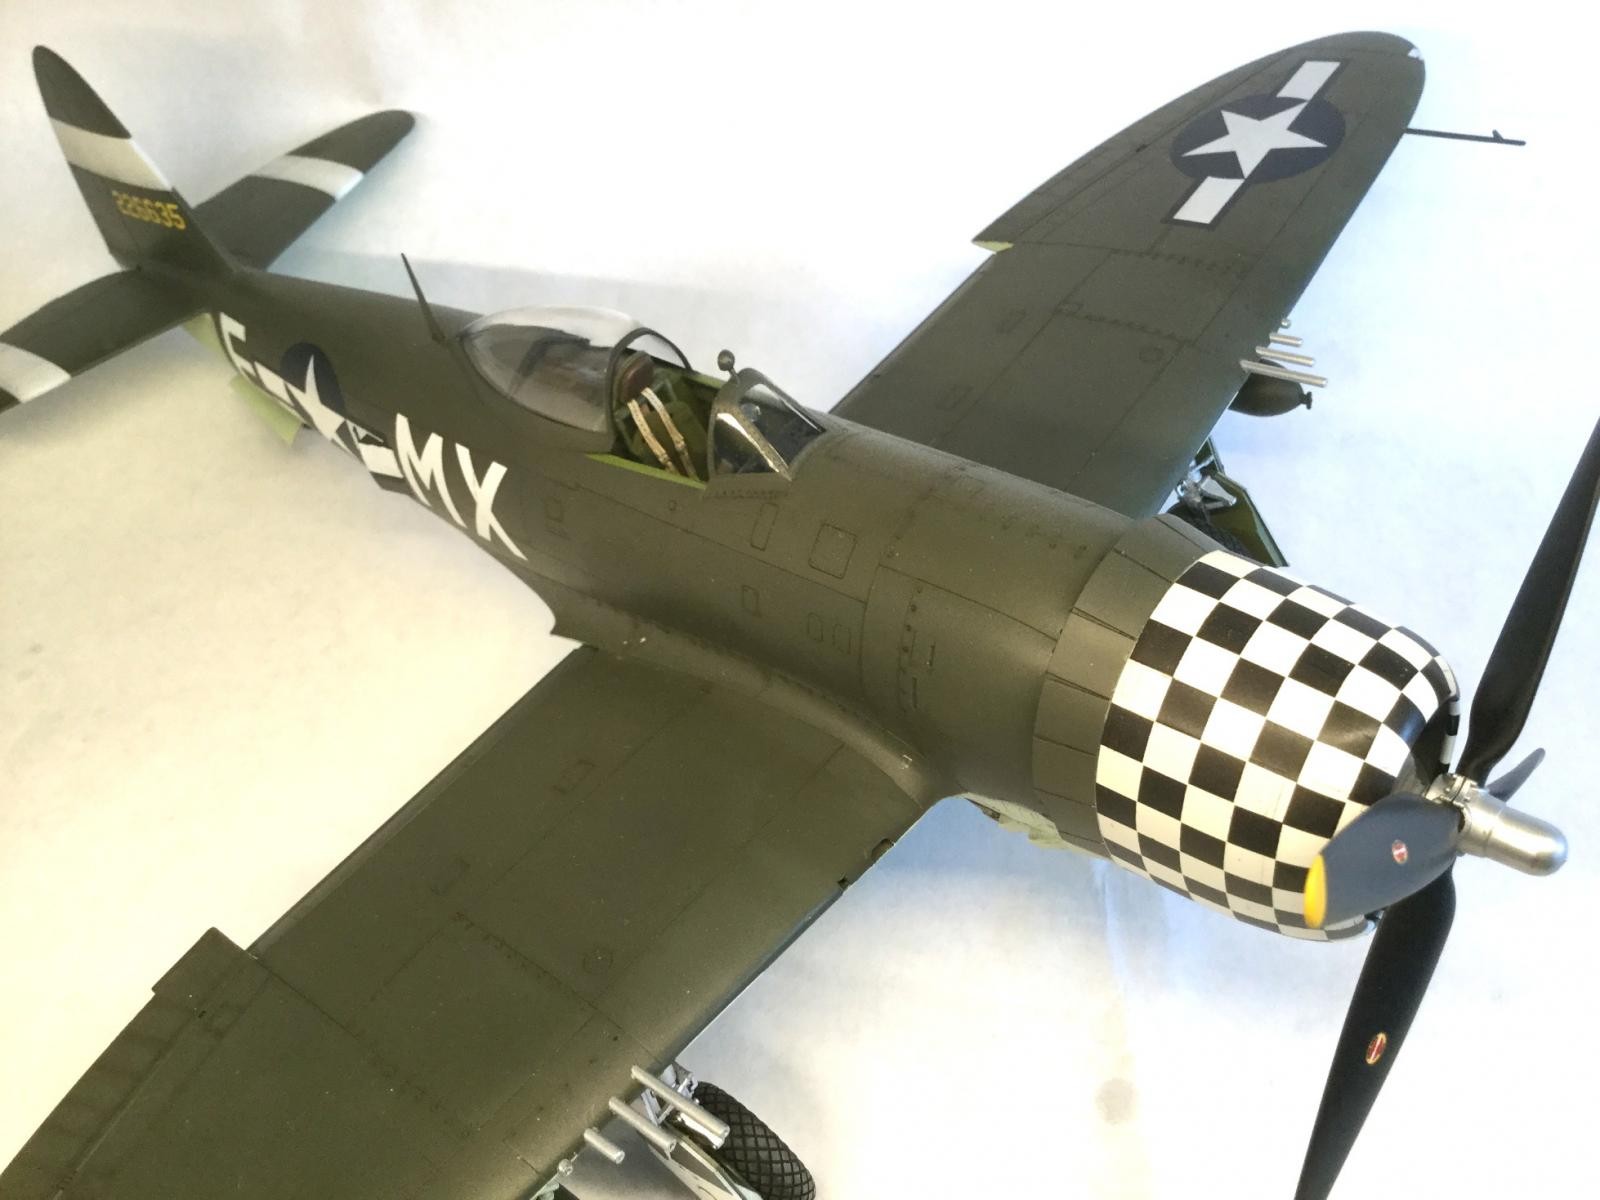
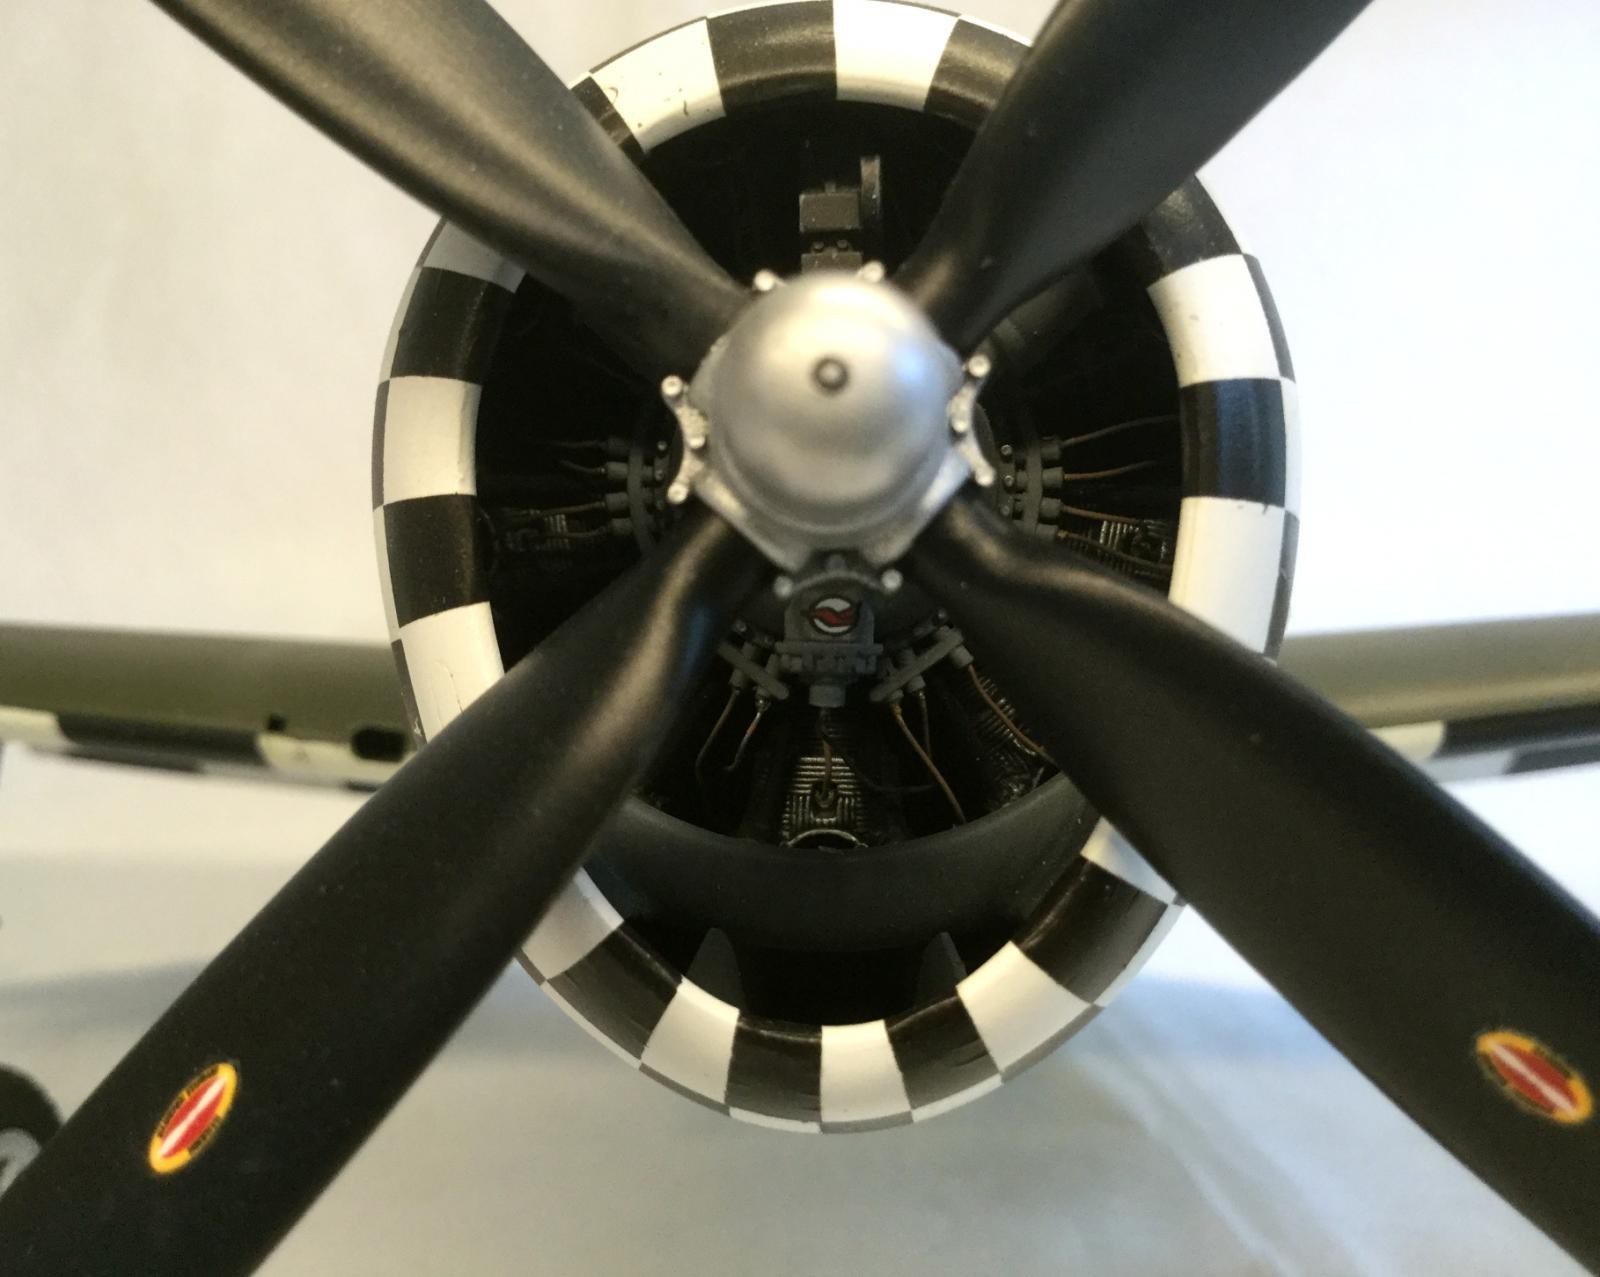
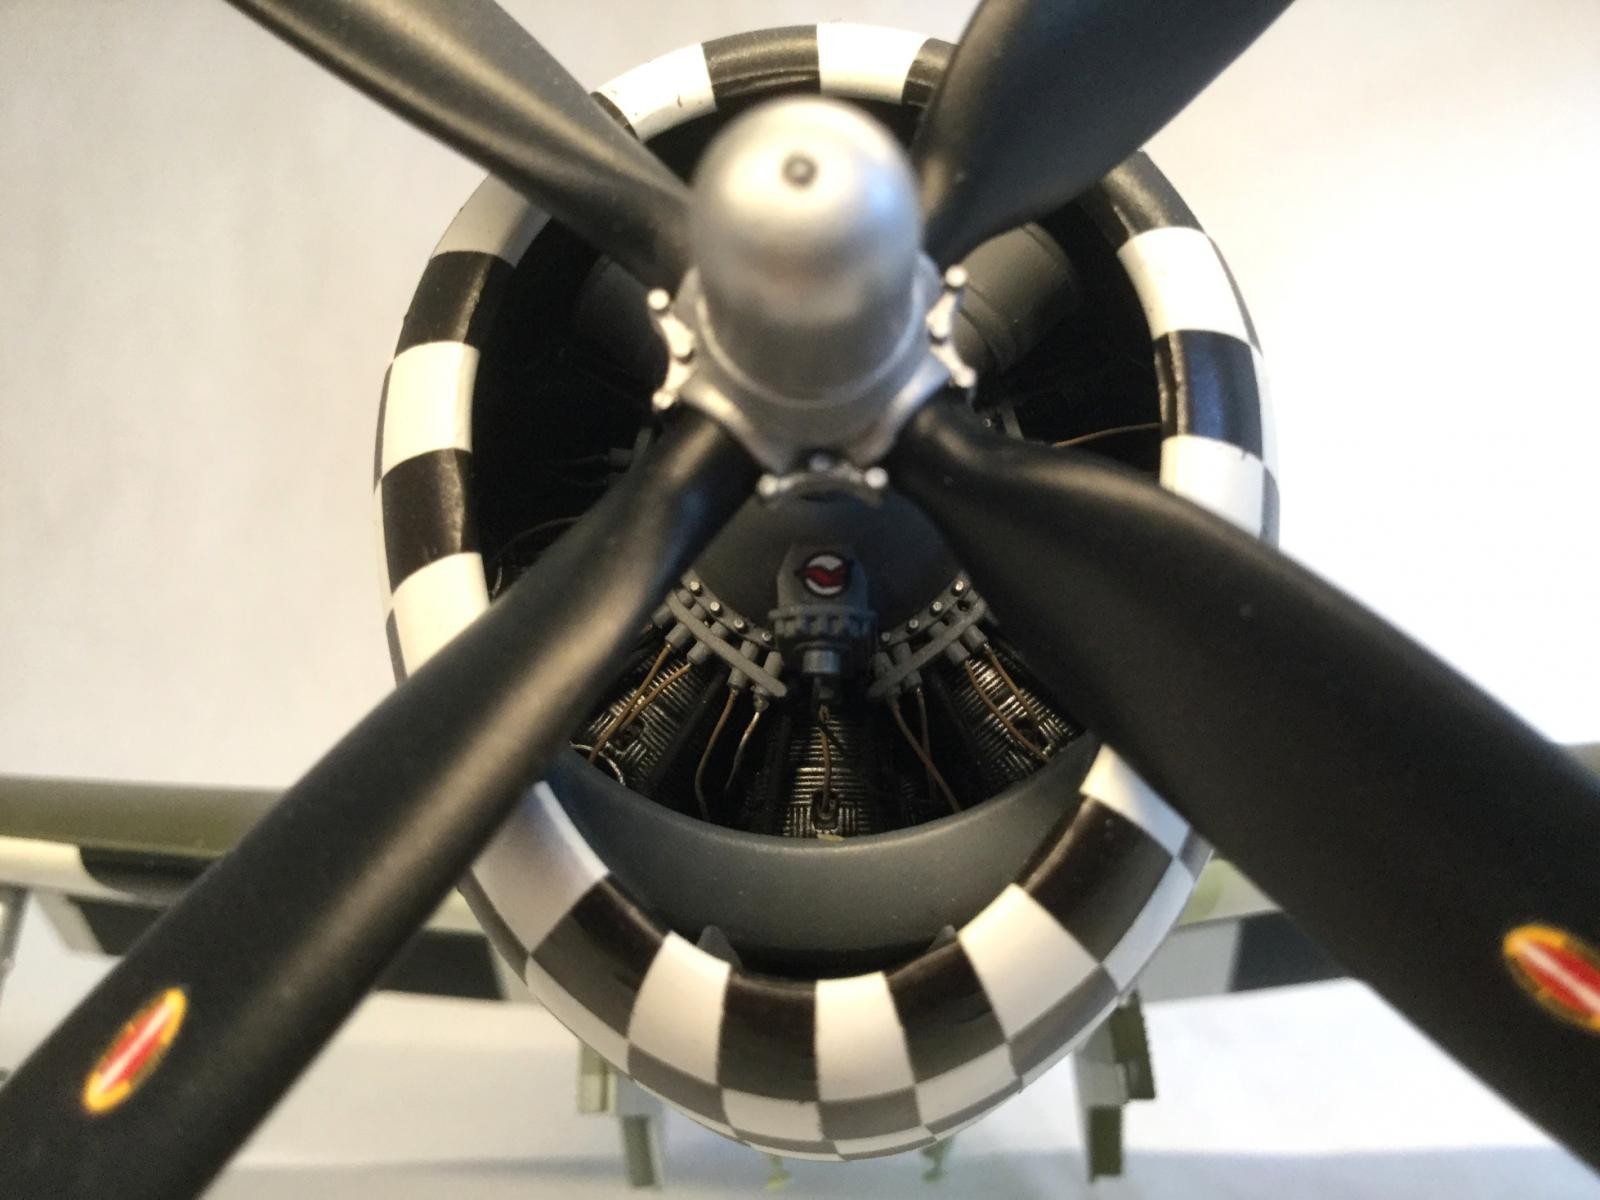
I must thank Tom Cleaver for warning builders about the step under the fuselage left by the misaligned engine in this kit (in reviews in Modeling Madness some years ago). Rather than using putty to fix it, I carefully realigned the fit of the engine during assembly by sawing off the mounting post and moving it up slightly. It was fiddly, especially when it came to dry fitting the engine after doing all the ignition wiring with solder and getting the cowling to go over that. Nonetheless, it worked and was worth the effort.
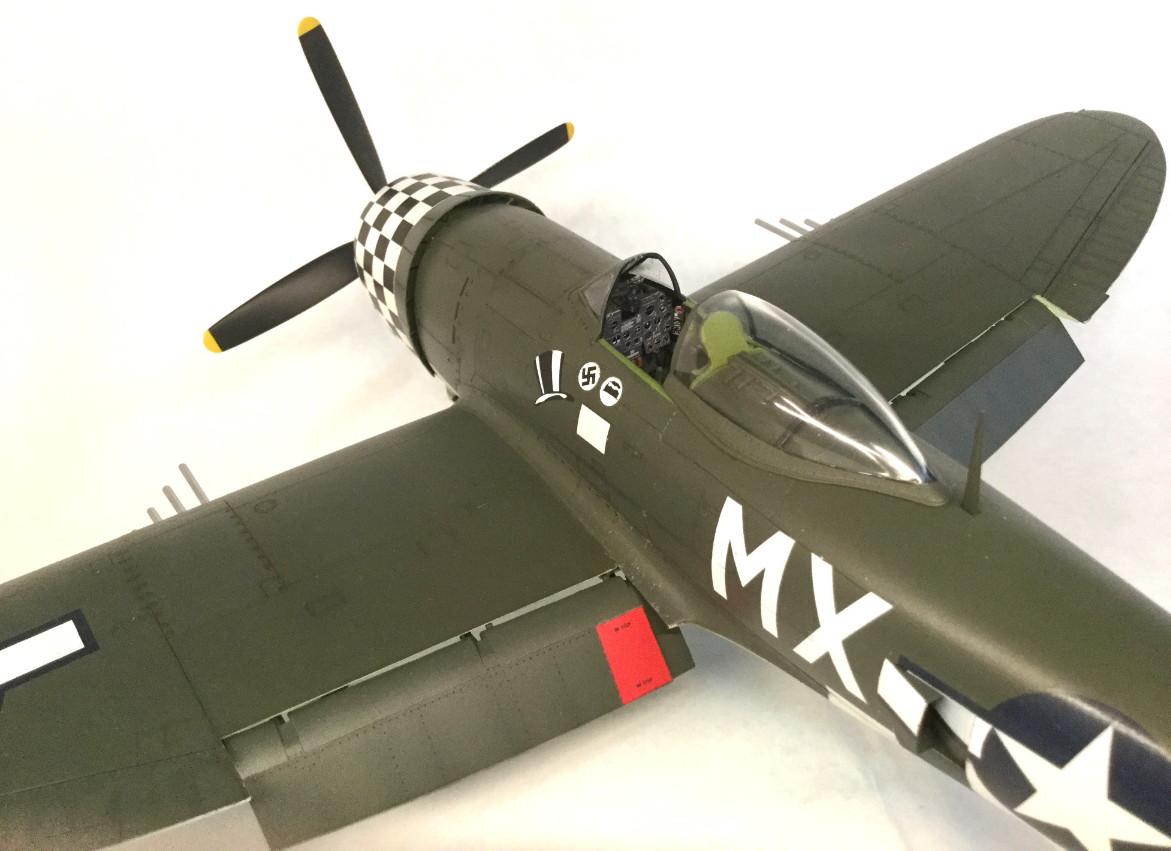
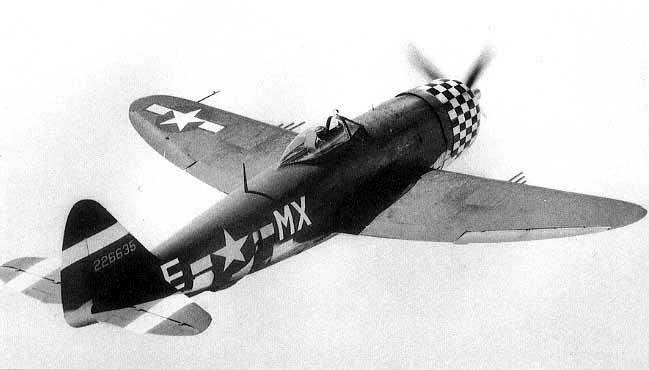
As I said before, I am still working out my photographic technique. Although the weathering of the undersides shows up well, the selective shading of panels on the upper surfaces disappears under the lights. I mostly used my iPad, although I tried the SLR to bring out the panel lines and tonal variation better. The RAF Dark Green is actually a mix of Gunze colors, RAF Dark Green, RLM Black Green and USAAF O.D. I got the proportions from a suggestion on-line by the Spanish modeler Juan Villalba in doing his P-51D Missouri Armada. I think he has the right idea in trying to get at the darker tones of repainted US aircraft at RAF bases. The sky is Floquil, a shade of that RAF color which I really like - quite an old bottle of paint as I think its OOP now. I have included one pic I gleaned from the Internet to show MX-Es relatively subtle weathering on the upper surfaces. BTW, you may note that the photo also shows no red rudder for MX-E, so that 's what I based that particular choice on. I feel like my weathering doesn't look to inaccurate, even when somewhat cleaned up by photography..
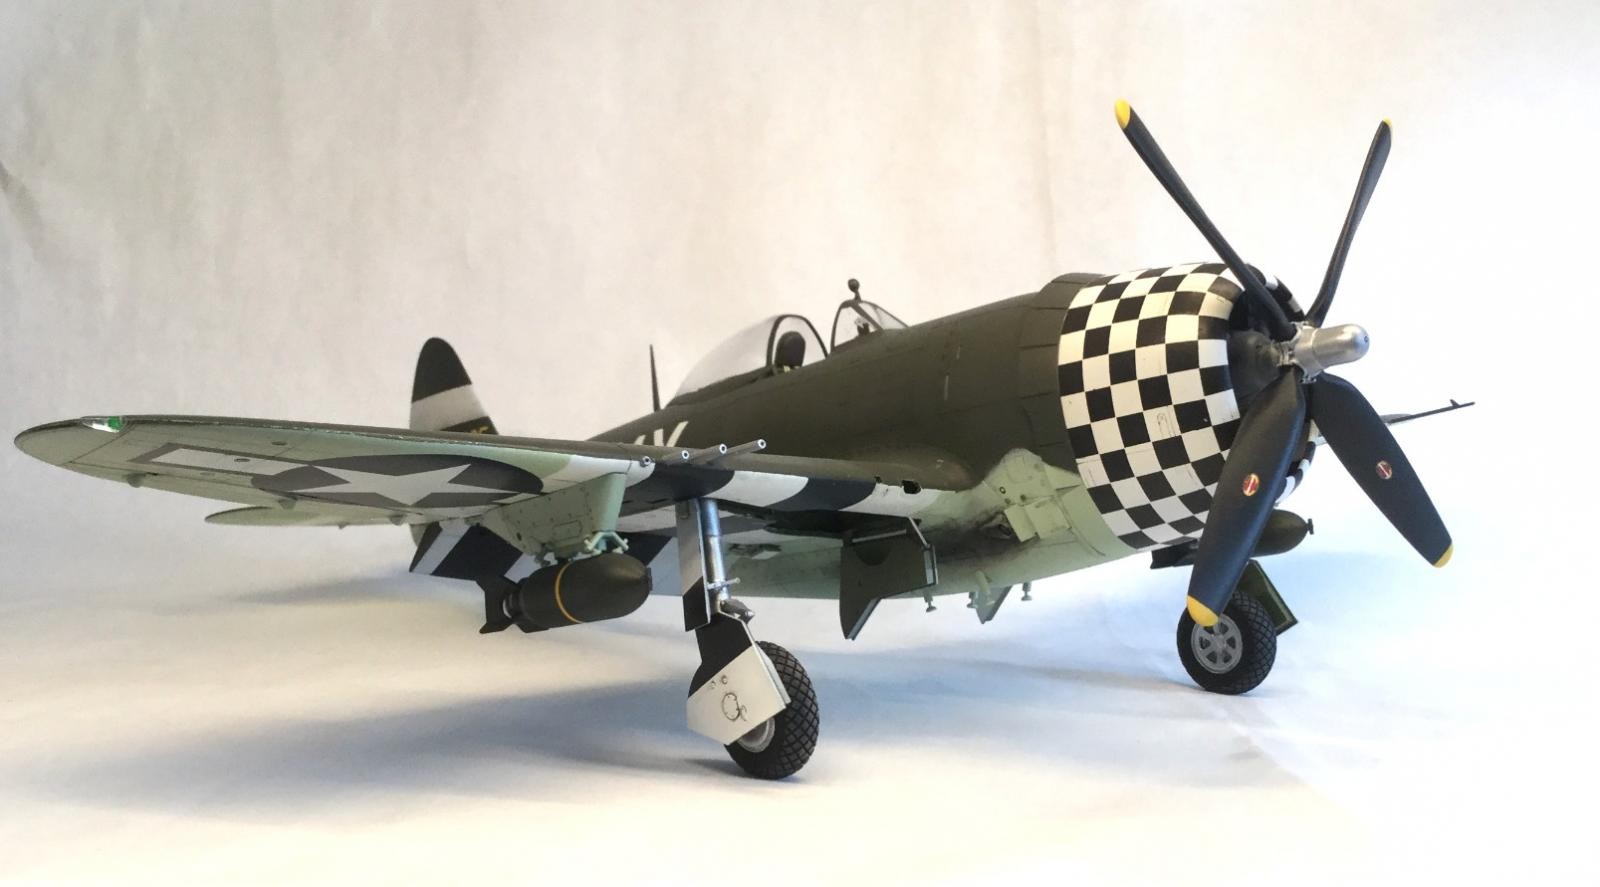
Cockpit is the Eduard Prepainted set and general colors of the interior are Gunze interior green ( I know many will say it should be bronze green but… ) I did the cowling interior in a silver-grey mixture with graphite, to suggest anodized aluminum, with some components in zinc chromate green. Diamond tread tires are resin bits from Barracuda. I drilled out the barrels for the 50 cal. blast tubes.
Overall, this was a challenging but beautiful kit to build. I really like the tough look of the bubble top p-47 and I am happy with how the kit turned out. Comments and critique most welcome.


Outstanding "Jug" !
Thanks. Robert. Glad you like it!
Your Jug looks fantastic. Congratulations,Colin!
All the best!
Thanks, Spiros. Great to get your feedback!
What a great build!
Thanks, Rick. I'm glad I persisted with it, in spite of mistakes along the way. The P-47 is a beast in 1/32nd and i really recommend the Hasegawa kit.
I like this a lot. Dick Hewitt was a great resource on the 78th FG when I wrote my book on them (Aces of the 78th Fighter Group - Osprey). All of the P-47Ds that are camouflaged in that group were done with RAF Dark Green and Sky - he was the maintenance officer in charge of the job, so I think he knew.
You're done excellent work here, particularly with the checkerboard being done "the hard way."
There's one little thing, a very obscure point Dick told me about, so no points off for not knowing: P-47s and P-51s that were camouflage painted "in the field" - i.e., at their group - are distinguishable from the ones that came off the production line in camo paint by the fact the leading edge of the flap that goes under the wing when raised is always silver. That's because they always raised the flaps on the airplane when they painted it. The ones at the factory had the flaps painted before they were attached to the airframe, and are thus painted the upper surface color in that area. If you have a photo of an airplane with the flaps down and are trying to figure out what color it was, that's the dead giveaway with 8th AF - if you can see the metal leading edge, then they were most likely painted in RAF paints (since there weren't any US paint in the UK). Dick was a real fount of knowledge on that sort of obscure information.
Thanks, Tom! I didn't know about your book. I just bought it on Amazon and look forward to reading it.
I appreciate the insight about the flaps. I really hesitated about how to do them. In the end, the Hasegawa kit allows you to snap them into place without glue. They are that tight. I left them to be removable and repaintable in case I got clarification on the bare metal issue. I will probably redo the edge with Rub n Buff. It is my favorite way to metalize after painting. It's great that you thought of asking Dick Hewitt about that detail.
BTW, I tried to follow what other modelers had done with MX-E when I found so few photos on line and in books. I found that you had done your Tamiya 1/48th version of MX-E on Modeling Madness with the flaps painted over (image added). Obviously this was before you spoke to Hewitt. It's nice that we can look to other modeller's efforts to try to figure things out but it is of course good historical research that decides things. Did you repaint your own model after finding out about the flap issue?
Anyway, thanks a lot for your kind words and encouragement. I always appreciate constructive feedback, especially of the detail kind.
1 attached image. Click to enlarge.
Colin, @ColinG
You might be able to remove the flaps since they were not glued in, and add a thin strip of bare metal foil along the leading edge. You could also leave it as is, since it looks good... and 98 % of the people will not know the difference.
Well done, Colin. Great model of a really cool fighter. I like to build 1/32 planes, but they really take up a lot of real estate.
Thanks, George. Yeah, 1/32nd planes are huge but you really feel you have something for your efforts when finished. I stack mine in a couple of Ikea display cabinets. It had worked so far with space still to spare.
Love Jug and that is a great Jug.
Thanks, Haslam. I had fun building it and i appreciate your comment. Happy modeling.
That's a nice looking Jug Colin. Well done.
Thanks, Tom. Glad you like it.
Looks great! Those checkerboard cowlings always intimidate me, but yours is excellent!
Thanks, Greg. Yeah, they almost defeated me when applying most individually. The trick is getting symmetry on the compound curves of the cowl. In fact, the real planes had them done with varying degrees of precision but of course everyone wants their model to look right. I just gradually reworked them several times, removing and re-applying pieces of decal until everything came together. It's like rivetting, it can be fairly relaxing when you don't fight the tedium.
Hello Colin, @ColinG
This is a great looking model ! The cockpit and the engine especially look great. Having an actual photo of the real thing is always a plus, and a nice touch to show as a comparison. Judging from the picture you provided, you nailed it !
The last time I attempted applying a set of checkered nose cowl decals was on a 1/48 scale Tamiya Fw-190A... They can be intimidating as well as fun.
After looking at how nice yours turned out, I'm taking another look at the decal set for "Eileen" WZ * S that were provided with an Academy P-47D "bubbletop". If I decide to build it, most likely I will use a Tamiya model and save the Academy kit to build a British Thunderbolt that served in South East Asia. These T-bolts also look very good in the SEAC scheme, and we just saw two of them in the headlines section today...
Thanks for taking the time to post this beauty for all of us to enjoy... Two thumbs up my friend, and I pressed the "liked" button too.
Thanks, Louis, The engine was a challenge, as I mentioned, but looks the part now. It was my first exposed radial in 1/32nd and it needed to be detailed to look acceptable.
I hope to do another P-47 in 1/32 from my stash one day. I also like the SEAC version but may go for David Schillings famous aircraft. I love the camouflage and cartoon on the nose.
The checkerboard pattern is really well done; I guess it wasn't a piece of cake. The close view on the engine suggests an excellent job done there. Bravo 🙂
Thanks, Alex. Yeah, the checks were daunting. Glad I had a lot of spares on hand. I really wonder how they did them on the real machines. It probably left the maintenance crews in a bad mood.
Fantastic big model. Actually nice to see an "unweathered" kit.
Thanks, Ross. It is big, for sure. Only my P-38 and F-4J are bigger in 1/32. The way that I dirtied it up is more visible on the underside. I followed pics of the exhaust streaks and fading on MX-E as closely as I could. I may add some chipping to the wing leading edge some time later. Always good to revisit earlier builds that way.
I'm a relative novice and haven't really tackled heavy weathering apart from an exhaust stain here and there!