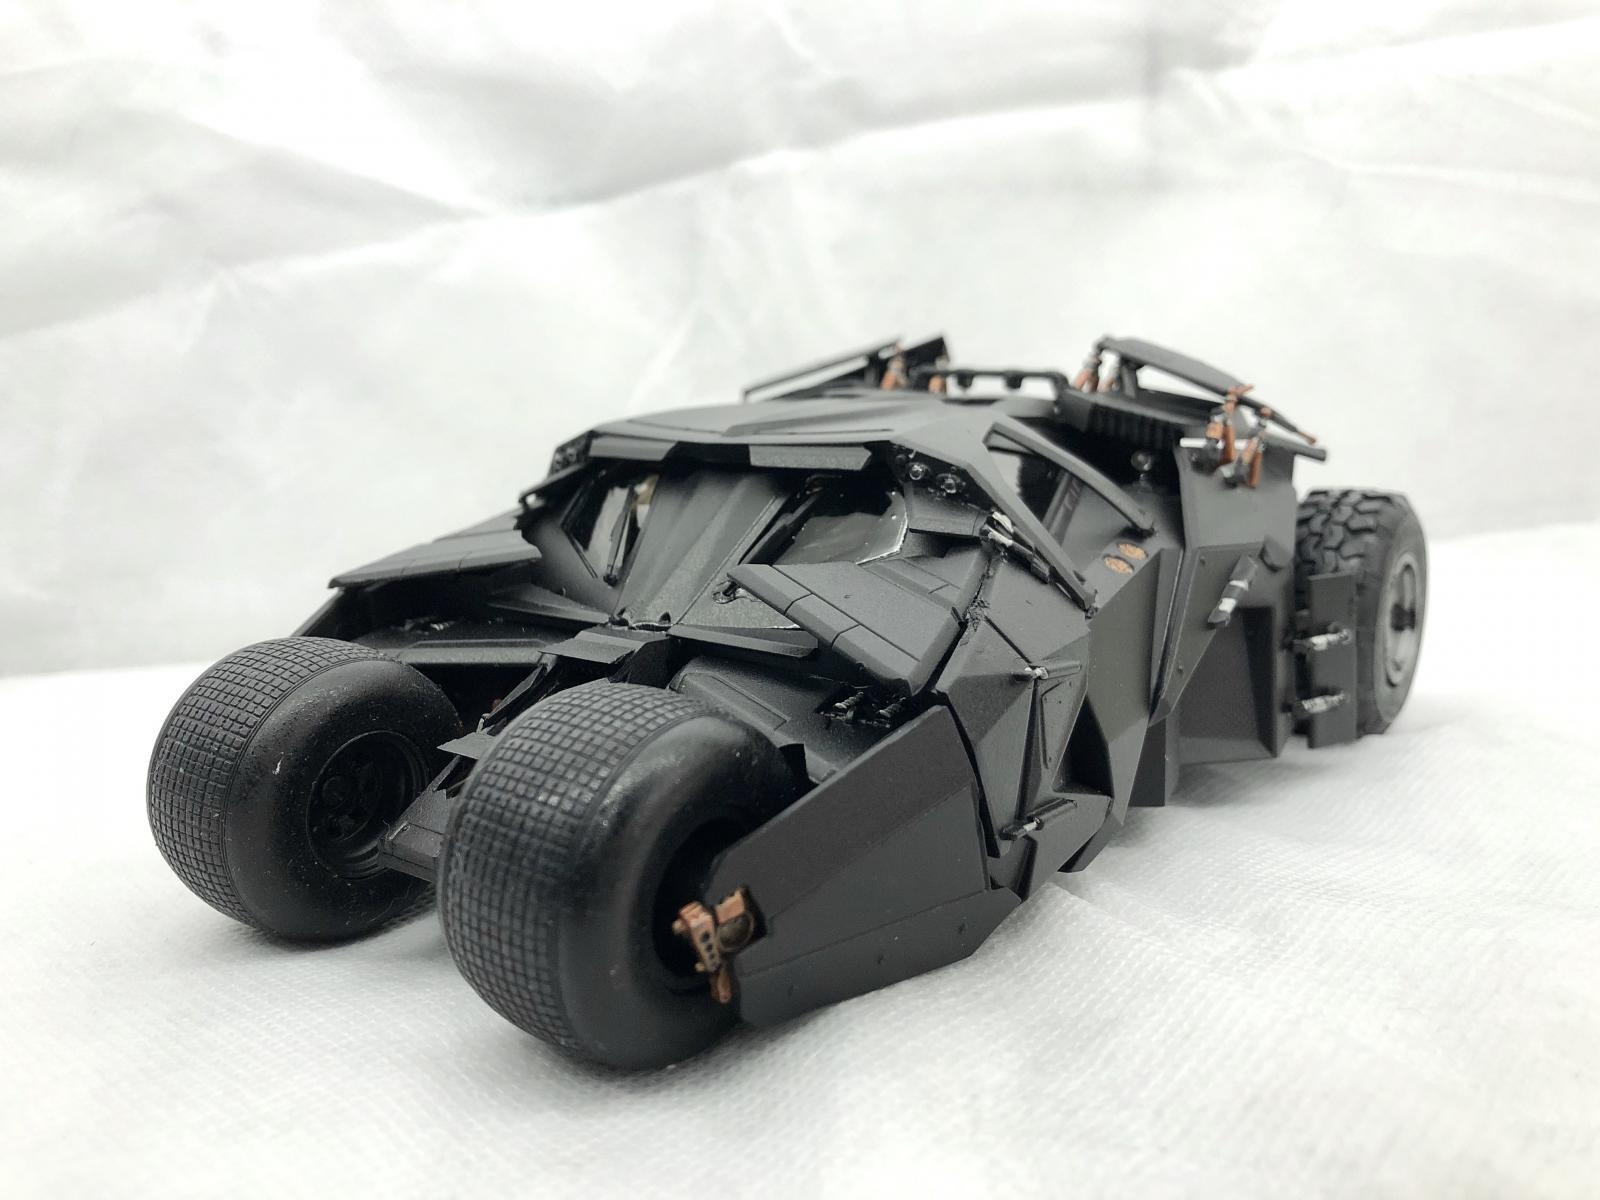
Moebius 1/25 Batman Tumbler
The kit:
This isn't the first run that was molded in black, its the one that's molded in a gold color that has the option as being built as the military version from TDKR and comes with a Bane figure as well. Honestly, there are too many parts shoved into the box, so much so that it was bulging and once I had opened it, there was no way to fit everything back in and get the box completely closed. I believe the shoving of too many sprues in there led to the warping of many of the parts that I experienced. The kit had a surprising amount of flash for such a new kit as well... I should say a terrible amount. The most impressive part of this kit were the instructions which come in a color book the size of a magazine. That and the tires which are very realistic rubber.
The build:
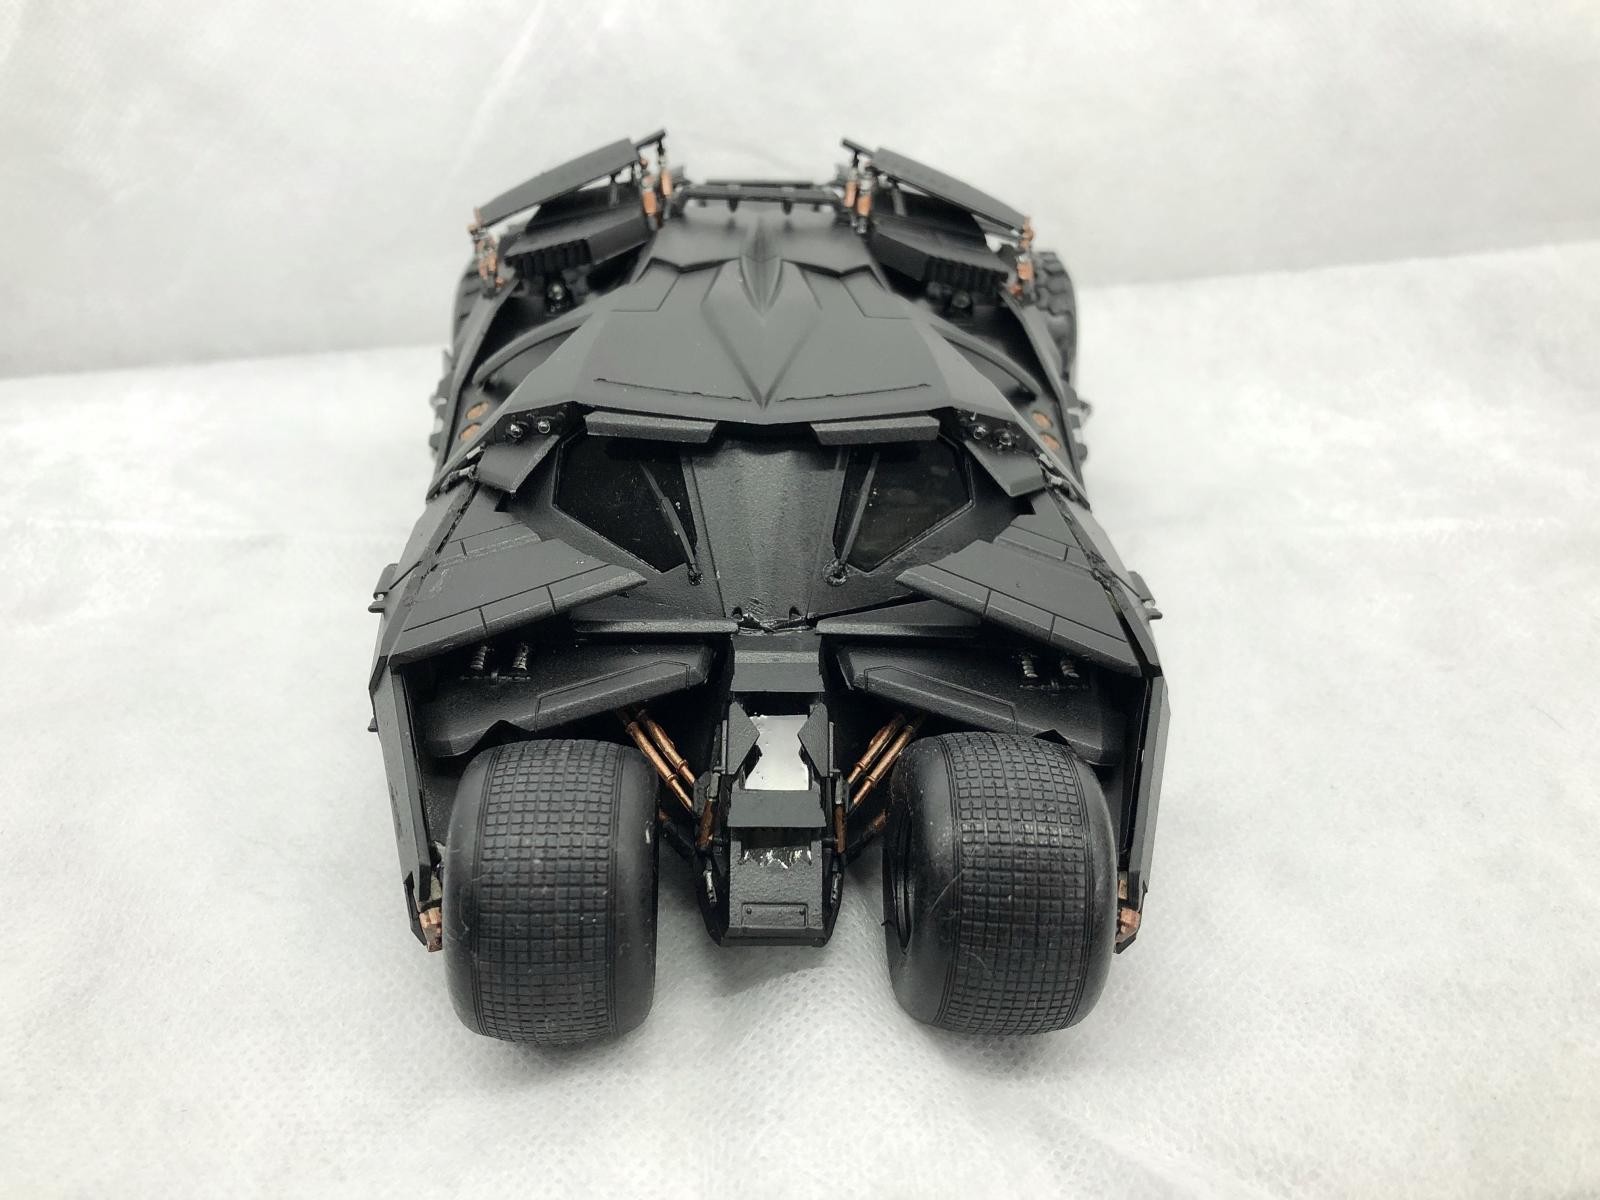
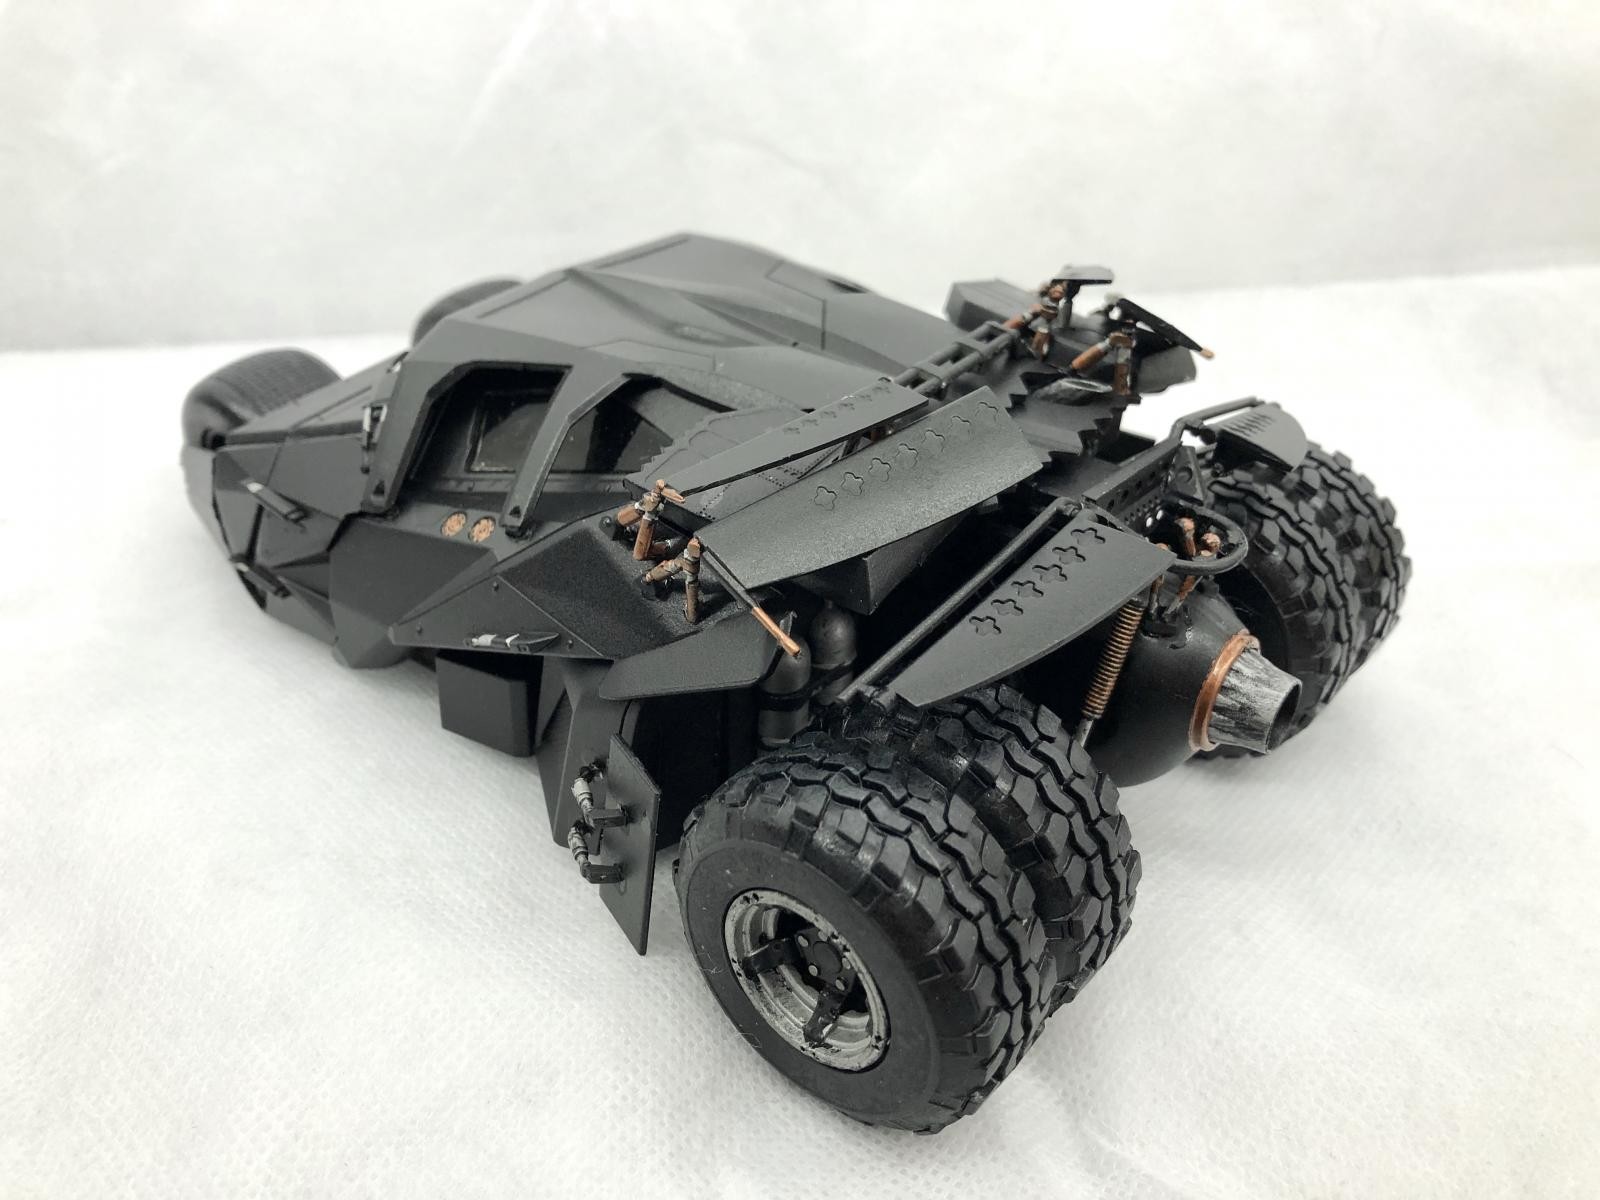
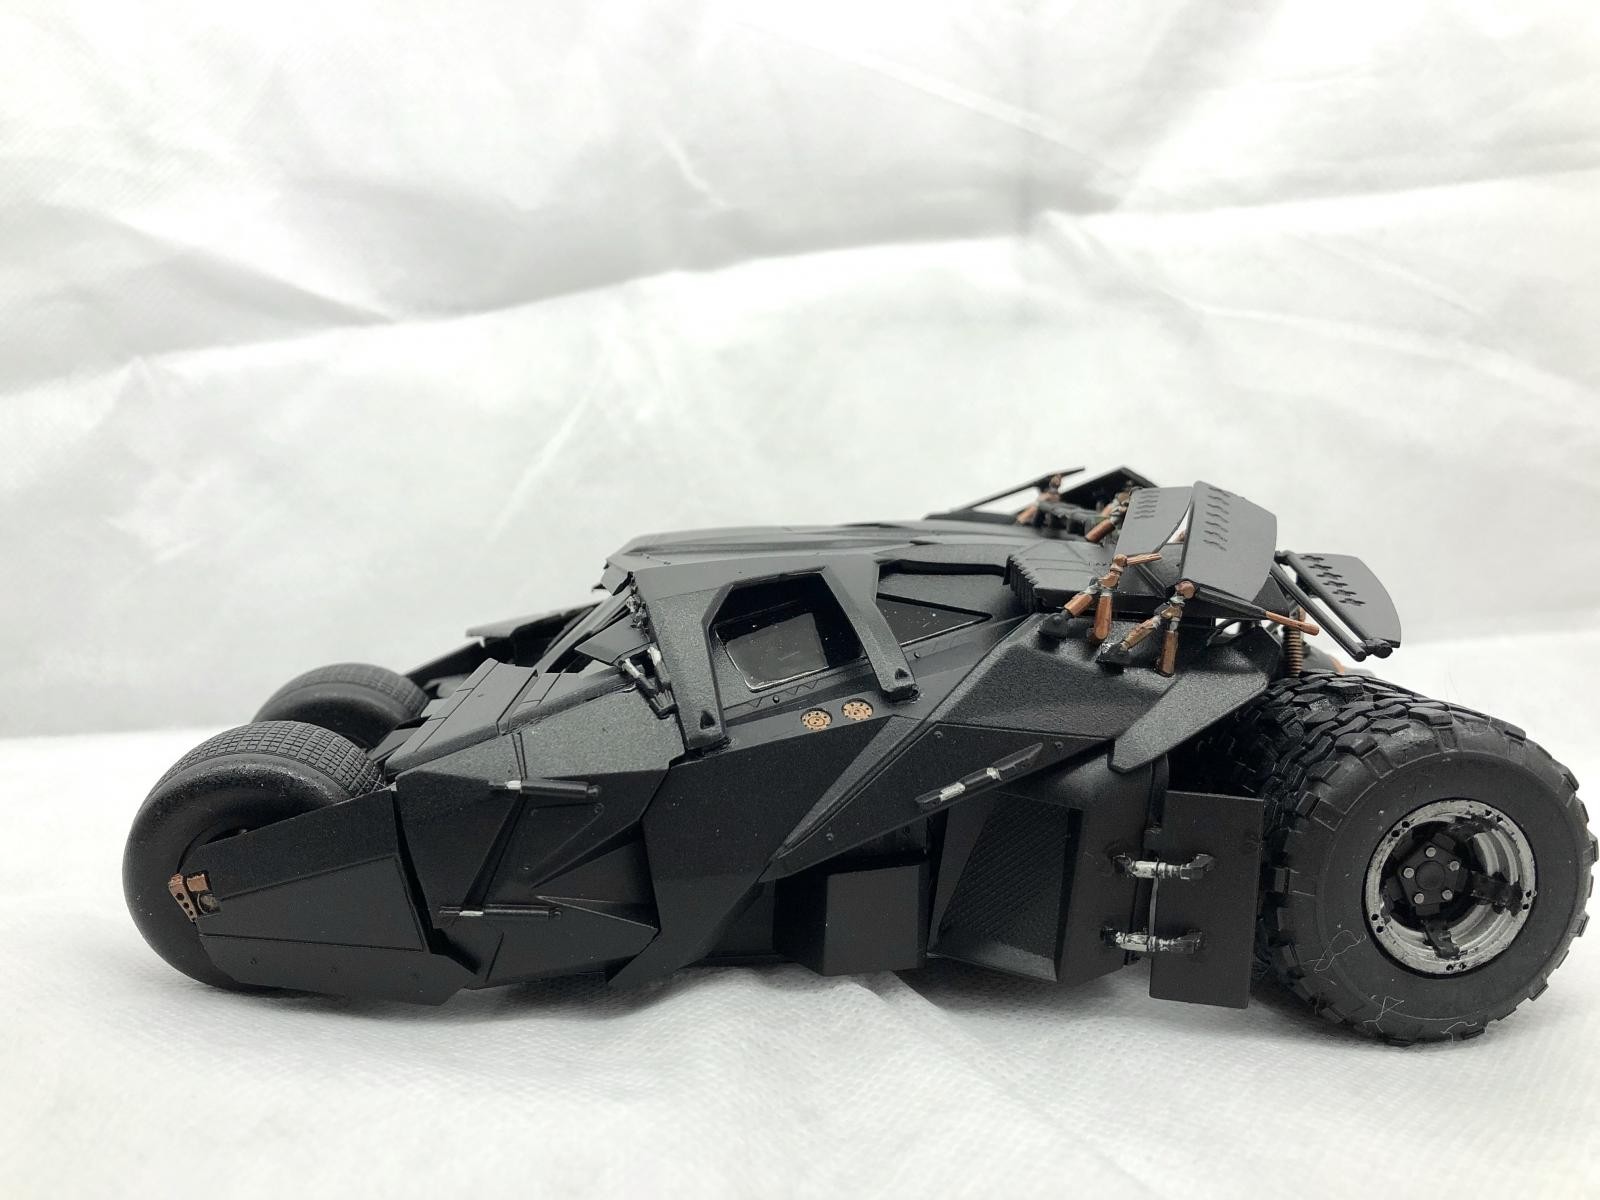
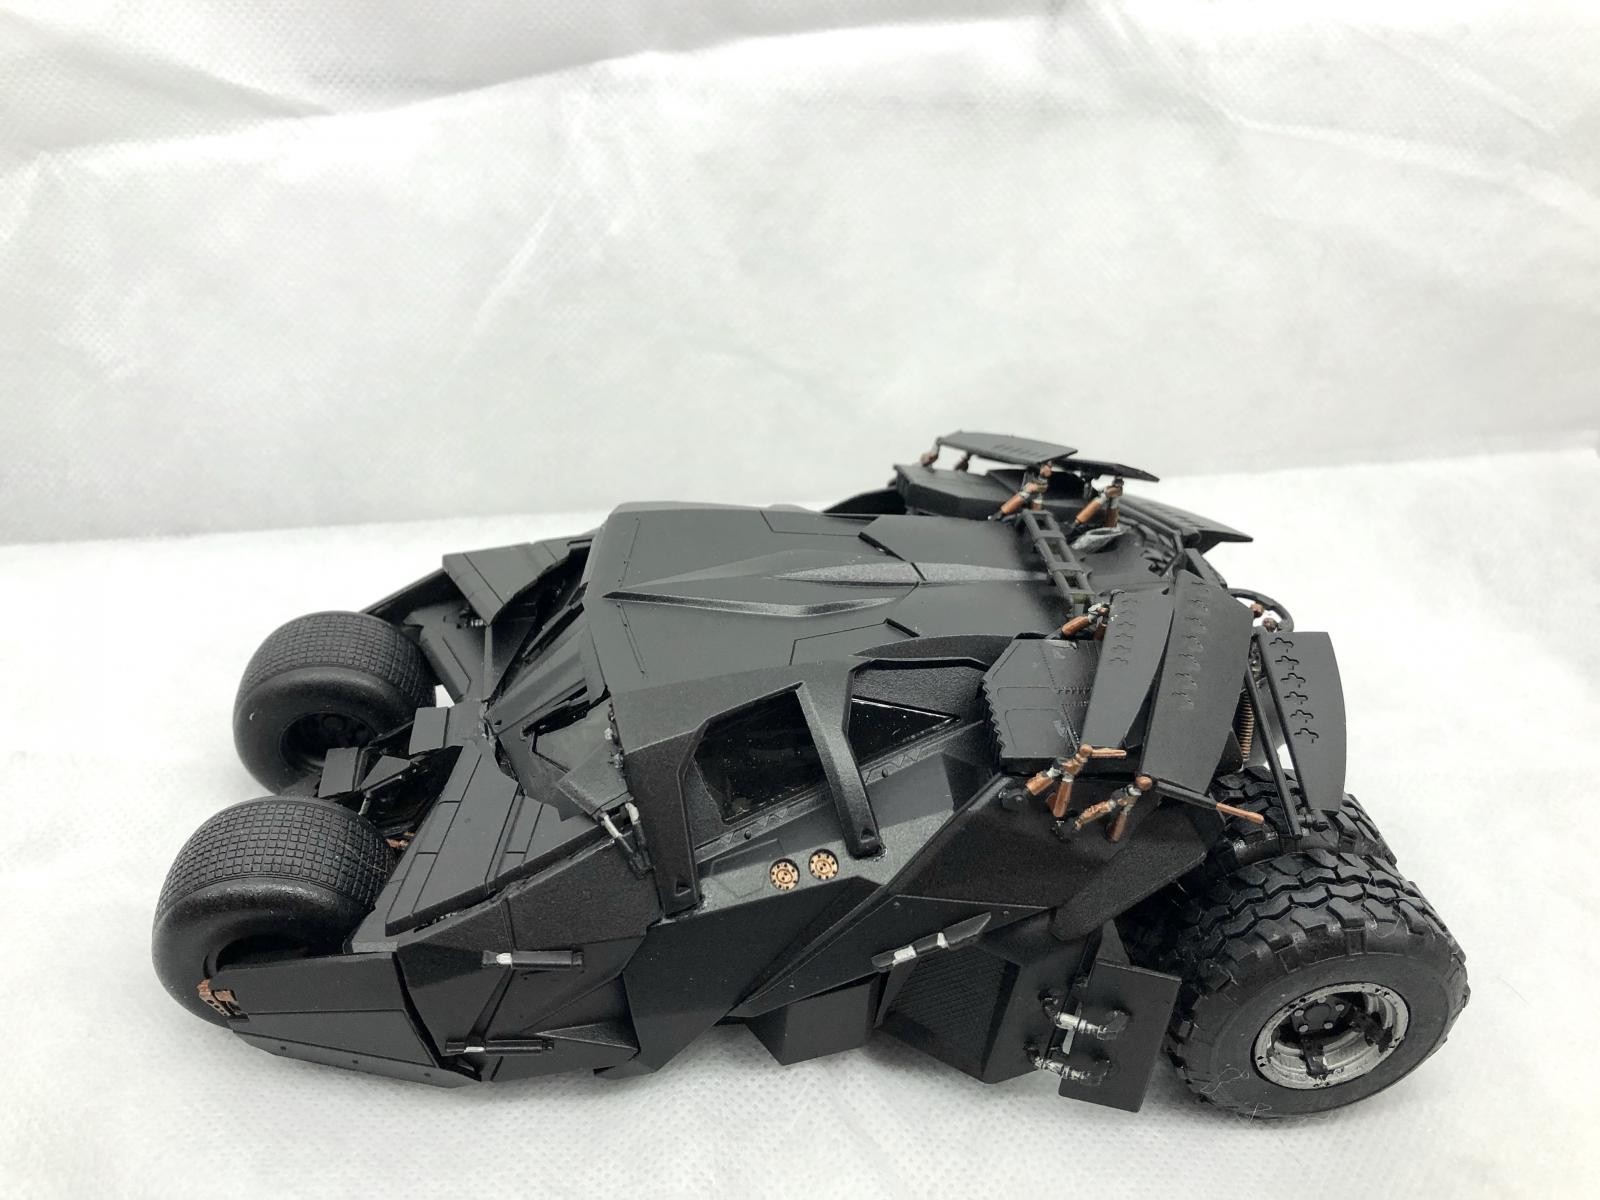
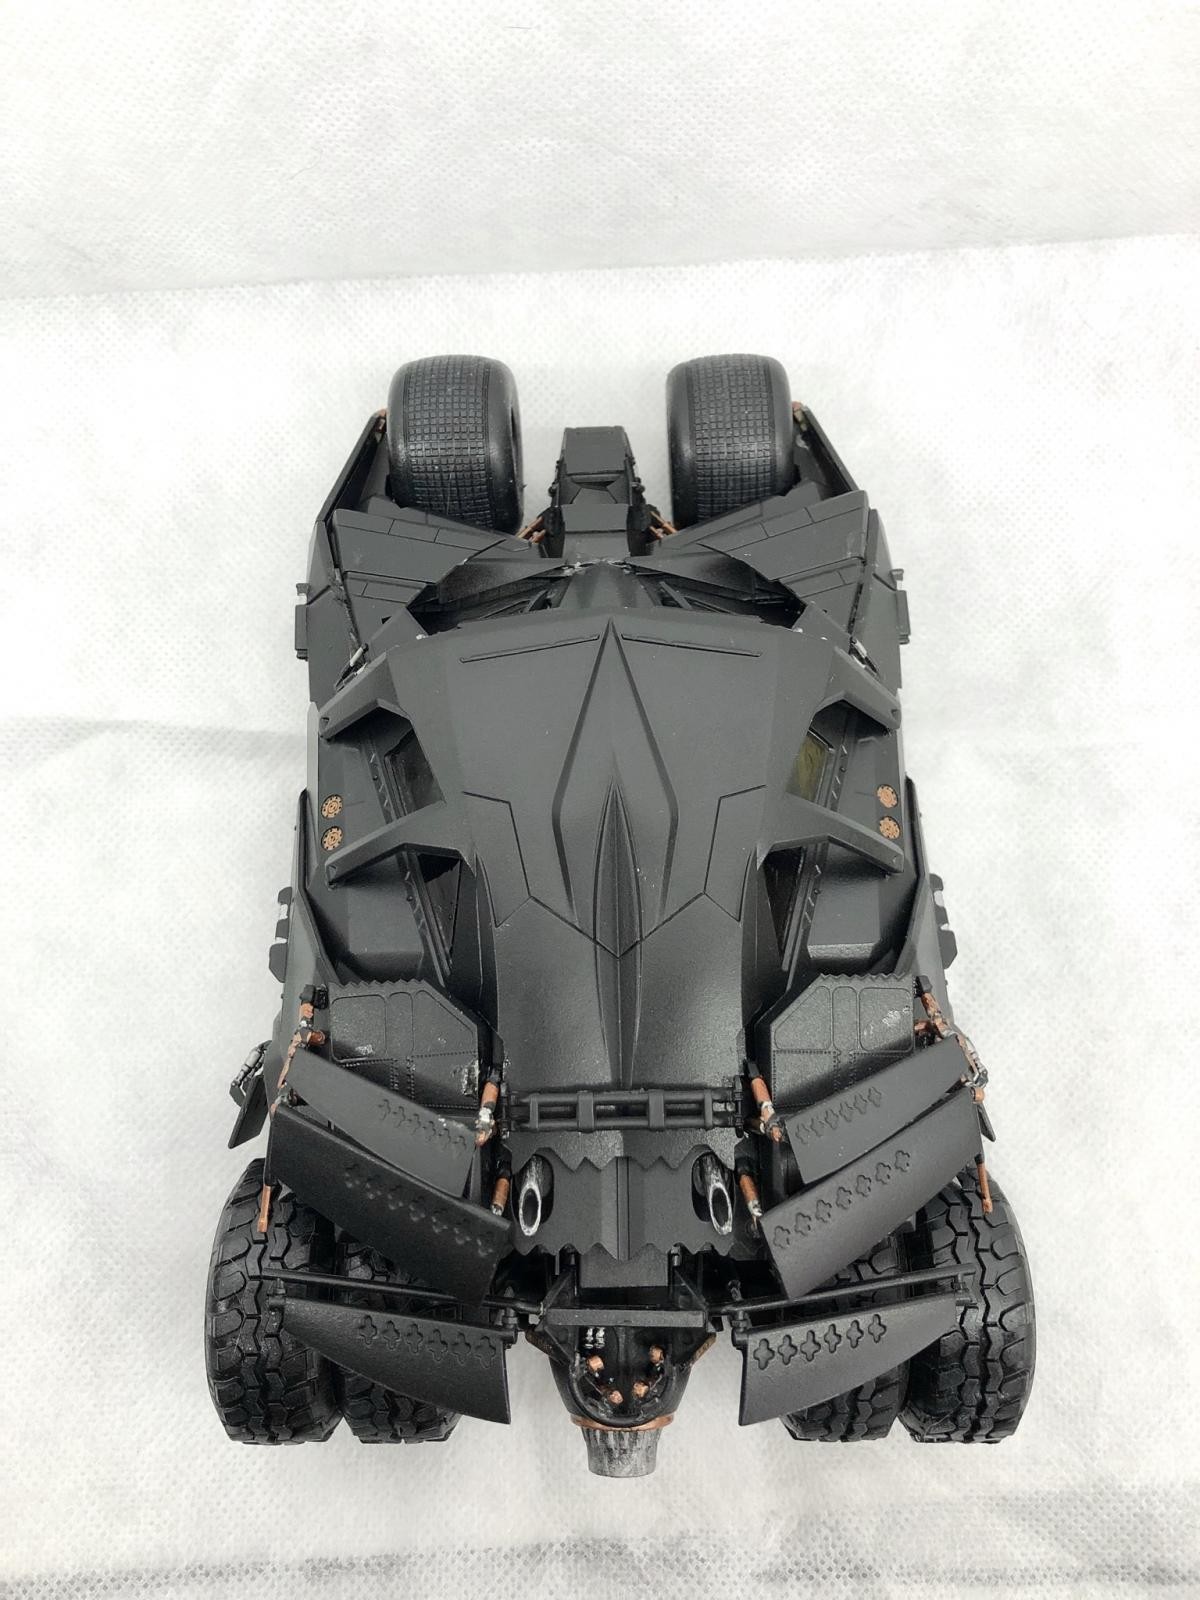
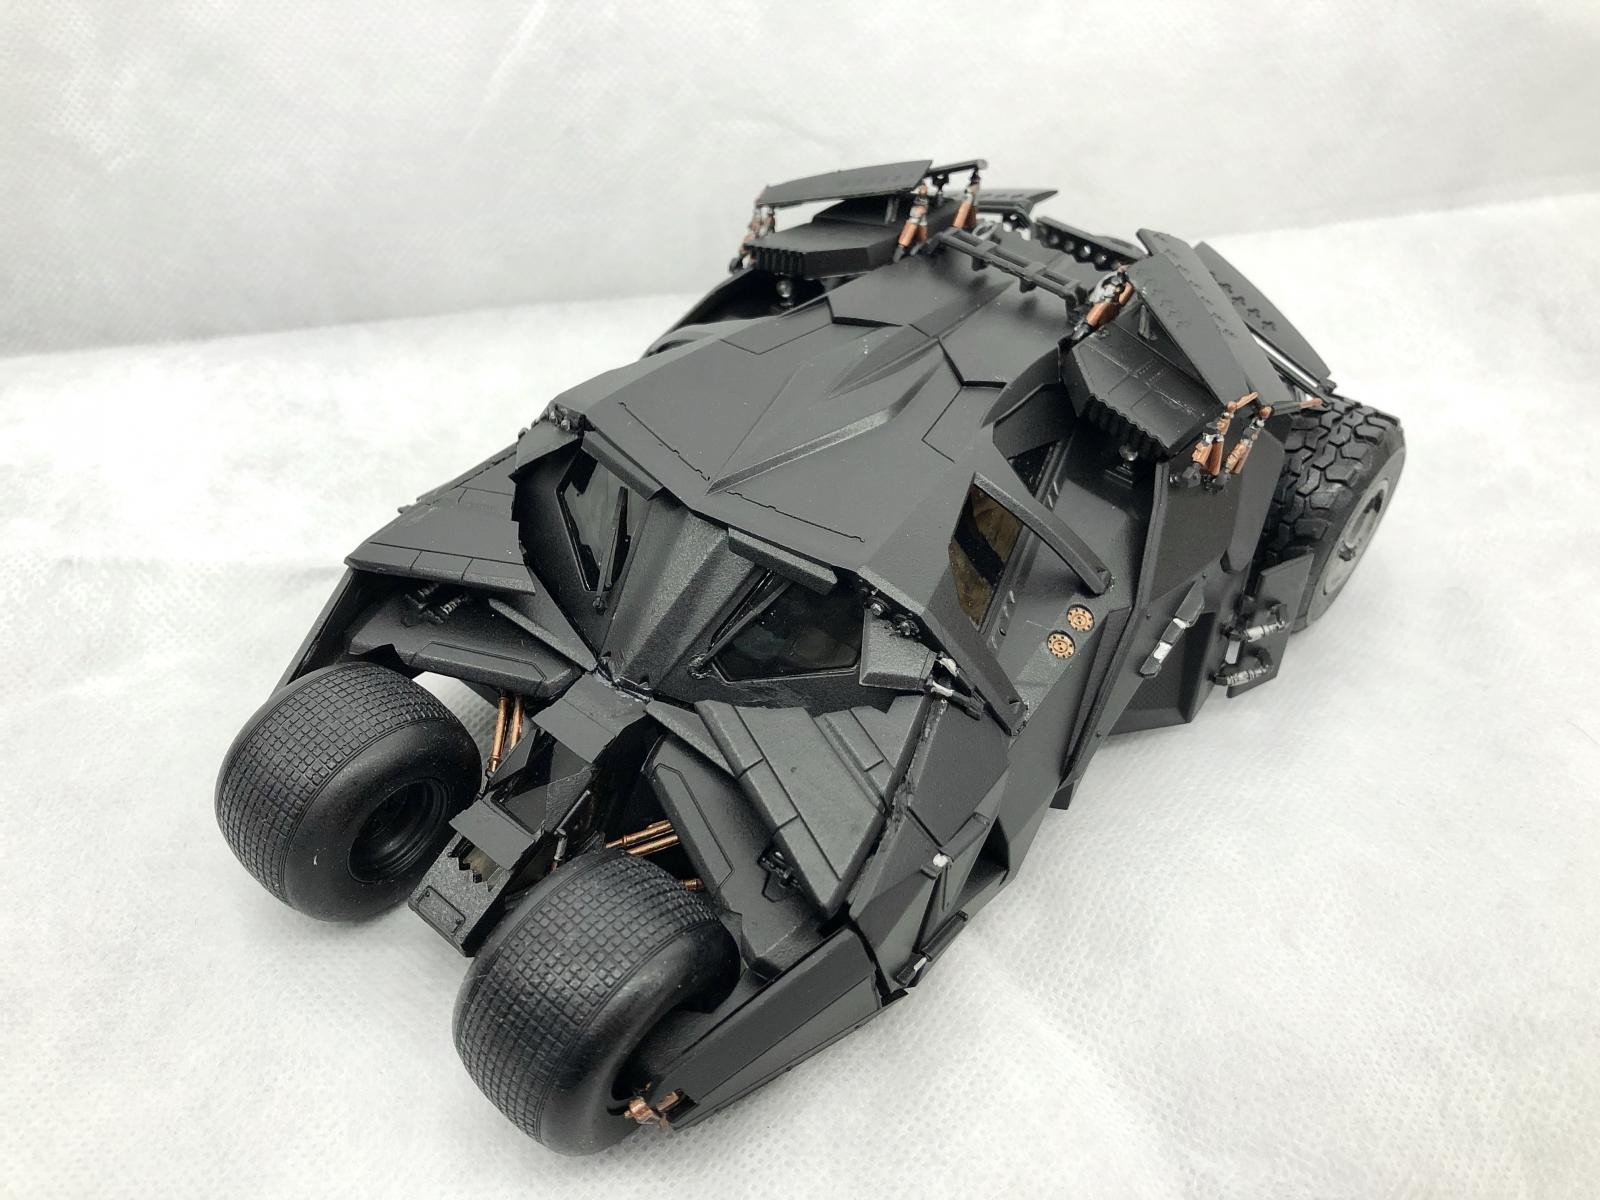
What a pain in the a*s. If I had not wanted this on my shelf so badly I would have chucked it at the wall and watched in delight as plastic went flying in every direction. I loved Christopher Nolan's Dark Knight trilogy and his idea of the Batmobile is by far my favorite so I soldiered through this build. First thing was the warping. Holy hell. As I said before, everything is CRAMMED into the box which resulted (in my opinion) in the warping. Another issue is with how this kit doesnt have holes and pegs for some very important parts which form the foundation of the entire build. The interior is really easy to put together and honestly lacks detail since the windows are supposed be tinted with smoke, reducing visibility. The problem in this part of the build is you're instructed to glue the passenger wall to the exterior pasenger wall, the driver wall to the exterior driver wall, and the dash to the front firewall, THEN glue all of those to the floor. Yet none of those pieces have any sort of holes/pegs, or slots or anything so you have to eyeball it based off the illustrations in the monster magazine instructions. This combined with the warping led to a very not square cabin. Maybe the warping in my kit made this worse than it had to be and I do suspect that was a large part of it as the floor was incredibly warped... though two other modelers who've built this kit told me they had the same issues with this kit's horrid fit. Anyway, if those parts don't go in perfectly square and level, it will throw the entire build off, which happened to me. The front cockpit extension has 3 seperate clear parts that go into the 3 windows that are practically connected. The clear parts are molded ridiculously thick which results in a bad fit when the 3 clear parts are crammed into that tiny space. In my opinion they should either have been molded thinner or as one piece. These are the thickest clear parts I've worked with in any scale. The instructions call for assembling the engine and suspending the rear aerofoils with some small brackets before then inserting them onto the peice that hangs from the rear firewall, I would advise glueing the engine to the firewall, then inserting the aerofoils, then using tweezers glueing the brackets and springs. Otherwise you will have to fight the aerofoils as you wait for the glue to dry as they are suspended by the tiny brackets which glue to the sides, not the underside of the aerofoil unit. This was probably the most frustrating part of the build. The second most frustrating part was the windscreen. It attached to the roof through two pegs at an angle. Then the whole thing is lowered onto the rest of the body. The angle is wrong. The screen should have more of a downward slope than it does. If you don't force it down, you will have a 1/2 inch gap between the bottom of the windscreen and the top of the front firewall. Getting it right was a huge pain but I managed to get it there. I thought maybe it was just my kit and the warping but after checking out a review for the kit and looking at the pictures they posted I noticed the gap. They had "fixed" it with post shading on photoshop so it hid the gap but I could see the windscreen and firewall did not connect. This leads me to believe it's a manufacturer error that needs to be corrected. A little detail I wished I would have noticed before the build is it appears that in the movie the aerofoils have holes in them, in the kit they are recessed. Maybe they are supposed to be drilled out but the instructions make no mention. Had I noticed that detail before I would have drilled them out for a better look but it's a little late for that now.
Final thoughts:
For how much it fought me the kit looks decent enough. It looks good on the shelf and I'm glad I have it there. If I look at it dead on I can see how the warped floor affected it's stance but it's probably only noticeable to me. If you really really really really want this in your collection, go for it. And hope that it's not as warped as mine. Maybe look for the first one without the Bane options and the box might not be so packed that it damages the kit. If it's a maybe for you, skip it, the build isn't that fun.


Jorge, I have to admit, I'm usually not interested in sci-fi or fantasy stuff, but this strikes me as something very cool. I can only imagine how much fun that would be to drive the real thing around town.
Your build looks very nice and is very interesting to look at (especially if you've seen the movie), Very well done !
Thank you. Yeah it would be a blast!
That's a great job of a difficult kit, Jorge. I love its looks!
Thanks!
Well Jorge I must say it looks good to me, especially after noting all of the issues you had building her. This vehicle always looked weird to me as if it was constructed from various vehicle parts from a junk yard. But hey it's Si-Fi, it's suppose to be weird. Nicly done.
Thank you.
Come on. Tell us how you really feel.
I appreciate your thorough critique. The finished kit looks awesome. I'd be eager to do a military version if not for your description.
Thank you.
Haha yeah I try to be honest in my write-ups. Not all kits are fun. But it ended up looking good so I'm happy with that!
Excellent results! Looks great.
Thank you
Nothing but spectacular, it really looks like Batman will jump out any moment:-) too bad the kit is a pain to build, but the end result does look pretty awesome
Thank you. Even though it was a pain I'm glad I did it cuz it looks cool on the shelf ?
Wow. I'm surprised. These are the first bad words I've heard about a Moebius kit but I guess every manufacturer has an off day. How much do you think can be attributed to the kit being stuffed into too small of a box? At any rate, the final result is what matters, and yours looks great. Did the windows come tinted or did you do that. If you did it, what did you use? I need to tint the headlamp covers on my Cody Coyote.
Thank you. Yeah I do think the parts being stuffed into the box had somethibg to do with it. Before I had even taken the plastic off the box it was bulging so much from top and bottom that I couldn't stack it with other kits. And for the windows I used Tamiya X-19 Smoke acrylic. It's a dark clear gloss. I use it on rocket seeker heads and targeting pods as well.
A triumph of persistence, stubbornness and talent over plastic. Great result!
Thanks!
You fought the good fight and won. Great build to have on the shelf.
Thank you
For all it fought, the end result is pretty impressive!
Thanks!
Love it
That looks great! I'm at the start of my build of the very same model and will look hard at the issues you've described. Question: How did you tint your windows? Thanks!