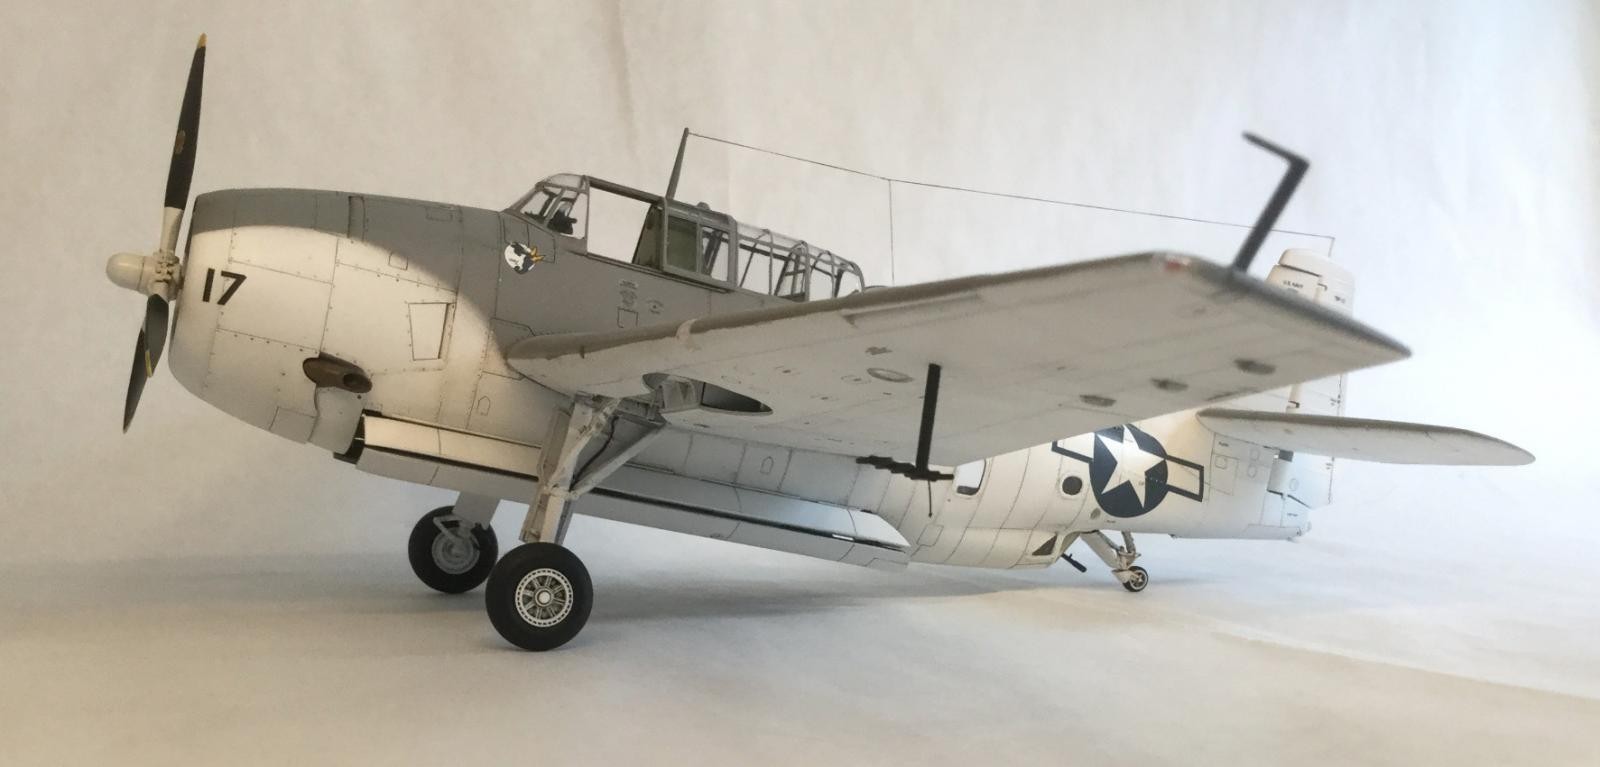
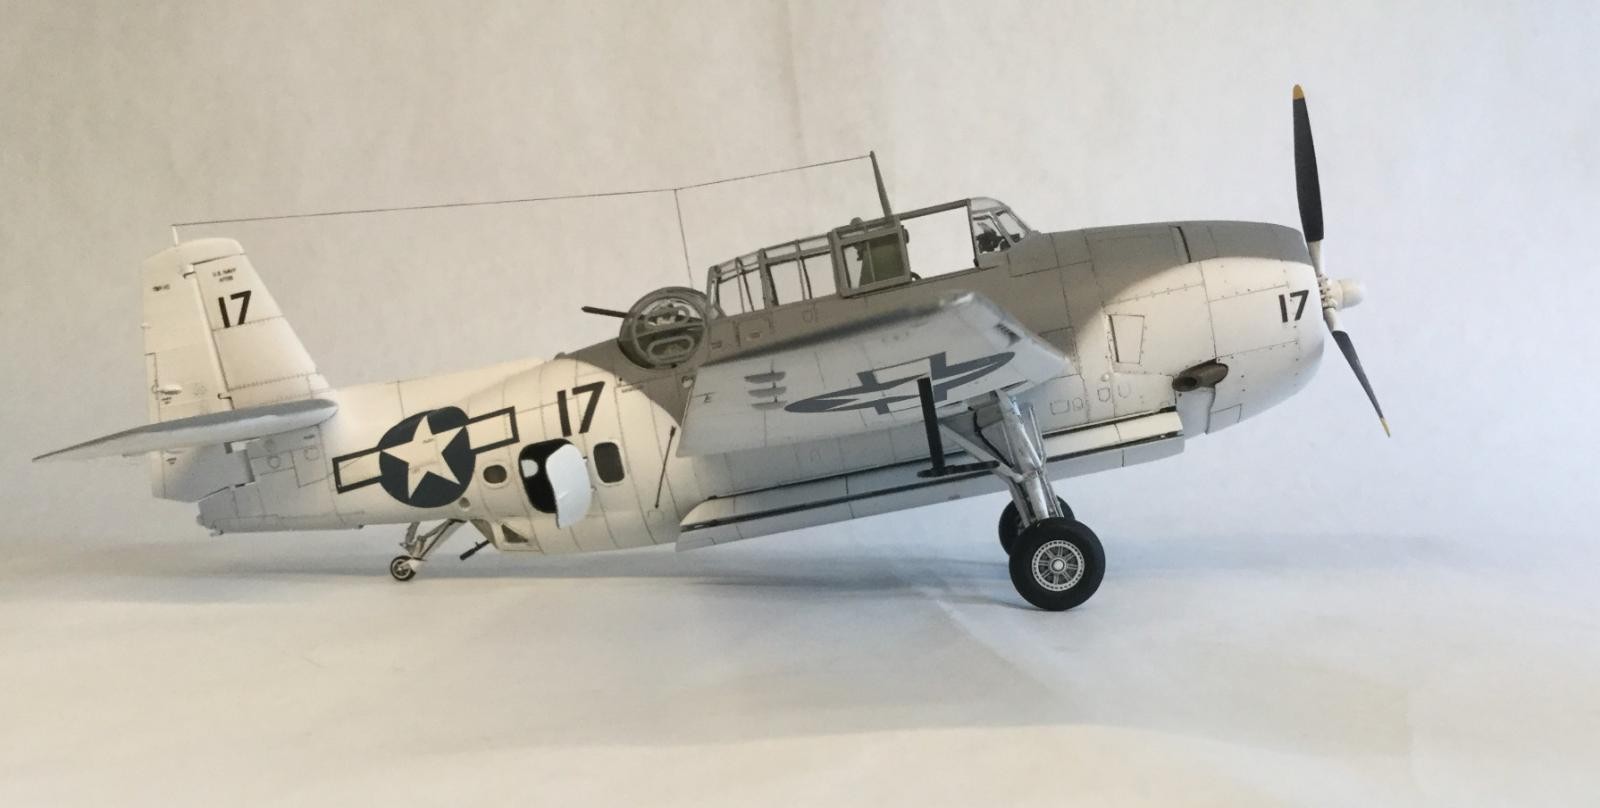
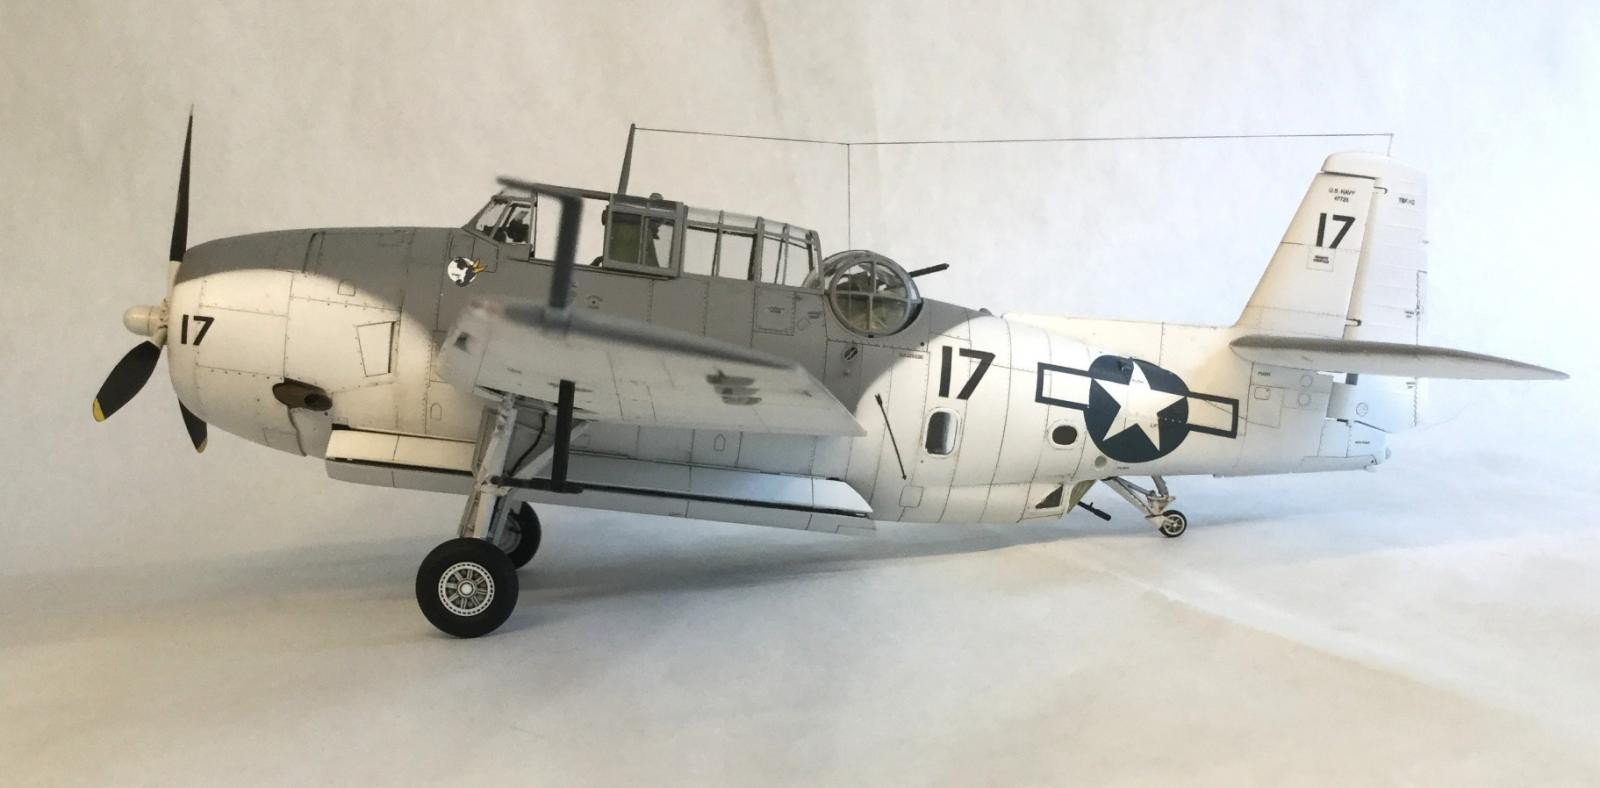
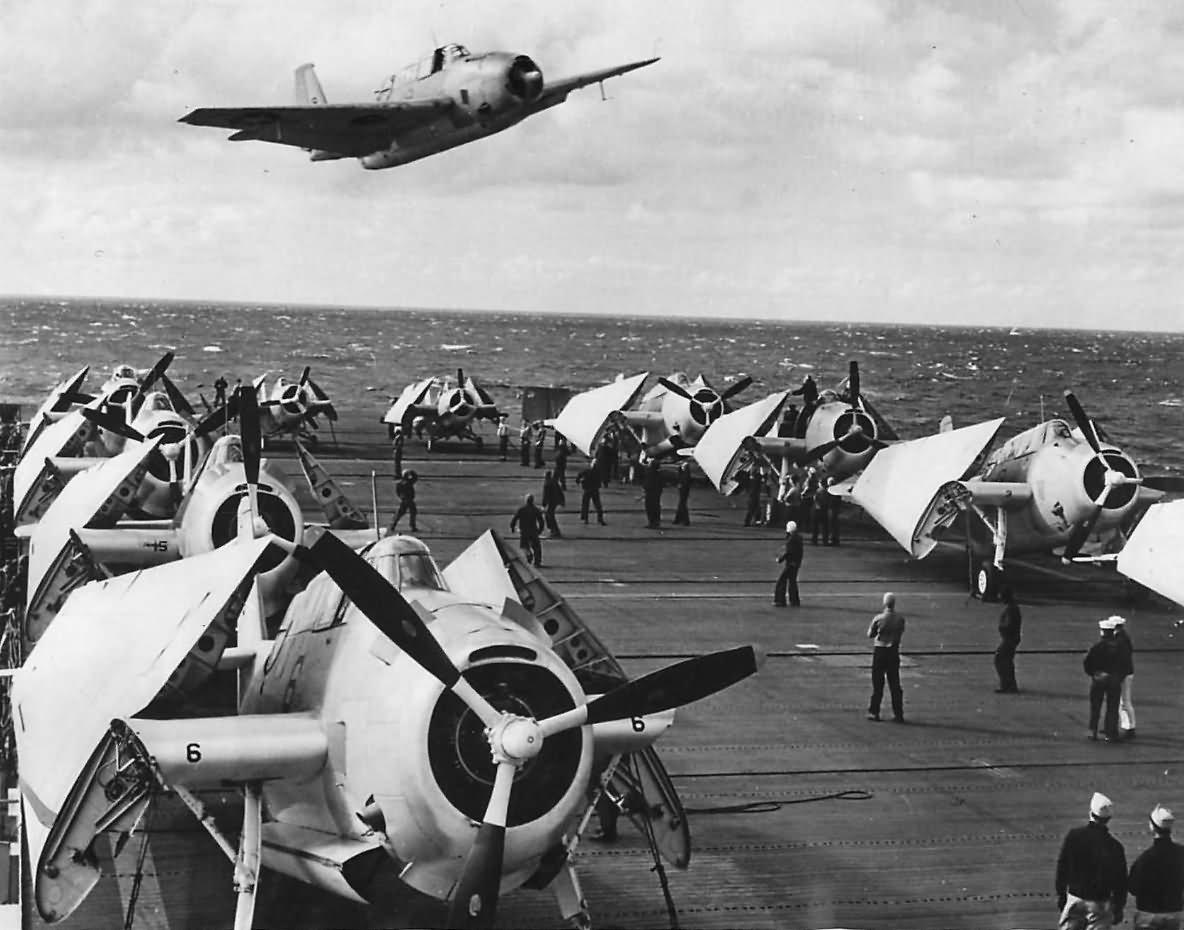
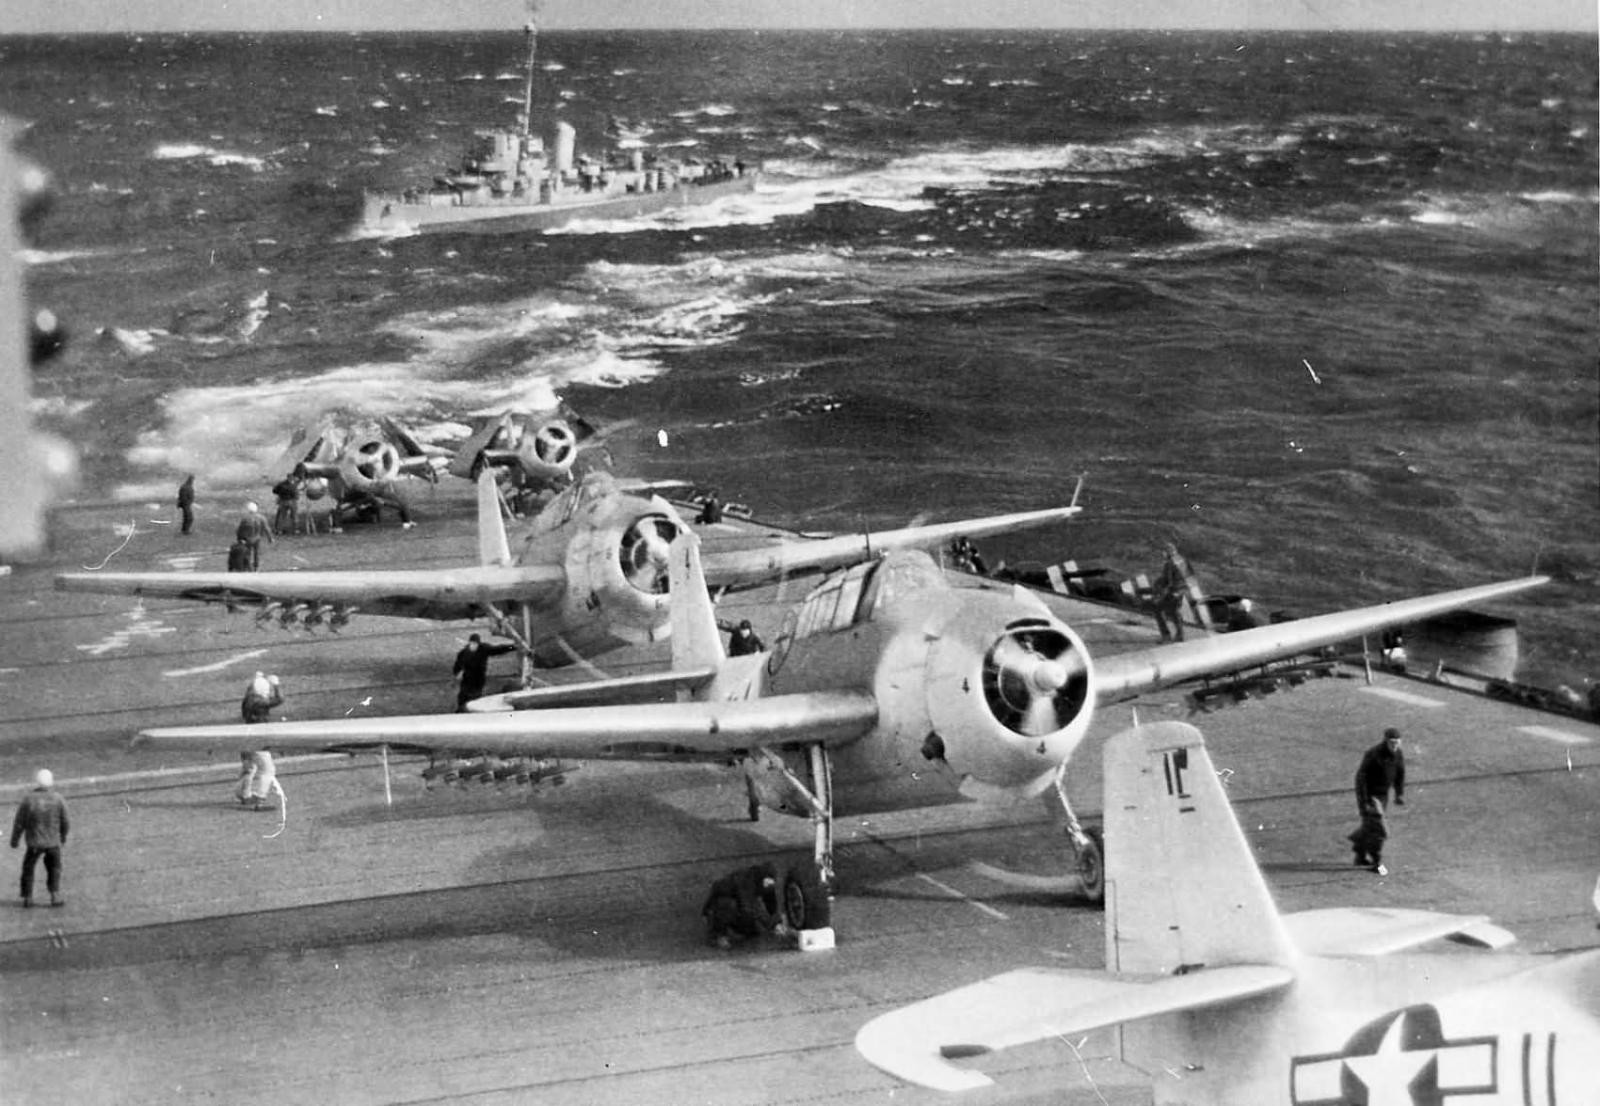
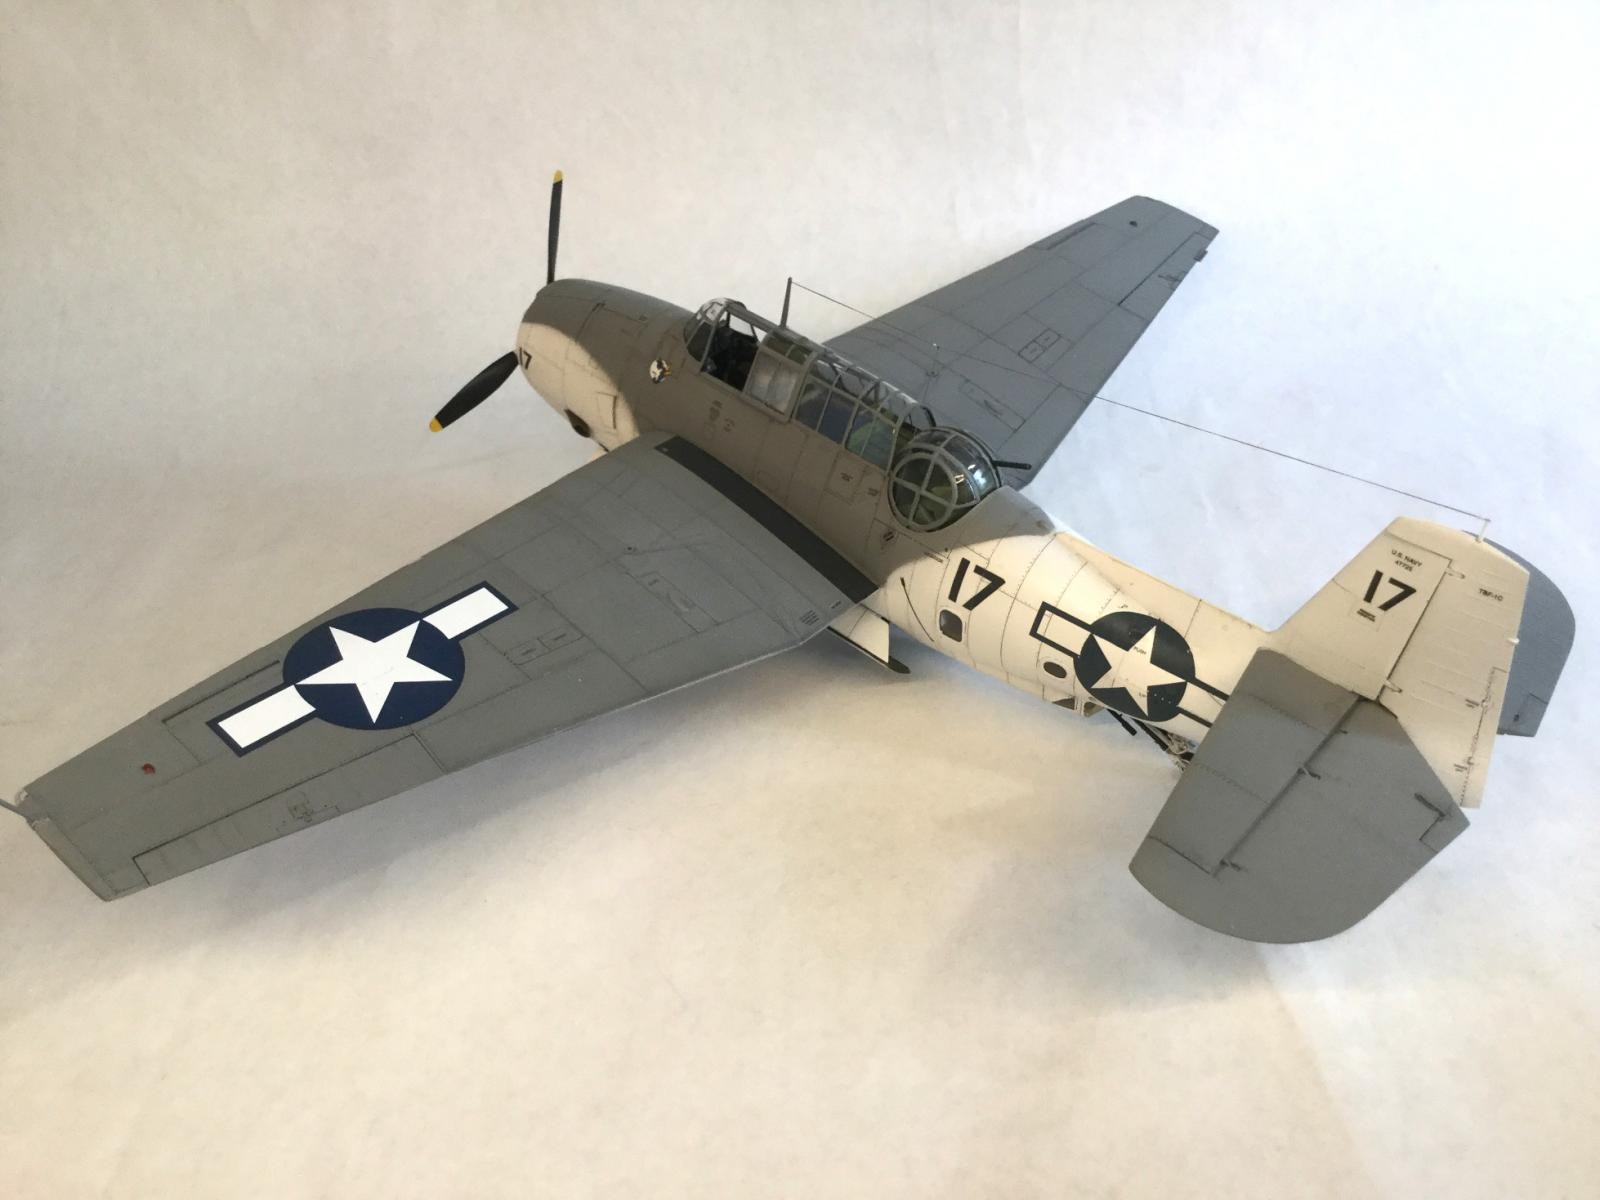
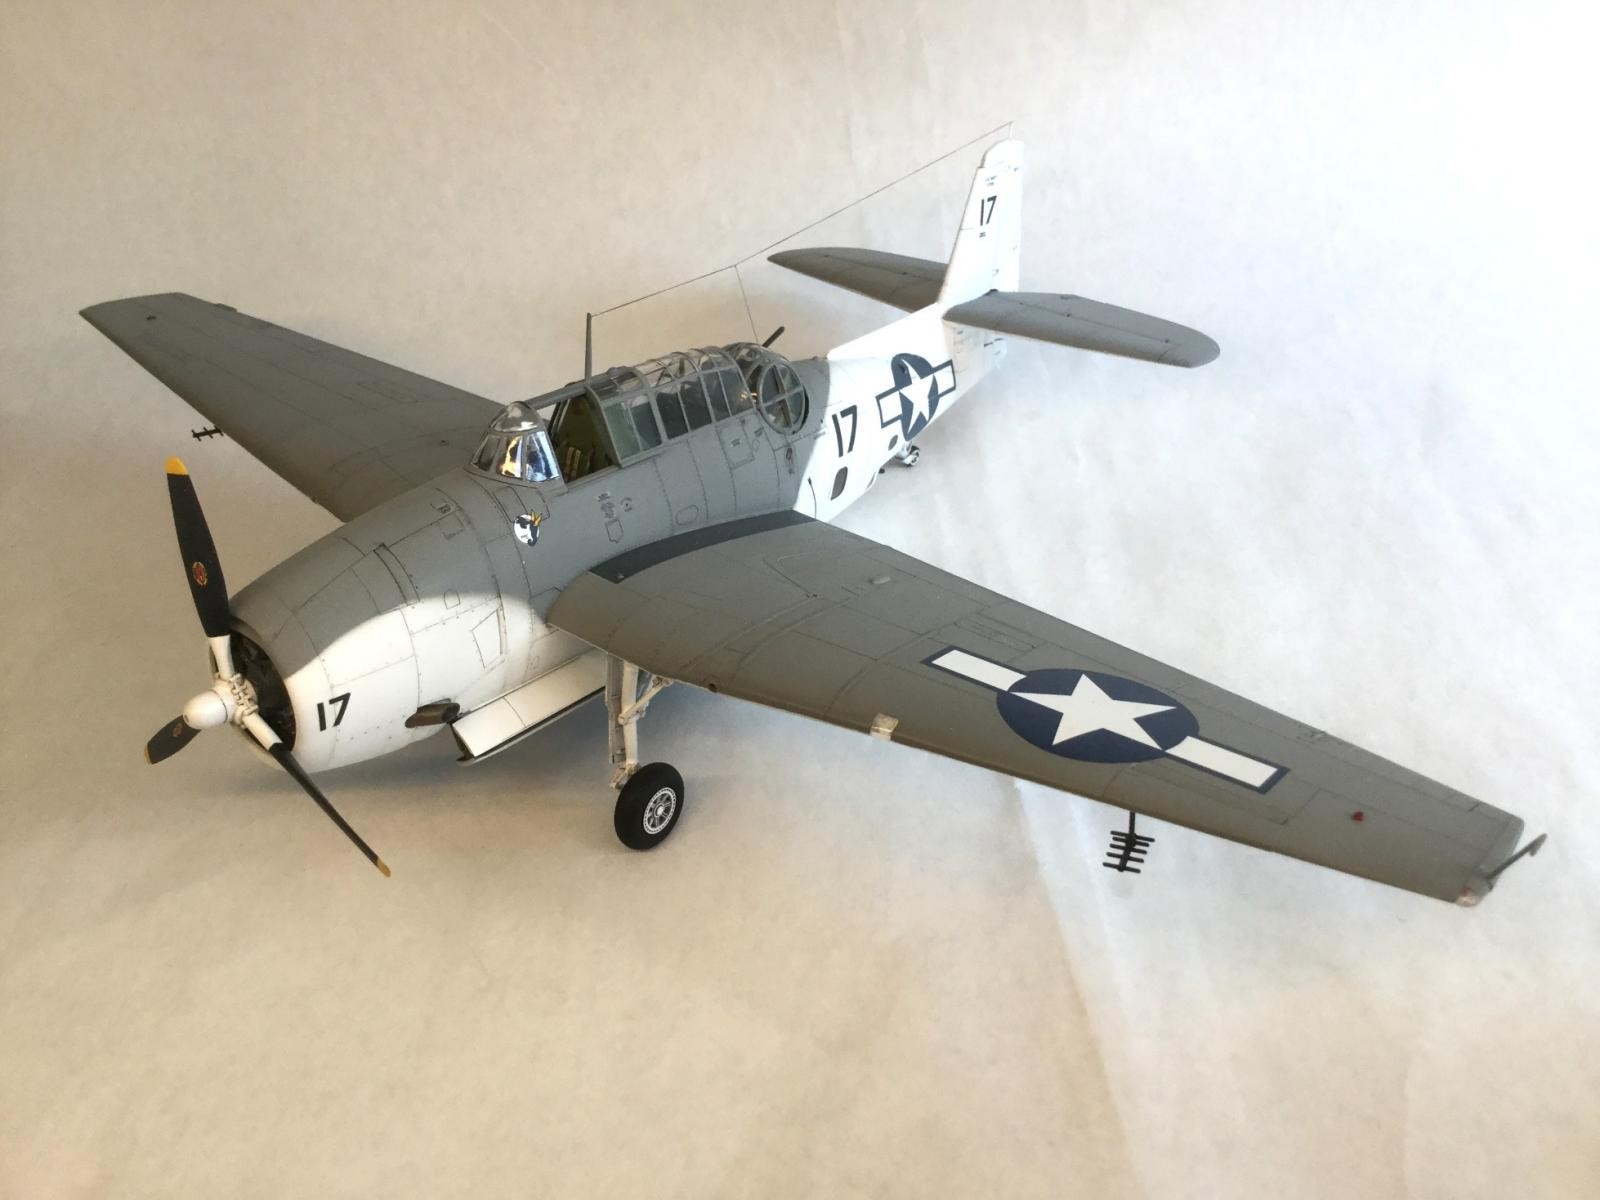
TBF Avenger – Atlantic Scheme
Hi Guys,
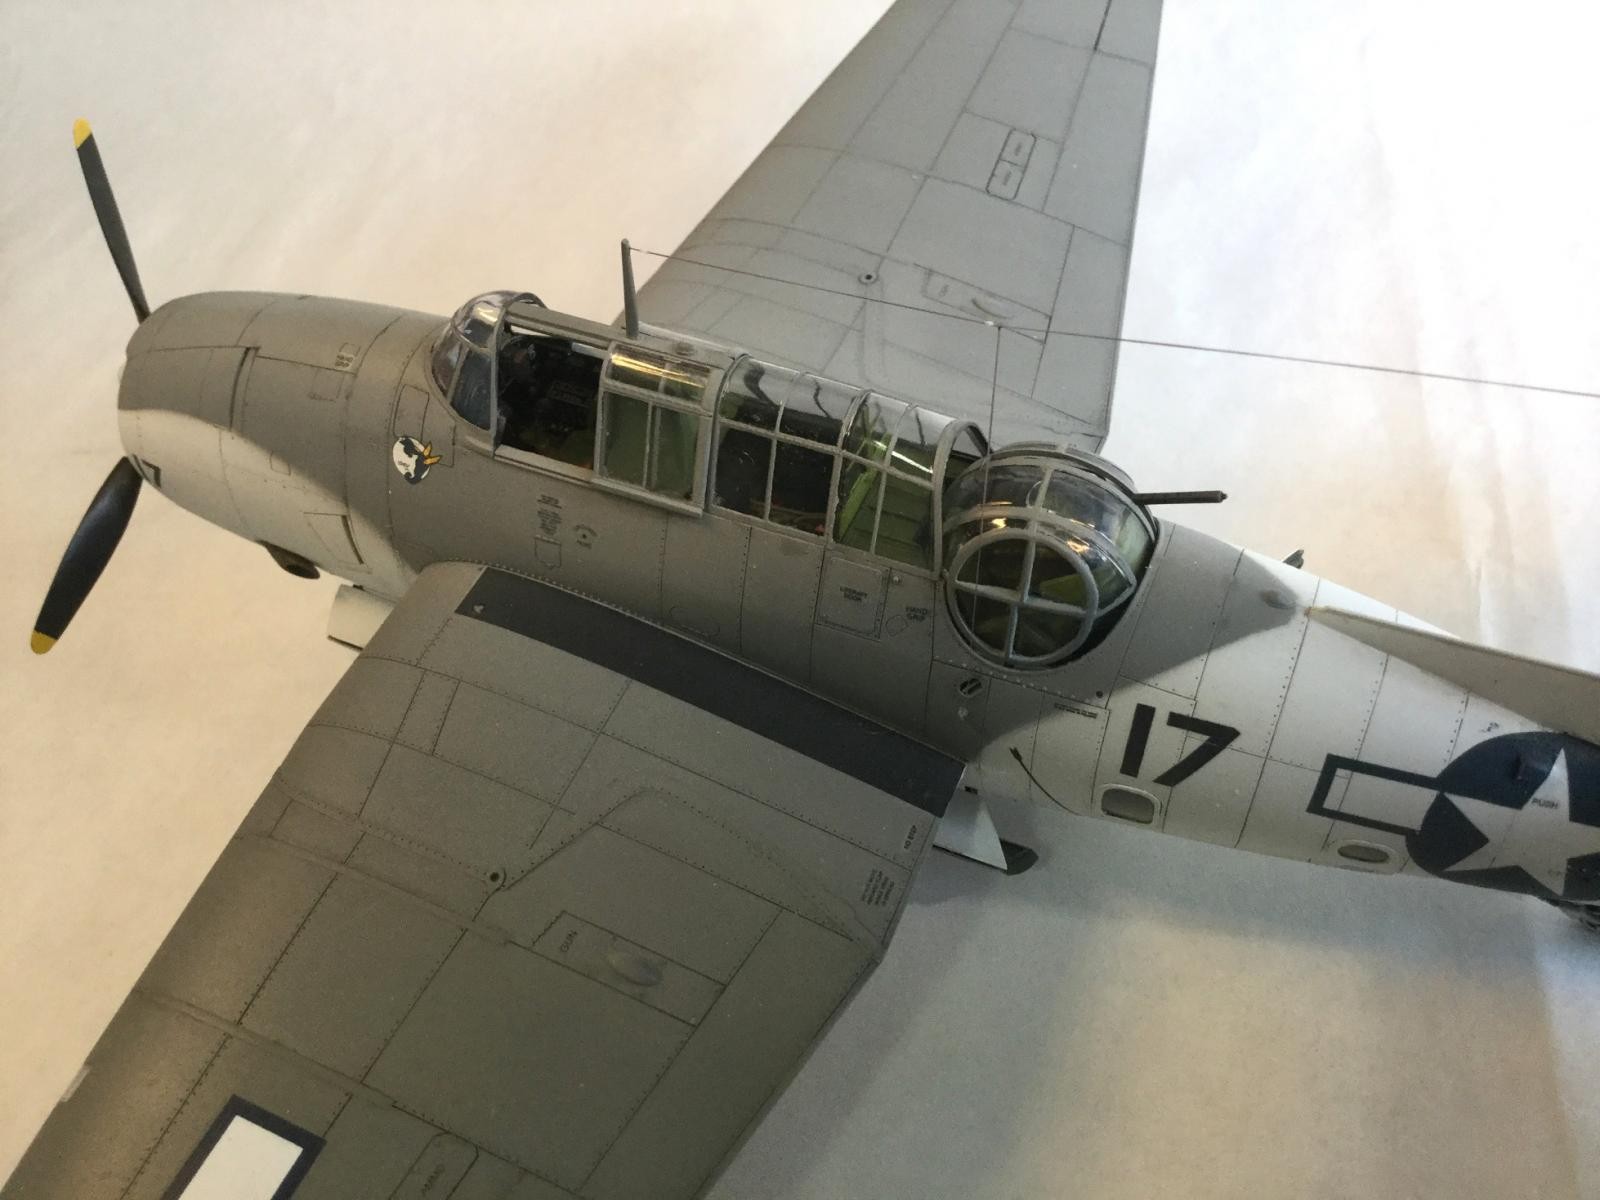
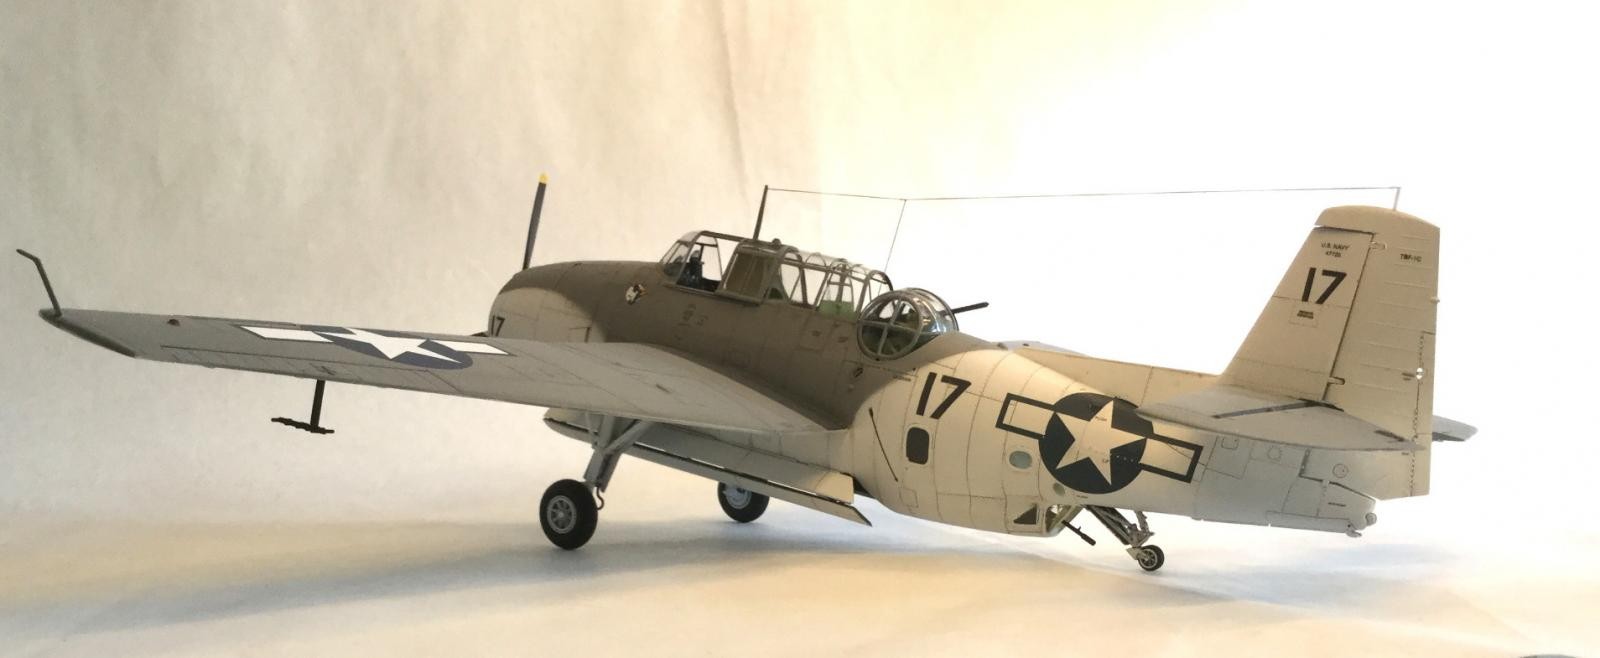
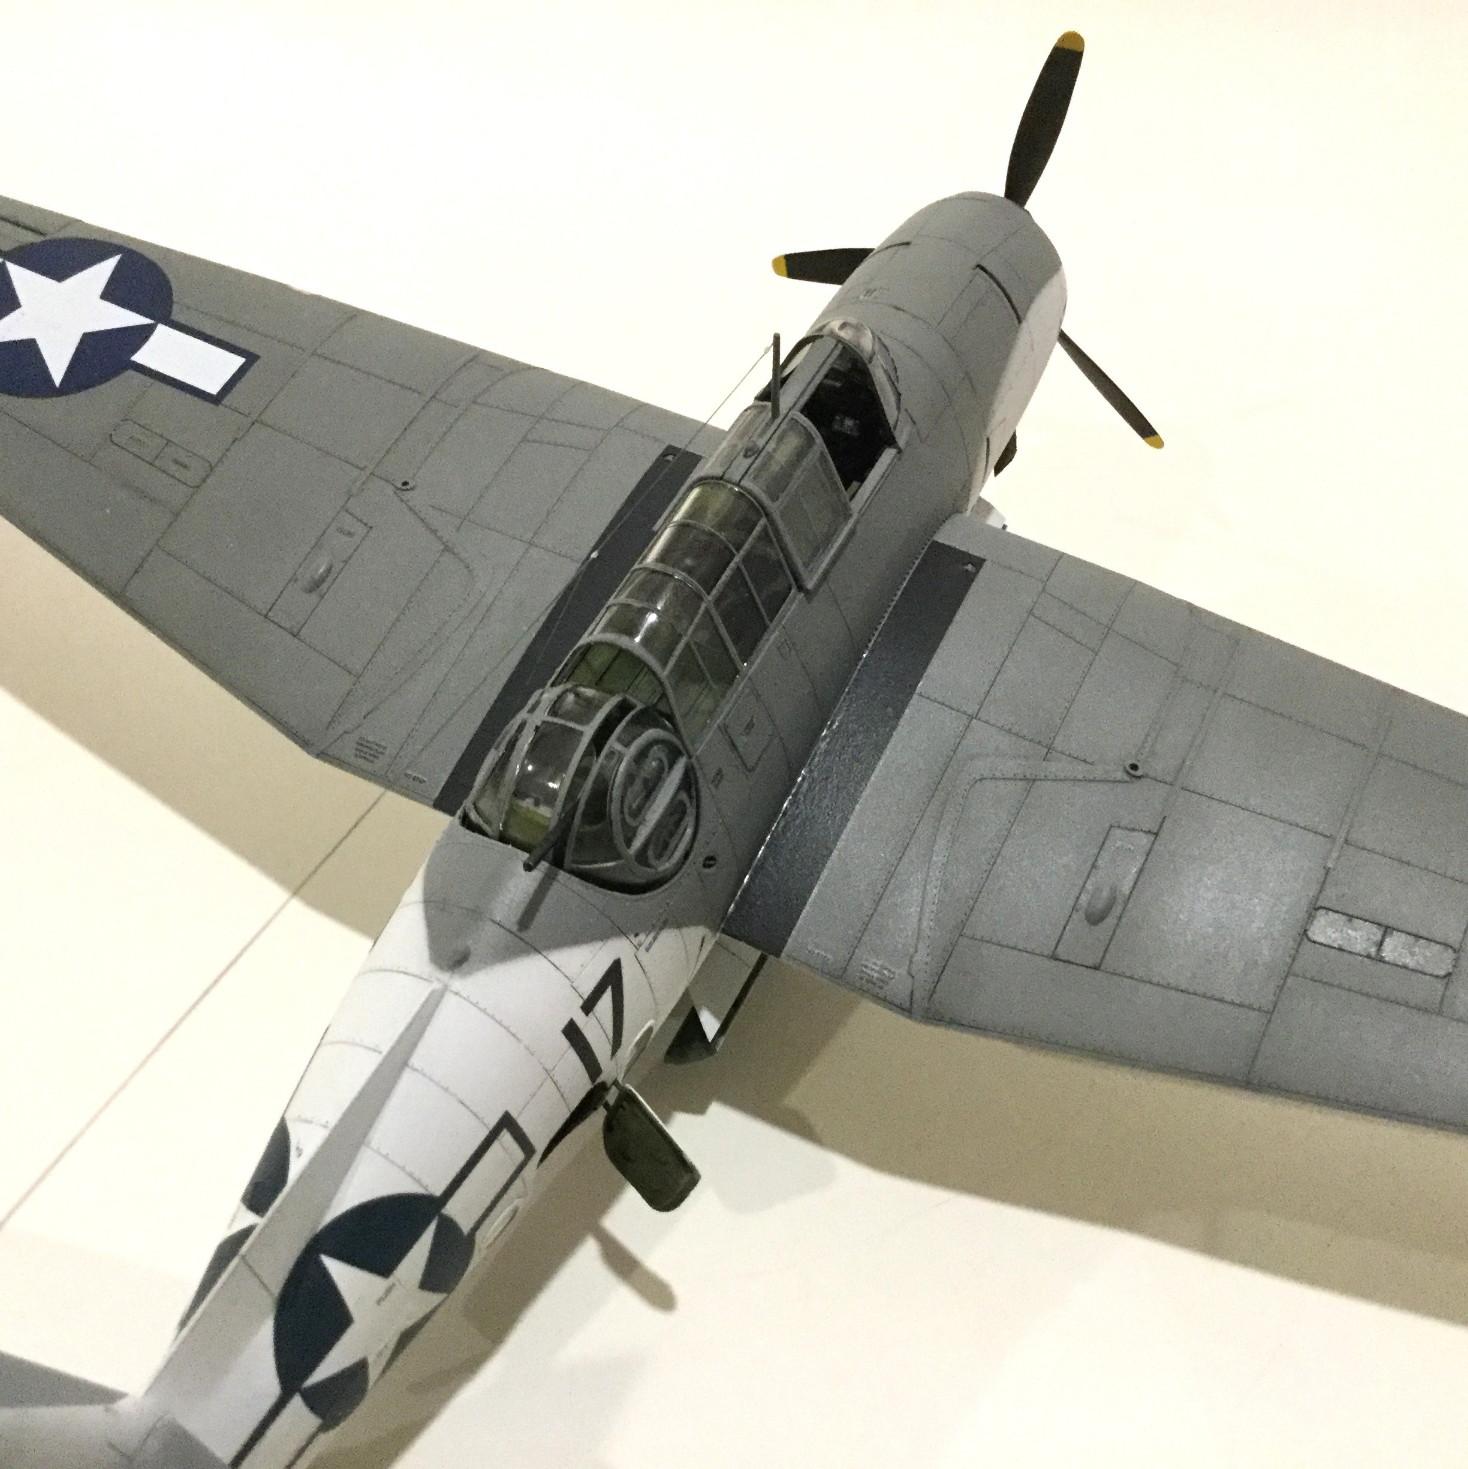
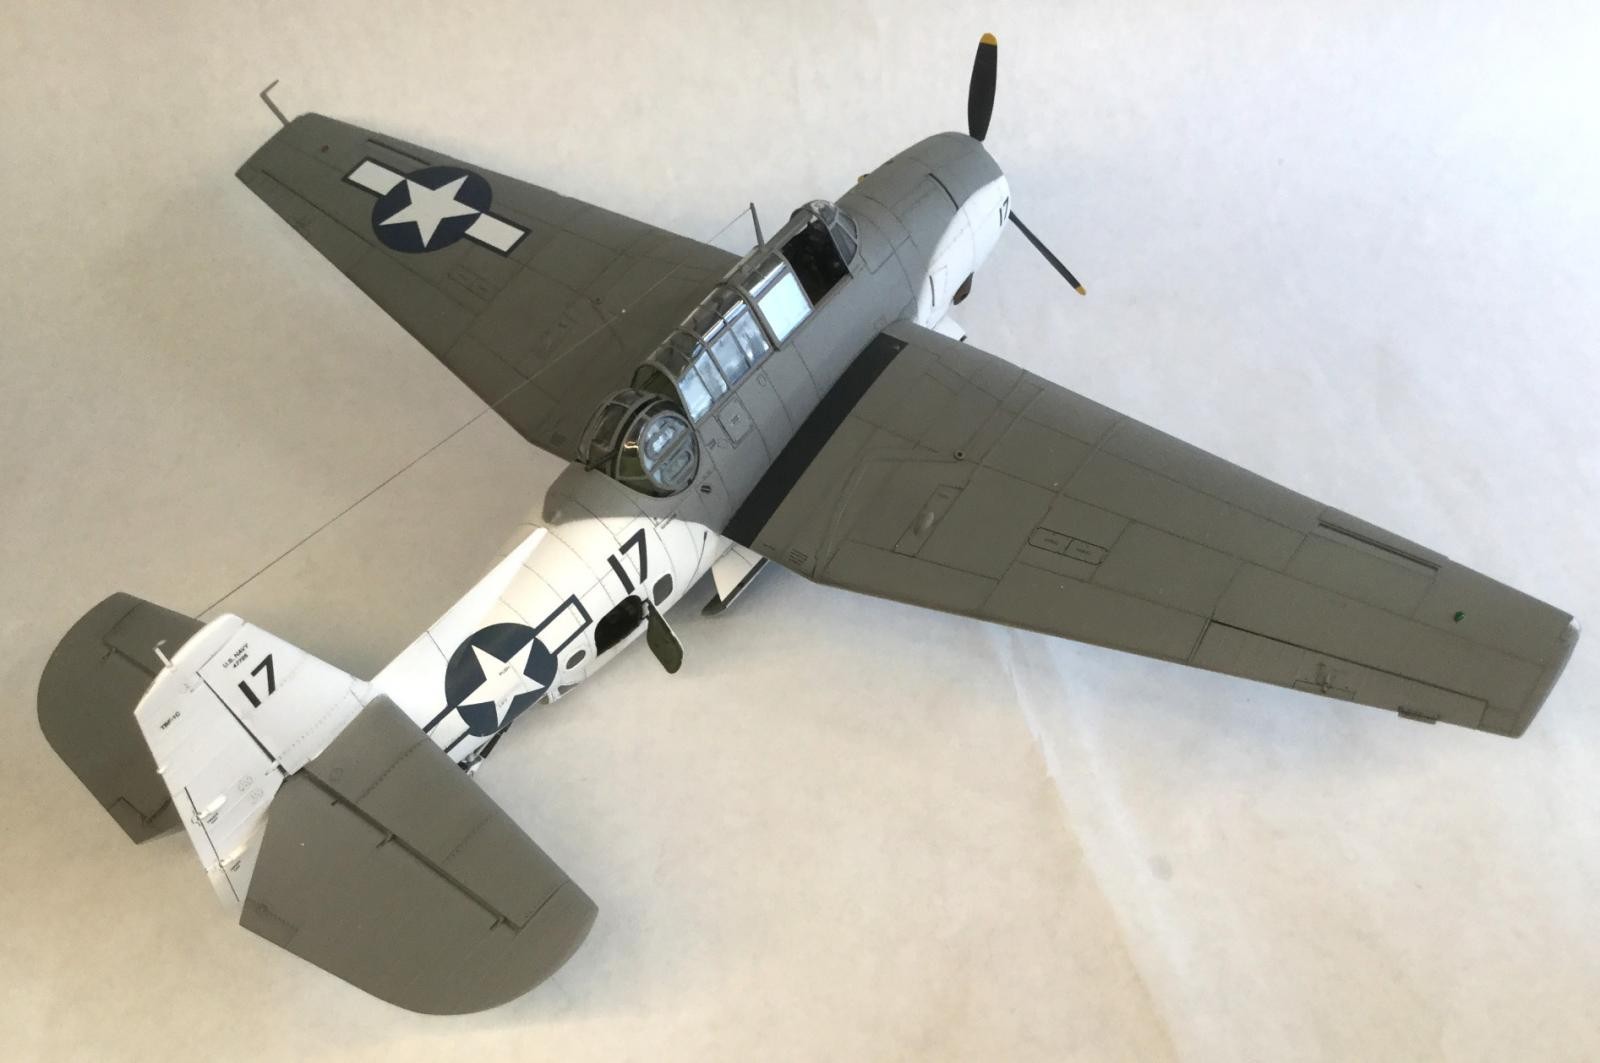
Here is my build of the great Accurate Miniatures TBF Avenger 1in 1/48. I actually had the Pacific version and had to buy Atlantic Scheme decals online. They were a bit old, so I substituted some of the stars and bars from other kits and spares (F4u and F64 leftovers).
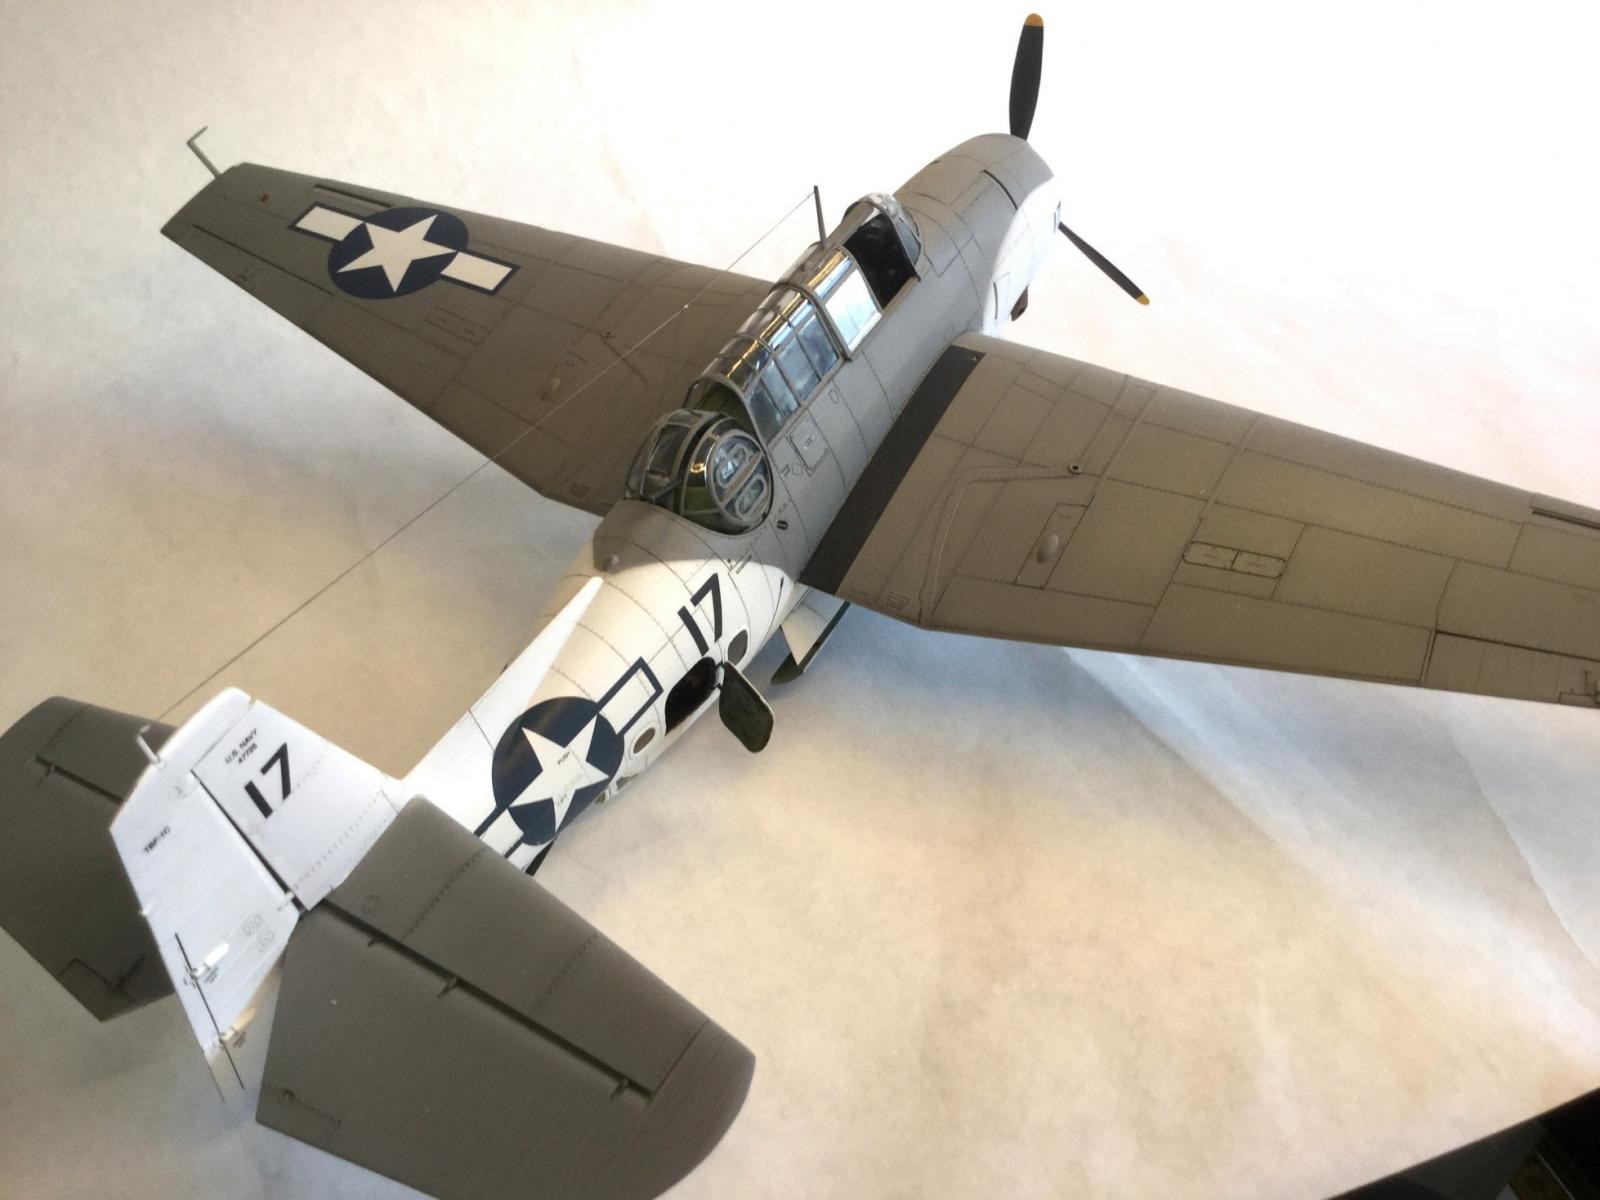
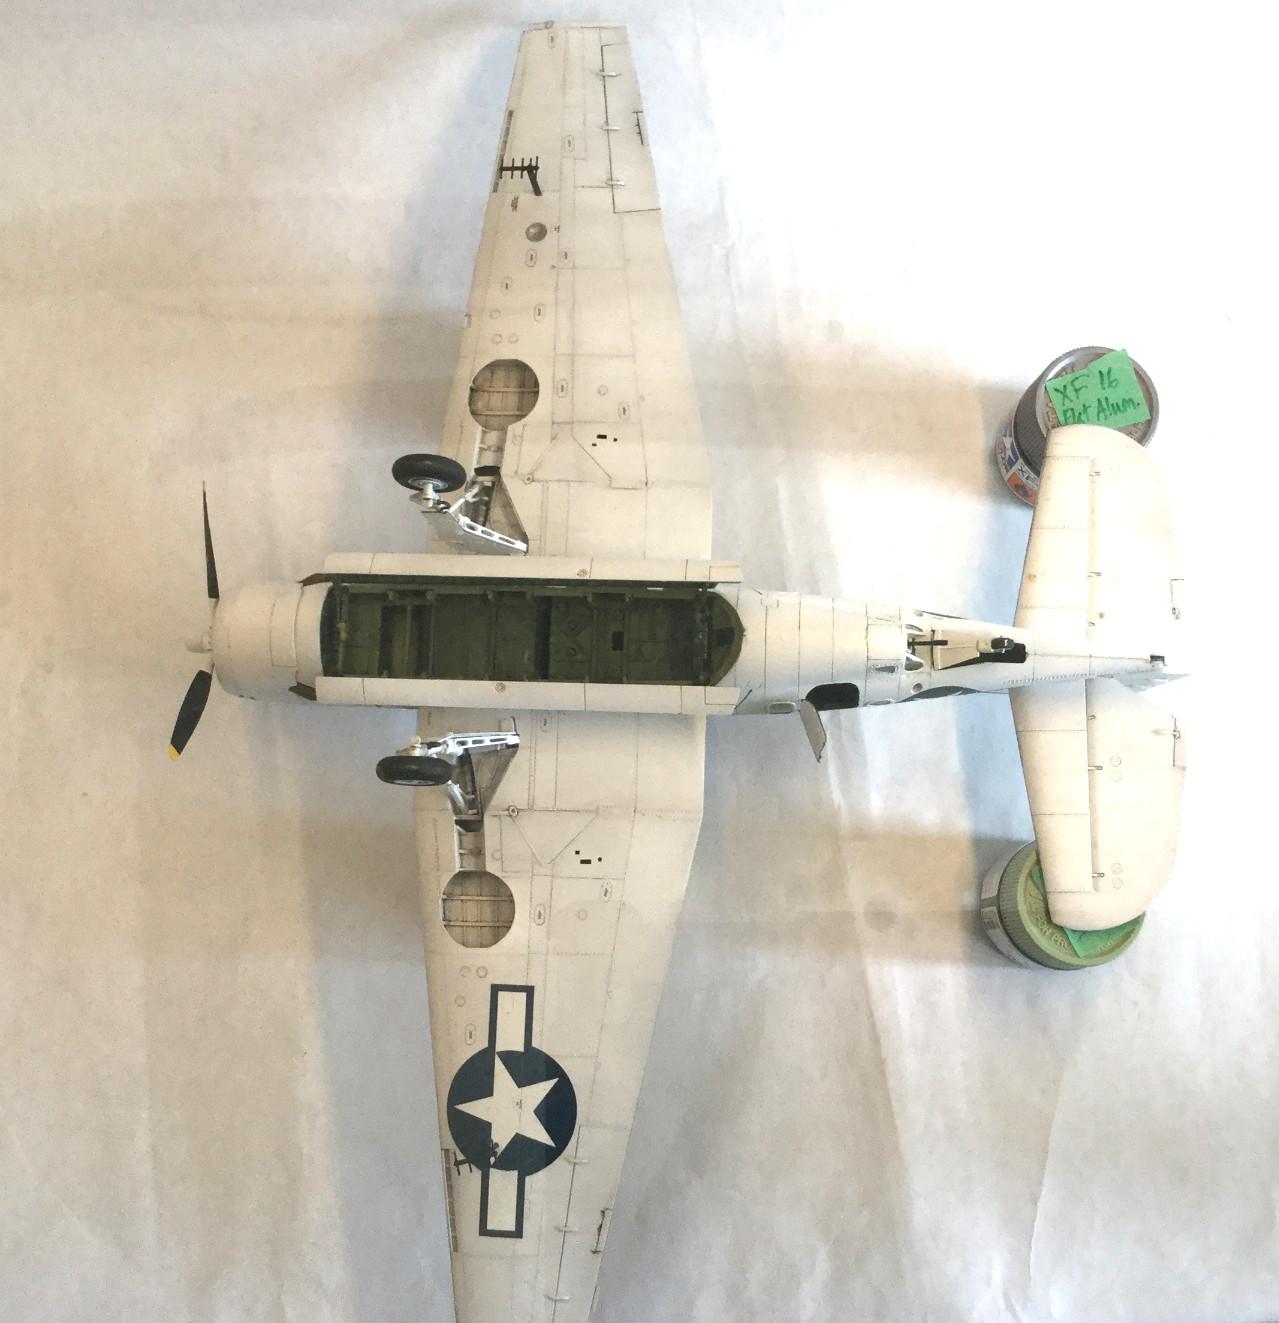
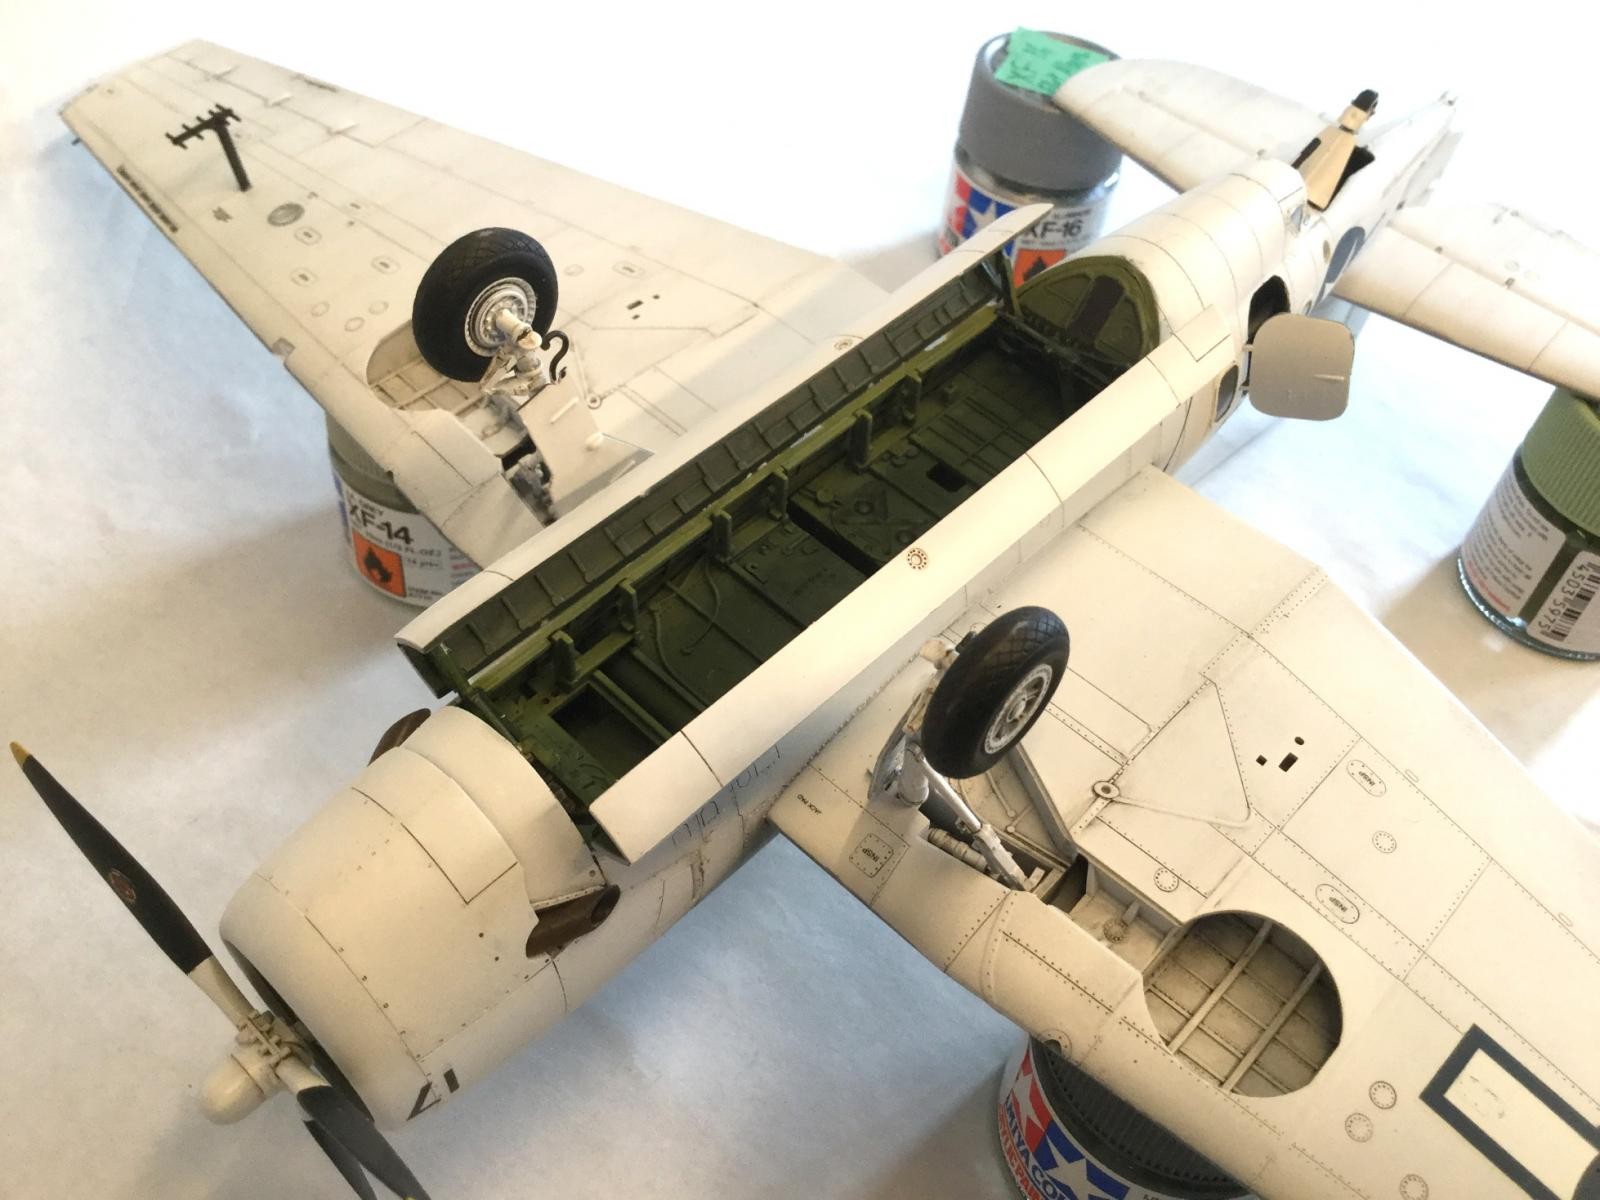
I weathered this based on testimony and photos that these aircraft were kept quite clean, including wiping off of exhaust streaks. I think I got the basic Atlantic weather wear without overdoing it, but you can compare the photos included.
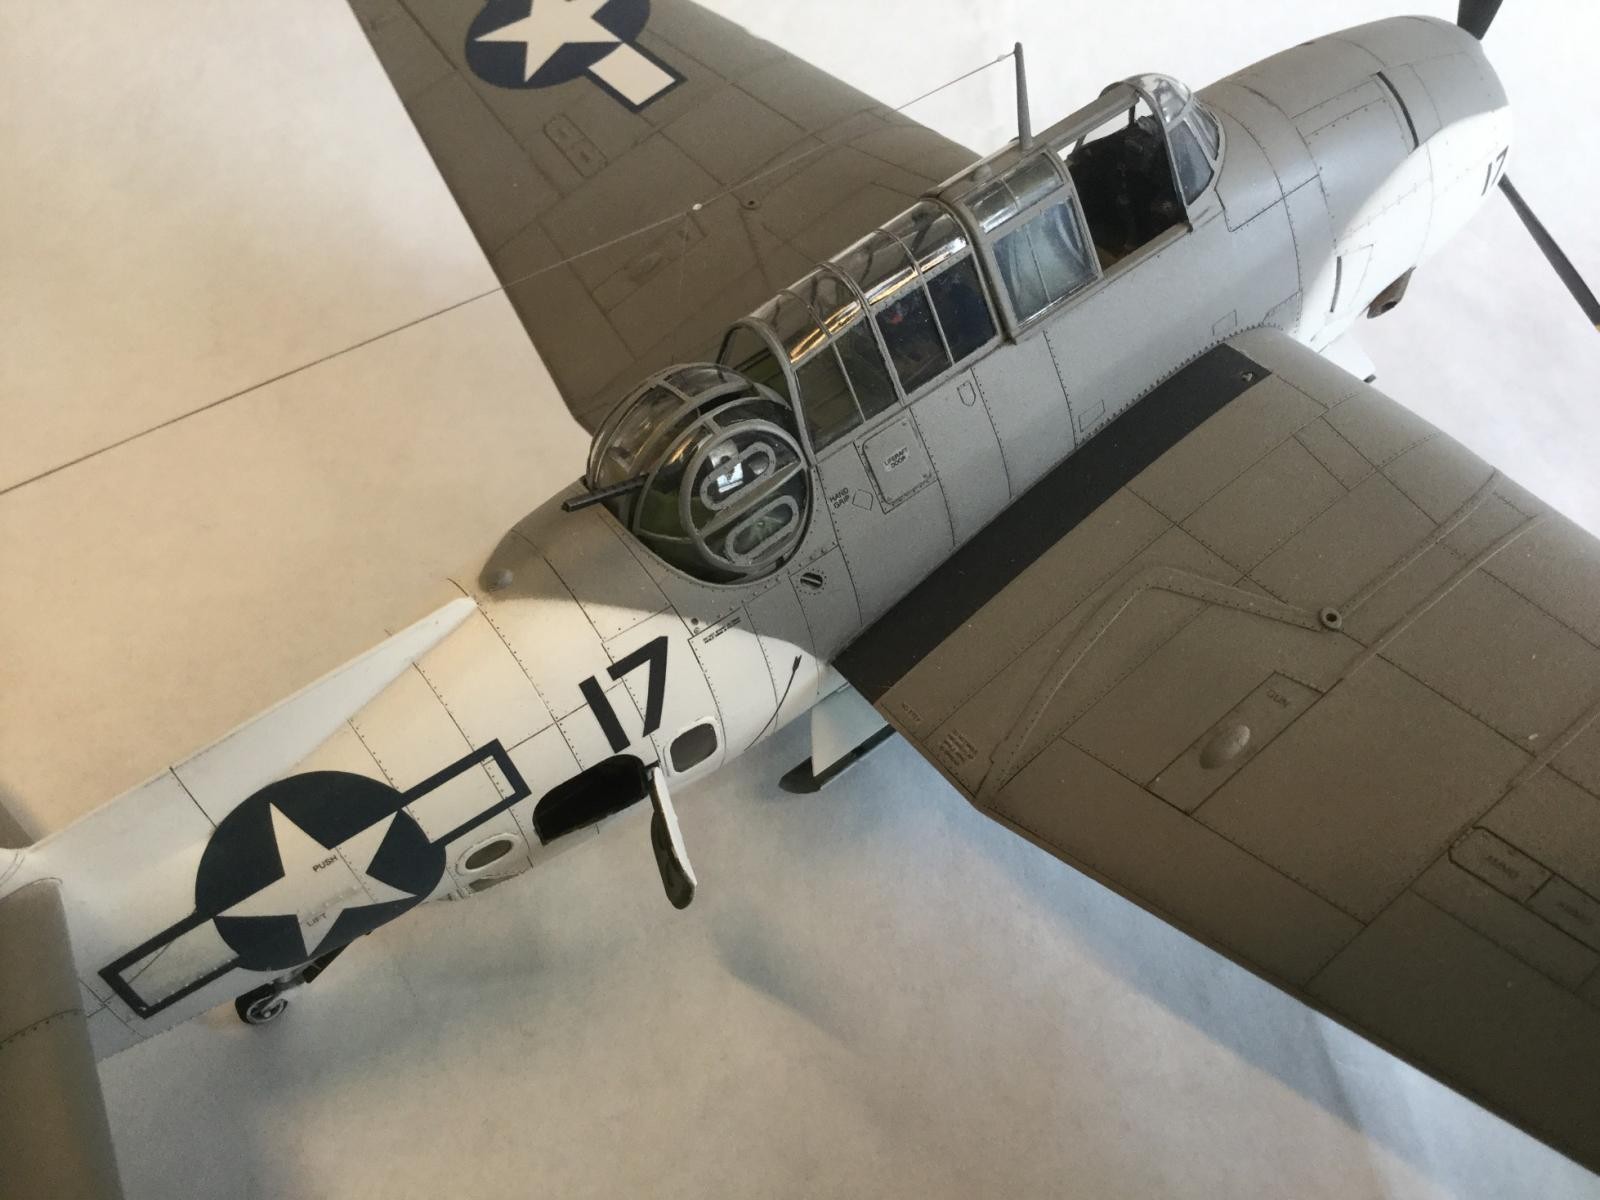
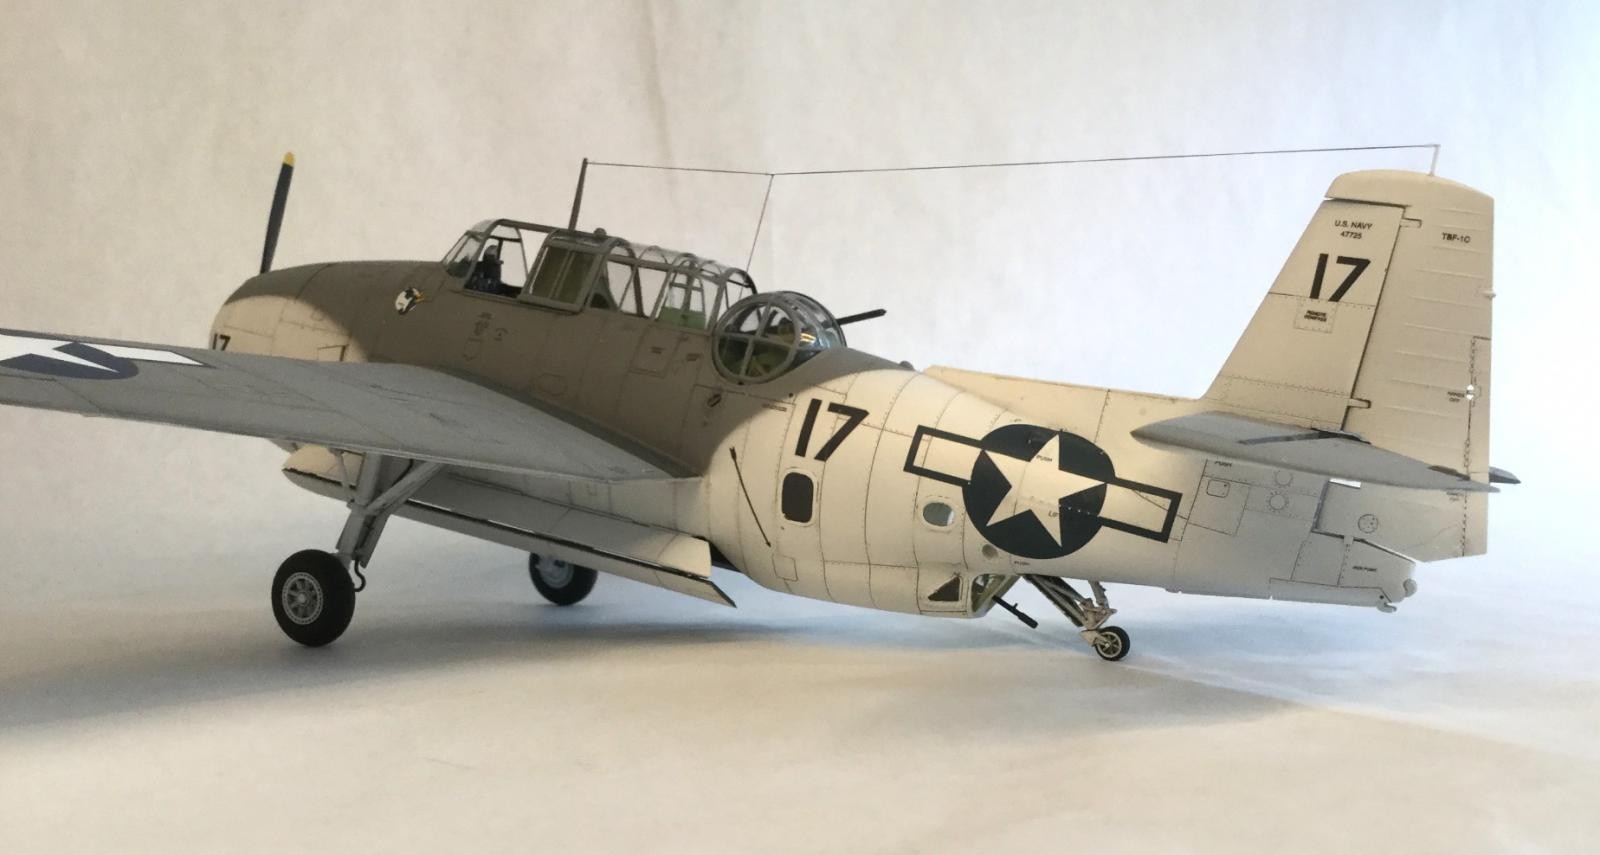
This is a superb, highly detailed kit. I only added few Eduard cockpit bits, including the instrument panel and seatbelts/harnesses. I redid the radio set wiring and added some labels. It's a n impressive cockpit OOB, actually. I think this is one of the best kits I have ever built. One day I will build a Pacific version and also do an SBD.
The canopy masking was laborious but effective, in the end. I used Eduard masks, which surprisingly did not fit well at all. I had to retrim practically every panel and I used some of the thick kit masks (which were cut perfectly, even though they were less flexible). The turret was hardest to mask and even harder to install without scuffing the paint but it IS possible. The kit actually fits well but the engineering is extremely tight.
Colors were Gunze Interior Green inside and Tamiya Flat White, Lifecolor Dark Gull Grey for the Camo. Antenna wire is EZ line with drops of white glue for insulators.
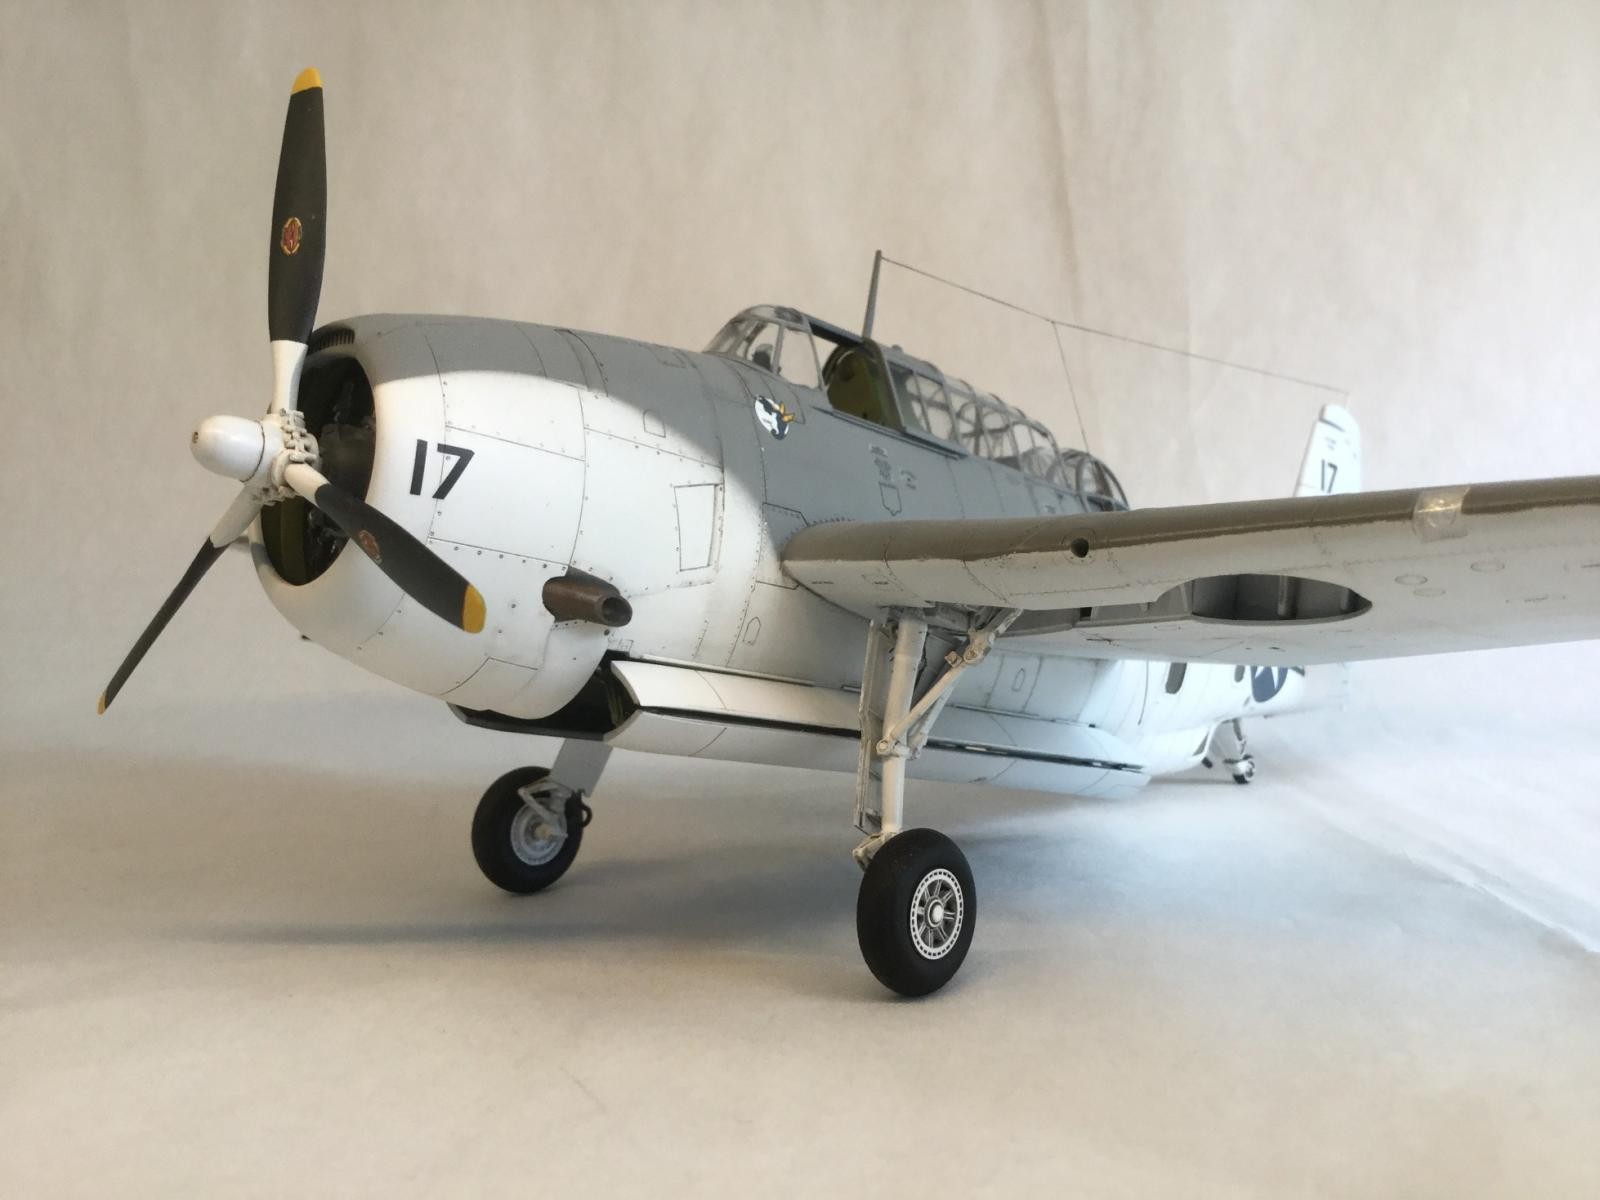
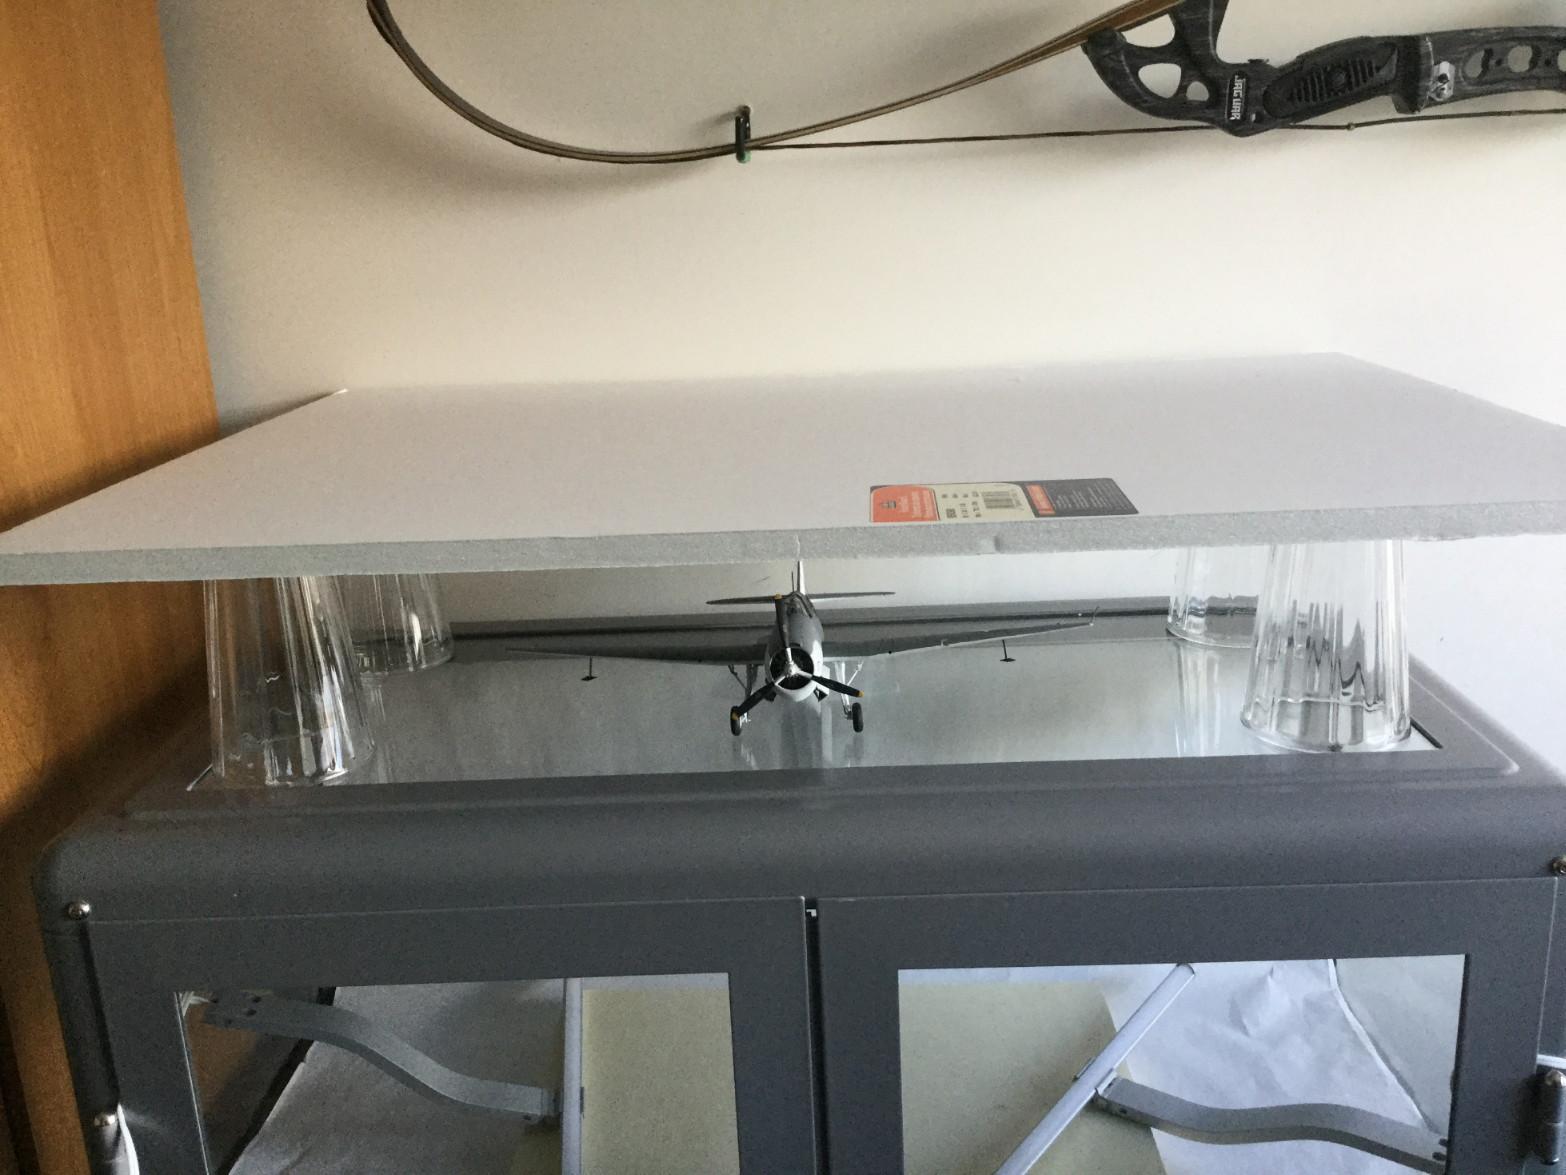
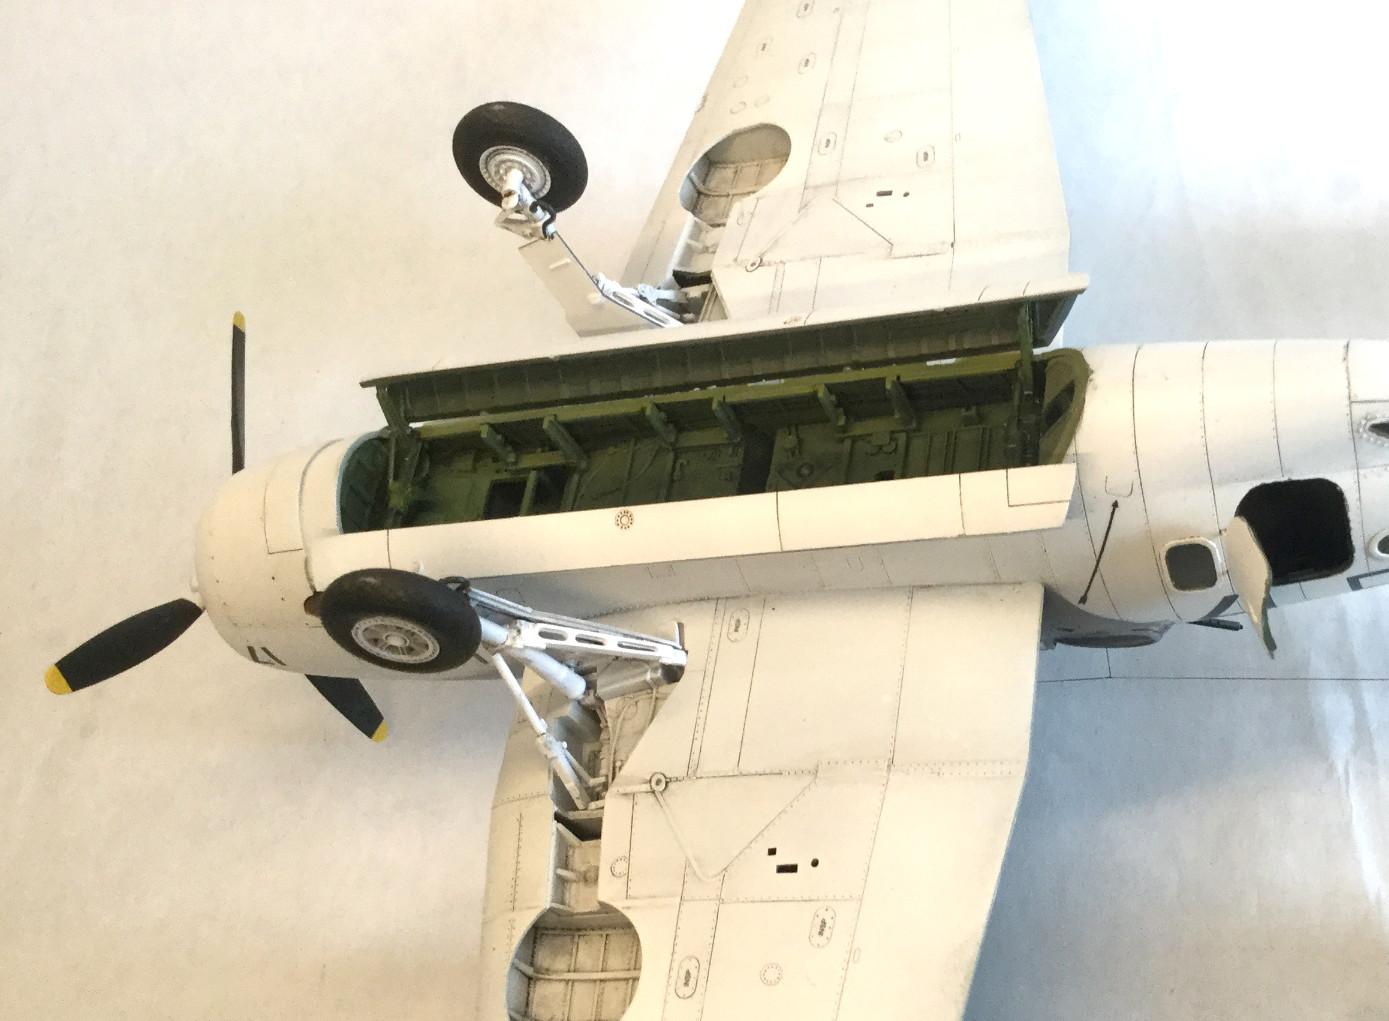
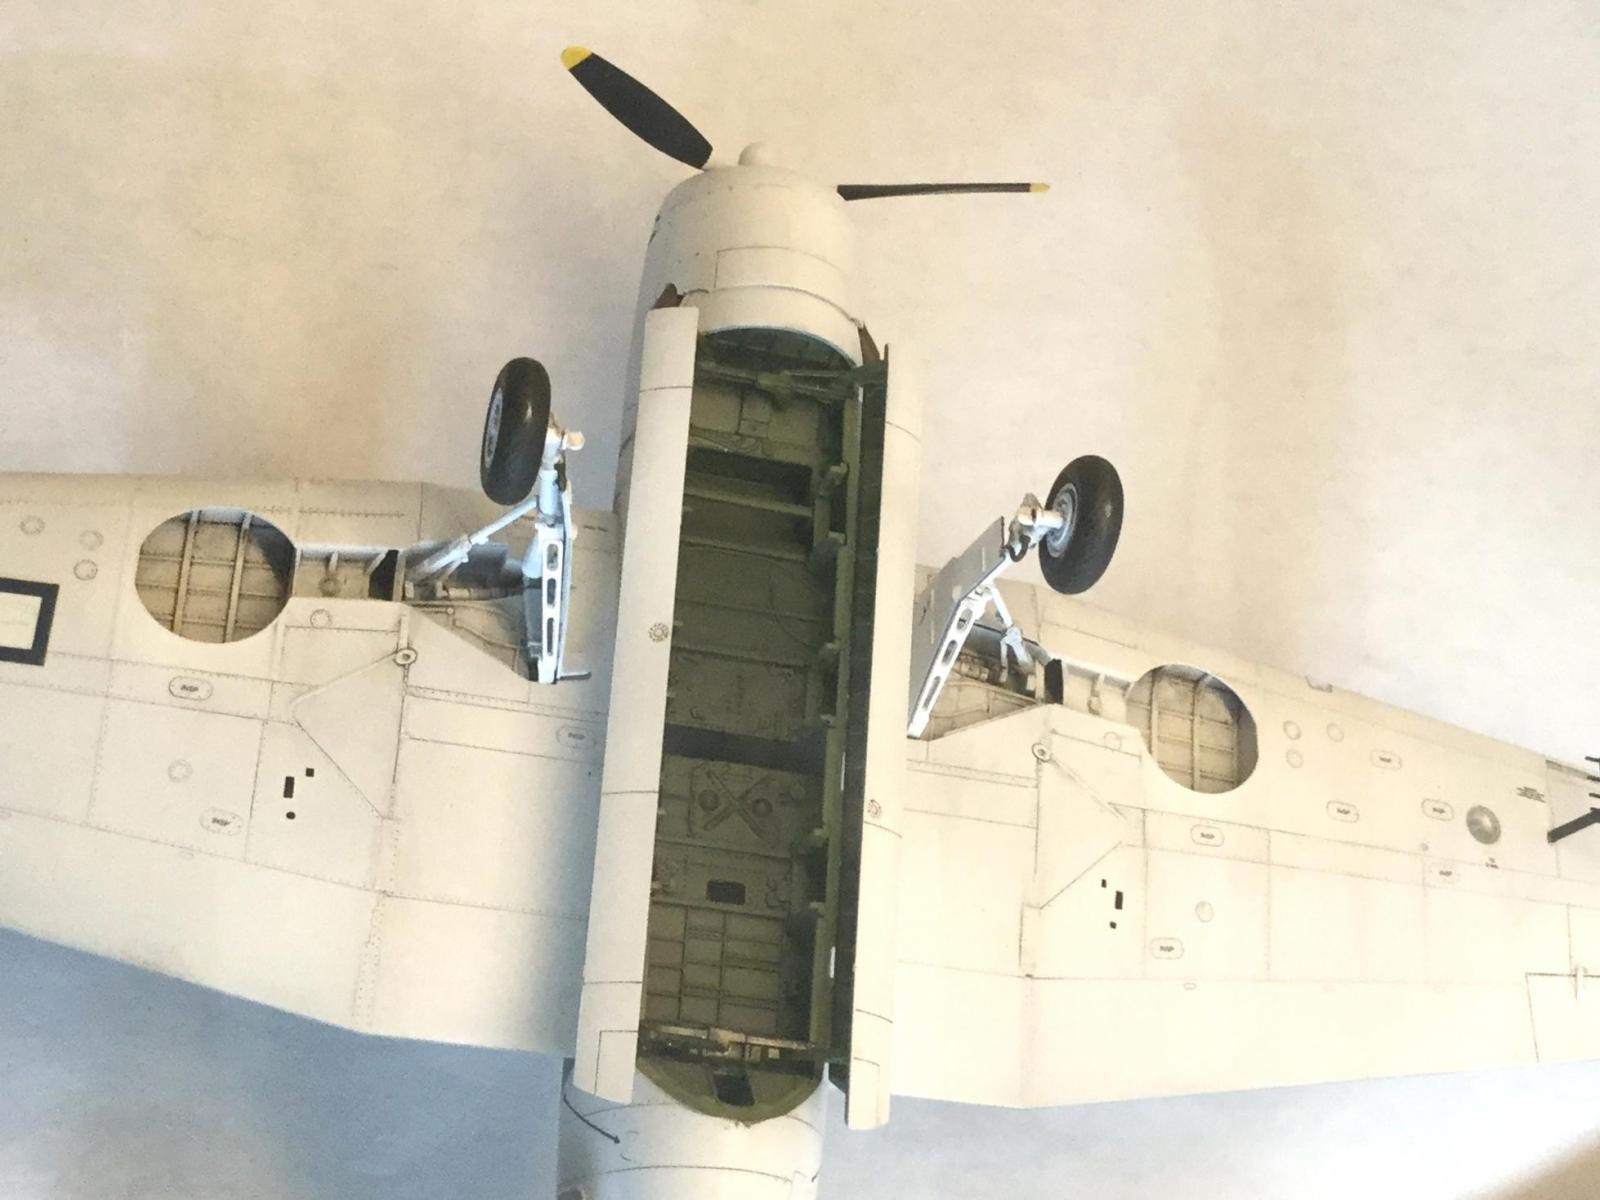
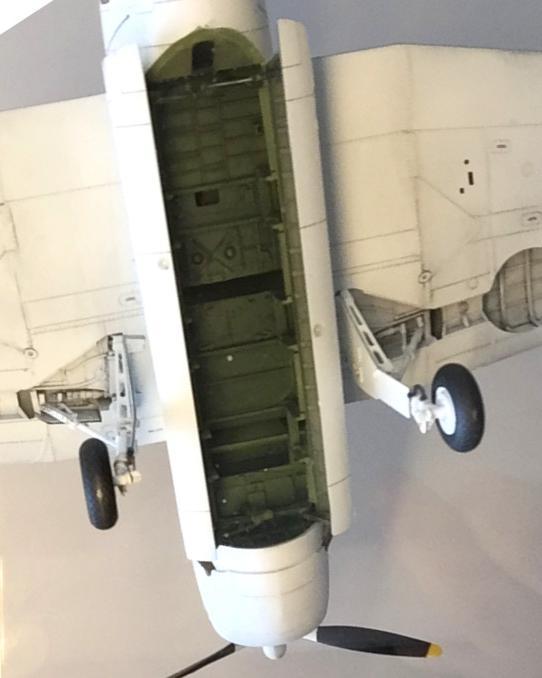
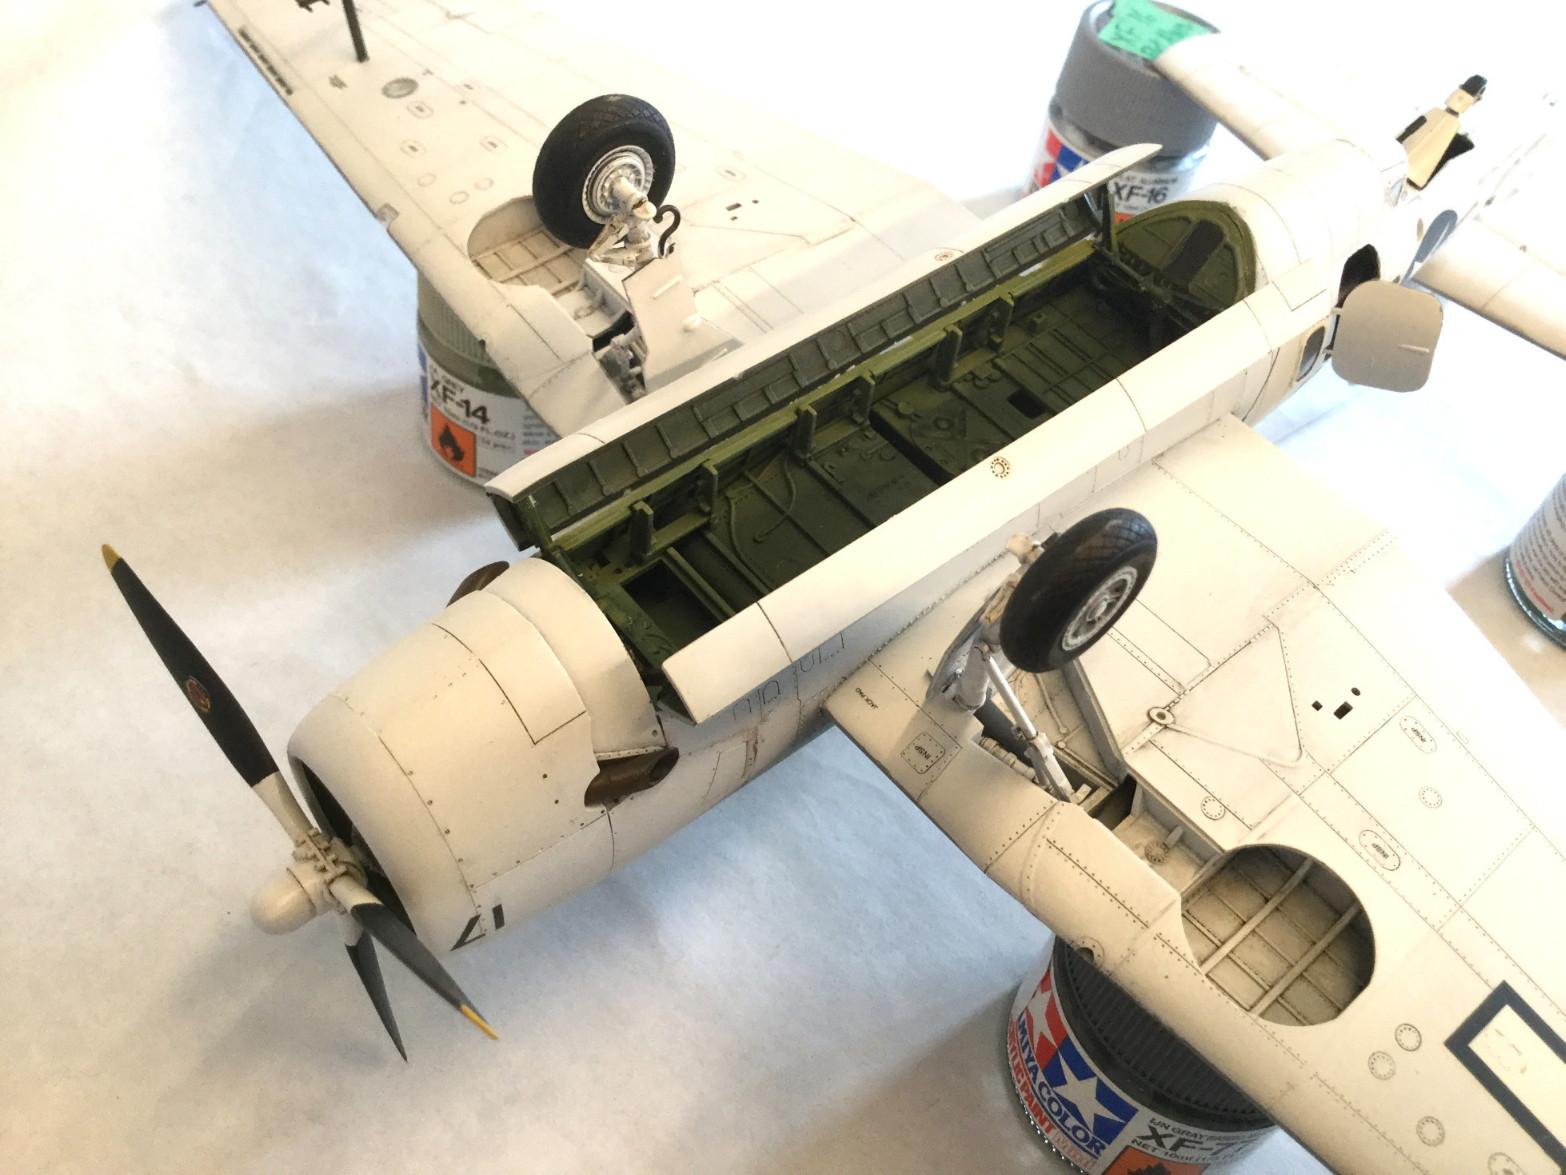
I added a few pics of the underside after one request. I didn't want to risk breaking anything at first, so I had the crazy idea to shoot upward in my cabinet through the glass. Only one pic was sort of OK. When I flipped it on its back, I broke one yagi antenna but did a quick repair. Better pics. The weapons bay is empty for now because I am making a carrier deck diorama with a torpedo still to be loaded. I may change that to depth charges, if I can find any.
Hope you like it.
Colin


Looks really good in the Atlantic scheme. All carrier aircraft were/are very well maintained or they would disintegrate rapidly from salt corrosion.
Thanks, Haslam. I am sure you are right. Some paint seemed to hold up better in the elements, however. I am planning to do a Canadian Corsair in 1/32 as serving on HMS Victorious . The FAA Corsairs and Avengers ended up much more battered and faded in their FAA colors. It's fun trying to replicate the real look of these warbirds.
It is a great kit and an equally great build, Colin! I think your weathering is pretty much spot on. I love the Avenger; still haven' t started my 1/32 Trumpeter in President Bush's marks. The box is enormous and it's FULL with sprues...Maybe I give my 1/72 ancient Airfix a go first...
All the best!
Thanks, Spriros, That Trumpeter TBF kit must be gigantic! I did the Trumpeter P-38 in 1/32and it kept on trying to pull itself apart from its own weight when I flipped it over to paint and detail. i had to put a ton of weight in the nose too, of course. It think its a good idea to try different scaled kits of the same subject, especially to figure out masking techniques. Starting smaller with 1/72 the first time sounds like a good approach. I did the Academy P-38 in 48th before the Trumpeter 1/32nd.
Well done Collin, always liked the Avenger in the Atlantic scheme.
Thanks, Tom. I am glad you like it.
Awesome build, and really good photography! I have a whole raft of Avengers to build. I have a major painting to get done, then maybe I can get back to some model building with being sheltered in place.
Thanks, Dan. I am in the fortunate position of still working from home during this emergency (for now). I actually have LESS time to model because I spend so much time and energy trying to figure out new ways to communicate with clients and colleagues. Anyway, this hobby is still a great way to keep your sanity in a crazy world.
Wonderful build. Wish you had posted more pics of the underside. I've always likes the 'seagull' Avenger and you nailed the look. Thanks for posting these pics.
Thanks, David. I will paste the text here that I appended above: I added a few pics of the underside after your request. I didn't want to risk breaking anything at first, so I had the crazy idea to shoot upward in my cabinet through the glass (as shown). Only one pic was sort of OK. When I flipped it on its back, I broke one yagi antenna but did a quick repair. Better pics. The weapons bay is empty for now because I am making a carrier deck diorama with a torpedo still to be loaded. I may change that to depth charges, if I can find any.
Great work on this and a super result.
Here's a trick for getting the turret in: do not glue the rear area of the cockpit interior on one side of the model, and then you can spread the fuselage enough to pop the turret in, after which you then glue those edges and finally install the canopy.
Thanks, Tom. As it happens, that was exactly the technique I used. After staring at it, I couldn't see any other way to get it to pop in. Even with that part not glued down, it still takes a bit of working back and forth to click in. Probably a quick preliminary prayer to the modeling gods helped too - ha ha. BTW, I am enjoying your book about the 78th Fighter Group. Great story telling plus I really like the time you take to identify and highlight the careers of each pilot.
Great looking Avenger, and that Atlantic scheme looks great on it. I'm going to have to get to an Atlantic scheme soon...
Thanks. Greg. I think the Atlantic scheme brings out the lines of the Avenger well, somehow. Not sure why, but half the pleasure of this hobby for me is thinking about how the appearance of our subjects appeals (at least for me).