Sister Squadrons
This project began shortly after i took GYPSY 203, a VF-32 Tomcat built for John Lawler, to the IPMS Nationals in Phoenix. Having enjoyed building the Tamiya Tomcat, i wanted to build one for myself.
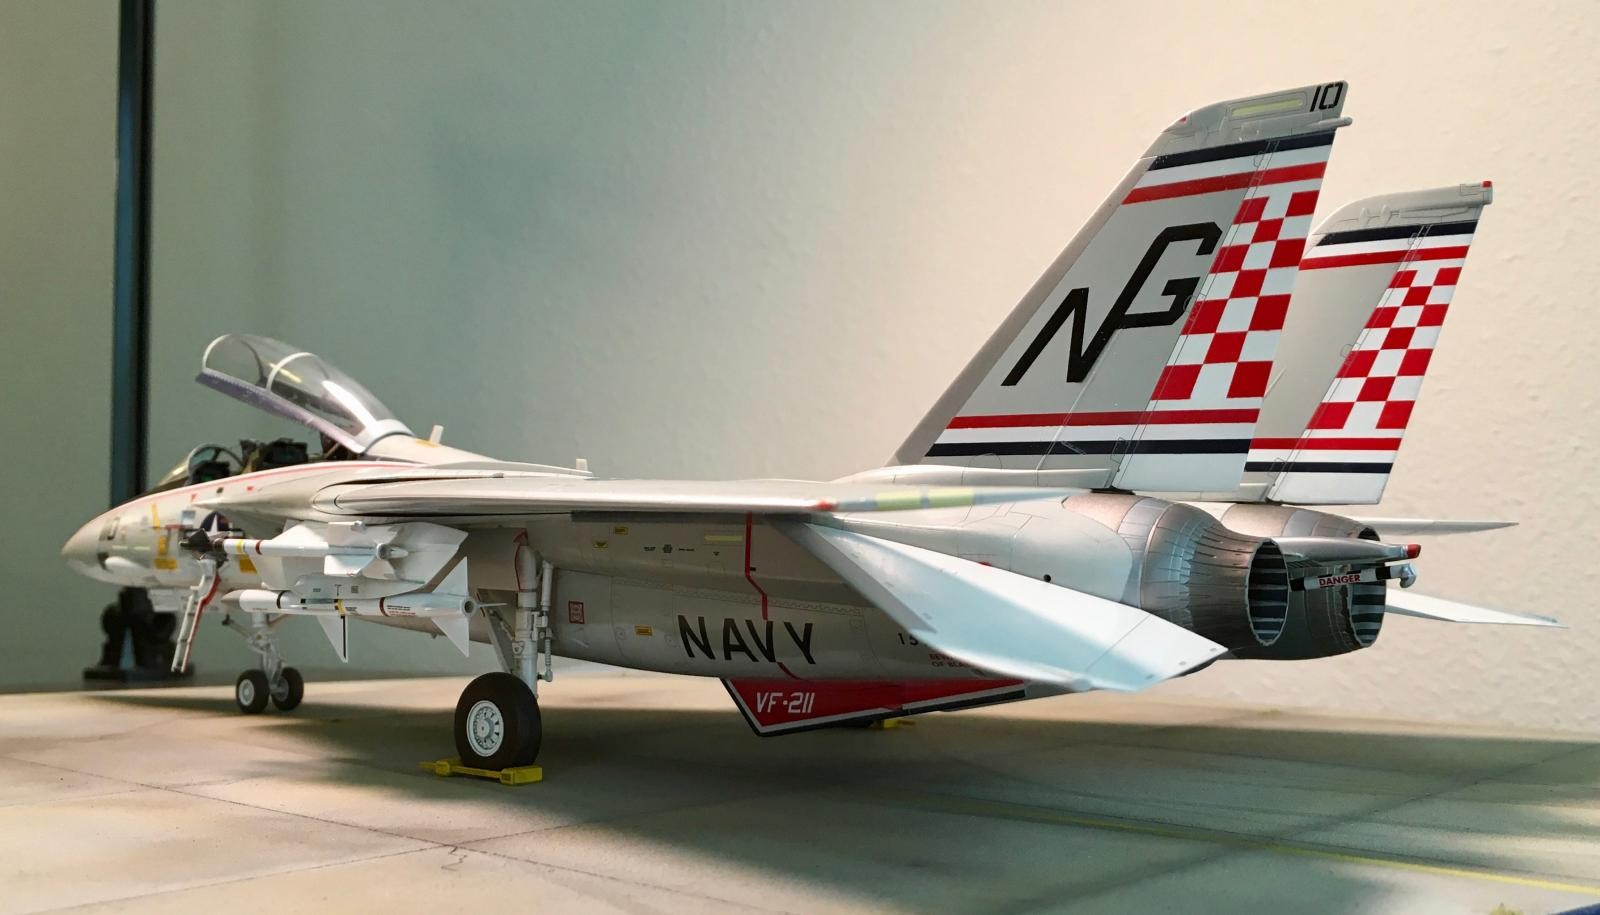
I was inspired by an issue of SCALE MODELER Magazine dating back to 1977 or 1978, where the reviewer wrote a feature on the then-new Fujimi F-14 Tomcat which i think was the first quarter-inch Tomcat on the market. The writer chose the beautiful markings of VF-211, the "Fighting Checkmates", callsign NICKEL for his first subject. The paint scheme itself is rather complex and hard to pull off, but i hadn't seen anybody attempt it yet so i figured do it- before it turns into a Tomcat Paint Scheme "Cliche", like VF-84.
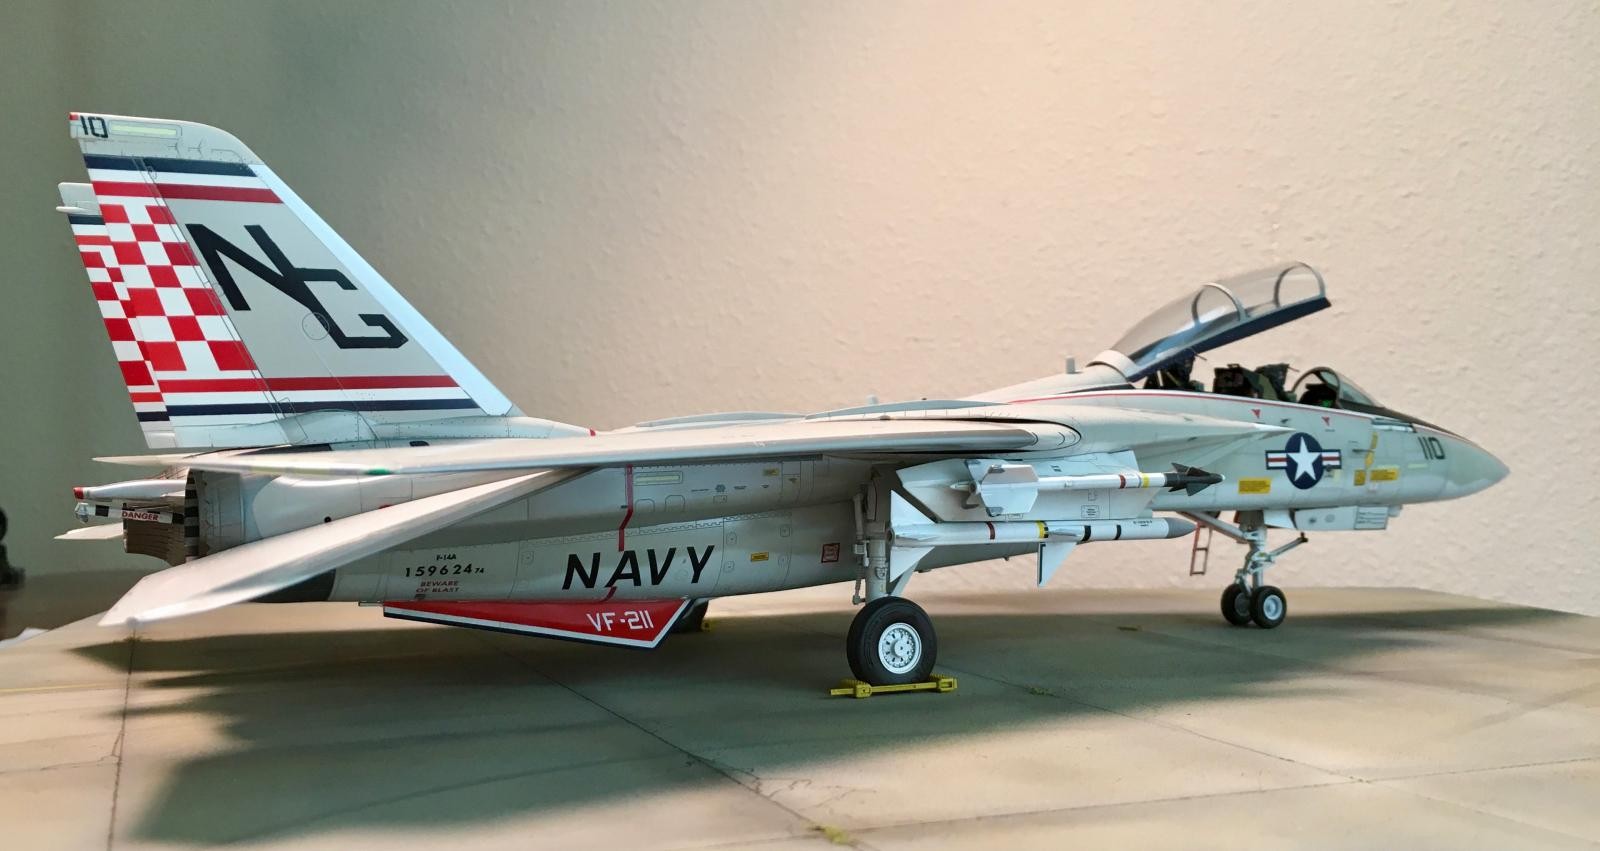
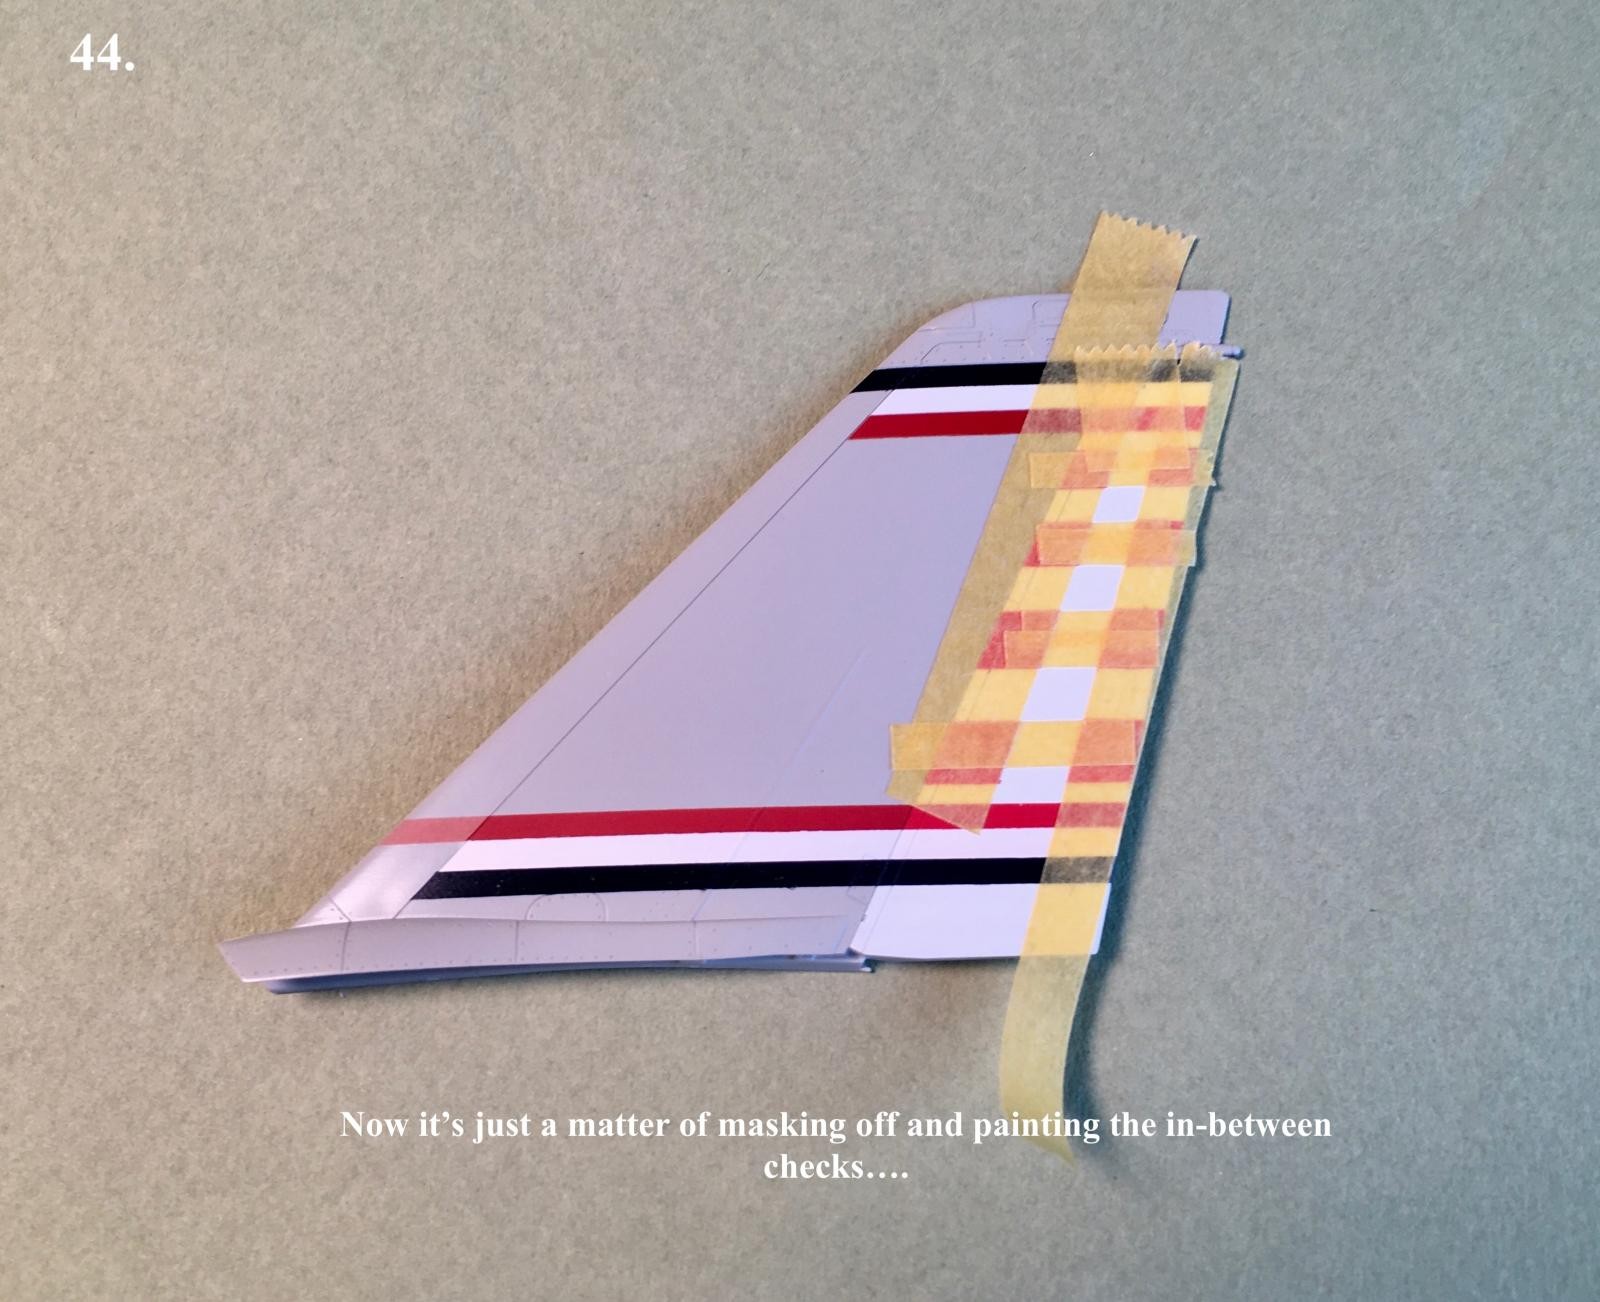
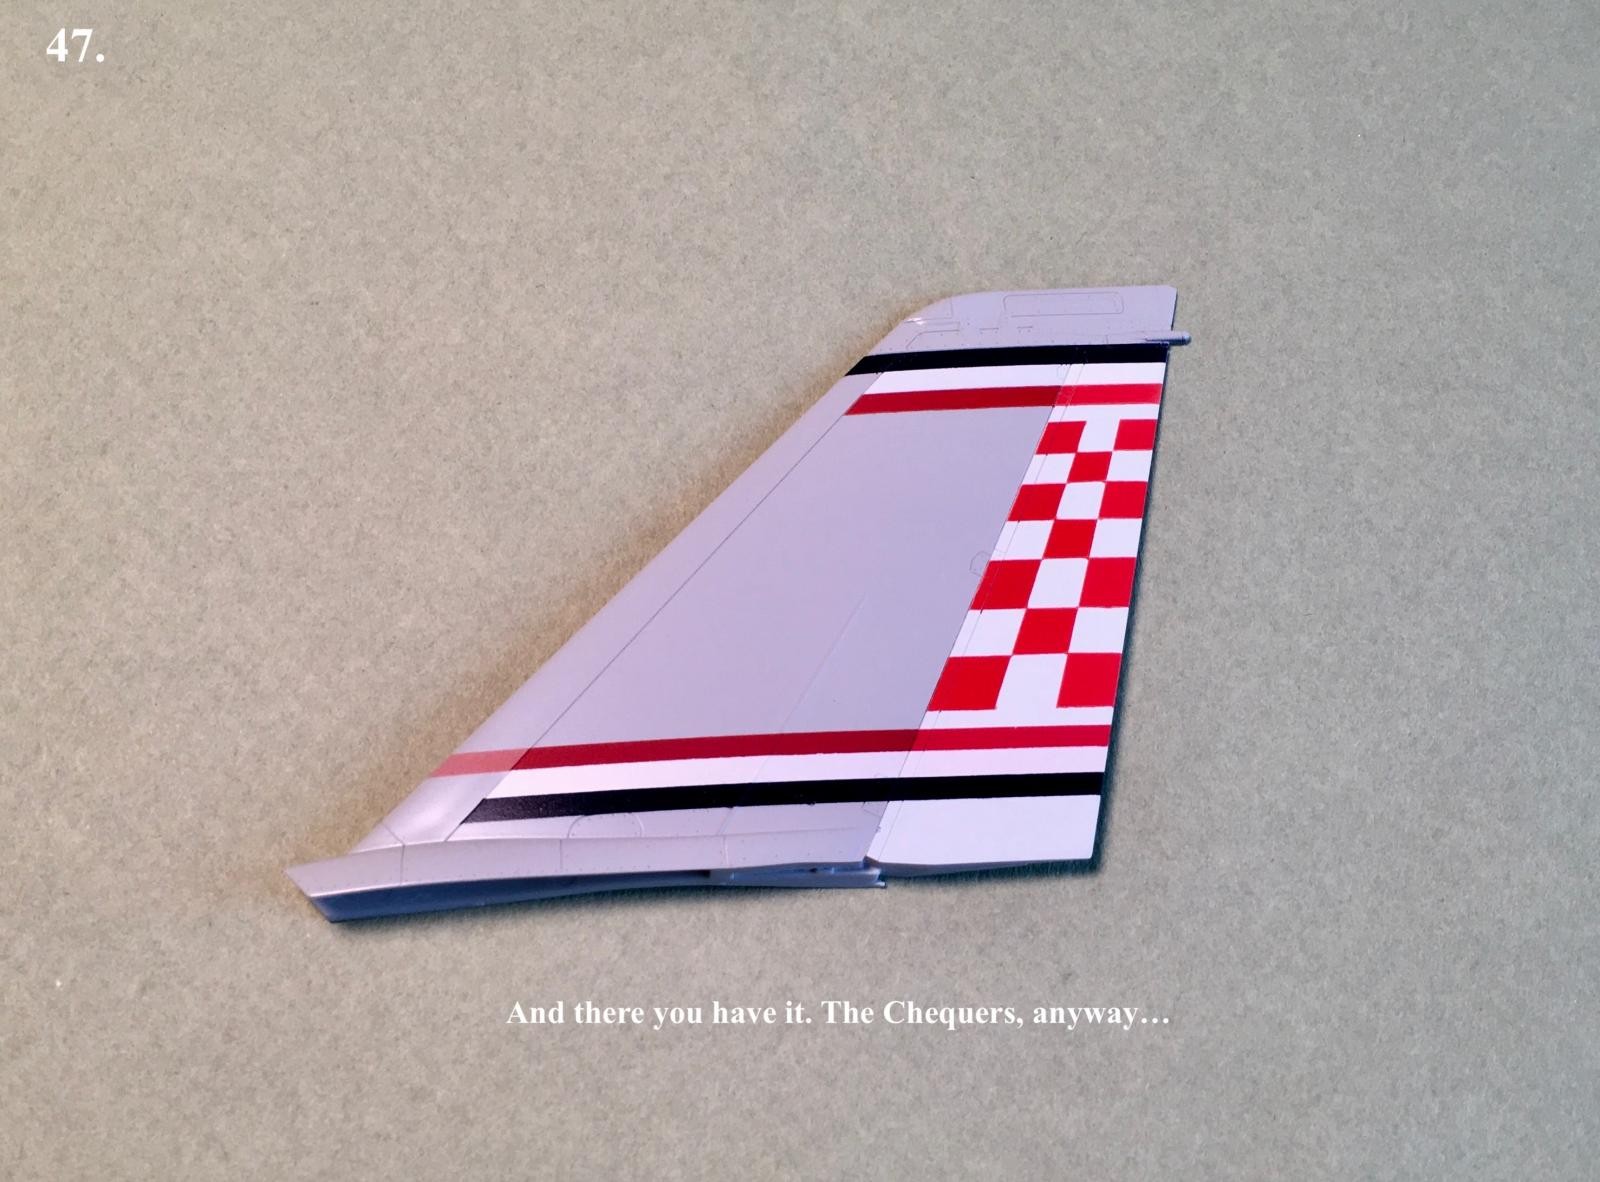
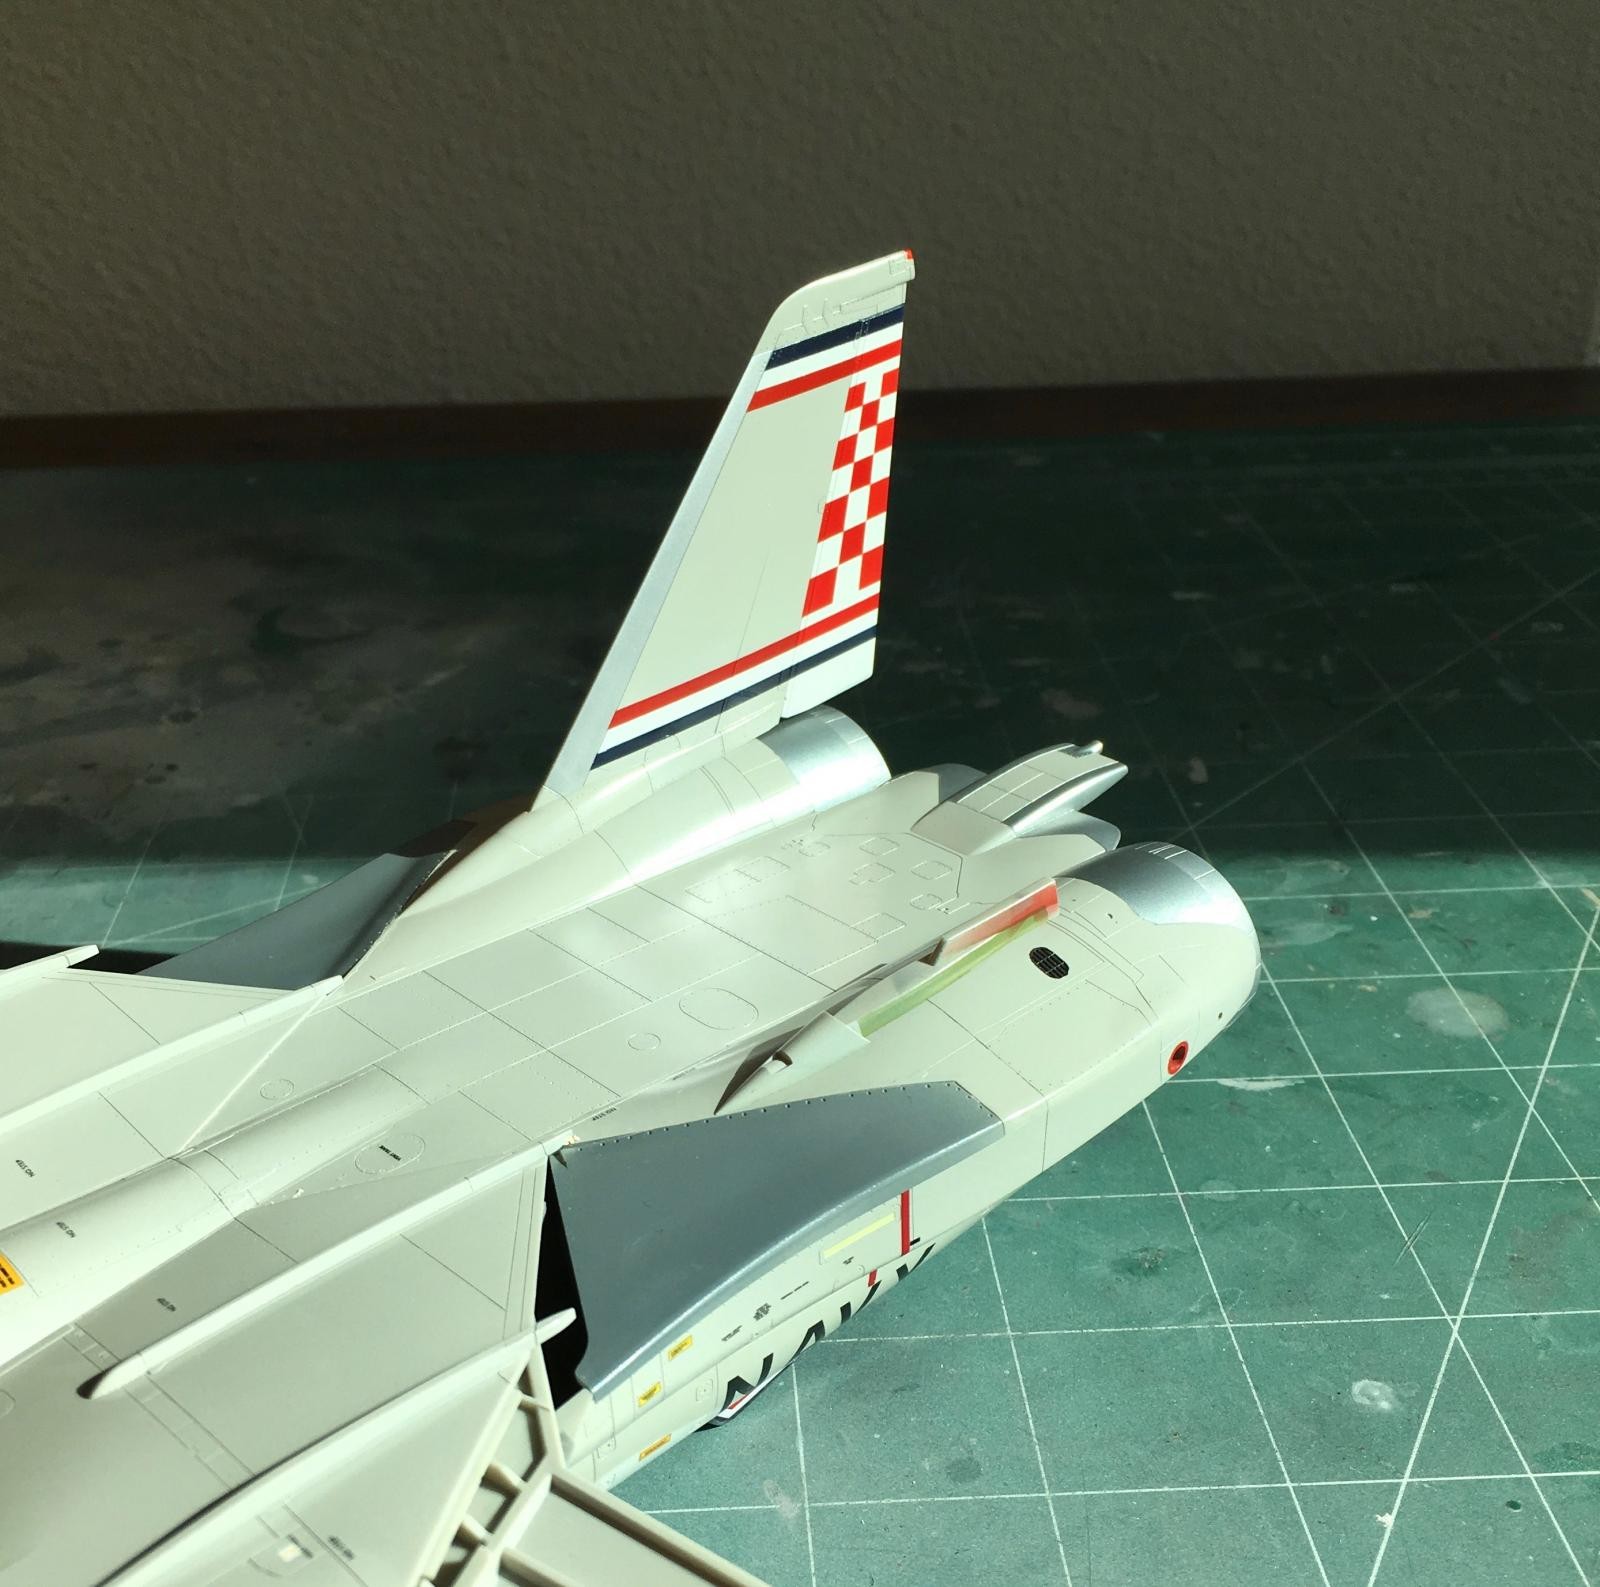
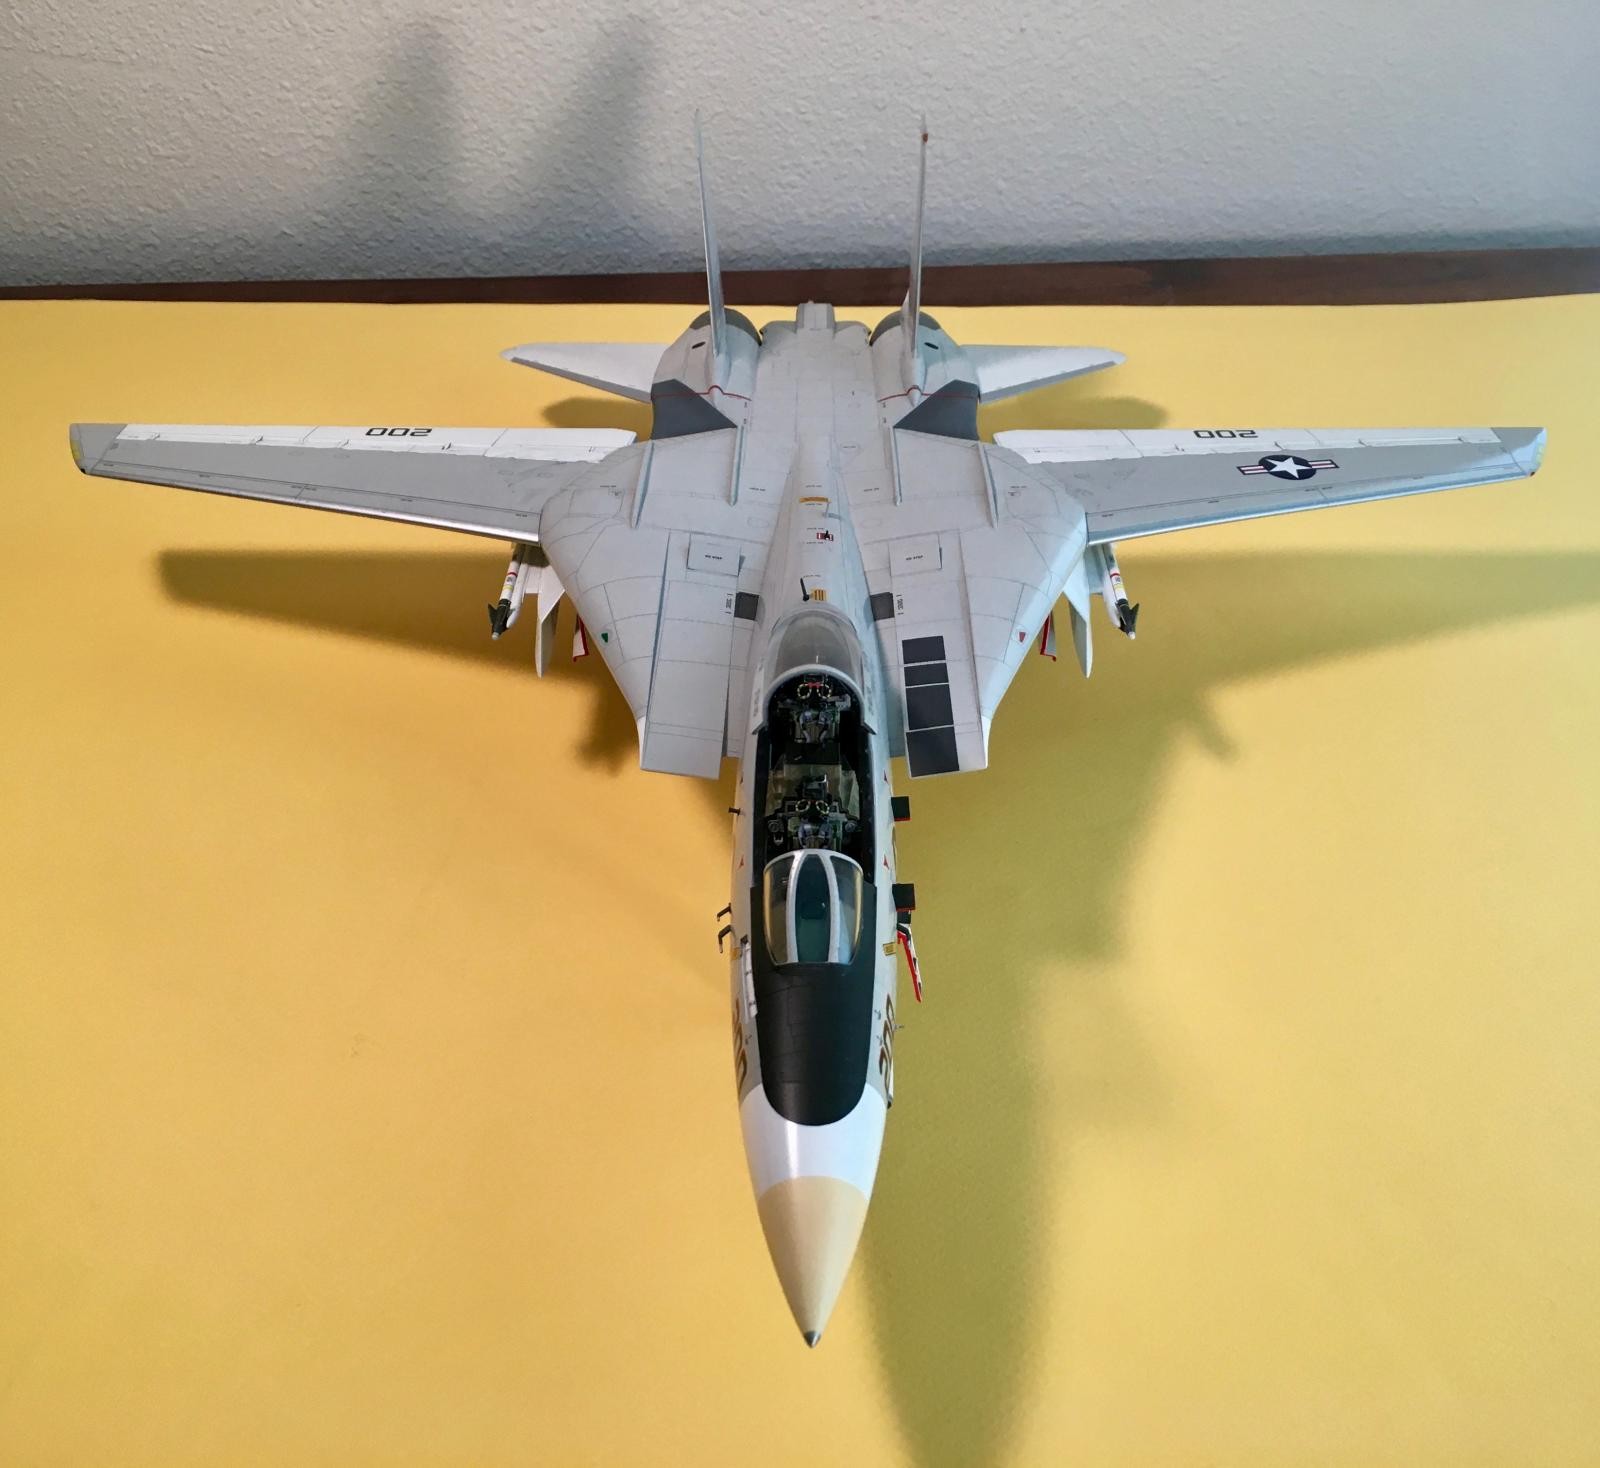
There were few decals available on the market for the early VF-211 scheme, so i had little choice but to paint the markings myself. The most difficult parts to accomplish were the red, white, and blue pinstripes that ran along the canopy deck, and the characteristic red and white checkers on the vertical fins. i consider this plane to be one of the rare exceptions where red and white checkers (or chequers, if you prefer) work on a plane...the other of course being the English Electric Lightning.
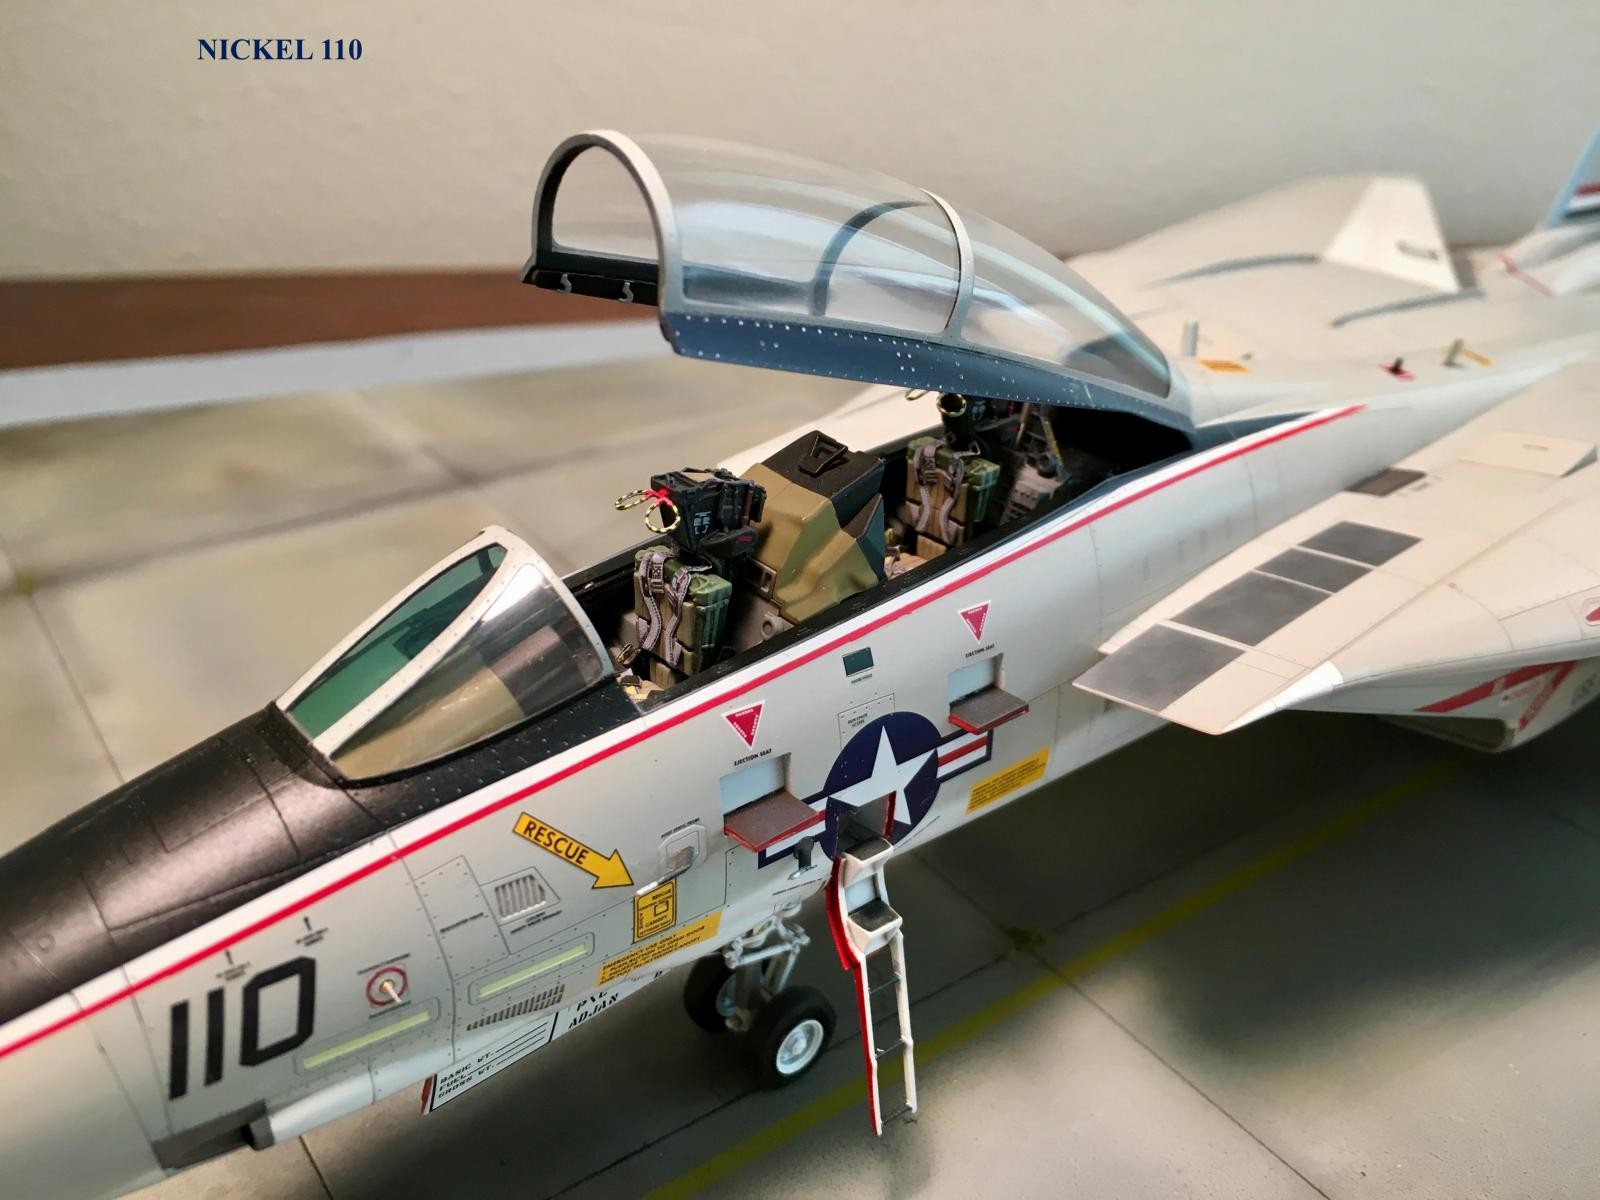

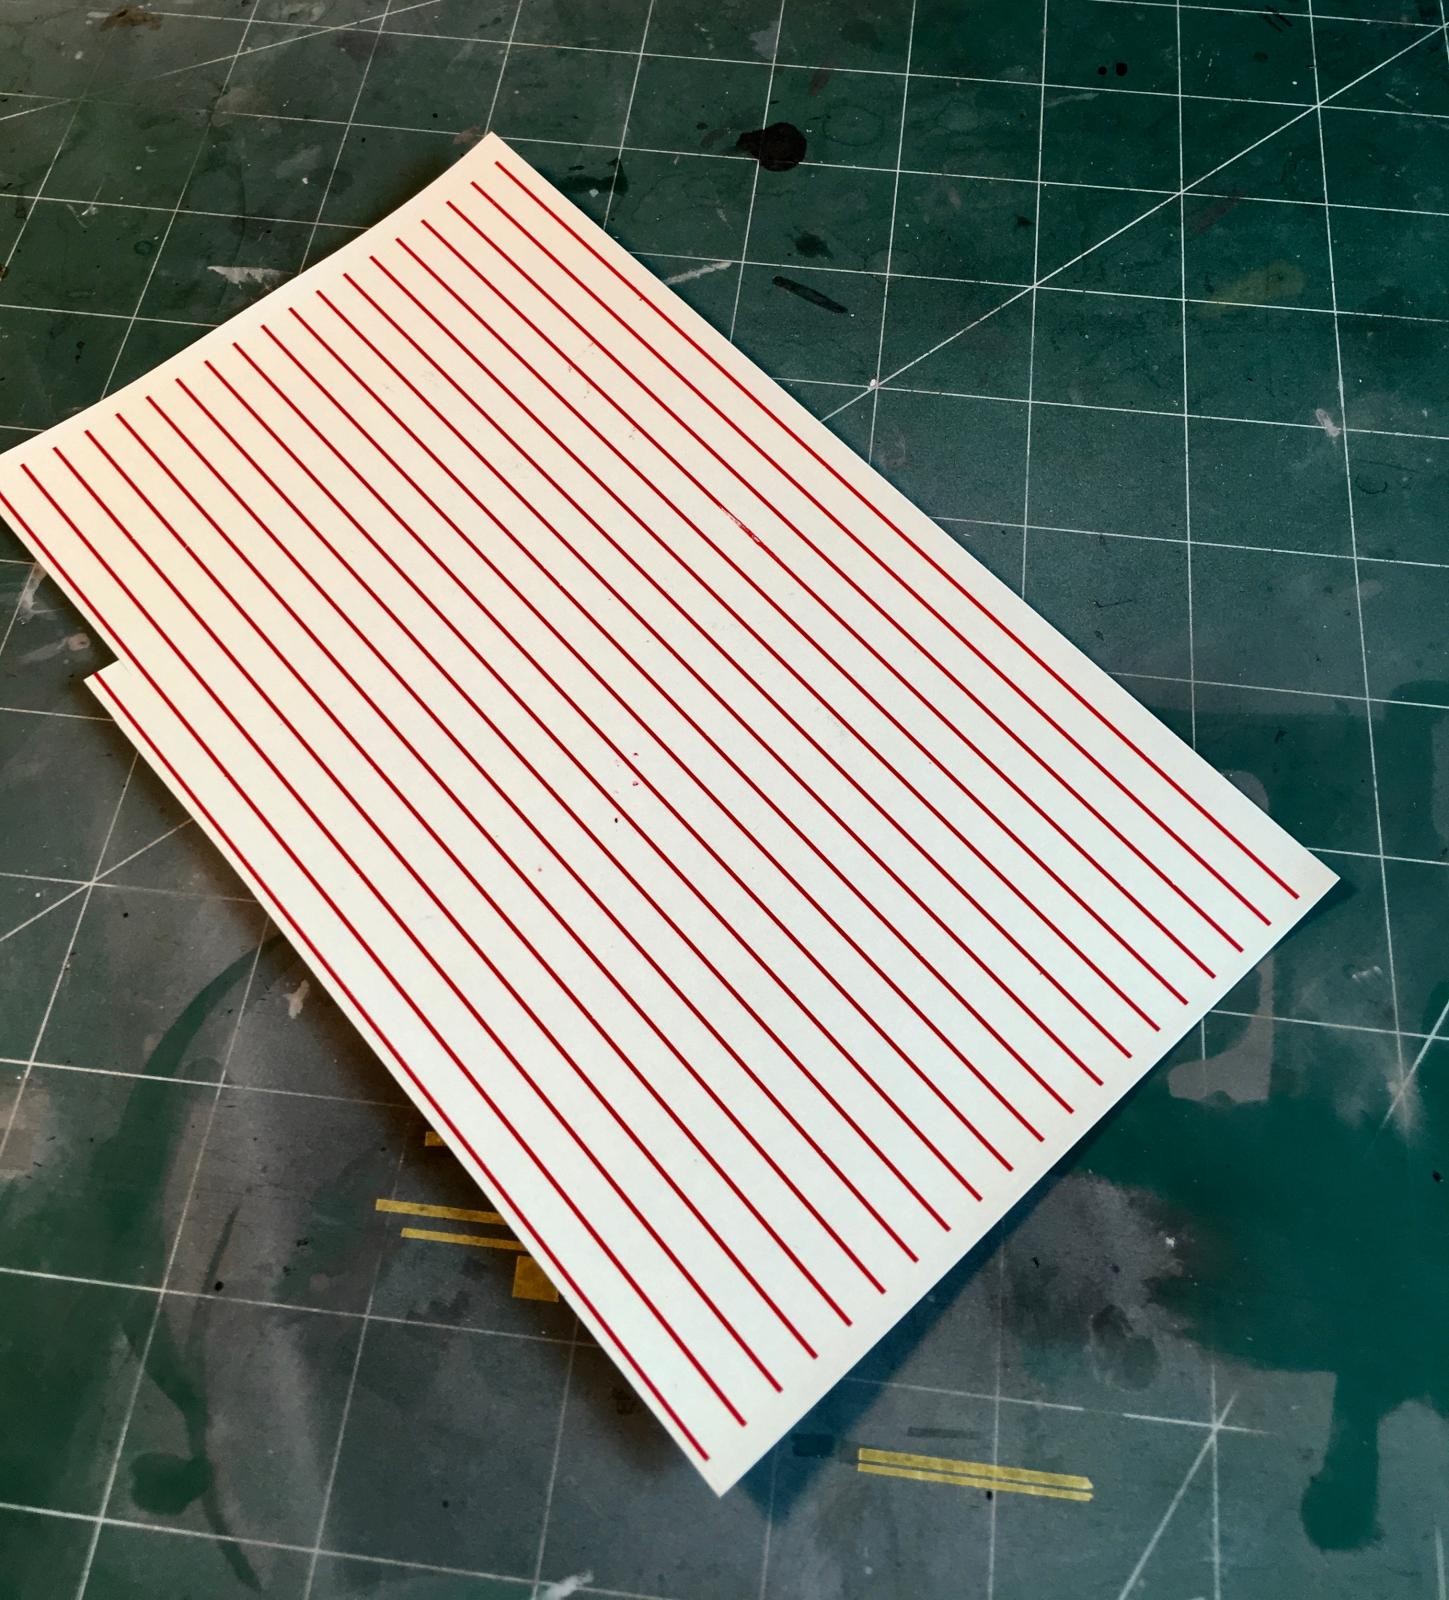
Basic painting of the exterior was done with Mr Color Super White for the underside, and my favourite Mr Color H315 Gloss Gull Gray for the upper surfaces. Corrogard areas on the leading edges of the flying surfaces were done with Metalizer non-buffing Steel. The stripes on the nose were done with Tamiya White surface primer (which was carefully sanded down after the masking was removed), Mr Color Thunderbird Blue, and i used some Microscale red pinstripe decal that i purchased sometime in the late 20th century. i never could have achieved a consistent pinstripe using anything other than decal, so after 30 plus years in my decal stash, it finally got put to good use.

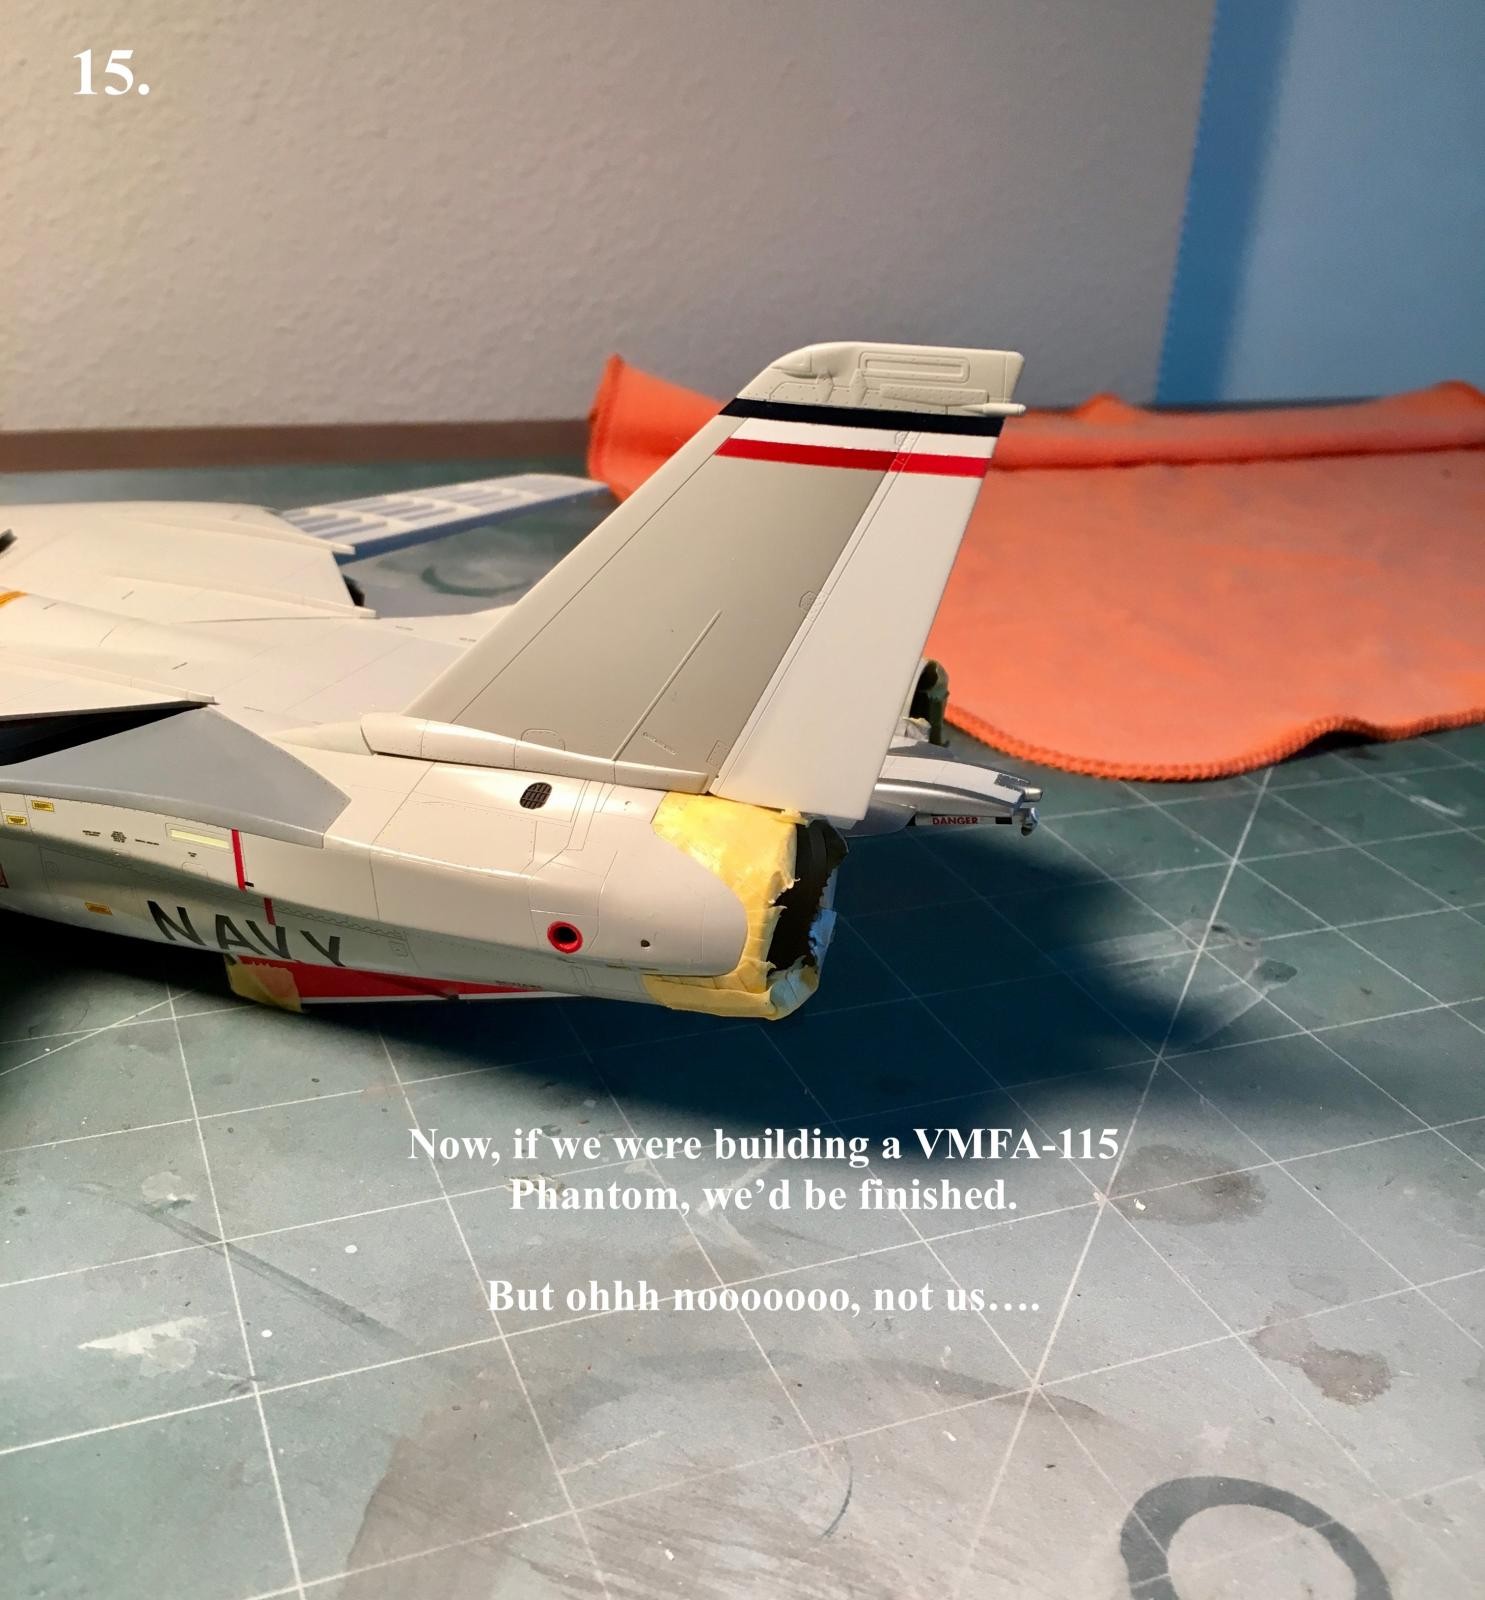
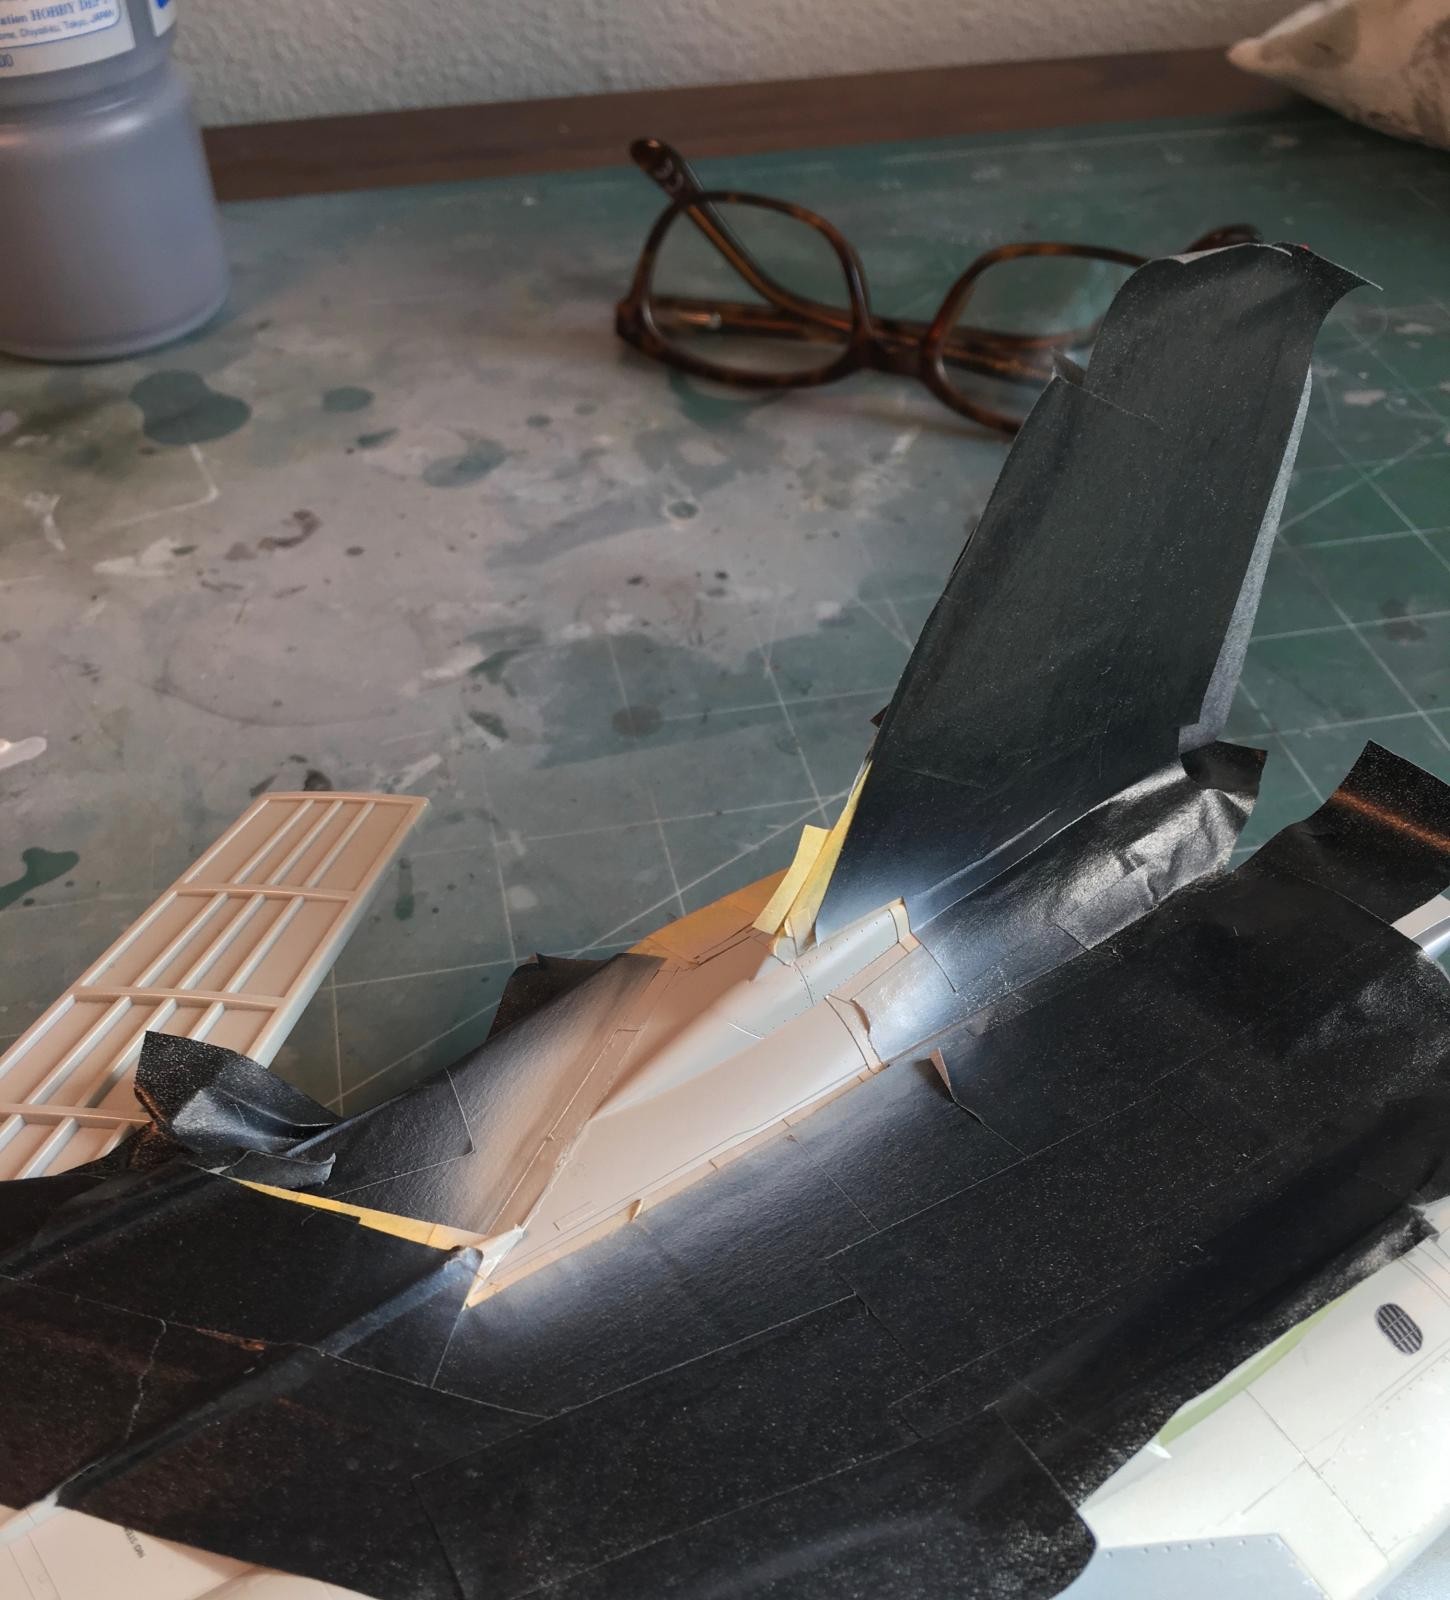
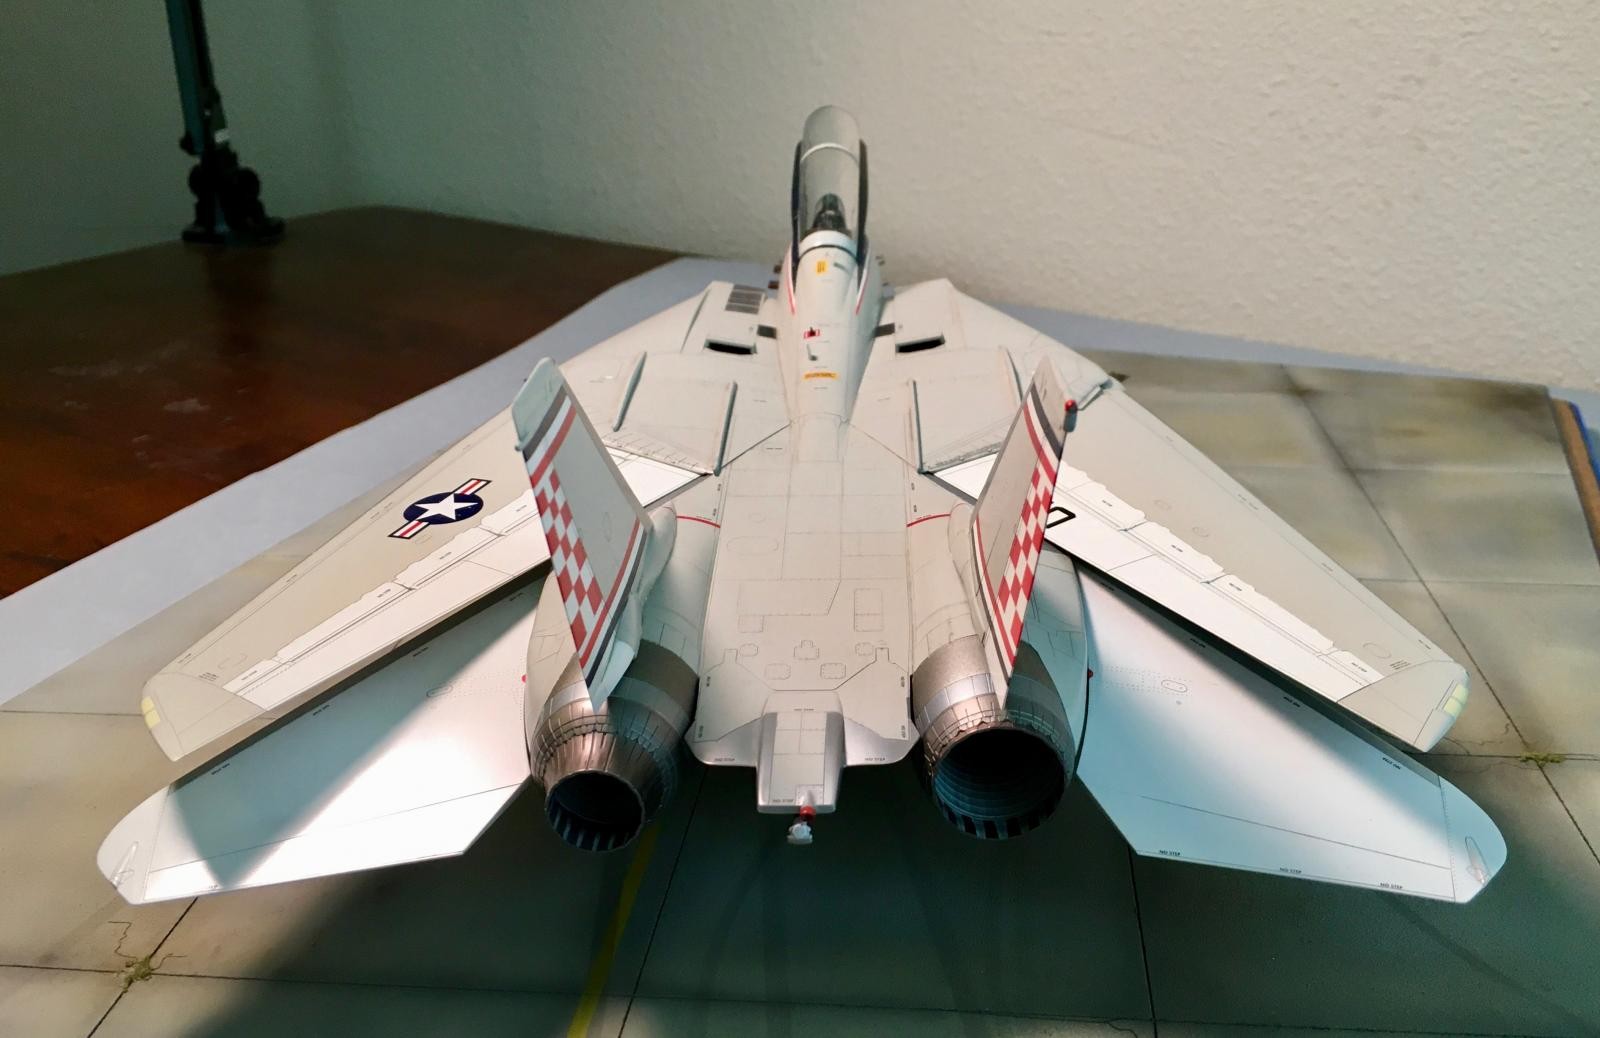
The painting of the distinctive checks on the verticals was a rather tedious process that i saved for the end of construction, the plan being to leave off the vertical fins until they were painted and decaled. There is quite a bit of variation in the checker and stripe patterns on the VF-211 aircraft, and i referred to the Detail & Scale Colors and Markings book for Pacific Squadron Tomcats constantly. There was no "Silver Bullet" solution available at the time, so i started by painting up the vertical fins exactly as Grumman would have, and then i carefully measured, masked, and sprayed the stripes and then added the checkerboard pattern last. The checks were particularly tedious, as the proportions change from the base of the rudders to the top and if the proportionality got screwed up it would look terrible.
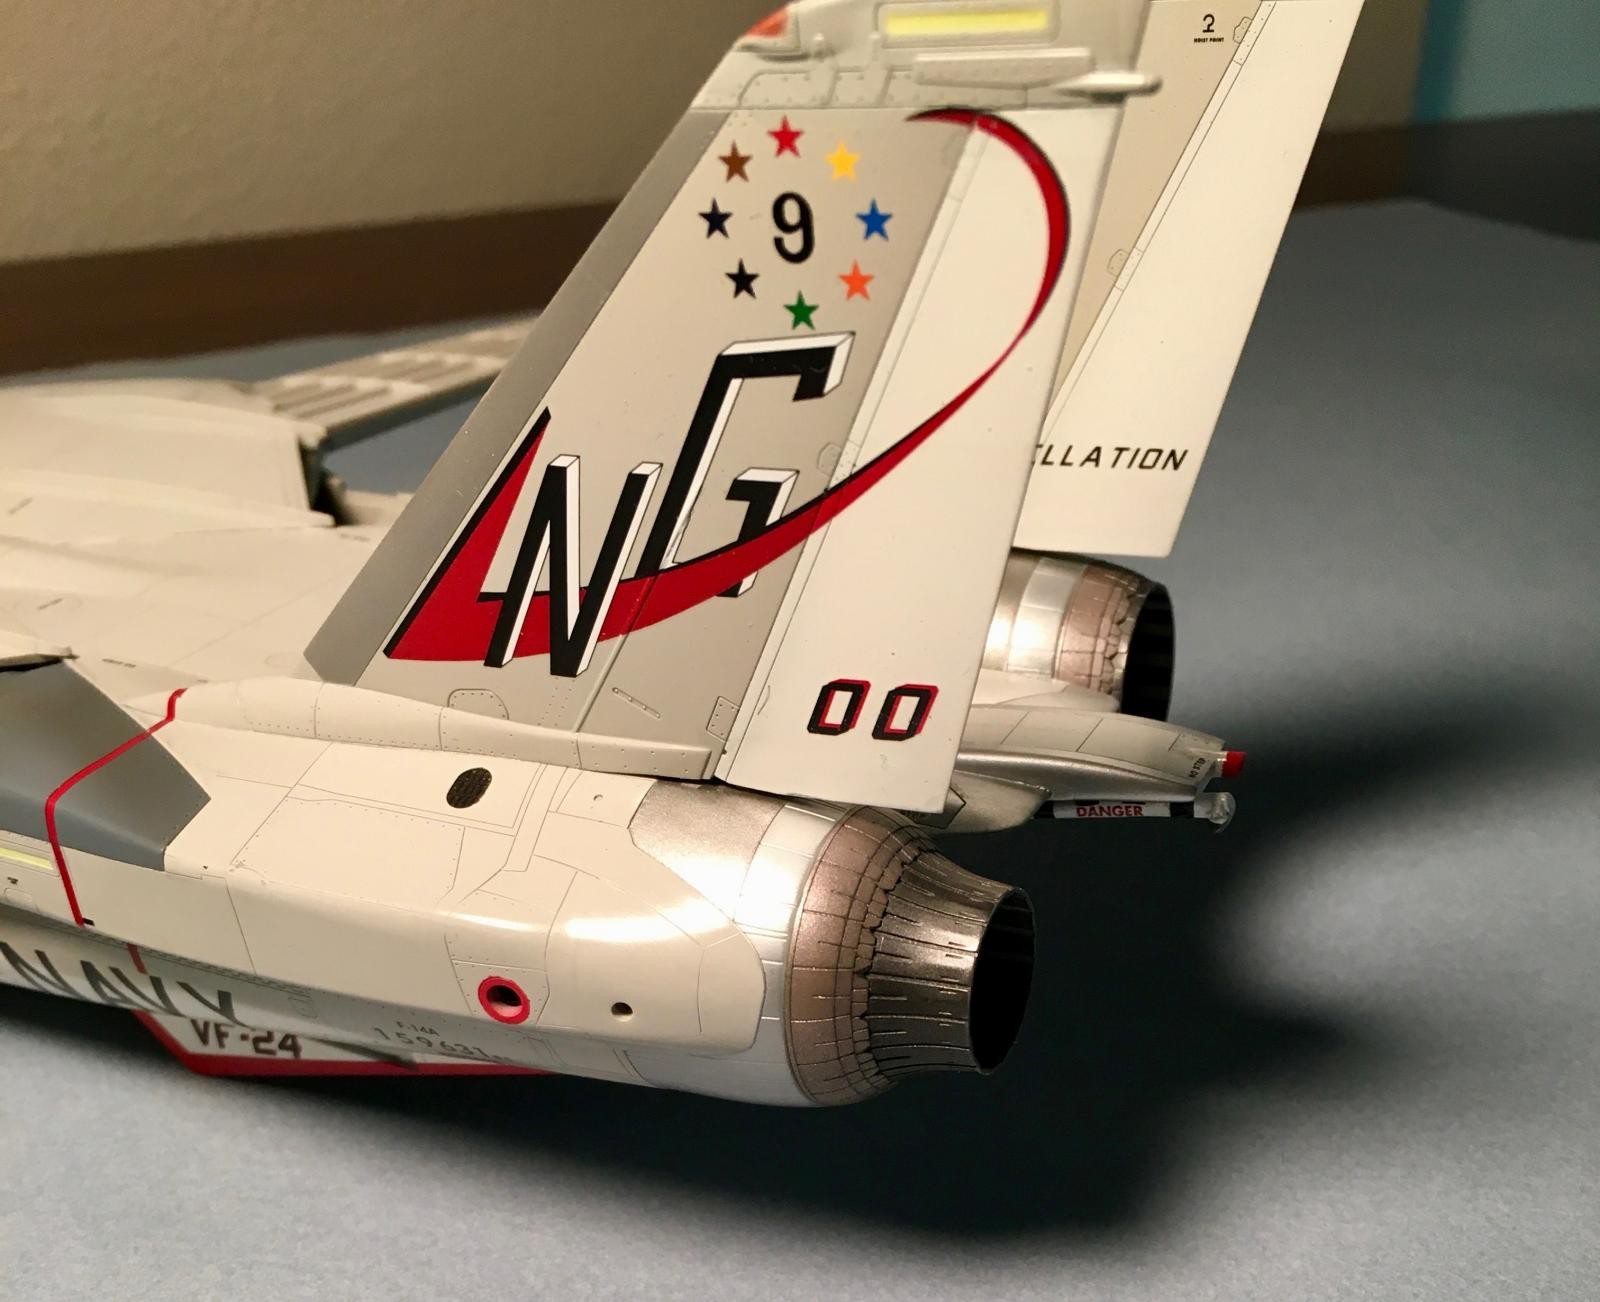
Todd Enlund printed me some "110" modex numbers, some BuAer numbers, and made some fantastic masks for the checkers (not used), the "NG" tail code, and the "VF-211" markings on the ventral fins.

The evolution in the end was worth it.
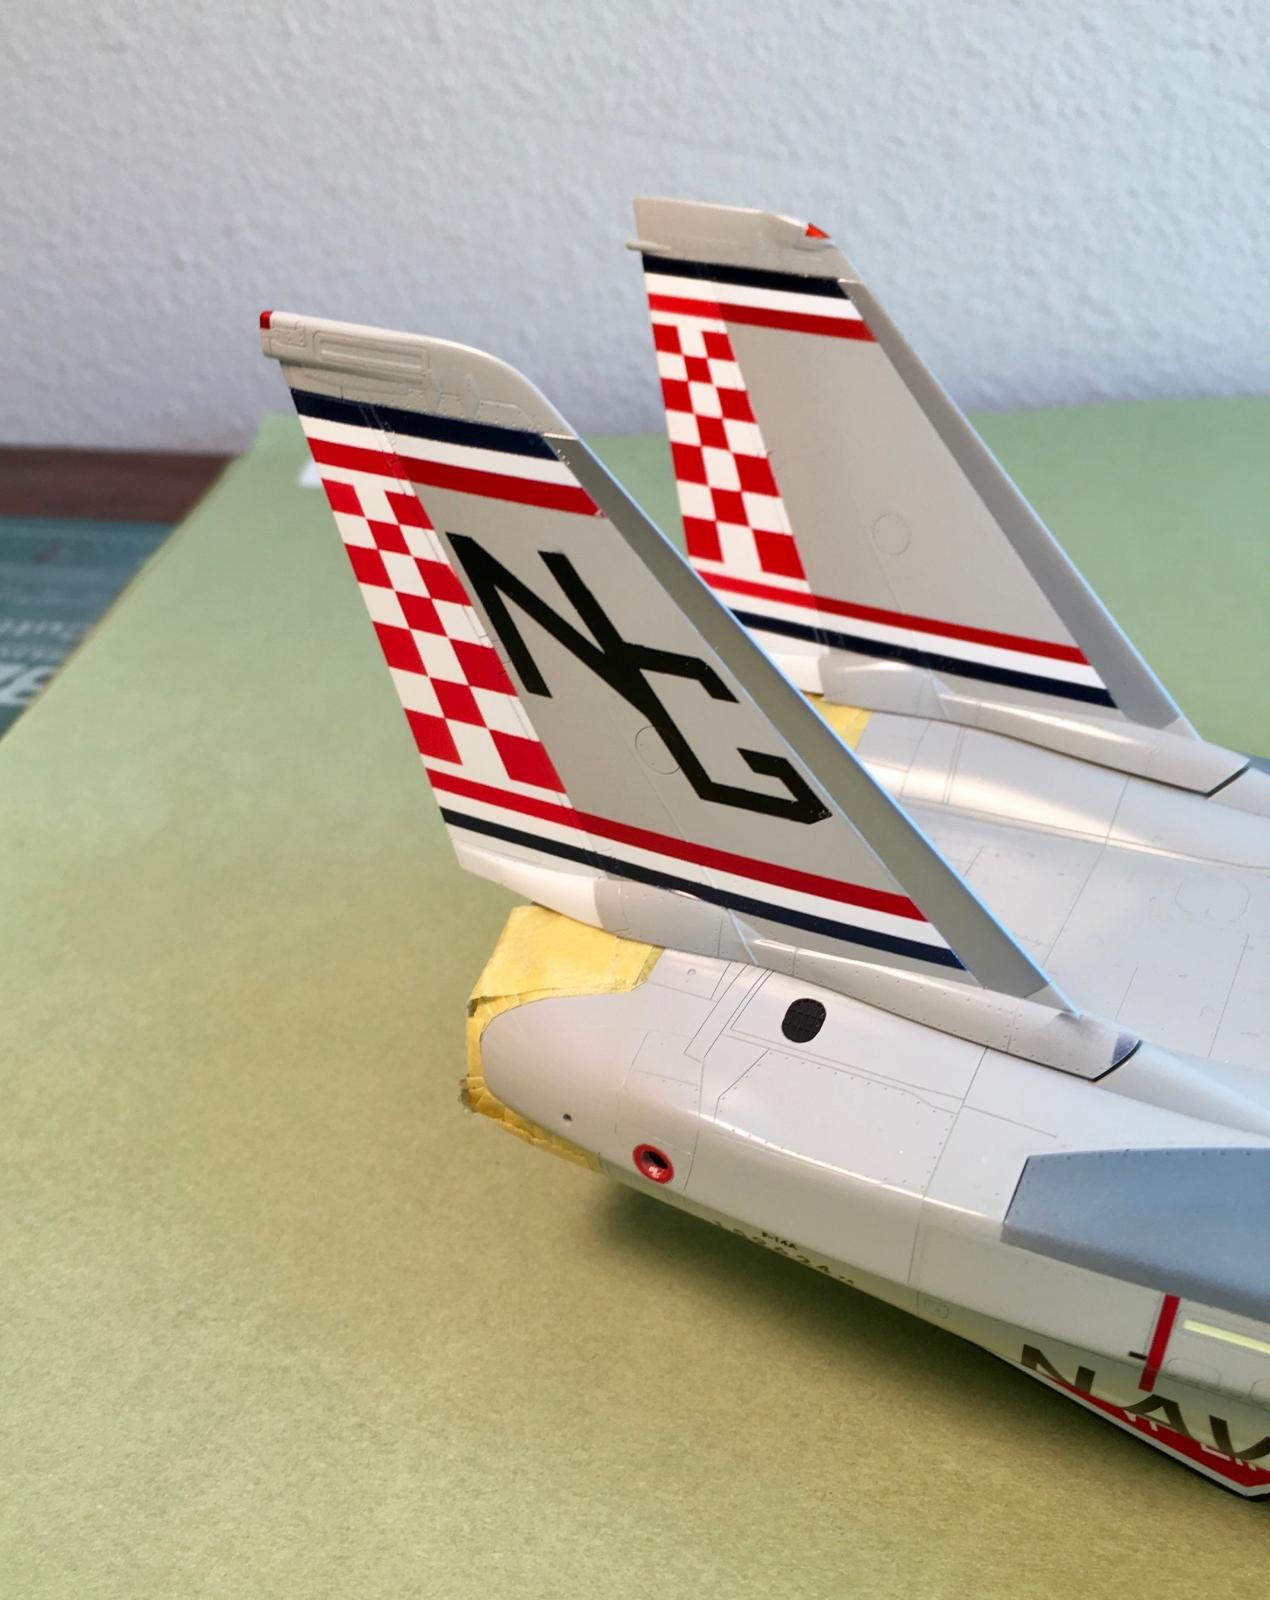
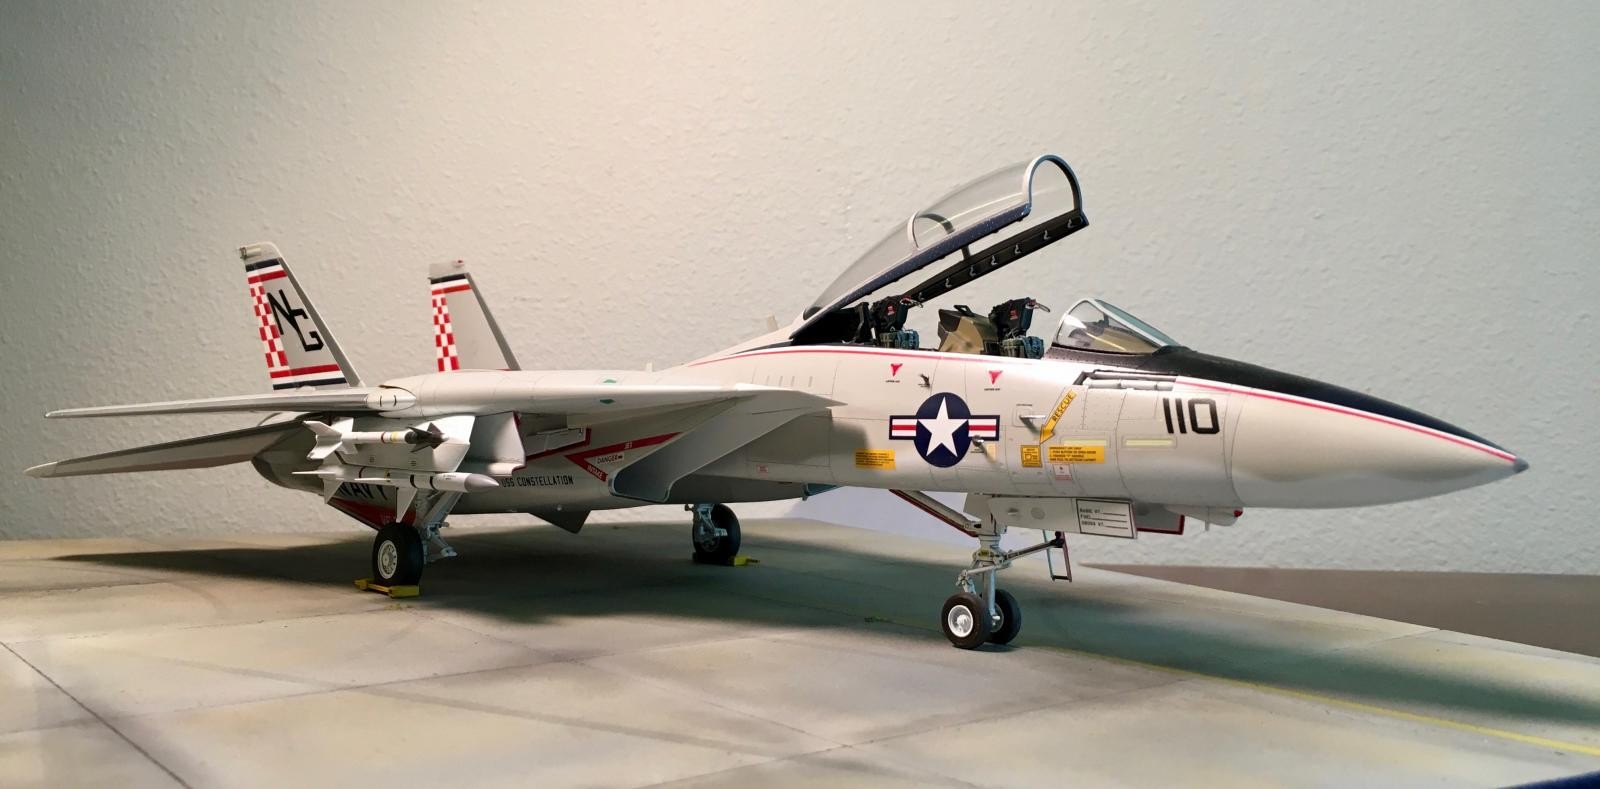
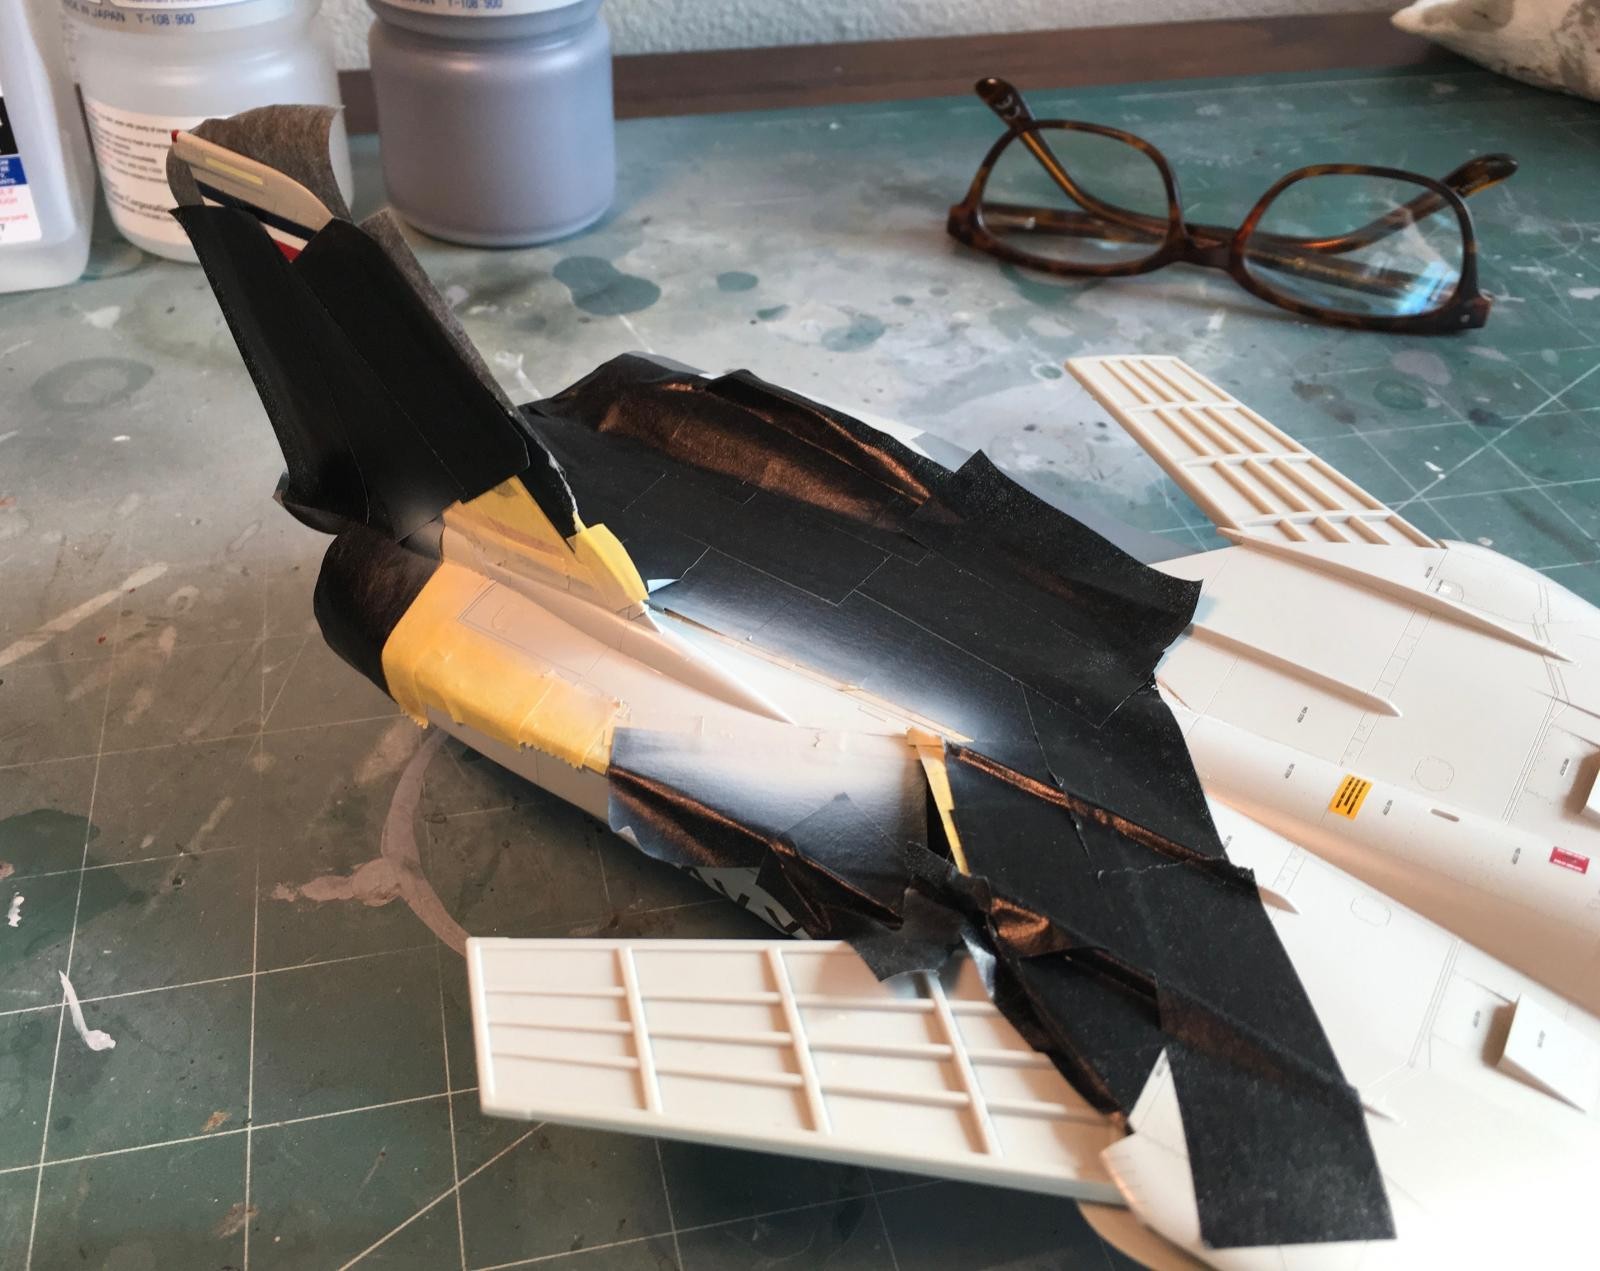
After painting, the verticals were carefully masked off and glued into place and blended into the upper rear fuselage. I find this to be the easiest way to install the fins, as its rather difficult to work in between them if you install them before painting.
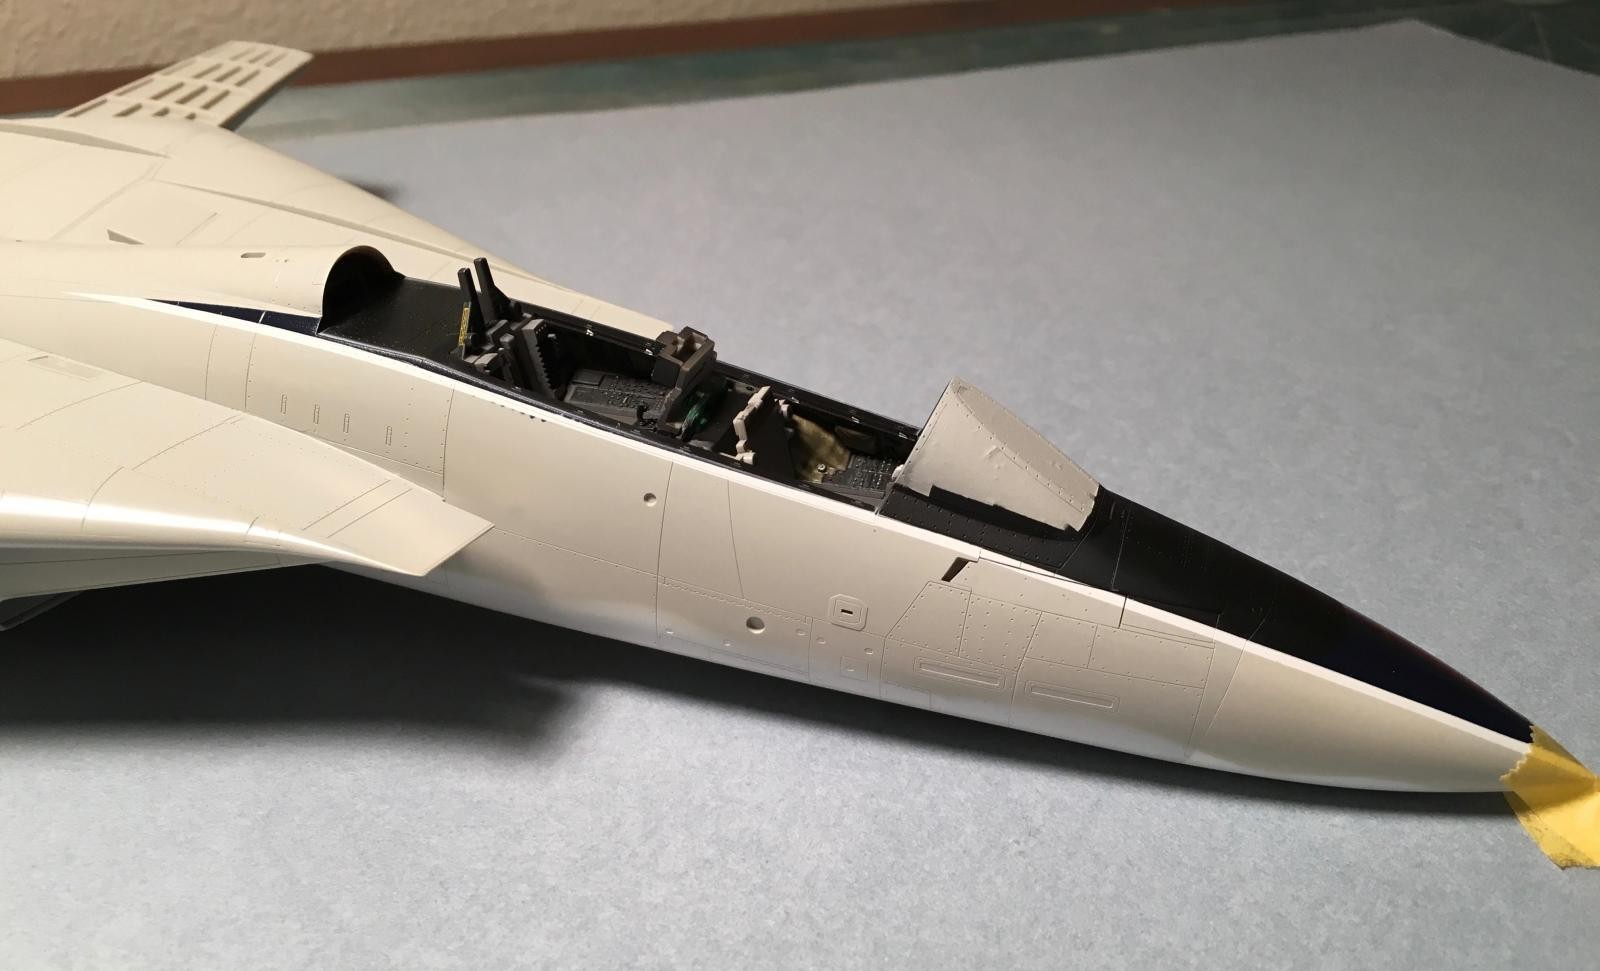
The rest of construction was uneventful; the modular construction of the Tamiya kit makes it very easy to build up the model in subassemblies, paint them, and then integrate them into the finished whole in what i call the "end game".
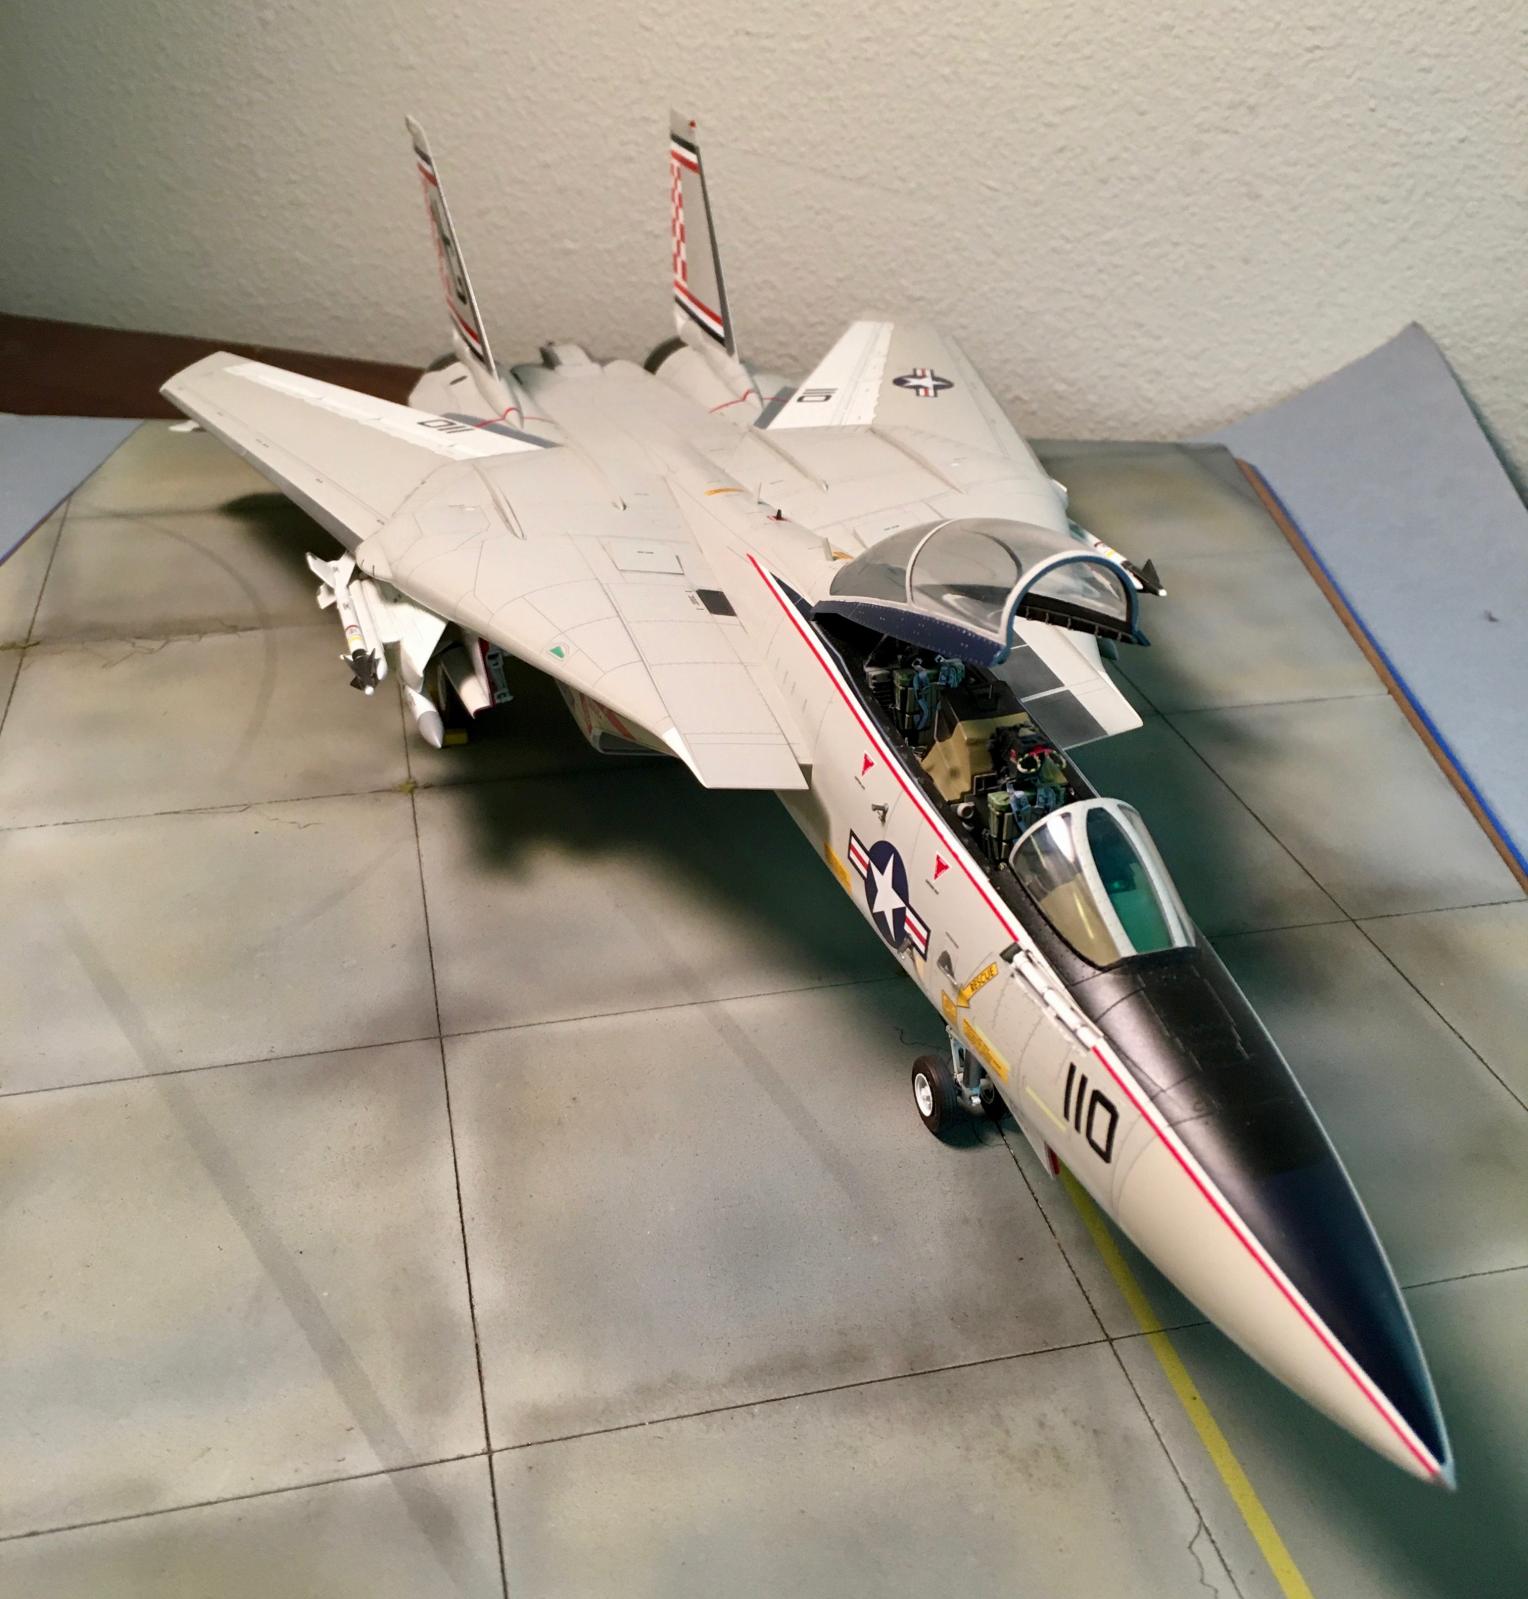
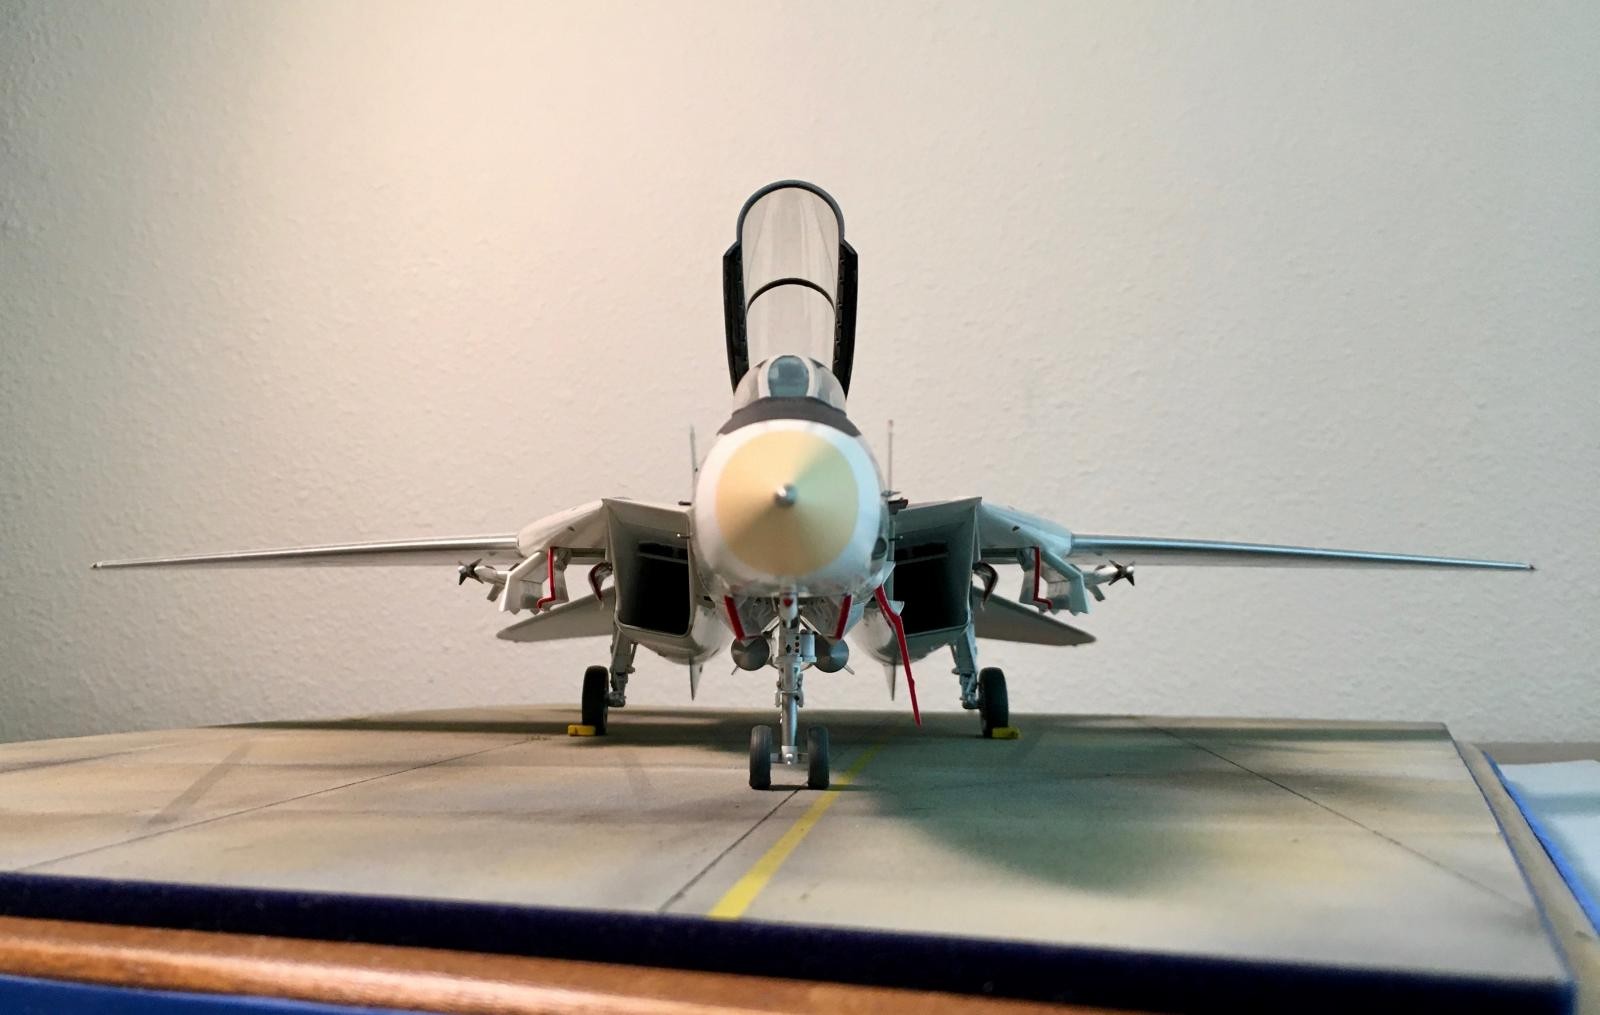
I used the Eduard ejection seats and Brassin wheels on 110. The fit of the wheels onto the axles was a bit sloppy, but i had plenty of control for setting the alignment, and the separate hubs made painting the wheels and tyres very easy and controllable.
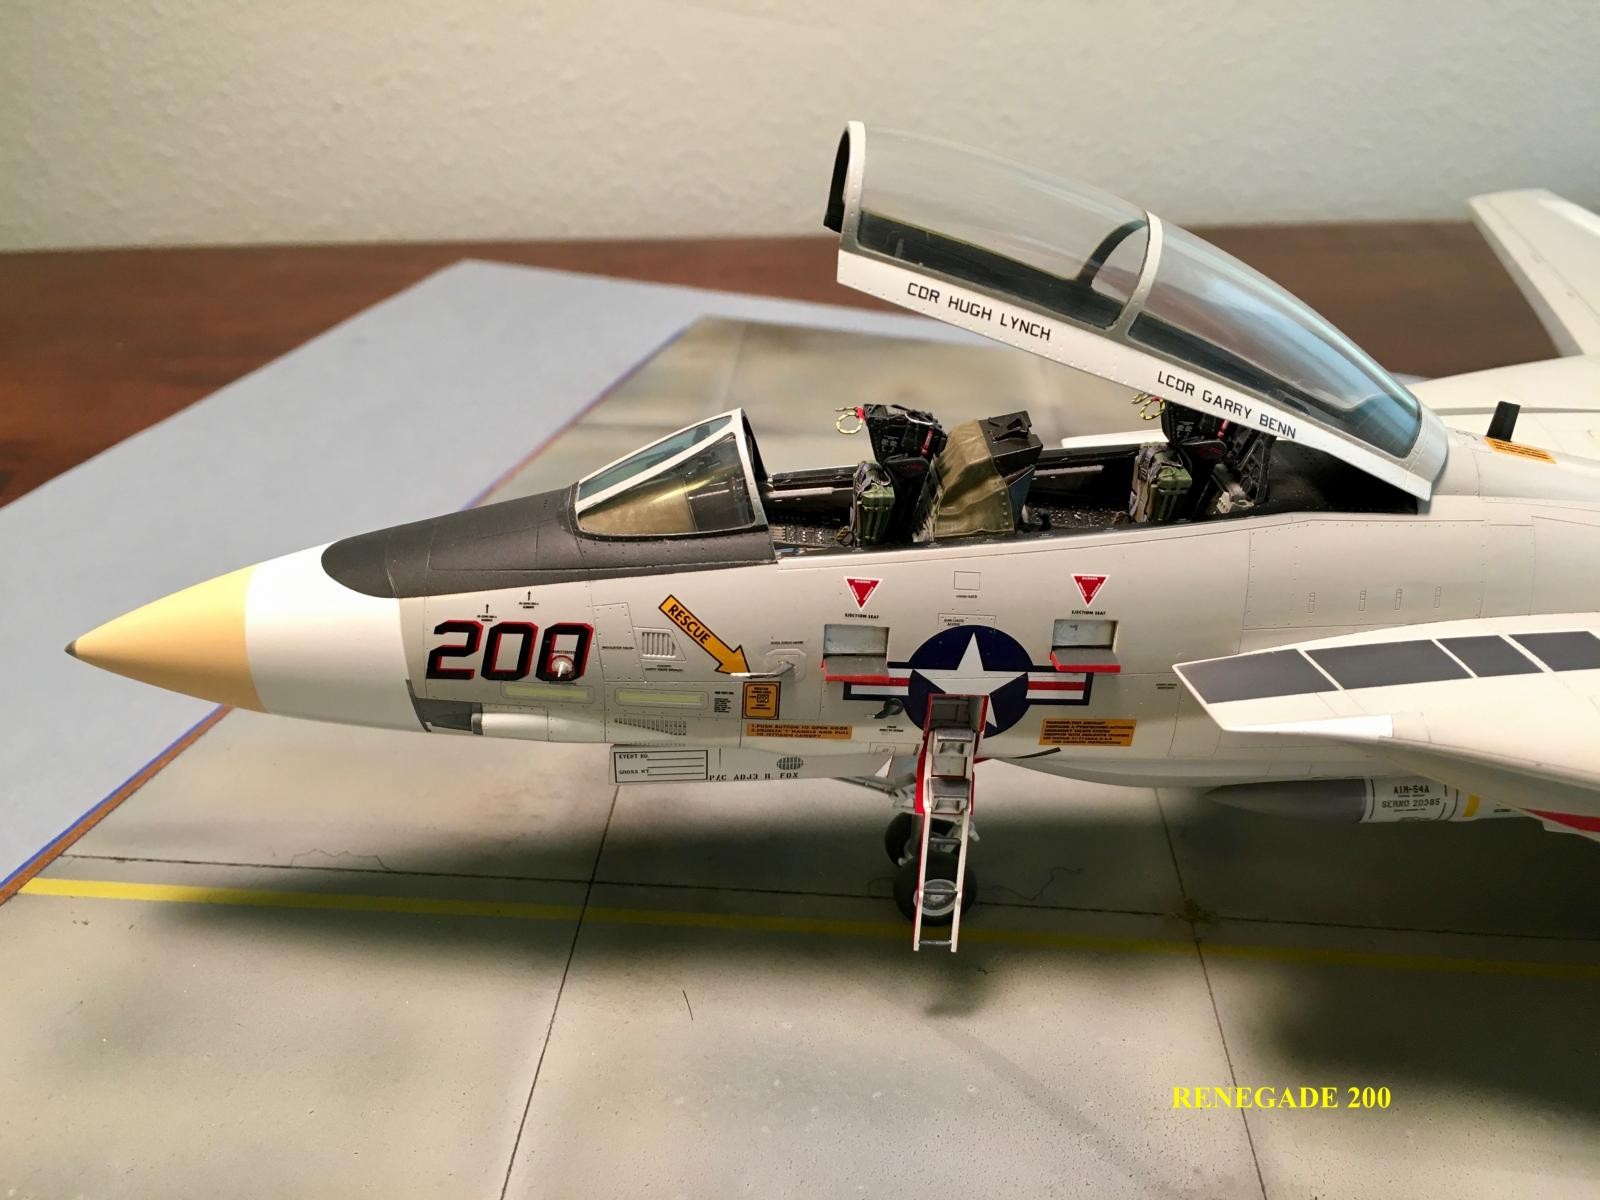
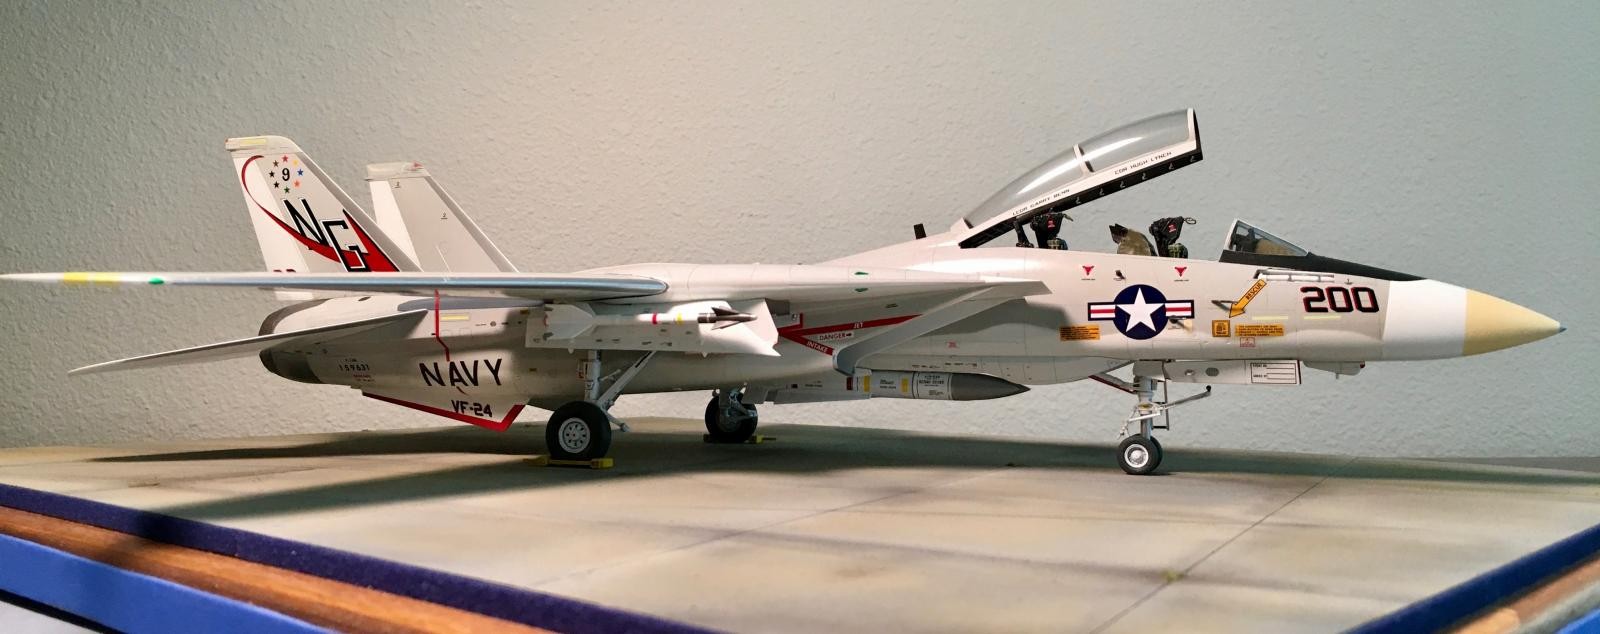
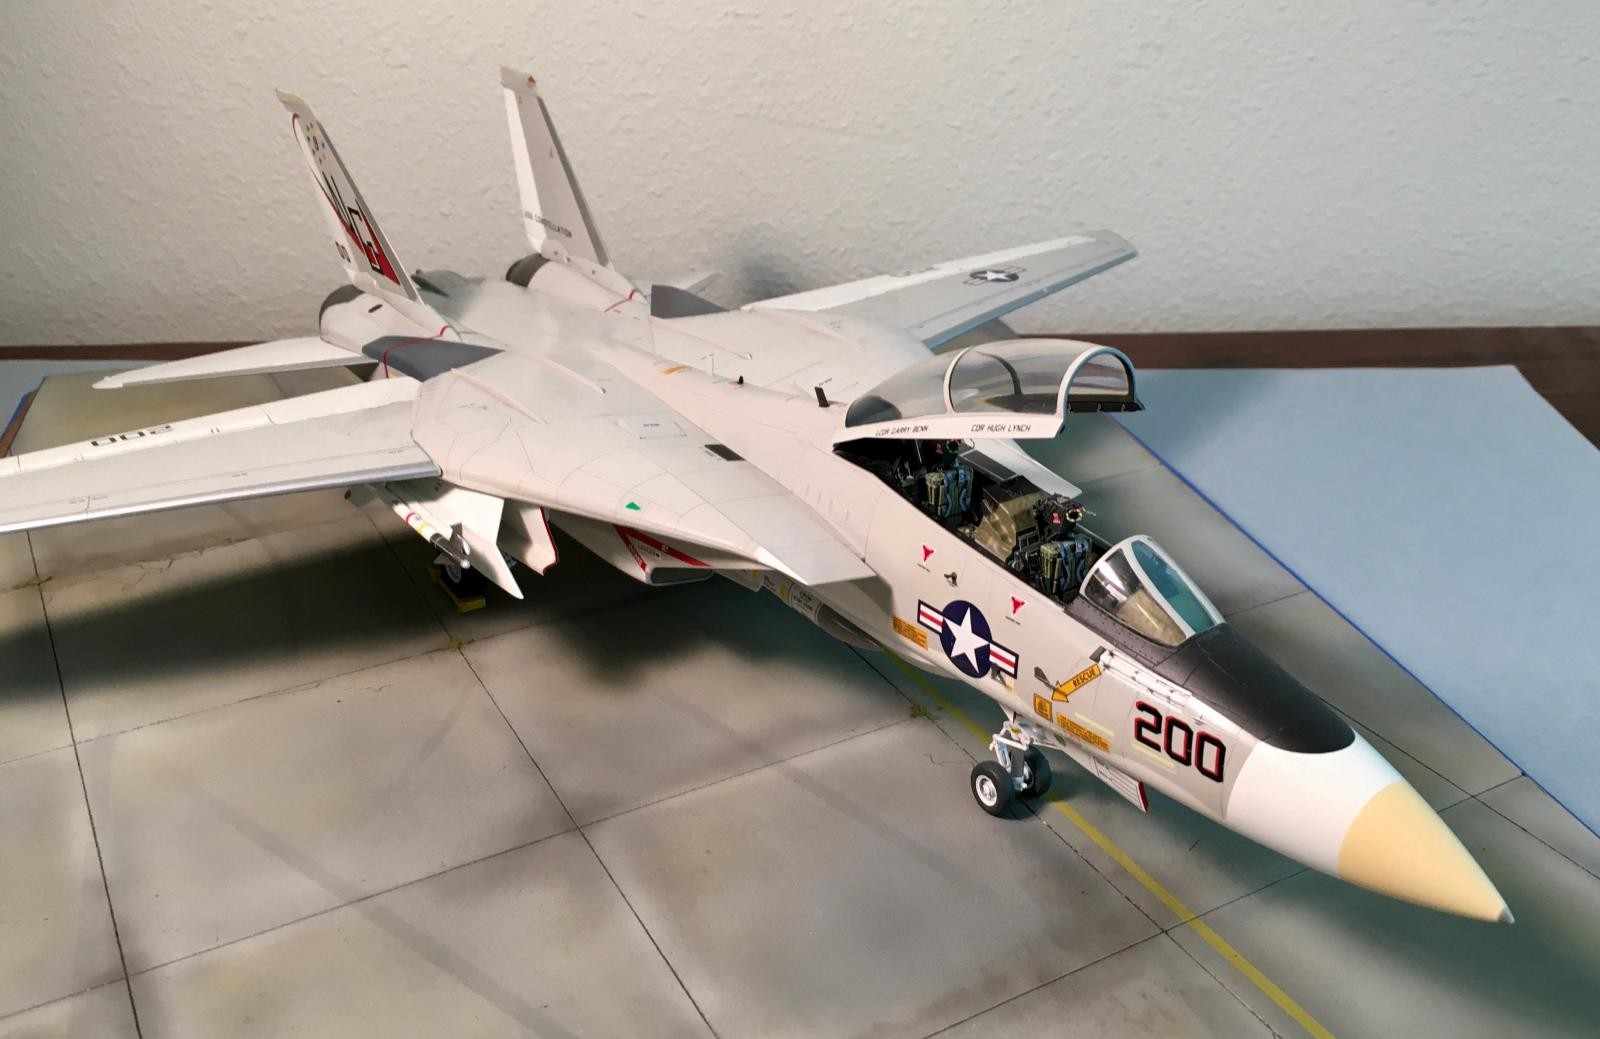
RENEGADE 200:
In the original SCALE MODELER publication, the second Tomcat was a rather bland, unmarked F-14, which would have been a waste to do on the Tamiya kit.
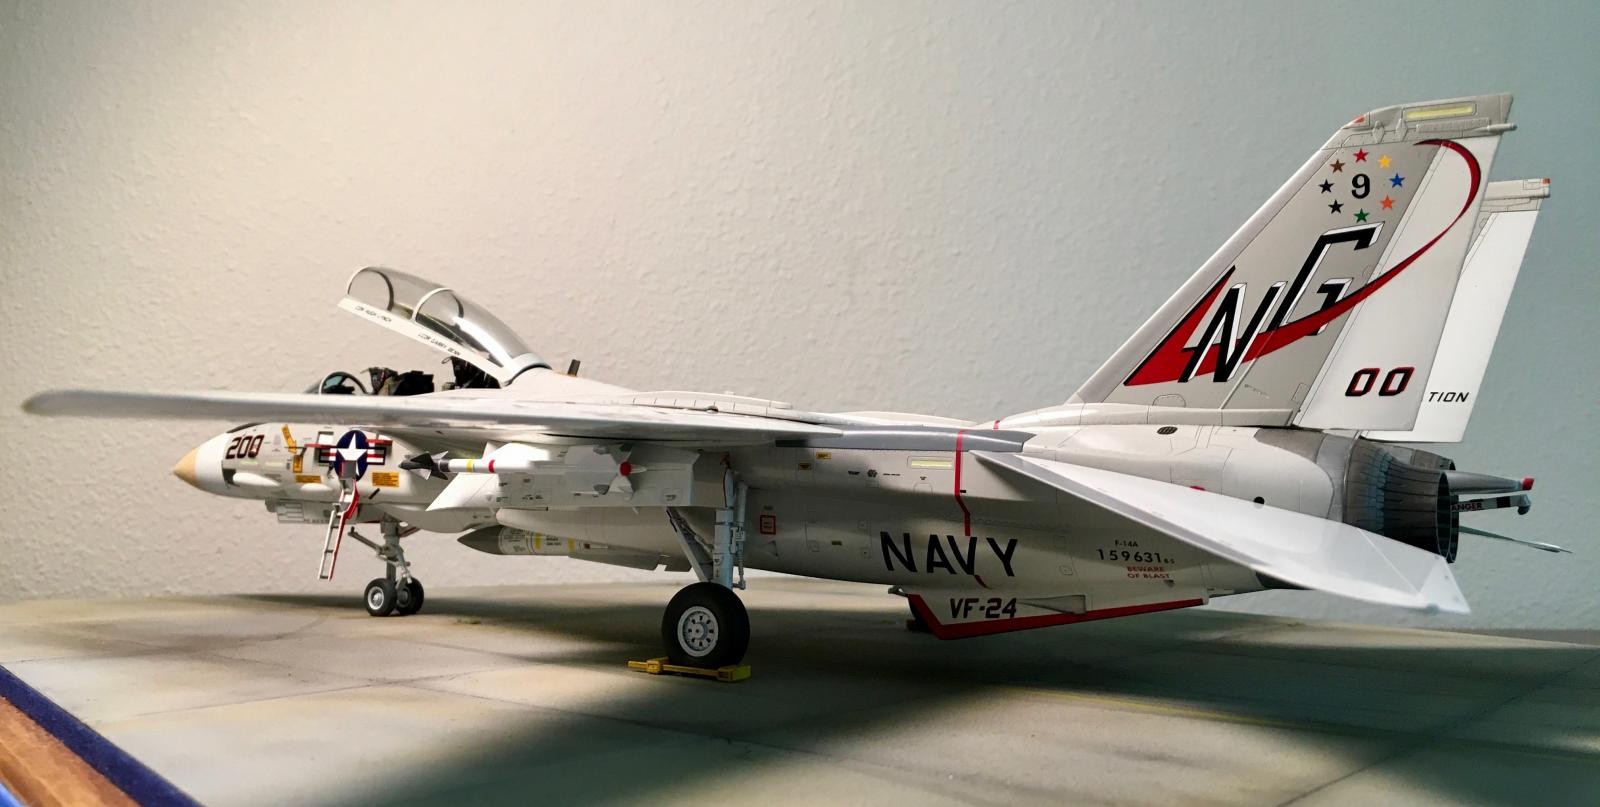
VF-211 deployed aboard CONSTELLATION with VF-24, the "Red Checkertails", callsign RENEGADE when not ashore at NAS Miramar. So, it seemed perfectly fitting to do the Checkmate's sister squadron, since the markings were readily available from Furball Aero Design.

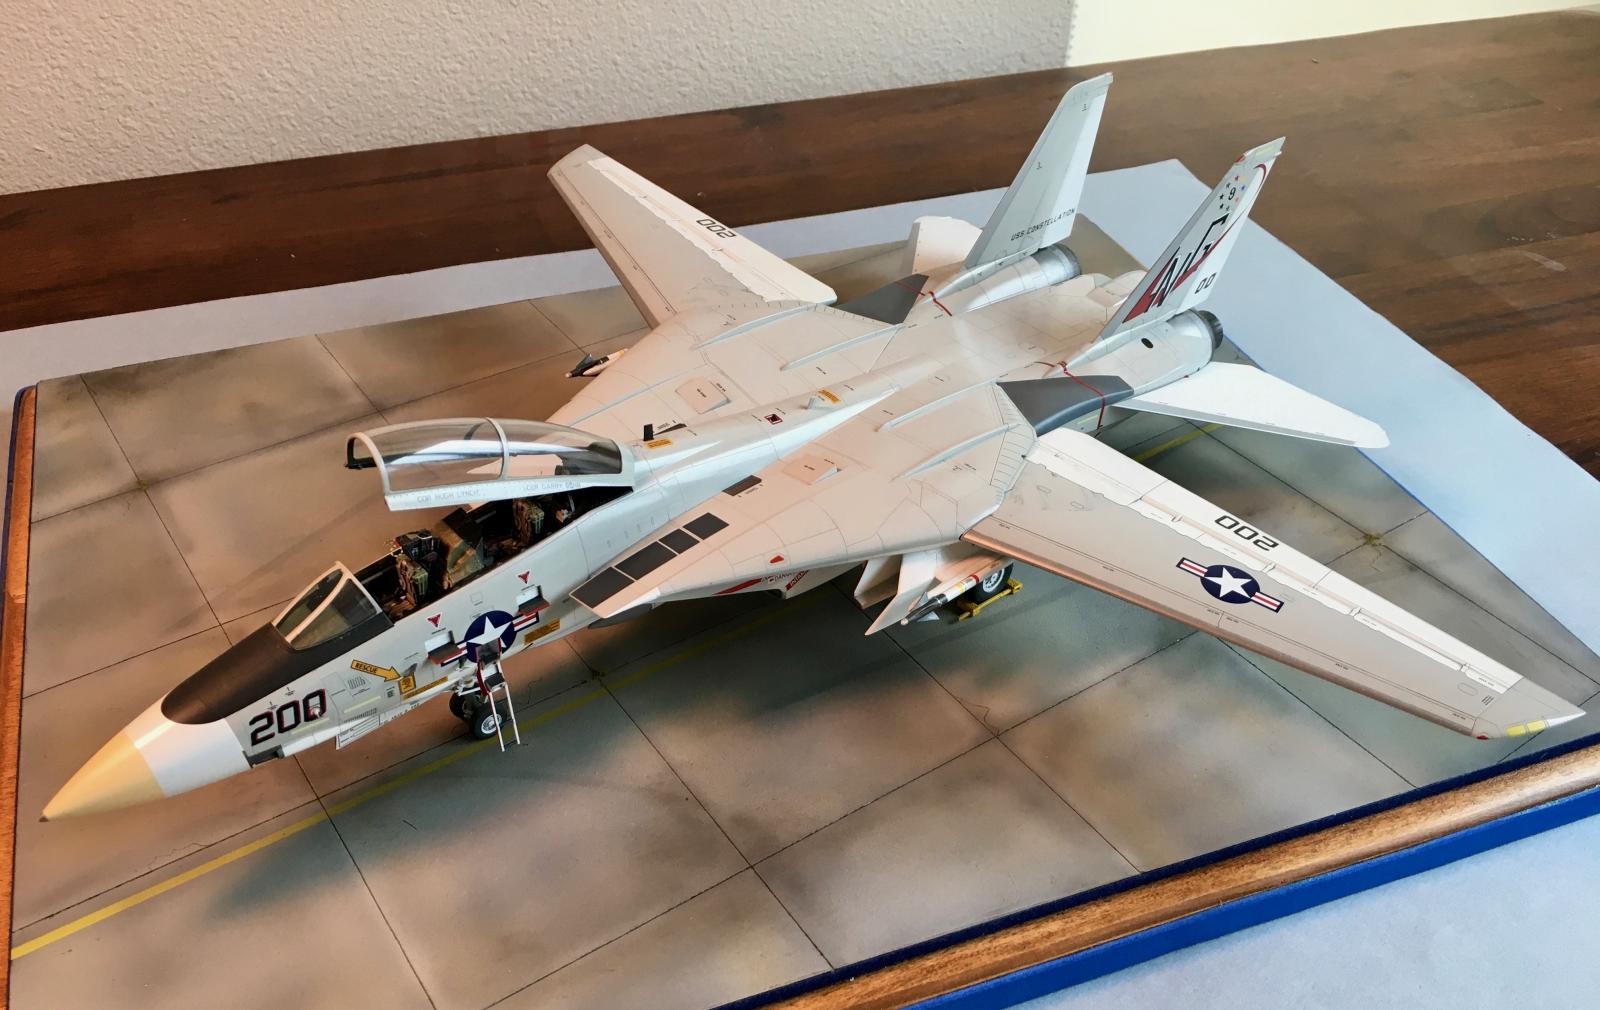
Compared to NICKEL 110, painting RENEGADE 200 was fairly simple. I went back to laying down a coat of flat white (in this case Mr Base White) before over painting that with Mr Color Gloss Insignia White. The Upper surfaces were again, Mr Color H315.
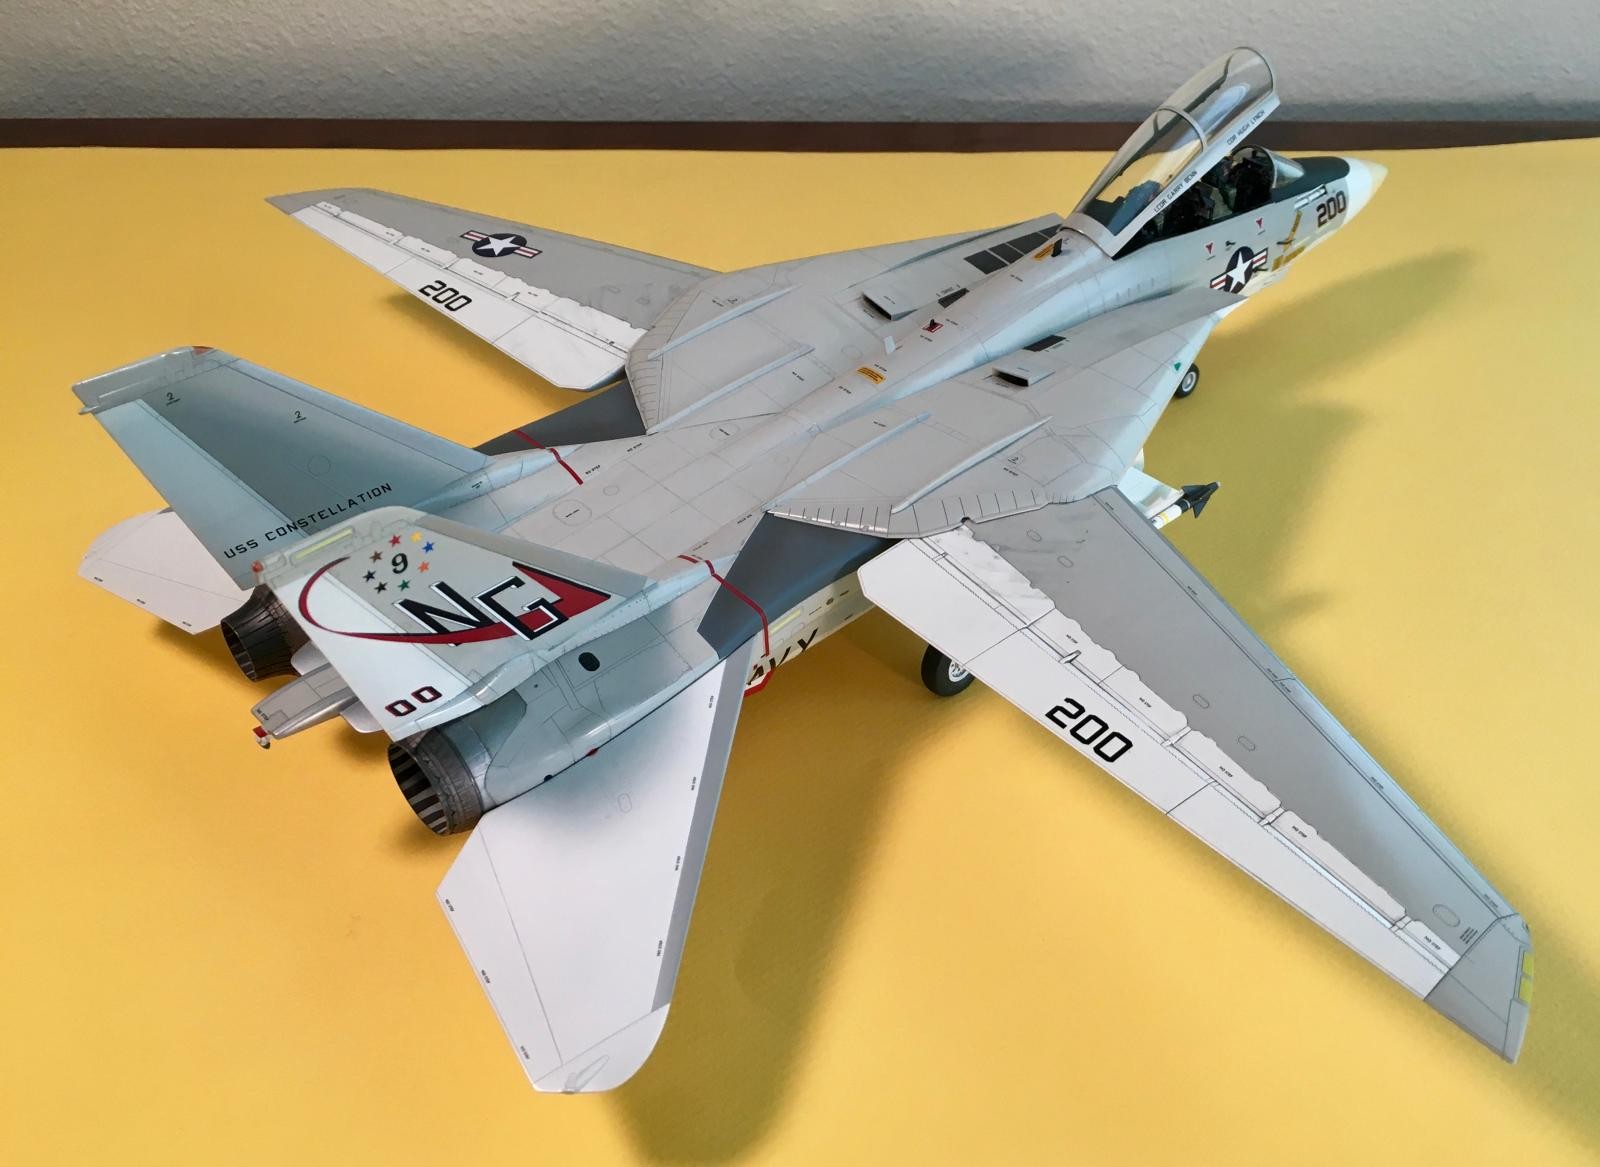

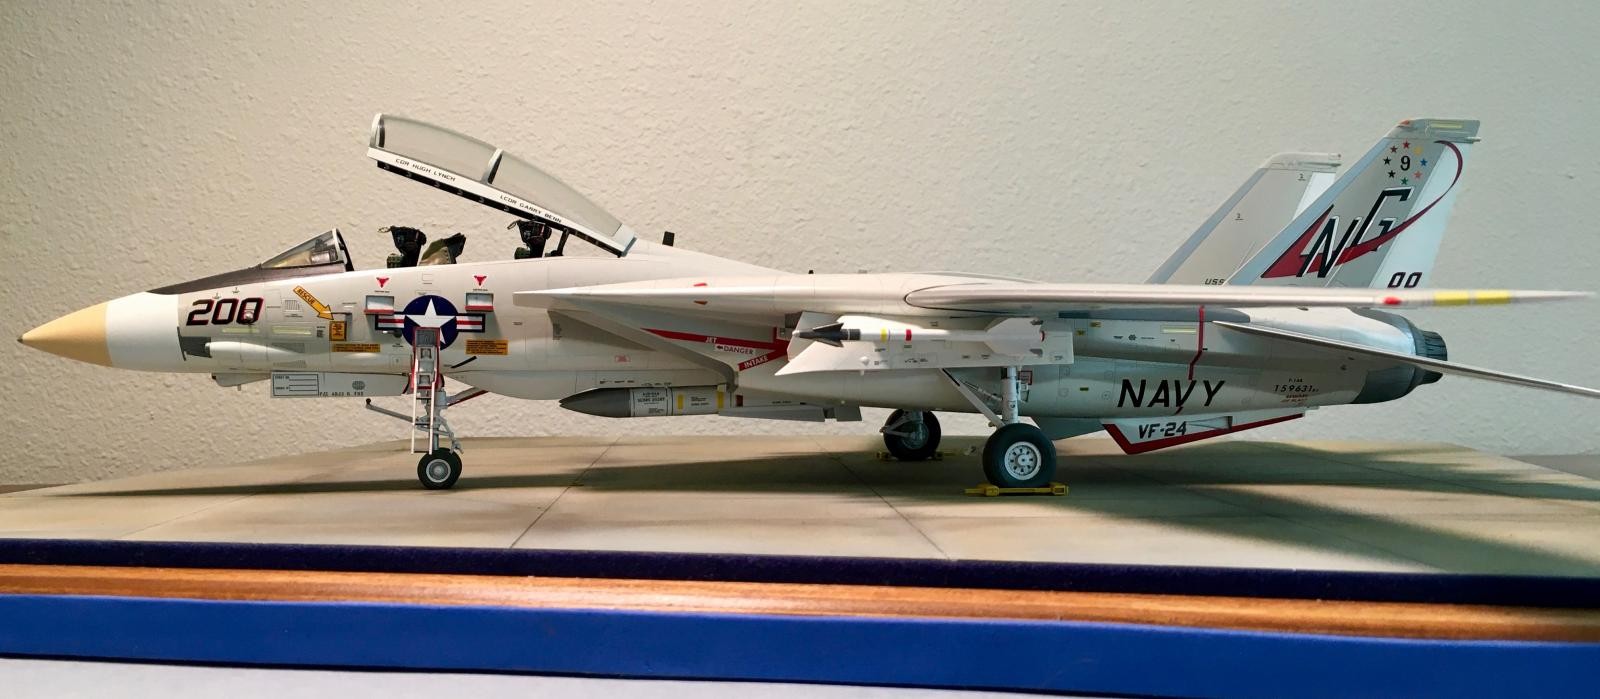
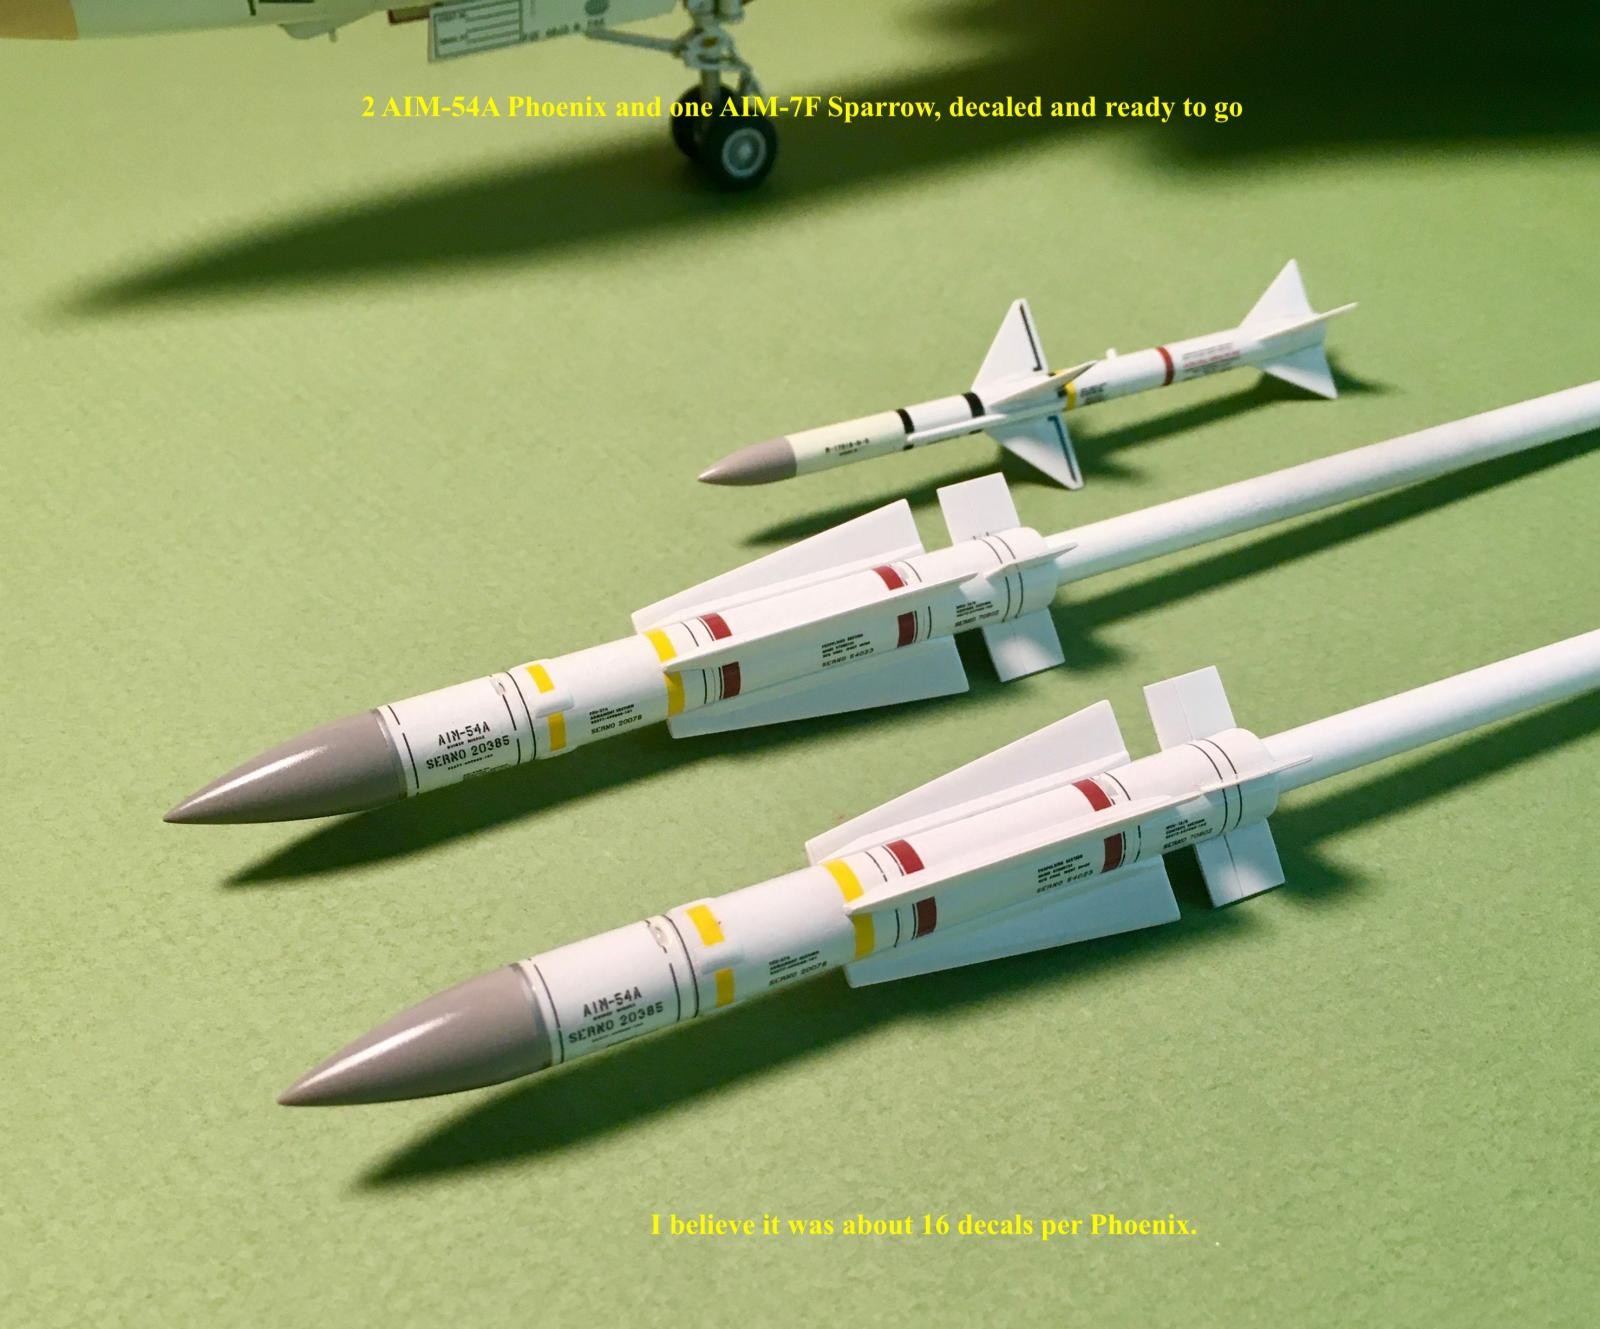
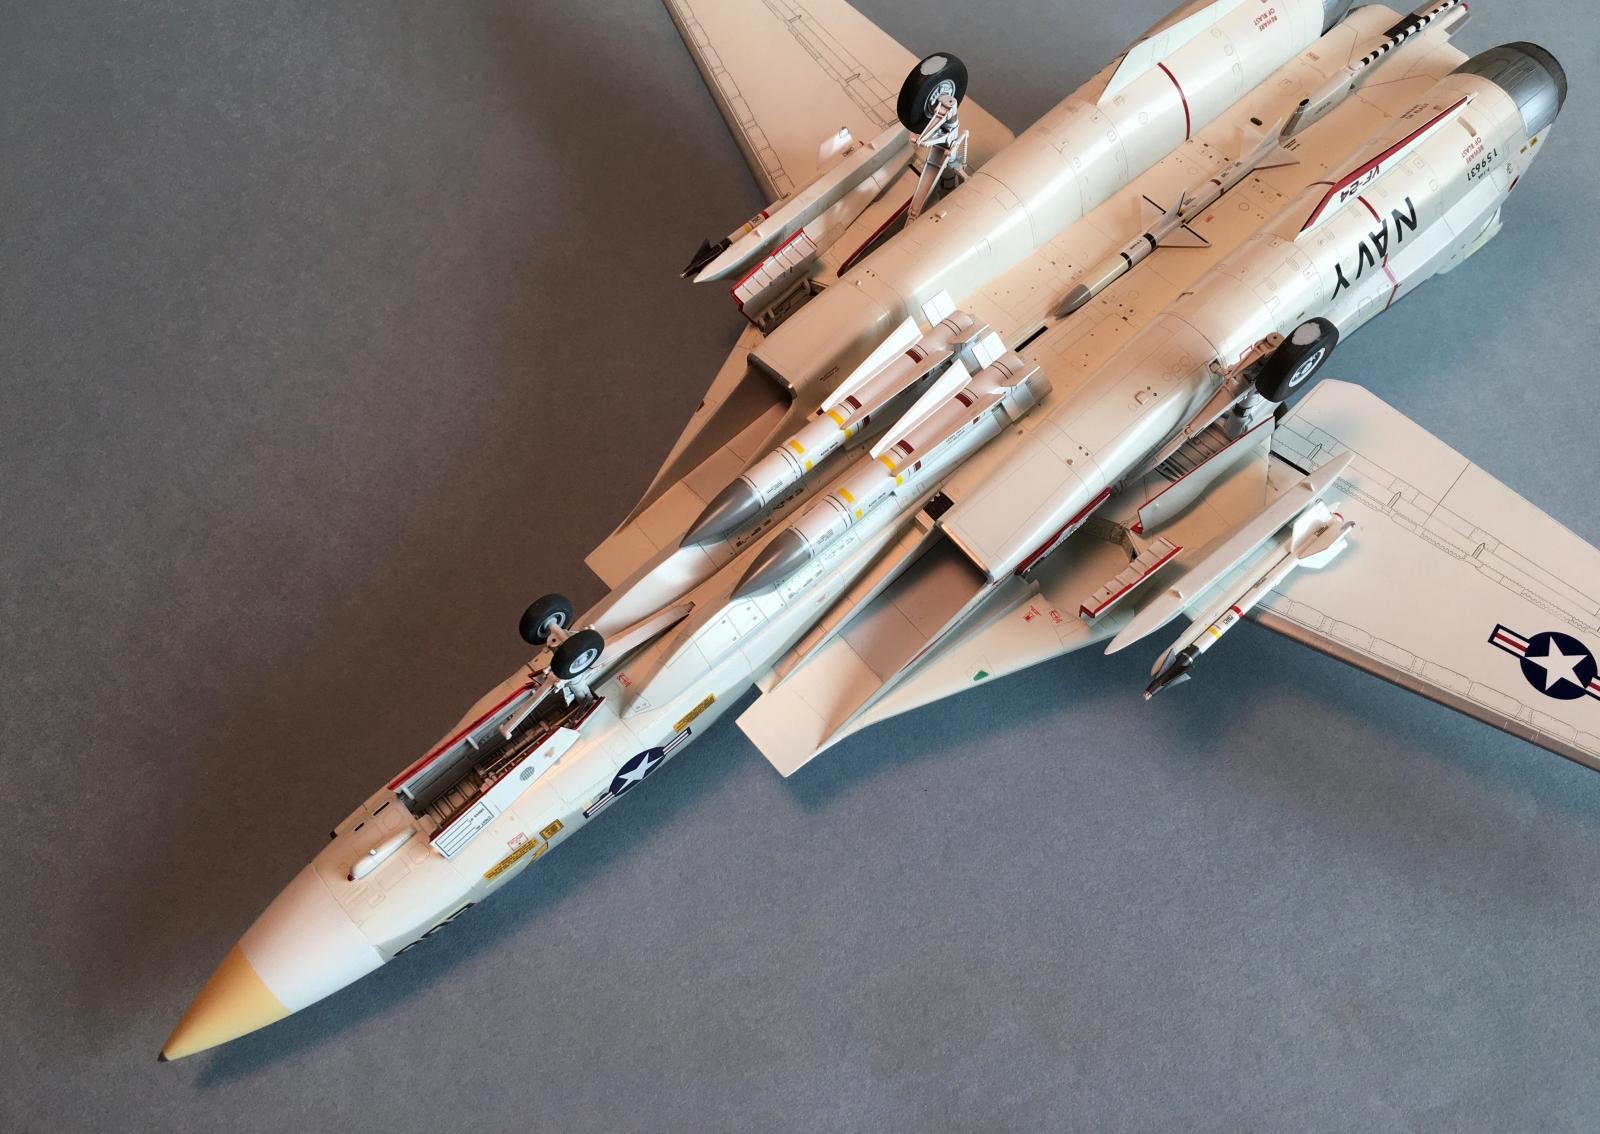
On this build, for comparison purposes, i built the model with the wings swept forward, and the Phoenix missiles installed (the AWG-9/AIM-54 combination was really the Tomcat's Raison d'Etre). It spoils the lines of the plane and makes for a somewhat chubby-looking Tomcat, but most of the photos i examined of RENEGADE 200 showed the Phoenix pallets installed. I used the Tamiya-provided "inflated" bladder bags with the corresponding finger plates for the forward-swept wings. The model looks very different from the "overswept" Tomcat we're used to seeing. Fixing the wings in the forward position is sort of akin to crossing the rubicon, as the wings cannot be swept back and this makes the model more unwieldy and takes up more space in a display case (its roughly the size of a P-61..maybe slightly bigger and longer).
The Tamiya Phoenix missiles go together well, but i had to go back many times during the painting process to fix seams and sprue attachment points that i though i'd eradicated. The Tamiya decals are kind of tedious to apply and the silver and segmented stripes that go around the front end are difficult to manipulate. I cut these into shorter segments in order to make them easier to apply. i fashioned styrene plugs, painted red, to close out the backs of the Phoenix and Sidewinder missiles.

On this model, i used the Eduard BRASSIN cockpit, which is very nice but a little finicky at the front end, and this time i used the DEF Resins Tomcat wheels. I didn't like them so much. It was impossible to position the main wheels properly on the kit axles and the integrated wheel/tyre casting made masking and painting much more of a chore. The end result looks perfectly acceptable but i like the thought process behind the Eduard BRASSIN wheels better.
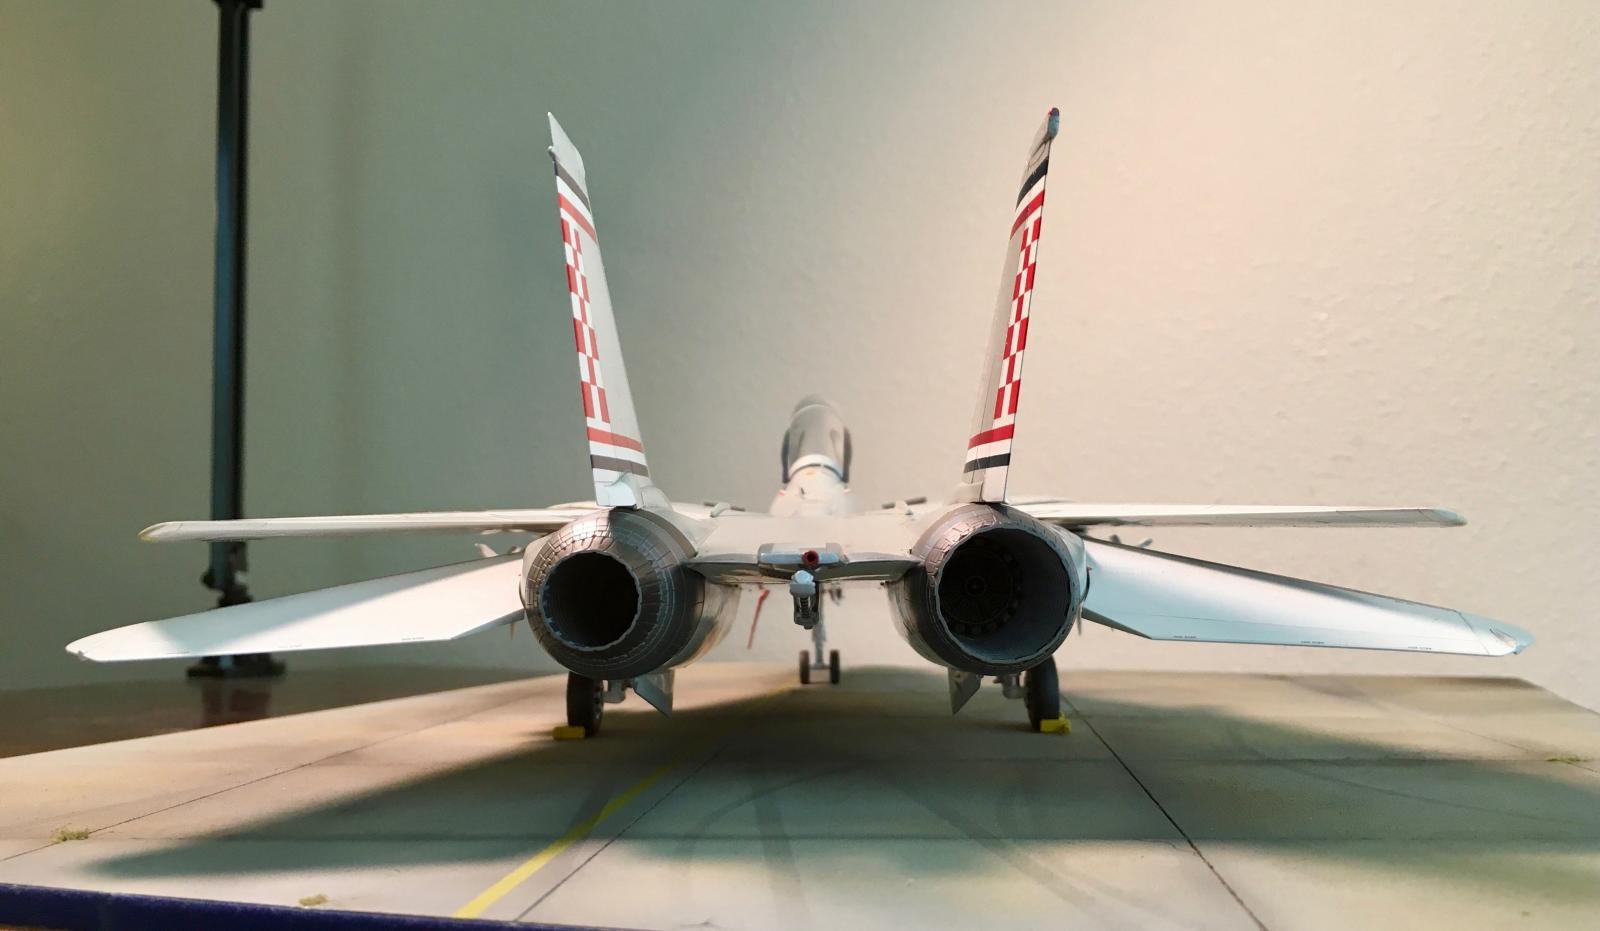
Both models made extensive use of masking sets by NewWare (NICKEL 110) and Galaxy (RENEGADE 200).
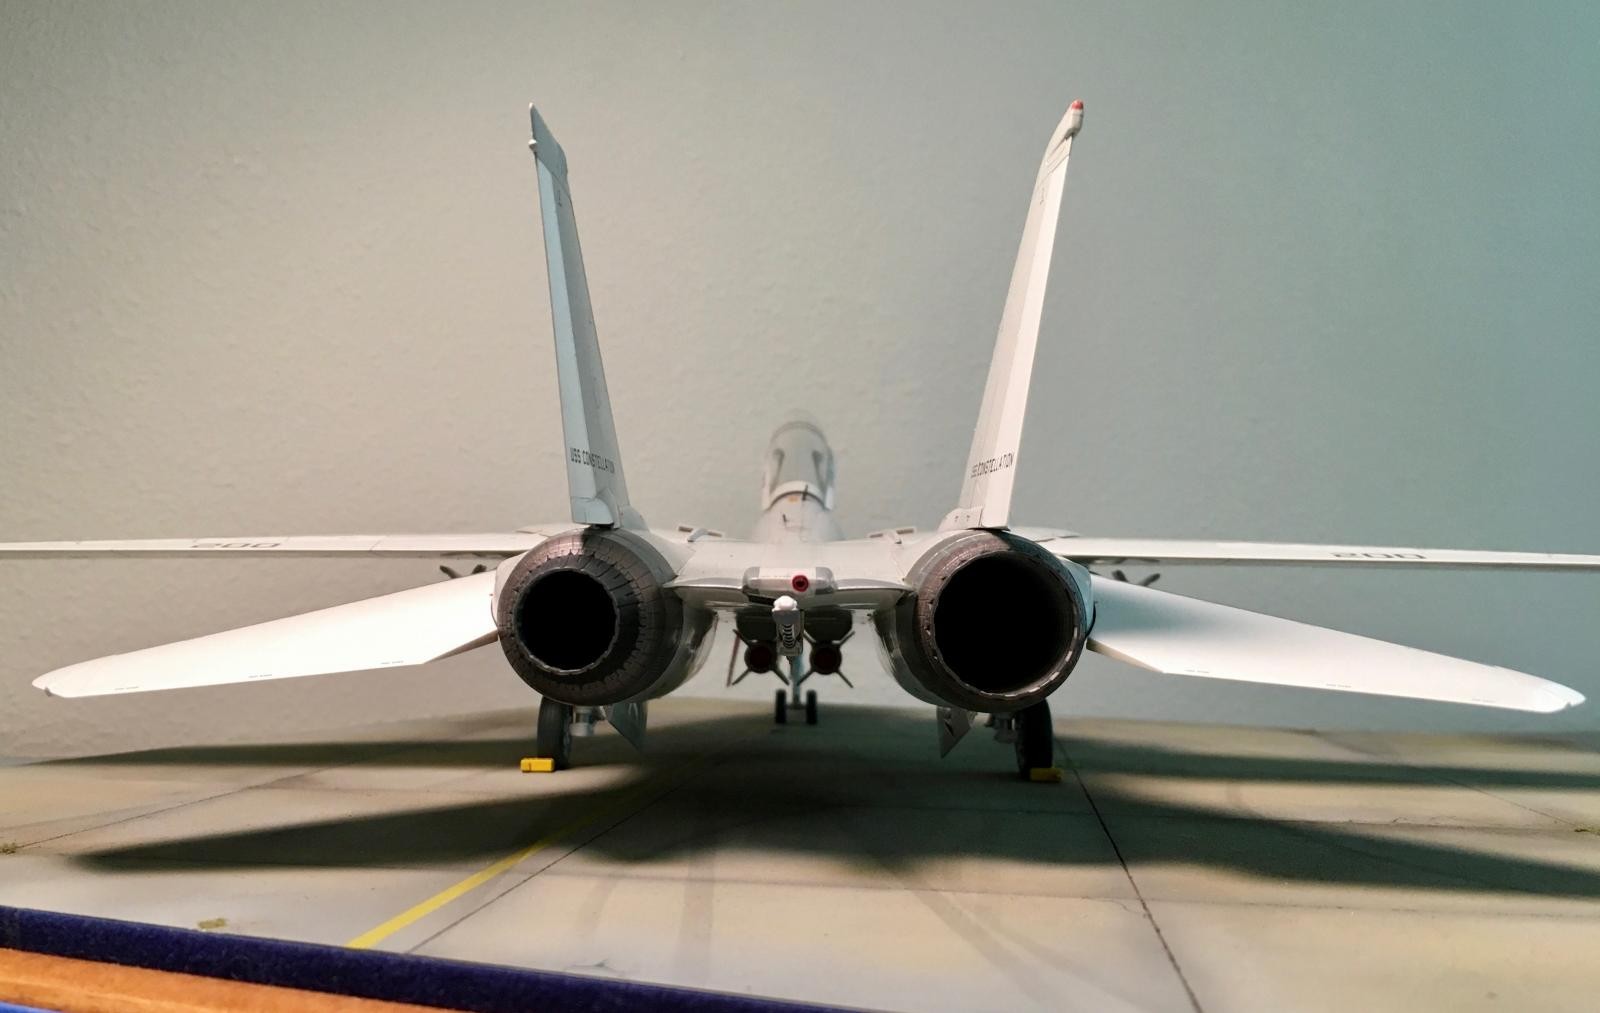
I cannot overemphasize how much of a time saver these are, particularly with respect to tedious places like the anti-glare panel, the flap/spoilers on the upper wings, and the intricate serrations around the afterburner nozzles.
So there you have it. 3 Tomcats in 3 years. I have 2 more Tamiya kits in my stash, but for now the Tomcat Trilogy has ended and i'm gonna go back to F8U Crusaders for a while.
Thanks for shopping!

Dave, Really nice work, or should I say "Nice work, Tomcat Dave". These all turned out fantastic !, Well done !
Thanks Terry. it's nice to be known for something other than Corsairs...
Excellent build, and wonderful job doing all that extra striping, checkering, etc. Well done!
Two beauties. All around great work, reflecting special skills.
Wow...just WOW! I feel like I just went through Tomcat School.
Really well done!
Great job on both. Just beautiful.
Thanks for sharing the entire story of your build.
Congratulations, Dave. The Tomcats are superb!
Fantastic work with all that masking and painting Dave!
Wow - just super work Dave.
Thanks Tom!
Totally agree with above gents, Dave.
This is such a splendid work!
Impressive looking kitty Dave.
Dave: you are the Tomcat master.
I absolutely love this airplane in the early gray and white schemes, with the colorful markings.
What a beauty!
Thanks Jeff! Having built three of em now, i'd like to think i pretty much reaped the benefit of the "Learning Curve". Now it's time to make some headway on some Crusaders...