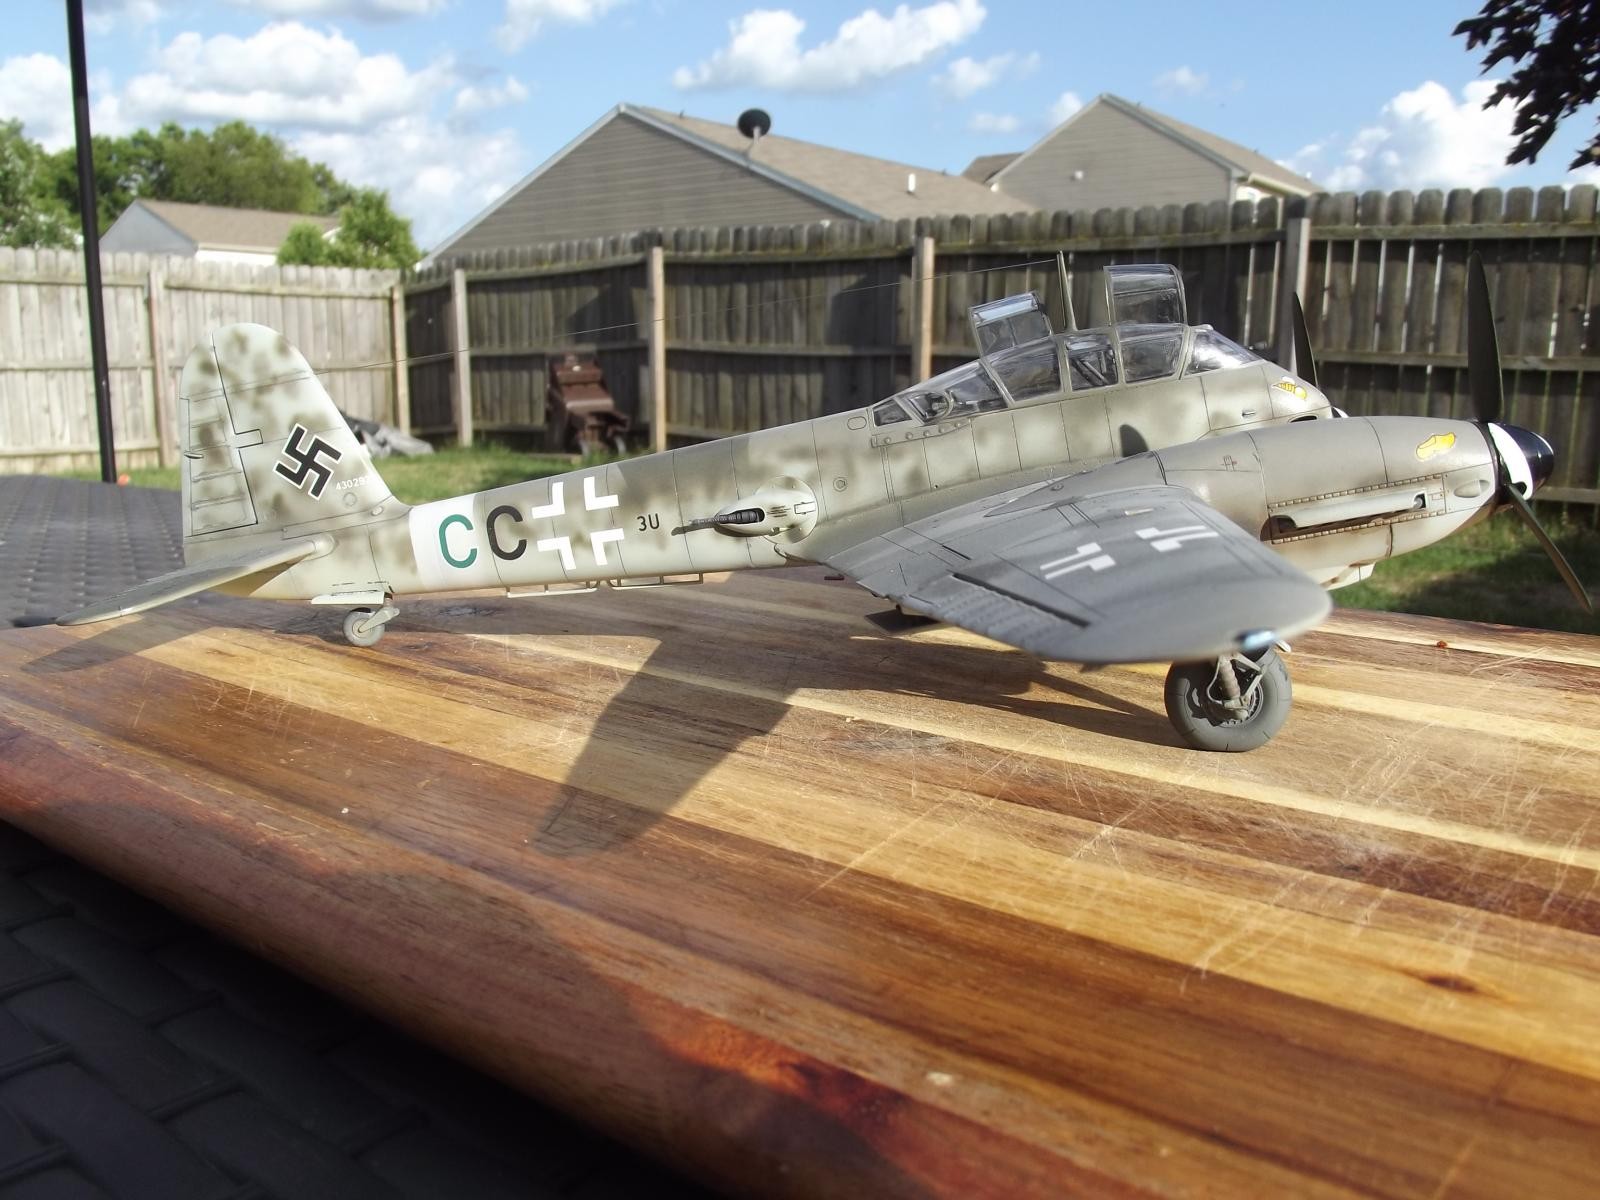
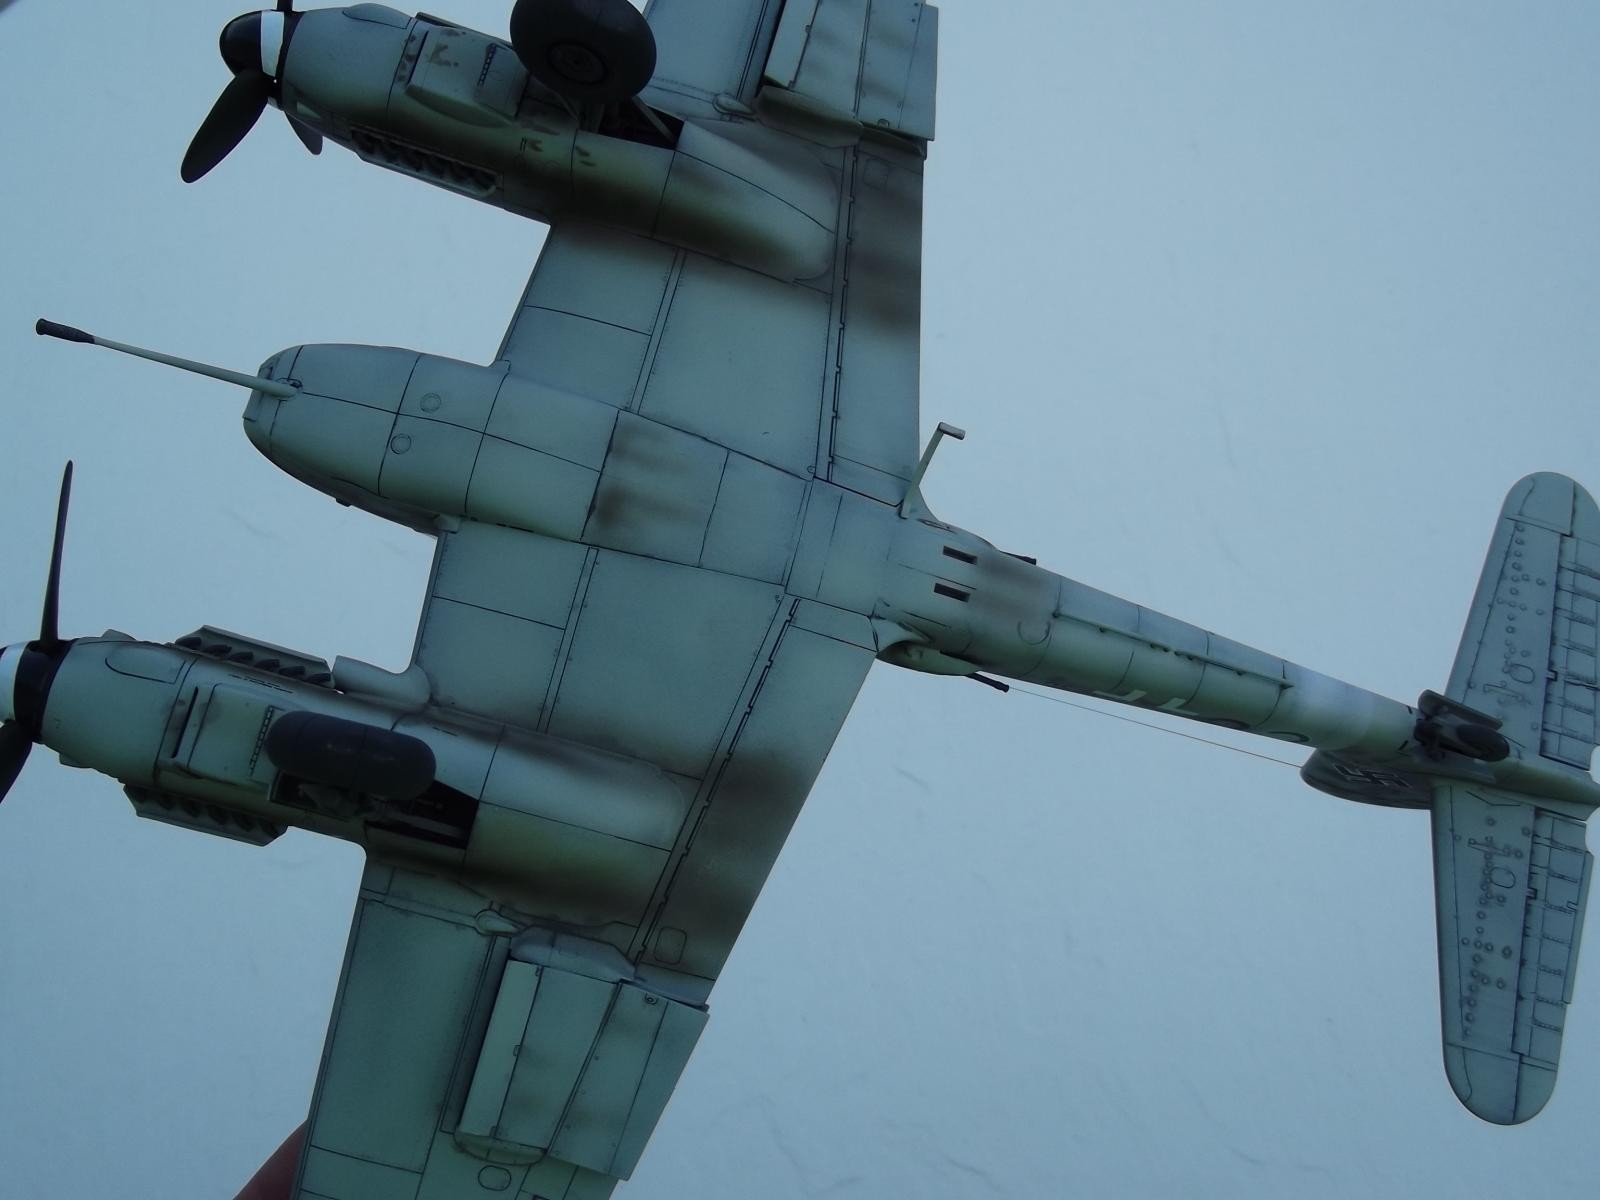
1/48 Me-410B-1/U4, Stab II/Zg26 by Revell-Monogram ProModeller
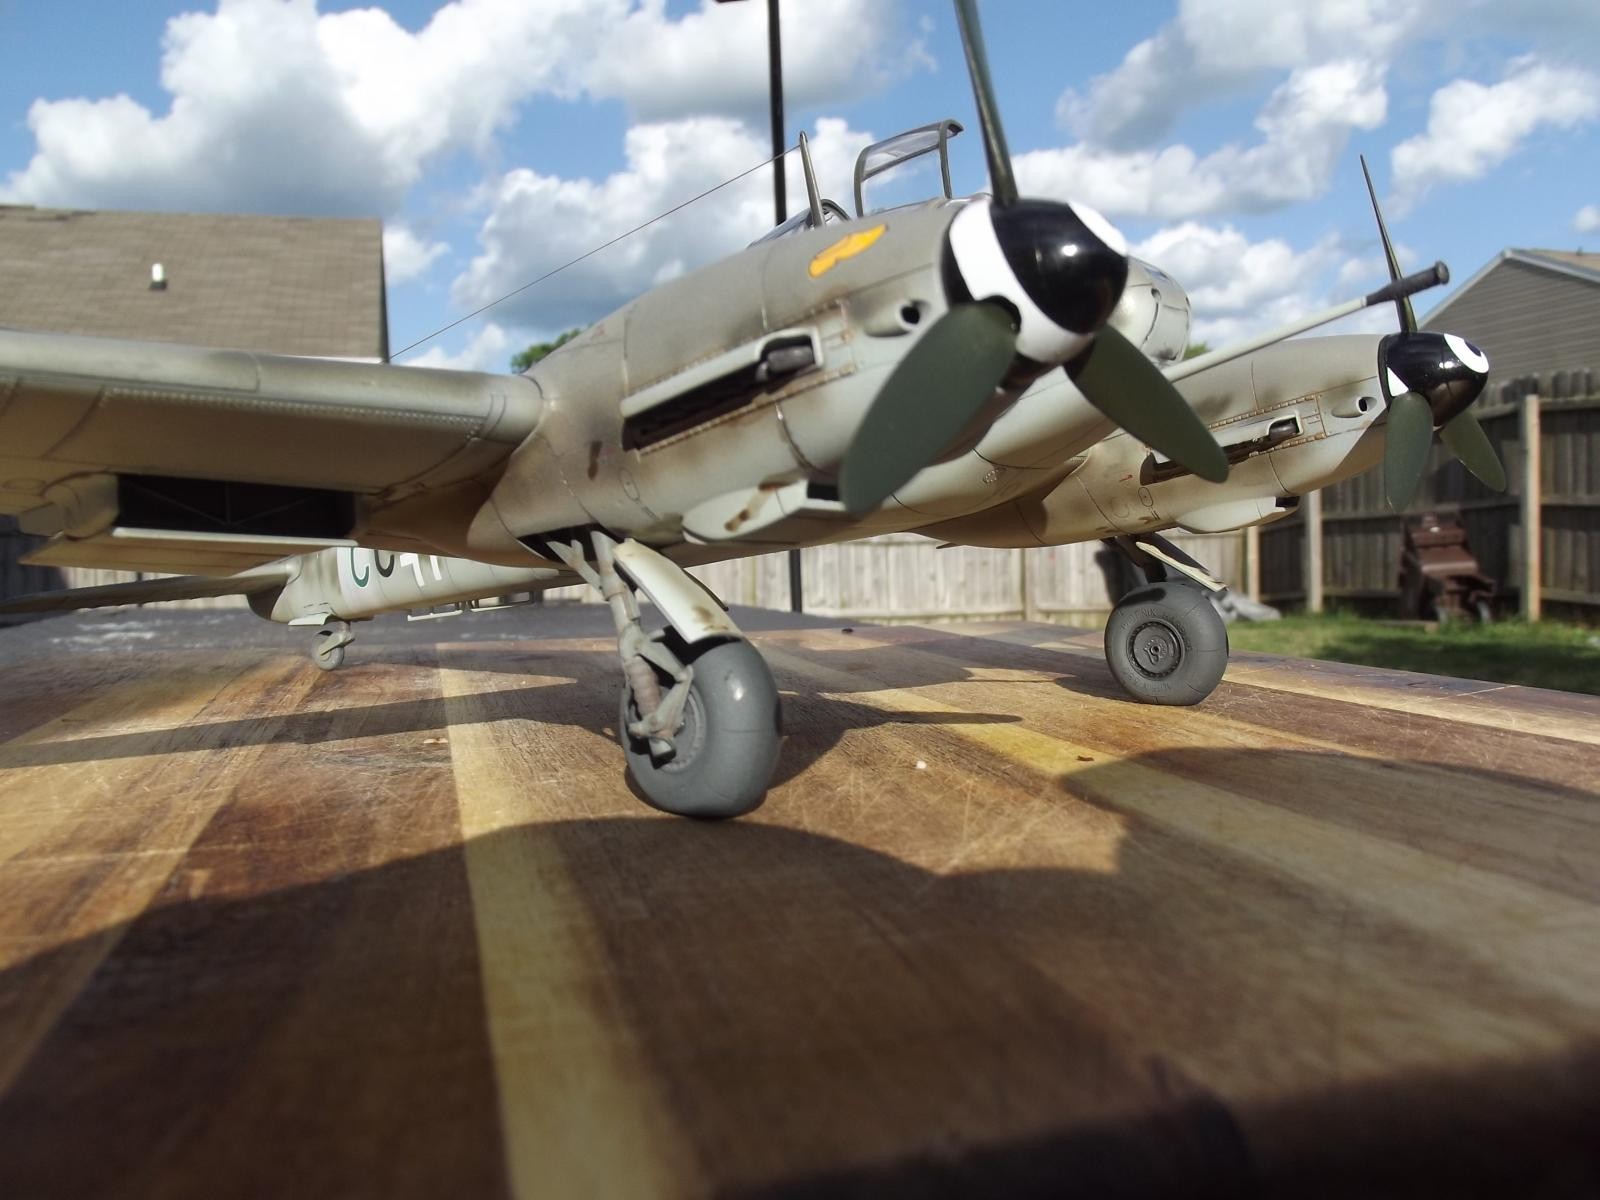
The Me-410 Hornisse was a follow on to the ill-fated Me-210 heavy fighter, which almost destroyed Messerschmitt's reputation due to its horrendous handling qualities. The design was intended as a Heavy Fighter, light bomber and reconnaissance aircraft. It is best known as a bomber destroyer (Zerstorer) and was used in the war-torn skies over Europe during 1943 and '44, until it was was pulled from service due to heavy losses from the P-51s and P-47s of the 8th and 9th AF and the RAF. During their heyday they were effective attackers, 1 hit from a BK50 aerial cannon would destroy a B-17 or B-24. They were also flown to good effect by the Hungarian Air Force as well.
Like most of you modelers around the world, I've been spending lots of time at home, except I was dubbed an essential employee. But other than work, I've spent most of my time with my wife and our two Cocker Spaniels, trying to stay safe. In the meantime, I've been able to actually build models during the summer; usually I'm out riding and being active. Looking thru my wall of unbuilt or partially built kits I spied...a kit I started as soon as I bought it back in 1997, by painting the cockpit...and then for some odd reason put it back in the box and into the "I'll finish it latter" pile. 22 years, 4 moves and over 100 builds latter, "latter" finally arrived!

The original issue of this kit, which is this one, included 30mm cannon, the 20mm cannon in underfuselage pod, the GR-2 aerial rocket pods and the BK50 Bordkanon, which is the version I wanted to build. However, this first issue did not include the correct under nose section to use the BK50! Probably why I put the kit away...In 2000, the kit was reissued with the correct undernose part, which I promptly bought, and stashed away as well!
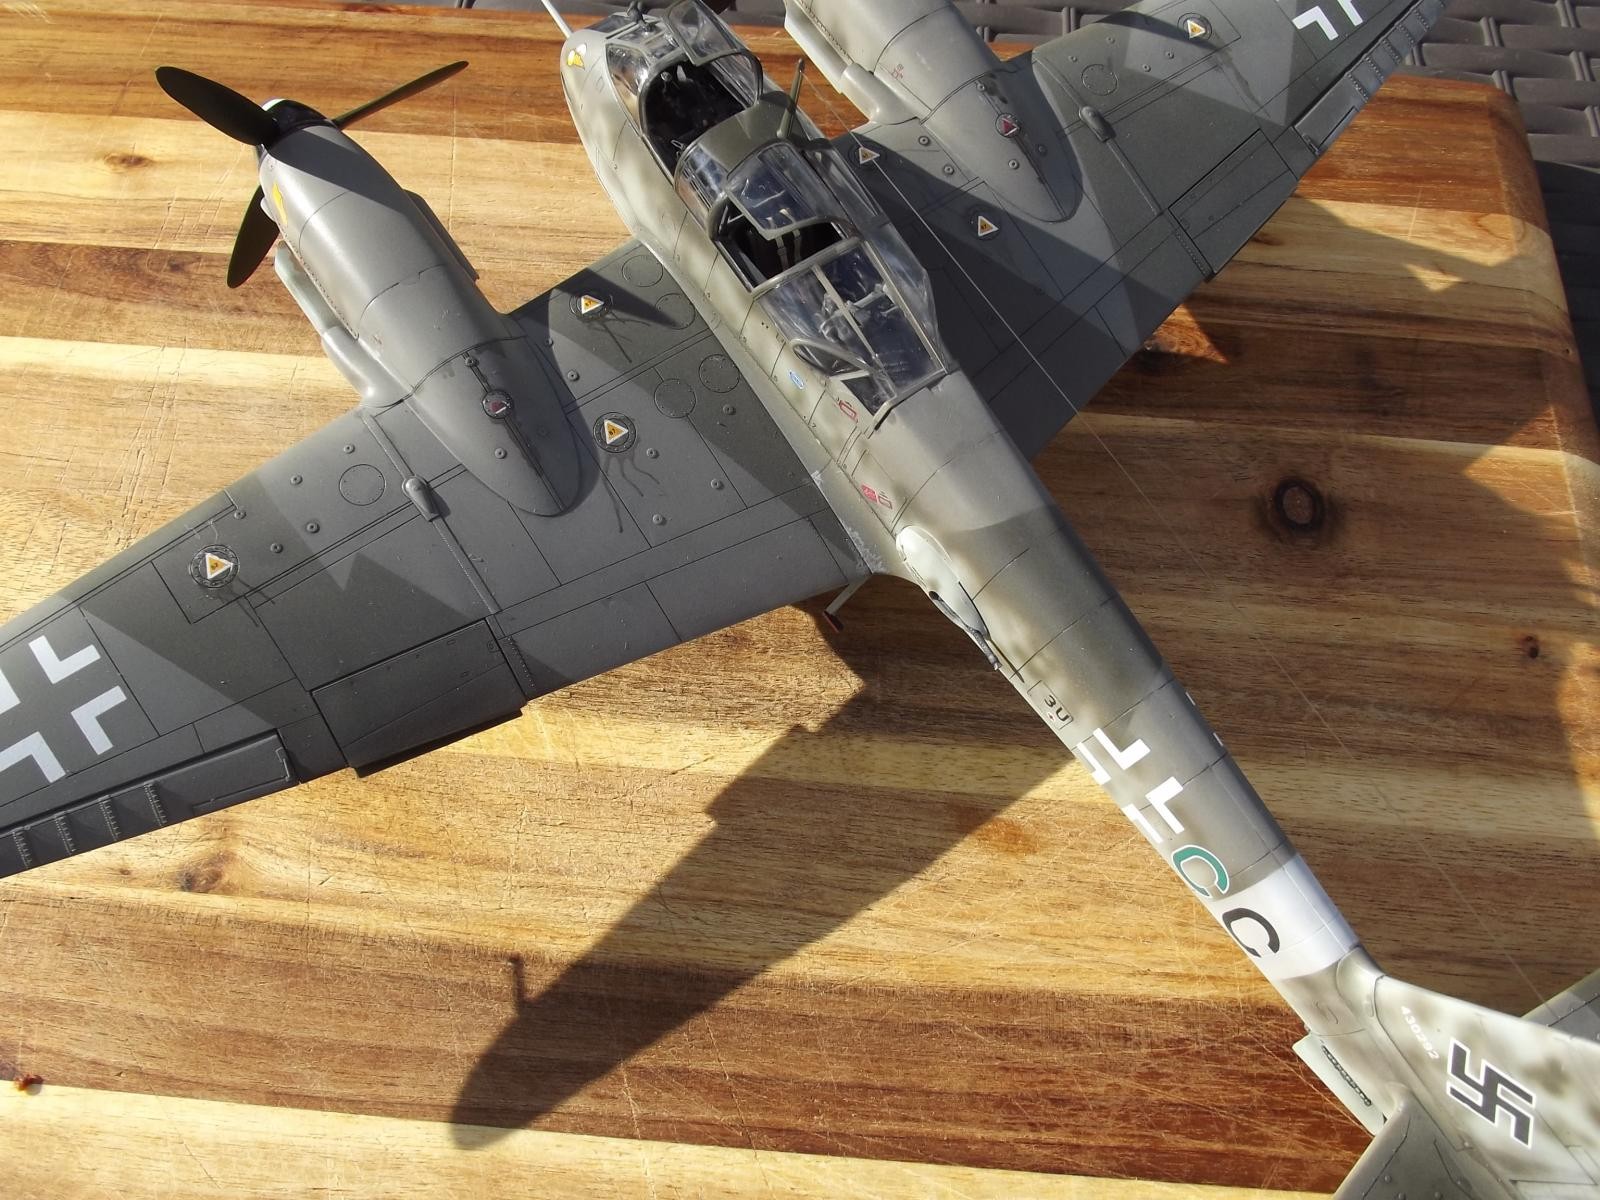
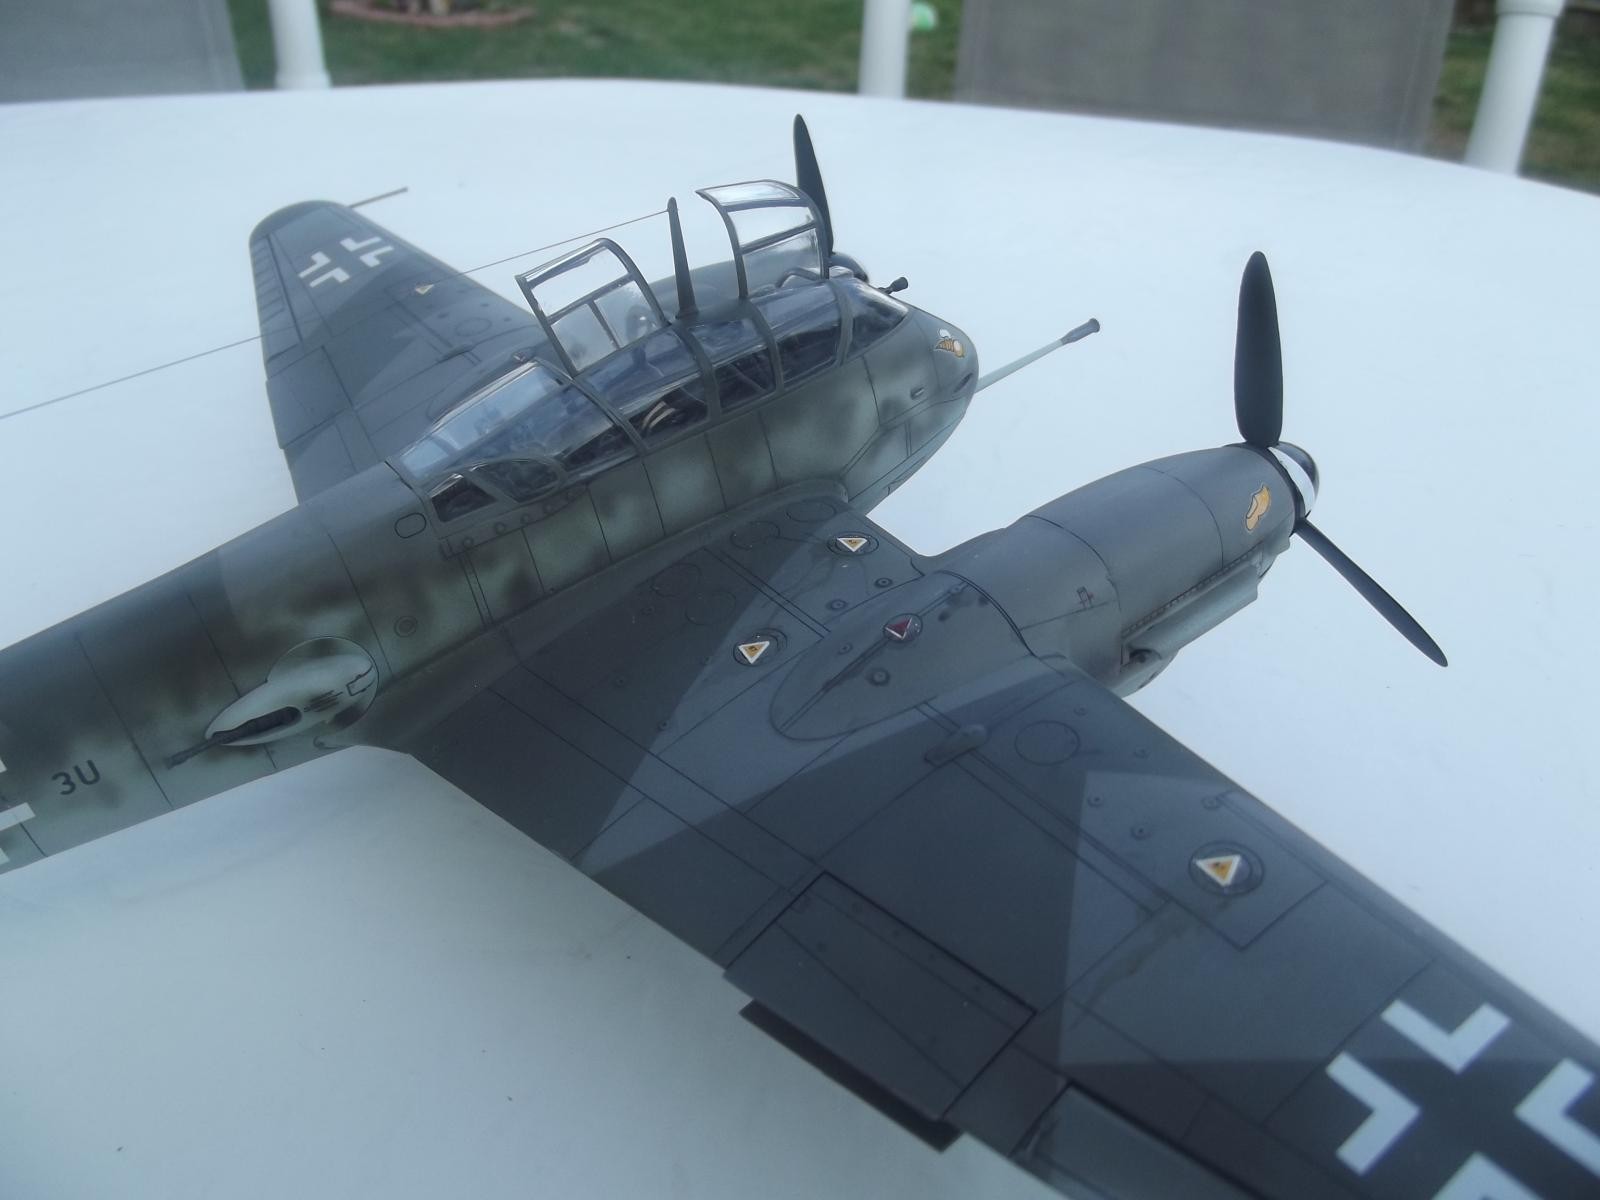
With the correct part in hand, and a set of Aeromaster' Decals for the version I wanted to model, I was off to the races. This kit was surprizingly easy to build, with all the parts fitting as intended and very well detailed. I didn't have to use any filler at all except for the canopy, which was the most daunting part of the kit. I had read that the fit of the canopy was a real bear, due to the complex shape and the number of parts, so I did a lot of dry fitting, and modified the gunner's rear sites by shortening the outboard sight mounts enough to fit inside the canopy without interfering with the canopy due to the thickness. Before tackling the placement I used the Eduard vinyl masking set I had aquired so many years ago and masked the inside of the canopy, sprayed RLM 66 Dark grey, removed the masks and got to work...
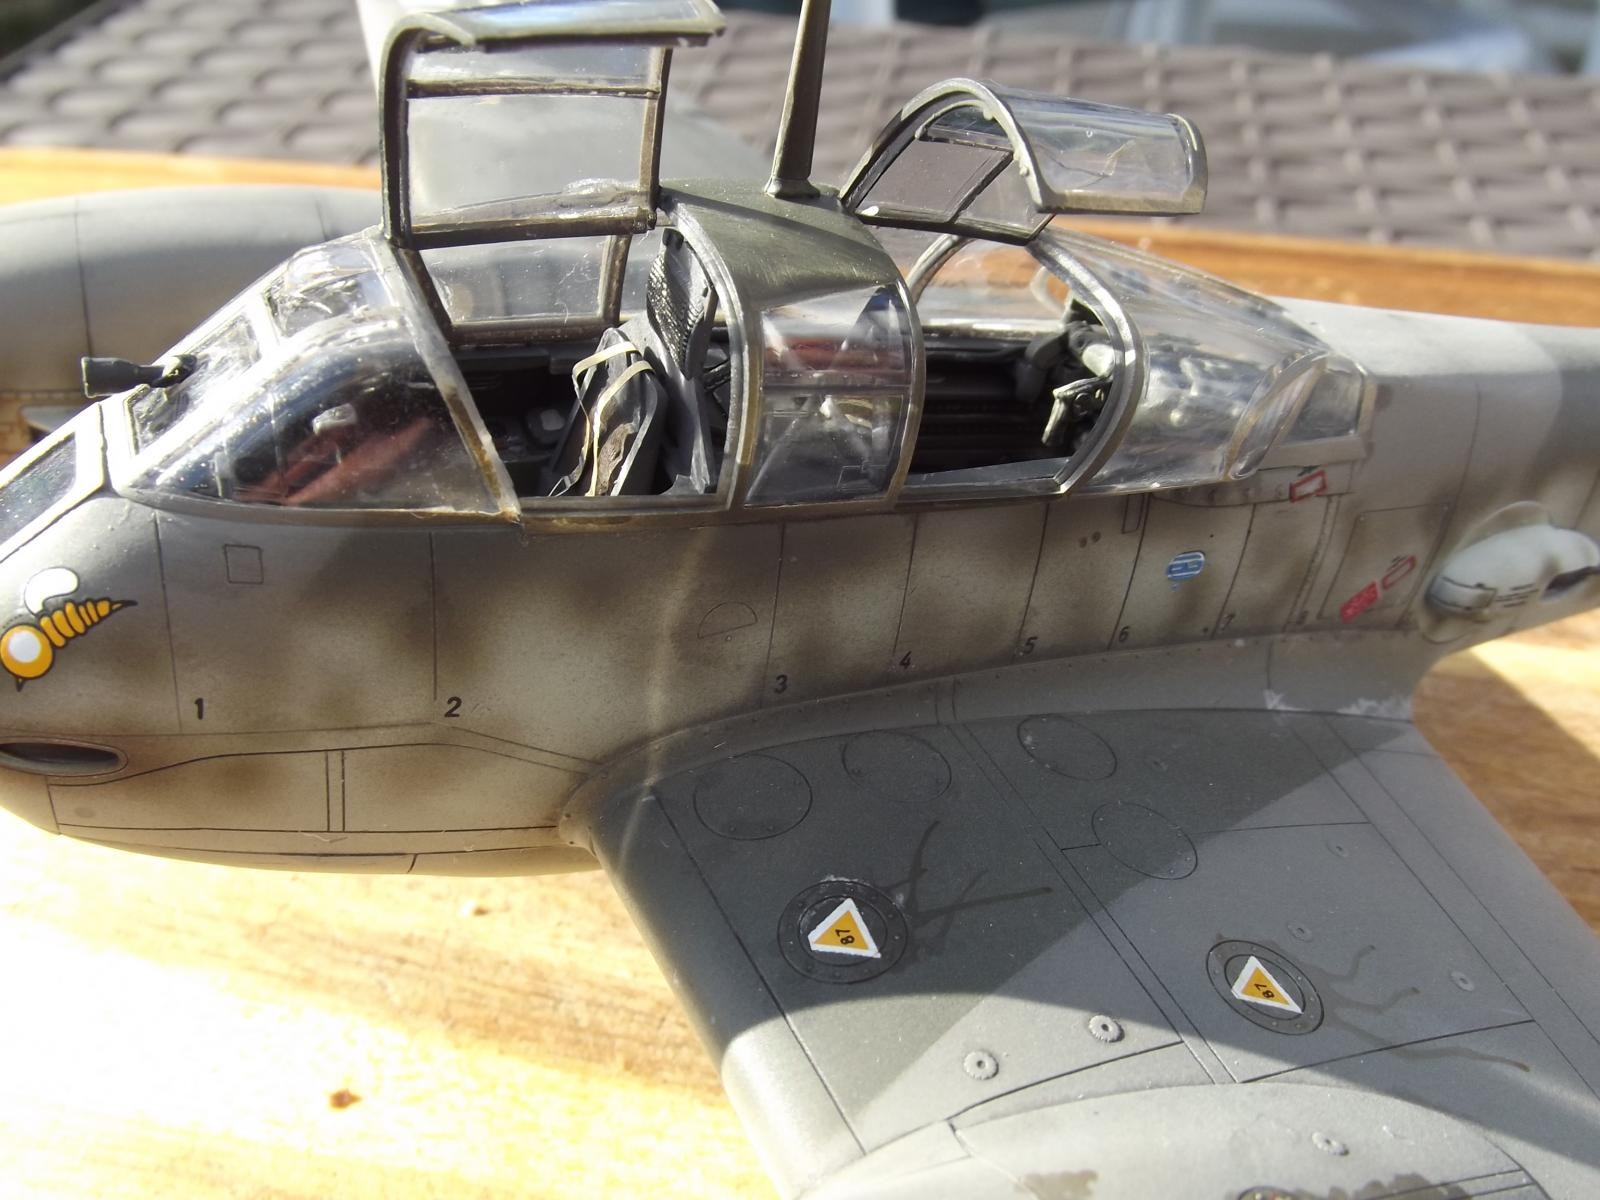
I started by cementing the windscreen first with Tamiya Extra Thin cement, followed by the right side canopy section. I had a gap between the windscreen and the rest of the canopy I filled with Vallejo acrylic putty, and set the assembly aside to dry overnight. Next was the hard part. the Left side had cutouts for the opening sections and was somewhat warped, so again I used caution and cemented the aft portion of the canopy first, making sure everything was squared up and dry before proceeding to the next segment. I had to trim a tiny slice in the front frame but so far so good. Finally I had to join the center segment behind the pilots seat, and there was a large gap that would be very difficult to join with cracking something...so I used a small piece of strip styrene, gently sanded after drying. I added the antenna after everything was dry instead of trying to sandwich the piece between the canopy halves. Overall, I am pretty pleased with how everything worked out.
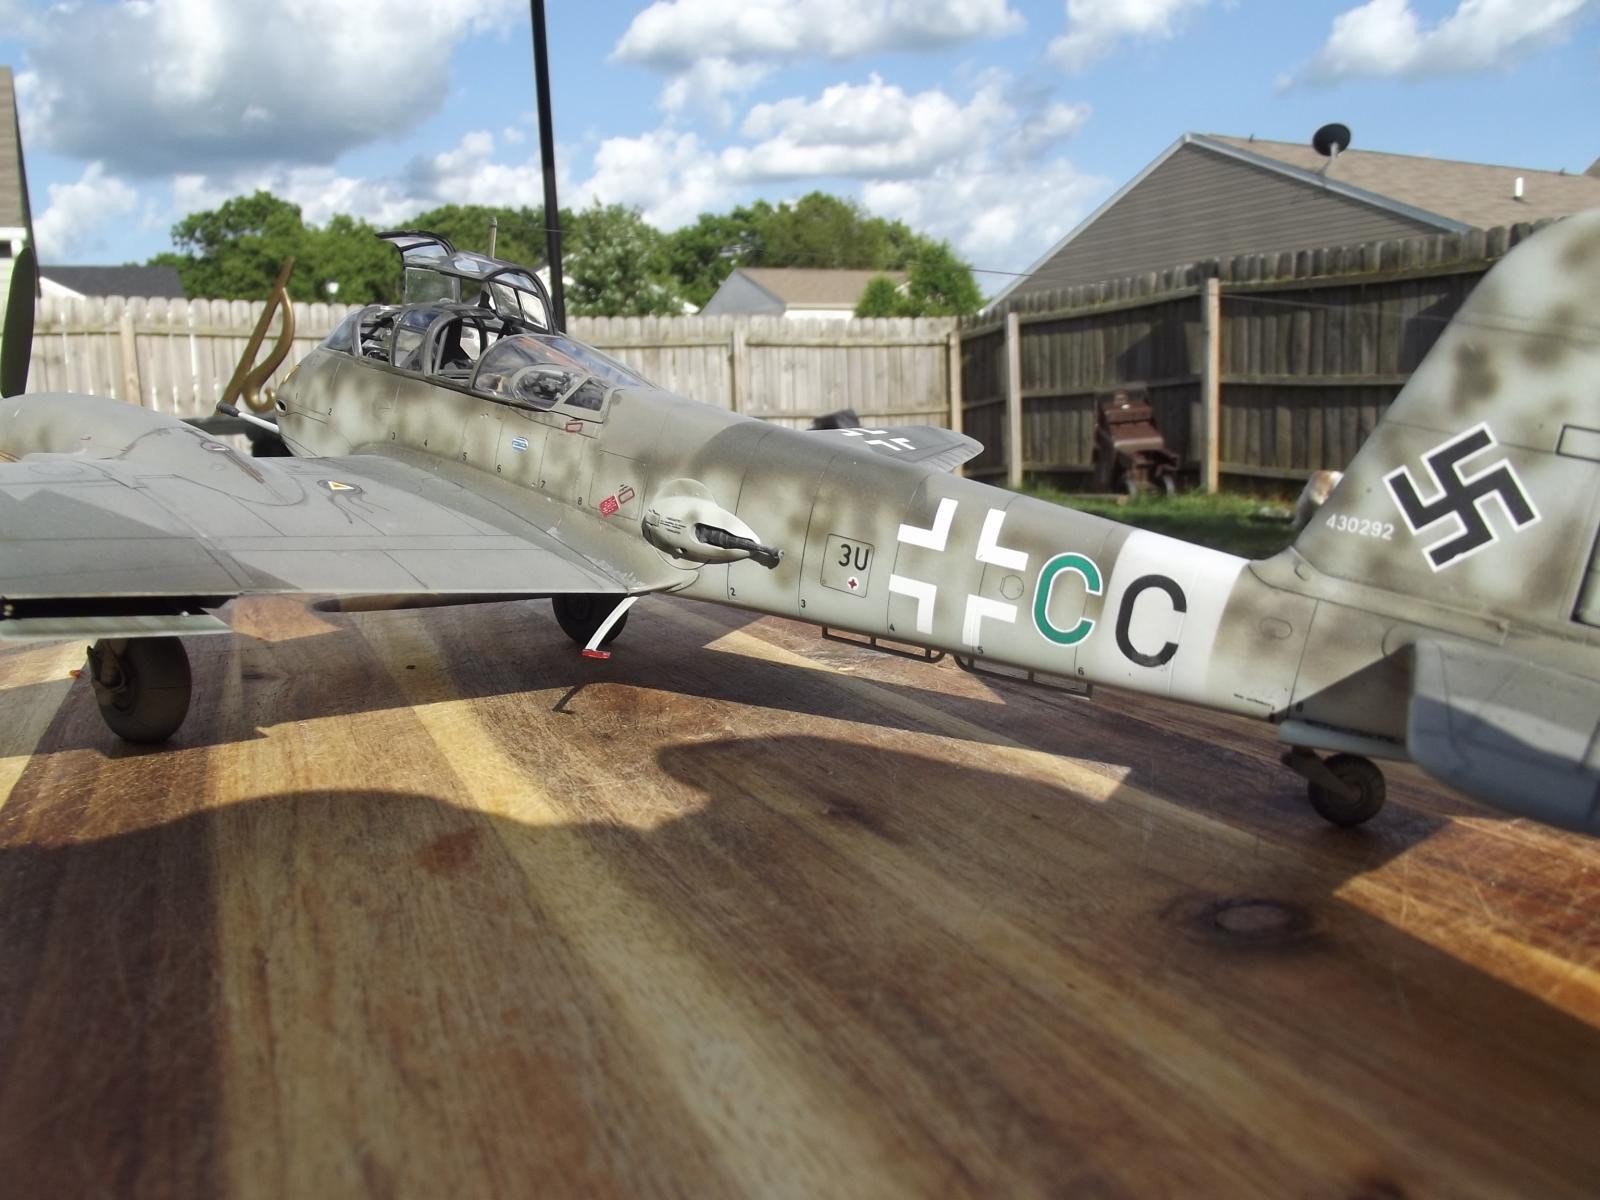
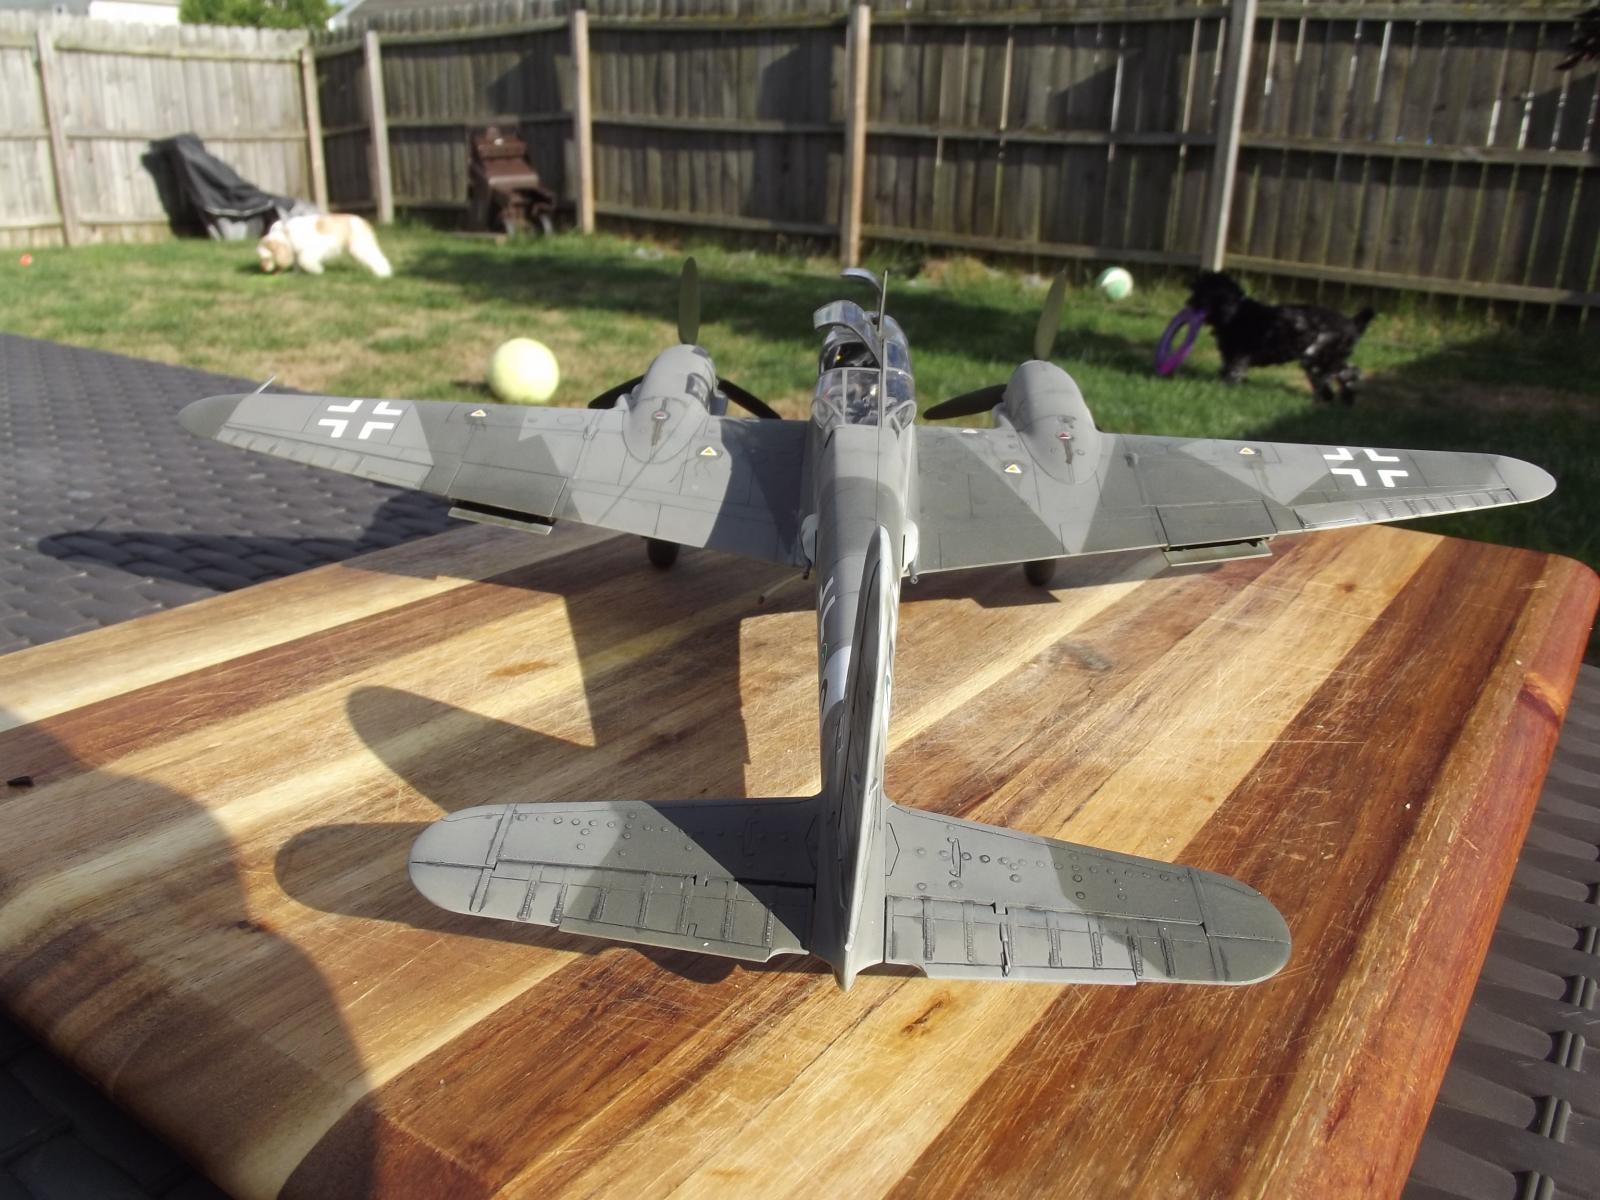
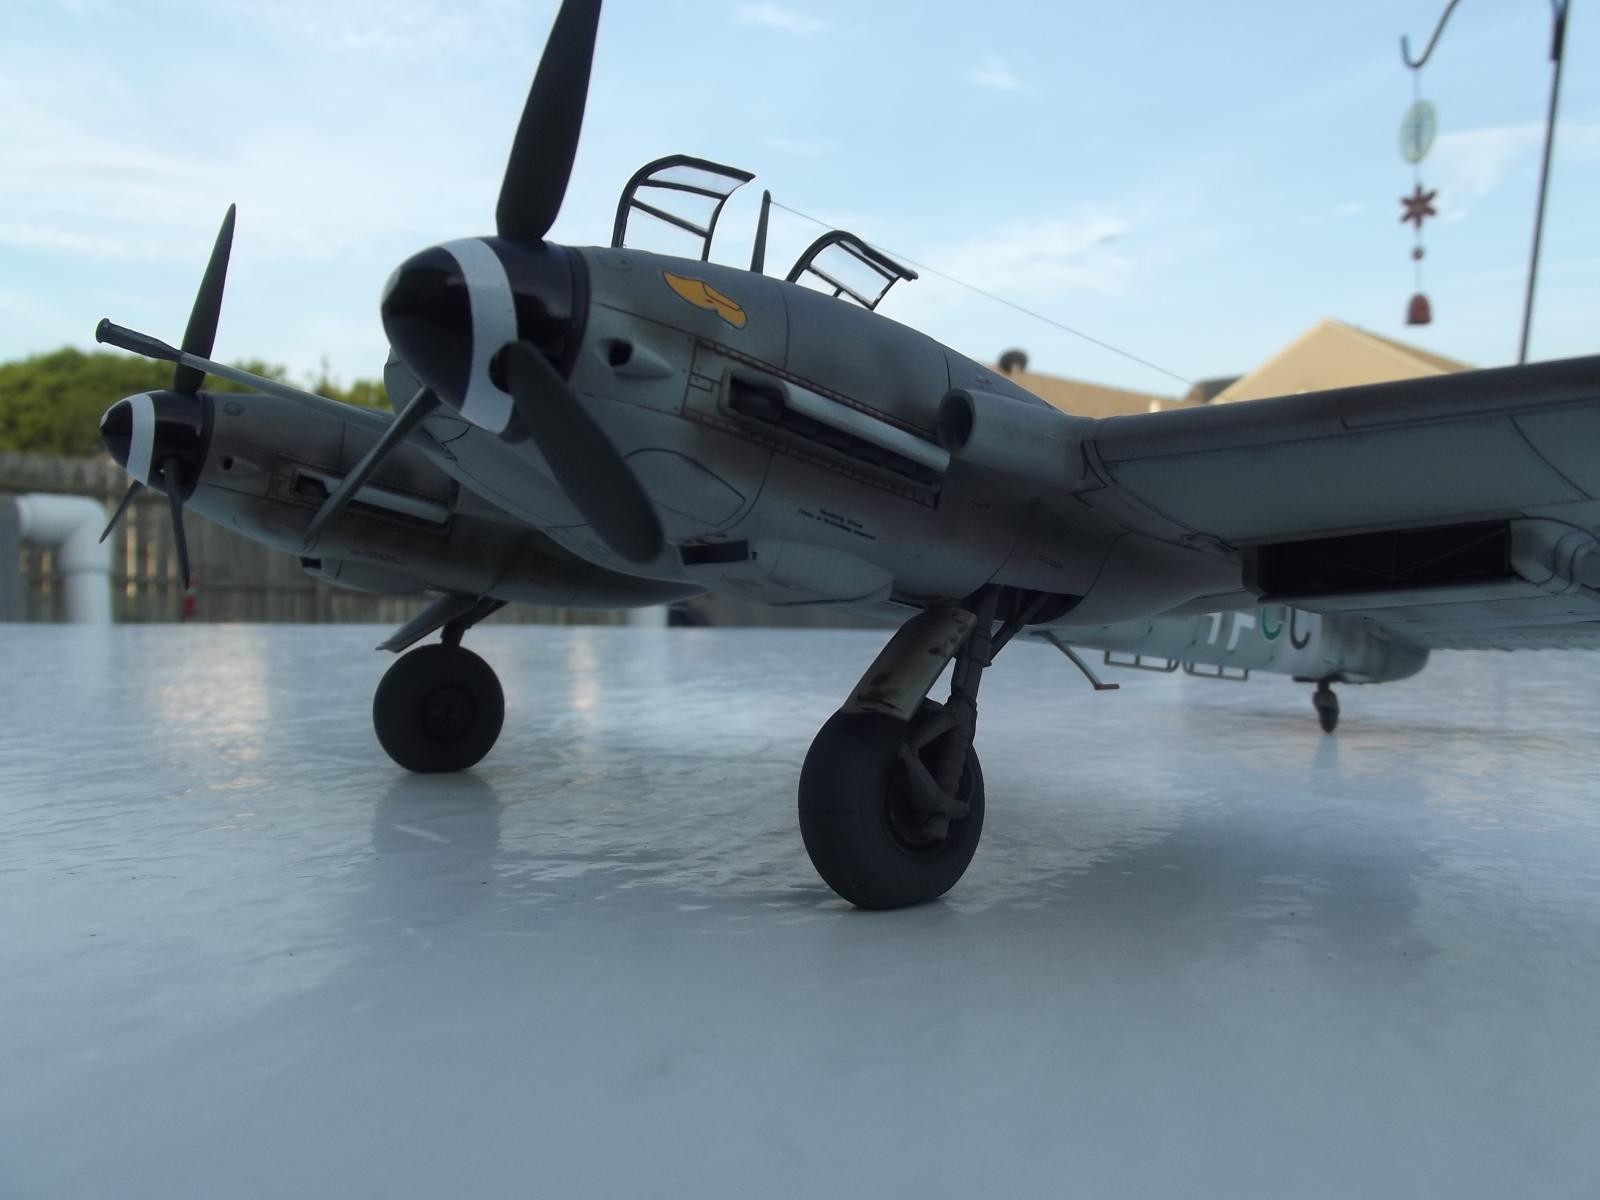
After masking the canopy I then proceeded to prep the kit for painting, first by praying the canopy frames with Tamiya German Grey, the outlining all the panel lines with the same color as a preshade. The actual 74/75/76 paints I used are from the AK RealColors Air Paints Luftwaffe Mid war set using an Iwata Neo dual action airbrush and using AK's recommended airbrush thinner at 50/50 ration, shooting at 16psi. I really like this paint, it lays down very smooth and feathers nicely. After all painting was done I used Tamiya's black and brown panel liners, wiped off in the direction of airflow this a cotton swab lightly dampened with Turpenoid. After adding an EZ Line aerial and a tail light from a small dab of Bondix and completing the usual weathering I am able to claim the Shelf Of Doom denizen as Saved! I have to admit that this kit turned out much better than I expected and was much easier and better detailed than it initially appeared to be in the box and is a welcome addition to my growing Luftwaffe collection.


Senior Benitez, you've done some fine work here. You clearly went through a lot of work to produce what you did. I'm only briefly-familiar with the 410B, but just was reading into it further, as a result of your post. Here's what stood out (taken from Wiki):
"From mid-1944, despite being Hitler's favourite bomber destroyer, the Me 410 units were taken from Defence of the Reich duties and production was phased out in favour of heavily armed single-engine fighters as dedicated bomber destroyers, with the Me 410s remaining in service flying on reconnaissance duties only."
Great looking build. That paint job very effective.
Great rescue. Beautiful job, mottled perfectly.
You've done a great job with this Juan, nice paintwork. I have the Meng offering of the 410, this makes me want to build it!
Beautiful build.
Painting and weathering looks fantastic.
Although you spent 22 years on it to finish, the result is great.
Very nice, one of my favourite twins of WWII.
Great job, story and presentation. The 410 was very advanced for its age with remote controlled cannons on the fuselage sides. Well done!
Nicely done Juan, Build one several years ago and thought it was a really decent kit. Nice detail as well as excellent fit of the parts. Except as you noted, that multi piece canopy. Man it tried my patience to the max. Yours looks great Juan, nice job.
Beautiful job, Juan
Nice finish on a long overdo project, congratulations!
How did you like that canopy? What a pain in the rump that was! Only part of building that model I did not like. Otherwise, she is really a pretty decent model kit.
I can only parrot all of the positive comments written above. However, I like the photos ...the forced perspective and the clear sharp focus combined with the natural light really shows this model to great effect. Even the back round with the sky and the roof tops kinda gives a feel that the kit/a/c is some where in Germany. Not every modeler can get away with showing a cutting board...but, it all works.
If ever they bring back the model of the month Juan, you'd have my vote. Either way two thumbs up in bringing this kit back into the light and out of the shelf of doom.
Another outstanding result Juan. As your brother from another mother I have concluded you got most of the artistic talent. So I’m going sulk now. You guys stay safe, hope to see you sooner or later, if Holcomb makes up his mind that is.
Beautiful model, Juan, and great job at that canopy.
Nice presentation and build description.
Photos too!
These "old" Revell 410s still turn out great in good hands. You did a wonderful job!
That's a super result Juan. The work on the kit is great and the paintwork is superb. This is a kit that stands the test of time. I like your model a lot!
Beautifully done - excellent paint work.
A great work!