This segment shows that I added some parts to the drop tanks, then proceeded to revise other kit parts and make new parts for the P-51B cockpit. I don't have any drawings and/or photos of the "B's" cockpit to show, but somehow I must have had something to show me what to build. As you can see I used card stock, including aluminum, brass and copper to fashion all of the items that I built.
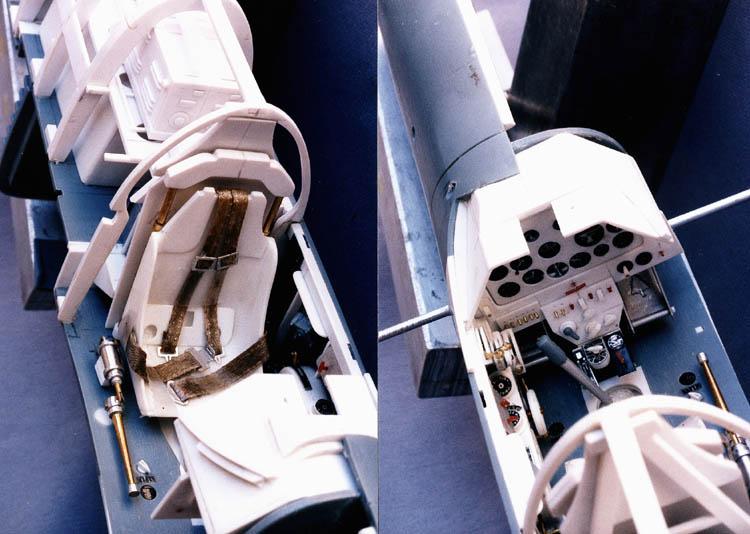
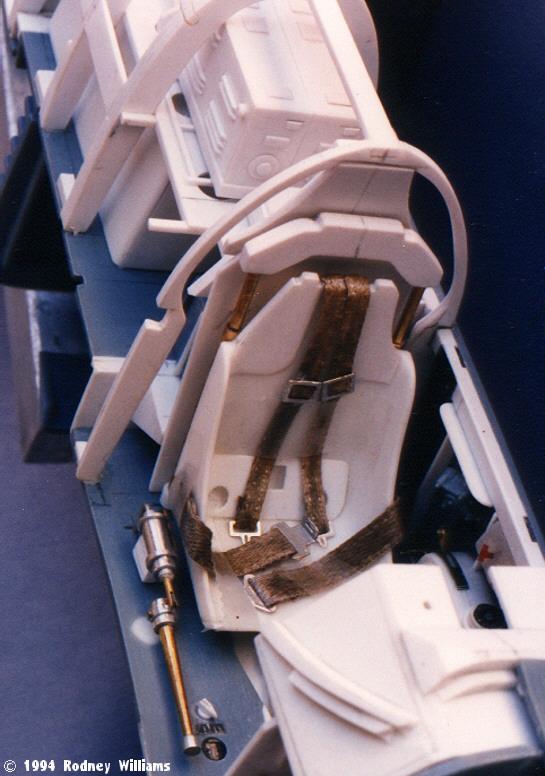
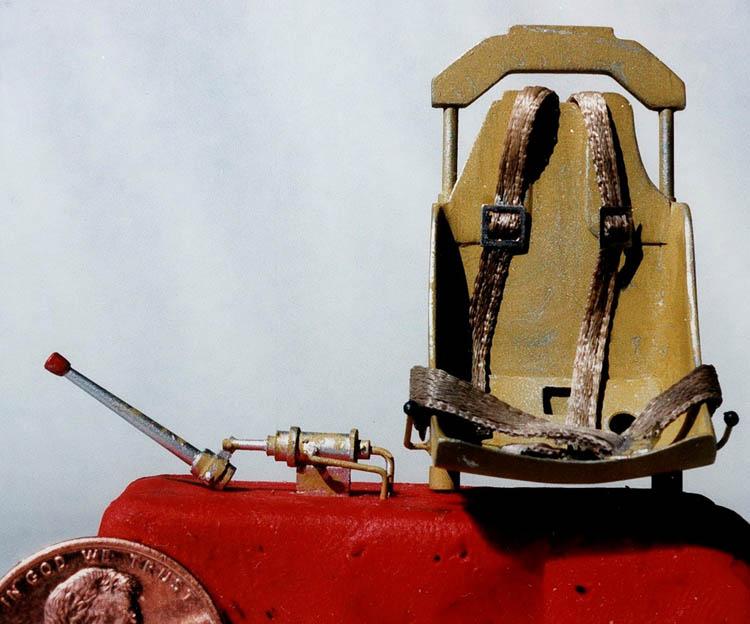
Look at the photo showing the back of the seat and you will see that I coiled some 0.10" diameter brass wire around the seat frame to represent the coil springs. I also used Waldron's brass buckles for the shoulder harness and seat belts. Years ago I bought different sizes of decorative ribbon from a local fabric store in San Jose, CA/USA and used it during my 30 years of building models.
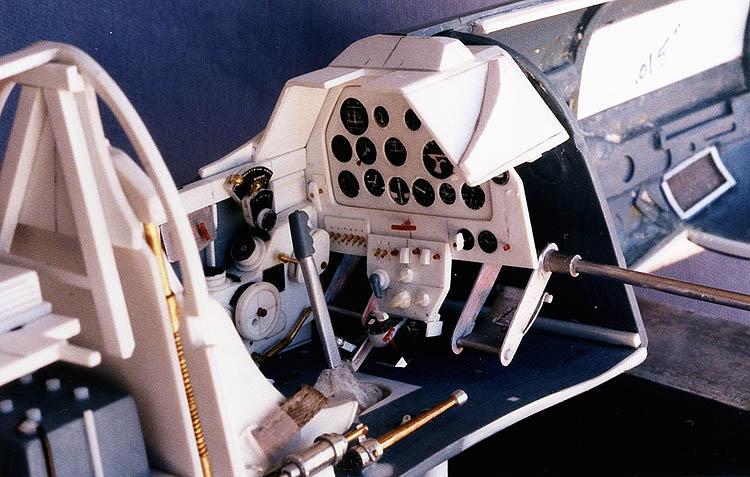
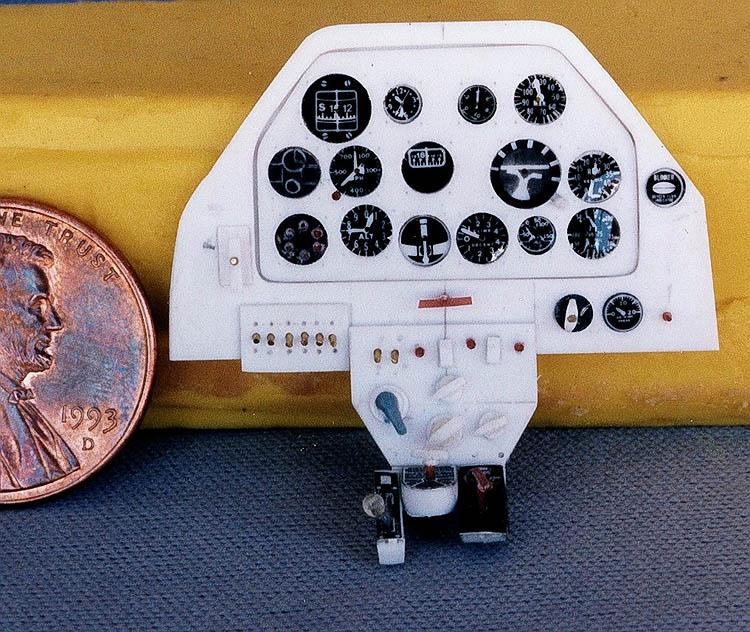
Thank goodness "WALDRON PRODUCTS" made excellent instrument dials in 1/24th scale. I used Waldron's punch set to punch out the dials, including the instrument panel.
I used Tamiya XF-1 Flat Black, Red and their XF-4 Green Chromate colors and sprayed on the paint with my Badger-200 Airbrush.
As you build your model, all the hand-made pieces are "dry-fit together" before there are glued to one another.
I built this model for a client, who hired me to build another model before I built this one.
When he dies, I have no idea what his wife will do with all the models he bought from me and another Canadian modeler. I have not heard from him since sometime in 2006, which was shortly after he took delivery of the model. 14 years is a long time...RJW...part 3 coming soon...
I tried to sell some of my models to museum's but they want you to donate your models, then pack them up and pay for the shipping. When you go to a museum, you pay an entry fee...
And to Jordyn Collier:::::::: Paul L. was the guy that got the model back in 1994. Now to the next part...
Rodney: Another fabulous installment. Thanks for the great in-progress pix.
We miss you in IPMS Region 9! Your models on the table always generated a lot of buzz!
I'm living in Irvine, CA and all 284 models of mine are packed in plastic boxes that have sealed lids, which I bought when we still lived near Cortez, Colorado. You can come down any time and take one and/or "ALL" of them home with you. The price for each model is $000.000 some time called FREE!
I'm 89 now and when I die, none of my extended family wants to keep any of the models.
Wow, stellar scratch built cockpit! All pics reveal details that put to shame some AM stuff. And the work around the drop tanks is also pretty darn good
Thanks everyone>>>>> I never knew I would build this kind of stuff when I got back into modeling in 1984 as it was O.O.B. all the way. Model's were taken out of the box Friday night's and up on the finished shelves by Sunday evening.
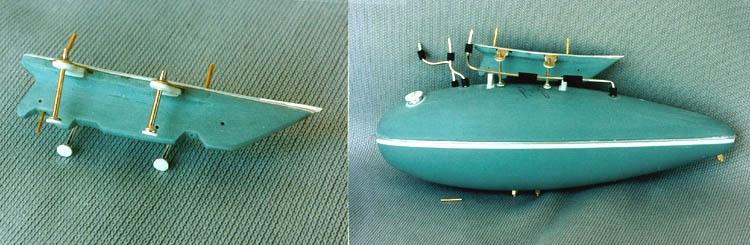
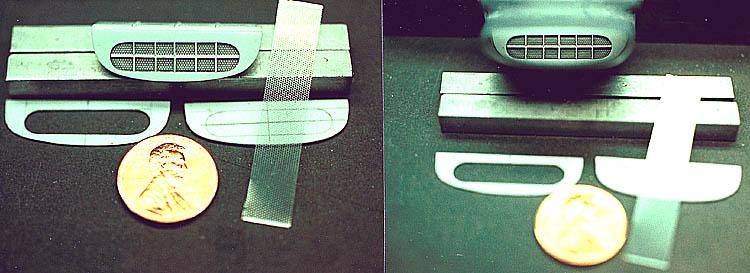


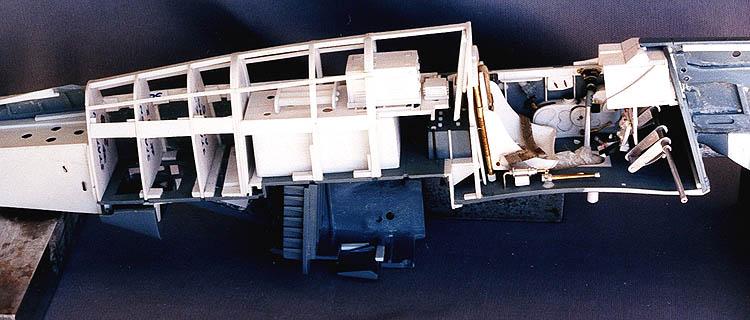


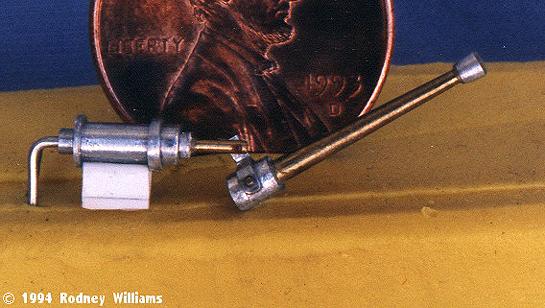
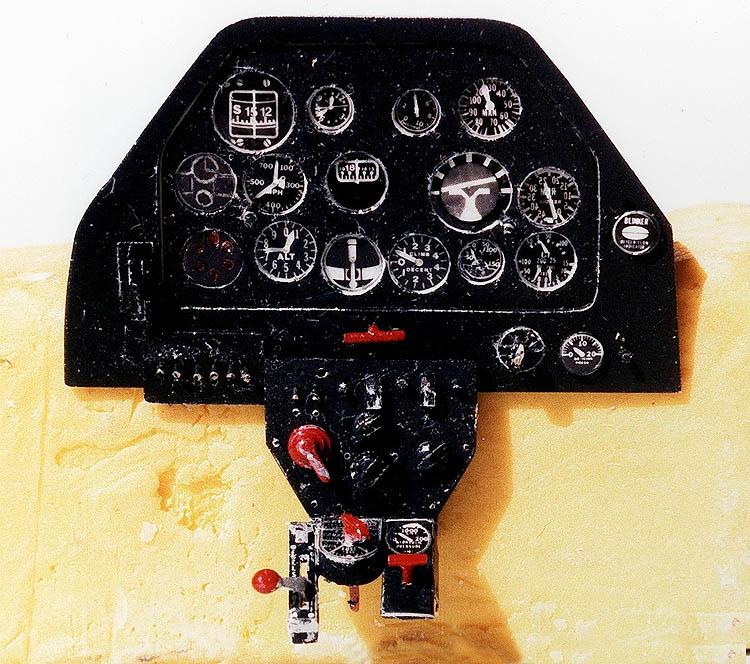


This segment shows that I added some parts to the drop tanks, then proceeded to revise other kit parts and make new parts for the P-51B cockpit. I don't have any drawings and/or photos of the "B's" cockpit to show, but somehow I must have had something to show me what to build. As you can see I used card stock, including aluminum, brass and copper to fashion all of the items that I built.
Look at the photo showing the back of the seat and you will see that I coiled some 0.10" diameter brass wire around the seat frame to represent the coil springs. I also used Waldron's brass buckles for the shoulder harness and seat belts. Years ago I bought different sizes of decorative ribbon from a local fabric store in San Jose, CA/USA and used it during my 30 years of building models.
Thank goodness "WALDRON PRODUCTS" made excellent instrument dials in 1/24th scale. I used Waldron's punch set to punch out the dials, including the instrument panel.
I used Tamiya XF-1 Flat Black, Red and their XF-4 Green Chromate colors and sprayed on the paint with my Badger-200 Airbrush.
As you build your model, all the hand-made pieces are "dry-fit together" before there are glued to one another.
Enjoy! Rodney
What an unbelievable details, Rodney.
Great work.
The level of scratchbuilt details in this build is magnificent. This is masterclass work that belongs in a museum!
I built this model for a client, who hired me to build another model before I built this one.
When he dies, I have no idea what his wife will do with all the models he bought from me and another Canadian modeler. I have not heard from him since sometime in 2006, which was shortly after he took delivery of the model. 14 years is a long time...RJW...part 3 coming soon...
I tried to sell some of my models to museum's but they want you to donate your models, then pack them up and pay for the shipping. When you go to a museum, you pay an entry fee...
And to Jordyn Collier:::::::: Paul L. was the guy that got the model back in 1994. Now to the next part...
Your skills are INSANE! Well done so far on this project! Kinda jealous of the guy who's gonna get this, lol.
Rodney: Another fabulous installment. Thanks for the great in-progress pix.
We miss you in IPMS Region 9! Your models on the table always generated a lot of buzz!
Marvin:
I'm living in Irvine, CA and all 284 models of mine are packed in plastic boxes that have sealed lids, which I bought when we still lived near Cortez, Colorado. You can come down any time and take one and/or "ALL" of them home with you. The price for each model is $000.000 some time called FREE!
I'm 89 now and when I die, none of my extended family wants to keep any of the models.
Later Brother!
Wow, stellar scratch built cockpit! All pics reveal details that put to shame some AM stuff. And the work around the drop tanks is also pretty darn good
Thanks everyone>>>>> I never knew I would build this kind of stuff when I got back into modeling in 1984 as it was O.O.B. all the way. Model's were taken out of the box Friday night's and up on the finished shelves by Sunday evening.
What scale is this? This work is light years ahead of anything I can do.
Fantastic, as usual, Rodney!