Antonov AN-2 Colt
Hobbyboss produced three kits of the AN-2, the AN-2V, the AN-2M and AN-2CX. The AN-2M is a specialized agricultural variant with a hermetically sealed cockpit and the squared-off rudder, so being one who wants a little more bang for their modeling dollar, I opted not to grab that release. Well, this time, anyway. The AN-2M may be fine if I ever want to model other civil and airliner variants.
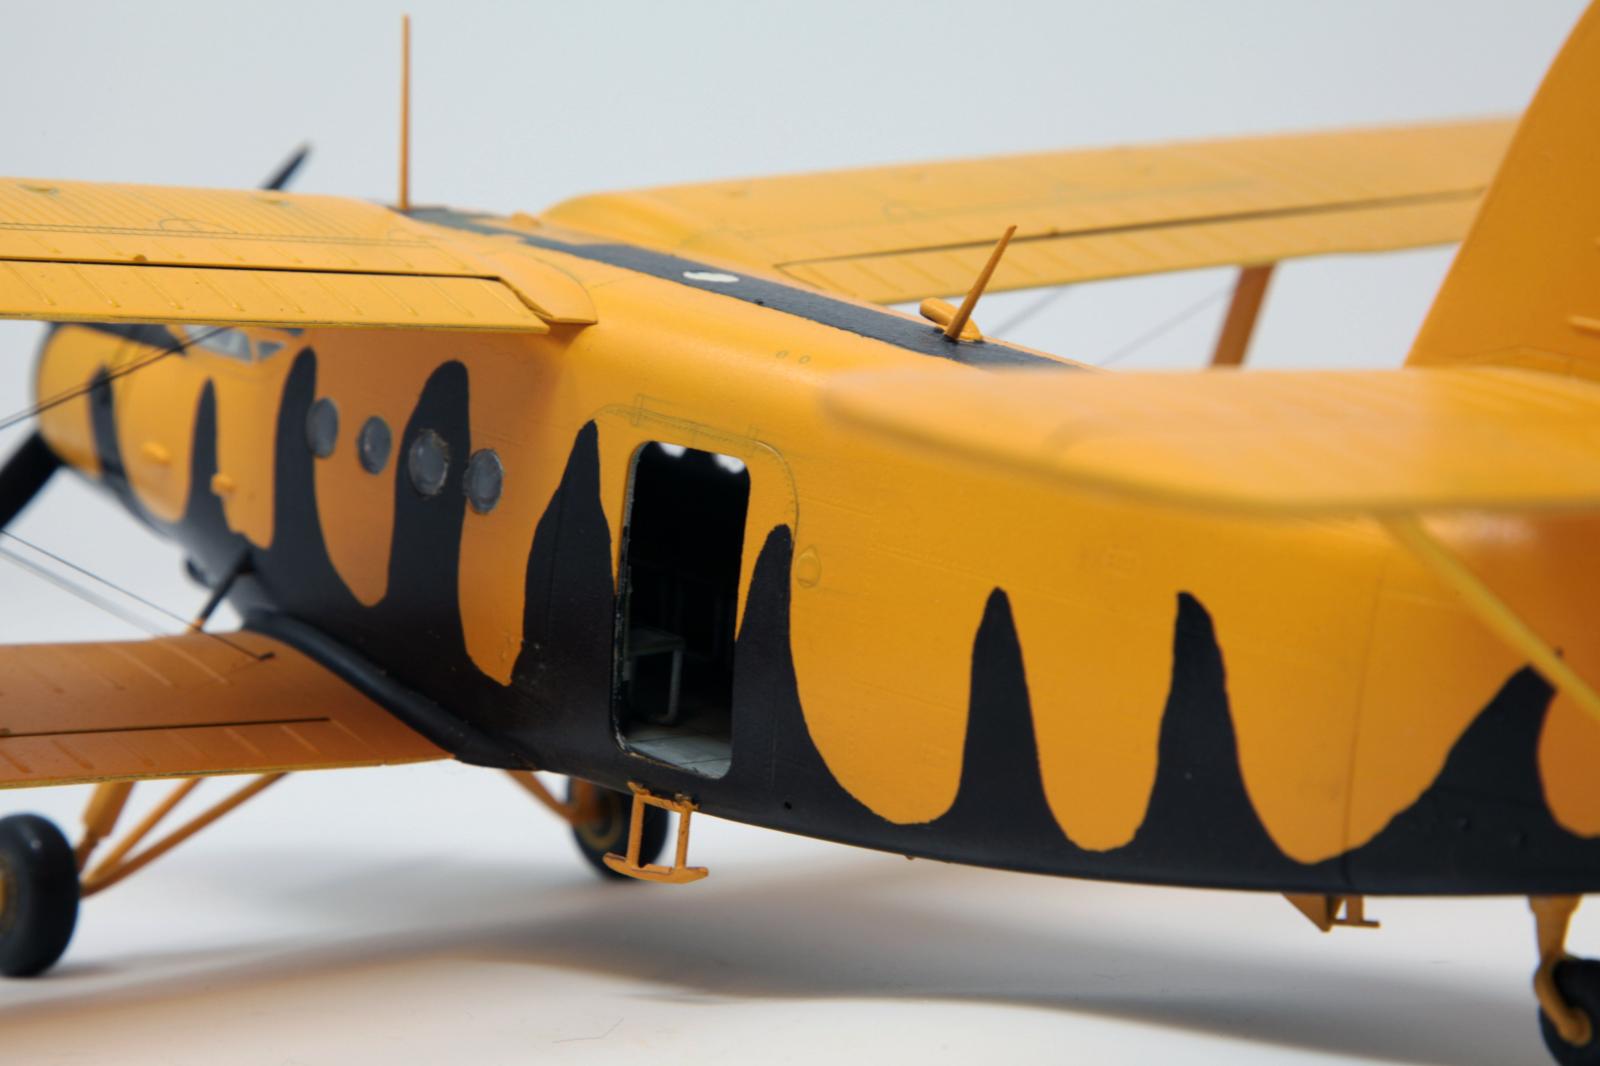
Aftermarket has been, strangely, somewhat scarce for a plane of such massive production numbers. There are many decal options but none of them specify if they are for the Hobby Boss, Neomega or Valom kits and while one would hope that each kit is a perfect 1/48 pantograph of the real thing, every company does everything a little differently. I would exercise caution before dropping hard cash on decals that may not fit properly. A cursory look brings some points of contention: the dorsal cowl intake is topped off by flat sections that look like shutters or venetian blinds. This is actually a mesh / screen. Careful crosshatching will remedy this. The rear door on the real plane is a two-peice affair, with the main door being part of a larger section that swings up. When it swings up, the main door is opened and propped against the side of the aircraft, probably to keep the large, upwards-swinging section from falling down. Thanks, Antonov! unfortunately, Hobby Boss has molded the hinges for this assembly as just another panel line. If nothing else, the hinges should at least stand proud of the surface. Rivets. The real plane is so awash in rivets that it's comparable to 80 grit sandpaper. On the model, they are neatly engraved. Well, you can't please everybody, but you really must do everything you can to bring attention to the rivets. The real plane is assembled like a cast iron boiler. Just ahead of the circular oil cooler on the underside of the cowl, there is a port that is molded shut. This port is typically open on parked aircraft in order to hang a can with which to catch oil. If you choose to keep this closed, you should at least scribe it much deeper the shallow representation in the kit. Either way, that's where a lot of oil comes out. Weather appropriately.
Now, some shortcomings. The engine supplied by the kit is basic and there's no "plumbing" represented behind where the kit puts a firewall, which is unfortunate if you keep the cowl flaps open. Engines And Things makes a Shvetsov M-25/ASH-62/ASZ-62/HS-5. If you're so inclined, use that instead. The kit is missing the firewall ahead of instrument panel, which is, again, unfortunate as it allows you to see through to the cockpit. The larger door needs to be scribed more to represent a door instead of just some panels. There's no rivet detail on the outside of the passenger door, and there is no structural detail on the inside of that door either-- but the door swings inwards and to the rear, so there is no way you'll see it. The rearmost starboard window is present on the real craft, but the kit places the rear bulkhead in such a way that it bisects the window. Wrong again! This window provides illumination to the area aft of the rear bulkhead, and since the doors leading to this area are molded shut, paint the backside black and then overspray with whatever interior color you're using. The spine of the aircraft is coated in an anti-slip substance. Here you can take a page from the armor modeler's book of secrets and-- with a lot of masking-- coat this area with something like Krylon stucco textural spray paint. The kit makes no mention of rigging, which the AN-2 does have. I eyeballed the locations of the rigging holes and used some of Bobes E-Z line for the rigging. Fortunately, the locating posts for the interplane struts roughly correspond to the actual locations of the bracing wire, so if you're careful and loop the line around the post before you cement it in, it'll be right where you want it. Not pretty, but it looks the part. Keep in mind, if you do use Bobe's E-Z line, it doesn't react well to Tamiya spray paint, so you should leave off the interplane struts (it's fine! the wing joints are pretty strong!) until you're done painting between the wings and then slide them in.

The wheeled/ski version comes with a different lower wing, with inserts to provide mounting points for the landing gear. If you're very careful, you don't have to (nor should you) glue the gear in-- leaving it possible for you to swap the wheels out for the skis at your whim. Yes, the struts for the gear and the skis are different, but they attach in the same manner. Neat!
Construction was without major drama. There really, truly, is no excessively fiddly aspect of construction. The AN-2 is a tough ox of a plane, and this translates well to a scale model-- all of the joints are secure and snug, the tab-slot arrangement for the stabilizers and the rear tail are chunky and strong.

Weathering
The real plane is powered by a direct descendant of the Wright Cyclone, and as befitting both a bush plane and a peice of 1930s era technology, there's dirt, soot and oil EVERYWHERE. Even if you are modeling a pristine, gloss-coated bird that's been lovingly cared for by its very rich owner, it'll have oil and soot all over it. Aeroflot craft and military Colts wind up making Skyraiders look clean. Do not hold back.
Painting
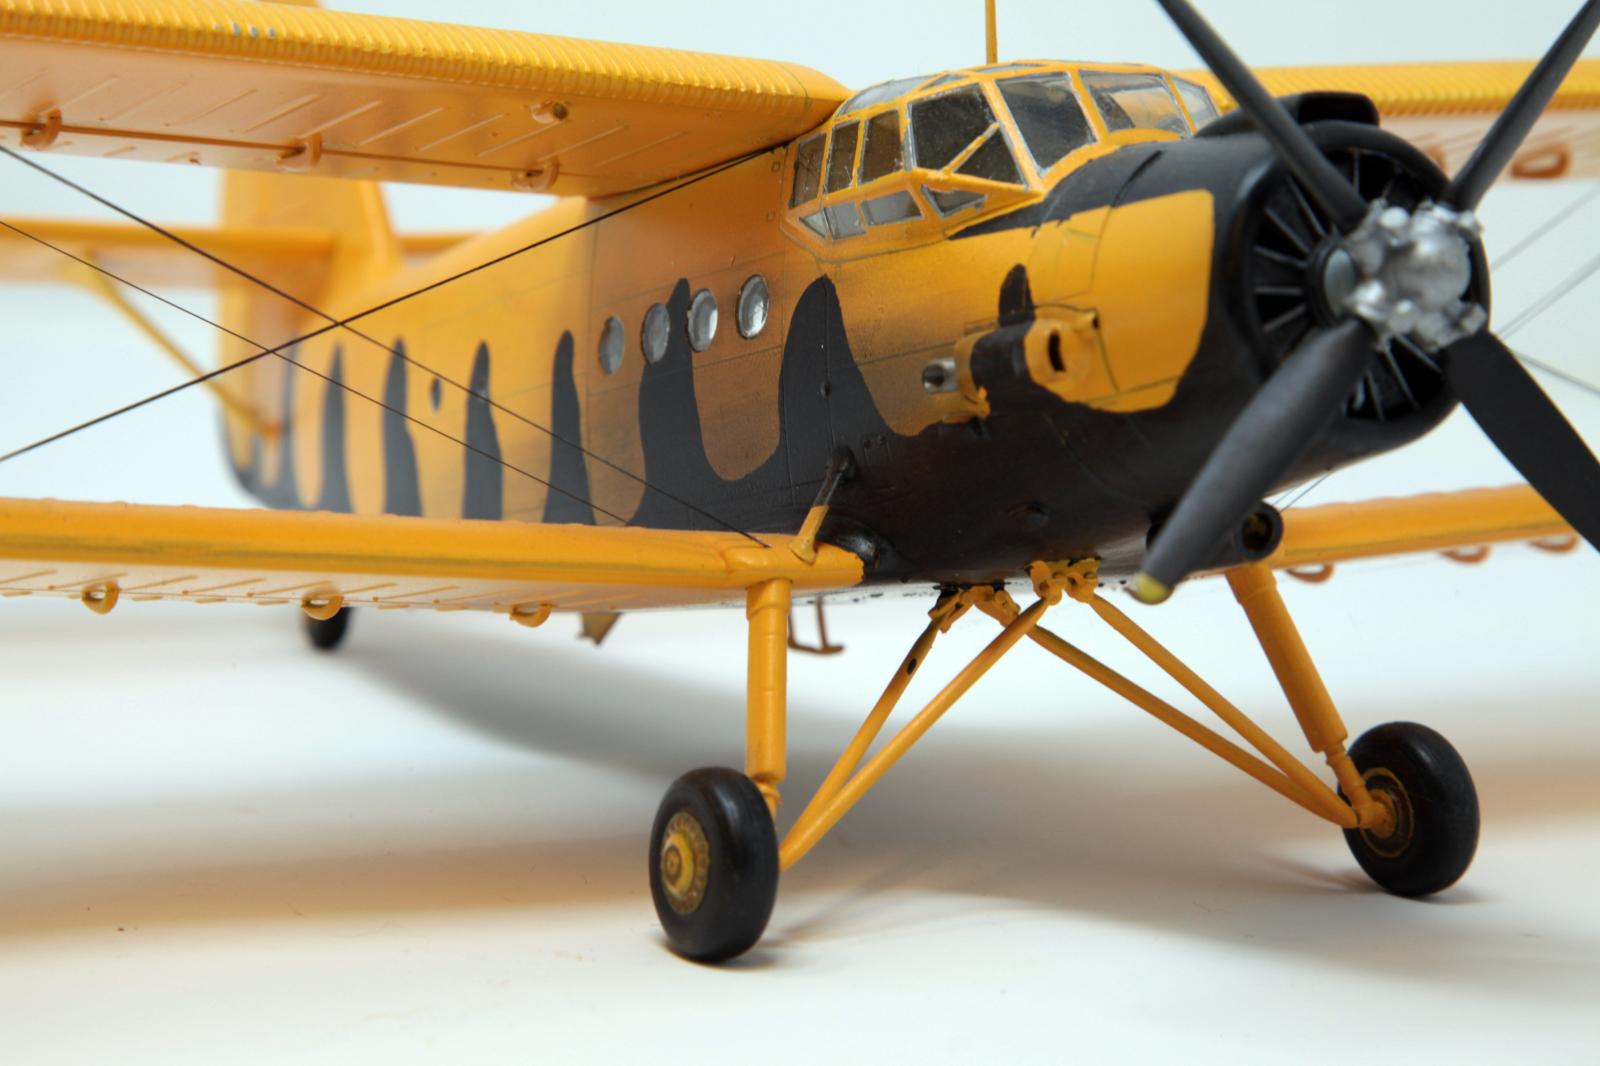
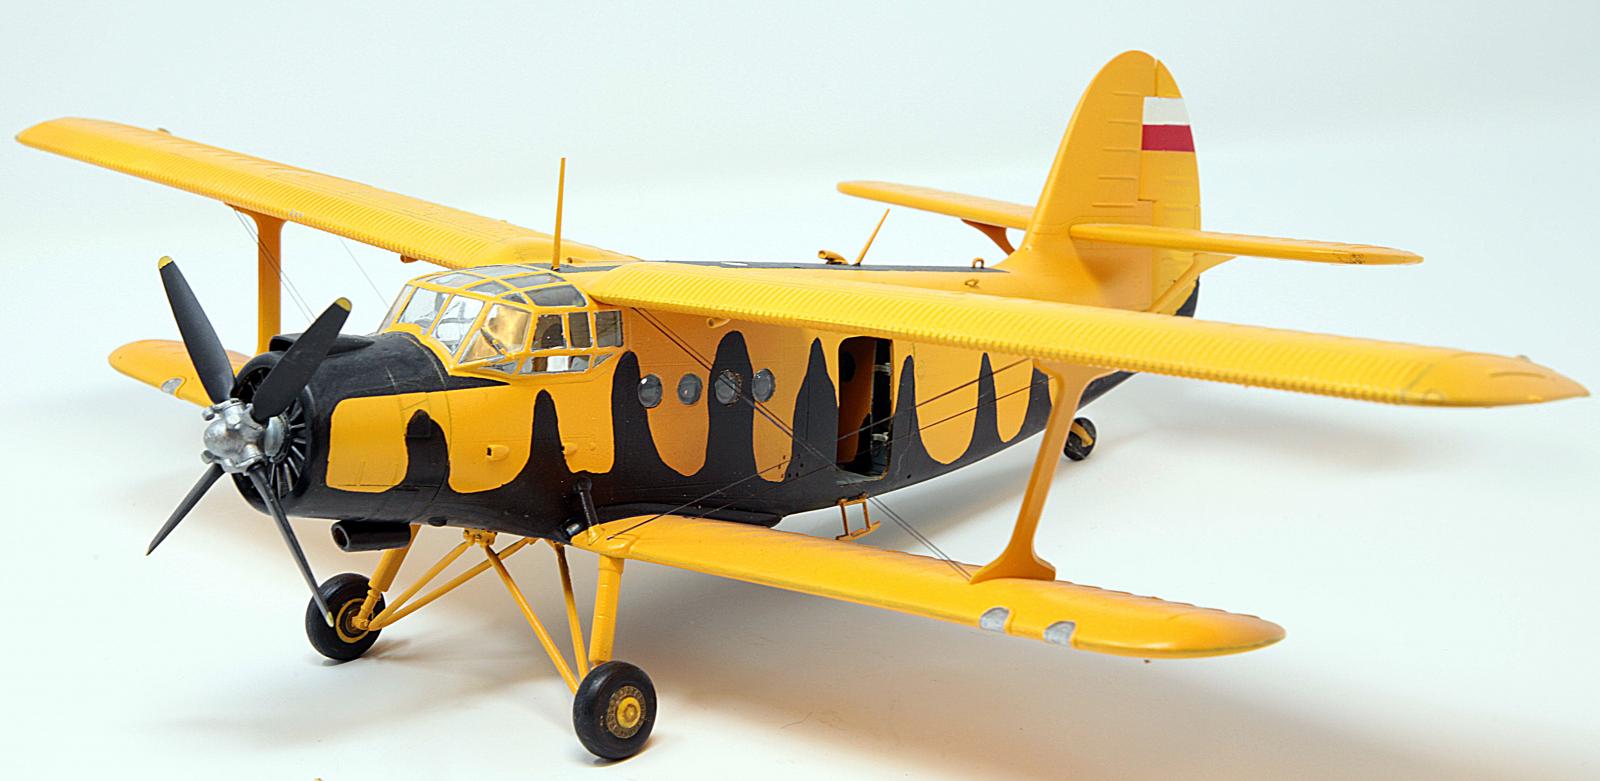
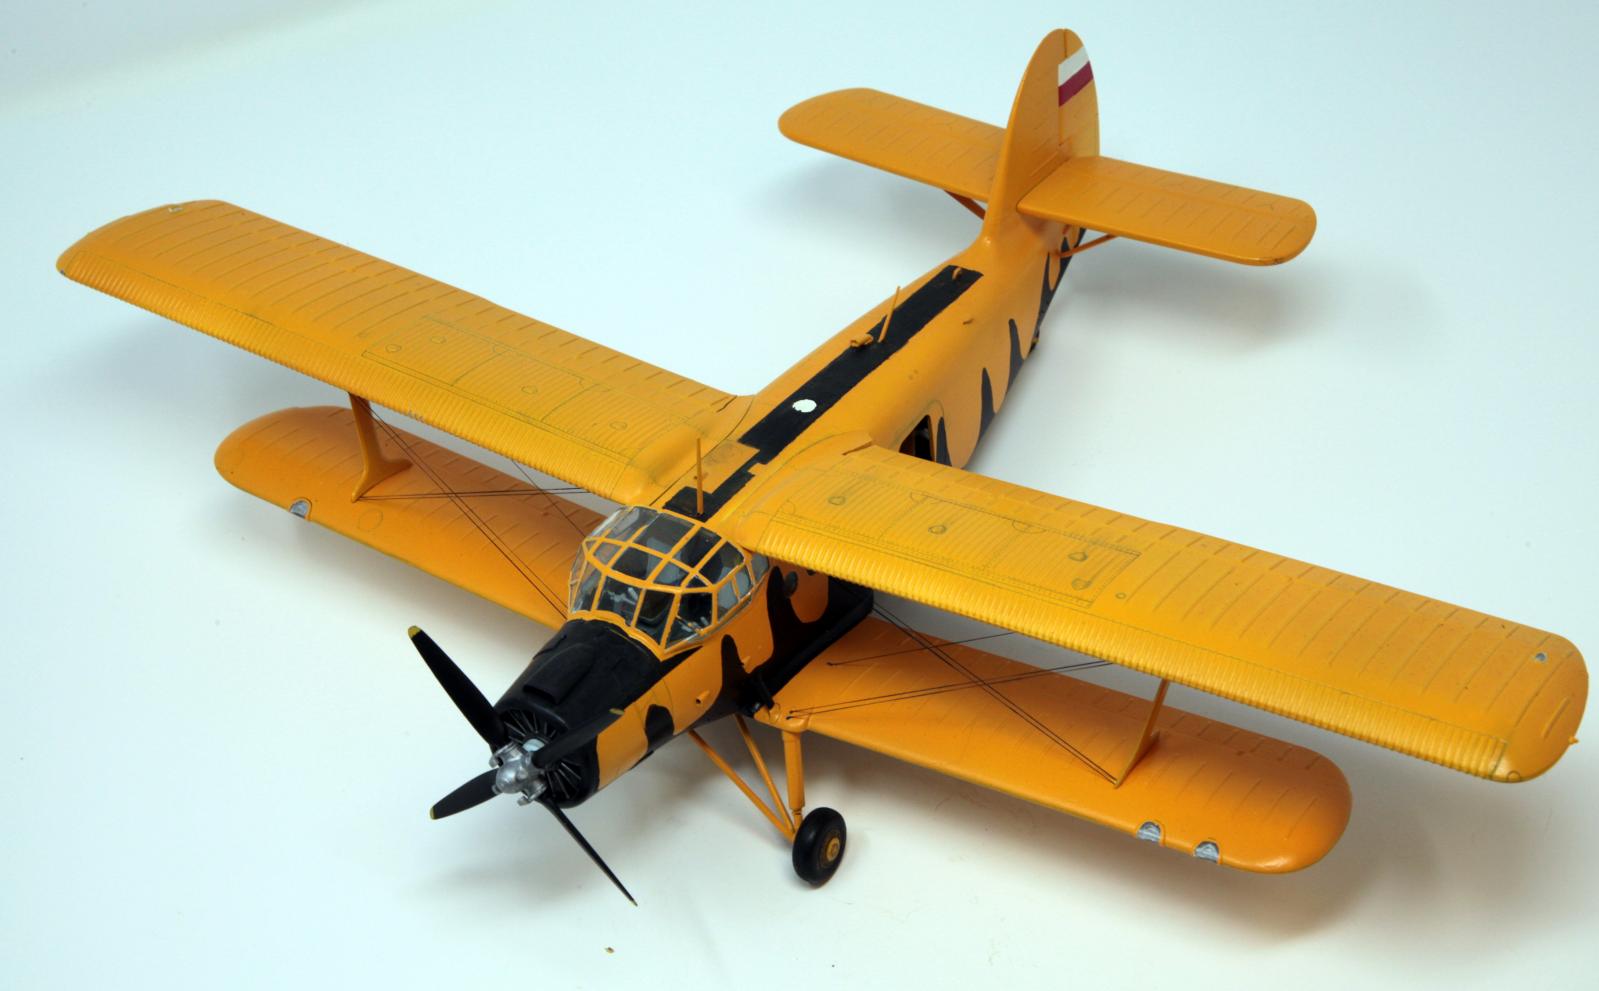
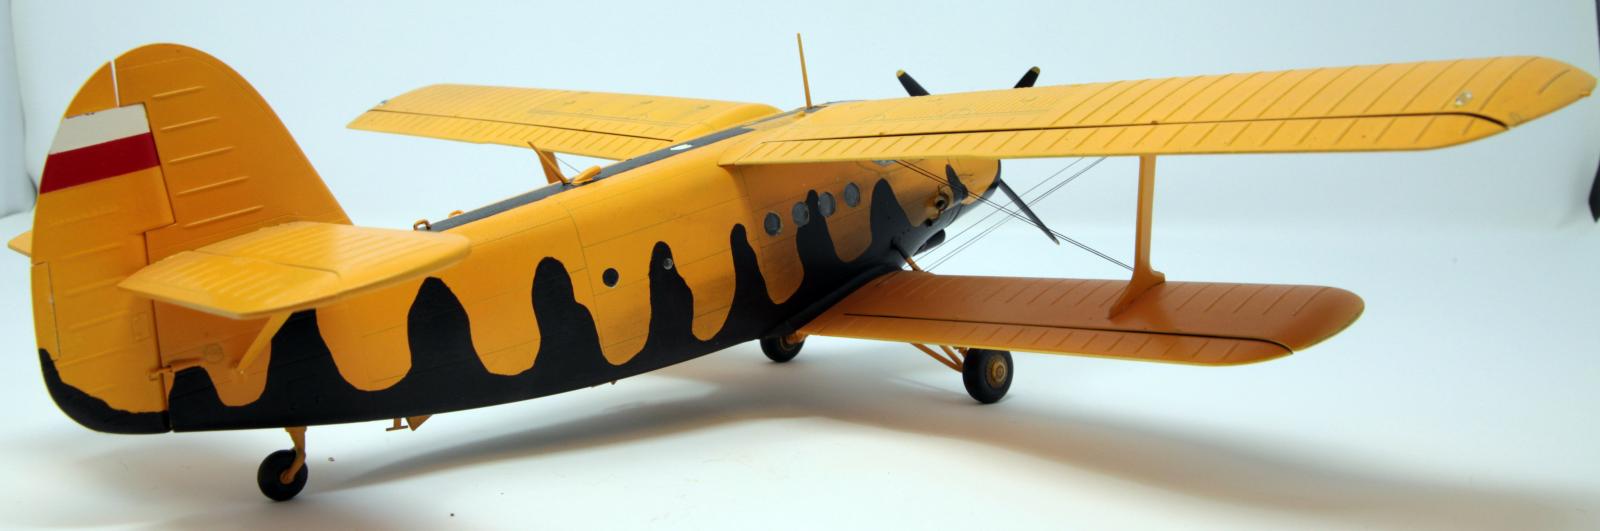
I chose SP-ANW, a Polish Colt doing agricultural work in Tunisia. This craft sports striking black tiger stripes over an all-over yellow paint scheme. "Aw heck, I can do this!" I thought. Another selling point? NO STENCILS! The only thing that I need to work on for SP-ANW's paint job is the registration on the tail and that's easily cobbled together from the decal dumpster. Prime with Model Master white primer, mask, spray the tail with Tamiya Italian Red, mask, prime, spray half a can of Tamiya Camel Yellow in multiple thin coats, wait for the paint to cure, sand down with some extremely fine sandpaper, spray the other half of the can of Camel Yellow. Once the final coat of Camel Yellow is fully cured, it's time to deal with those tiger stripes. As I had absolutely no faith whatsoever in the grip between Model Master primer and Tamiya spray paints, I figured masking and spraying would be an uncomfortable gamble. Instead, I started to paint the outline with Polly Scale Flat Black. This did not go on well-- it wasn't entirely opaque and it had a tendency to run-- so I used it to mark the outline of the tiger stripes. I then let the plane sit for a week while I mulled over what to do. Build up multiple coats? Nah, I'd lose surface detail. Airbrush? Ha! I was nowhere near that good, and besides, the stripes are sharply demarcated. Hmm. It's a little odd... but what if I... used a calligraphy pen? It's not fancy-- just a typical Faber-Castell brush pen you can get at any craft store-- but the base for the ink is india ink, so I know it'll be black as night. But will it grip the surface I'm applying it to and not bead or smear?
Yes!
It went onto the previously applied black paint smoothly and evenly, and even applied well to the bare yellow paint. After a very delicate process of finding new and inventive ways of holding the model during the painting process, I had the whole paint scheme completed. To seal things and give a more unified finish, I sprayed the model with a coat of Krylon workable fixatif. This stuff is great-- it provides a smooth, semigloss finish that takes weathering well, and it comes in gigantic cans!
Very cool looking model
Very cool model of a very strange airplane
Nice build and very nice scheme, Wes!
Great accompanying article!
Nice work.
You have made a very agricultural airframe look quite attractive.
Proof that slapping tiger stripes on anything makes it look 100 times better.
An attractive scheme and great build, Wes.
Well done.
Very nice! I've got one of these on floats in the stash, and I'll take your advice about oil, soot and weathering!