Three Me 262s Part 2: Me 262A-1a/U3
As indicated by the title, this is the second of three Me 262s built simultaneously;
- Dragon Me 262A-1a/U4
- Hobby Boss Me 262A-1a/U3
- Tamiya Me 262A-1a
The Me 262 was a natural candidate for a high speed reconnaissance platform and development was proposed in September 1942 and a mock-up completed in February 1942. Further development of a reconnaissance version was necessarily delayed by technical issues with the fighter version, principally the delays in development of reliable engines.
From mid-1943, further proposals were developed that required extensive modification of the airframe. The program gained some momentum in early 1944 when the technical issues were largely resolved and in May the decision to build three experimental aircraft with minimal modification of the standard airframe was made.
Two reconnaissance versions of the Me 262 were planned;
• Me 262A-4a "temporary". This designation eventually changed to Me 262A-1a/U3, although the former continued to be used in some official documents. As indicated by the U3 designation (factory modification 3), the former aircraft involved minimal changes from the fighter version in order to not affect Me 262 mass production efforts. These modifications were largely confined to the nose section, with the main fuselage modifications being limited to the rear part of the bulged fairings for the camera bay and the necessary camera controls in the cockpit. Intended armament for this version was a single 30mm MK 108 canon in the nose, but this was later dropped only for NAG 6 to add one as a field modification to at least some of its aircraft.
• Me 262A-7a "definitive". A general reorganisation of all Me 262 model designations resulted in this becoming the Me 262A-5a. was a more extensive design fitted with three cameras and armed with two MK 108s plus one 20mm MG 151/20 in the lower nose. Later this was changed to two cameras and two MK 108s. While the Me 262A-1a/U4 has simple square windows for the cameras, there were plans to develop sliding covers to protect these windows on the definitive version. In the end, no Me 262A-5a were manufactured.
The Me 262A-1a/u3 entered service with NAG 6 (Nahaufklärungsgruppe 6 - Close Reconnaissance Group 6) in February 1945 and with NAG 1 in March. On 31st of March, an order was issued for NAG 1 and NAG 6 to transfer 14 Me 262s to III./EJG 2 (Ergänzungs-Jagdgeschwader 2 - replacement training squadron 2) and a number of these were discovered attached to the unit at Lechfeld at the end of the war in Europe.( Brown, D. E., Poruba, T. and Vladar, J., Luftwaffe Over Czech Territory 1945, Vol IV: Messerchmitt Me 262 Production & Arado Ar 234 Final Operations, JaPo, 2012).
With the nearing of the end of the war in Europe, the US and UK formulated plans to capture examples of advanced German technology for examination and exploitation and jet aircraft were naturally high on this list. To this end, the US created an intelligence exploitation division under the code name LUSTY (LUftwaffe Secret TechnologY). With the end of the war, elements of the 54th Air Disarmament Squadron (Feudin' 54th ADS) arrived at Lechfeld to discover a number of Me 262s and attempted to make 15 of them flyable for transport back to the US. The squadron was latter named "Watson's Whizzers" after its commander, Col. Harold E. Watson.
The captured aircraft were individually named on the port side of the nose by the 54th ADS personnel and most received a "Feudin' 54th ADS" inscription on the starboard side. After being ferried to Melun, south east of Paris, the aircraft were renamed by the pilots assigned to ferry them and the 54th ADS label over-painted (Smith, J. R. and Creek, J., Me 262 Volume Four, Classic Publications, 2000).
At least seven Me 262A-1a/U3 aircraft were found at Lechfeld and were photographically documented. Three were selected for transfer to the US and were quickly made airworthy by the 54th ADS.
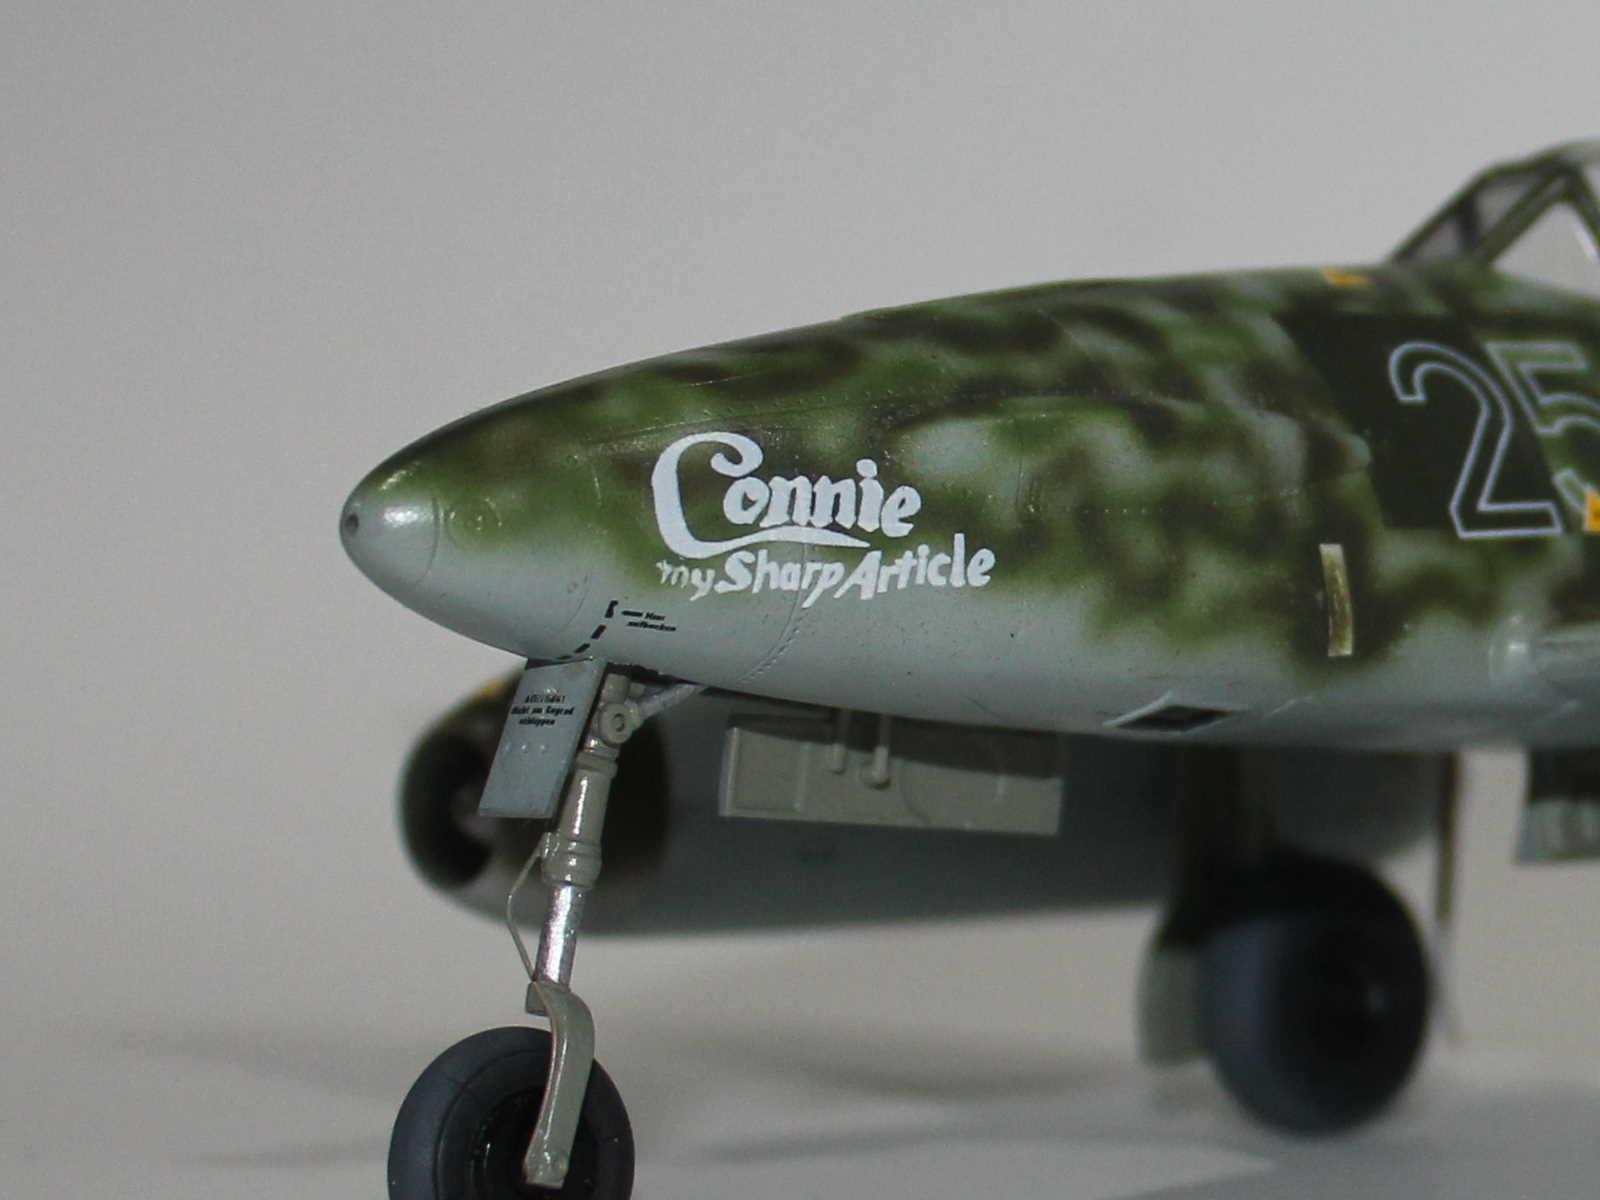
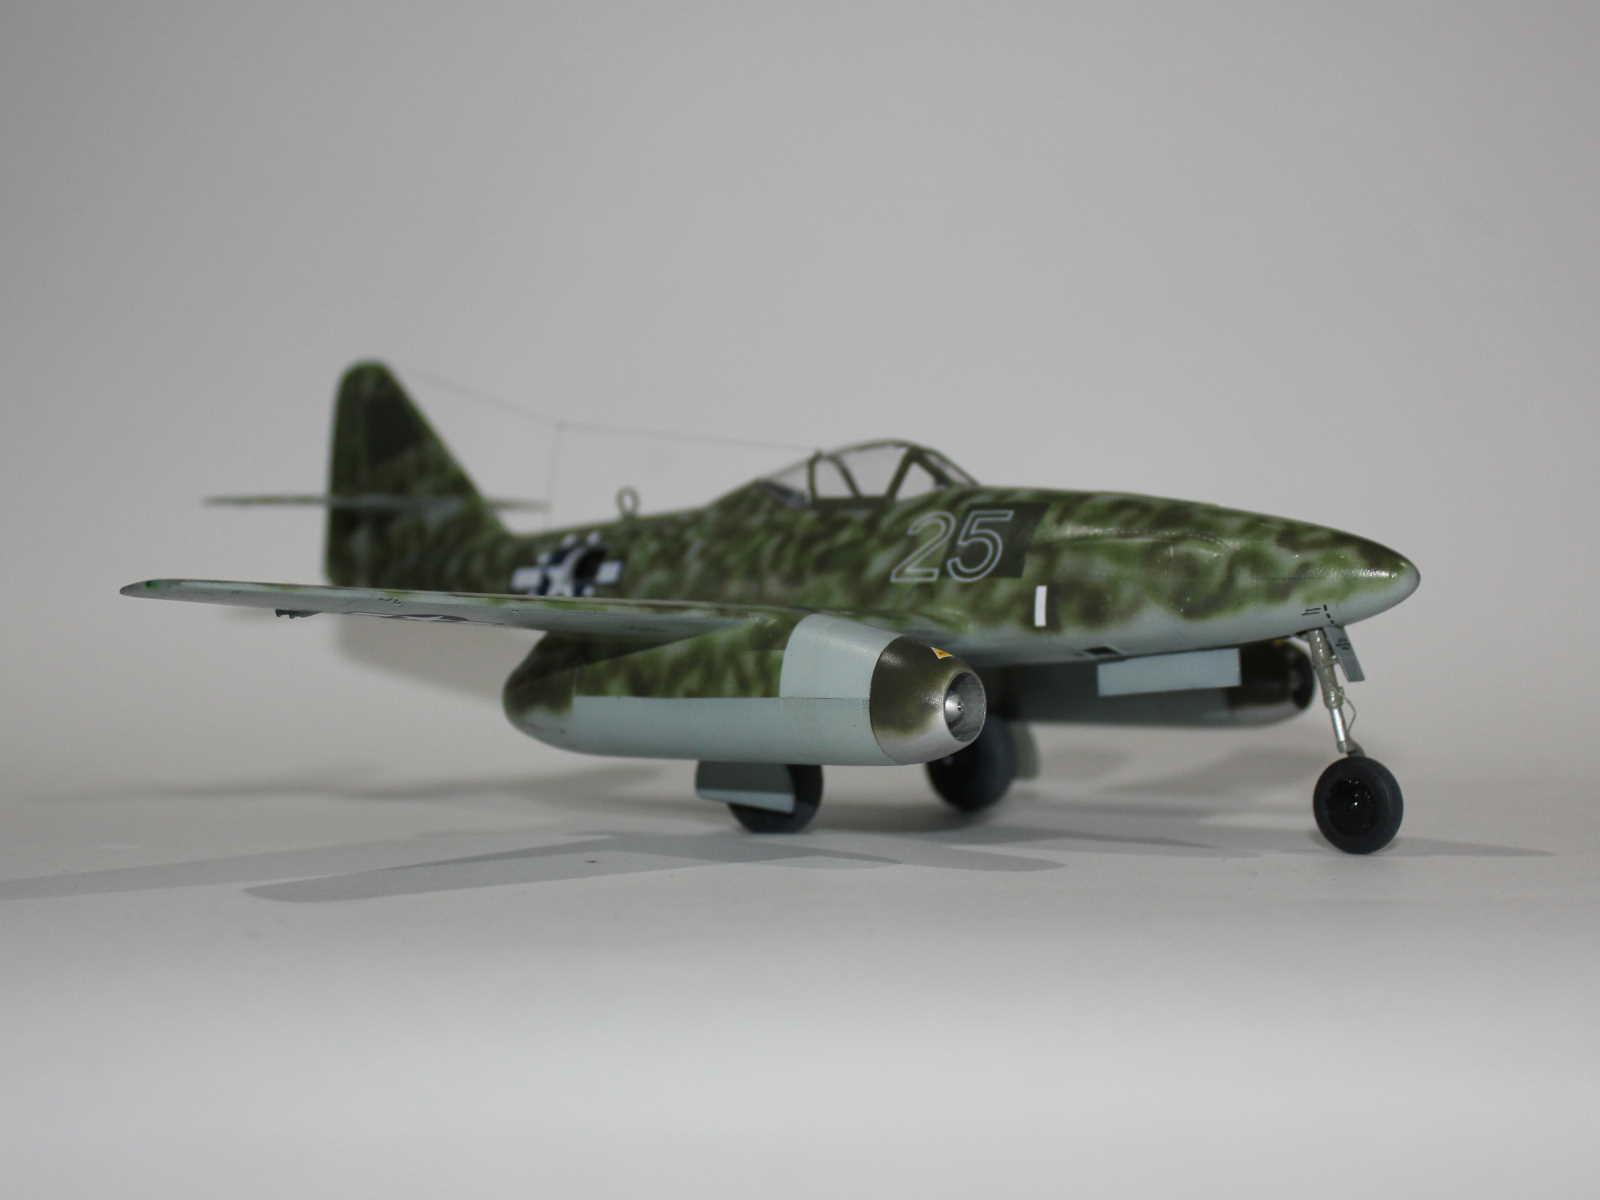
White 25, "Connie My Sharp Article", was one of these aircraft and is the subject this model represents.
The aircraft was manufactured by Flugzeugwerk Eger G.m.b.H (FWE) based in Cheb, in the annexed part of Czechoslovakia. and was camouflaged in a scheme characteristic of the sub-type, overall RLM 76 Pale Blue over which were sprayed meandering scribbles of two green colours, most likely RLM 81 Brown-Violet and RLM 82 Bright Green. The W.Nr. is not known for certain but would have been in the 500xxx series.
There is evidence that the aircraft had been fitted with the field modification MK 108 in the nose, which points to it having been operated by NAG 6. However, it later removed and the opening faired over, as indicated by an oval patch of green on the upper nose, to comply with a 2nd of March order from NAG 6 command to 2/NAG 6 that "prior to production of a photo-reconnaissance version equipped with 2 MK 108s, aircraft will fly unarmed and provisional attachment of the MK 108 gun must end" (JaPo).
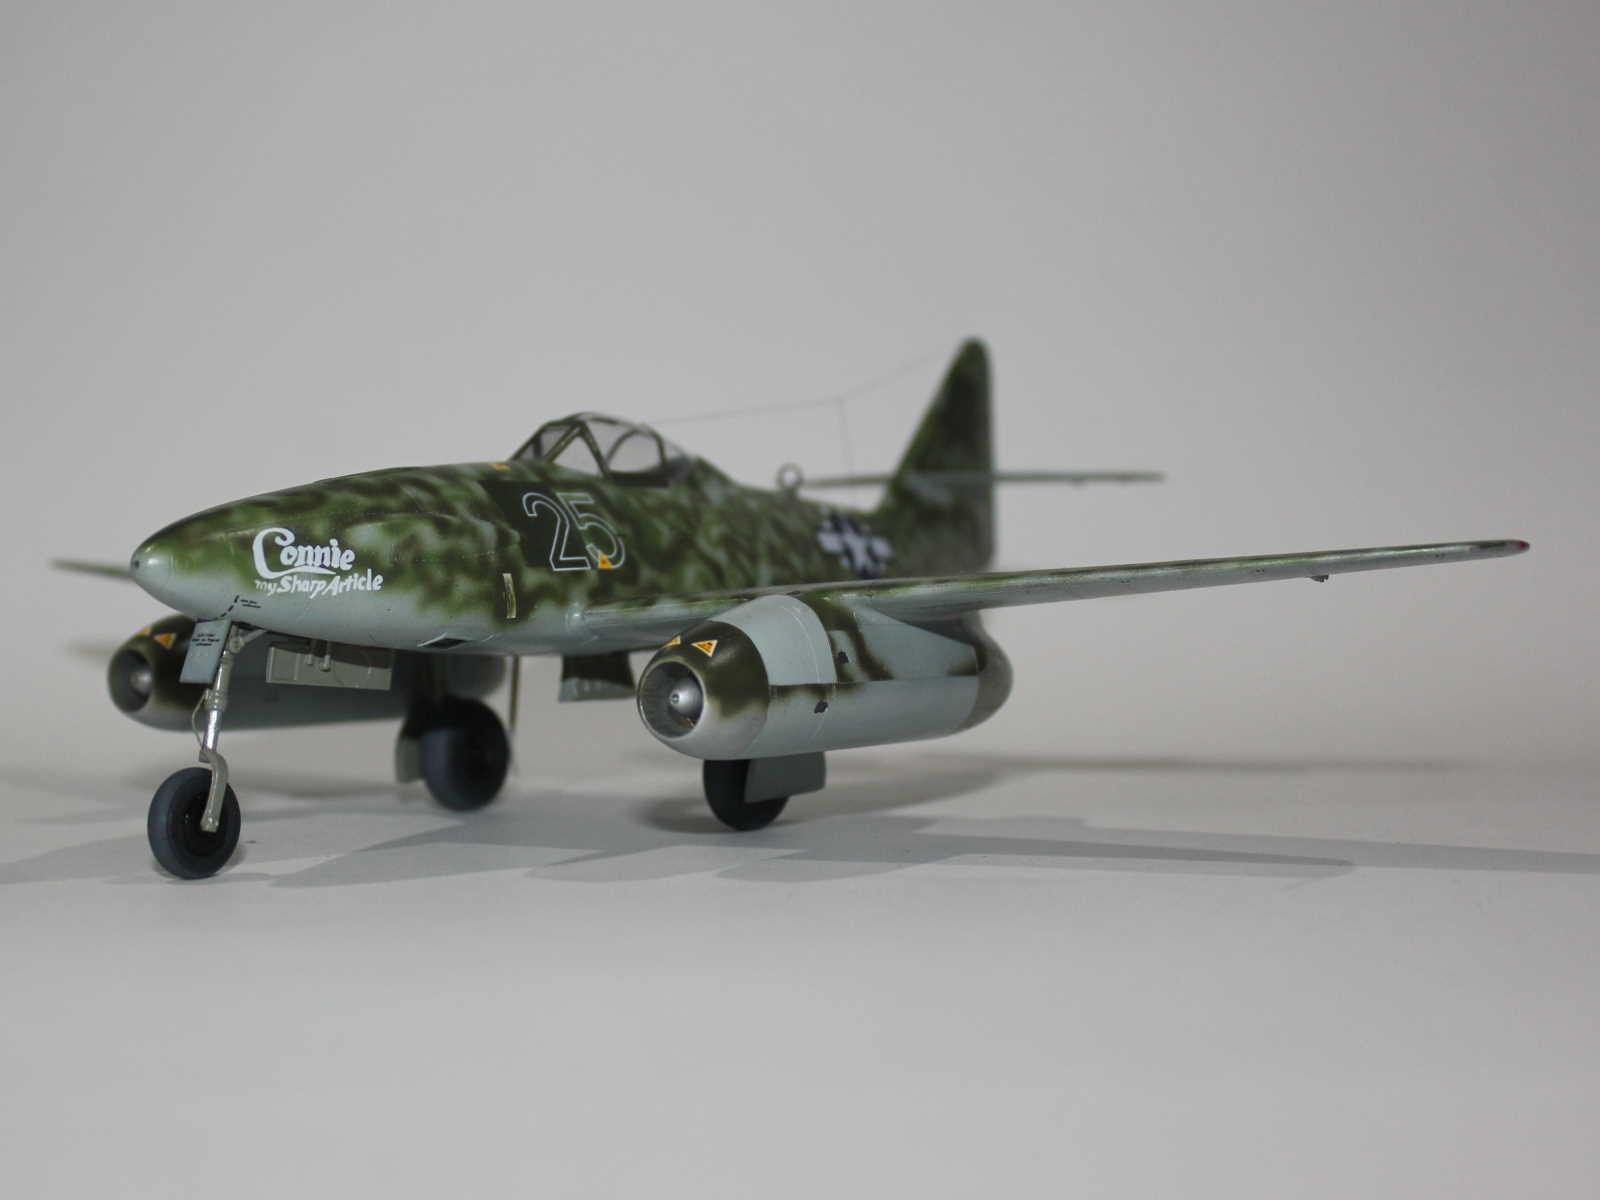
The aircraft is most likely one of those transferred to III./EJG 2 and the individual aircraft number applied by its previous unit, presumably NAG 6, has been painted out as evidenced by the large solid rectangle under the new "White 25". The style of this new number differs from the standard III./EJG 2 format, but is in common with the other six Me 262A-1a/U3s found at Lechfeld.
Otherwise, the aircraft has a mix-match of engine cowling panels, most likely due to the Americans sourcing engines and parts from different aircraft and spares to make it airworthy.
This is an aircraft I've wanted to build ever since I read "Jet Planes of the Third Reich" when I was a teenager (Smith, J. R. and Creek, J., Jet Planes of the Third Reich, Monogram Aviation Publications, 1982). At some stage I purchased the Ventura decal sheet (Ventura Decals V4859, American Captured Me 262's:- Me 262 A-1a/U3, U3 and B-1a versions), which covers this aircraft (and the name change to "Pick II"), Me 262A-1a/U4 "Wilma Jeanne"/"Happy Hunter II" and Me 262B-1a "What Was It?", with the hope of one day building one or more of them.
This kit is something of a curator's egg, being a generally well designed and fitting kit, but with a few odd features and inaccuracies. Hobby Boss have created an aircraft which is a mix of Me 232A-1a/U3 and Me 262A-5a as follows;
• The kit has the Me 262A-1a/U3 projecting blast tube for a centrally mounted cannon.
• Two gun ports are moulded on the lower nose of the fuselage halves and instructions have you add the MK 108s, as for the Me 262A-5.
• The camera ports under nose are solid and incorrect shape. These could be covers that were intended for the Me 262A-5, whereas the Me 262A-1a/U3 had simple square windows.
• The aerodynamic nose blisters over the camera bay sit too low and are too narrow. This could be an Me 262A-5 feature, but I couldn't find any evidence to support that except for a reference to these as being “although larger, these were slimmer and more streamlined than those fitted to the earlier provisional variant” (Smith, J. R. and Creek, J., Me 262 Volume Two, Classic Publications, 1998, and see my build log: https://imodeler.com/groups/work-in-progress-aircraft/forum/topic/three-me-262s/?topic_page=9&num=15). This was the only real disappointment with the kit.
• Curiously, the cockpit tub has tabs that fit into slots in the fuselage sides to hold it in place. These can be seen in the main wheel wells and are both unnecessary and unattractive.
This was part of a three Me 262 build project and details of the build can be seen here: https://imodeler.com/groups/work-in-progress-aircraft/forum/topic/three-me-262s/
A summary of the build is:
• The fit of the parts is generally very good, and any problems encountered were probably my fault.
• I removed all armament for the version I built, filling the two lower cannon ports and removing the central one.
• I corrected the camera ports by sanding them back and opening them up. Clear covers were added from thin, clear acetate.
• The camera bay has basic detail, but I would assume that the cameras had been swapped for some ballast. I wanted a clean look anyway so closed them up.
• The aerodynamic fairings over the camera bays are an incorrect shape and sit a little too low. However, I didn't realise this until too late and I doubt that I would have attempted to fix them if I had seen it earlier.
• I removed the slots and tabs for the cockpit tub and decided to try and hide some of this by adding the missing electrical harness using fine wires, but this didn't work as well as I had hoped.
• No seatbelts are included so I used after-market etched belts.
• Decals are included for the instrument panel.
• The kit has internal parts for the rear fuselage and open access panel so you can view some of the detail. It includes: the main compass, radio boxes and mounting frame and oxygen bottles and mounting frame. I left this hatch open.
• The wingtip navigation lights are solid plastic, so I cut these off and replaced them with shaped clear sprue.
• While the kit includes a white metal nose gear bay to prevent tail sitting, this is barely sufficient and a knock or less than flat surface will have the aircraft on its tail – I recommend adding more weight here.
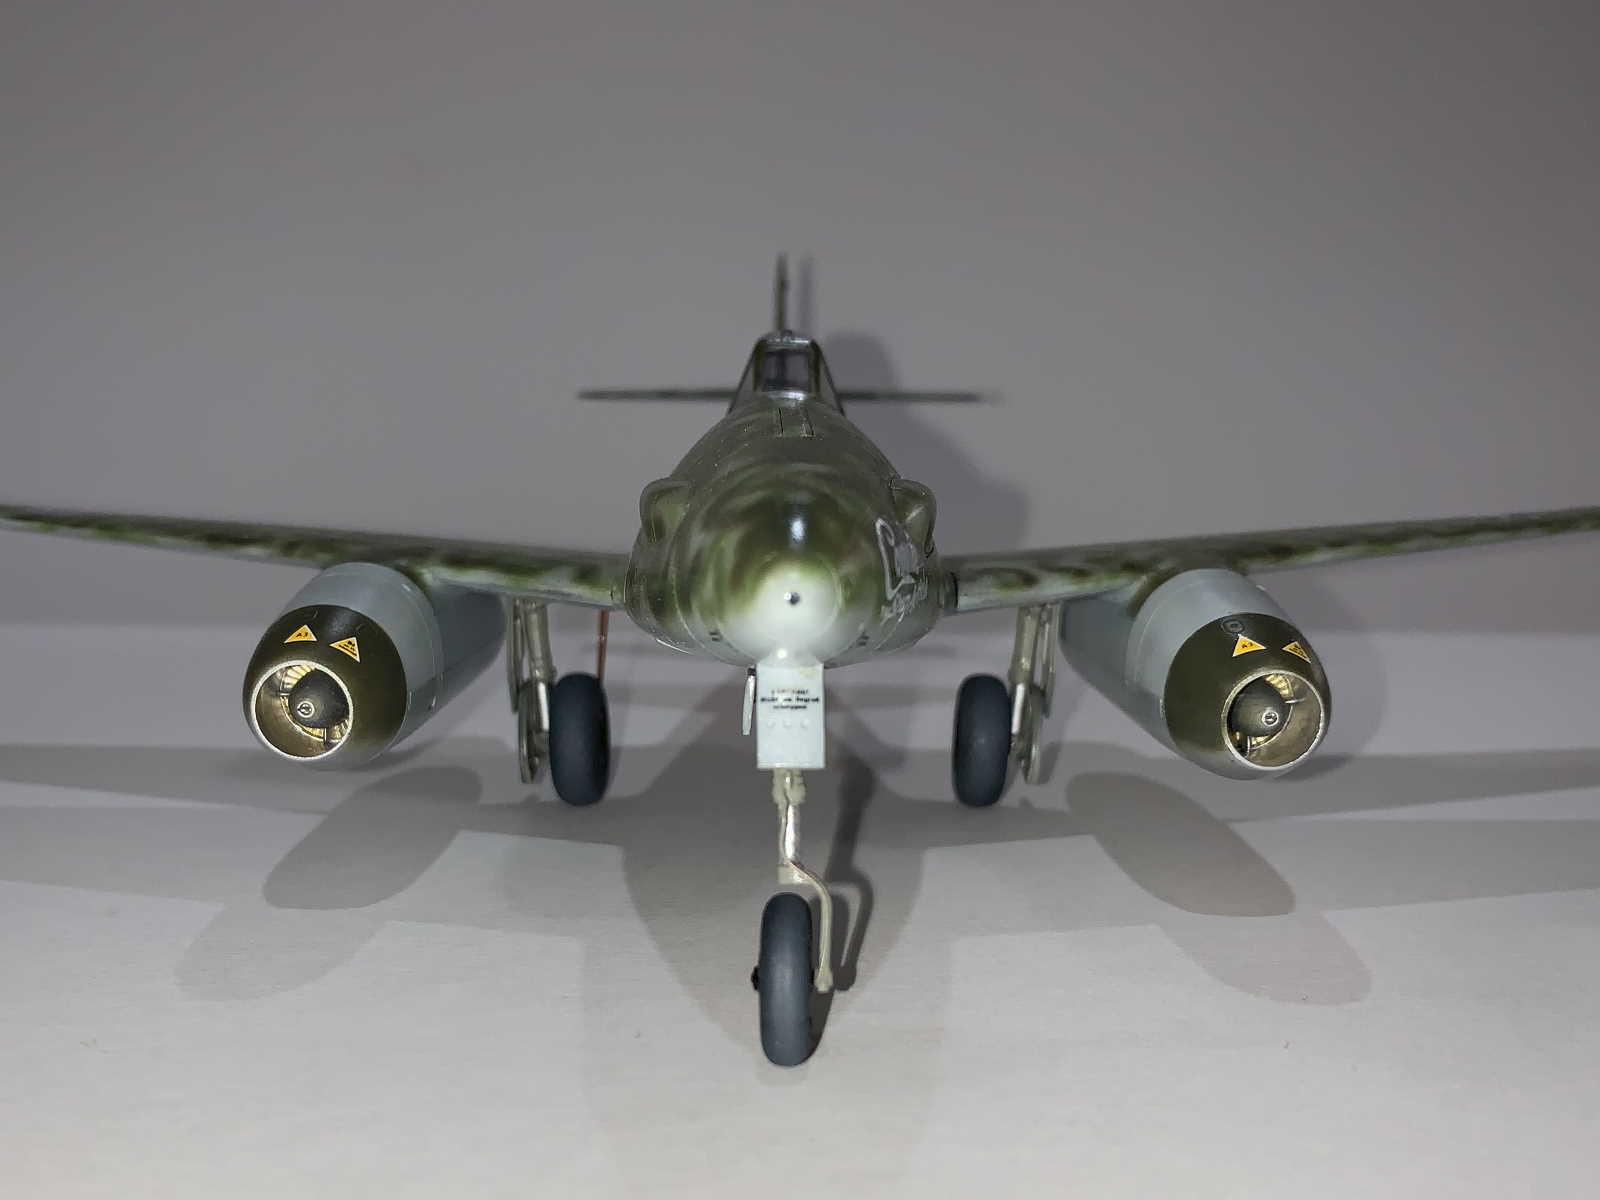
• A nice feature is that, unlike the Dragon kit that has single piece engine intakes (awkward to paint), the engine intakes are split between the intake and duct (which can easily be painted silver) and the compressor face (gold) with the starter motor "bullet" cover (silver).
• Unlike the Dragon kit, the undercarriage and associated covers are very well engineered.
• I added a short section of thin copper wire to the rear canopy and attached aerial wire using Infini Model Fine (0.082mm) Aero Black Rigging line, the first time I've used this product.
My interpretation of the aircraft's colour scheme described above is as follows:
The aircraft was painted overall Gunze H417 RLM 76 Light Blue with a scribble of H422 RLM 82 Bright Green. A further scribble of H421 RLM 81 Brown-Violet was sprayed over that.
The rectangles under the "White 25" that covered the previous aircraft number and the patch on the nose where the MK 108 was removed were painted H423 RLM 83 Dark Green. That essentially completes the colours when in service with III./EJG 2.
The JaPo book includes a photo of this aircraft being flown post-war with its new name on its nose but with full German national markings retained. A second, later photo shows the under wing national markings over painted with a light colour, for which I used a lightened RLM 76, and the tail swastika painted out with a dark colour, for which I used H64 RLM 71 Dark Green.
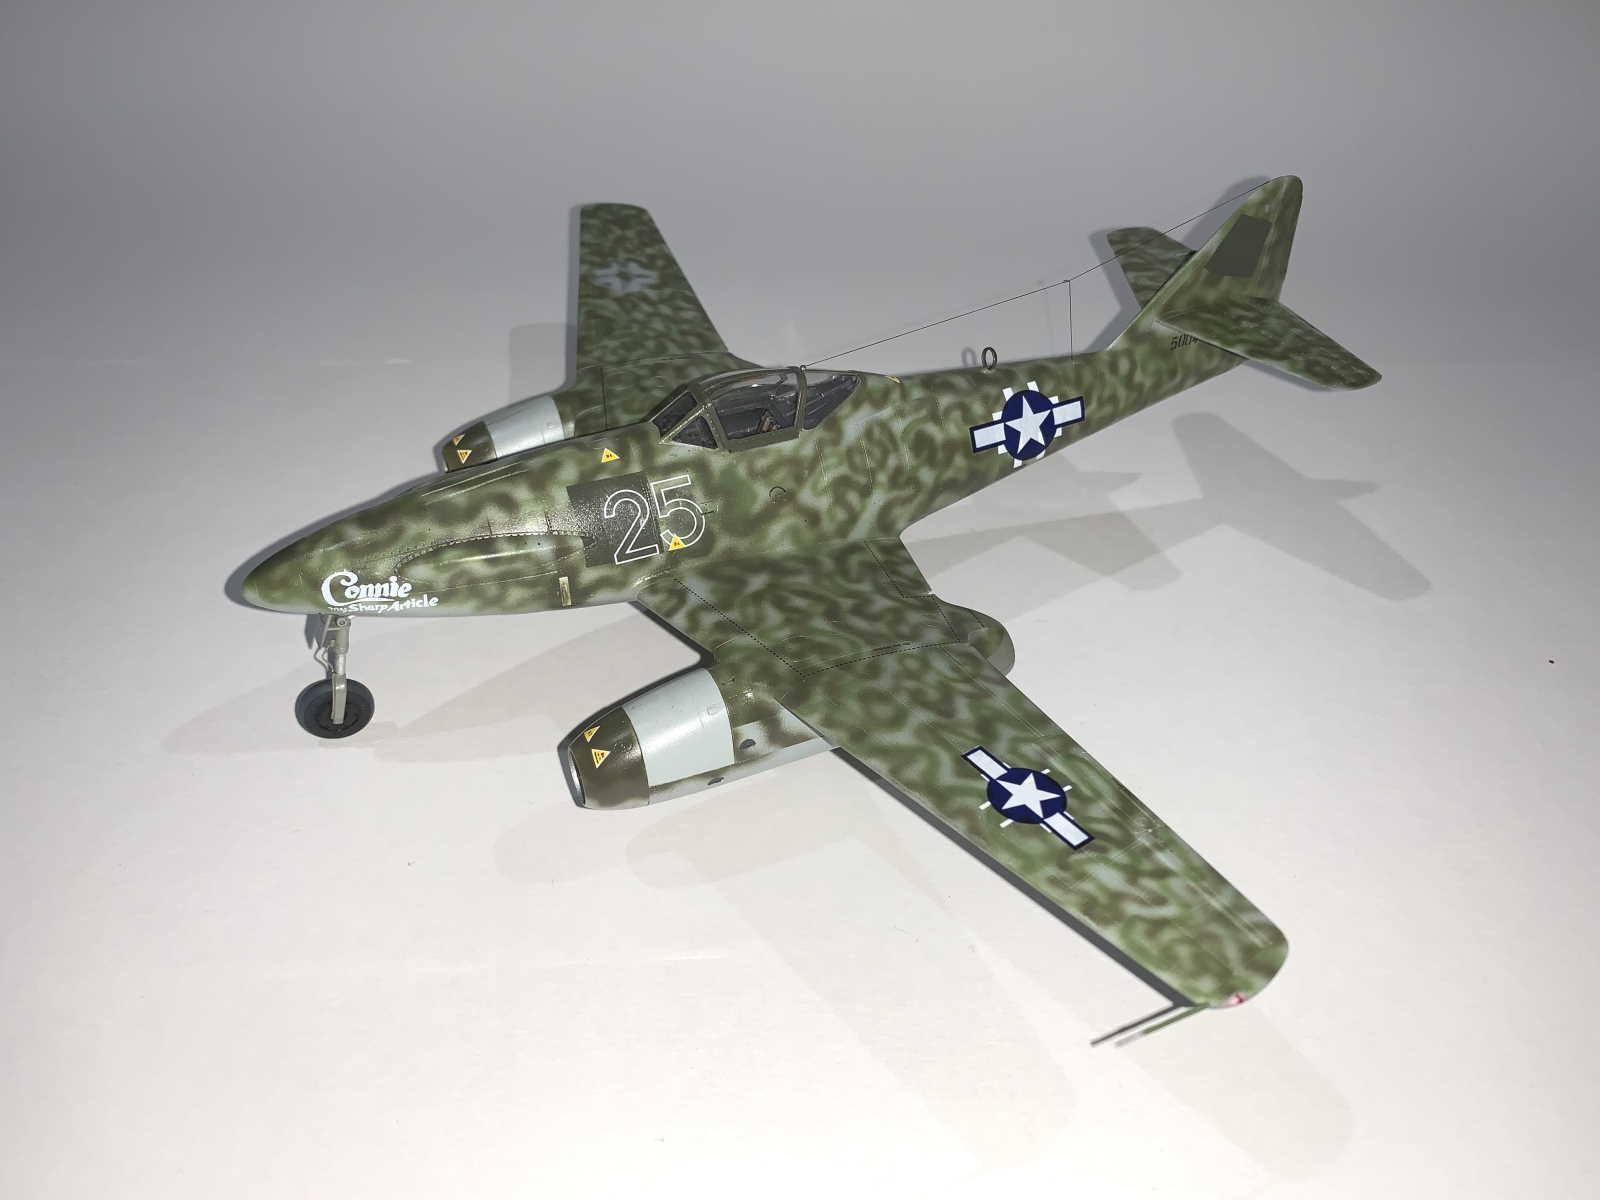
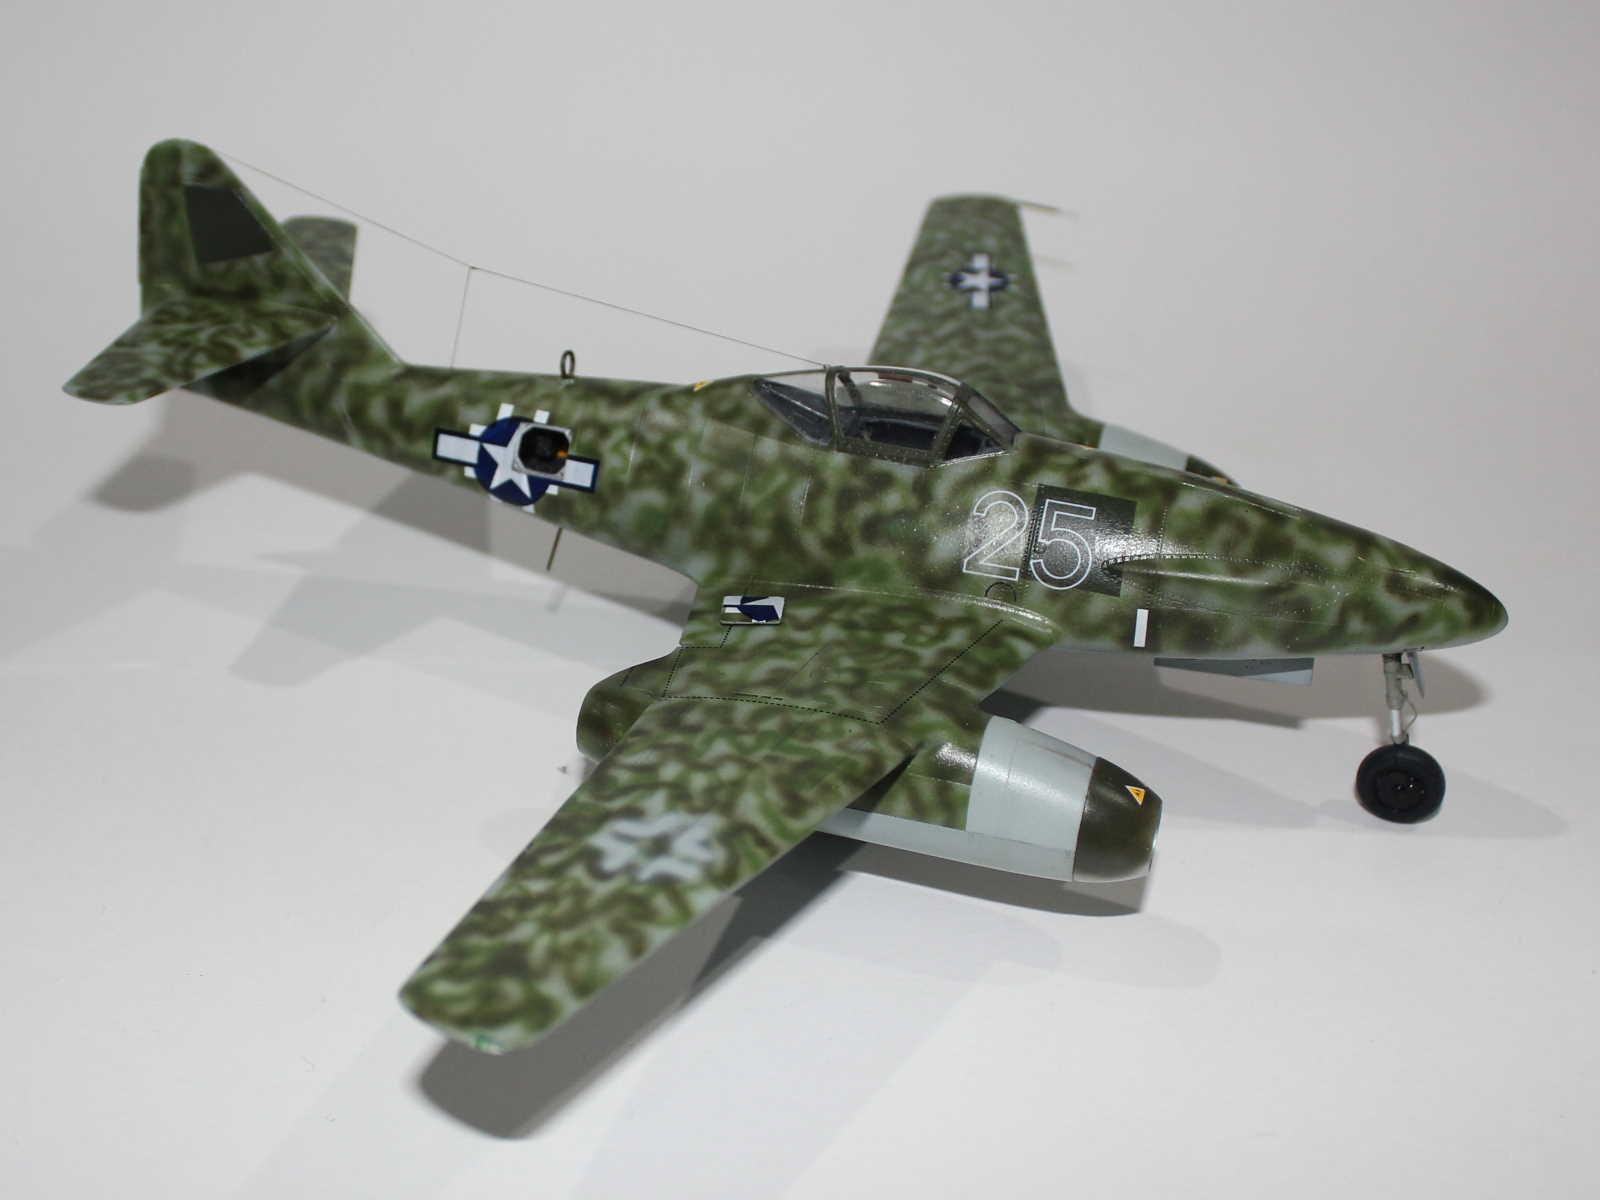
This second photo (see also http://silverhawkauthor.com/axis-warplane-survivors-german-aircraft-part-iii-junkers-ju-290-to-messerschmitt-me-261_566.html) shows that the American star-and-bars insignia were applied directly over the fuselage crosses. I chose to do the same for the fuselage and port upper wing crosses and apply the German crosses and then the US stars and bars. However, I decided to mask and spray, and then overspray, the starboard upper wing marking with the lightened RLM 76. This gives a defined cross shape showing under moderate overspray that I like.
This photo also shows the mis-matched engine nacelles and I paid particular attention to masking and painting to replicate what I saw. I interpreted the engine intakes as being natural metal with a rough overspray of RLM 81 on the top surface. The upper cowlings behind the intakes were painted a lightened RLM 76 and the rear port engine, which is darker, I painted H70 RLM 02. The starboard side of the engine nacelles are not visible so I decided to paint the starboard nacelle outer under-wing panel as it would have been painted at the factory, with a continuation of the upper surface scribble. The starboard under-engine panel was masked off and left RLM 76 to represent a replacement part.
The name of this aircraft has long thought to have been "Connie the Sharp Article" and the decal sheet reflects this. Later research established that it was in fact "Connie my sharp Article" so I cut out the "the" and applied the decal and then hand painted the "my".
Most aircraft collected by the 54th ADS had a stencilled "Fudin' 54th A.D.Sq." applied to the starboard nose, but a head-on photo of this aircraft (JaPo) does not show evidence of this, so i didn't paint on as I did for the Me 262A-1a/U4 "Wilma Jeanne".
While the W.Nr. of this aircraft is not known definitively, it is thought that it may be 500453 (http://forum.12oclockhigh.net/showthread.php?t=44720&page=2). I decided to add this under the port stabiliser using a mix of W.Nr. digits from another Me 262 decal sheet.
The remaining stencils and the and white pieces of sealing tape on the nose were kit decals.
The tyres were painted over-all Tamiya XF-85 Rubber Black, which was then mixed with white and sprayed around the circumference to give a worn look that I am quite happy with.
This was one of three Me 262s I built for a club competition and, due to the resultant timeline pressures, I only applied minimal weathering.
In spite of the few problems and accuracy issues, I really enjoyed this build and am very happy with the result - it looks like the aircraft it represents, which was the goal of the build.
The Hobby Boss kits are the only current out-of-box option for the more exotic versions of the Me 262, so I may buy and build more in the future.


This is an amazing 262, Michael, that I had the pleasure to foolow through your triple build thread.
Your accompanying article is really detailed, a great reference for anyone having interest on this type. Thanks for sharing.
Congratulations!
Thanks Spiros (@fiveten),
It was good to have your company during the builds.
Fantastic research and attention to detail has resulted in a truly authentic model of this unique aircraft, definitely liked.
Thanks for the comments, George (@chinesegeorge).
I have two hobbies, buying model kits and planning to build them and buying books on aircraft so I can research the aircraft I'm planning to build.
Sometimes the plans come together and I end up with a completed aircraft (or three).
I followed your thread with a lot of interest.
Also this one ìs a work of art, Michael.
I do have that same Hobby Boss kit and am eager to start with it when seeing yours.
Thanks for sharing all this background information.
Thanks John (@johnb),
Good luck with your build.
I look forward to seeing it completed.
Great job, Michael! Your extensive research has really paid off.
I am currently working on this kit and I hope mine turns out as nice as yours. I'm thankful you mentioned the incorrect camera port/windows before I put paint to mine.
Again...very nice!
G'day Gary (@gwskat),
Thanks for the kind comments.
If you look at the first page of the WIP blog you will see a photo, from the JaPo book, of the actual camera port.
I look forward to seeing your completed build.
Superb paintjob! Very realistic build too. Liked!
Thanks Michel (@michel-verschuere).
Michael, @michaelt
This is a wonderfully detailed article, and I especially like how you spelled out the differences between the various 262 types in an easy to read chronological order. It is also very good to know about the "little things" with the kit, that are not as good as they could be, and what has been done to correct these minor problems. I also like how you have included the resource books from where you obtained this gold mine of information.
I have been following your triple 262 builds with a lot of interest. Your completed model looks very good and is one of my favorite planes from this era. Well done my friend.
I also pressed the "liked" button. Thanks for posting the build journal and these wonderfully detailed articles. I will definitely be using them as a guide when I start building mine.
G'day Louis (@lgardner),
Thanks for your comments.
I was worried that I had written too much.
I do like to read the background behind other's builds as that inspires me to perhaps build the same aircraft.
I also think that adding the good and bad of the kit also helps to decide on purchasing that kit and provide guidance for future builds.
And citing references is something of a professional habit.
Being a somewhat unique aircraft, I thought it worthwhile detailing the particulars of the aircraft type itself.
I hope this is of use to you and others choosing to build the same aircraft type.
As for the WIP blog, this is the first time I have taken progress photos and documented the build process and the first time I've built more than one aircraft type of different brands simultaneously. I very much enjoyed it, even though there were the odd challenge to overcome.
Thanks for your interest and support during the build.
Very nice looking 262 - love the scheme, and executed well! Great work.
Thanks, Greg (@gkittinger).
Splendid. Well done Michael (@michaelt).
Thanks, Erik (@airbum).
@michaelt - A really good model (which inspired my own venture) and a great, informative article to accompany it. Super.
G'day Tom (@tcinla),
Thanks for your many comments during the build.
It was great to be able to inspire your build, because the same applies to me when I read your articles.
You beat me to the end of the build, though. :~)
Great job, an unusual scheme.
Thanks, Robert (@roofrat).
It seems that most of my builds are either unusual aircraft or have unusual schemes.
I guess that makes the ordinary ones unusual for me.
Very nicely done.
Thanks, Haslam (@Haslam55).
🙂 ... Greetings ... 🙂 :
Very good work and research on this model Michael.
Your fine results can be seen in these photographs.
The camouflage job is so well accomplished, thank you for sharing these images.
Thanks, @de4ever