Three Me 262s Part 3: Me 262A-1a
As indicated by the title, this is the third of three Me 262s built simultaneously;
- Dragon Me 262A-1a/U4
- Hobby Boss Me 262A-1a/U3
- Tamiya Me 262A-1a
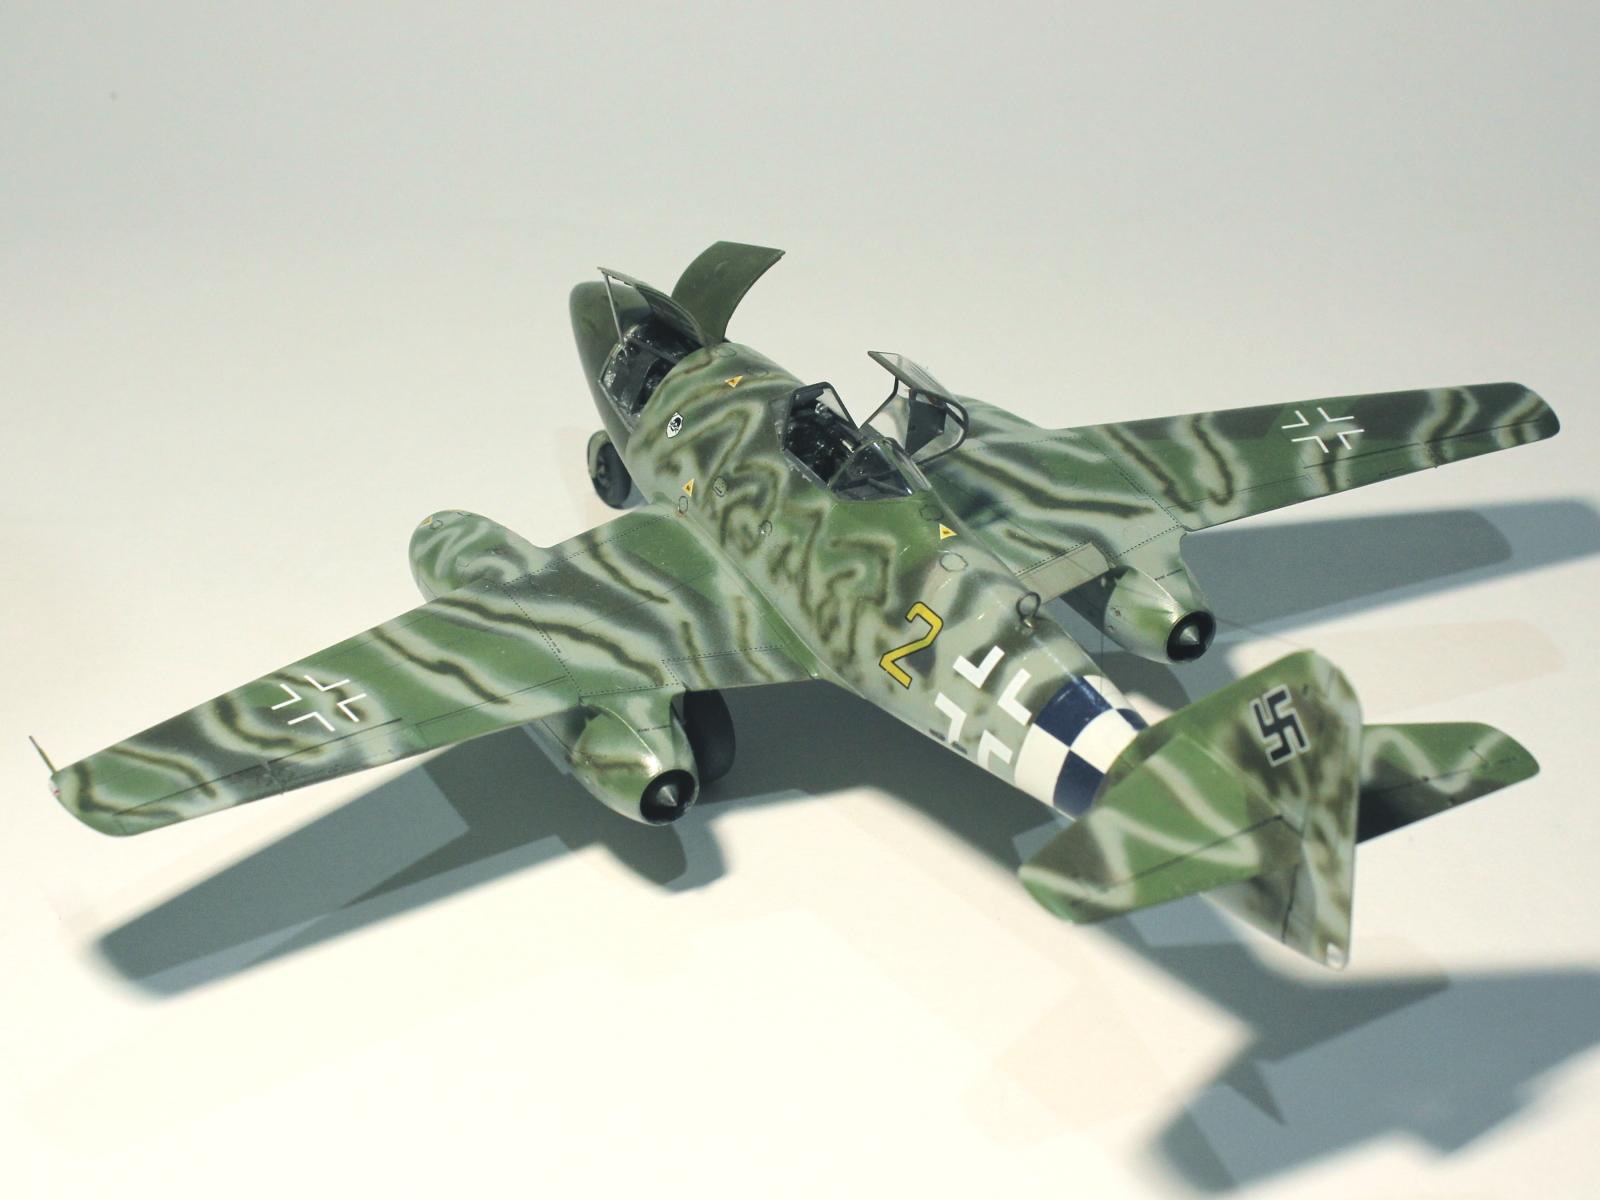
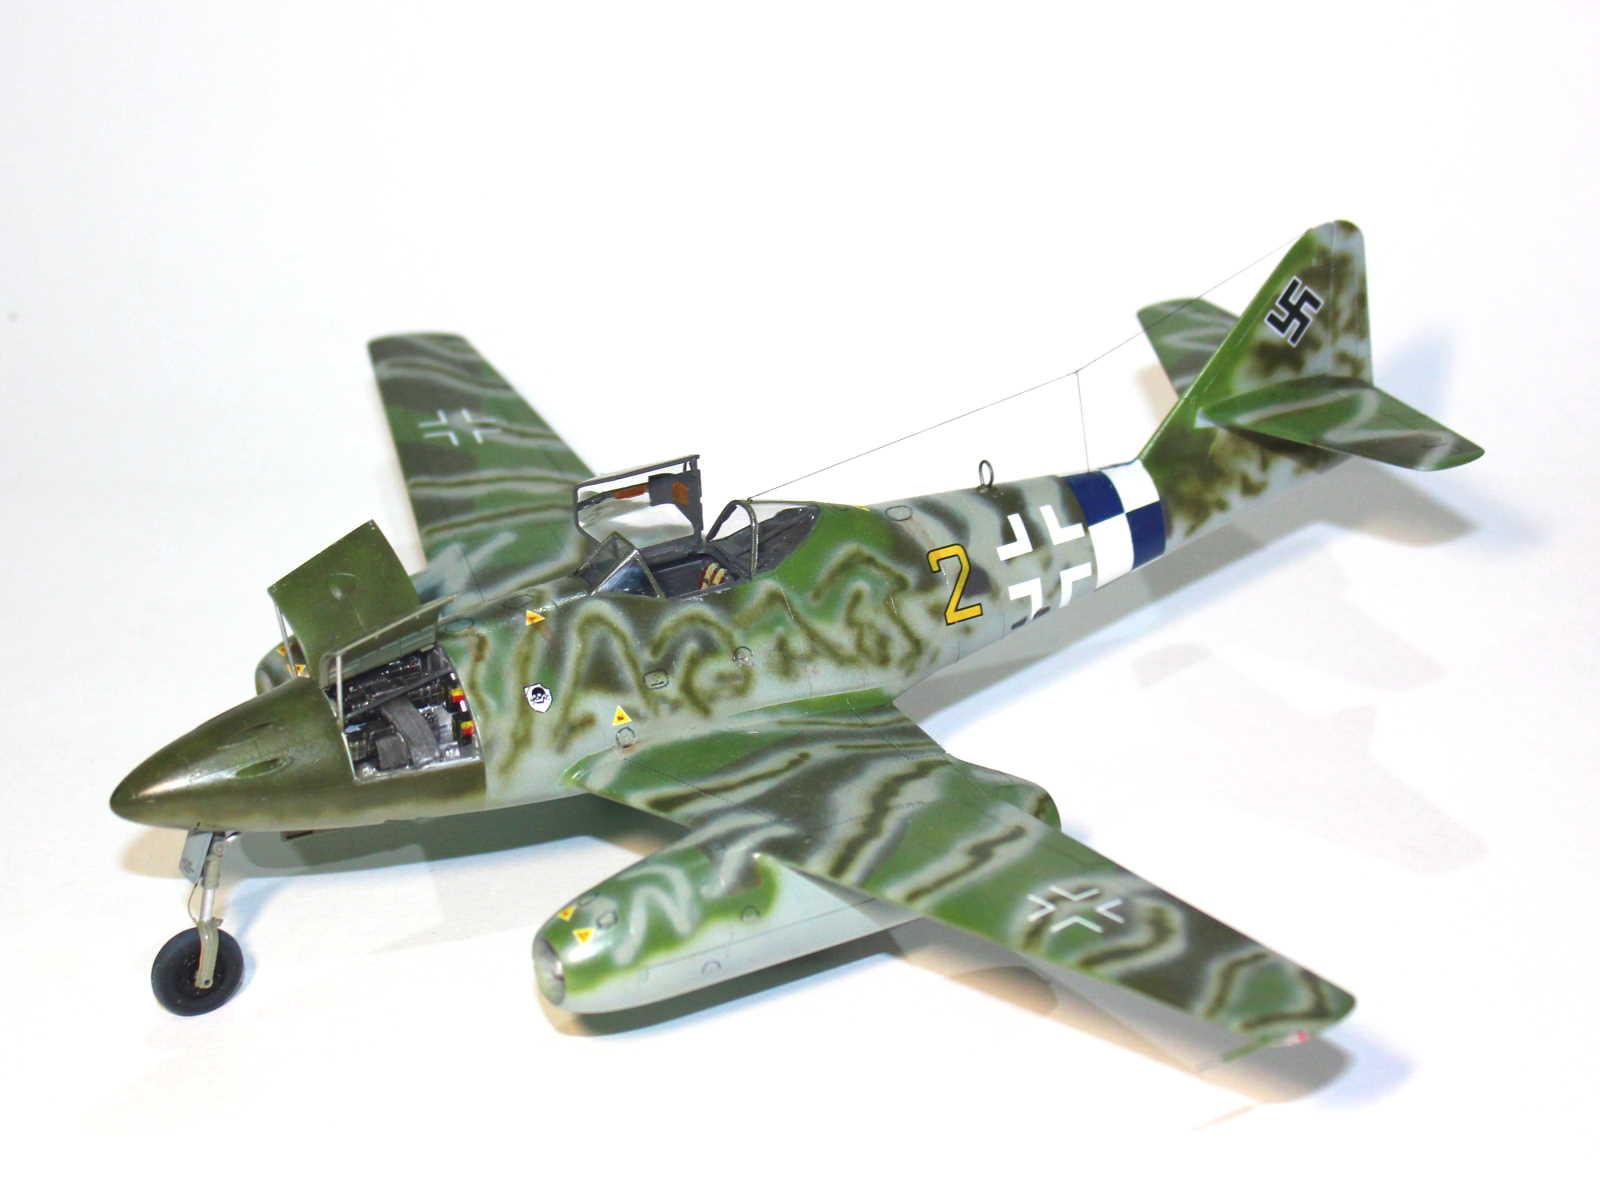
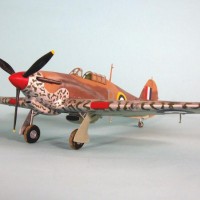
The subject this model represents is a Me 262A-1a aircraft operated but 3./KG(J) 54 as indicated by the yellow aircraft number and blue and white checked fuselage band. It was found abandoned at Ruzyne airfield Prague, Czechoslovakia (now Czech Republic) the end of the war [Brown, D. E., Janda, A., Poruba, T. and Vladar, J., Luftwaffe Over Czech Territory 1945, Vol III: Messerschmitt Me 262s of KG & KG(J) units (Limited edition including decals), JaPo, 2010].
The aircraft is interesting because it combines an unusual and complex camouflage scheme, evidence of earlier aircraft identity code having been painted out and a replacement nose.
This is a typical Tamiya kit - a good level of detail, accurate shape and dimensions and minimal fuss in assembly. Indeed, any problems encountered were because I didn't follow the correct sequence given in the instructions.
So, there is not too much to say about the construction except:
• Decal seat belts are included but I used after-market belts instead.
• Decals are provided for the instrument panel and I cut these out individually or in small groups and applied them.
• I also added yellow painted wires to the rear of the instrument panel as this area is just visible.
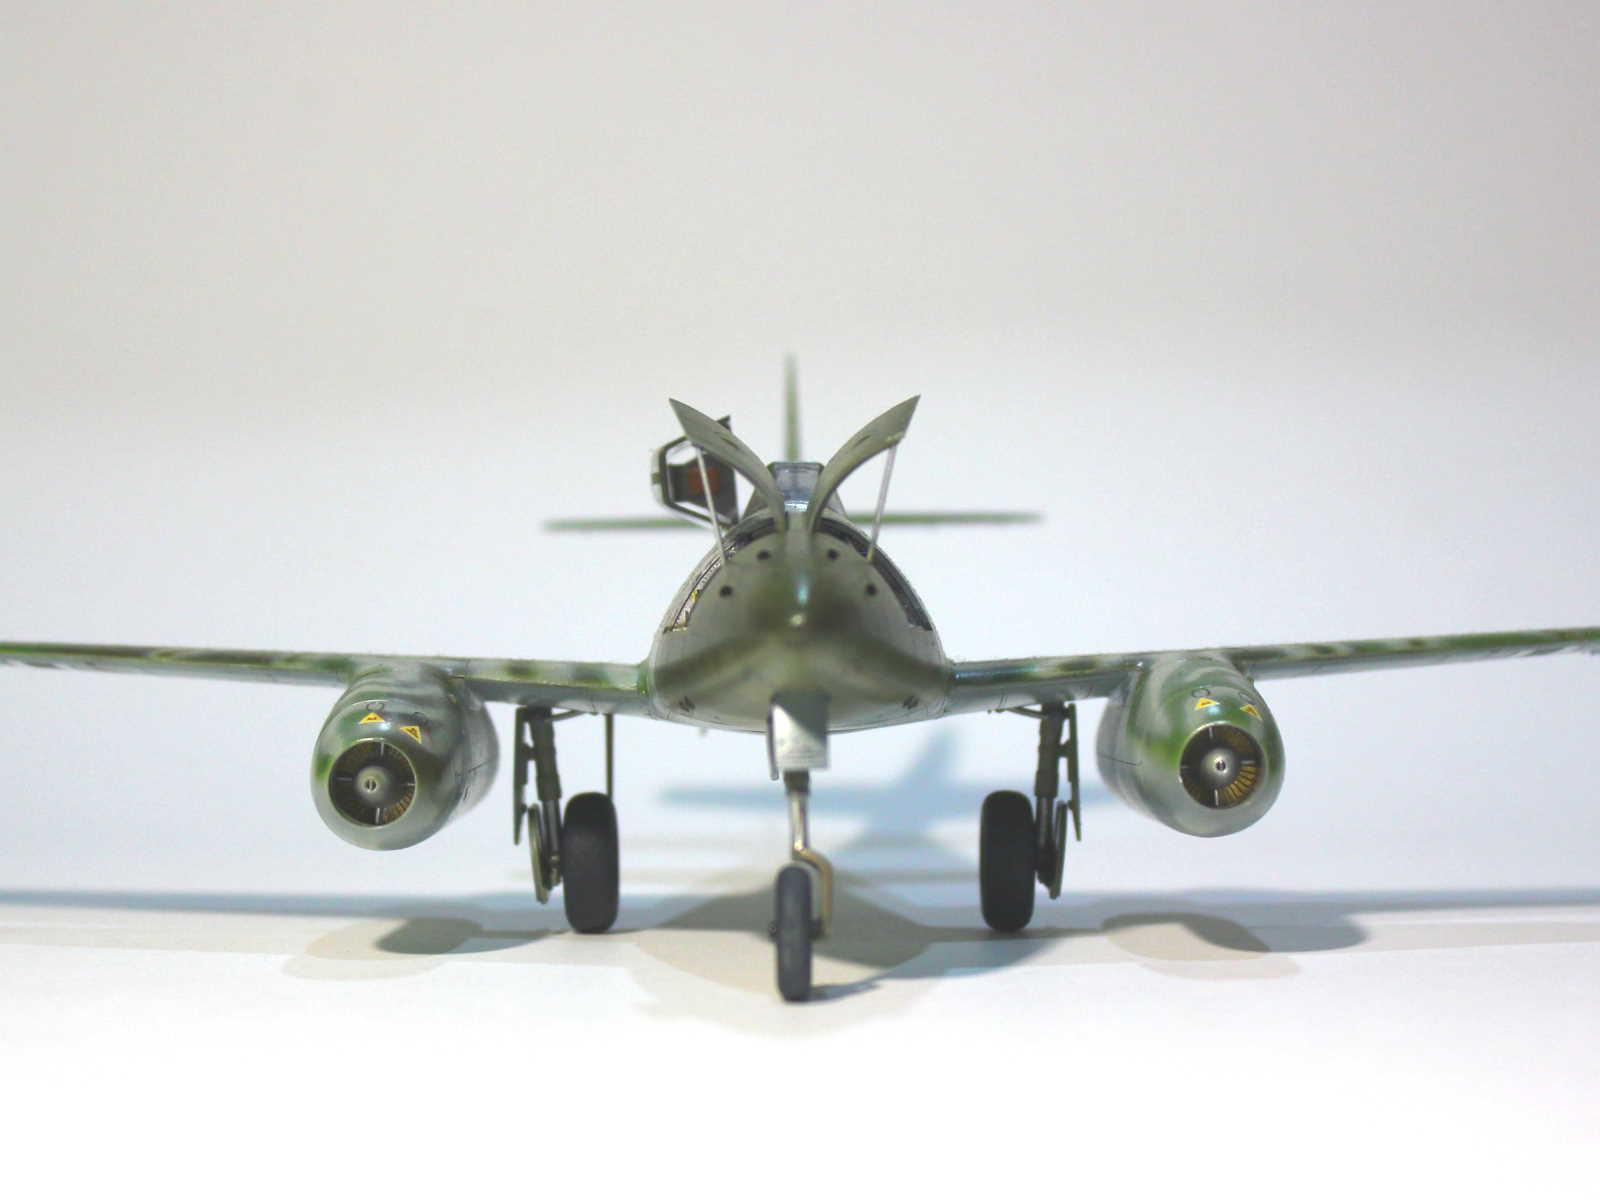
• The kit includes white metal nose gear bay and, unlike the Hobby Boss kit, this is enough weight to prevent tail sitting.
• I had a couple of self-induced problems because I didn't follow the correct procedure for assembling the armament bay. Somehow this resulted in a gap in the forward upper nose and a stress crack in the rear of the gun-port panel just forward of the gun bay. I filled these with super glue and sanded them smooth.
• I added elevator and aileron control rods inside the main wheel well.
• The fit of the wing to the fuselage is great with no filler needed along the upper wing roots, but a little filler required underneath. The shape of the forward fuel tank is just a little more curved than the front fuselage, but I more or less left this alone, noting that the fit of these panels was probably a bit rough on the real aircraft.
• All three undercarriage legs had brake lines added using copper wire.
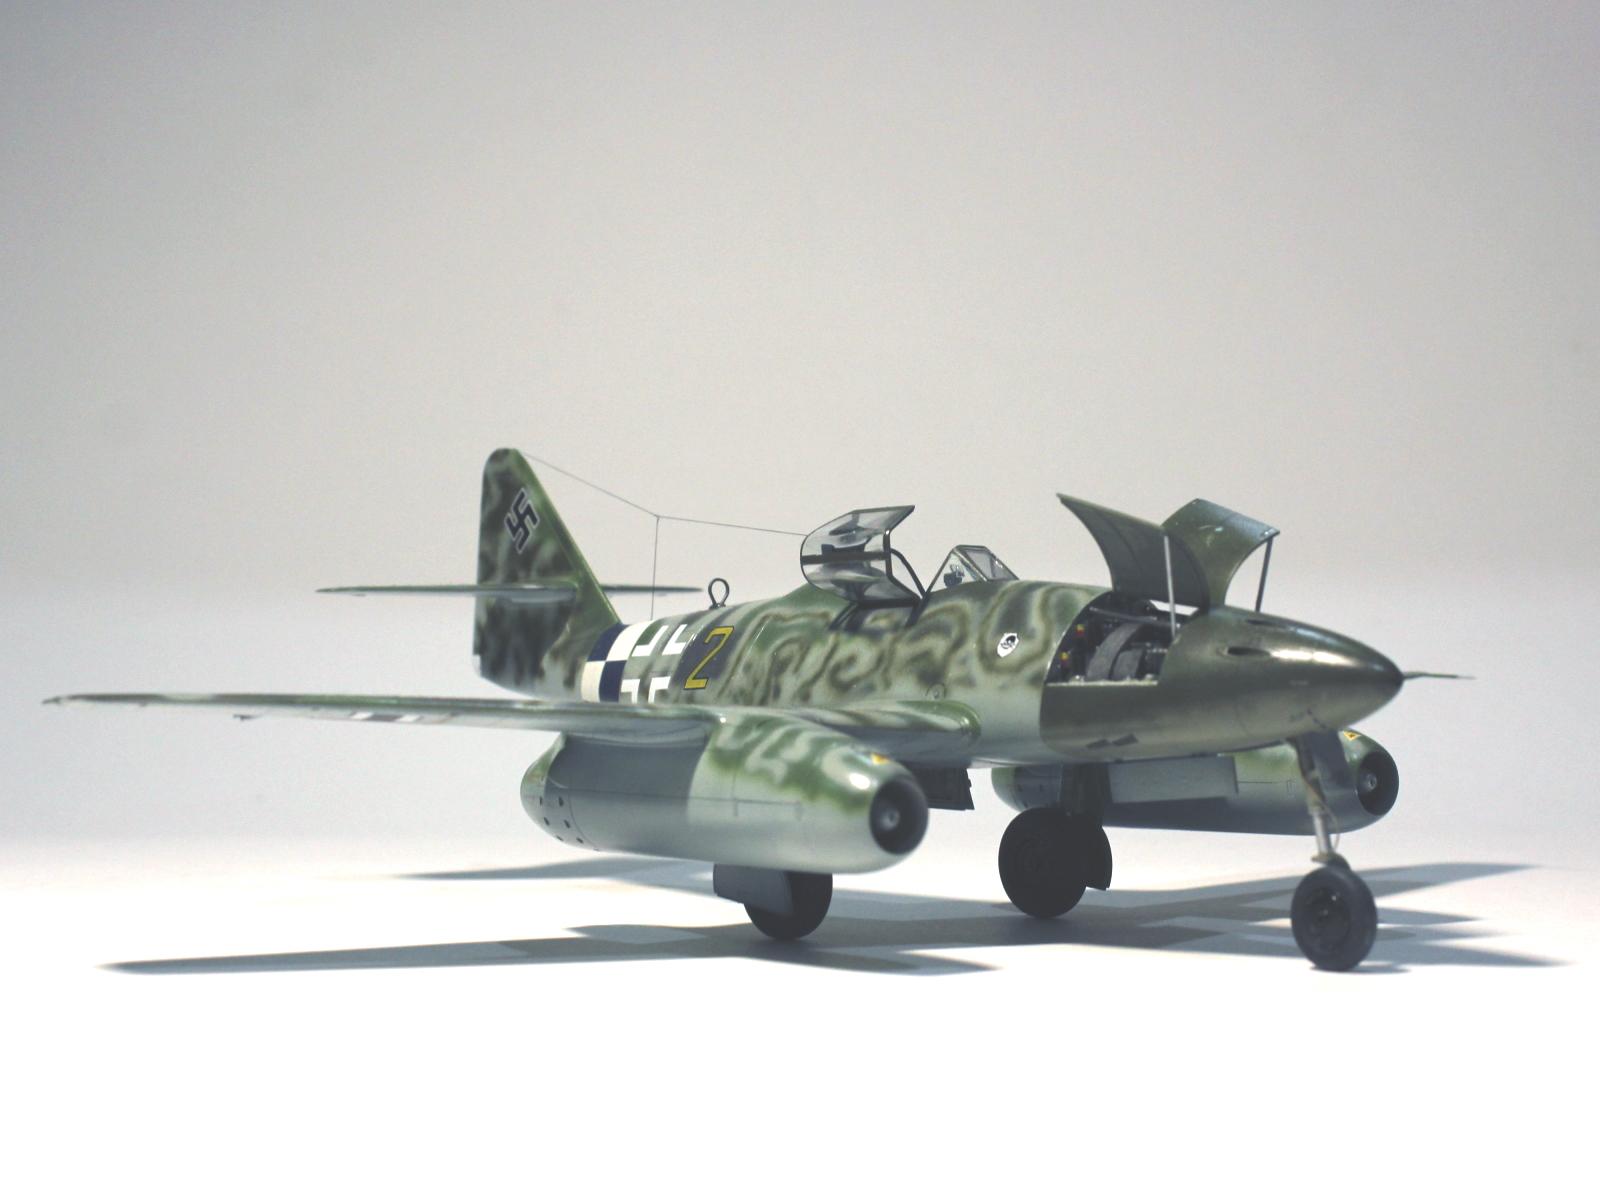
• I added a short section of thin copper wire to the rear canopy and attached aerial wire using Infini Model Fine (0.082mm) Aero Black Rigging line.
I purchased the limited edition of the JaPo book which included a 1/48 scale decal sheet for this and nine other Me 262s. While little is known about the history of this aircraft, the book includes a description of the markings , speculates on the likely manufacturer and W.Nr. and includes a detailed analysis and reconstruction of the camouflage scheme. I have done my best to replicate that on my model.
The first thing I did was to pre-shade the kit.
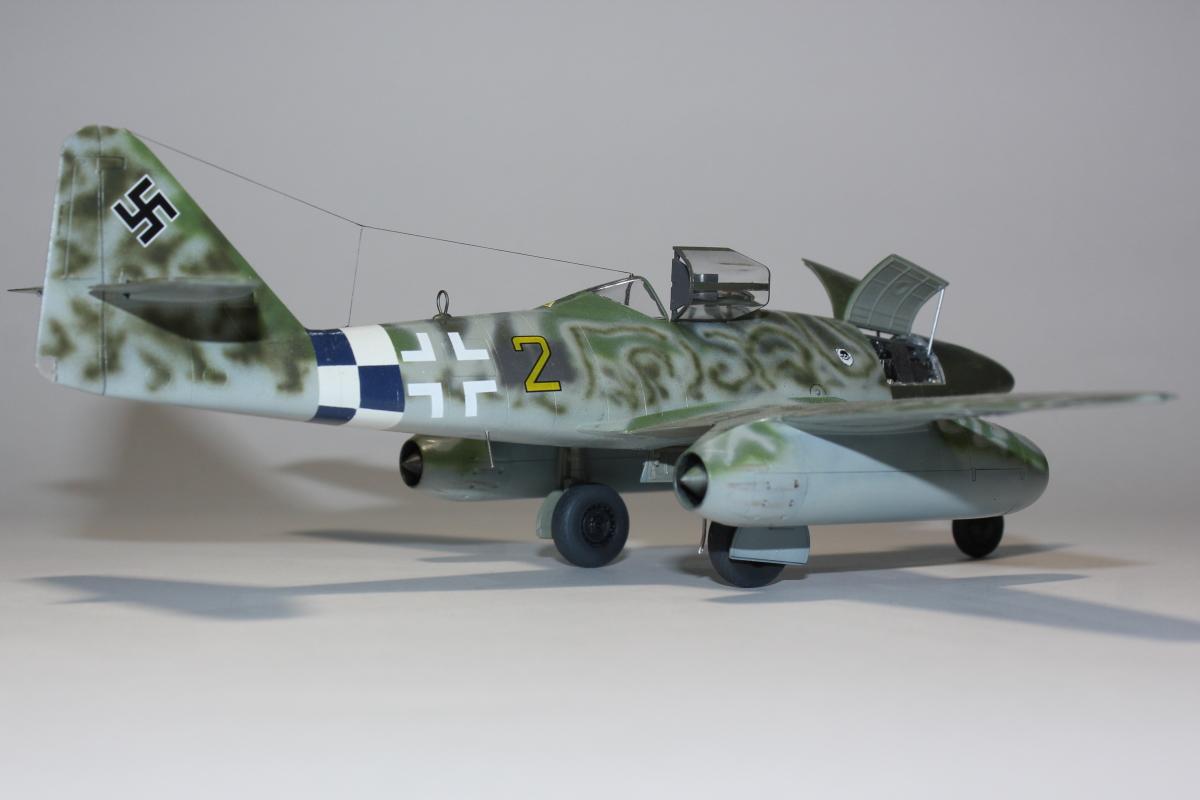
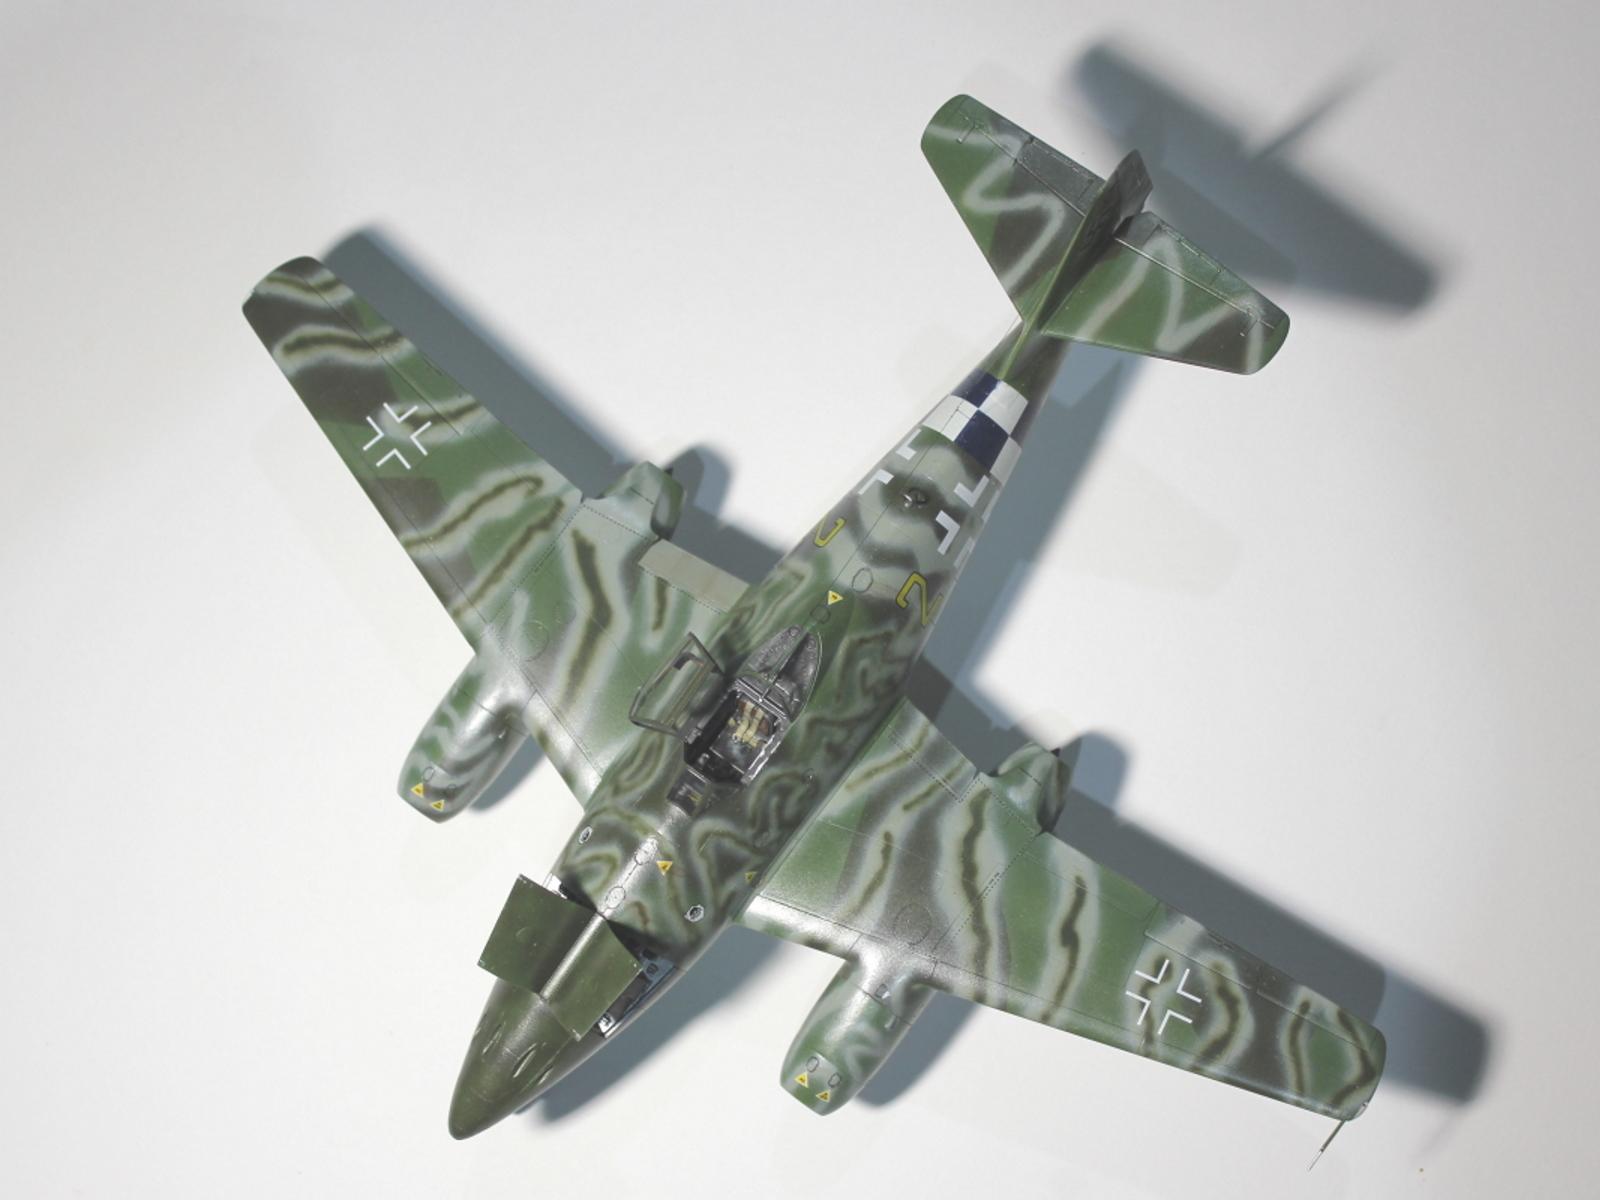
Next I added the white for the tail band and, when dry, I masked this to give two columns of eight checks (four white and four blue, forward and aft) as seemed to be indicated in the profile in the book. I then sprayed the RLM 24 Blue. However, when I removed the masking, I found that the checks were not properly aligned and that they were too thin vertically.
I started again by respraying the band white. This time, I masked off the forward half of the band and then masked three white checks and sprayed the blue, to give six larger checks around the fuselage. When dry, I removed the masking and used strips of tape to cover the rear blue checks and extend these to cover the forward white checks, thus ensuring a consistent alignment. I then masked off the rear white checks and sprayed the forward blue colour. This resulted in a tail band that better matched the photo of the aircraft.
I then masked off the whole fuselage band in preparation for painting the camouflage pattern.
The nose of this aircraft was a replacement, possibly due to battle damage or a nose-wheel collapse. It was painted in a late production camouflage and is likely to have been produced by a different factory to the rest of the airframe. I painted this a patchy mottle of RLM 81 Brown-Violet and RLM 82 Bright Green over a lower surface of RLM 02 Grey-Green. When dry, I masked it off in preparation for painting the rest of the aircraft.
The inner starboard trailing edge flap was also likely a replacement part due to damage, so I took the opportunity to paint it RLM 02 and then mask it off.
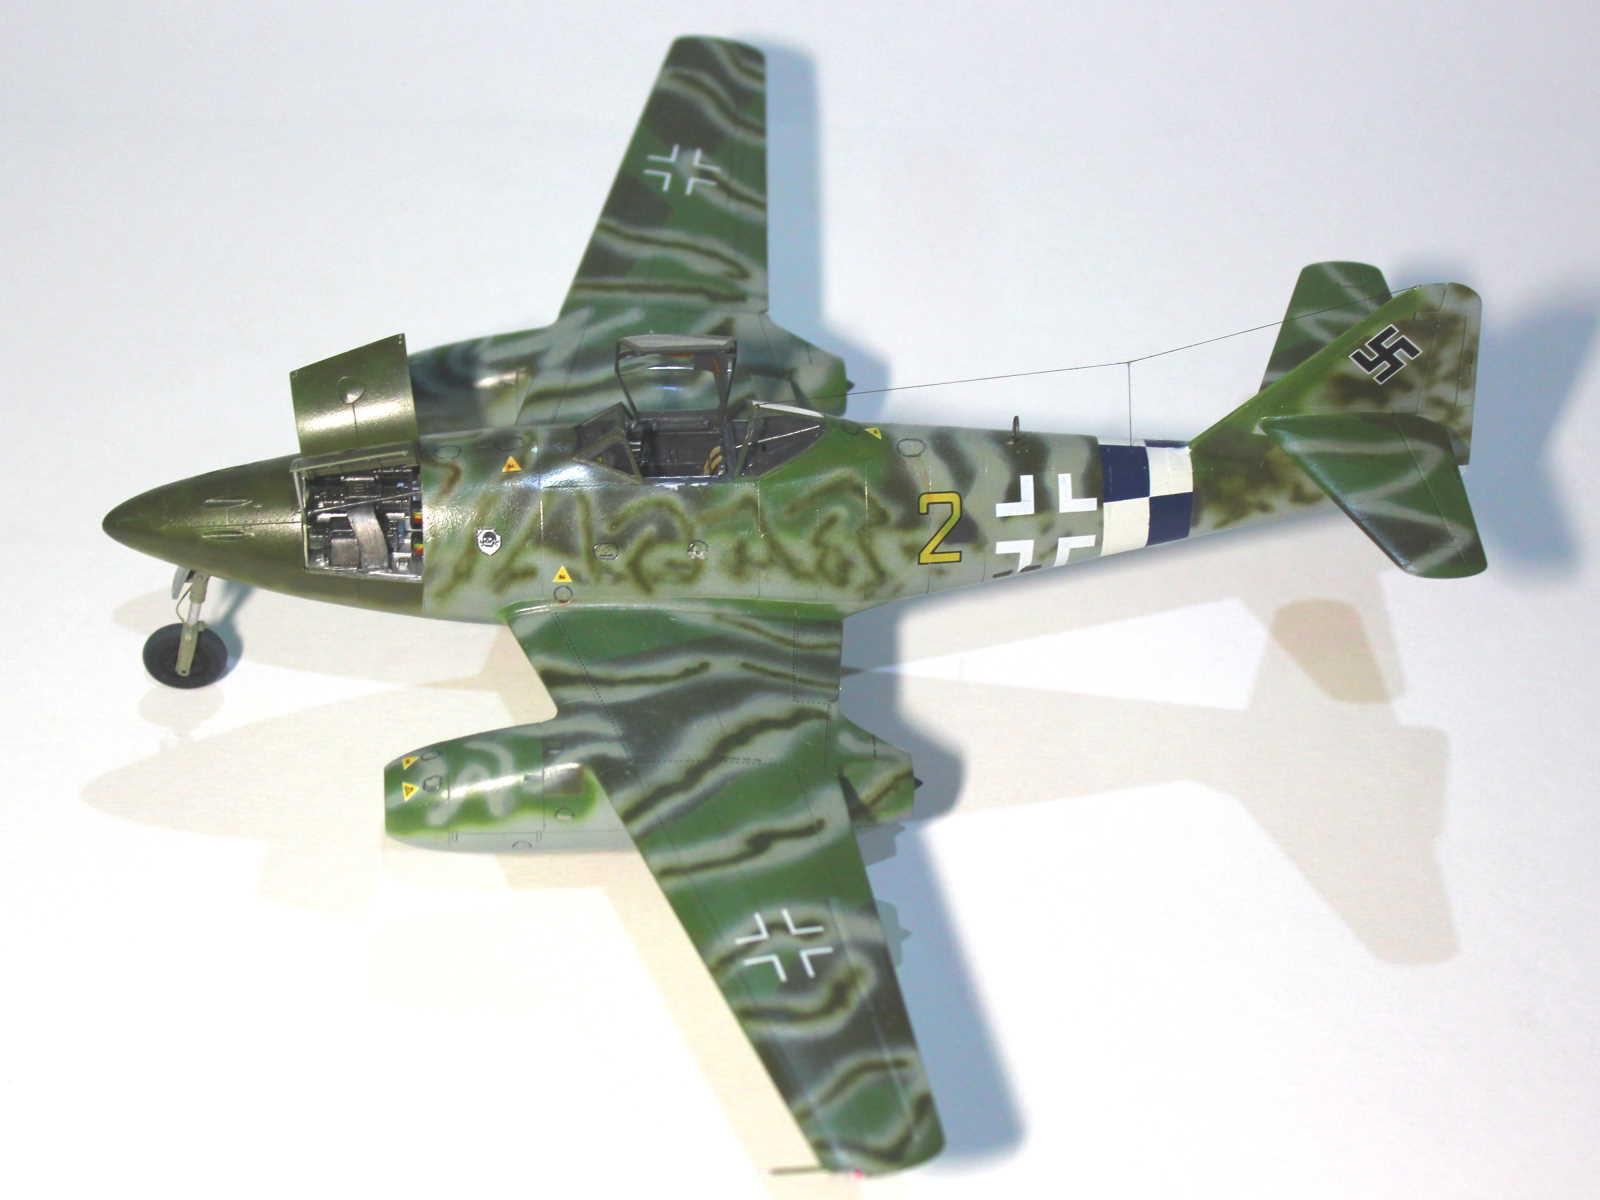
The rest of the airframe has an elaborate camouflage scheme.
The consisted of a standard RLM 81 Brown-Violet and RLM 82 Bright Green over RLM 76 Pale Blue scheme over which was sprayed streaks of a light colour, but darker then the RLM 76, which was then toned down in some easy to reach places with a darker colour. I decided to use a mix of RLM 76 and RLM 02 Grey-Green (about 50:50) for the lighter streaks and then sprayed thin lines of RLM 83 Dark Green down the centre of some of these as guided by the photo and profiles.
A roughly painted dark patch can be seen under the starboard Yellow 2 in the photo of the aircraft. This is large enough to be covering the last two letters of a bomber style four-character aircraft code of the form B3+XX that JG(J) 54 originally used. In fact, other photos exist of abandoned KG(J) 54 aircraft that still had these codes. The first two characters would have been covered by the tail band.
On the port side, it is likely that the first two characters would have been likewise painted over, although they would have been much reduced in size, as was the standard late in the war. The larger rear two letters would not have been completely covered by the tail band, though.
To replicate this, I masked appropriately sized and located rectangles and sprayed then with RLM 66 Black-Grey. I then unmasked and lightly over-spraying them freehand with more RLM 66 to give a soft edged look.
After applying the decals, I gave it a semi-gloss clear coat and attached and painted various small/breakable parts such as the pitot tube and aerials. Oddly, Tamiya does not include the small rod aerial below the rear fuselage even though it has a small depression in the correct location. I used a piece of dressmaker's pin for this.
The tyres were painted over-all Tamiya XF-85 Rubber Black, which was then mixed with white and sprayed around the circumference to give a worn look that I am quite happy with.
Weathering was kept to a minimum.
The only thing better than a three-colour camouflage scheme is a four-colour camouflage scheme.
I thoroughly enjoyed researching, building and painting this kit.


Fantastic job Michael! I love the 262 and yours looks stunning in that unique scheme. Bravo!
Thanks for looking, Ben (@popeofchillitown)
That is the wildest Me-262 scheme I have ever seen! Great work, Michael.
G'day Tom (@tcinla),
Thanks for the comments.
It is a scheme that has been done before and posted here on imodeler.
I wanted to to try it myself and it was great fun to paint, although I couldn't have done it with my old airbrush. (The Harder and Steenbeck Evolution is fantastic.)
Magnificently done friend. It looks amazing.
Thanks, Jonathan (@slowglide).
🙂 ... Greetings ... 🙂 :
That camouflage scheme has really caught my attention.
Great modeling and painting Michael.
Thank you for sharing these images.
Thanks again for looking, @de4ever.
This is a splendid result, Michael, that I had the pleasure to follow along through your build thread.
Your accompanying text is really good, most helpful for anyone who decides to tackle this kit and/or this camo.
G'day Spiros (@fiveten),
I can almost rule a line under these three builds now.
The contest judging was supposed to be today but has been postponed until the next club meeting on 7th of March.
Your 262 looks great, you really gotta love that scheme. It really does add all kinds of interest to an already great build! Very well done!
Thanks, Walt (@luftwaffe-birdman).
It was great fun to paint.
Wow a psychedelic swallow. Awesome .
Thanks, Haslam (@Haslam55).
All three 262's you created look beautiful, Michael.
This one attracts because of its camouflage pattern.
Nice to read your building progress as well.
G'day John (@jophnb) ,
Thanks for your comments and for following the build progress.
Another fantastic 262, Michael, and, yes, that camouflage is particularly eye-catching, but doesn't that defeat the object of camouflage? Never mind, it makes for a fantastic model.
G'day George (@chinesegeorge),
Thanks for the comments.
The objective of camouflage is to break up the outline of, in this instance, an aircraft to delay or prevent recognition. It was probably hidden amongst trees when parked on the ground, so the stripes would have been quite effective.
And, yes, it is a great scheme to look at.
Very impressive paintwork!
Thanks Erik (@airbum).
This is one of the hardest camouflage to do freehand, and you pulled it brilliantly.
I have this scheme in decals from a Kagero book and initially planned on doing it, but instead chose the other option which is almost as mad as this one, that one of my to-finish projects for months now...
From all three, this one is undoubtedly my favourite of your 262 build Michael, thumbs up!
G'day Pedro (@holtzhammer),
Thanks for the comments.
I'd love to see your Me 262 as I've seen the quality of your other work.
The scheme wasn't as difficult as it looks, or as I had anticipated. I painted the main camouflage over 2 days under the pressure of a deadline and I surprised myself to get most of it right first go. Apart from the tail band, the only difficulty I had was with the horizontal tail as I initially made the light squiggles too broad - I was still getting used to my new airbrush - and had to repaint them.
The only thing I would change is to make the pale stripes less 'solid' looking.
Michael, @michaelt
This is a fantastic Me-262 model, and likely the best paint scheme I have ever seen on one. Your trio build journal is very informative and inspirational. You couldn't ask for anything more.
Now I have two of the "new tool" 1/32 scale Revell kits on my work bench. One is a single seat fighter, while the other kit is a twin seat night fighter. I will be using your build journal as a reference for mine, even though they are larger in scale.
Too bad they postponed your clubs judging until March 7th. I'm sure that you will do well as all of your 262's are spectacular.
Thank you for being so detailed and concise with your build journal. It will be of tremendous help to a lot of people in the future, myself included in this group.
I definitely pressed the "liked" button.
G'day Louis (@lgardner),
Thanks for your kind comments, and for following the build.
I usually write up build notes after I've finished, sometimes long after when trying to recall details, so writing a journal as I progressed was a different experience. Plus, I tried to make it interesting and informative for others to read.
I have the 1/48 Dragon 2 seat night fighter that I will one day build as a trainer using other decals from the sheet that came with the book. I will need to work out how to build the back seat, though.
I'm looking forward to see your Me 262s.
Very impressive paint work on your 262, Michael. I have yet to brave anything so complex myself. I also admire your persistence in getting the checks right. Dealing with contingencies and working out fixes is one of the challenges of our hobby - well worth the effort in this case. The sheen of the finish is quite striking. My understanding of 262s is that they were puttied, sanded and otherwise smoothed over for speed so the look you have settled on seems quite authentic to me. Great work and inspiring attention to detail overall.
G'day Colin (@coling),
Thanks for the comments.
As I told Pedro, I was surprised ow easy it was to paint - you just need a quality airbrush and patience.
Like everyone else, outstanding camo pattern. Unique among 262s.
Thanks, Dan (@dbdlee).
Sharp work on the camo scheme. I plan on doing this same scheme using Eaglecal decals. Your build has motivated me to get it started.
Thanks, Dale (@dtravis).
It is not as hard a scheme as it looks.
I look forward to seeing your build.
Nice airbrush work!
G'day Reinhard (@gromreaper),
Thanks for the compliment.
I admire the quality of your many builds too.
Yep - like everyone else, I love that scheme, and you did a masterful job with it. Well done!
G'day Greg (@gkittinger),
Thanks for your generous comments.
What a camo, fabulous! The model is magnificent! Love it !
Thanks, Yann (@yann).
@michaelt, I just came across this stunning model, Michael! Wow, does it look fantastic! 🤩 Great work on my all-time favorite aircraft! 👍
G’day Gary (@garybrantley),
Thanks for looking and commenting. When I discovered imodeler ~10 years ago I went backwards through every post to the first page (well, the aircraft) and marvled at the quality and diversity of the builds.
Now I will search a particular aircraft type that I am thinking of building for inspiration.
I’m glad you found this one.
P.S. If my maths is correct, I was born up the road in Melbourne at the time you were living in Geelong.
You're quite welcome, Michael @michaelt! 🍻 You are so correct, there are so many talented modelers here at iModeler, and the wonderful diversity of their work is a never-ending delight!
That's interesting about your birth, you must be a '66 model, right? 😃 (maths was never my strong suite! 😉)
I enjoyed every trip over to Melbourne while living in Geelong. The zoo, the museums, Sandown Park Racetrack, the Cricket Grounds, the downtown train station; all of those still have a place in my heart! Oh, how I'd love to see it all again! 😊
G’day Gary (@garybrantley),
Your maths is spot on.
Melbourne has obviously changed quite a bit since you were here, but those places still exist.
Let me know if you ever make it back here.
Ta, mate! 🍻 I would love to revisit Australia, and who knows, maybe that will happen. I'll certainly take you up on your offer, Michael @michaelt! 😁