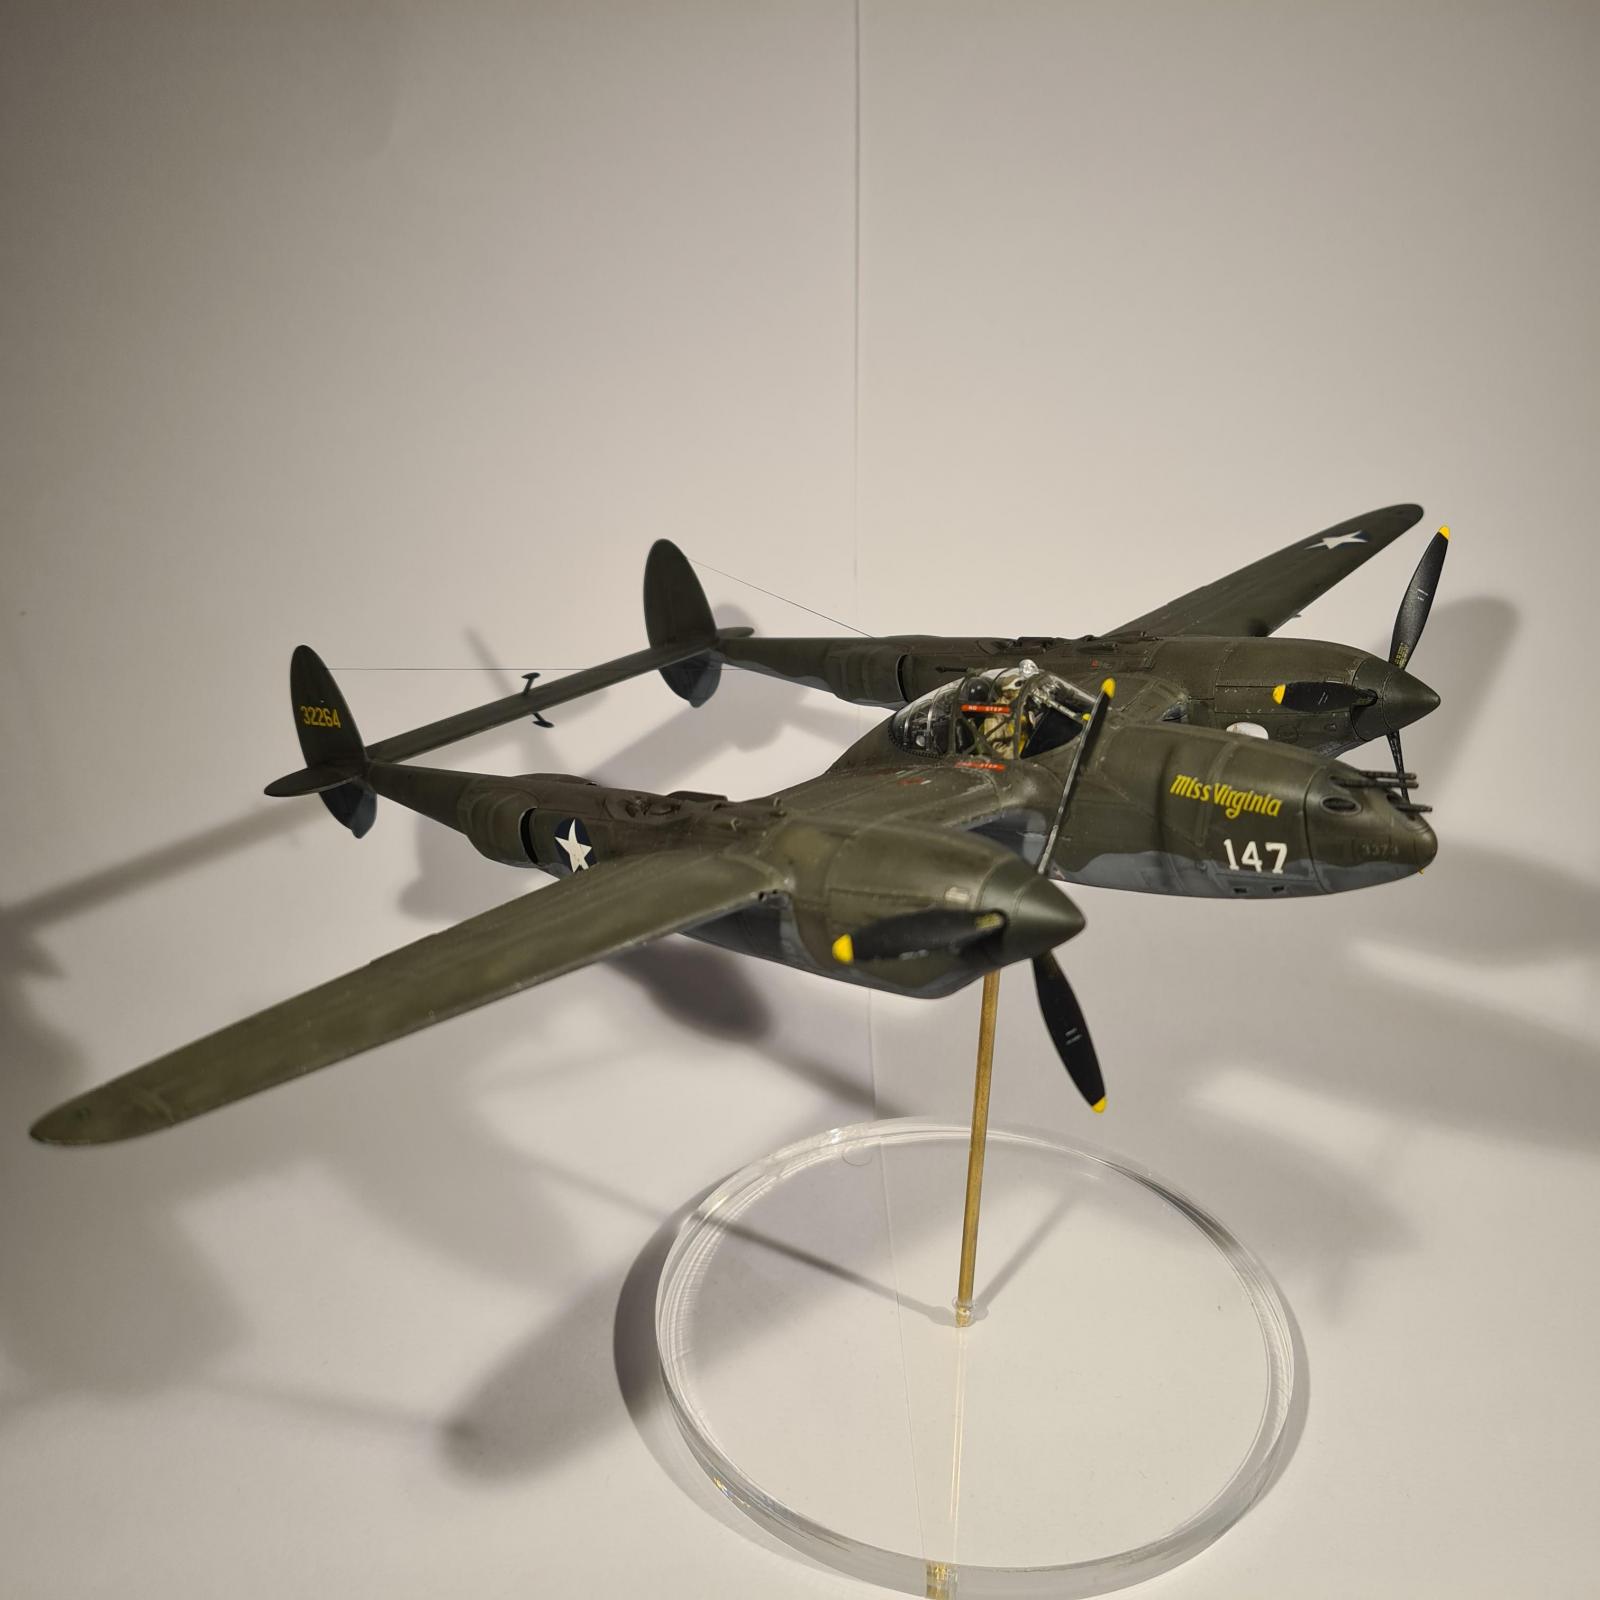
Tamiya P-38G Lightning, 1/48. 'Miss Virginia'
This article is part of a series:
-
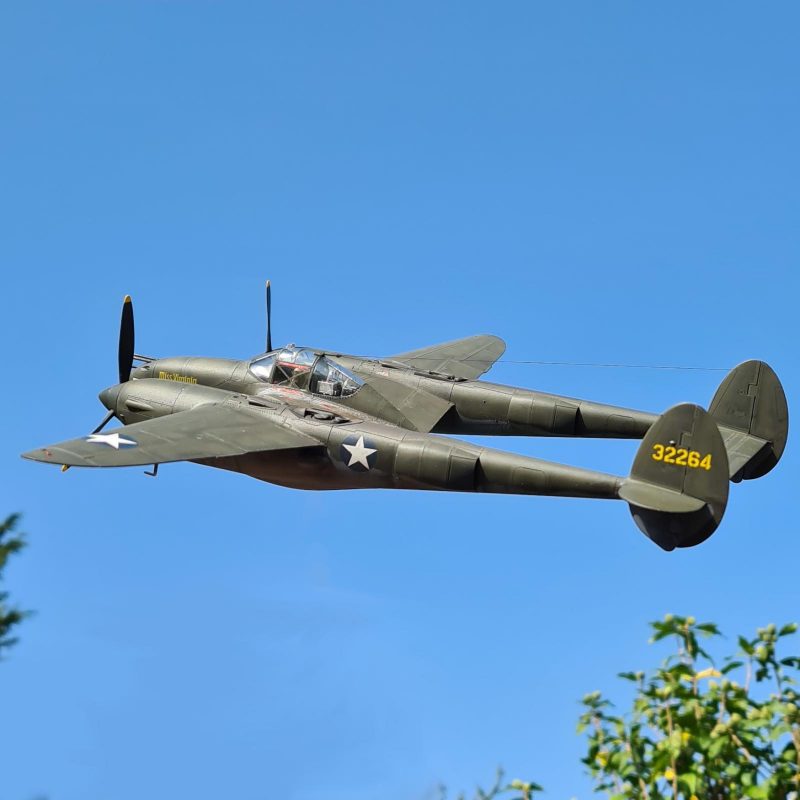
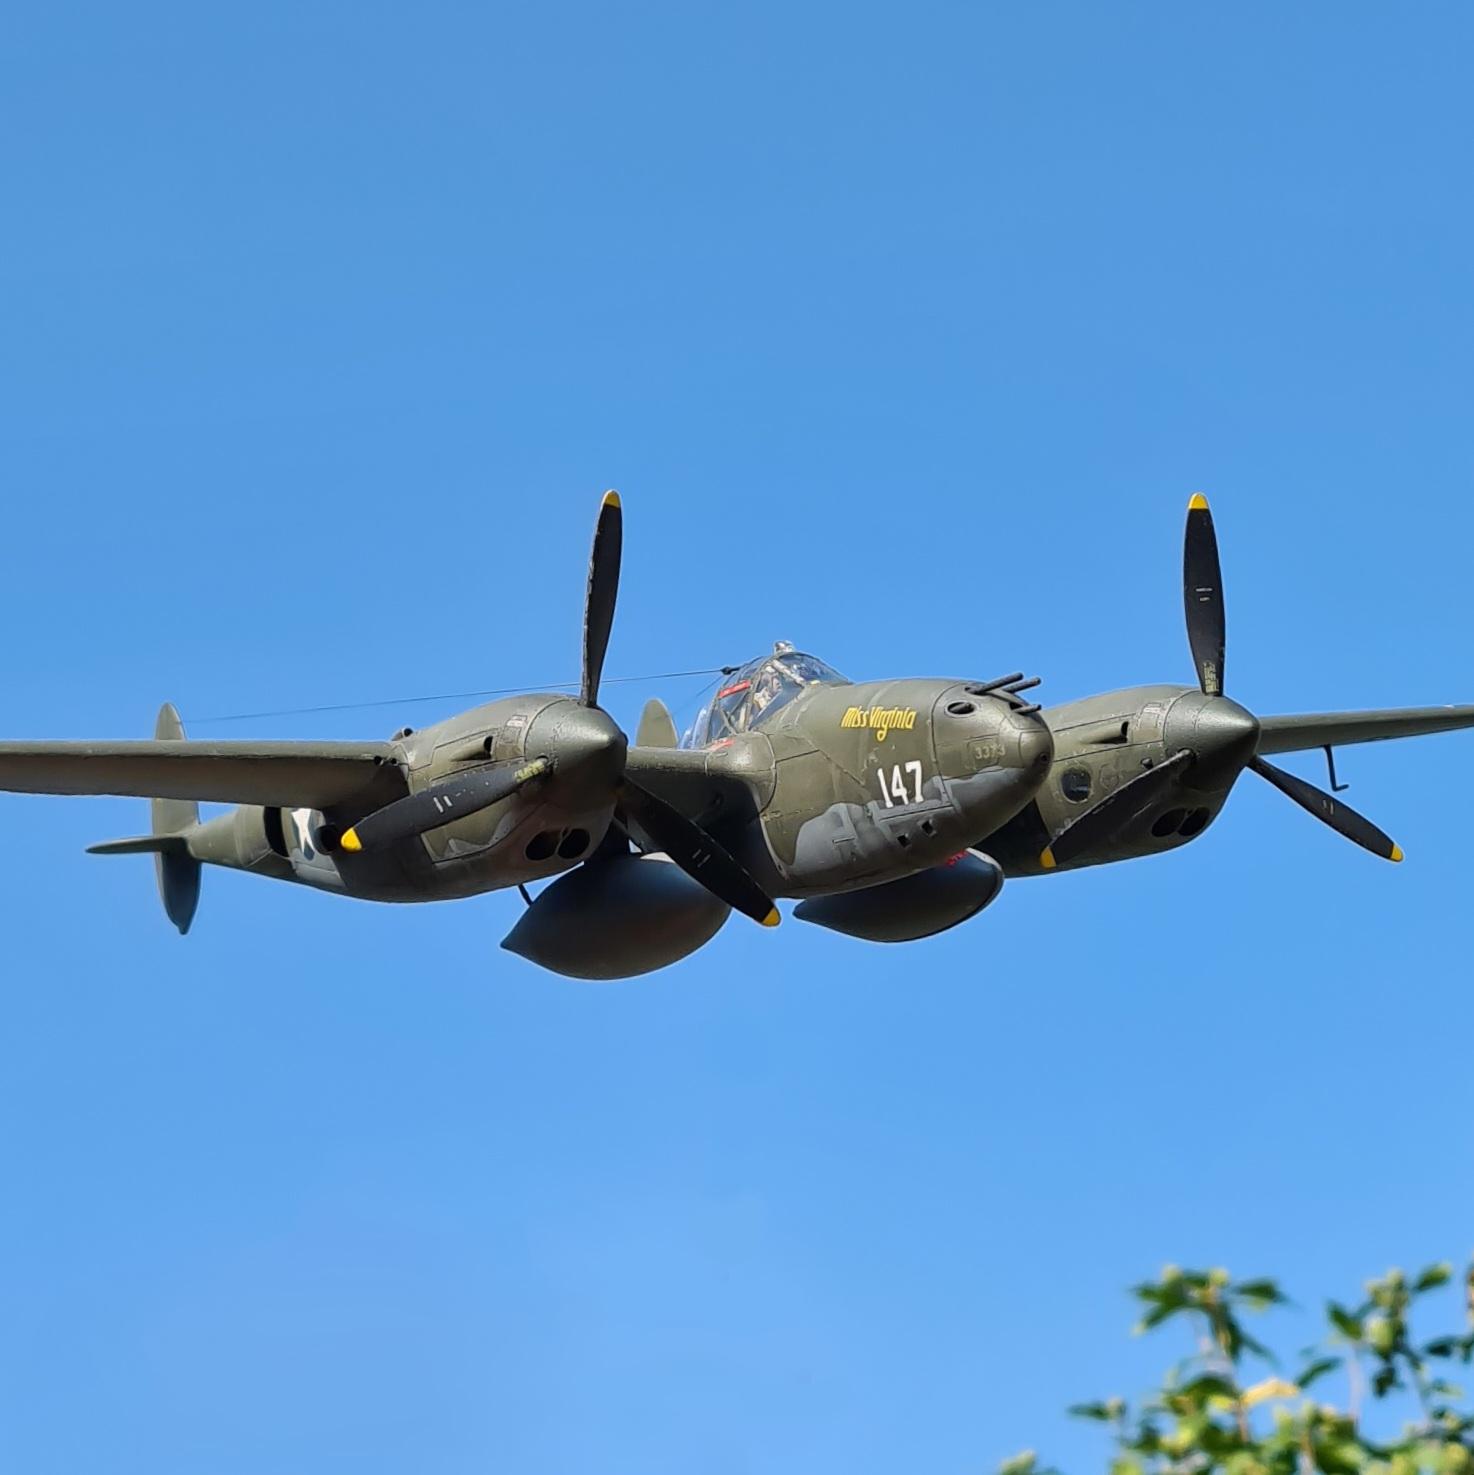
- 1. The Magic of photoshop, a quick 5 minute job in any free editing tool can remove the stick holding this model up, making it look more like an R/C aircraft.

My first of the Operation Vengeance trio in 1/48 was this Lightning, an amazing kit and probably the best engineered model I've made to date. There isn't a lot of negatives to say about this kit, in fact whilst I completed this model in September last year I'll go ahead and list the negatives I can remember right now:
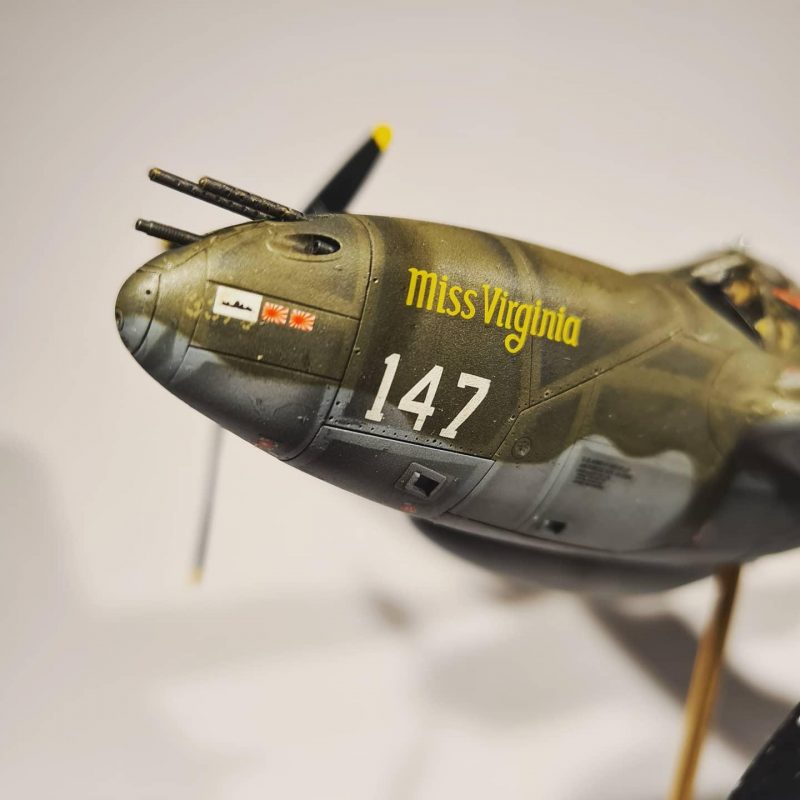
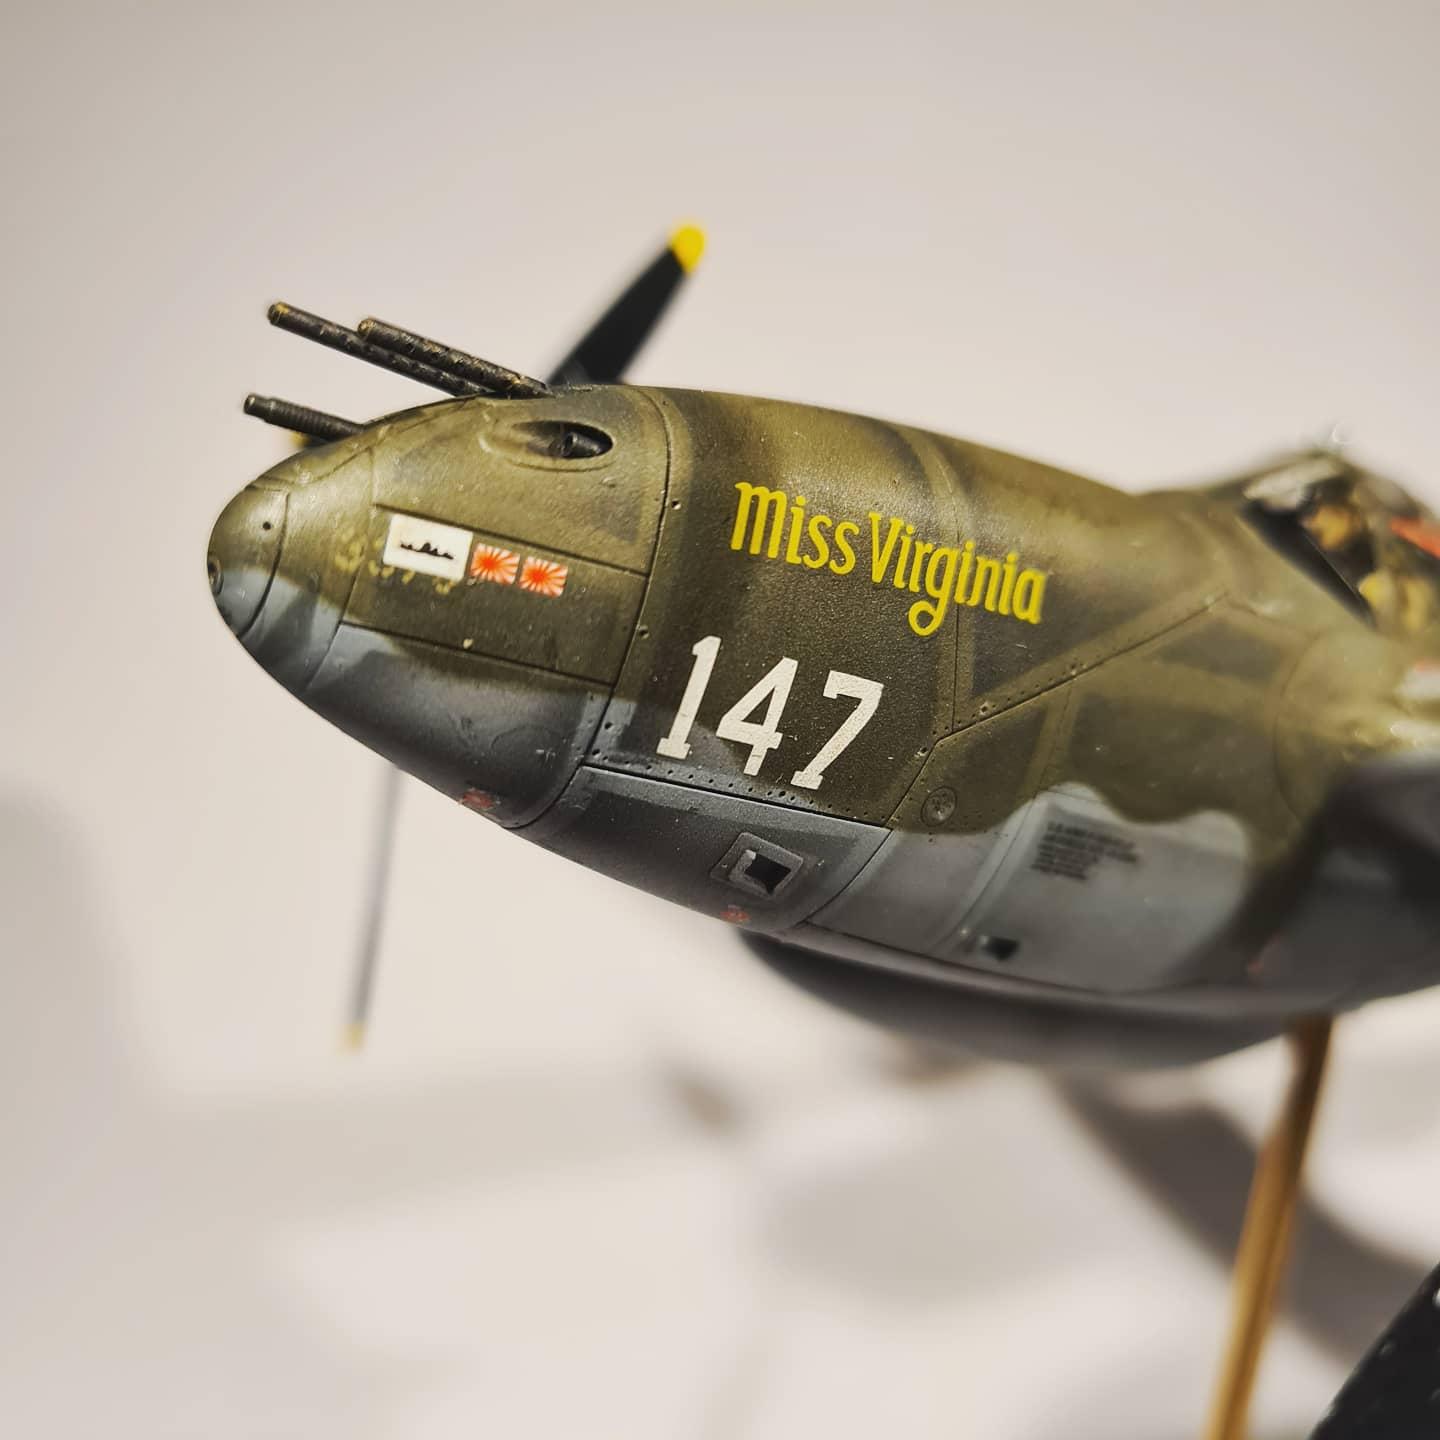
- The gun barrels for the 50cals are modeled as a round tubes without detail, you're meant to add decals to provide the details. You'll want to go ahead and pick up some brass replacements like I did.
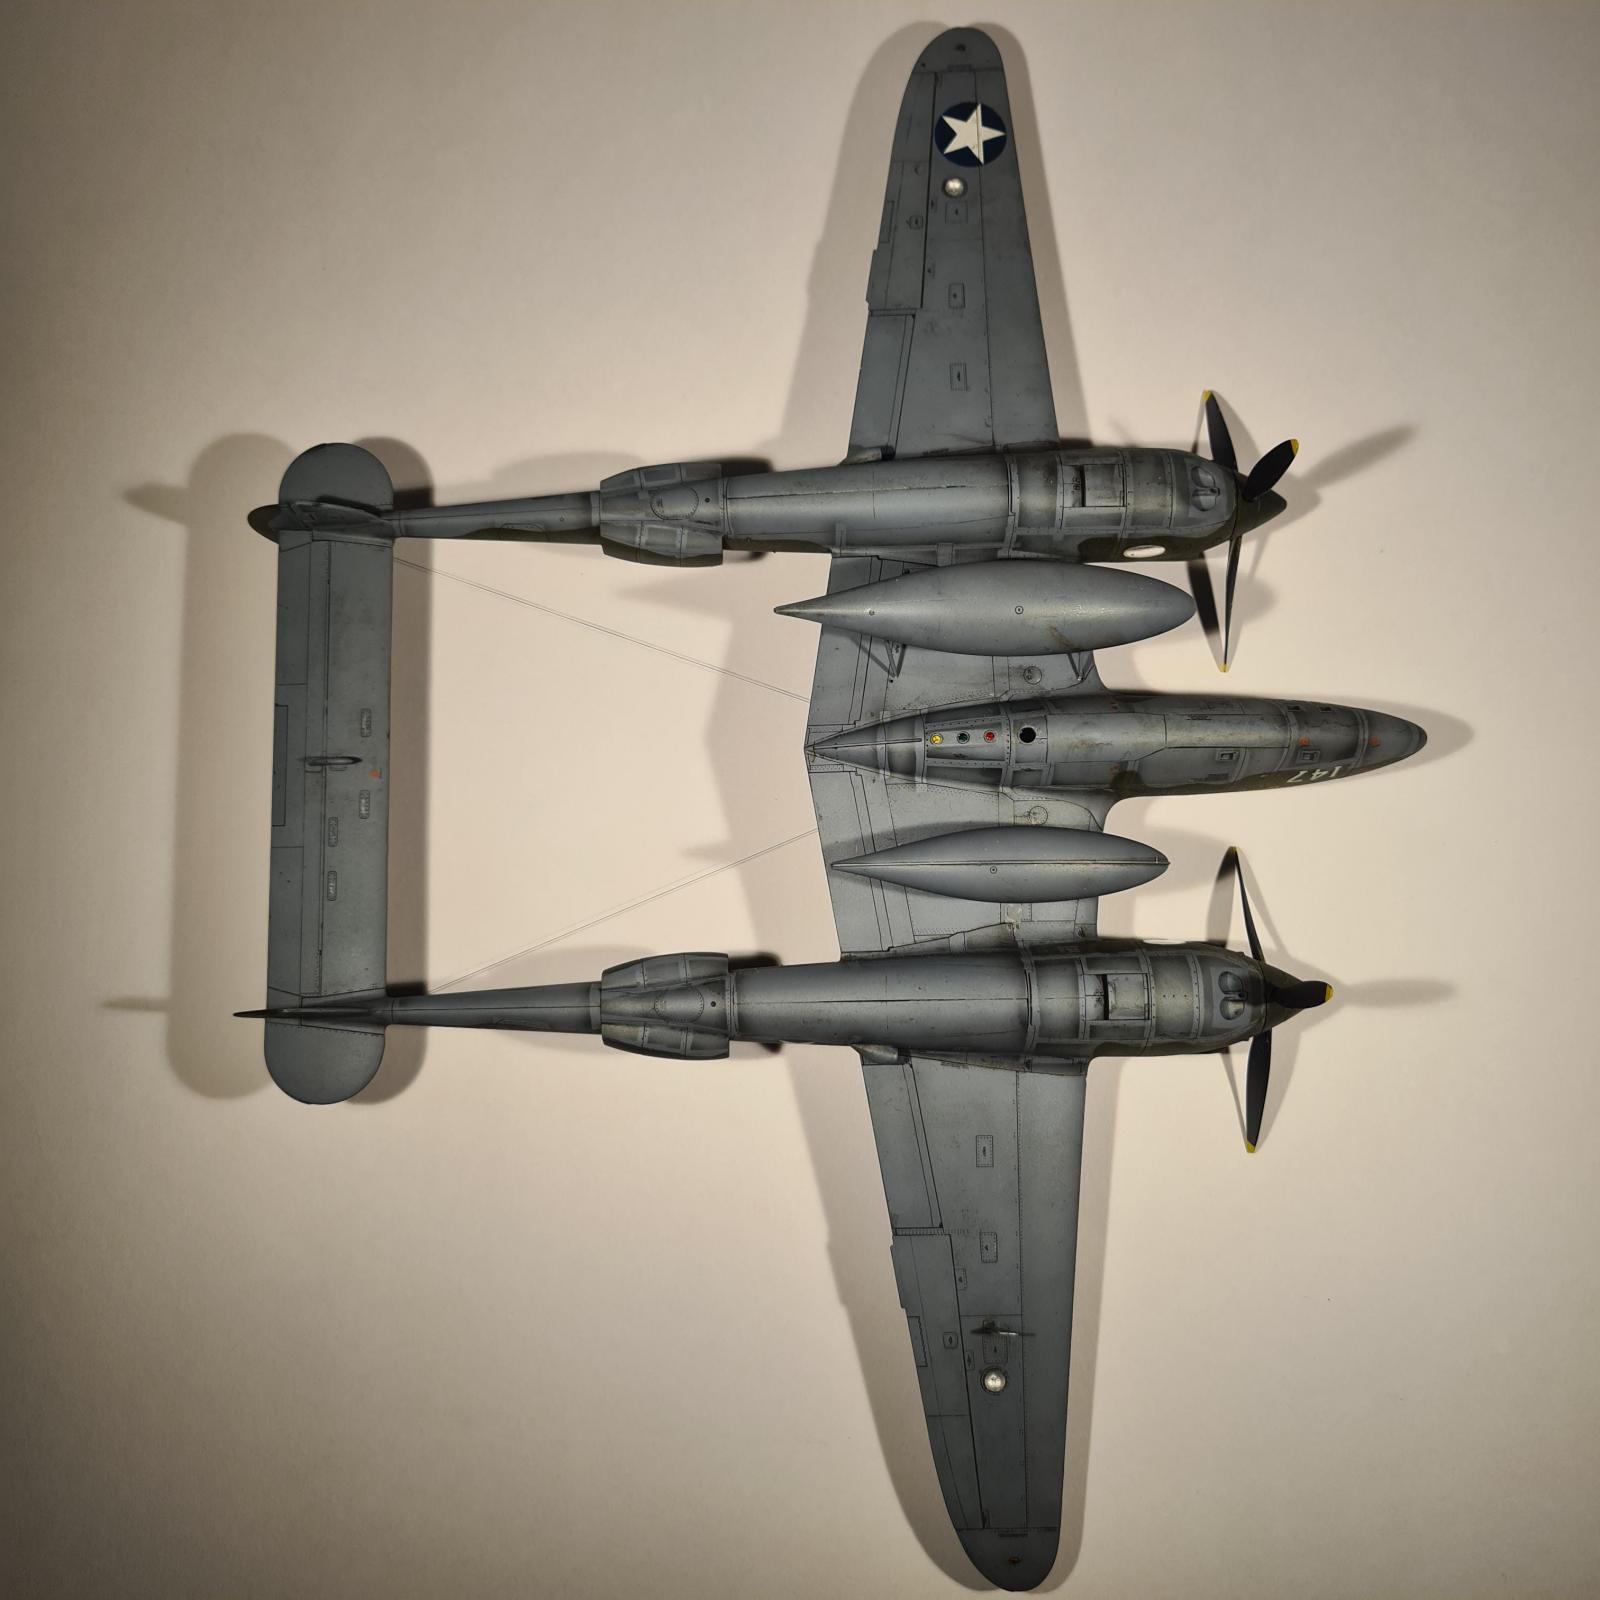
- It doesn't come with a wheels up option, like 99% of 1/48 scale kits these days.
-
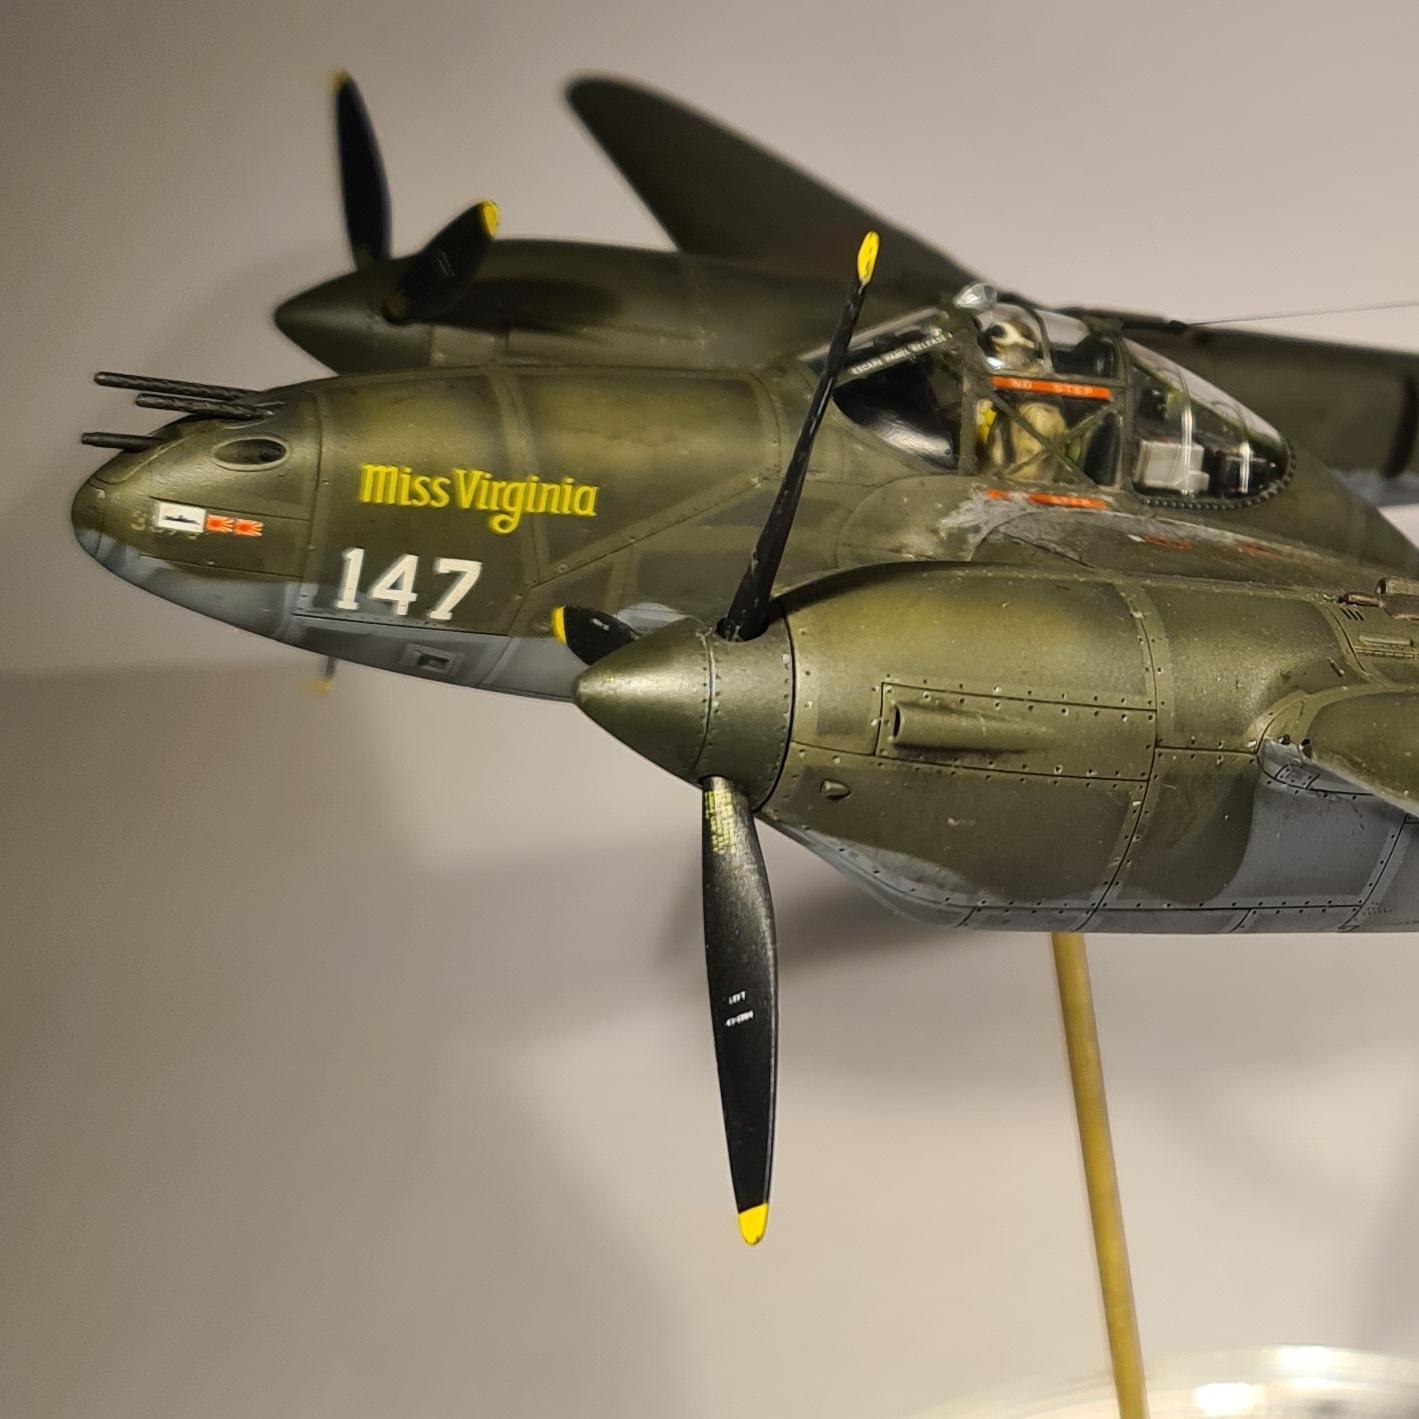
- 1. The tapelines on this model go a long way in breaking up the otherwise plain colour of olive drab.
- 2. The brass gun barrels are an essential purchase for this model in my opinion.
Aside from that the kit is damn near perfect, it goes together like people say modern Tamiya kits do which is to say 'it almost builds itself'. It's truely an amazing build and I highly recommend it, the attention to detail (beyond the aforementioned guns) is incredible and the fit is so good that the only filler I needed was in areas where I had cut too much off of the plastic when removing from the sprue.
-
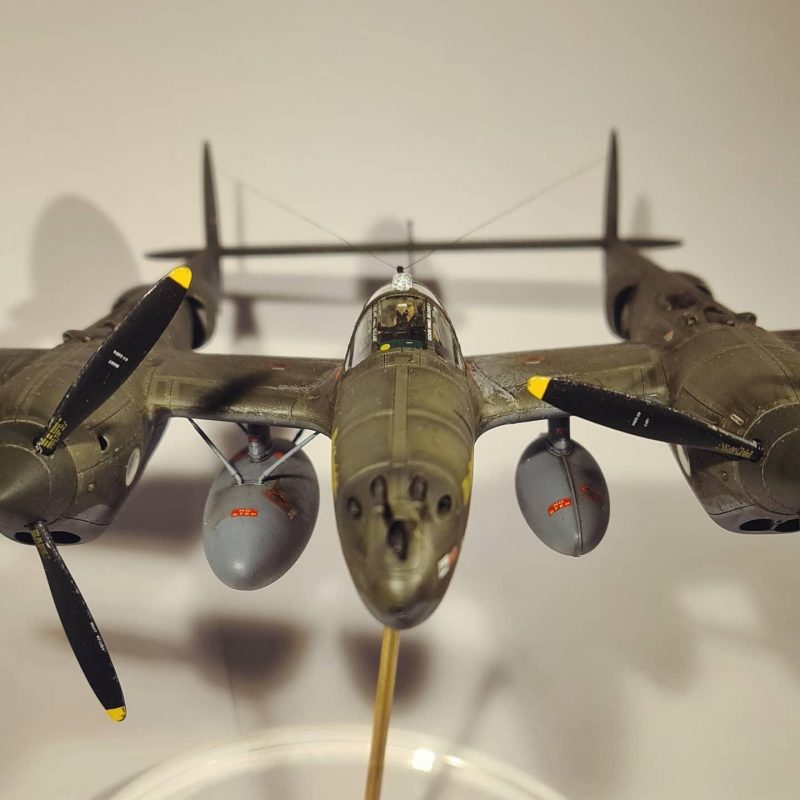
- 1. The mixed loadout of the 330gal and the 165gal fuel tanks provided the Lightning with just enough range for the 1,000 mile round trip. Some P-38s ran out of fuel whilst taxiing off the runway after the mission!
When the P-38 was transported via boat and truck it would have it's canopy covered, and the panel lines would be taped over to protect from the elements, this sometimes resulted in a noticeable difference in the paint of the aircraft with the paint being slightly faded in the areas not protected by the tape, if you look up images of P-38s particularly those in the pacific you may see this effect. 'Miss Virginia'was one such aircraft with this based on photographs found of it, to accomplish this effect I sprayed the panels slightly lighter and I taped off every panel line on the sides and upper areas before painting the tape darker, producing an overspray either side of the tape that looked darker. Needless to say, it was a pain and took a lot of time, but it did help create a more interesting looking model. The olive drab was mixed with white, khaki, and desert yellow to spray randomly different colour panels. This was the second or third time I really painted a model with variations this way and hadn't quite got the technique down, but it looks okay.
Does any build go smoothly? Yes sometimes. But not this time! At the time my go to clear coat to end a model was Vallejo Satin Acrylic Resin, but at a quite high cost to volume I decided to buy a big bottle of Vallejo Satin Polyurethane, I tell you this now knowing my mistake as at the time I didn't realise they were different. Long story short, I recommend the Acrylic Resin clear coat, but the Polyurethane caused a lot of issues. The clear coat didn't look very good and very quickly began to flake off not unlike when you get PVA glue on your hand and peel it off, along with it some stencils were taken off and for whatever reason the carrier film around the decals became incredibly obvious. Learning my mistake, I bought a bottle of the tiny resin Satin and fixed it but for some reason the decals were never fixed, thankfully I used montex masks for the main markings of this kit. The paint in subsequent layers would always be quite rough and have a weird texture to it, which is actually why I'm posting this today as I decided to take some new photos after giving this kit a quick swipe with a polishing stick which has helped remove those imperfections.
All in all I thoroughly recommend this build, and it sits alongside my other models to complete a lovely trio of Operation Vengeance models. The kit was a joy to build at every step, though as stated the painting issues at the end did throw a spanner in the works but that can't be put down to a fault of the kit. I highly recommend anyone with an interest in WWII aviation to add this or the P-38H rebox to their stash, just don't forget some brass barrels to add the final touch to this model.
-
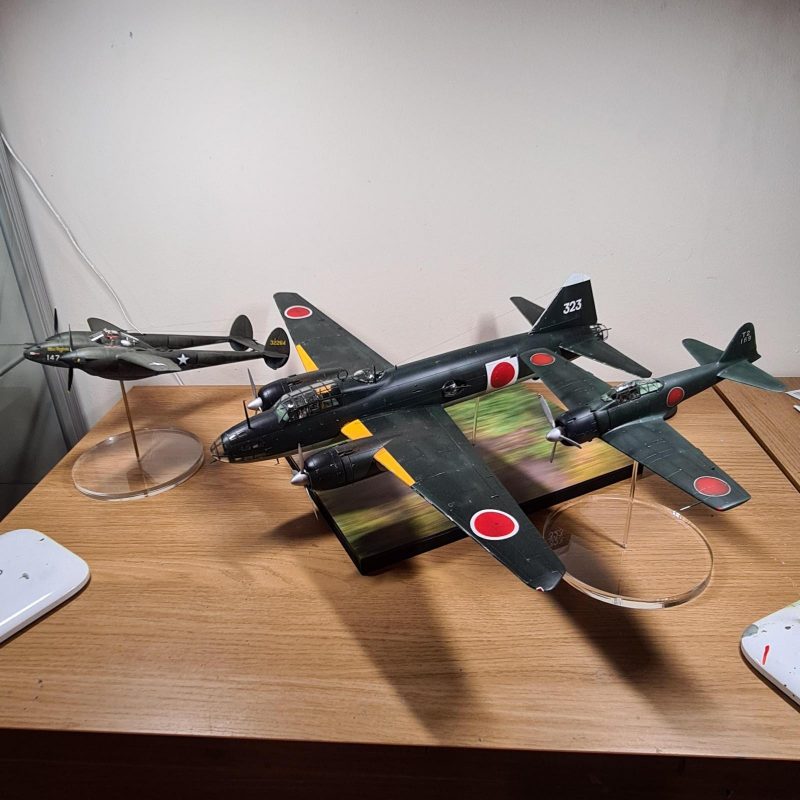
- 1. The trio all together is a massive collection, I wish I could take more good photos of the trio but I don't have the space!
-


Magnificent work ! Thanks for posting this beauty for us to admire. The weathering and tape marks look spot on to me. I think that all of us have experienced something going wrong during a build. Like you mentioned, I typically have at least one thing go wrong on almost every model I build.
The last major problem I had was when I was spraying my "Brubaker" Panther jet in overall Gloss Sea Blue. I had problems using the spray can. It was very old and should have been tossed out. Instead someone gave it to me to use. That should have been the first warning sign... I had just finished the filling and sanding work, which was quite considerable, since the plastic parts were warped from being improperly stored. I purchased the kit second hand on EBay... Well wouldn't you know it ? After shaking the paint can for about 5 minutes I sprayed it right on the model. I should have tested it out first on something like a sheet of paper... Nope. Not me !
Needless to say, the paint came out in huge blobs. It reminded me more of how they used to coat ceilings with a popcorn textured coat... It was THAT bad. The plane almost went of a maiden flight right then and there. Instead, I ended up stripping all of the paint, which also ended up removing the filler work that I had just painstakingly performed.
I have several original photos of "Miss Virginia" that were included as part of the Zotz decals. I'll send them to you as a PM here, so please watch your mailbox. Now I definitely have to get busy with my "Operation Vengeance" builds.
Well done ! I pressed the "liked" button too.
Thanks for sending those photos! I'm glad my paint issue was fixable, I had something similar with spray cans happen on my first model I did but luckily I sprayed it on a test piece. I think one of the signs of a good modeller is being able to fix issues like you had without giving up!
Beautiful! I'm currently working on this kit, and it really is a game-changer.
In my opinion it's up there as probably the best engineered kit in /48th to date. Makes me excited to see what Tamiya's next kit, the Phantom II, will be like.
Allow me to edit your first photo's comment...
"The Magic of photoshop, a quick 5 minute job in any free editing tool can remove the stick holding this model up, making it look EXACTLY LIKE THE REAL aircraft."
😀 gorgeous build!
Thank you! I tried doing the photoshop on a couple of other models and it worked out well, I'll post them in a few days. I have a backlog of a few kits that need to get some photoshop in flight treatment but sadly the weather seems to be against that idea!
Agree completely on the nose guns; this very special kit/model begs for the high quality of brass..
Due to your paint-work, the model takes on a high level of realism. Special.
Thank you very much!
Very nice work and a good result. You're right about these P-38 kits being as easy as they are with a practically guaranteed great result.
If I might suggest an easier way to go on the "tape weathering" (which I also did on one of my Tamiya P-38s): paint the model overall the basic OD/NG color, then tape off the areas that were taped on the original (Tamiya white vinyl tape is the perfect size for this), then "fade" the rest of the model. Much less of that PITA masking to do this way; then drybrush Tamiya "smoke" over the tape so it slops over the tape, which will look like the tape/dirt residue. It's the lazy modeler's way to go.
That makes sense! I tried a few methods on a test piece but in hindsight I never tried doing weathering in the piece, so I tried OD with tape and smoke sprayed around the tape but didn't think the contrast was enough but as stated I didn't try and weather the OD further on the test piece.
Eitherway, the true problem with this is trying to survive taping everything without going crazy!
Great build, Harvey.
Recently finished this one myself and it is indeed a great piece of engineering.
Your pictures are awesome, it sure looks like a real P38 in the sky.
Thank you!
Looks fantastic, nice display stands.
Congratulations on your build, Harvey!
Spectacular result, and I like the tape marks rendition a lot.
You are right, many times something goes wrong during a build; good thing is that, in modeling, everything is fixable: you can keep walking one way or another.
P.S. Your Photoshop result is superb: at first I thought I was looking at an airshow pic...
Your in flight shot looks so great I took the liberty of adding some prop blur. Now people might think it's from an airshow.
Great work.
Cheers.
1 attached image. Click to enlarge.
Thank you very much! How did you accomplish this? I briefly tried to have a go but couldn't get it looking that good when I tried to mimic a prop blur on a previous model.
I have an older version of Photoshop. If you have photoshop I can send an iModeler Personal Message with instructions. Or maybe I should do an article for the community.
Cheers.
If you could message me it that would be great, though a community post I'm sure would be helpful to many people!
Great result, Harvey!
🙂 ... Greetings ... 🙂 :
I am enjoying this build and at the same time , can see you
having fun with it and the computer work ... that is modeling !
The model looks very well done, the weathering is very convincing and well achieved.
Again ... great modeling Harvey and thank you for sharing the pictures.
Thank you very much!
An excellent build of what is already a classic kit, definitely liked.
Very nice! Made for nice closure to your project. Well done.