Review: Airfix 1/48 Spitfire F.XIV, “Johnny” Johnson
History:
It's a strange but interesting fact that the only "built for that specific powerplant" Spitfire to achieve a large production run was the Mk.I; while there were several other Marks specifically designed to make maximum benefit of the additional power of the later Merlins and then the Griffons, in each case the "interim" type cobbled together to bring the additional performance operational as soon as possible was the version that saw the most widespread production. This began with the Mk.V, which was essentially a beefed-up Mk.I airframe to take advantage of the Merlin 45's additional 400 h.p. This was followed by the Mk.IX, a beefed-up Mk.V to take advantage of the Merlin 60 series while the Mk.VIII was being designed to take maximum advantage of this engine. The last was the Mk.XIV, a beefed-up Mk.VIII airframe to use the Griffon.
The Type 394 Spitfire Mk. XVIII bears the same relationship to the Spitfire XIV that the Spitfire VIII bore to the Spitfire IX: designed to use the particular engine to best advantage, yet not produced in numbers approaching the "interim" type. This type introduced a new wing which was specific for the "E" type armament, rather than the "universal" wing used since the Spitfire Vc. Originally, the aircraft used the same Griffon 65 as the Spitfire XIV, but the Griffon 67 - which offered an additional 300 h.p. - was quickly introduced.
Group Captain J.E. ”Johnny” Johnson:
The RAF and Western Allies “ace of aces” in World War II, James Edgar “Johnny” Johnson was educated in the East Midlands, where he qualified as an engineer. He began his RAF career by being turned down for the Territorial Army because the local unit only wanted excellent polo players. Turned down in turn by the RAuxAF for not being sufficiently “foppish,” he managed to get in through the RAF Volunteer Reserve in August 1939 despite a medical problem stemming from having broken his collarbone while playing rugby, an injury that later complicated his ambitions of becoming a fighter pilot and would later keep him out of the Battle of France and Battle of Britain.
In 1940 Johnson had an operation to reset his collarbone, and began flying regularly. He came under the influence of Douglas Bader, the man who he would later credit with teaching him everything that led to his aerial success, when they met during an invasion scare in September 1940, where Bader was the only person looking forward to the fight. He took part in the offensive sweeps over German-occupied Europe from 1941 to 1944, almost without rest, taking only two three-month breaks. His combat tours included participation in the Dieppe Raid, Combined Bomber Offensive, Battle of Normandy, Operation Market Garden, the Battle of the Bulge and the Western Allied invasion of Germany. By the end of the war, he was promoted to Group Captain and placed in charge of the Spitfire XIV wing in Holland.
Johnson was credited with 34 individual victories over enemy aircraft, as well as seven shared victories, three shared probable, 10 damaged, three shared damaged and one destroyed on the ground, over 700 operational sorties in which he engaged enemy aircraft on 57 occasions. Included in his list of individual victories were 14 Bf-109s and 20 Fw-190s destroyed making him the most successful RAF ace against the Fw-190. He scored his final victory of the war in September 1944 during Operation Market Garden. He made certain to lead the wing on its first mission over Berlin in April 1945.
At the end of the war, with the wing now based at Celle, Germany, Johnson was the Senior Allied Officer Present when he learned of the presence of Buchenwald Concentration Camp in the area under his command. Enraged by professions of ignorance about the camp from the local Germans, when it came time to pass out ration cards, he set up the registration operation making certain that every German who got their card was forced to walk through the camp. “They bloody well knew what it was and what had happened there after that!” he later declared.
Johnson remained in the RAF after the war, flying a tour in Korea with the 51st Fighter Wing, and ended his career as Air Vice Marshal commanding RAF forces in the Middle East in 1966.
THE KIT
Airfix's Spitfire XIV is the first really accurate 1/48 Spitfire XIV released, and is clearly superior to the Academy kits issued 20-some years ago. The kit can be turned into the F.XIV, F.R. XIV or F.R. 18 without difficulty.
Construction:
Several modelers have complained about the difficulty of building the kit without use of putty and subsequent loss of detail. There is a very easy way to assemble this kit, such that one will have perfect fit and will use no putty or other filler in the process. Here it is:
-
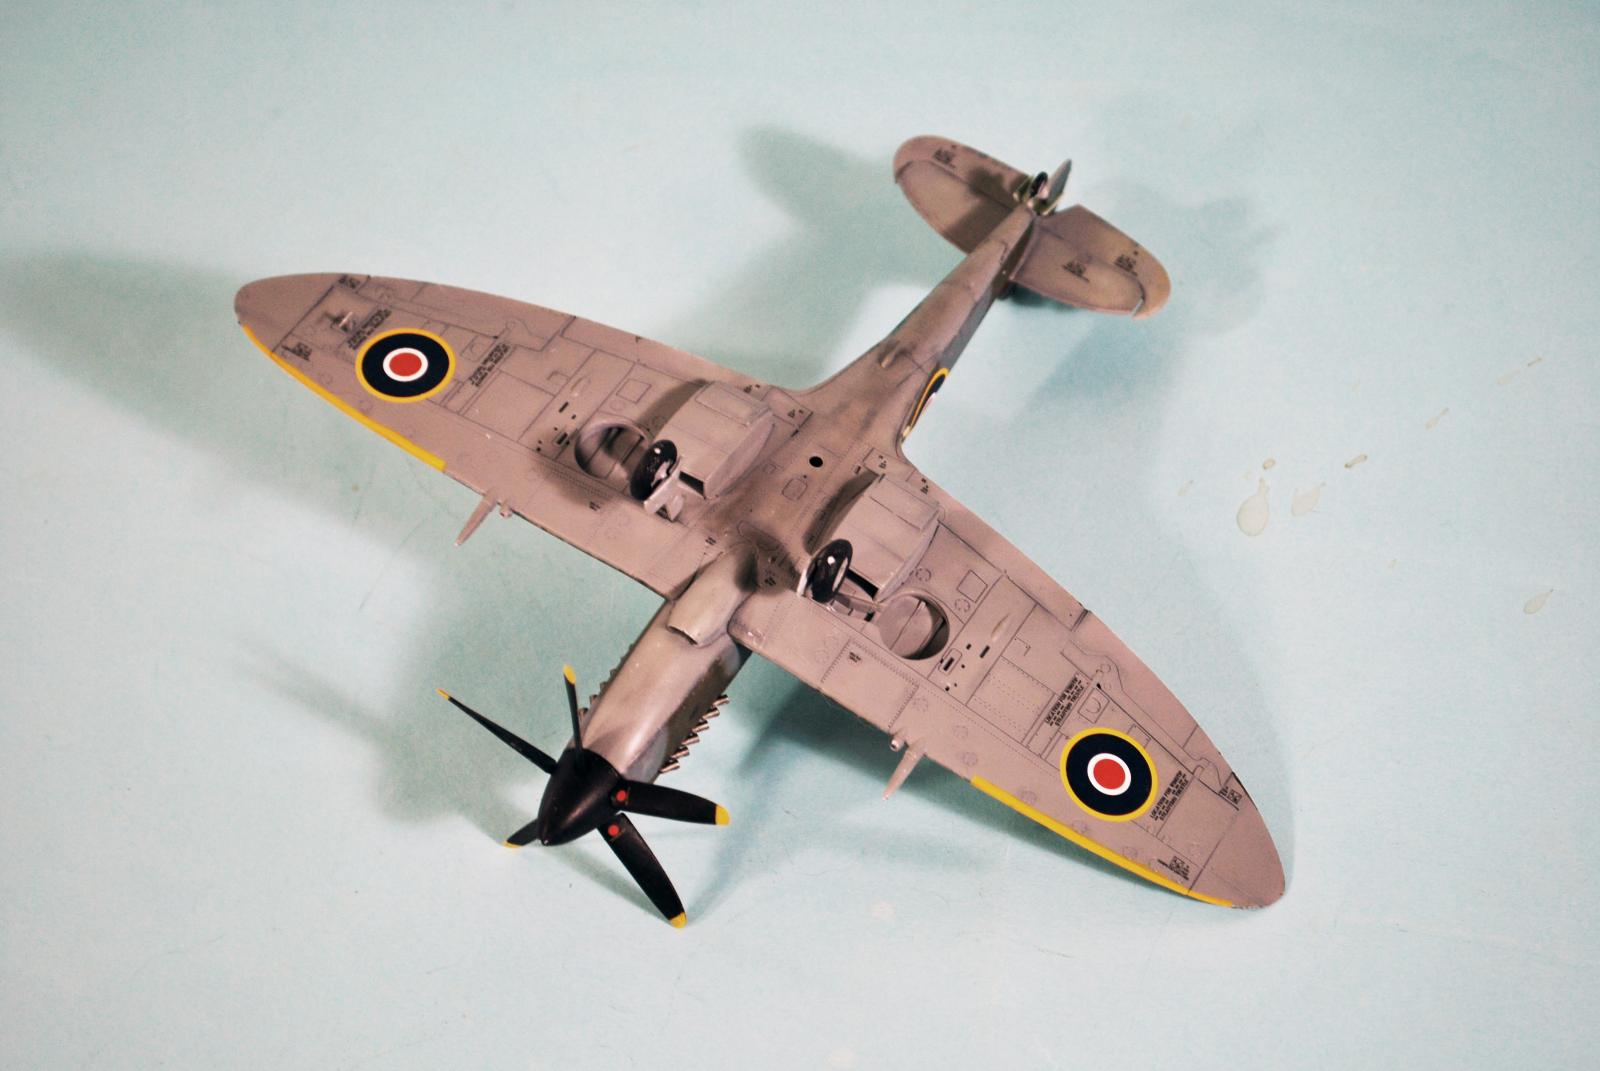
Before assembling the fuselage, glue some Evergreen strip inside along the lower join line for the gas tank. Assemble the fuselage without attaching the cockpit. This allows you to work the fit of the gas tank to the fuselage from inside and out to get a perfect fit. If you take care in attaching the fuselage halves, you will only have to scrape down the centerline joint to have a smooth result. Before attaching the fuselage halves, cut open the side hatch if you want to pose it open on the finished model.
-
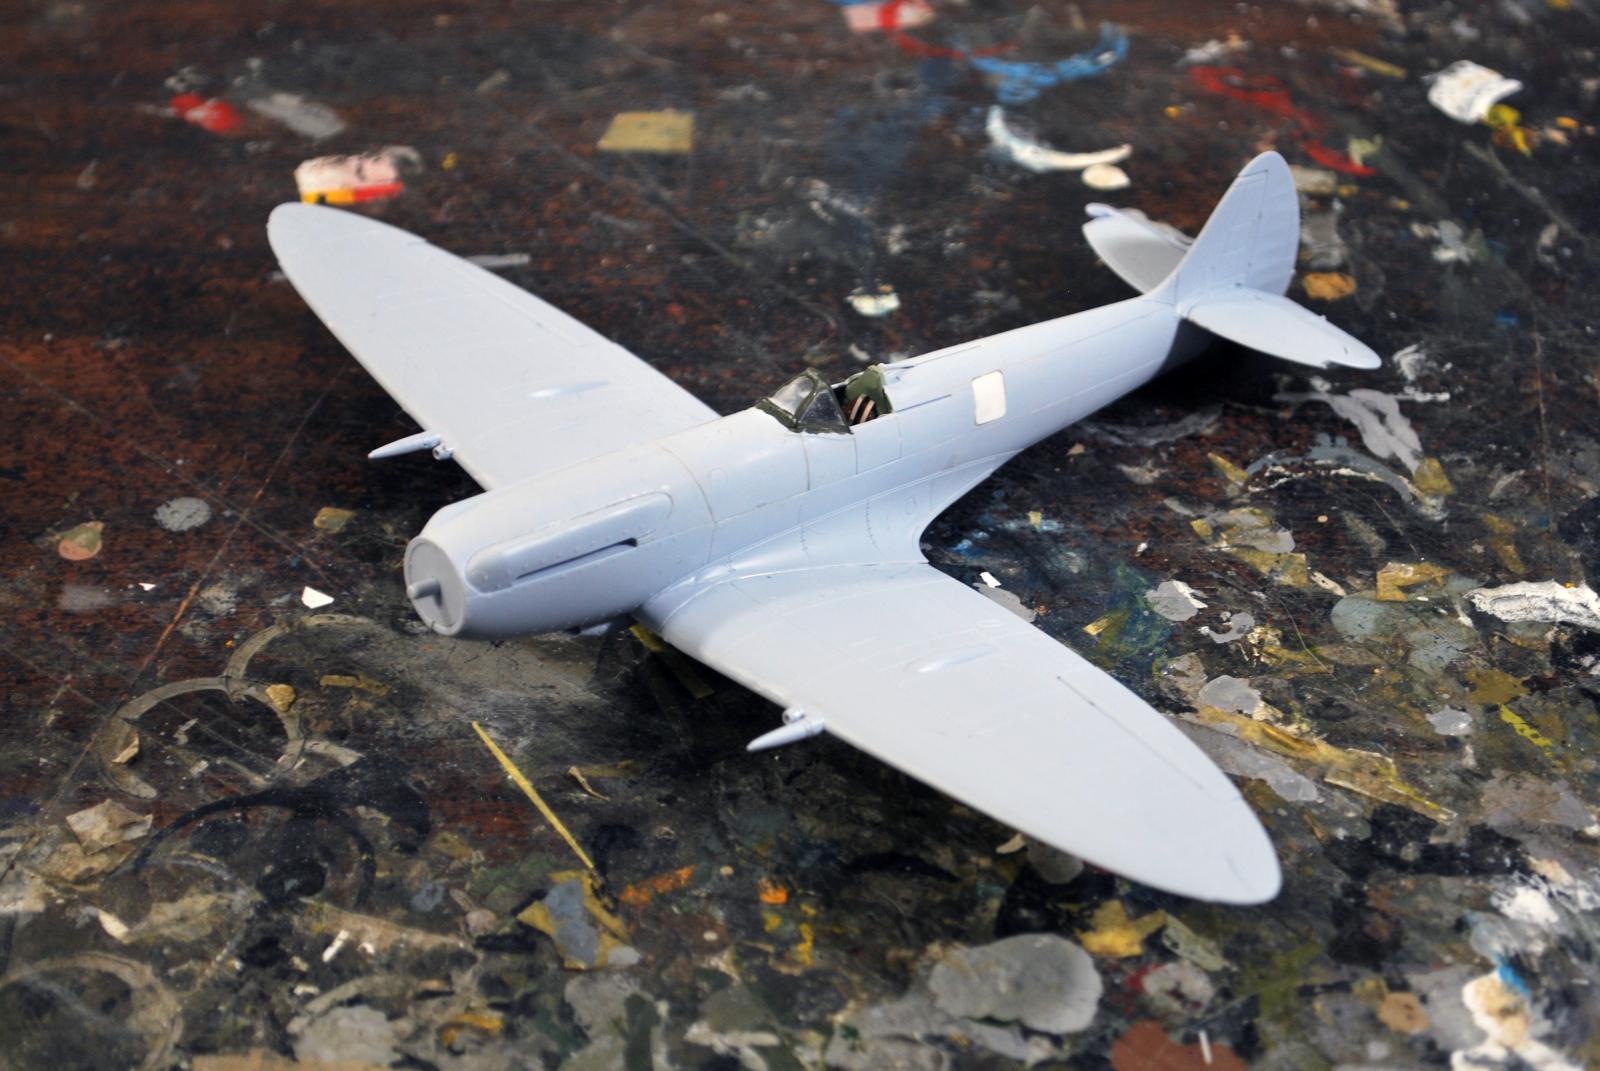
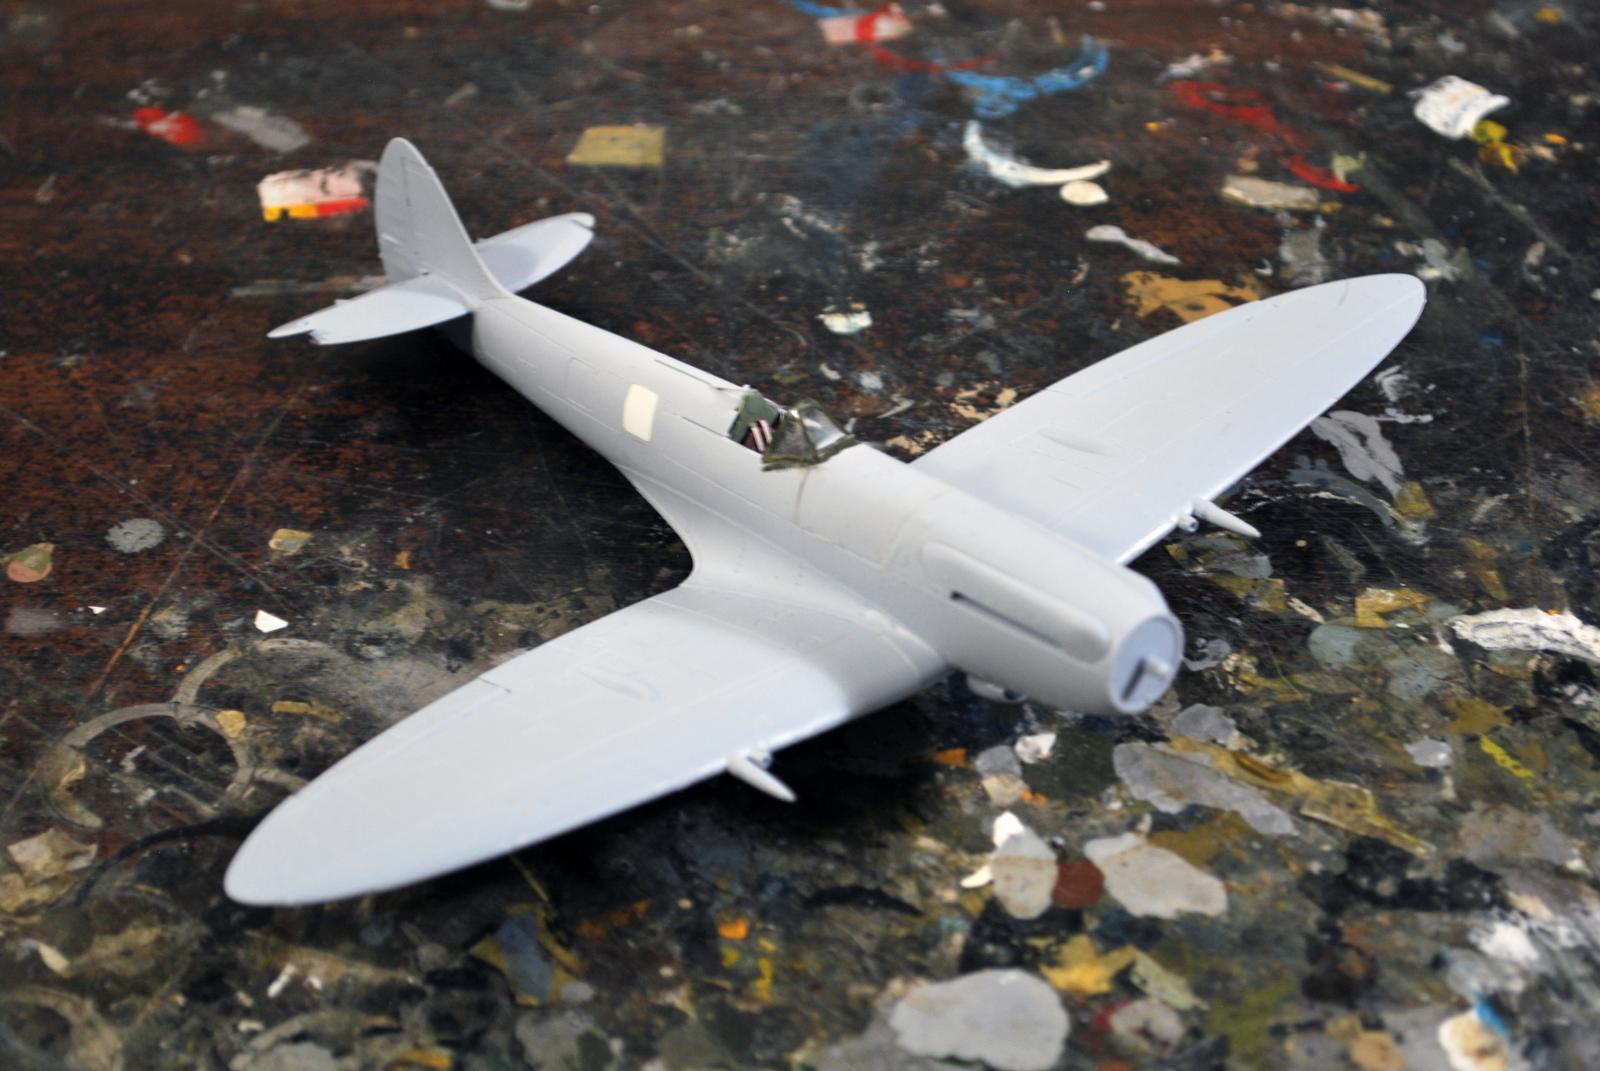
Assemble the cockpit. Cut off the ferschlugginah “gun sight” and make a Mk.14 sight, which is easy since it's a cube with an adjusting wheel on either side. All Spitfire XIVs used it and it solves the one “mistake” in the kit. (There are photos of the gunsight to be found on the net, google “photos of Mark 14 gyro gunsight”) I only used Eduard photo-etch seatbelts, the rest of the cockpit looks fine when it's viewed inside the fuselage.
-
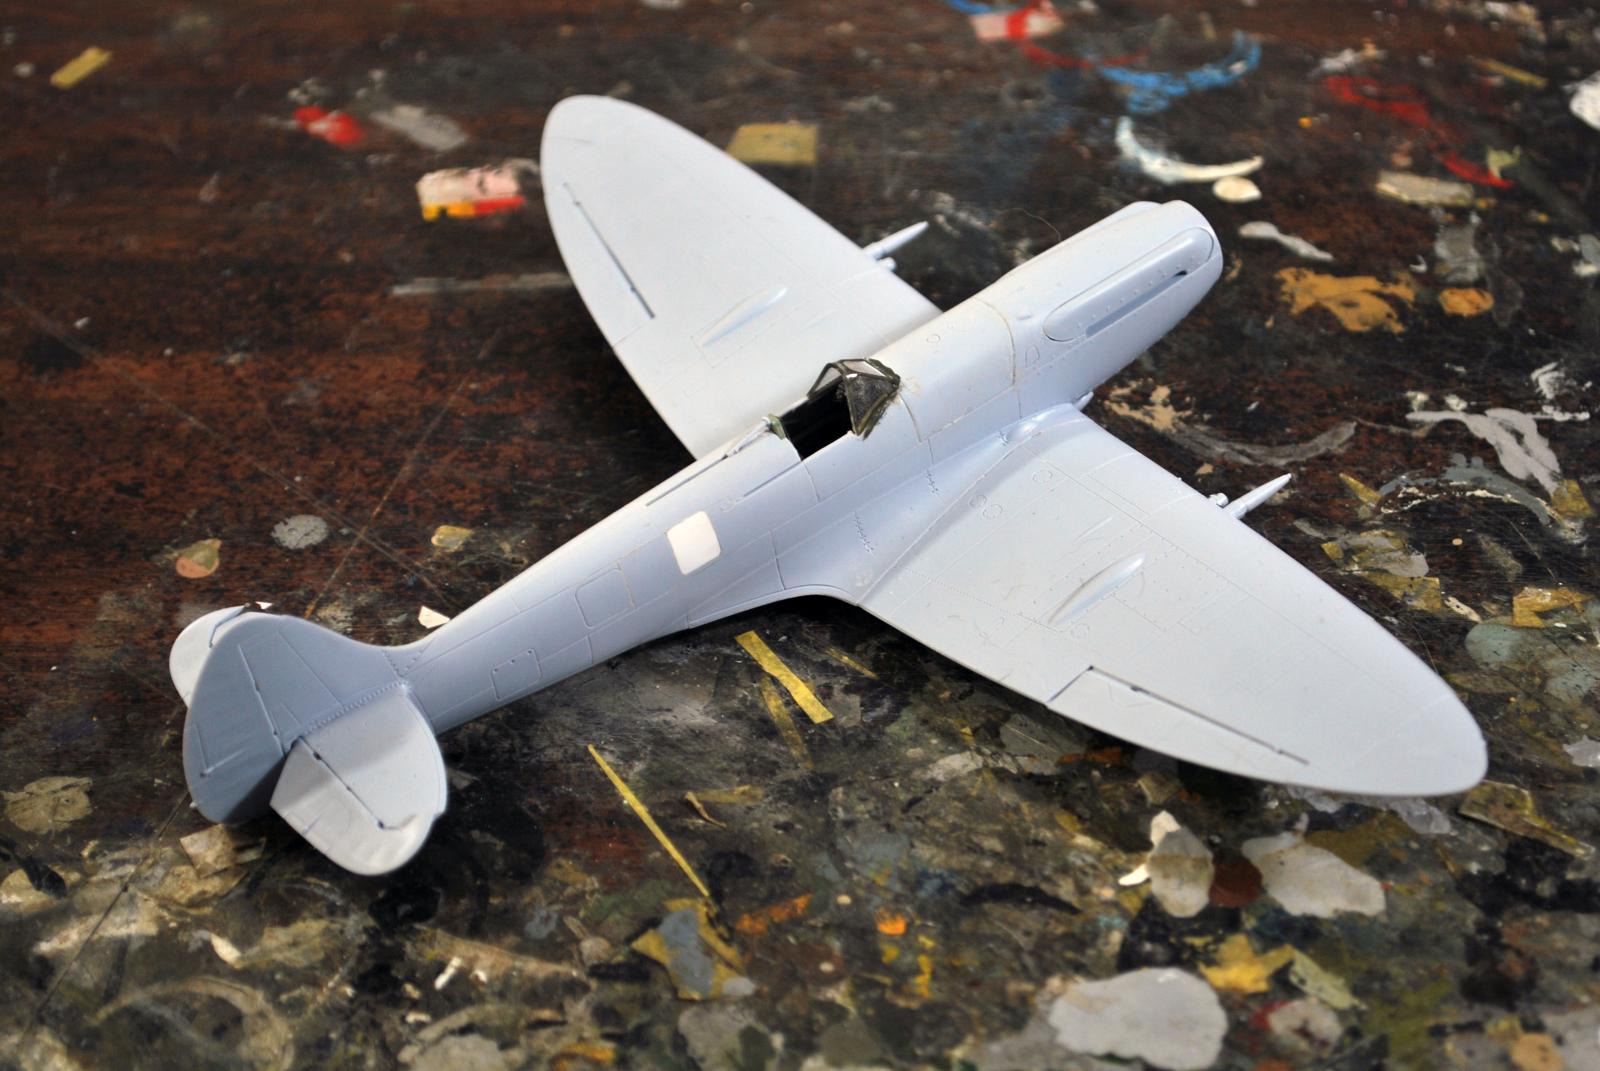
Insert the cockpit into the fuselage, it will “click” into position, then glue it in place.
-
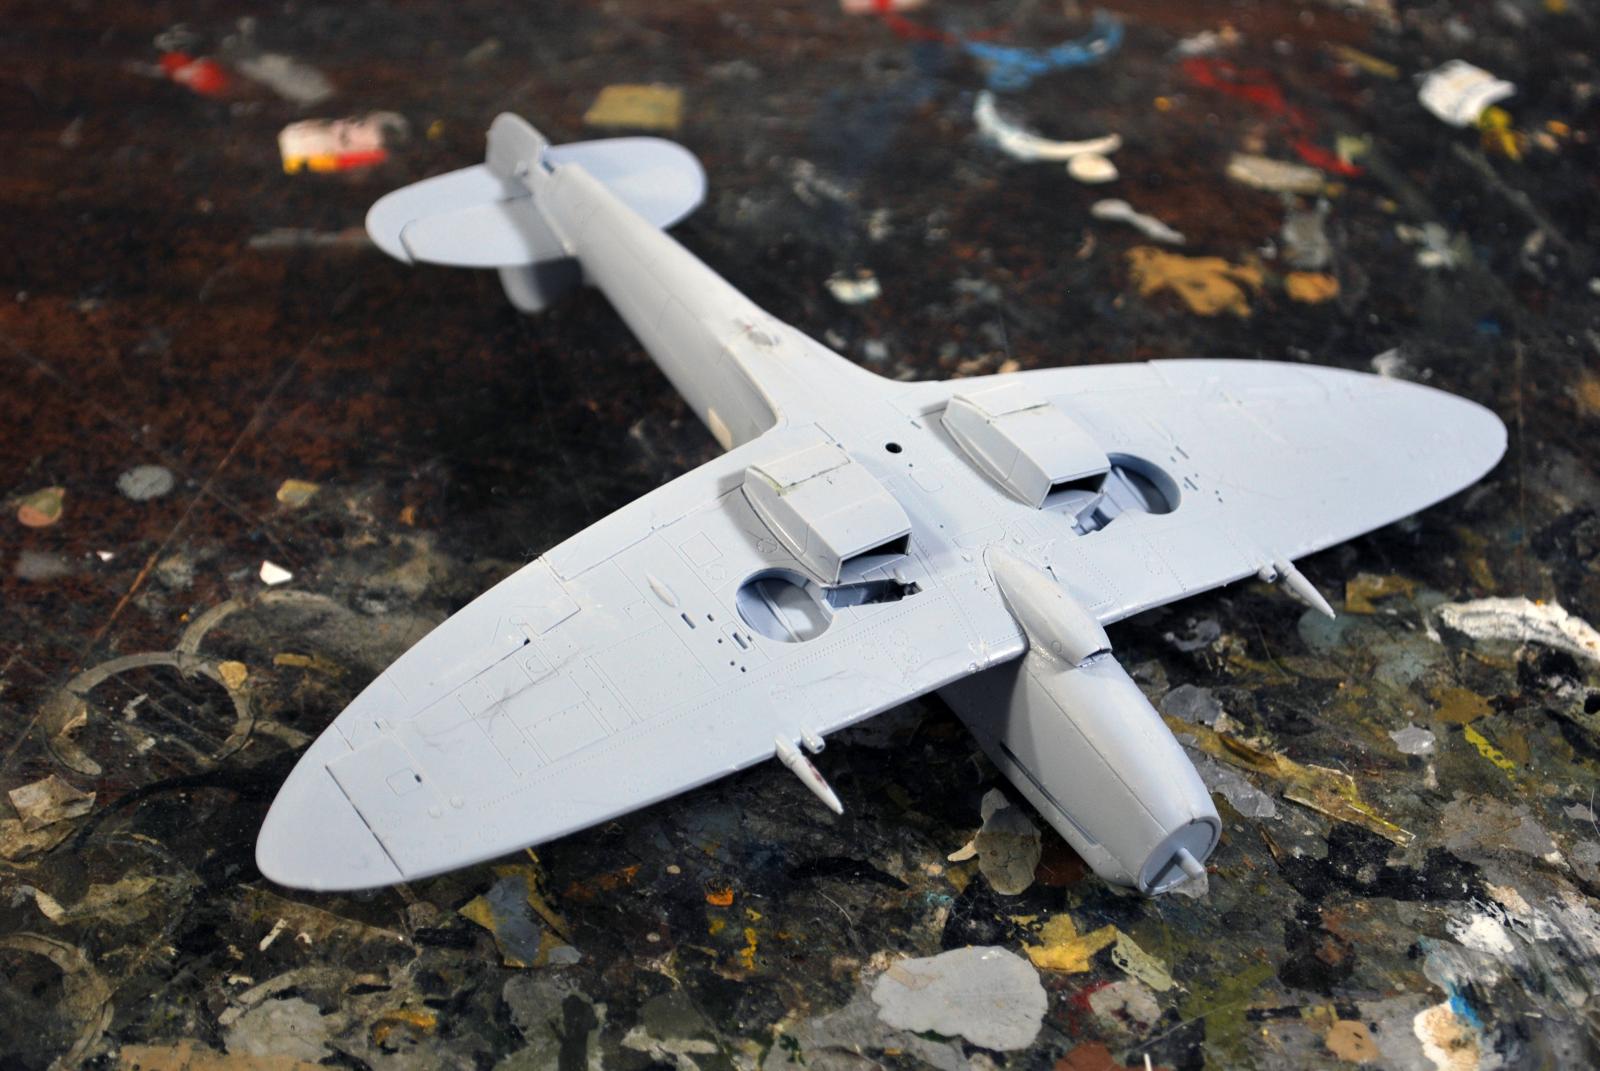
Assemble the main gear wells to the lower wing part, then glue the lower wing to the fuselage.
-
Carefully make sure that the inner edge of the upper wing part will fit perfectly to the fuselage, smoothing off the sprue nubs. Attach the upper wing by starting with the wing-fuselage joint, then glue the upper part to the lower.
-
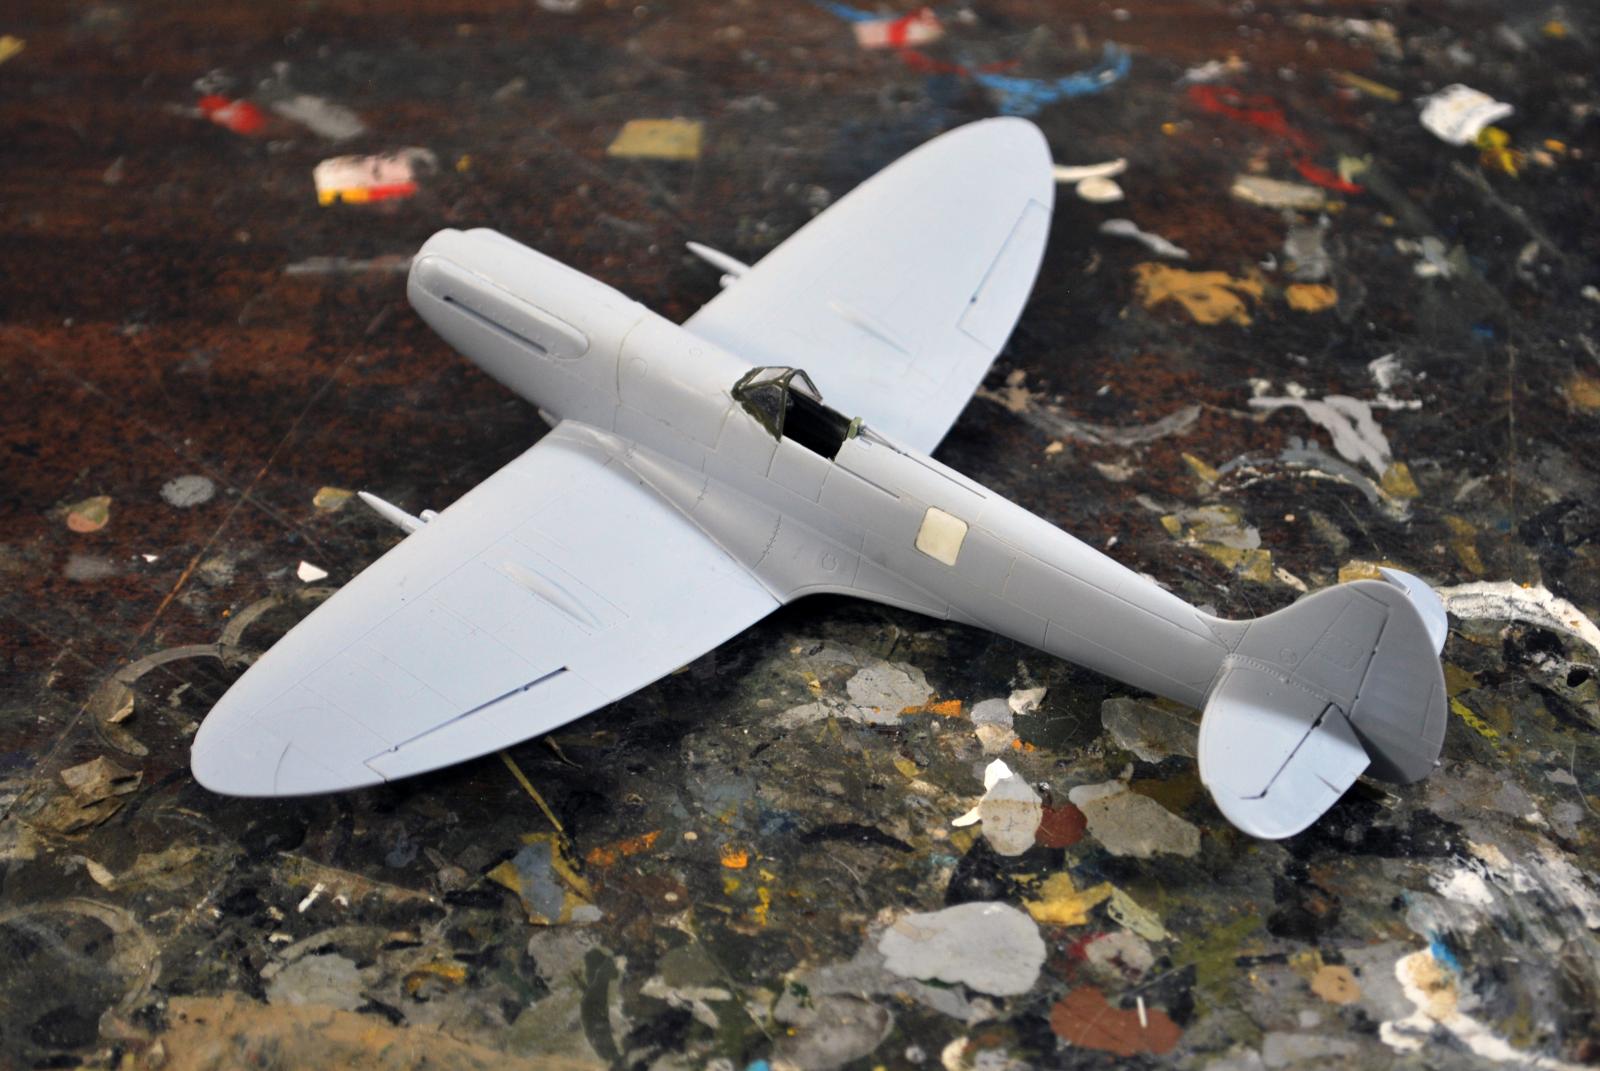
Attach the horizontal stabilizer. Cut the elevators apart. Attach the plug in the vertical fin, then attach the elevators as you wish them posed.
-
Assemble and attach the radiators and housings and the carburettor intake. If you flood the area where these parts will be attached with liquid glue, it will fill any gaps and you will not need putty anywhere.
You now have a perfectly-assembled model, ready for paint.
If you choose to do the fighter version rather than the fighter-reconnaissance version, merely cover the camera covers with Mr. Surfacer or the putty of your choice and sand smooth, then rescribe the panel lines as necessary. You can also do as I did with this kit, substituting pieces of Evergreen sheet for the camera covers, puttying them and sanding smooth.
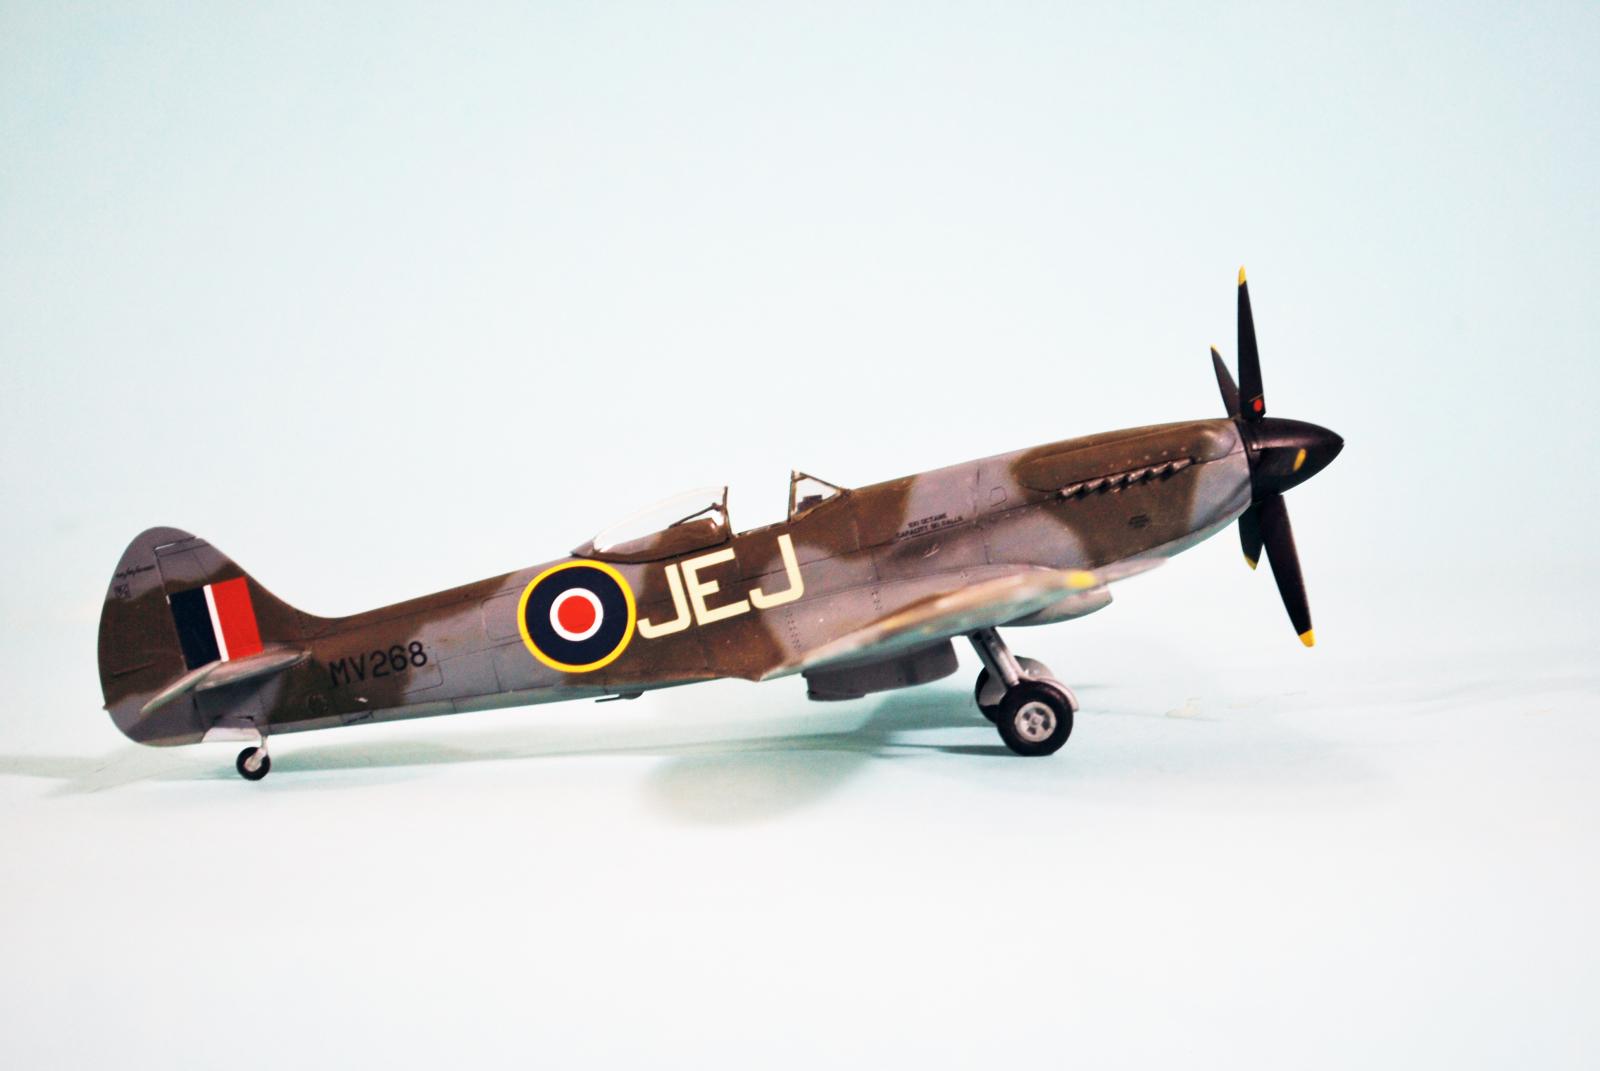
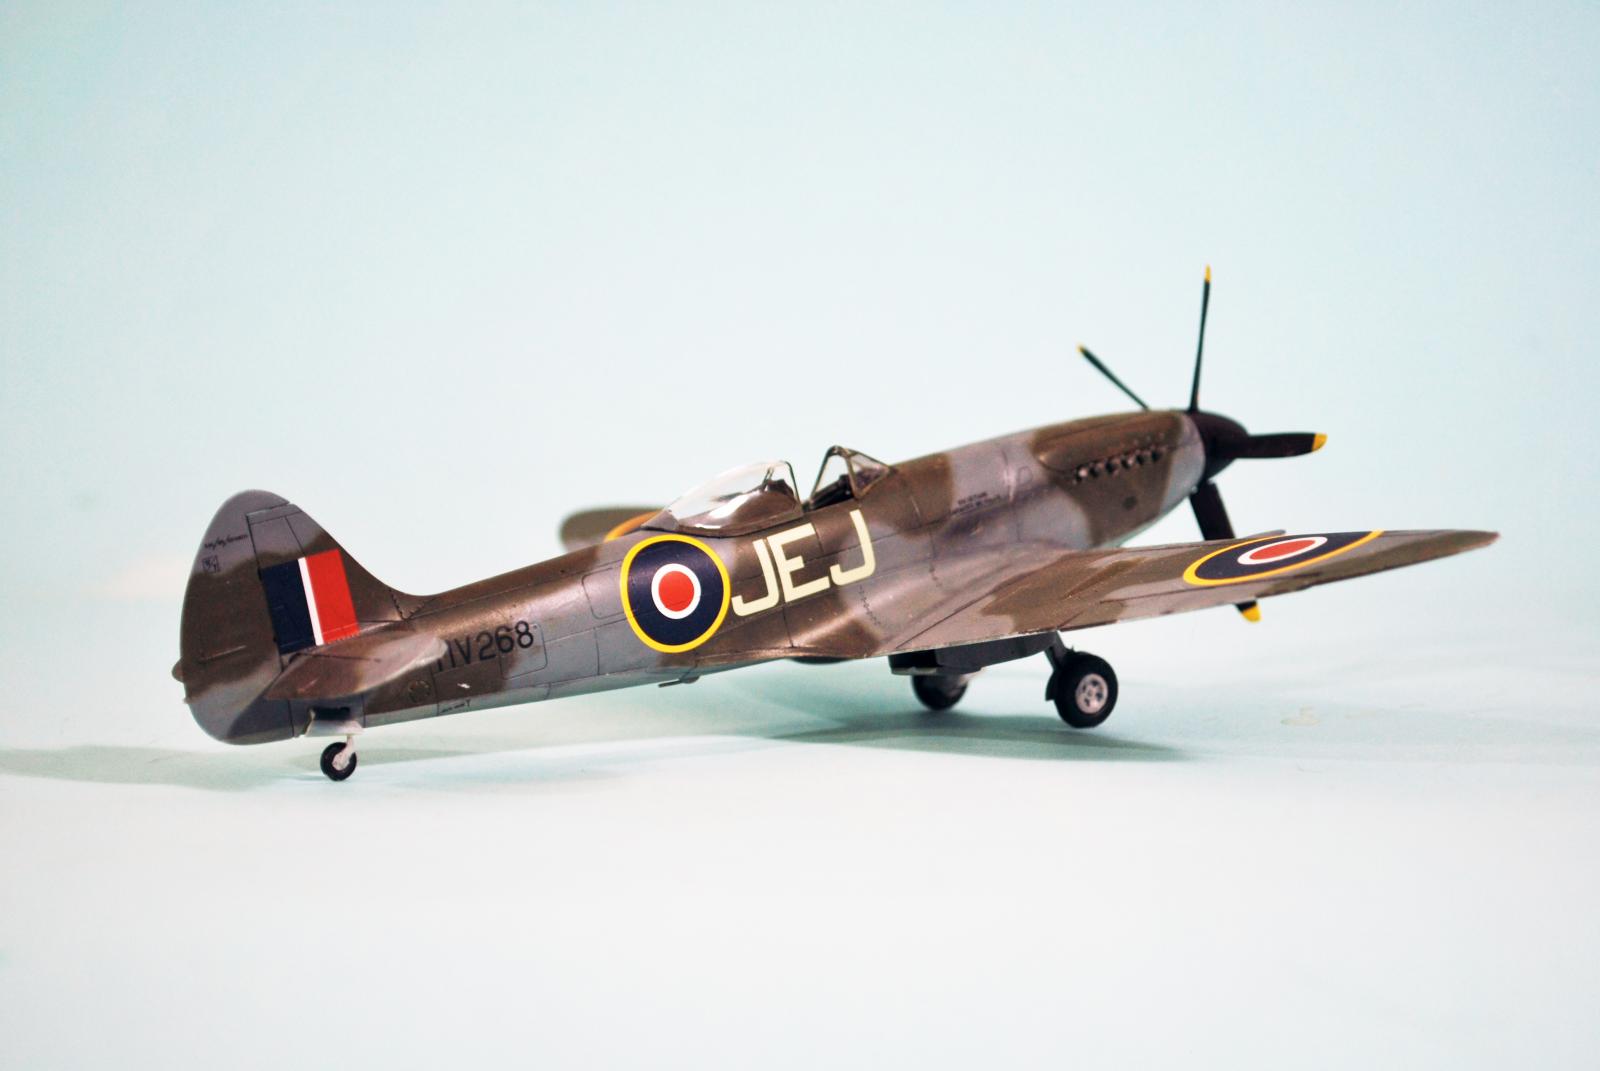
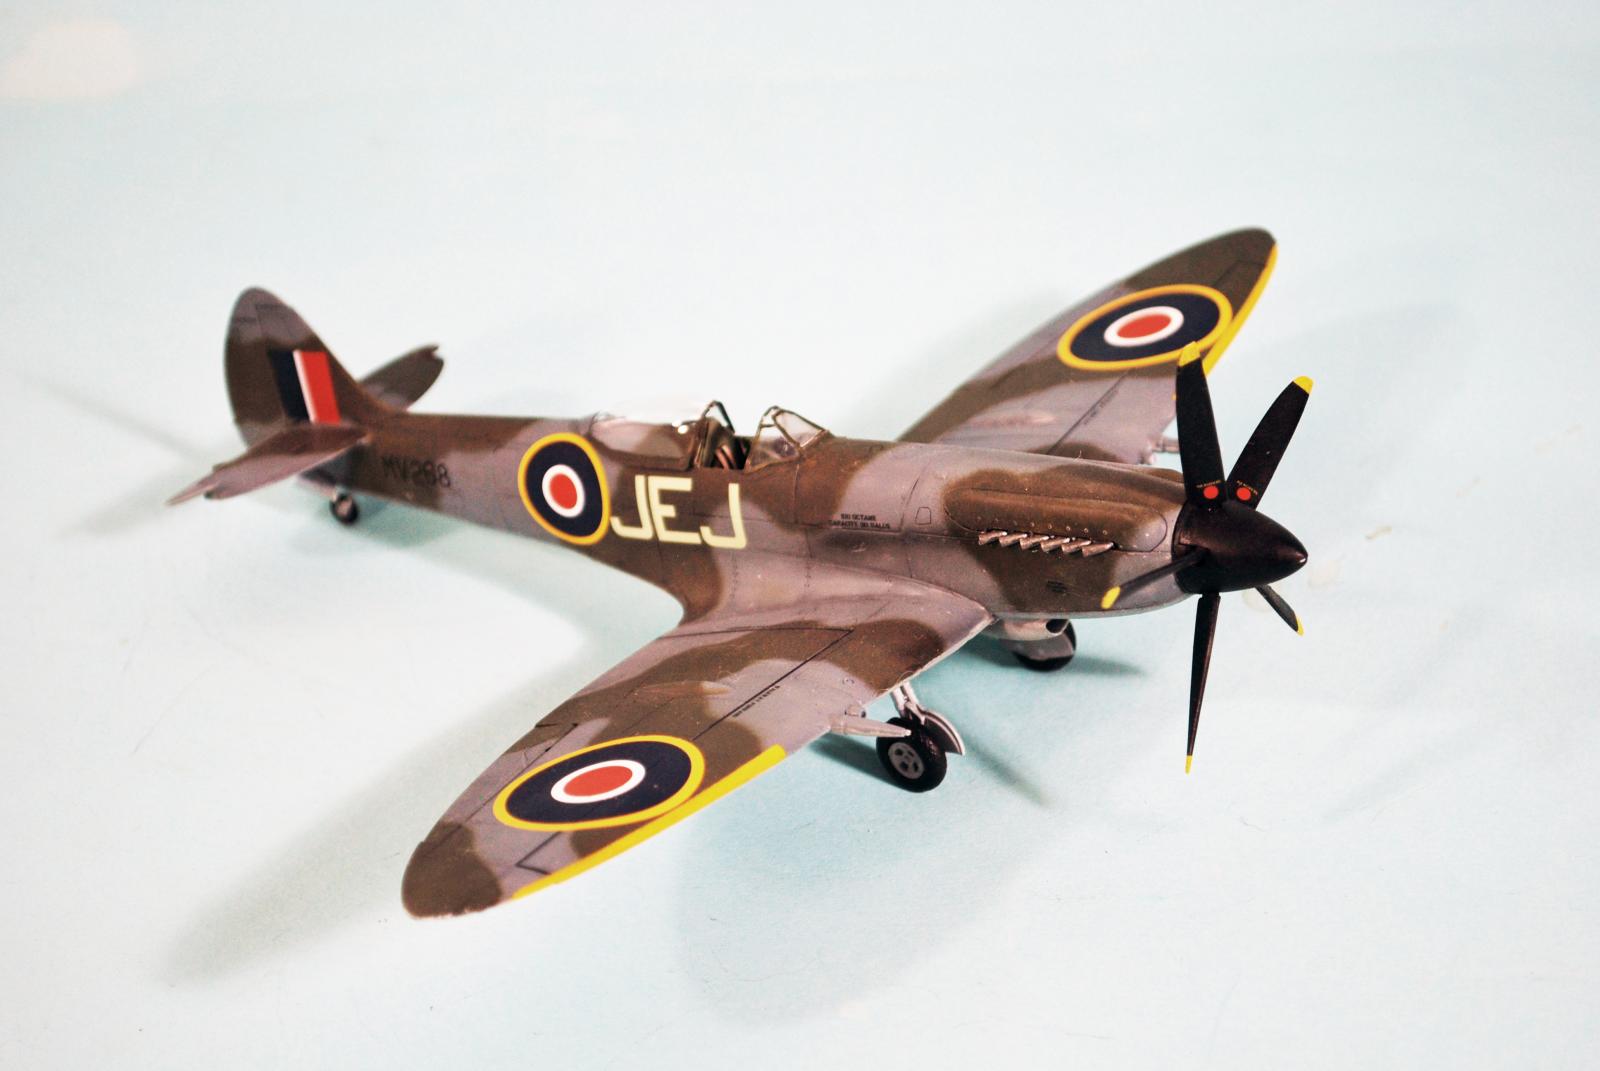
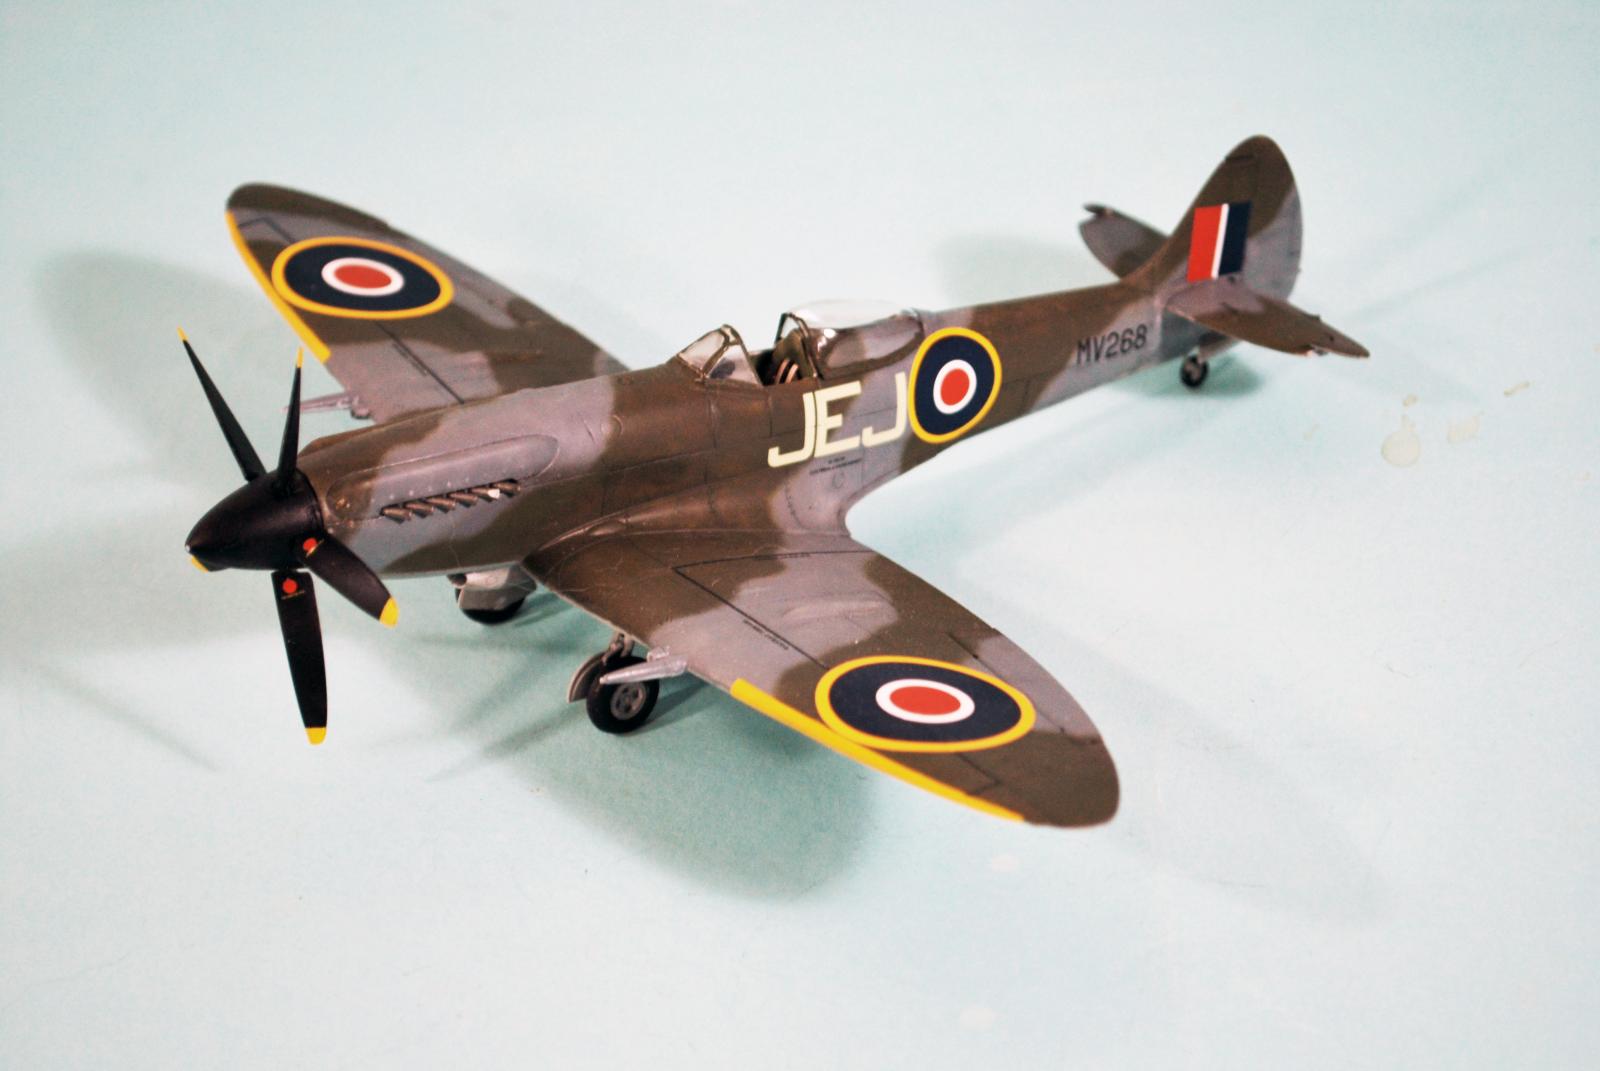
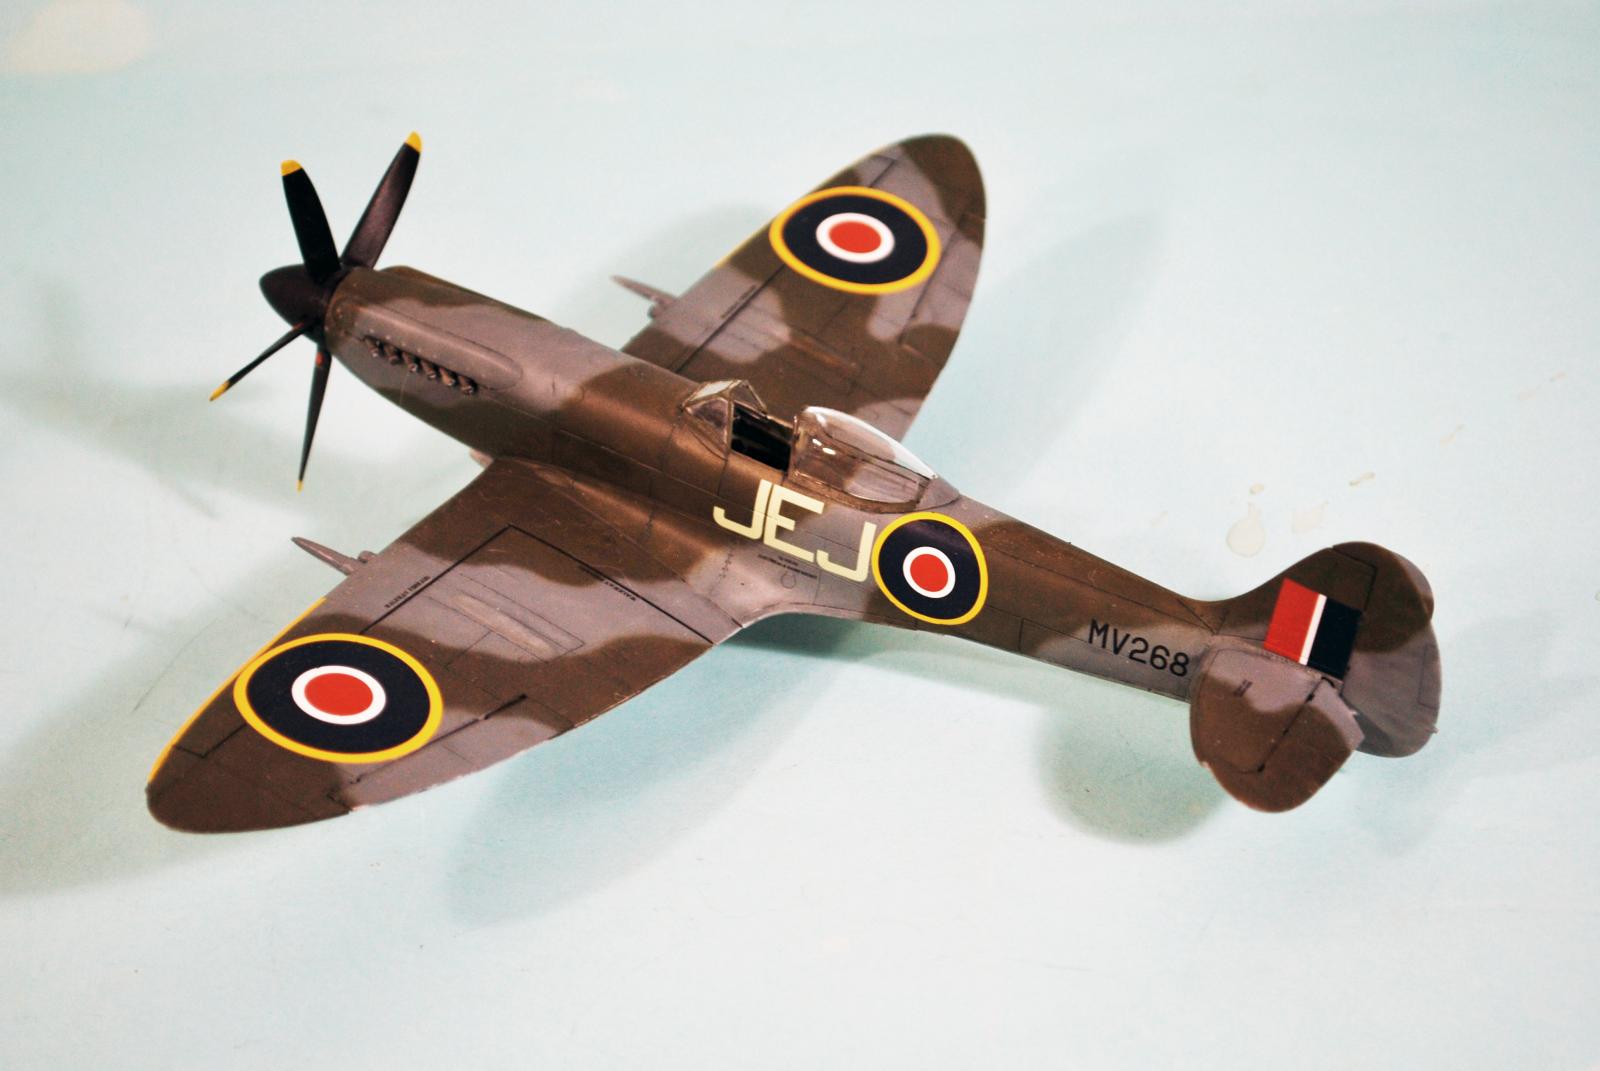
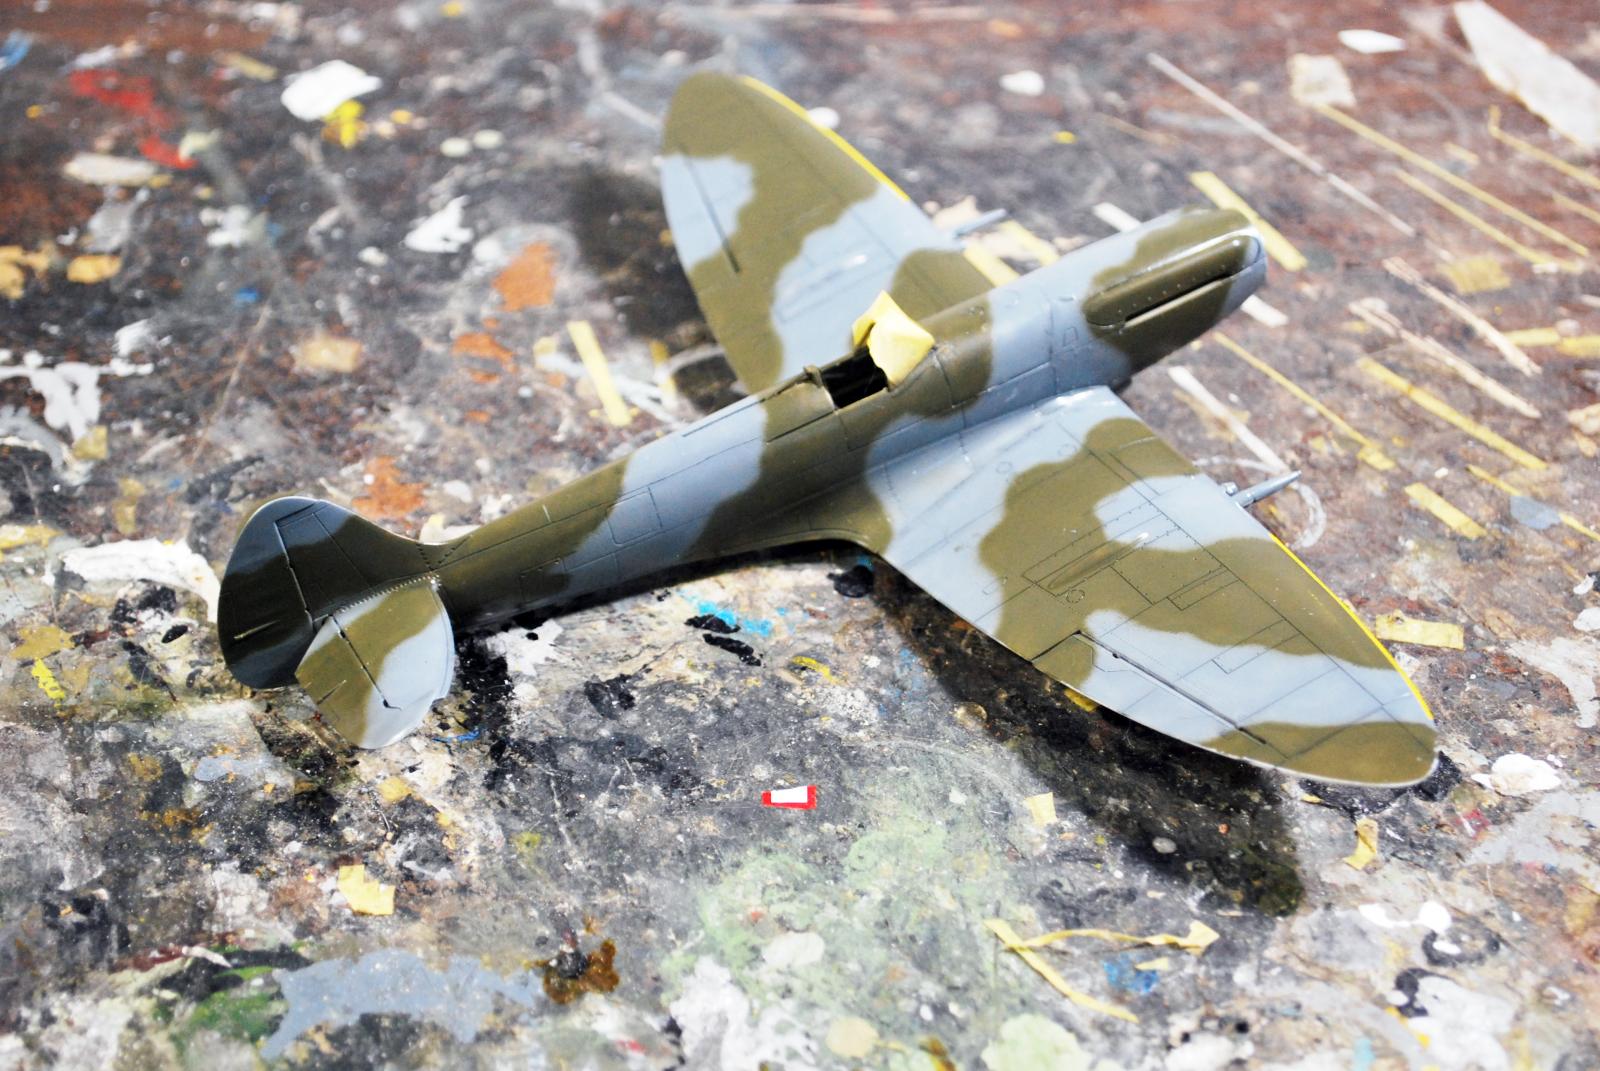
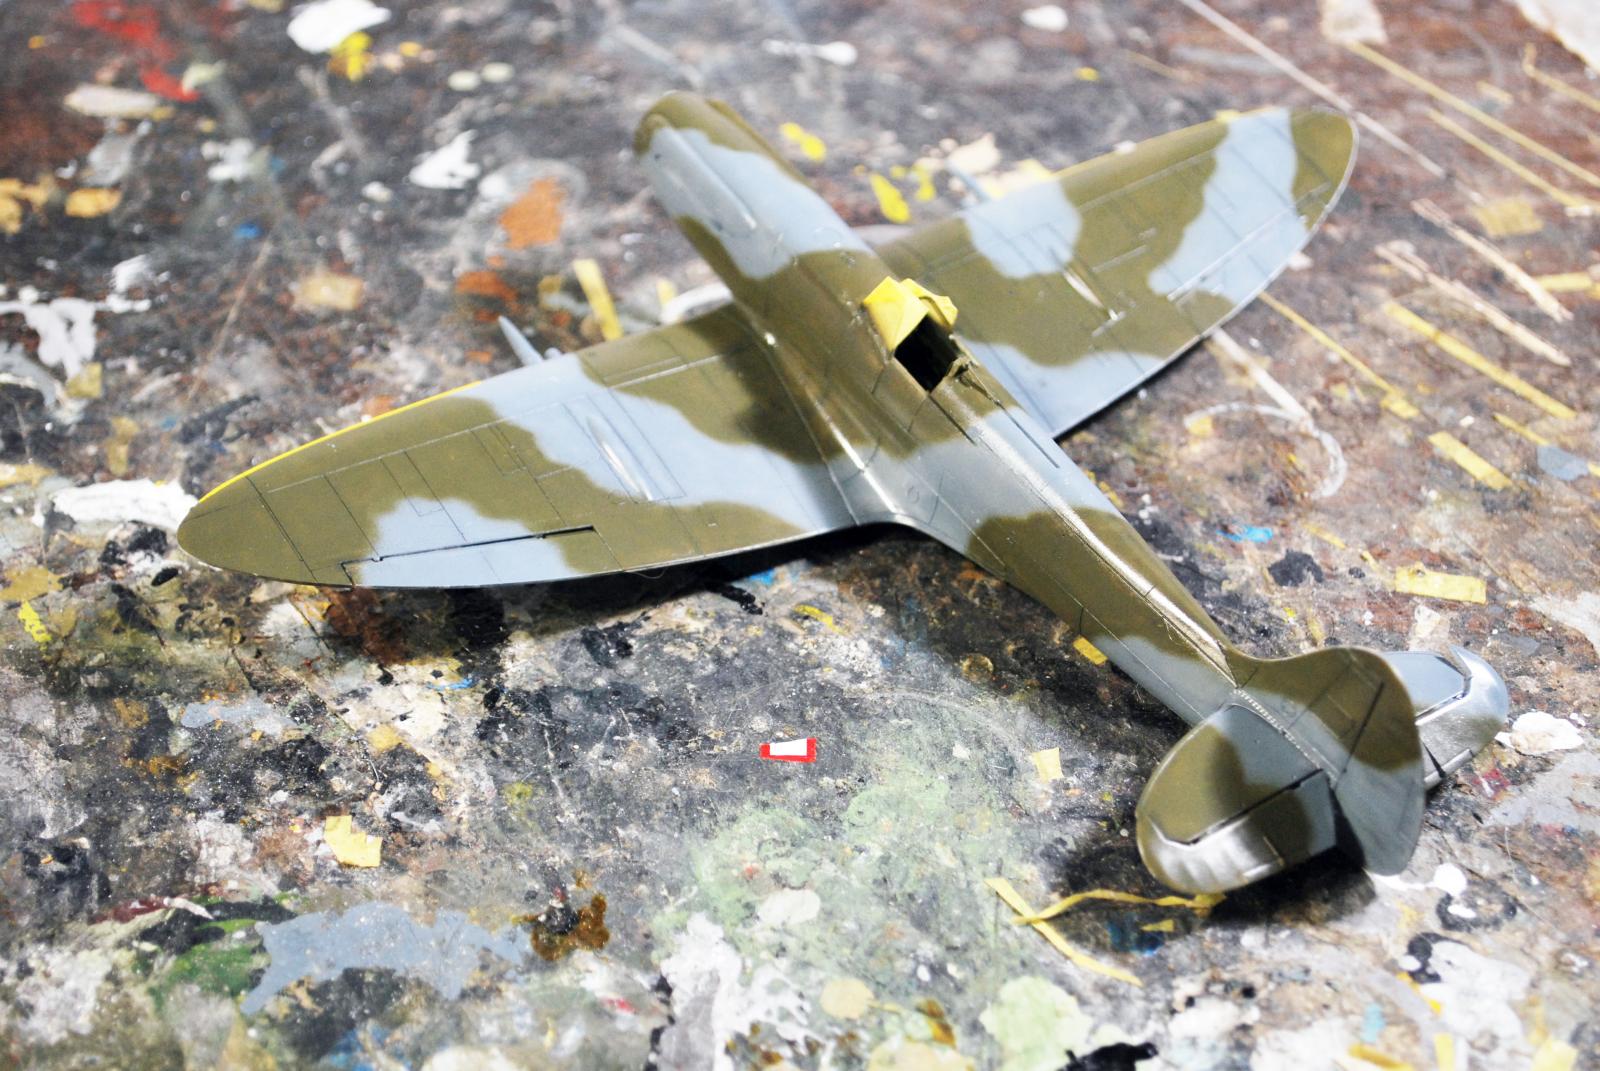
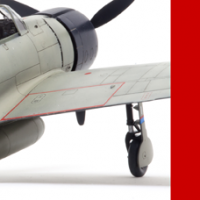
Painting and Markings:
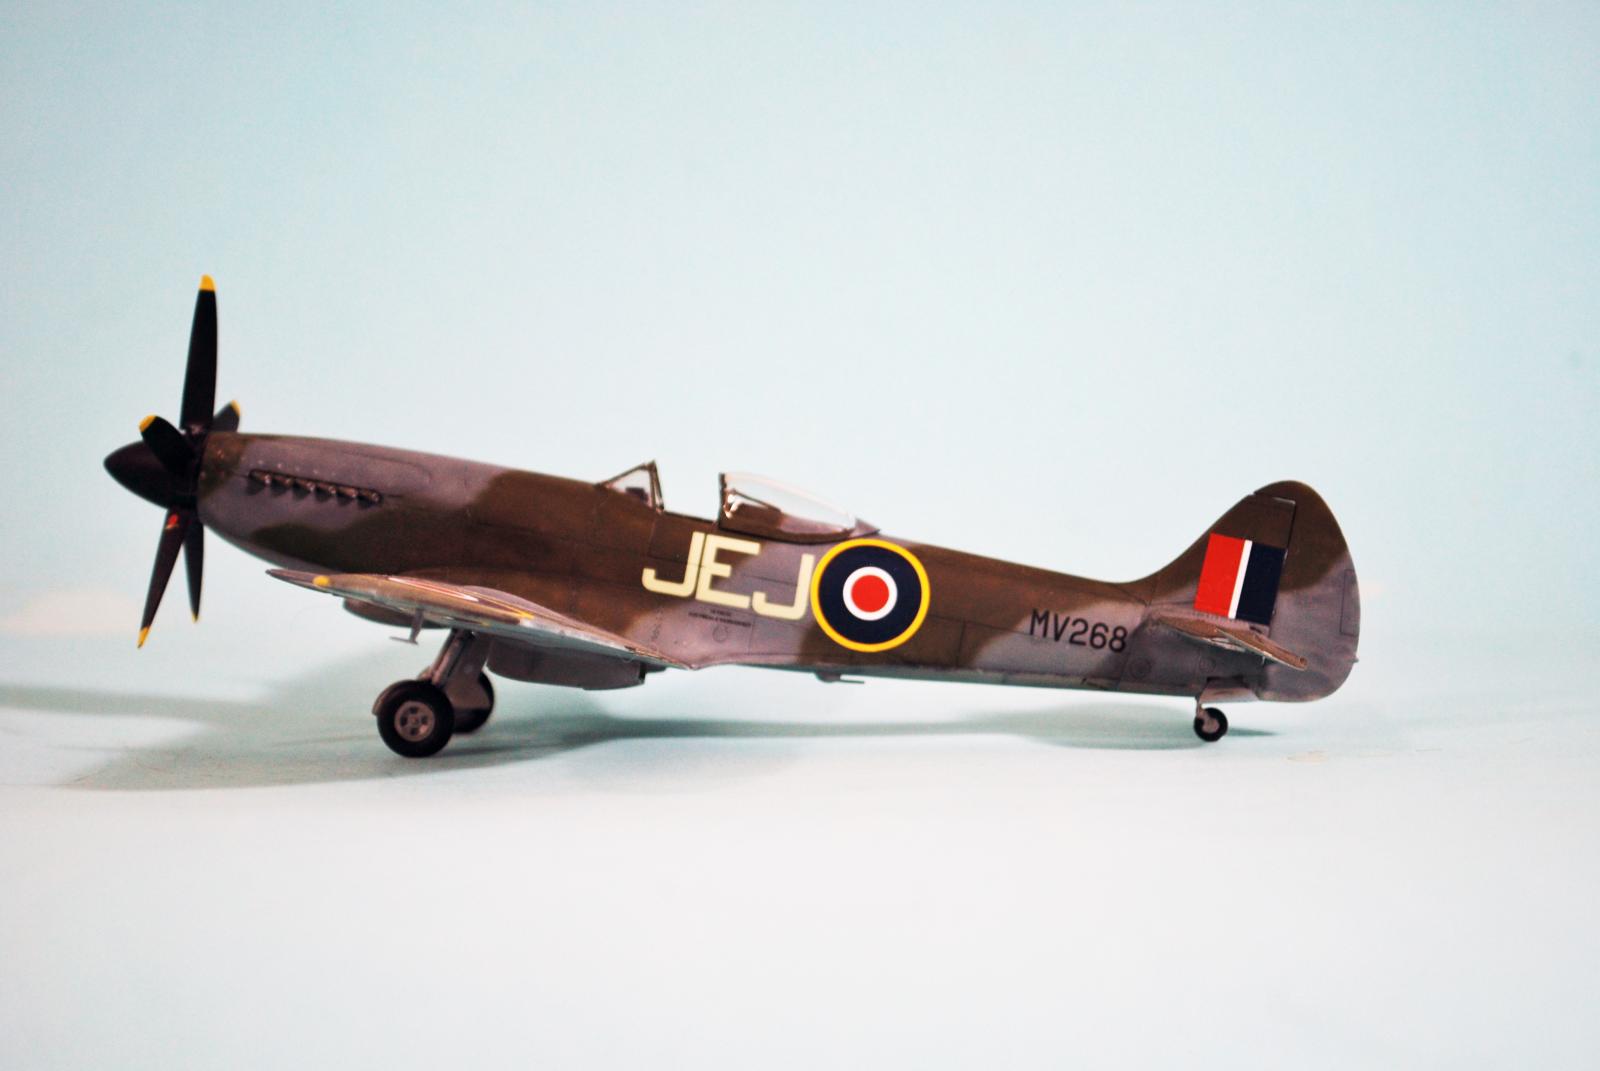
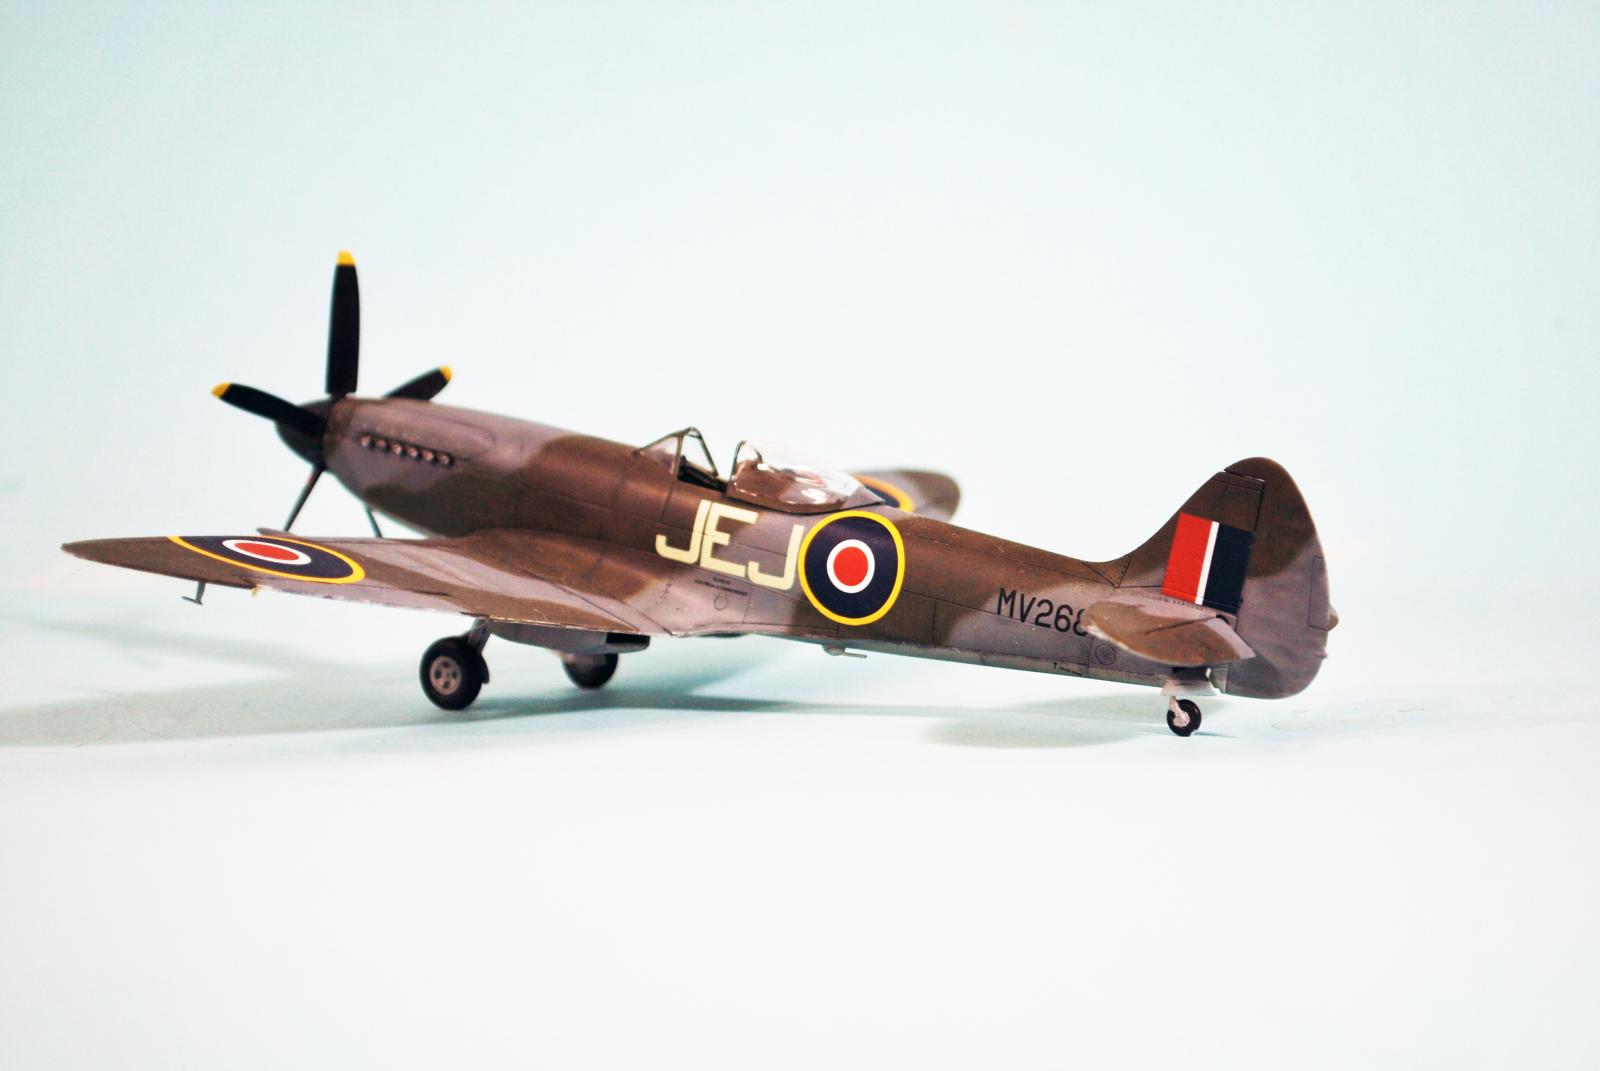
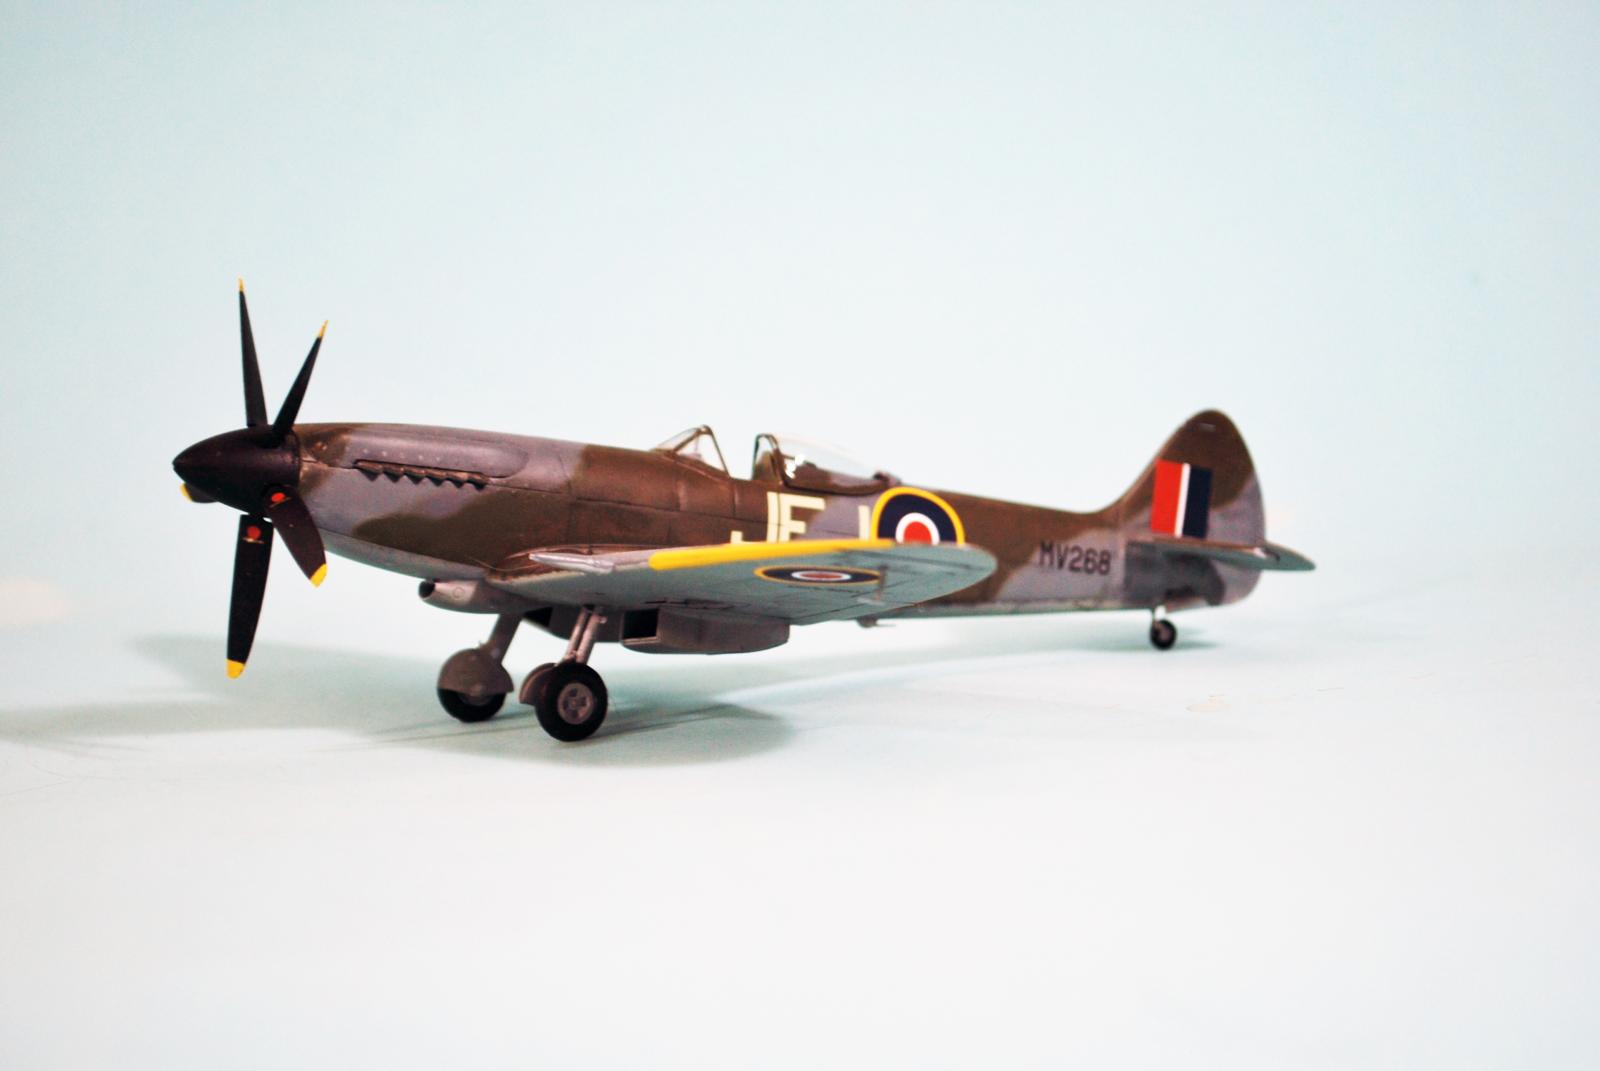
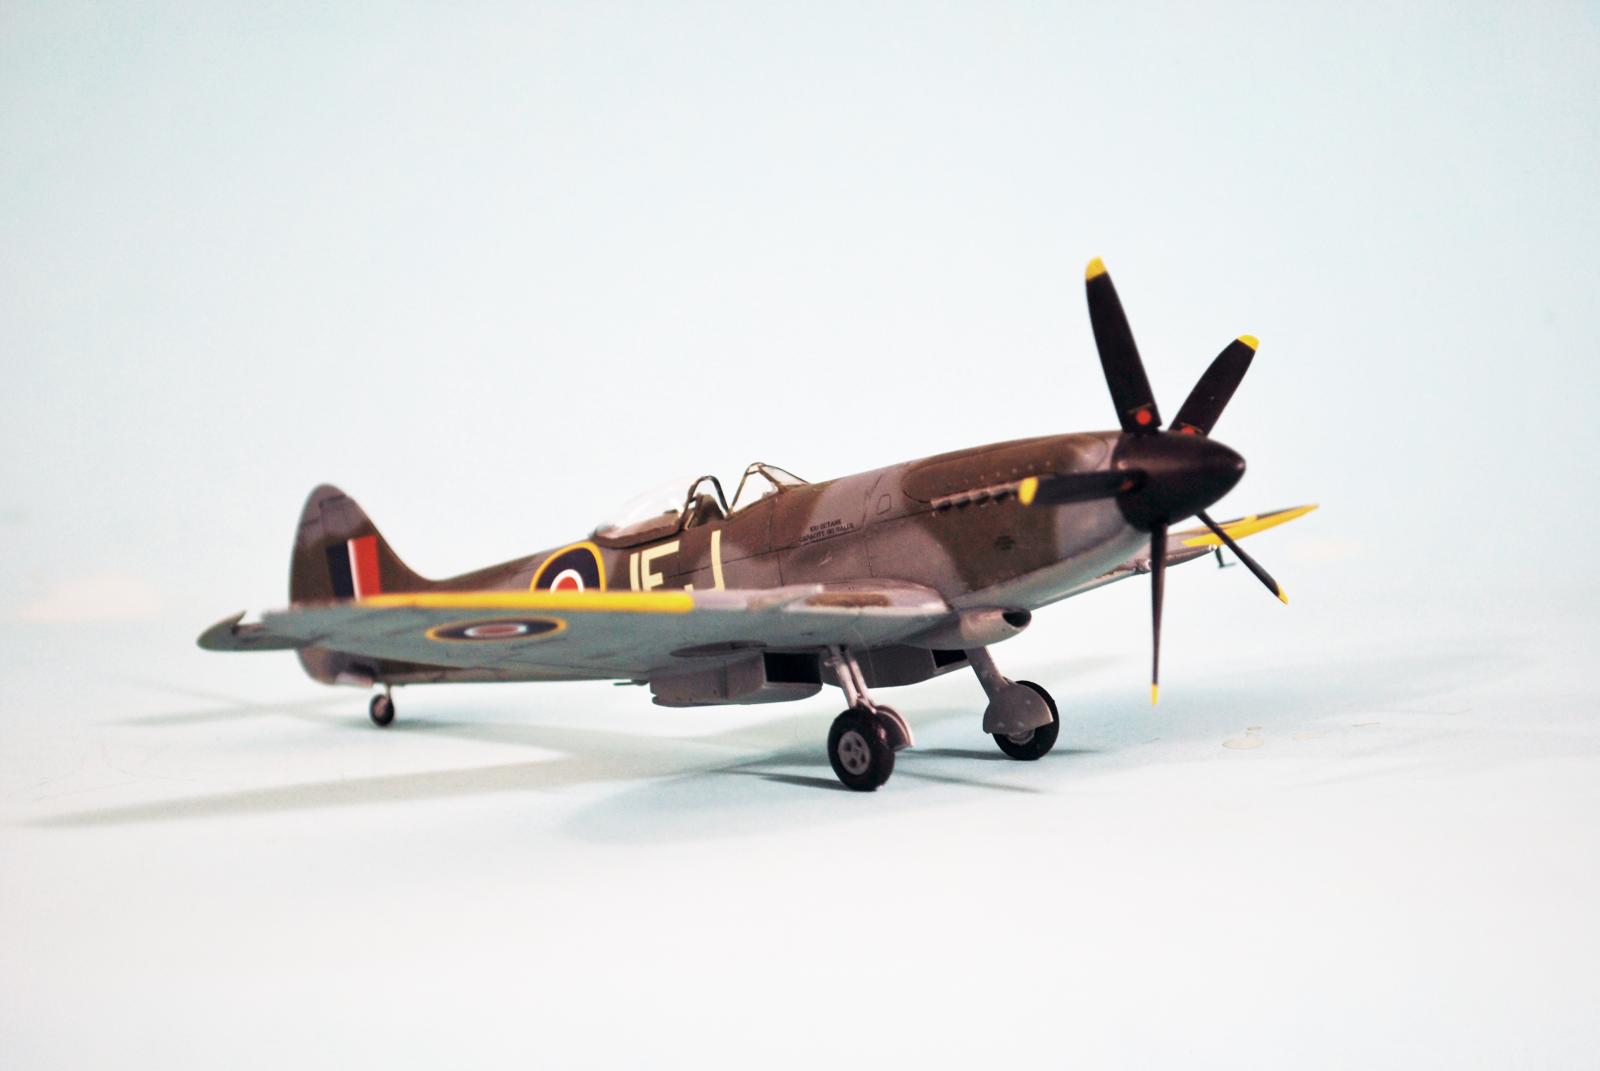
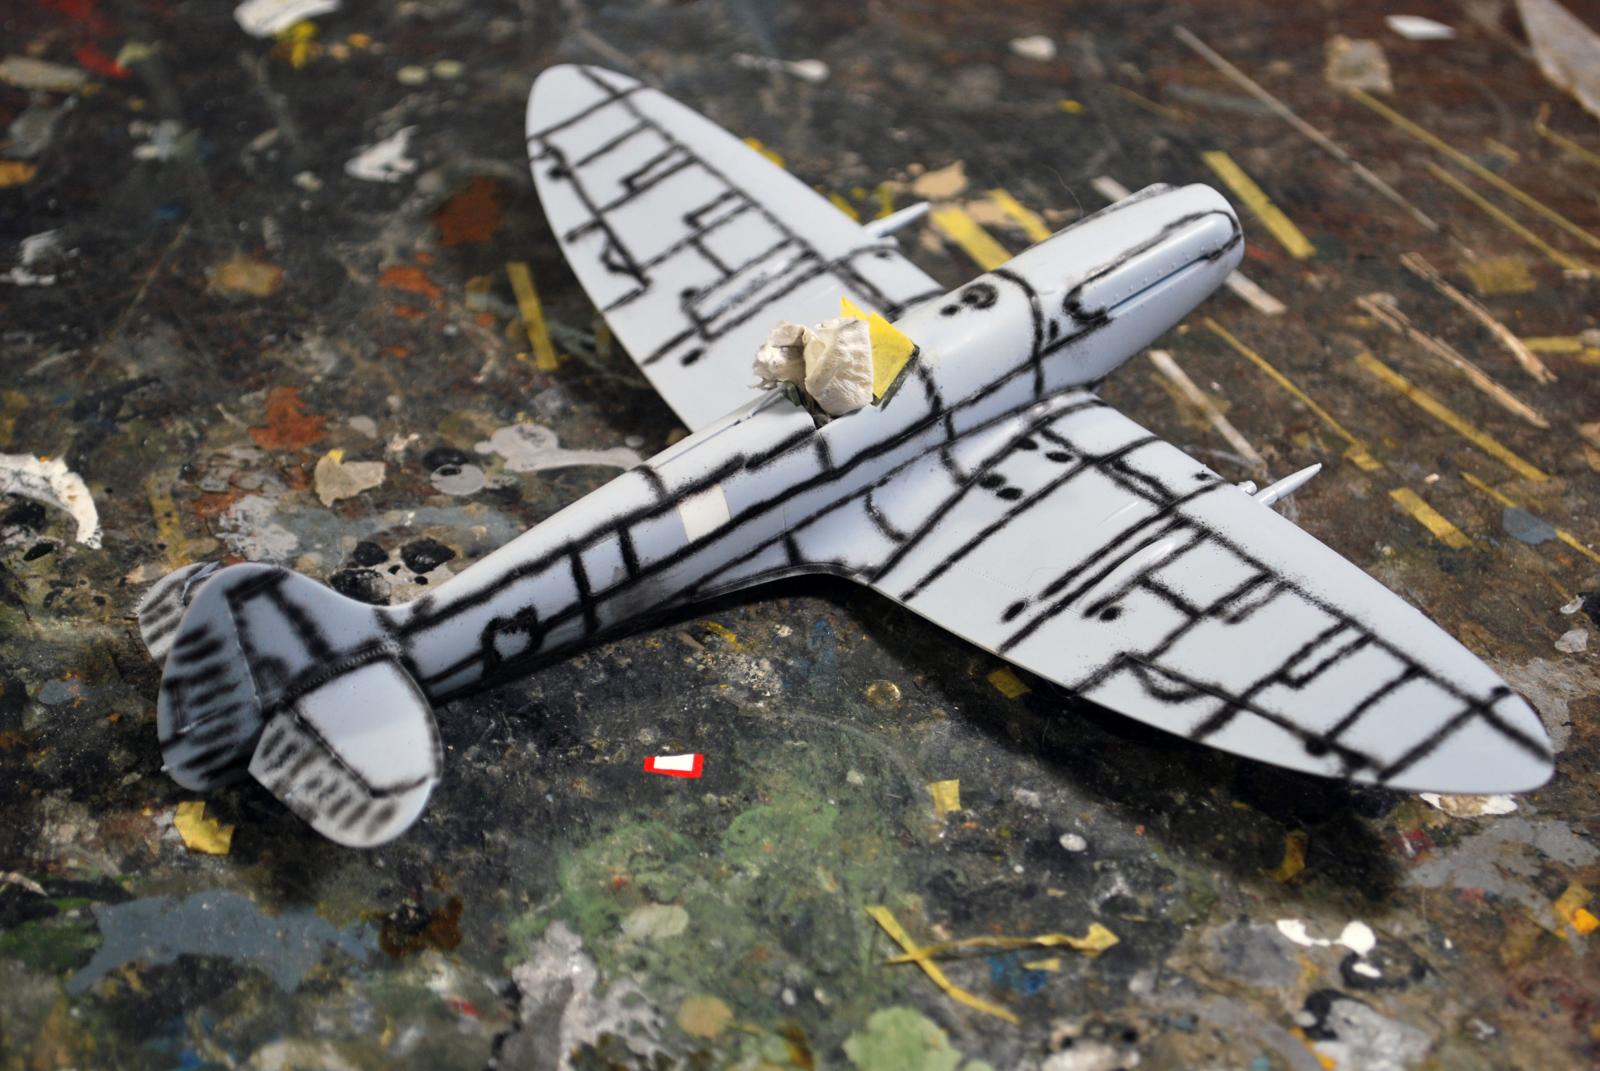
I painted the yellow wing leading edge, then masked it off. I then freehanded the camouflage pattern using Tamiya RAF Ocean Grey, Dark Green and Sea Grey Medium.
I used the kit decals for the stencils and late-war national insignia with the yellow surround on all six positions, then sourced the serial numbers and the ID letters from the Victory Productions “Spitfire: Aces of the Empire” sheets I have.
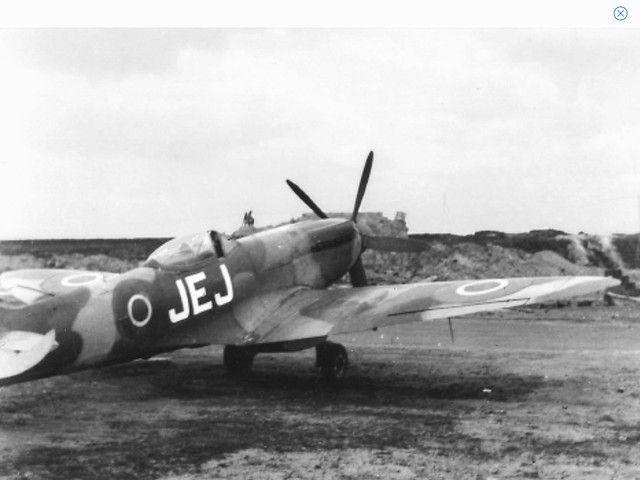
Since it was a Group Captain's airplane, I kept it nice and clean, the way the photos show it.
I then attached the exhausts, the landing gear and prop, unmasked the canopy and placed it in the open position.
Conclusions"
This is a very nice kit and makes up into the most accurate 1/48 injection-molded kit of the Griffon-powered Spitfire. Everything is there in the box to turn it into any particular sub-type of the “bubble-top” Griffon Spitfire.
Tom Cleaver


Great build Tom and thanks for the construction tips.
Beautiful work, Tom, and a really beneficial lesson in how-to modeling. Thanks for sharing both.
Nice! I don't know If It's related but I've built their 1/72 Mk22 it was a little tricky around the forward cockpit , but some how I got her done with out the need for any putty.
Beauty of a build and info, Tom. Geez, the only thing missing is a video.
I've always like the earlier Spits, but the more I see the teardrop canopy Spitfires the more I like them.
Great build, Tom @tcinla.
It was nice to follow the progress in the WIP group.
Thanks for sharing those helpful tips.
Beautiful model, beautiful WiP (your usual warp building speed - now you see the kit, now you see the model done - oh yes, TC is building), and a beautiful article posted at our beloved Modelingmadness, regarding an important man, my friend @tcinla.
Please allow me to post two pics below from a past thread of a lesser build of mine (using the dogfight double Airfix), depicting "Johnny" chasing a Bf-110. Don't know how accurate the scene (and the models) might be, but here they are:
The diorama is likely "novelistic" @fiveten, since by the time JEJ had a Spitfire IX, the only 110s not on the eastern front were night fighters. But it's a cool diorama regardless.
The boxart to blame (and the builder's non research 🙂 , @tcinla...
"Modeling the boxart" is cool, @fiveten.
Nice work, Tom. I’ve got one more of those kits left and will do an F. XIV too.
Another very nice Spit!
Sharp work on this Tom. The Mk XIV's look a lot better without the clipped wings.
@dtravis - yes indeed! The only Spitfire that looks good with clipped wings is the XII - maybe because it only ever had them?
Lovely. Makes a change from the usual Kenley Wing Spit IX's. A testament to the Spitfire airframe that it could be cobbled together as it was. Later Griffon Spit lost the grace though. Became more akin to a Tempest or Thunderbolt.
A Tempest or thunderbolt? those two big hulking brutes?
"... those two big hulking brutes," indeed!
Great looking Spitfire, Tom. Very interesting write-ups as well. As always.
Beautiful paint job Tom!
Another nice XIV build and history Tom. Saw this previously over at Scott's place. I particularly like how you “exhausted” the underwing areas. You’ve really got a thing for these recent Airfix IVs. What is this one , number 5 or 6? 7? More to come?
Not unless another one shows up at the LHS
Excellent work Tom. Great paint and much appreciated building tips along with the aircraft and pilot history.