Review: Special Hobby 1/32 Tempest F.B. II

History:
The Tempest, which was first called the Typhoon II, was Sydney Camm's response to the shortcomings of the original Typhoon fighter, most particularly the Typhoon's unexpected deterioration in performance at high altitude due to its too-thick wing, by replacing that with a thinner laminar flow design. As the design began to significantly diverge from the Typhoon, it was renamed Tempest; it became one of the most powerful fighters of World War II and was the fastest single-engine piston-engine aircraft of the war at low altitude.
Sydney Camm always had his next design in mind when developing his current project, and the Hawker design team had already planned out a series of design improvements by the time the Typhoon prototype first flew. The result was the Hawker P. 1012, otherwise known as the Typhoon II or Thin-Wing Typhoon. In March 1940, Hawker engineers investigated the new laminar flow wing developed by NACA in the United States. Using this data, the maximum thickness of the Tempest wing was set at 37.5% of chord versus 30% for the Typhoon's wing, reducing wing root thickness by five inches on the new design. The wing planform was changed to near-elliptical to accommodate 800 rounds of ammunition for the four 20 mm Hispano cannon.
As with the Typhoon and Tornado, different powerplants were proposed for the design. Six prototypes were built: a single Mk.I, HM599, powered by a Sabre IV; two Mk.IIs with the Centaurus IV radial; a single Mk.III with a Griffon IIB and a Mk.IV with a Griffon 61; and a Mk.V with the Sabre II in an installation similar to that of the Typhoon. Ultimately, the Mk.V prototype flew first The Tempest II was subject to repeated delays due to its Centaurus engine, but was persisted with, while continued problems with the Sabre IV ended the Tempest I, while the decision to use the Griffon in the Spitfire stopped further development of the Tempest III and IV. The Mk. V, which had the least difficulty with its engine due to the work on the Typhoon, became the main type produced.
The Tempest II benefited from examination of captured Fw-190s. The Centaurus engine was closely cowled and the exhaust stacks grouped behind and to either side of the engine; air outlets with automatic sliding "gills" behind that with the carburetor air intakes in the inner leading edges of both wings with an additional oil cooler in the inner starboard wing.
The first Tempest II, LA602, flew June 28, 1943, powered by a Centaurus IV with a four-blade propeller. The second, LA607,had the enlarged dorsal fin associated with the Tempest and flew on September 18. The first major problem experienced was serious engine vibration, which were cured by replacing the rigid, eight-point engine mountings with six-point rubber-packed shock mounts. The four blade propeller was replaced with a five blade unit before a more finely-balanced four bladed unit was adopted. Problems with engine overheating, poor crankshaft lubrication, exhaust malfunctions and reduction-gear seizures delayed production. The eventual solution was the “tropicalized” modification with the installation of an air filter and intake in the upper forward fuselage, just behind the engine cowling, using a louvered outlet just ahead of the fuselage gas tank; this was retroactively fitted to earlier Tempests in F.B. II production and was original after the first 50.
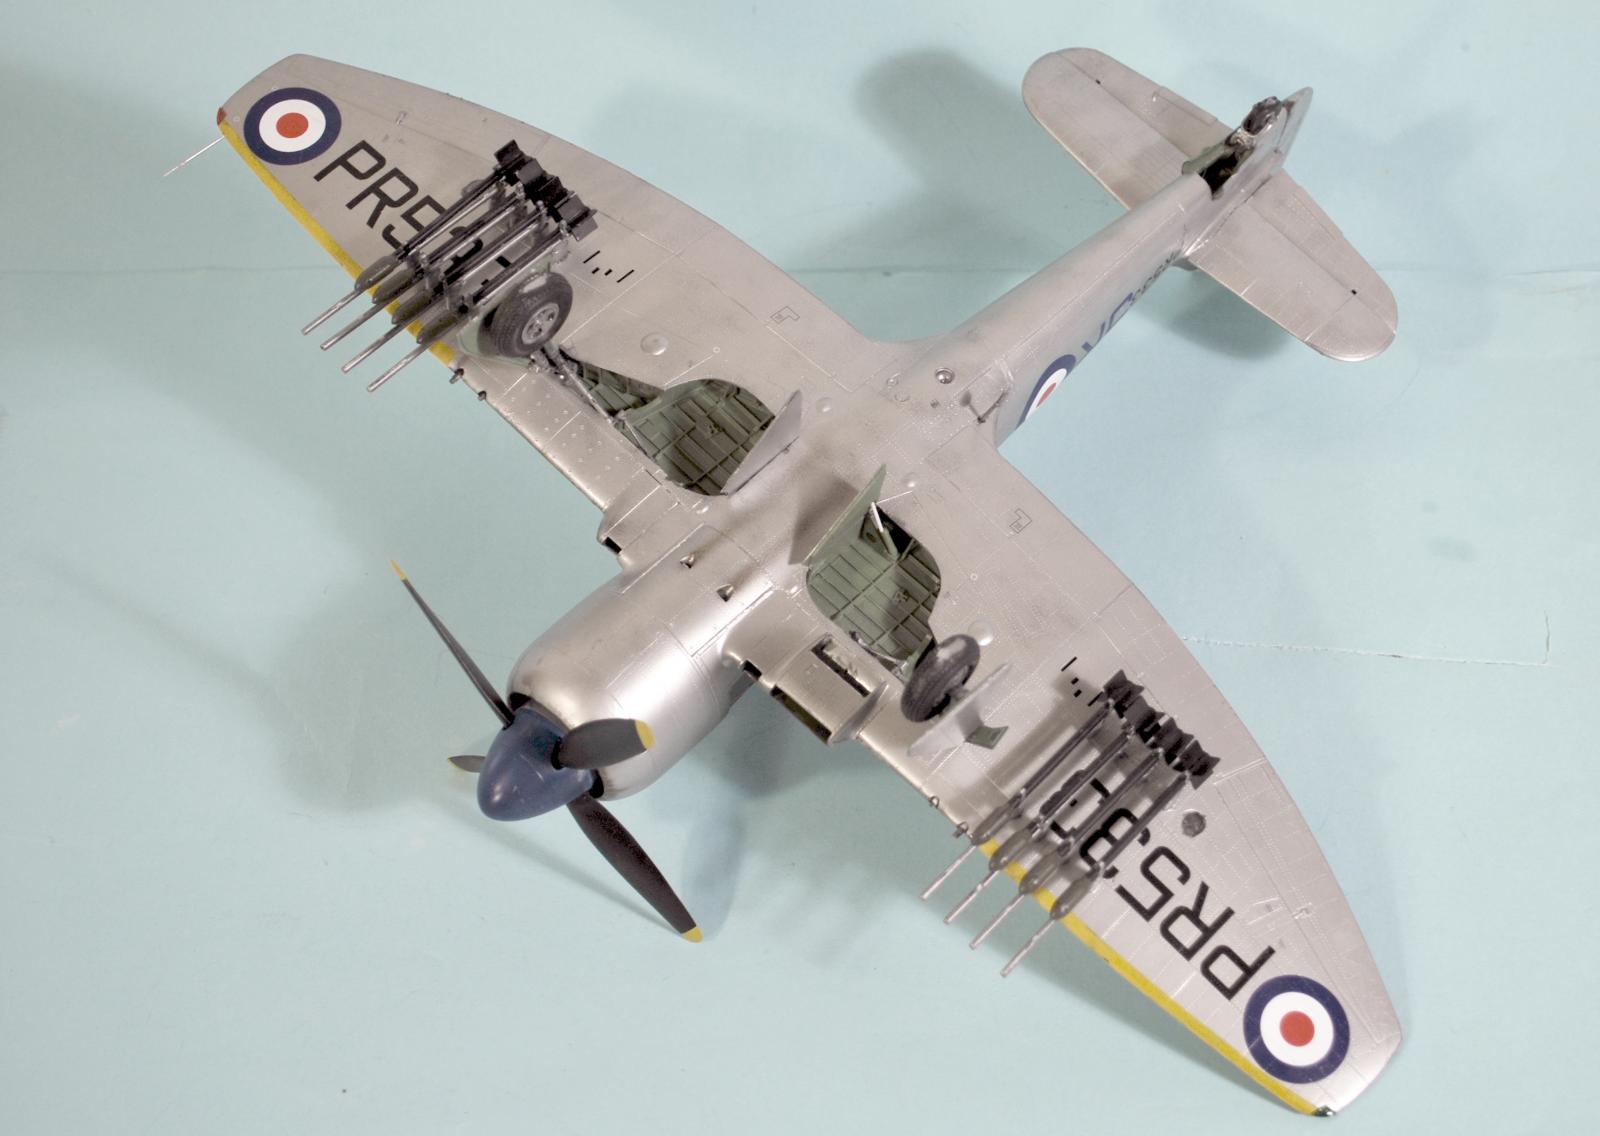
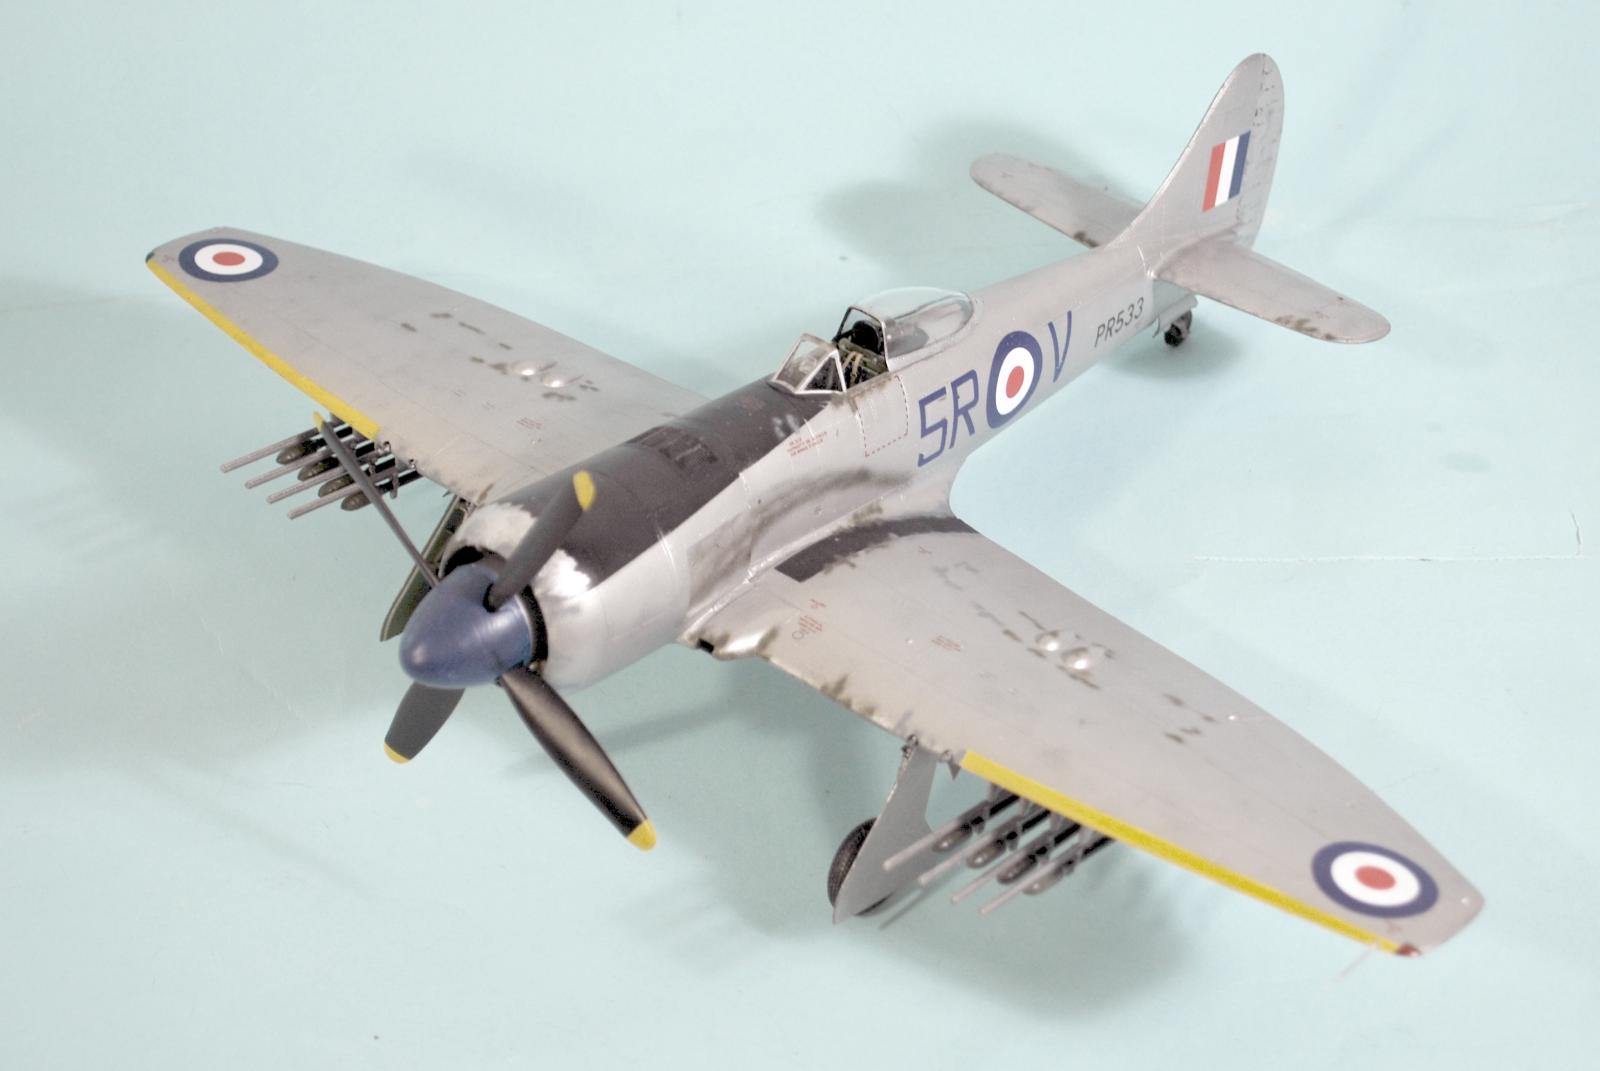
In September 1942 contracts were signed for 500 Tempest IIs to be built by Gloster but because of priority being given to the Typhoon, a contract of 330 Tempest IIs was allocated instead to Bristol, while Hawker were to build 1,800, a switch that further delayed production. The first Tempest II came off the Hawker line on October 4, 1944; the first six production aircraft joined the prototypes for extensive trials and tests.With the end of the war in sight, orders for the Tempest II were cut or cancelled: Bristol production stopped after 50, and Hawker eventually built 402 in two production batches: 100 built as pure fighters, and 302 F.B. II fighter-bombers with reinforced wings and wing racks capable of carrying bombs of up to 1,000 lb or eight RPs.
The Tempest II had the best performance of the series, with a maximum speed of 442 mph at 15,200 ft, climb rate to the same altitude of 4.5 minutes compared with 5 minutes for the Tempest V, and service ceiling of 37,500 ft. All production aircraft were powered by a 2,590 hp Centaurus V driving a 12 ft 9 inch Rotol propeller. The Tempest II would have formed the fighter component of Tiger Force, a proposed British Commonwealth long-range bomber force based on Okinawa, however the Pacific War ended before they could be deployed.
By October 1945, a total of 320 Tempest IIs had been delivered. The aircraft were sent to squadrons in Germany and India. A Tempest II flown by Roland Beamont, led the flypast at the London Victory Celebrations of June 8,1946. The sole combat use of RAF Tempest IIs was against guerrillas of the Malayan Races Liberation Army during the early stages of the Malayan Emergency.
The Kit:
Special Hobby announced in 2014 that they would do a Tempest V and Tempest II in 1/32, releasing CAD drawings at the time. The Tempest V came out in 2015, and the Tempest II in 2017. At the time, this was the first injection molded kit of the Tempest II since Special Hobby produced their 1/72 kit back in 2005.
In the box, both Tempests look really good. The surface detail is to a high standard, the parts appear well-molded, and there are sufficient different markings offered on the decal sheet to let a modeler dream of creating a really nice model.
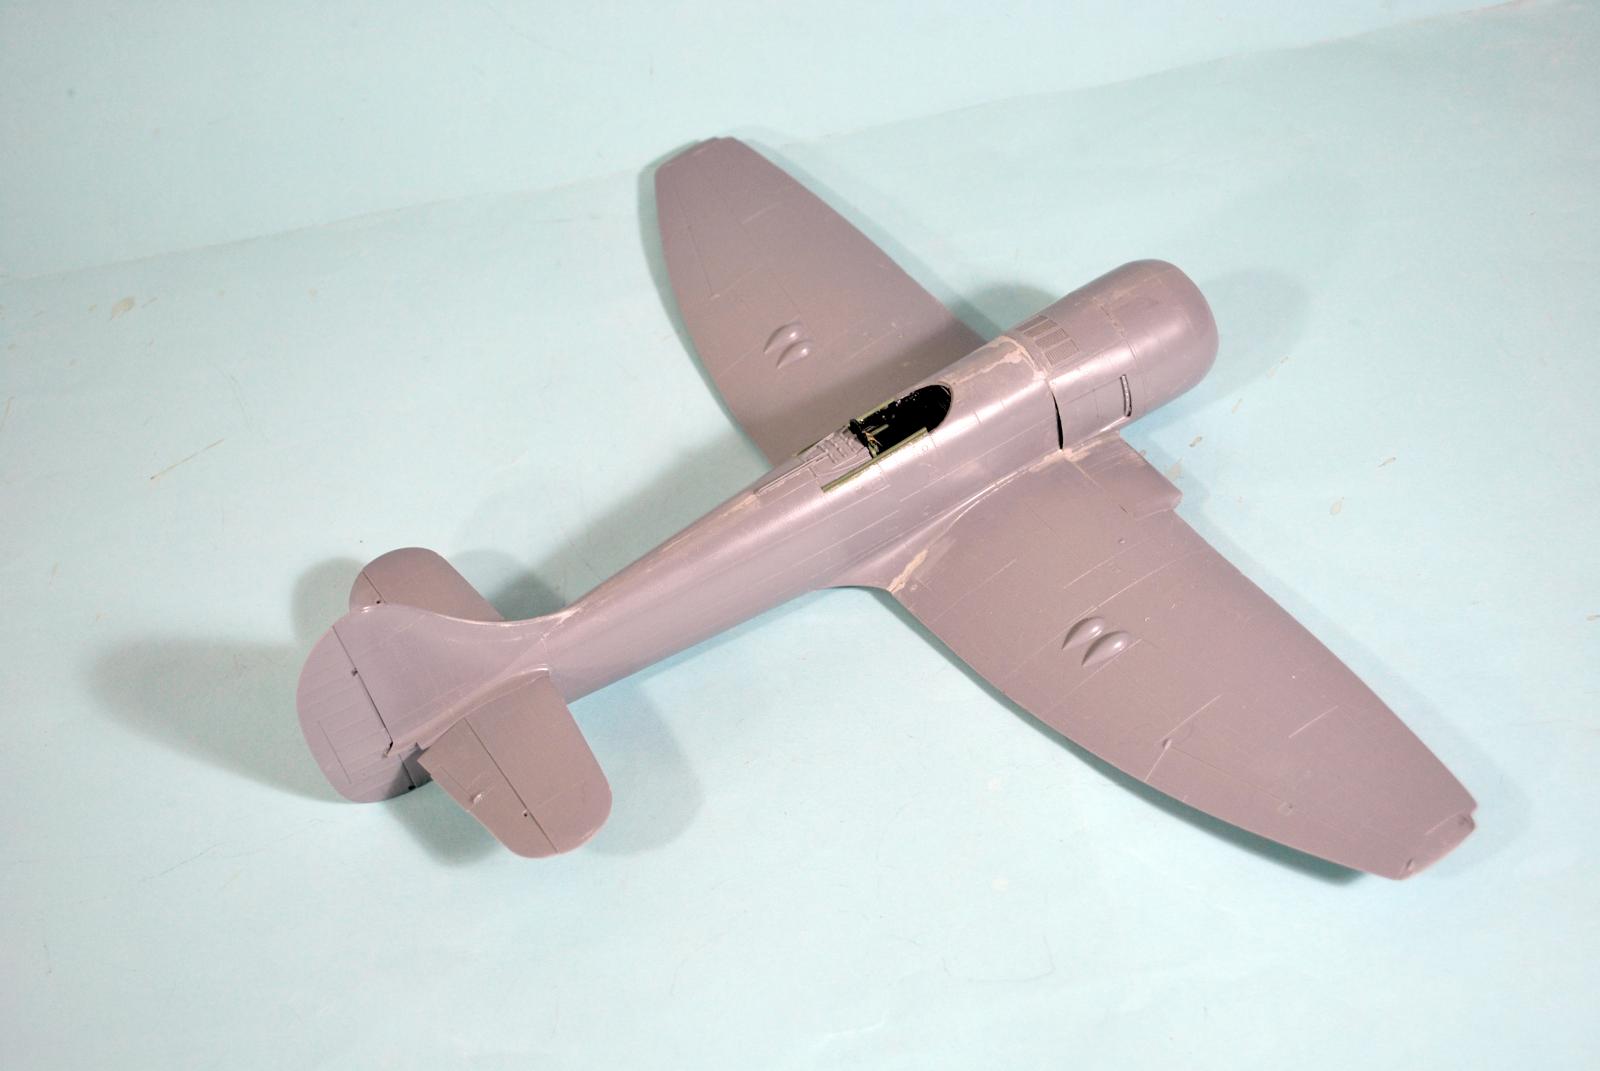
Unfortunately, Special Hobby designed the two kits to have a maximum of commonality, differing primarily in the forward fuselage/engine cowling. This was the same design philosophy that was used with the P-36/Hawk 75 series several years before, and the result was the kits shared the same problem that occurred with the earlier releases: there were serious fit problems, primarily around the fit of the forward fuselage/engine cowling to the rest of the fuselage and the wing. In the years since the kits have been released, I have seen reviews and posts at discussion boards by good modelers bemoaning the problems they encountered trying to build the kits. I had my share of problems with the Tempest V, and they were such that when I read that the problems with the Tempest II were worse, I let the review kit I received slip further and further into the back reaches of the Closet of Doom.
In the years since, Eduard released the Tempest V in 1/48. That kit has its own problems, but they are far less than what is found with the 1/32 kit. When I read that Special Hobby was releasing a Tempest II, I imagined they might do a scale-down of the 1/32 kit. With that thought in mind, I decided to attempt the larger kit, thinking that any problems found and resolved would be applicable to the new kit, which as I write is winging its way to Le Chateau du Chat.
Construction:
I went back over Dan Lee's review, and realized I had had the same exact problems he did, with the first Special Hobby 1/32 P-36 I did, because the fuselage is split to have different engines. As it turned out, the same “secret” I discovered to do three more of that kit without problems works with this kit.
Here is what to do to give a less-problematic build:
-
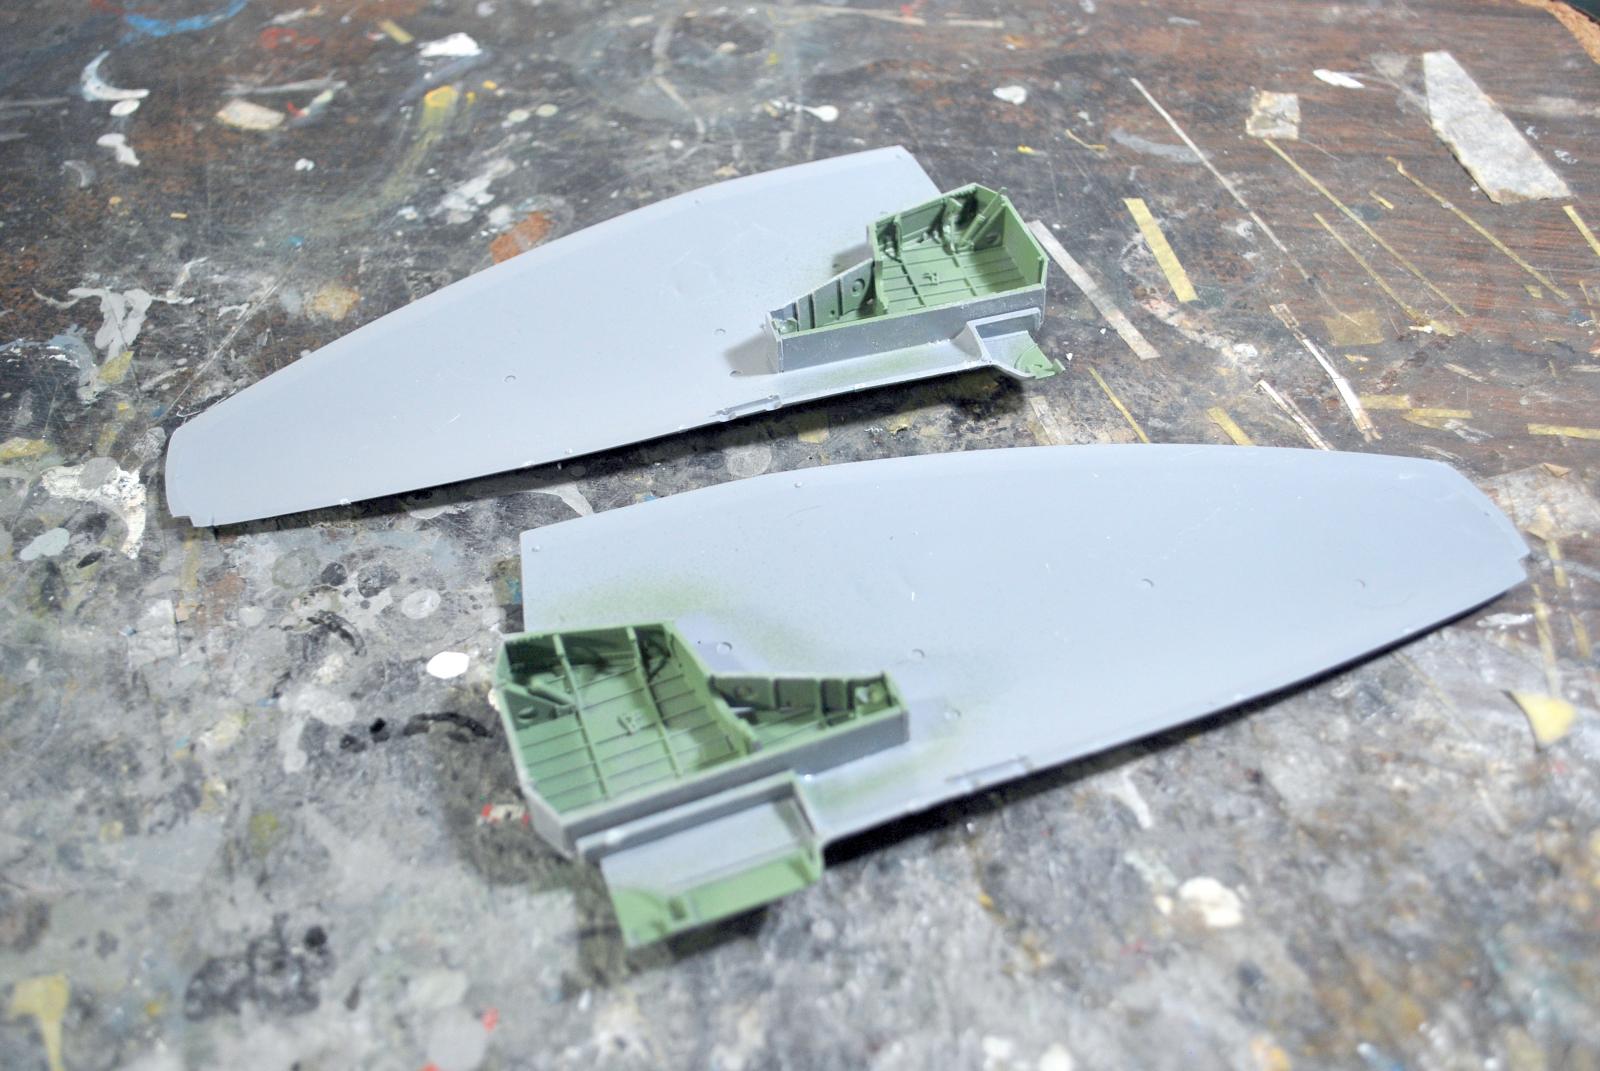
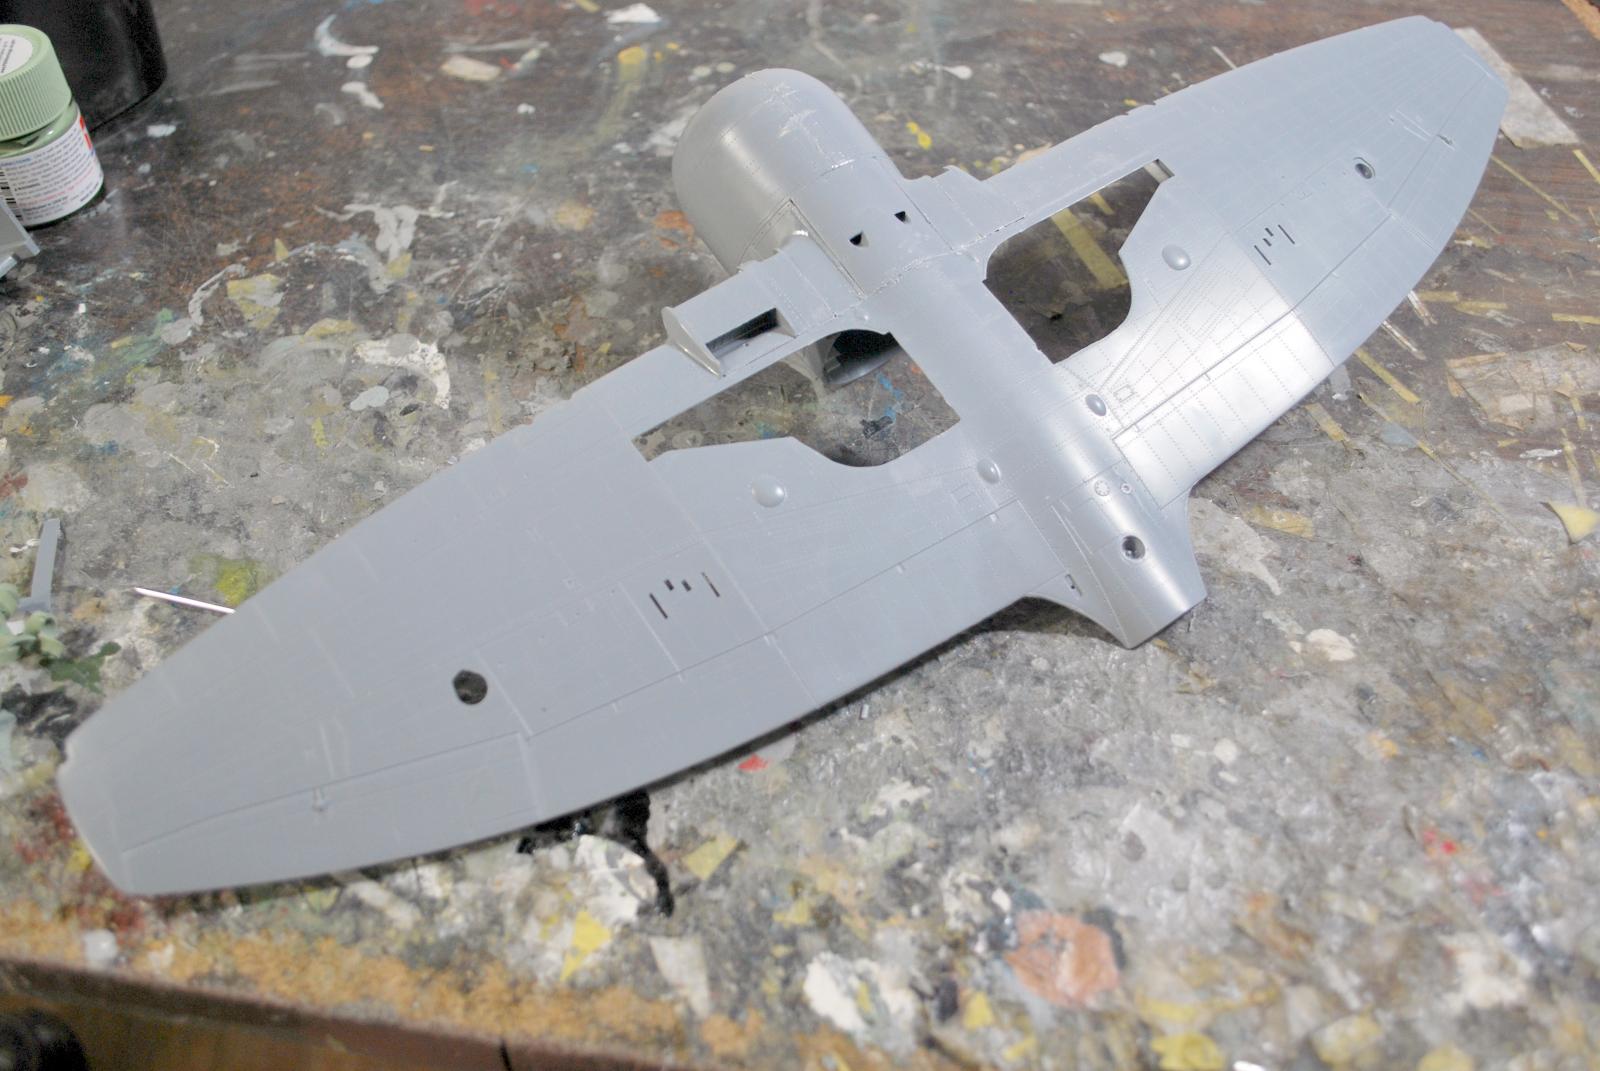
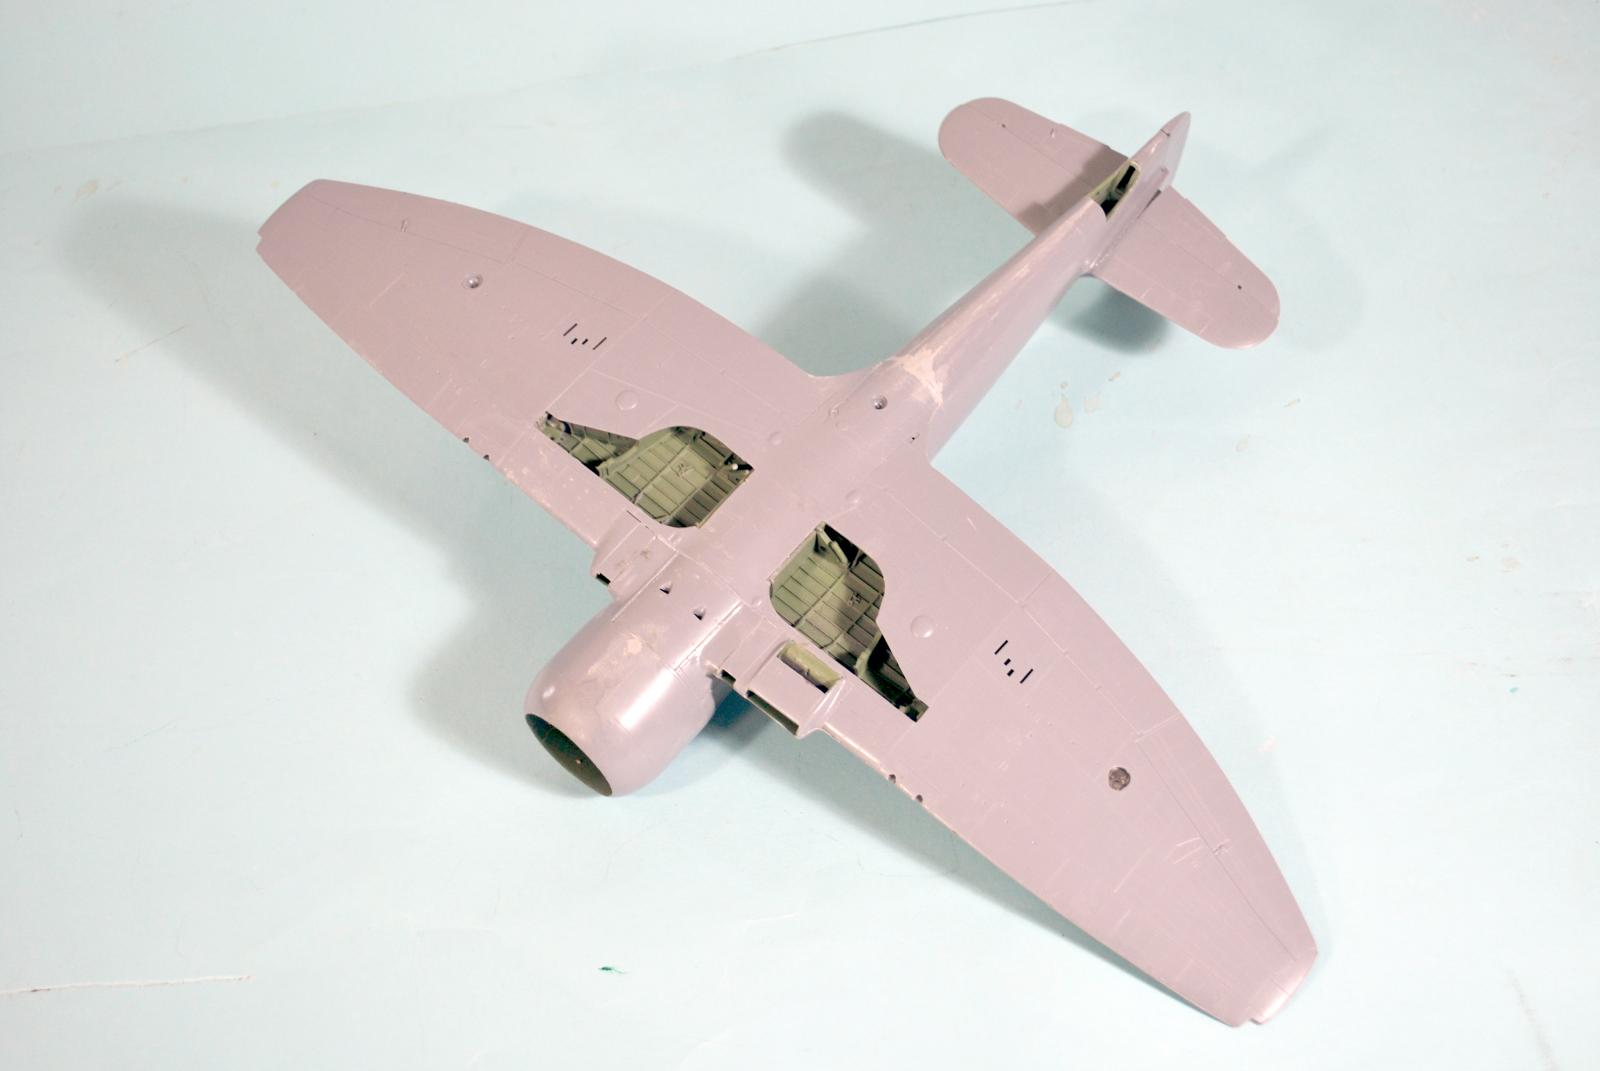
The wheel wells must be carefully assembled, so everything creates a “level” mating surface with the lower wing. You must test fit each piece in turn, sand it a bit to get that level surface, test fit each one as you glue them to see if they fit to the lower wing. Once you get the wheel wells all smooth and level on their mating surface (and the modifications to the left are different than to the right, there are no shortcuts here), you can fit the upper wings to the lower wing surface and all fits right without problem.
-
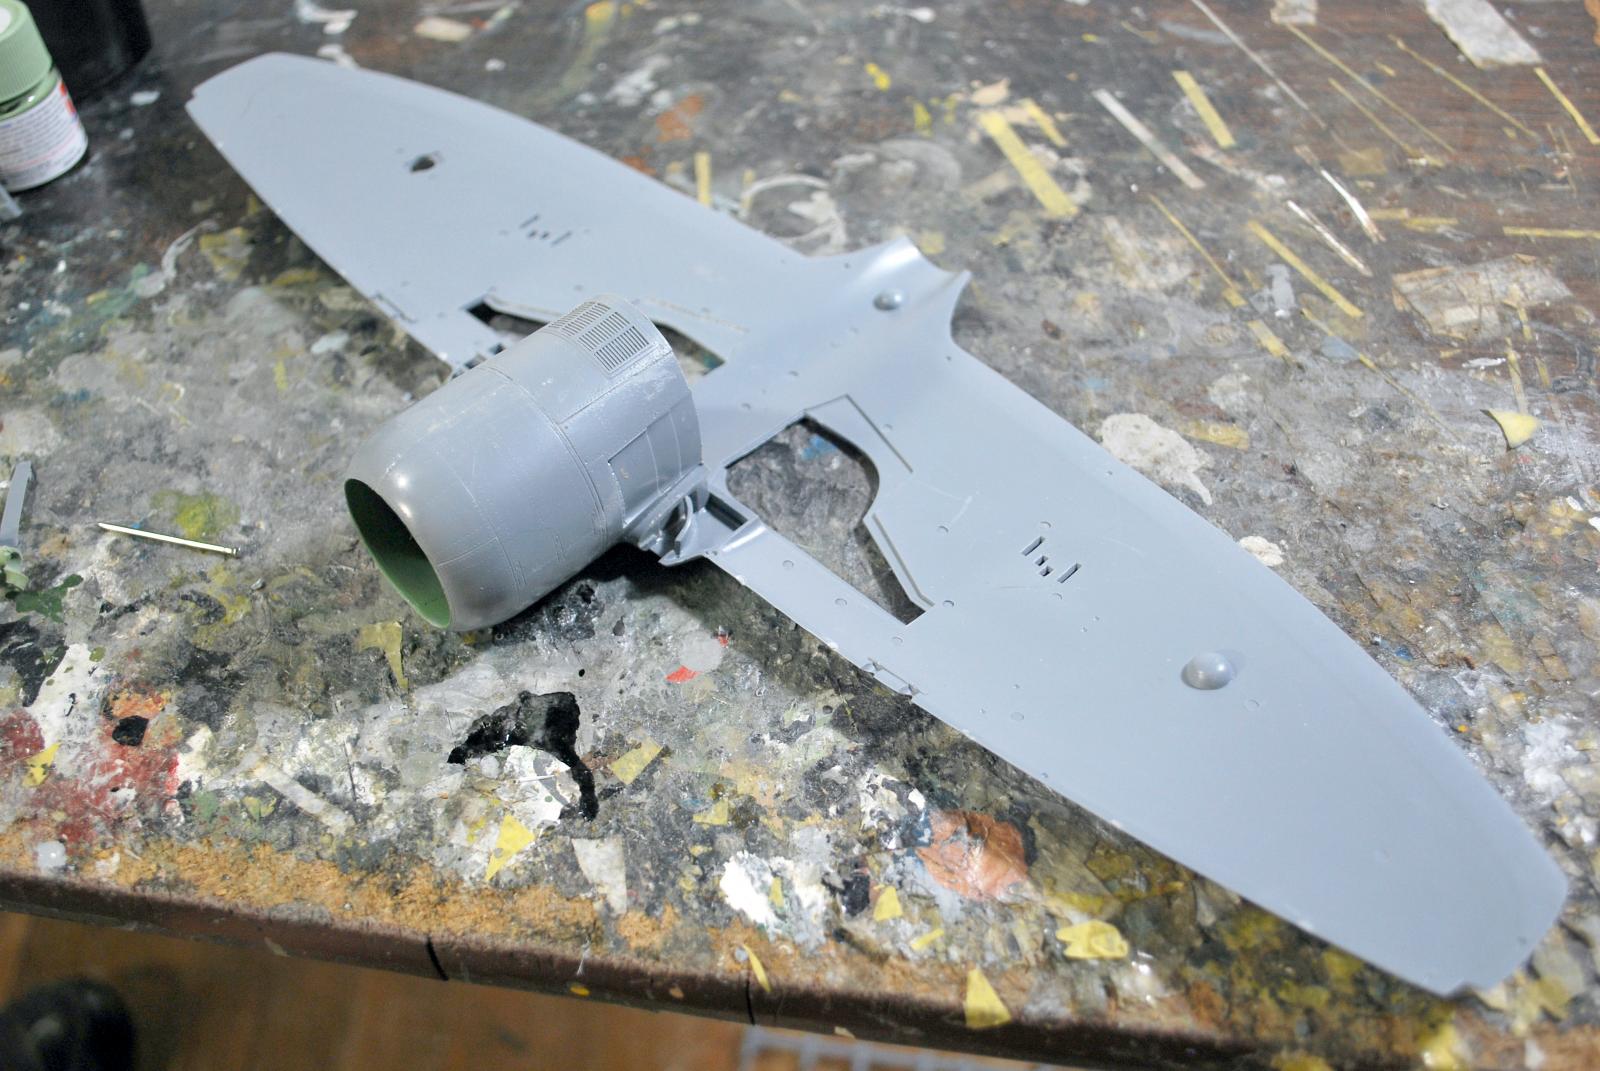
The forward fuselage/cowling must fit the opening of the wing. Once it's assembled, test fit to the lower wing and keep sanding down the surfaces that mate to the wing till they fit, because it's a bit wide - I found the same problem with the 1/32 Tempest V, and this worked there, too. Once it will slip in tightly, position and glue it. This way, you can work the fit from inside and outside to get it perfect.
-
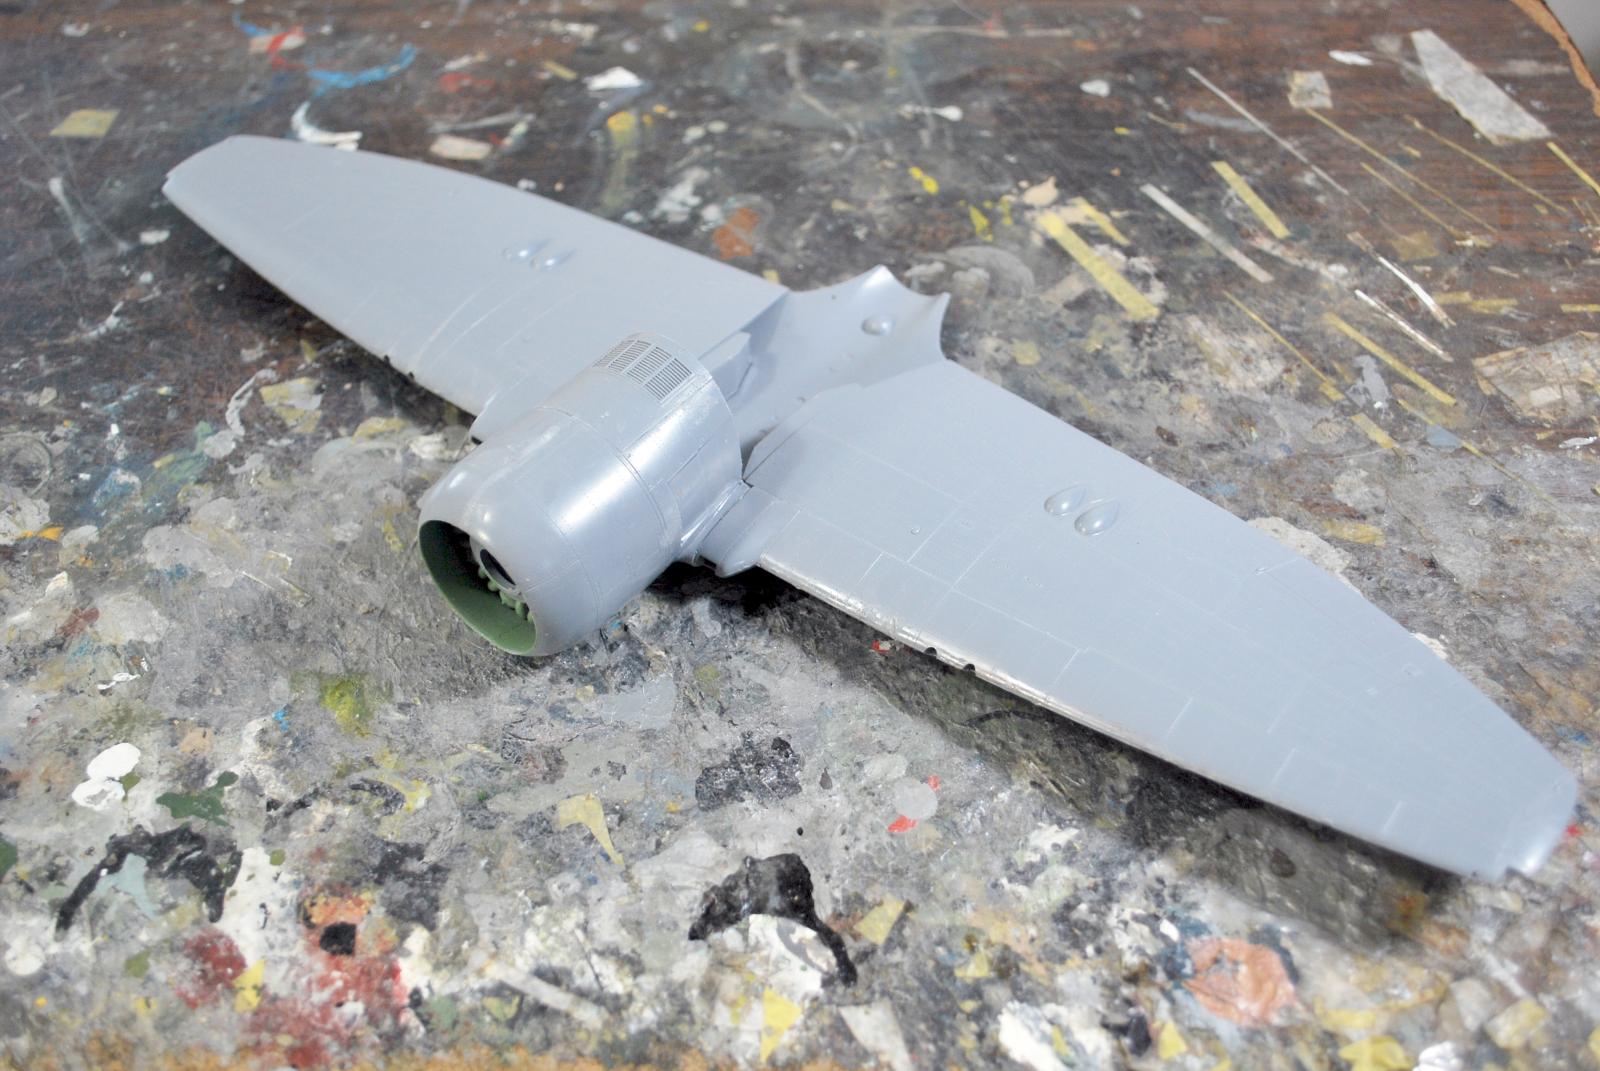
Once that has set up, attach the upper wings and get them to fit nice and tight, which will be possible due to having gotten the interior structure right. Rubber band them to set up overnight because it's overall a tight fit.
-
The rear fuselage will slide into position with a bit of fiddling at the forward end; then rubber band around the rear wing/fuselage joint and a rubber band from wingtip to wingtip to pull the wing up and get a nice tight fit with the upper wing/fuselage joins. If you do this right, all will be easy and you will use a minimum of filler,preserving that beautiful surface detail).
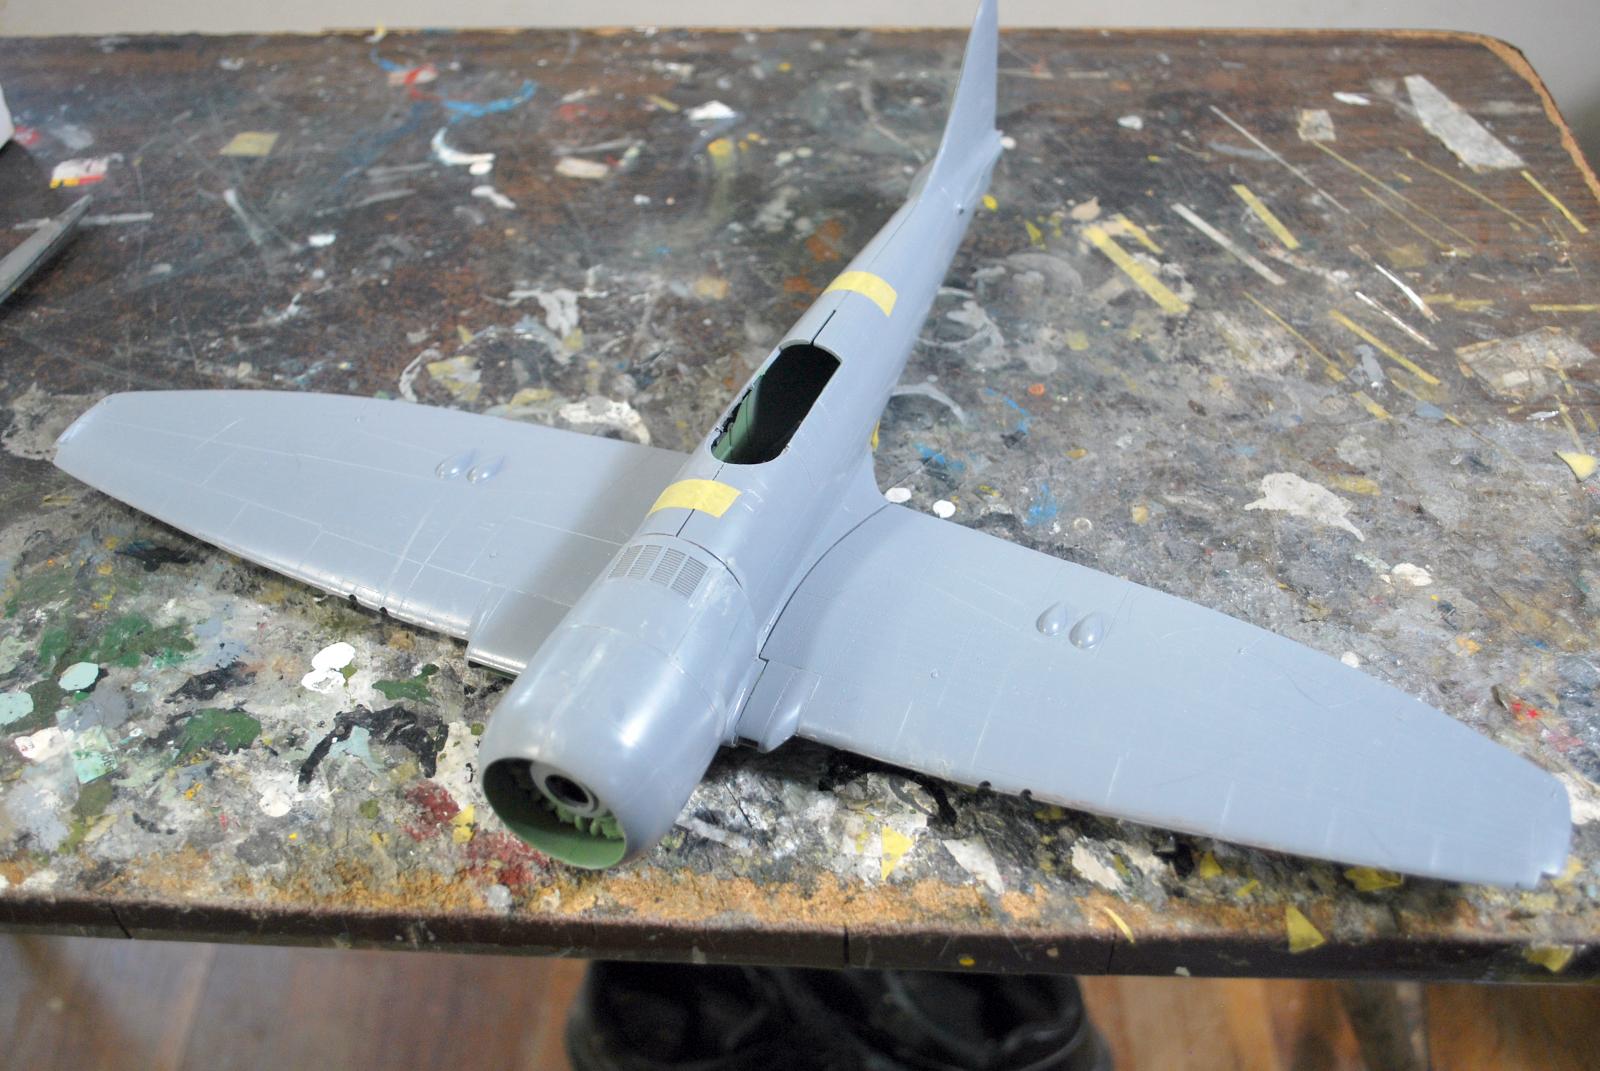
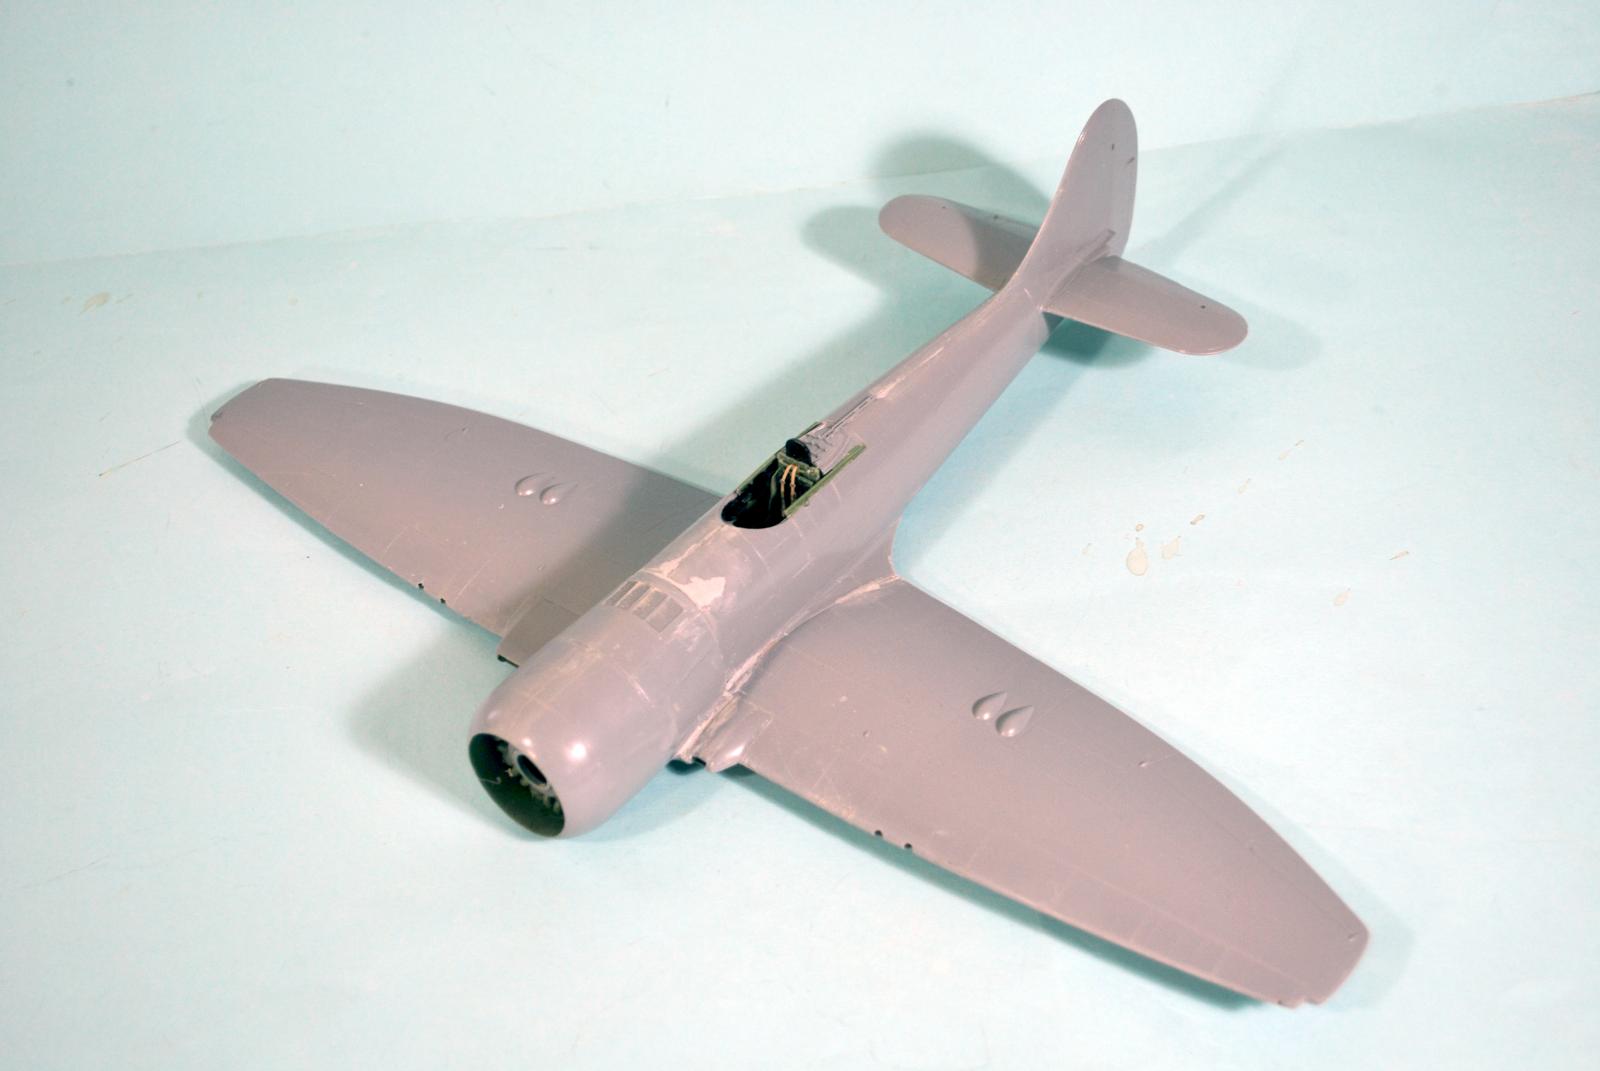
Once the initial assembly has been done, the work on the aft fuselage is “standard model assembly.” I think the need for Mr. Surface at the upper forward/aft fuselage connection and at lower aft wing-fuselage join that I did with this may have been the result of Modeler-Induced Problems of not getting the rear fuselage fully seated. But the end result looks nice with minor rescribing of surface detail needed.
Painting and Decals:
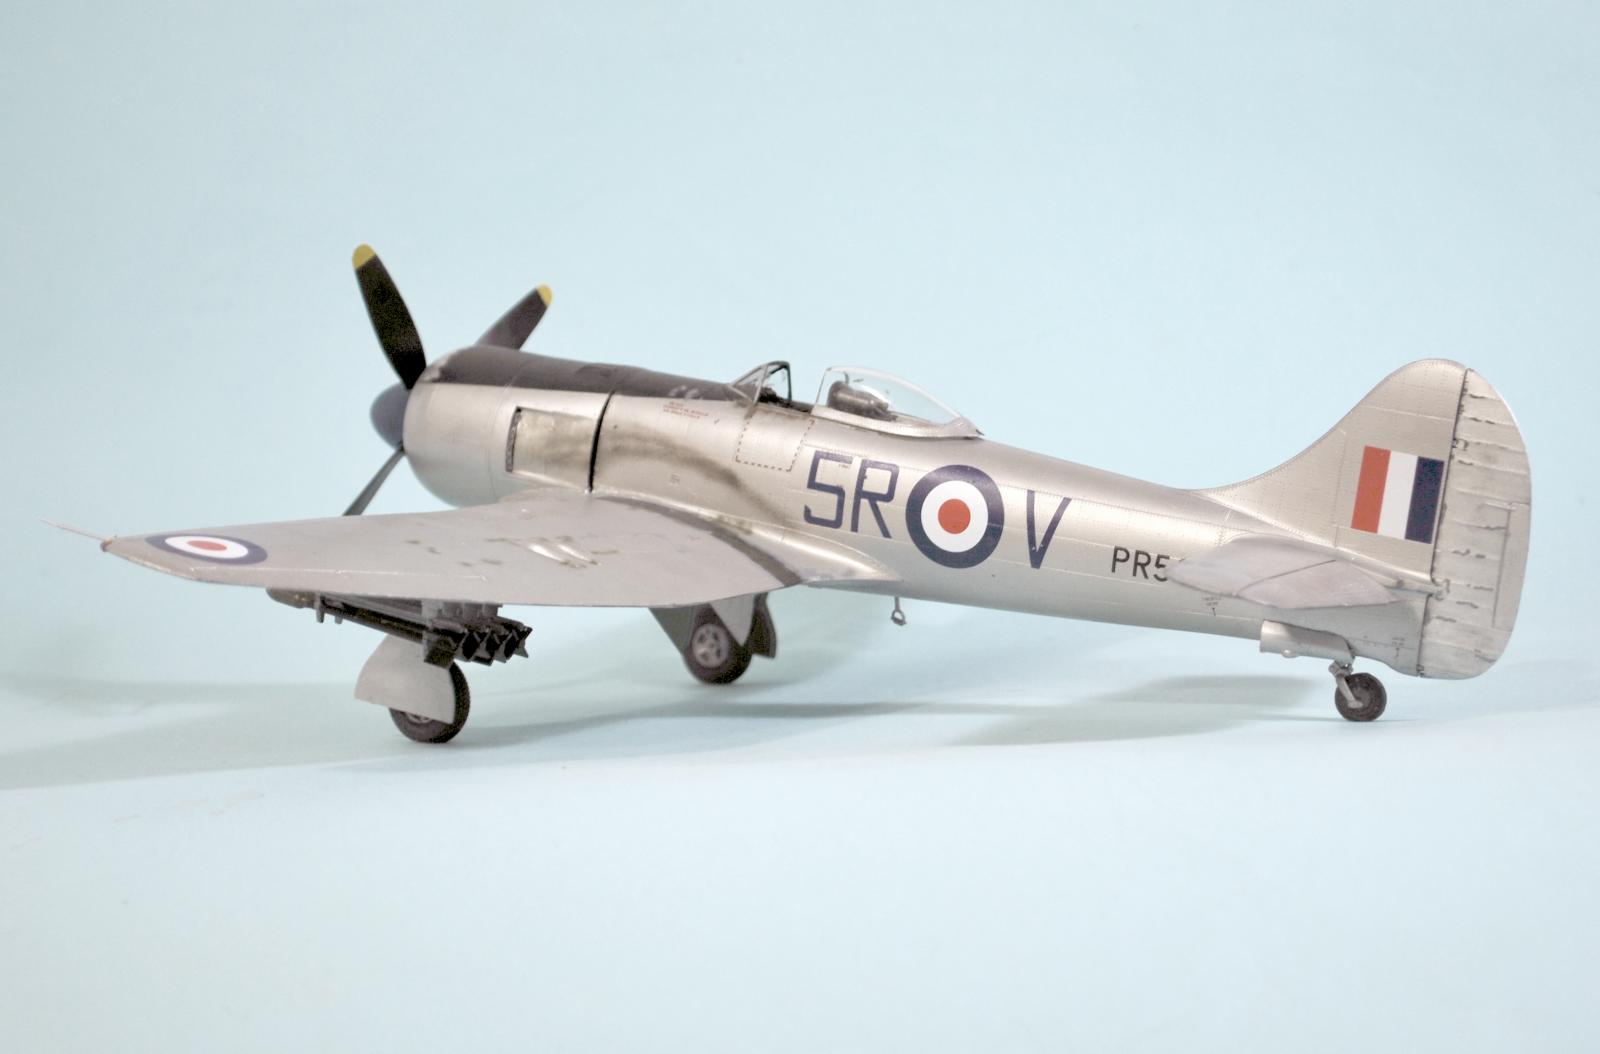
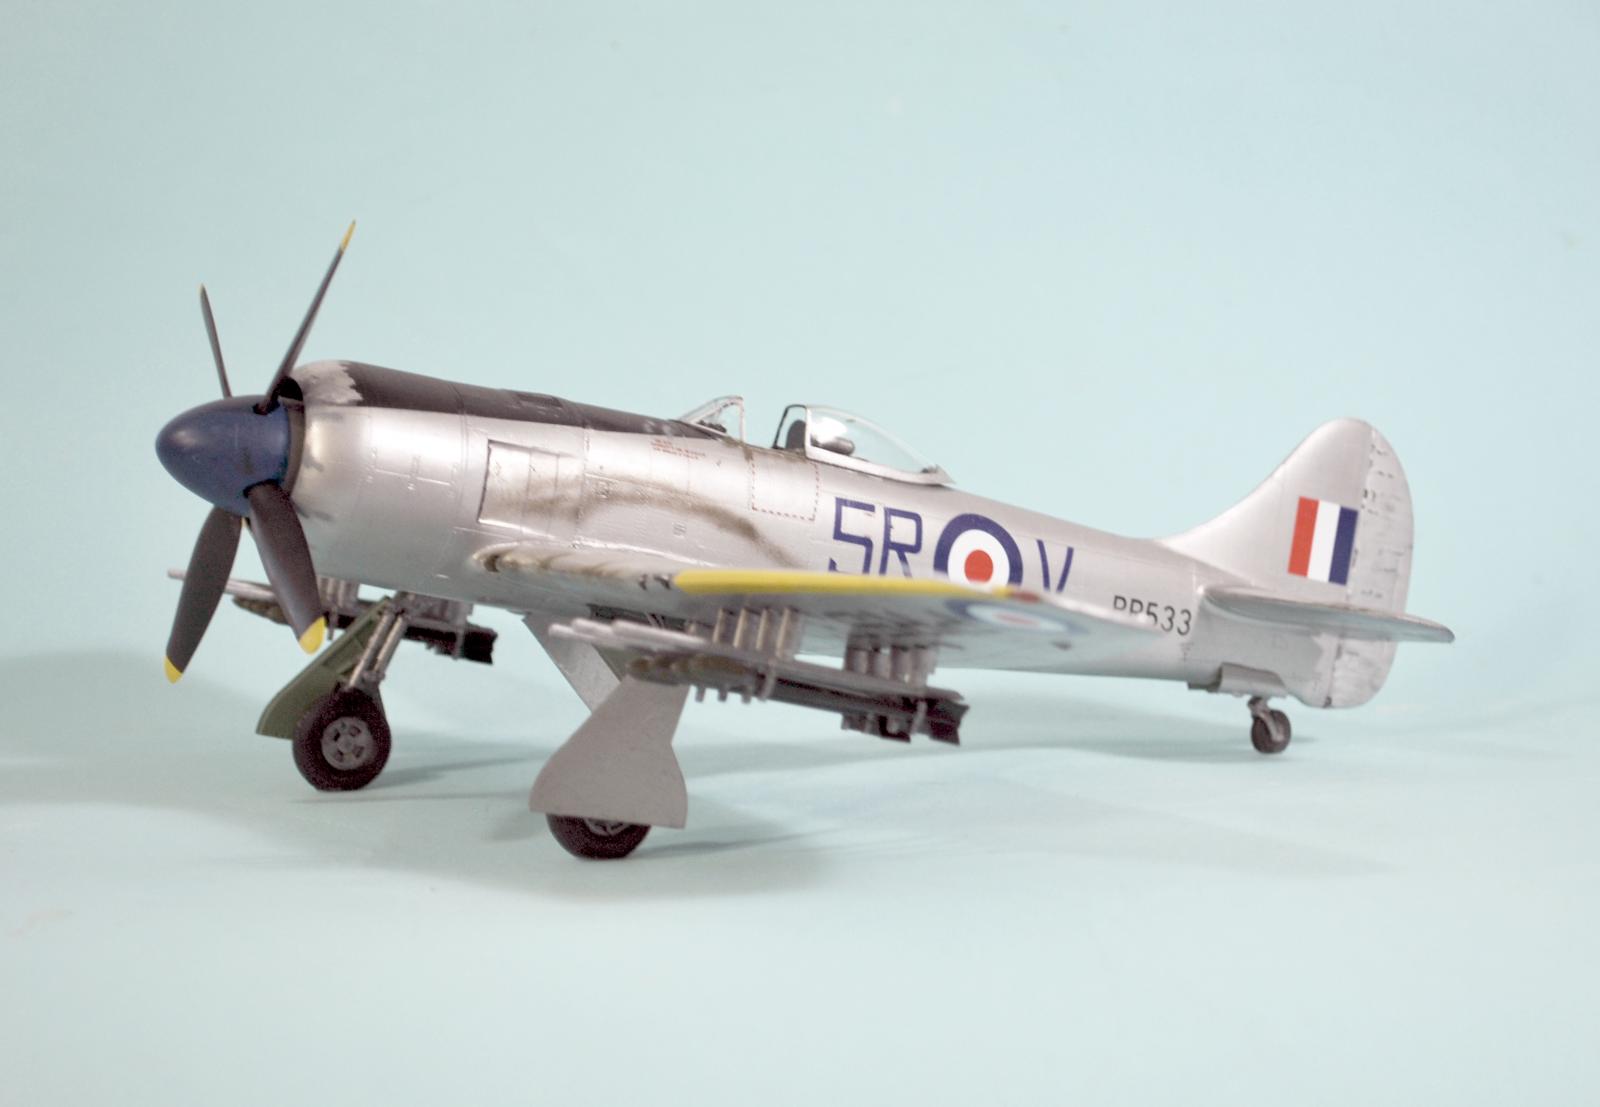
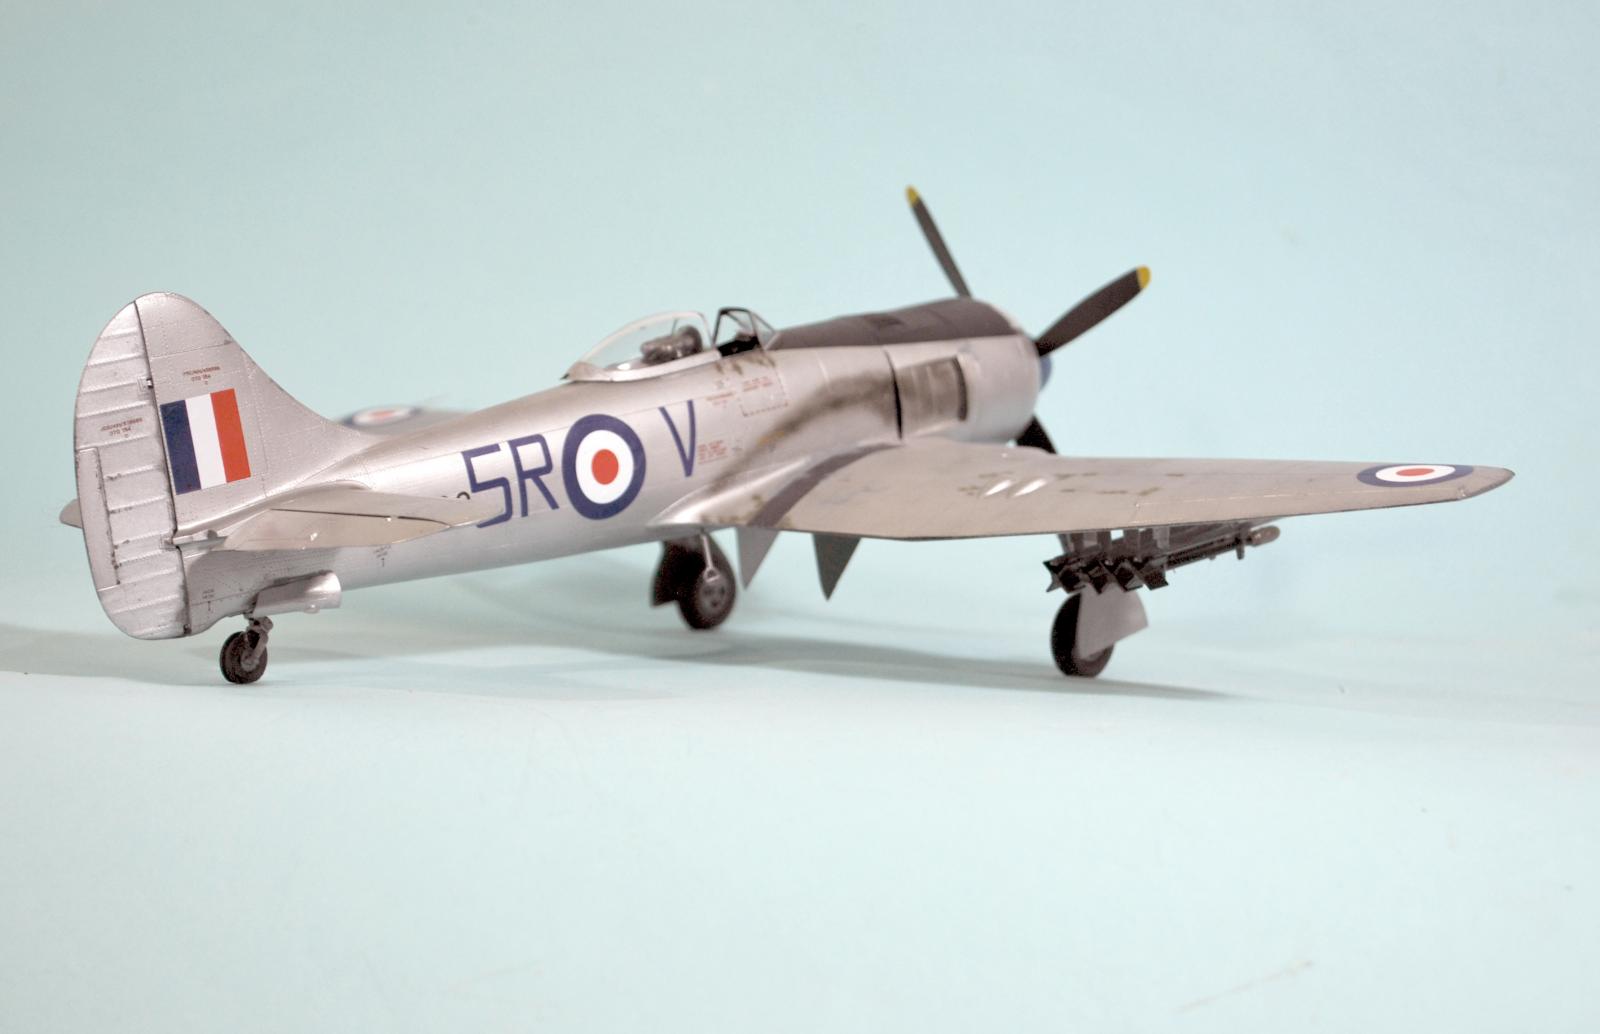
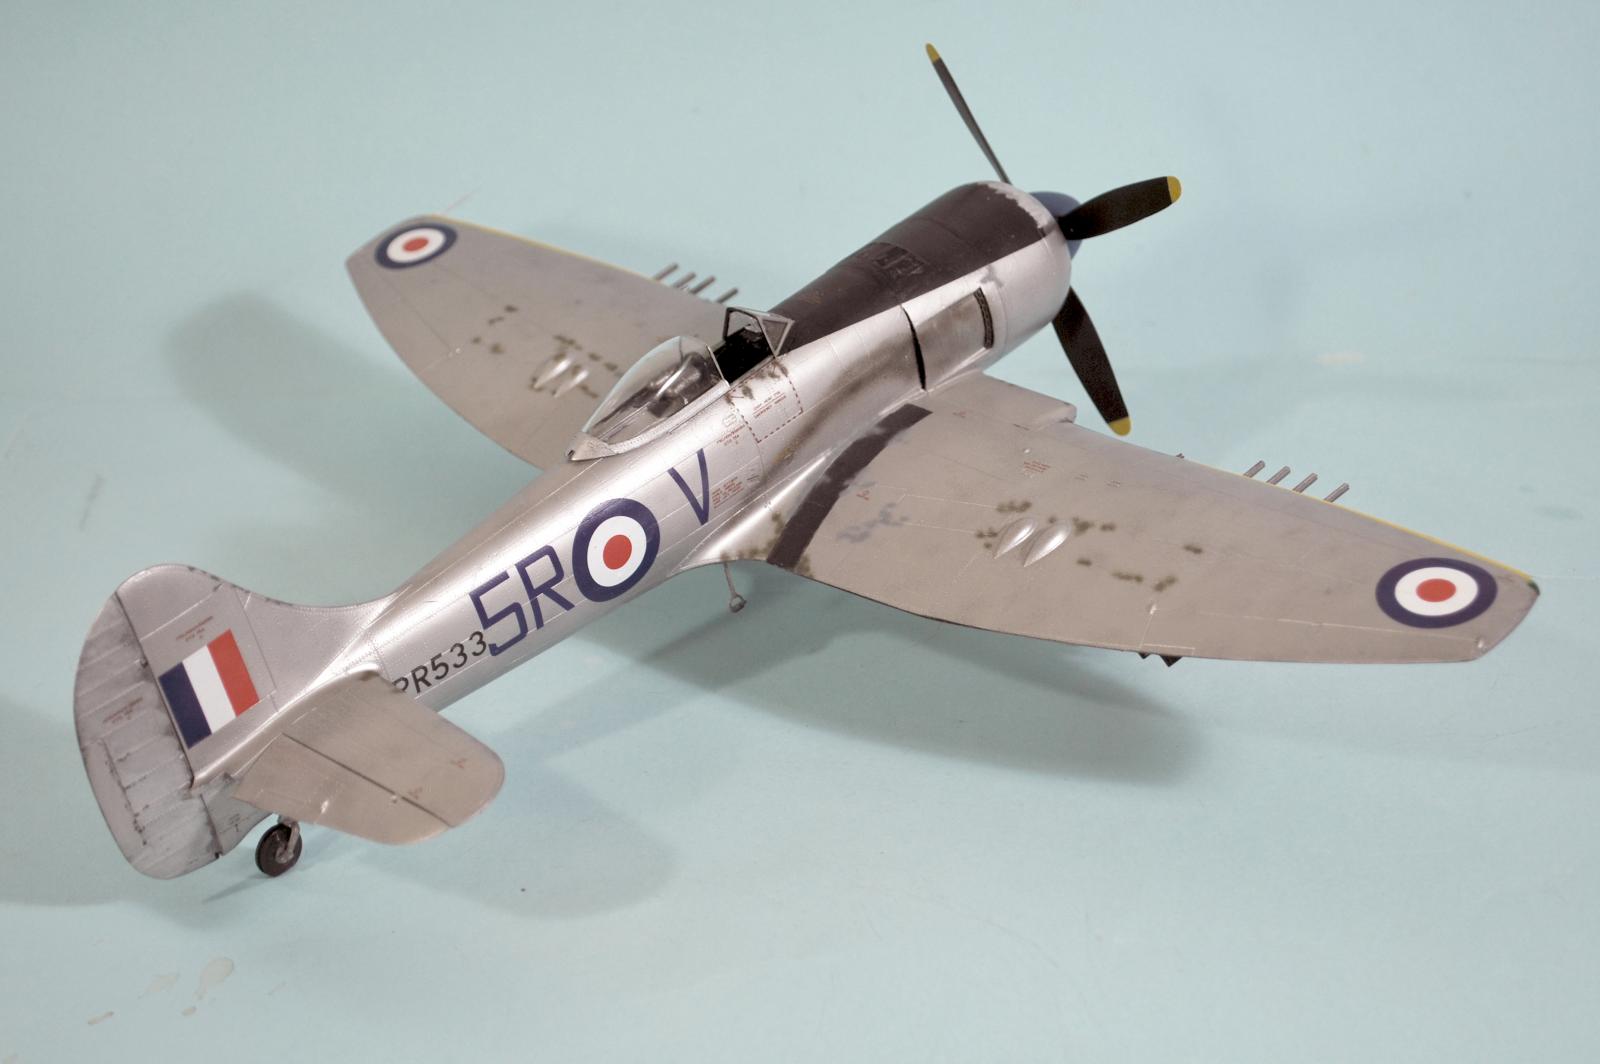
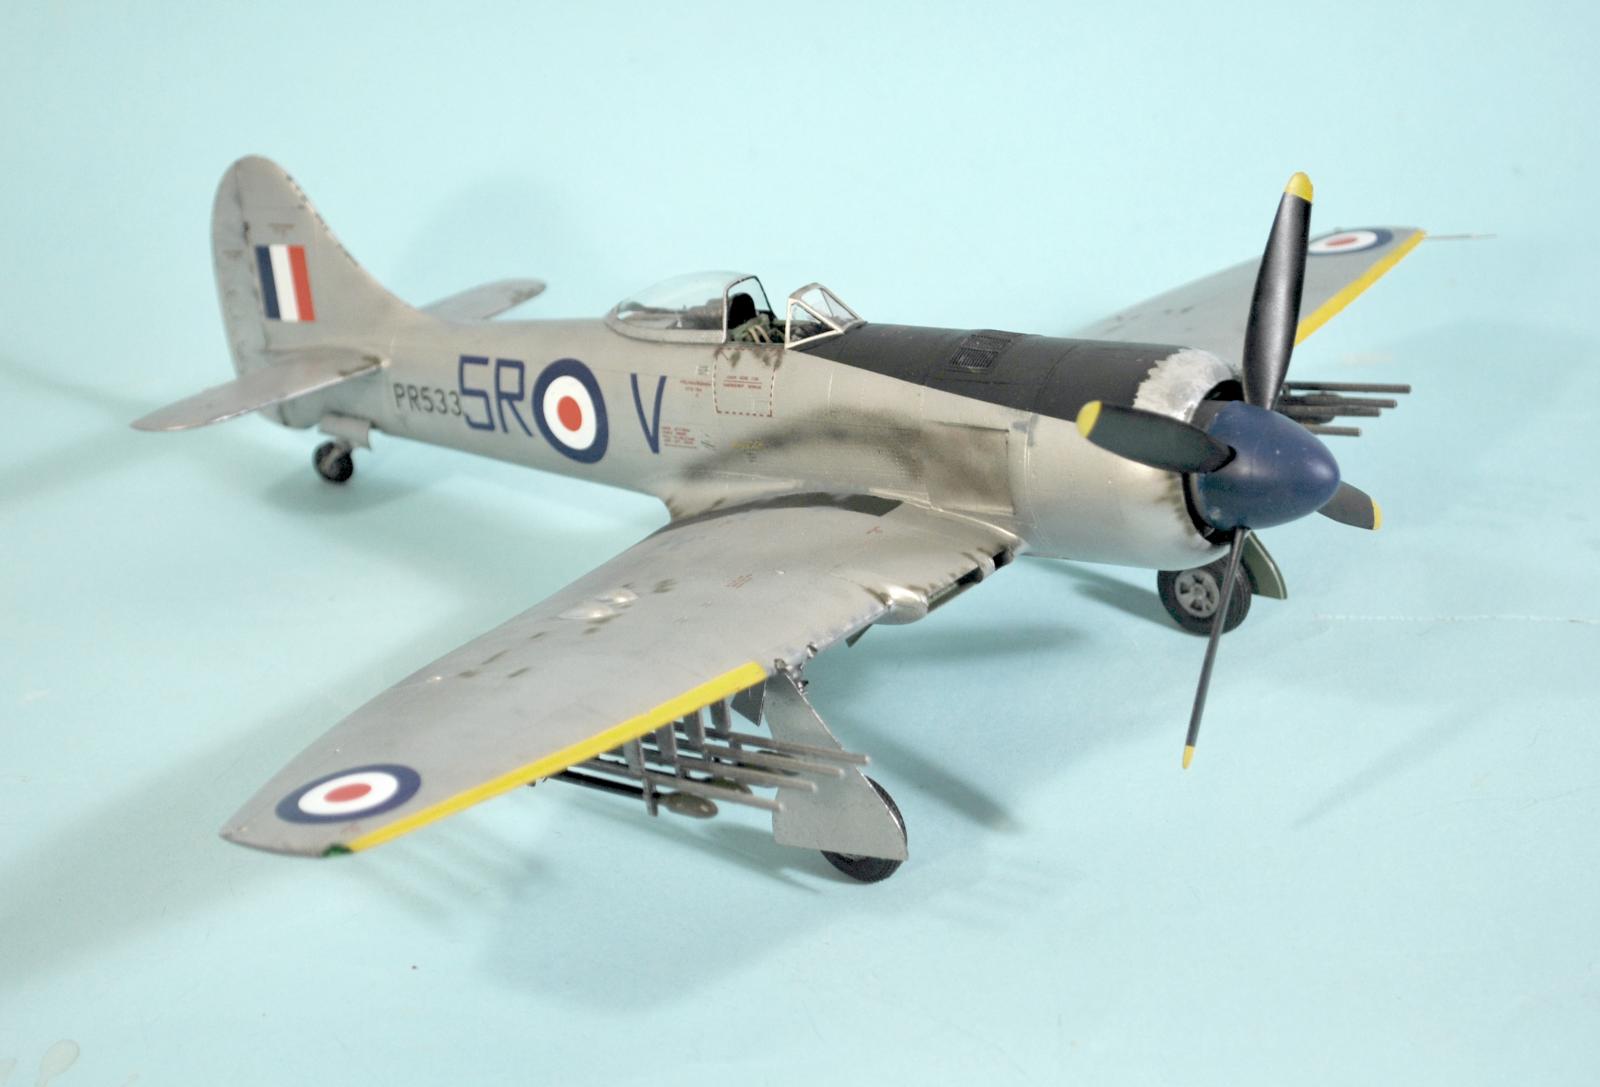
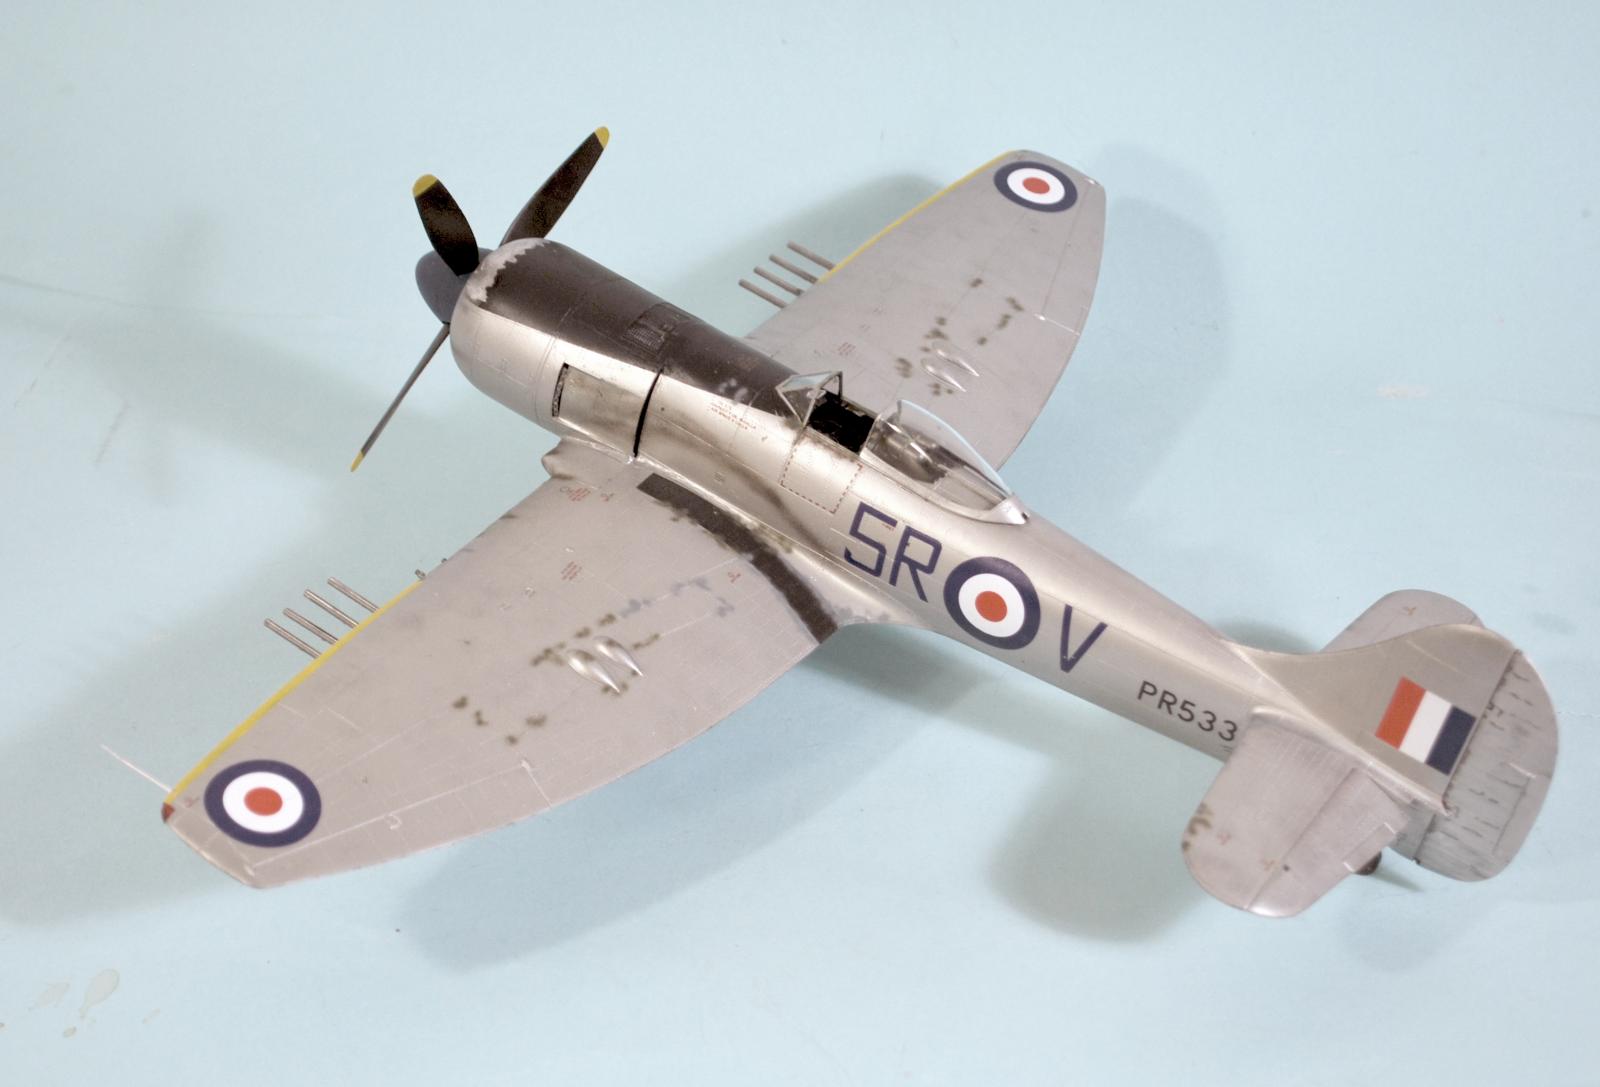
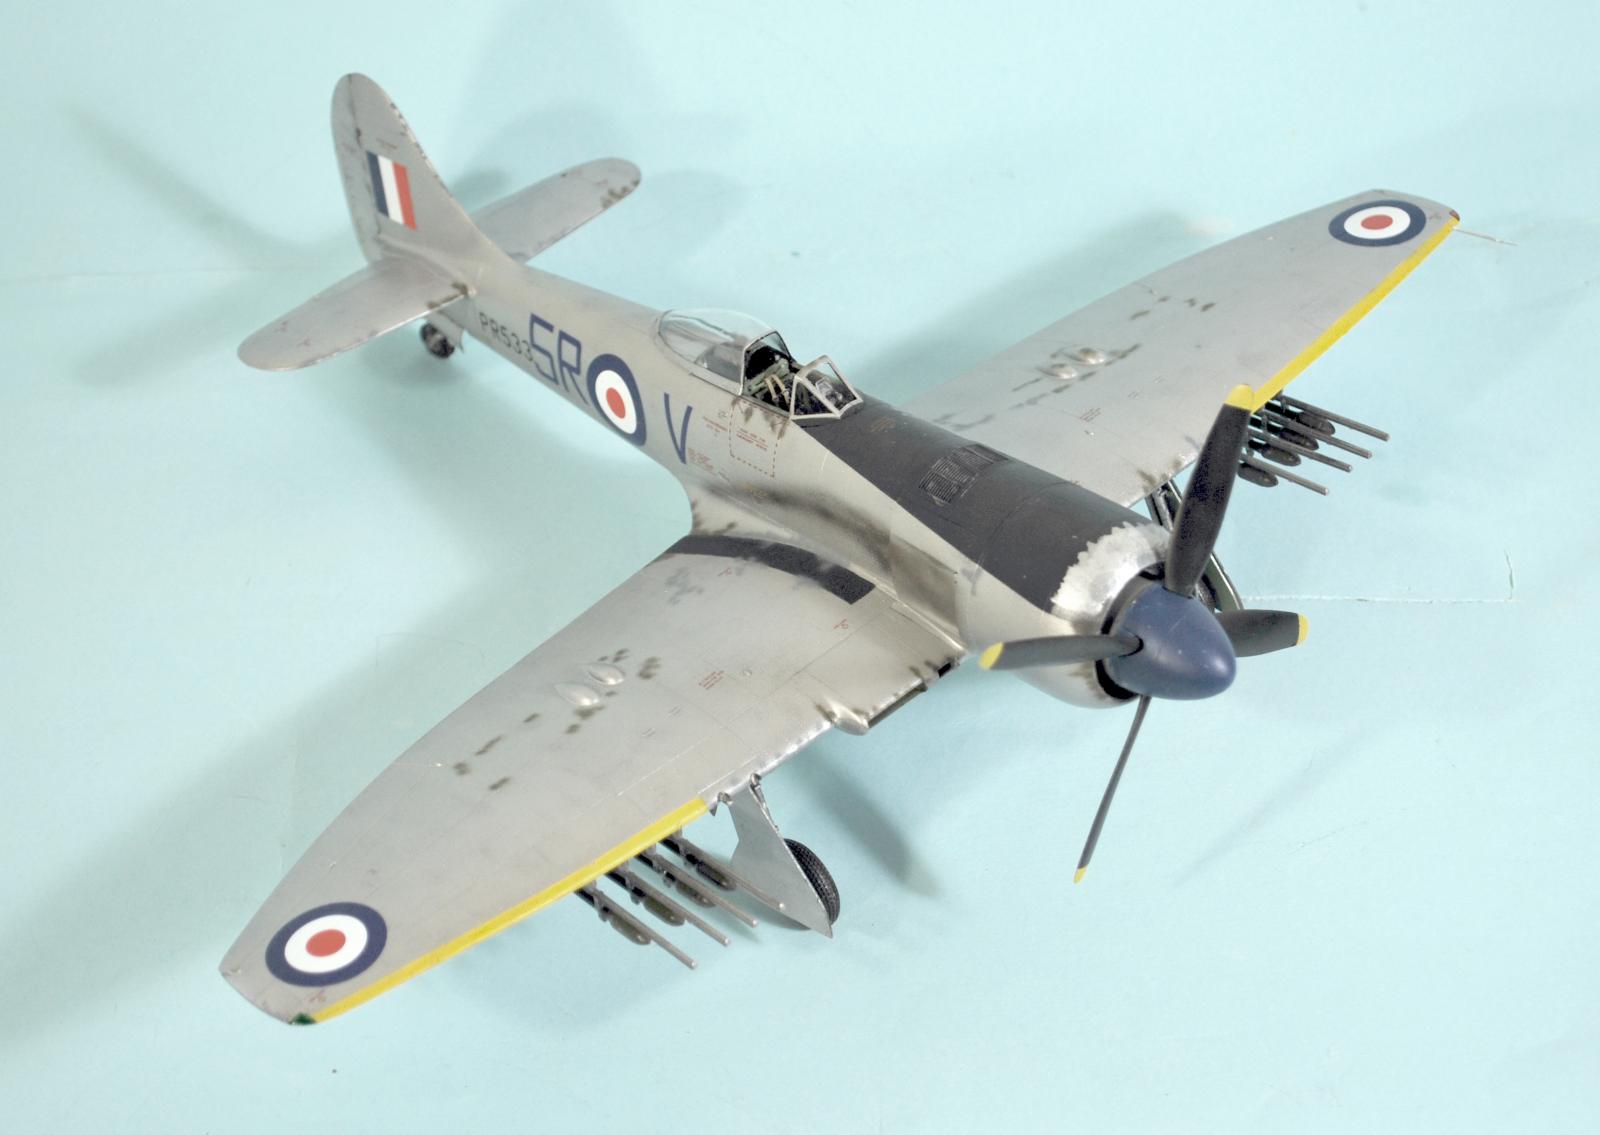
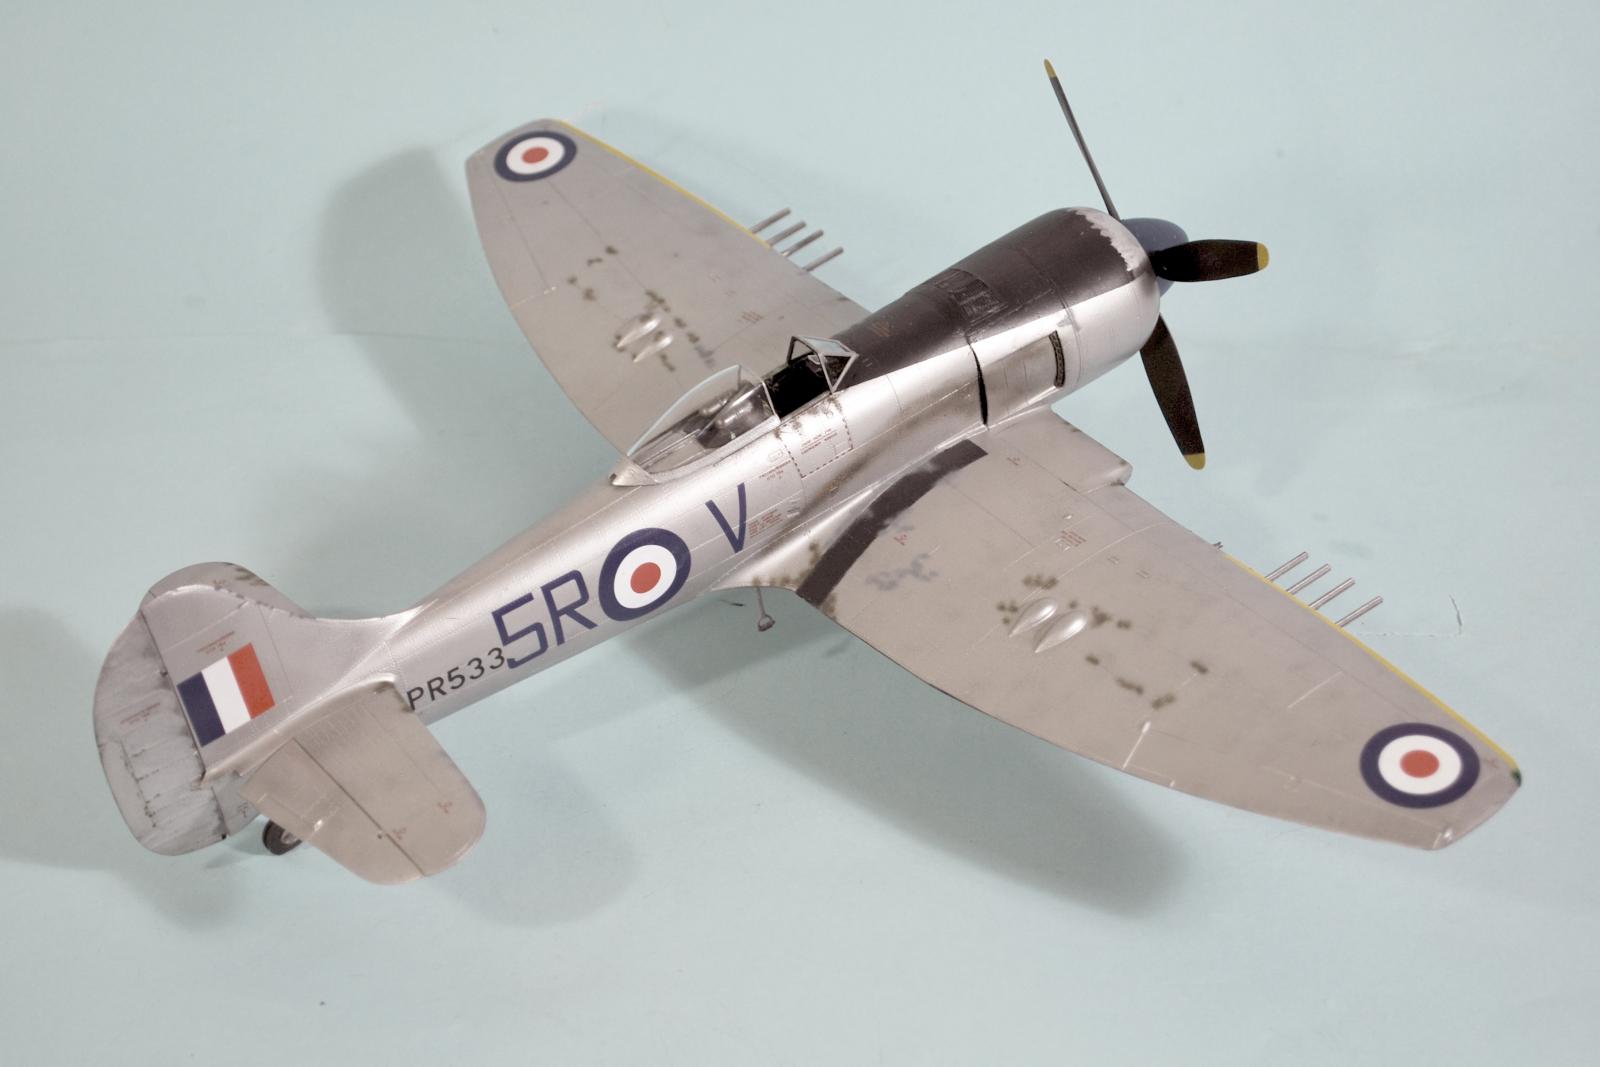
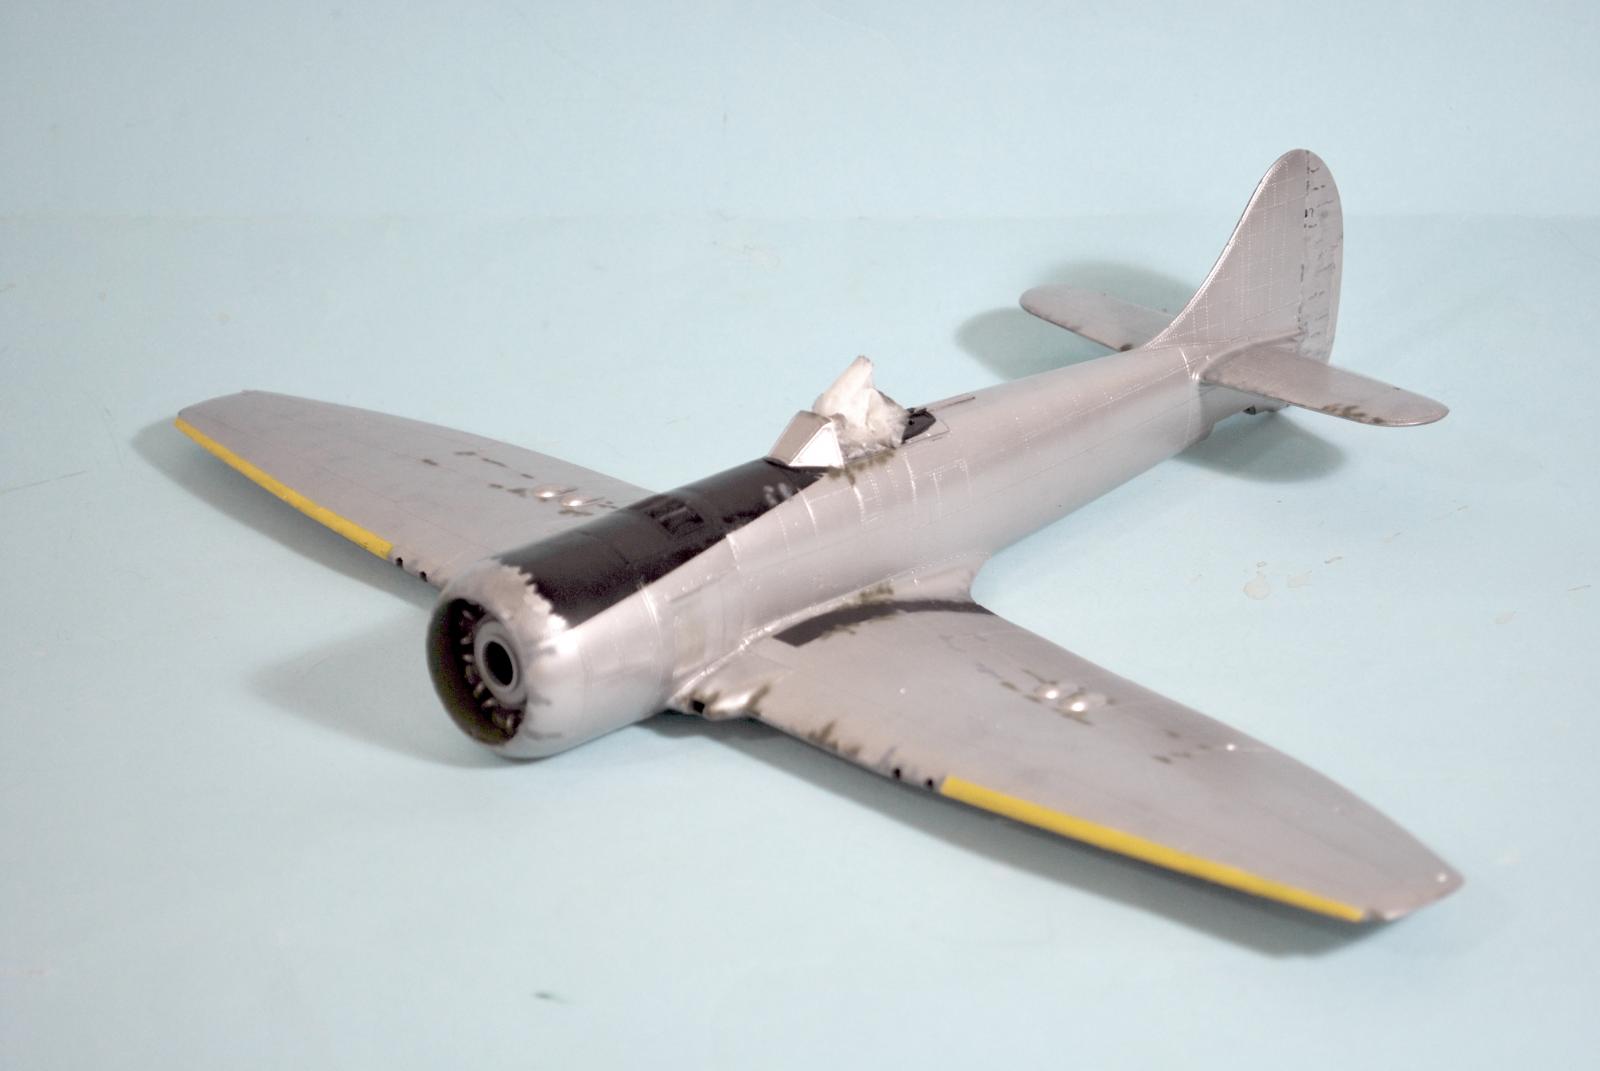
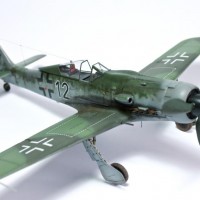
After applying an overall coat of Tamiya X-18 Semi-gloss Black, I painted the rudder with Tamiya XF-16 Flat Aluminum, thinned 50-50 with clear gloss. I deliberately didn't get it nice and monochromatic, leaving a “hint” of darkness under it since this airplane had the High Speed Silver scheme applied over its factory camouflage and I wanted to simulate wear.
I then painted the yellow ID stripes on the leading edge of the wing. The rudder, the leading edge, and the anti-glare black panel and the wing walks were then masked off and I applied an overall coat of Vallejo “Semi-matte Aluminum,” again leaving some areas with a “hint” of darkness beneath for wear.
When this was dry, I unmasked the other areas and then I tore some masking tape, positioned it on the anti-glare area and applied a light coat of the Vallejo Aluminum, since this had worn away in use. I then made “wear areas” with Tamiya XF-81 RAF Dark Green and XF-82 RAF Ocean Grey around “high traffic areas like the wing walk and cockpit, the gun bays, the wing and tail leading edges and leading edge of the cowling, also some wear on the ribs of the rudder, done with a 0000 brush.
I applied the decals, which went down without problem under Solvaset and melted into the nide surface detail.
I gave the model an overall coat of clear “satin” then went over the upper surfaces with clear “flat” to simulate weathering under the tropic sun in Malaya. I attached the landing gear and posed the canopy open and attached the prop, and called it done.
Conclusions:
It turns out this is a good kit, despite the assembly problems, and I like my result. The discovery of the “secret” in assembly was what made the project manageable. Recommended for modelers experienced in assembling limited-run kits. As it turns out, the 1/48 kit will be nothing like this, with the fuselage and wing parts molded sub-type-specific, as was the Eduard Tempest V.


Great model and great article, Tom. Love the scheme.
Thanks for the assembly tricks!
Beautiful build and ditto article, Tom.
The silver scheme looks very nice.
I love silver finish!
Thanks for the progress pics. Now I really get what you did to improve the build process. That's a lot less filler (well, CA glue and Perfect Plastic Putty) than I used on mine. Probably a lot less swearing too!
The model and the weathering is very good (the weathering makes it look like it has seen better days.)
Turned out awesome!
Very nice Tempest Tom @tcinla, the color scheme is stunning and your article is very detailed, thanks for sharing!
Thanks for sharing the build/paint process Tom The Master teaches the pupils.
Nice job on that one Tom! It's a beautiful aircraft sir, with a lovely finish.
It occurs to me that you must have an incredible model collection Tom. Where do you keep them? I'm envisioning a vast display unit. Do you have any photos of the entire collection together?
It would be a photo of a garage full of boxes. 🙂
They used to go out to Planes of Fame, but since Ed's death, that place has changed and those days are over.
I remember those rooms with display cases packed with models. I can’t believe you built them all, so who else contributed their builds. Are they still there? What’s the story?
They're still there, there's just no one left (Ed was a modeler first and foremost) who cares about them. The full "cult" is now in charge and non-cult members are no longer welcome.
Don't get me wrong, if you go there as a visitor, nothing's changed. It's when you step behind the curtain.
I know what you mean. I used to work with the gift store as a vendor.
Yeah, it's sad as hell. Having been around a for-real cult, I know the signs, and that place has been filled with them for years. Without Ed (who would have been incensed to be told what had happened) to appeal to, the full cult is now in charge.
Very nice! I have the 1/72 Special Hobby of this to do... hope my take on the silver turns out as well as yours.
Awesome build, Tom!
Beautiful looking Tempest, Tom. Surprised to see the filler requirement, but looks like it was well handled - especially with NMF. Really enjoyed the article also.
Beautiful model Tom...nice work.
Nice build, looks great. Love the silver scheme.