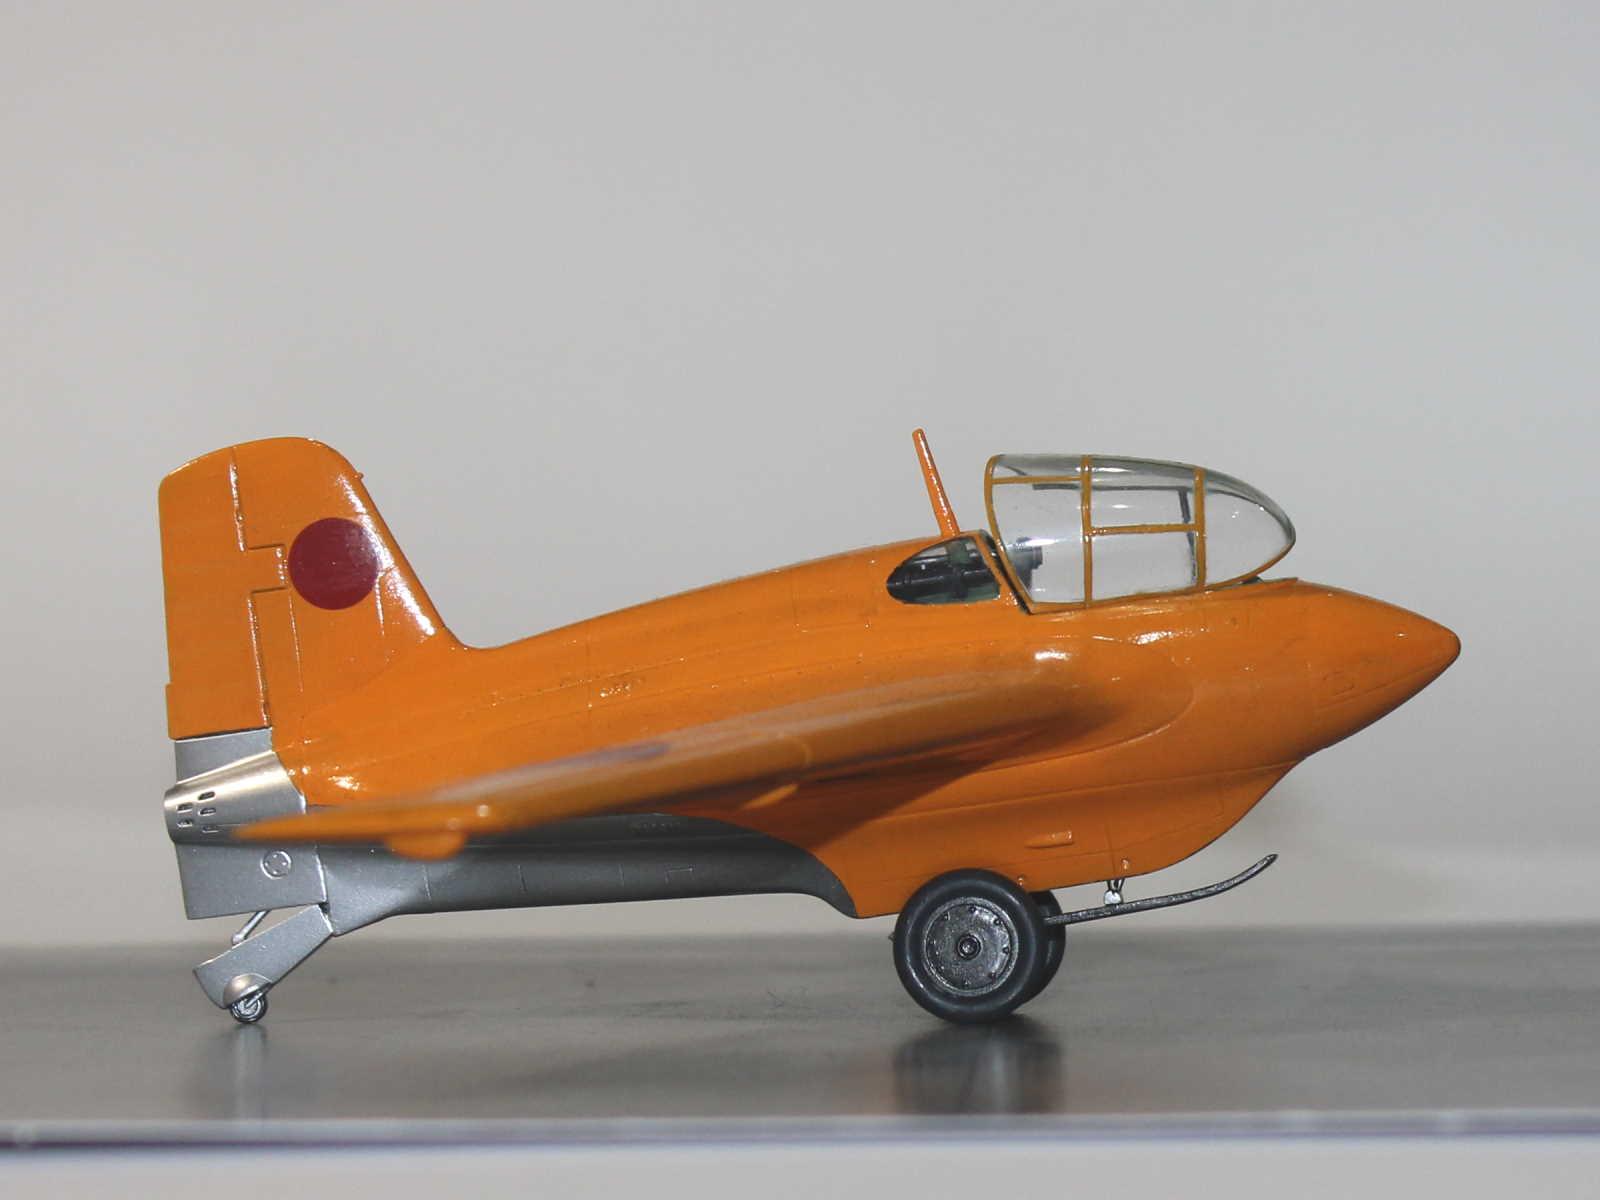
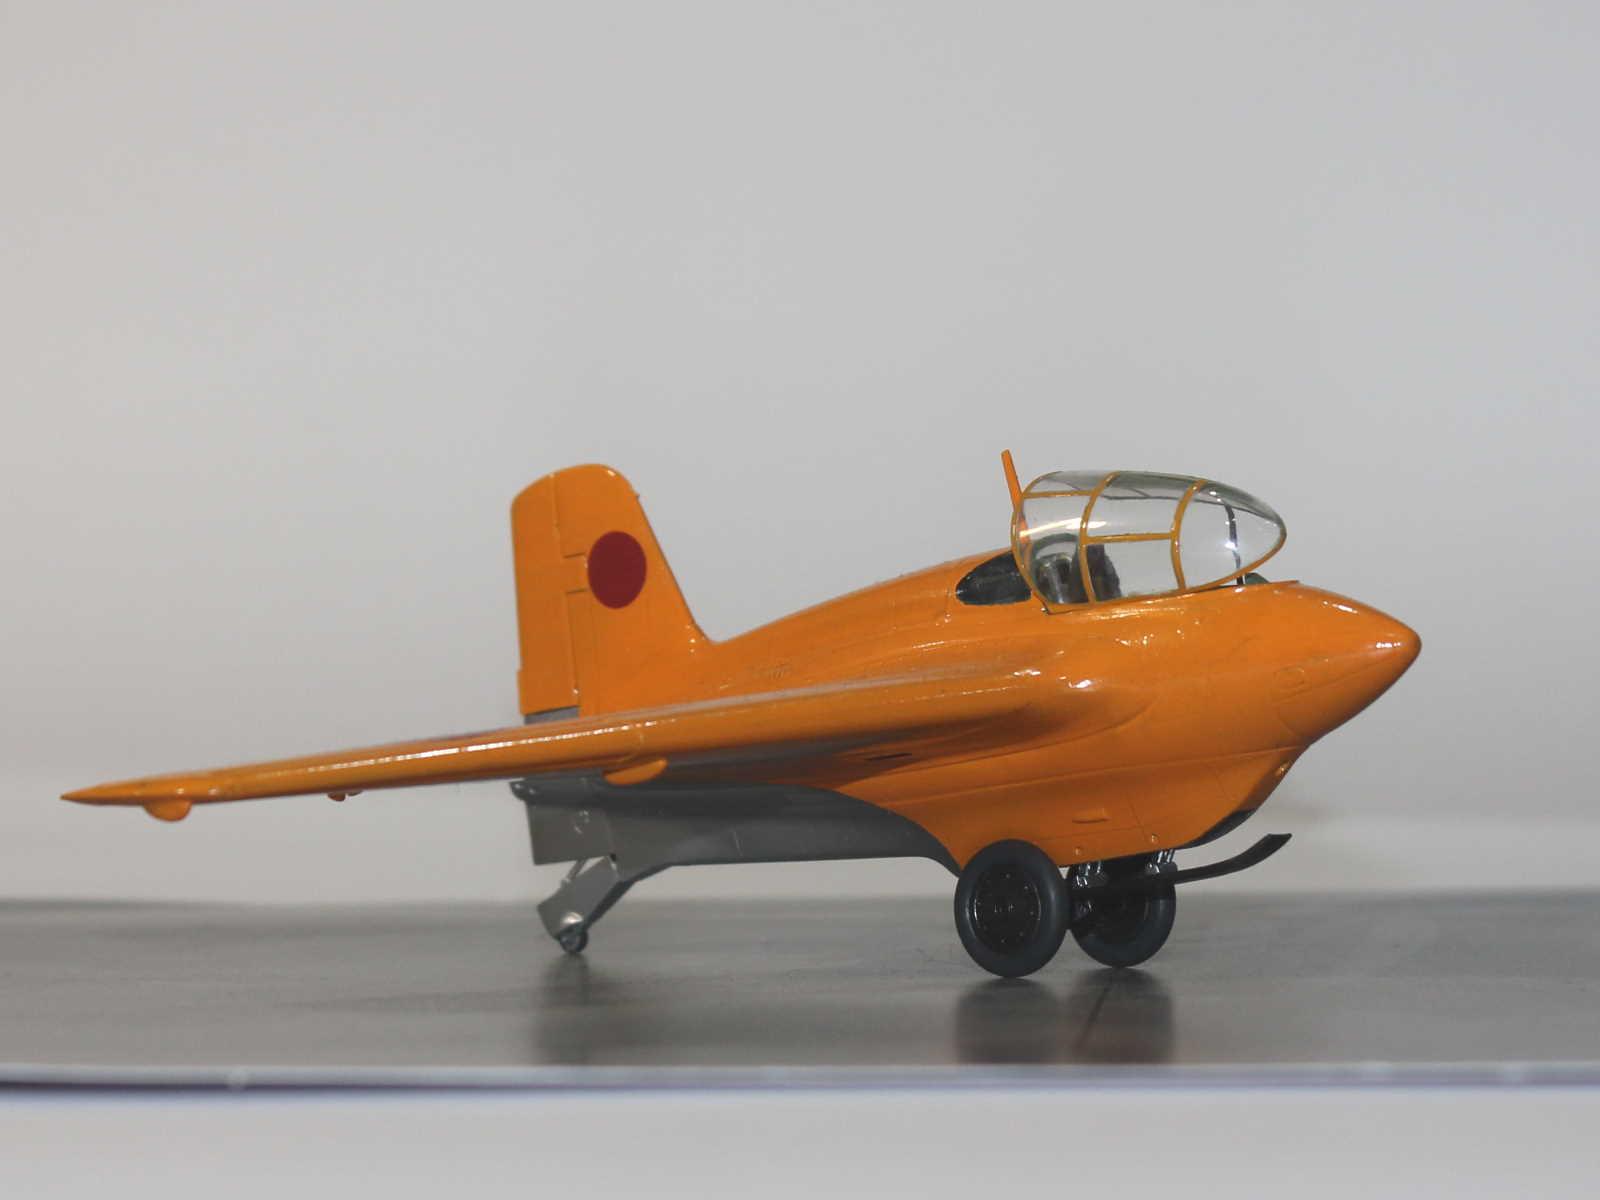
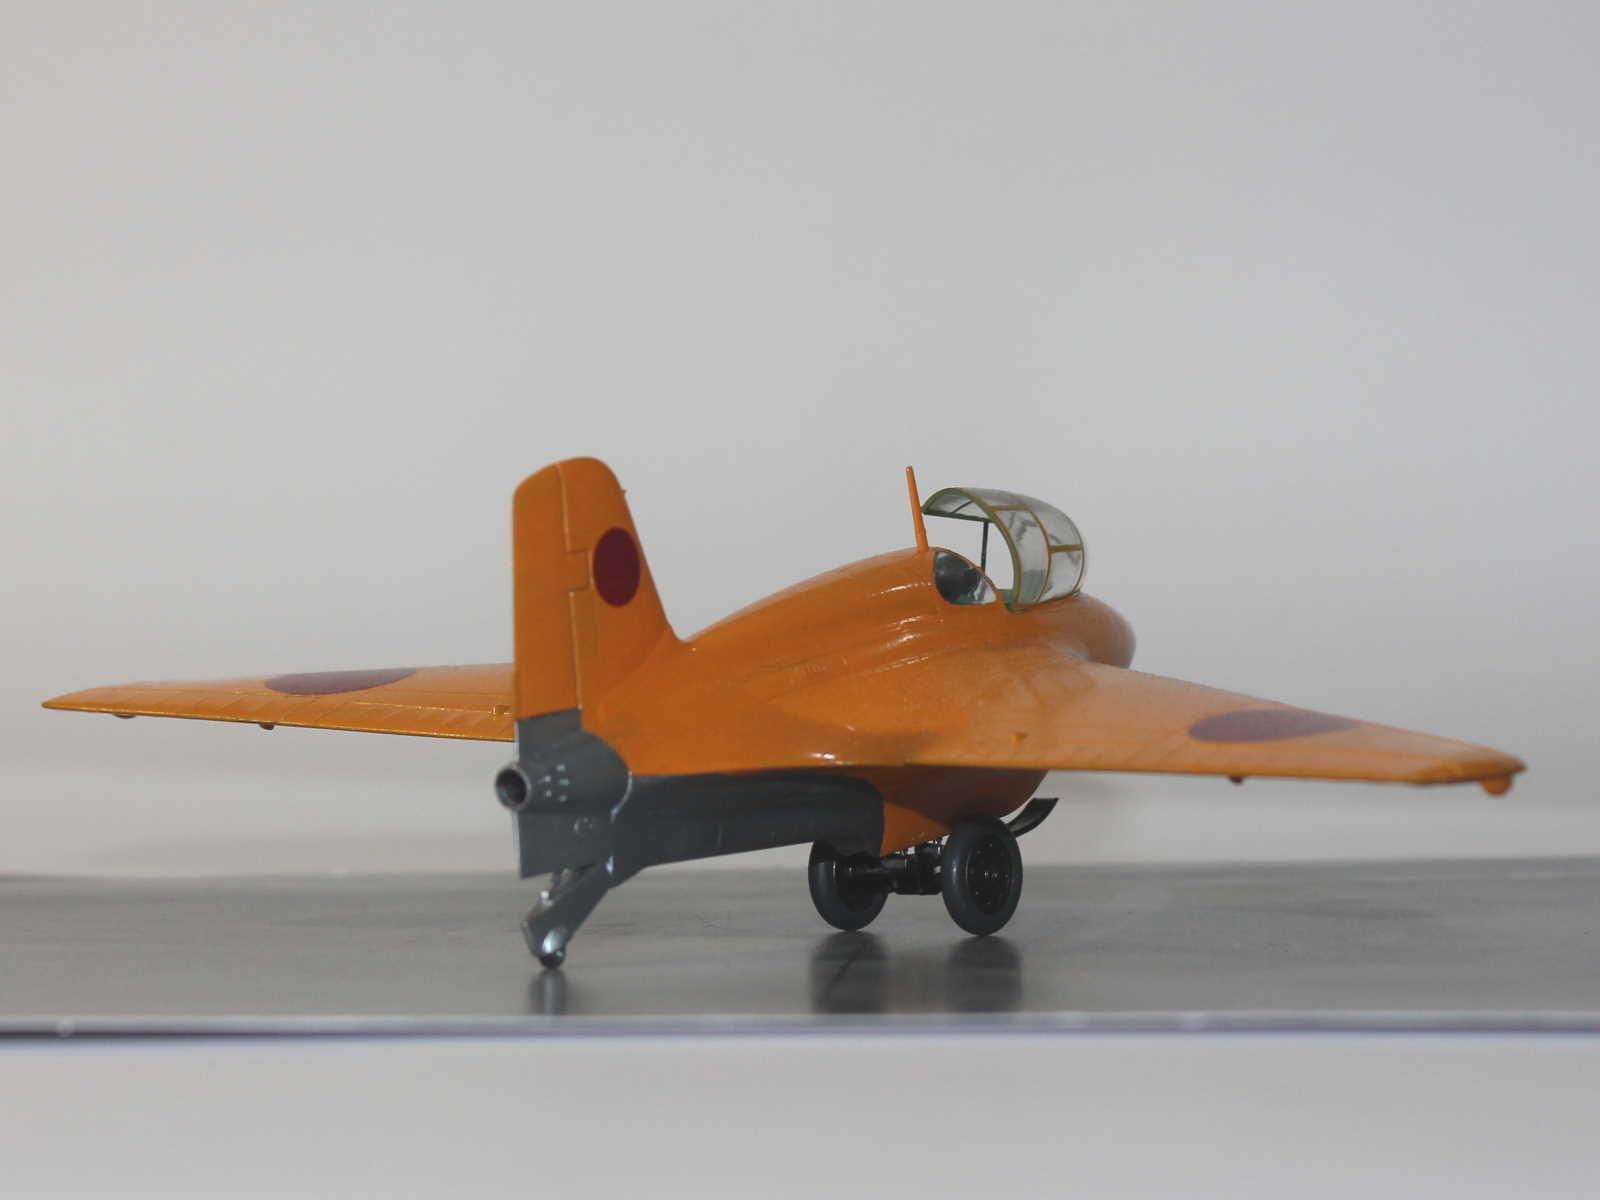
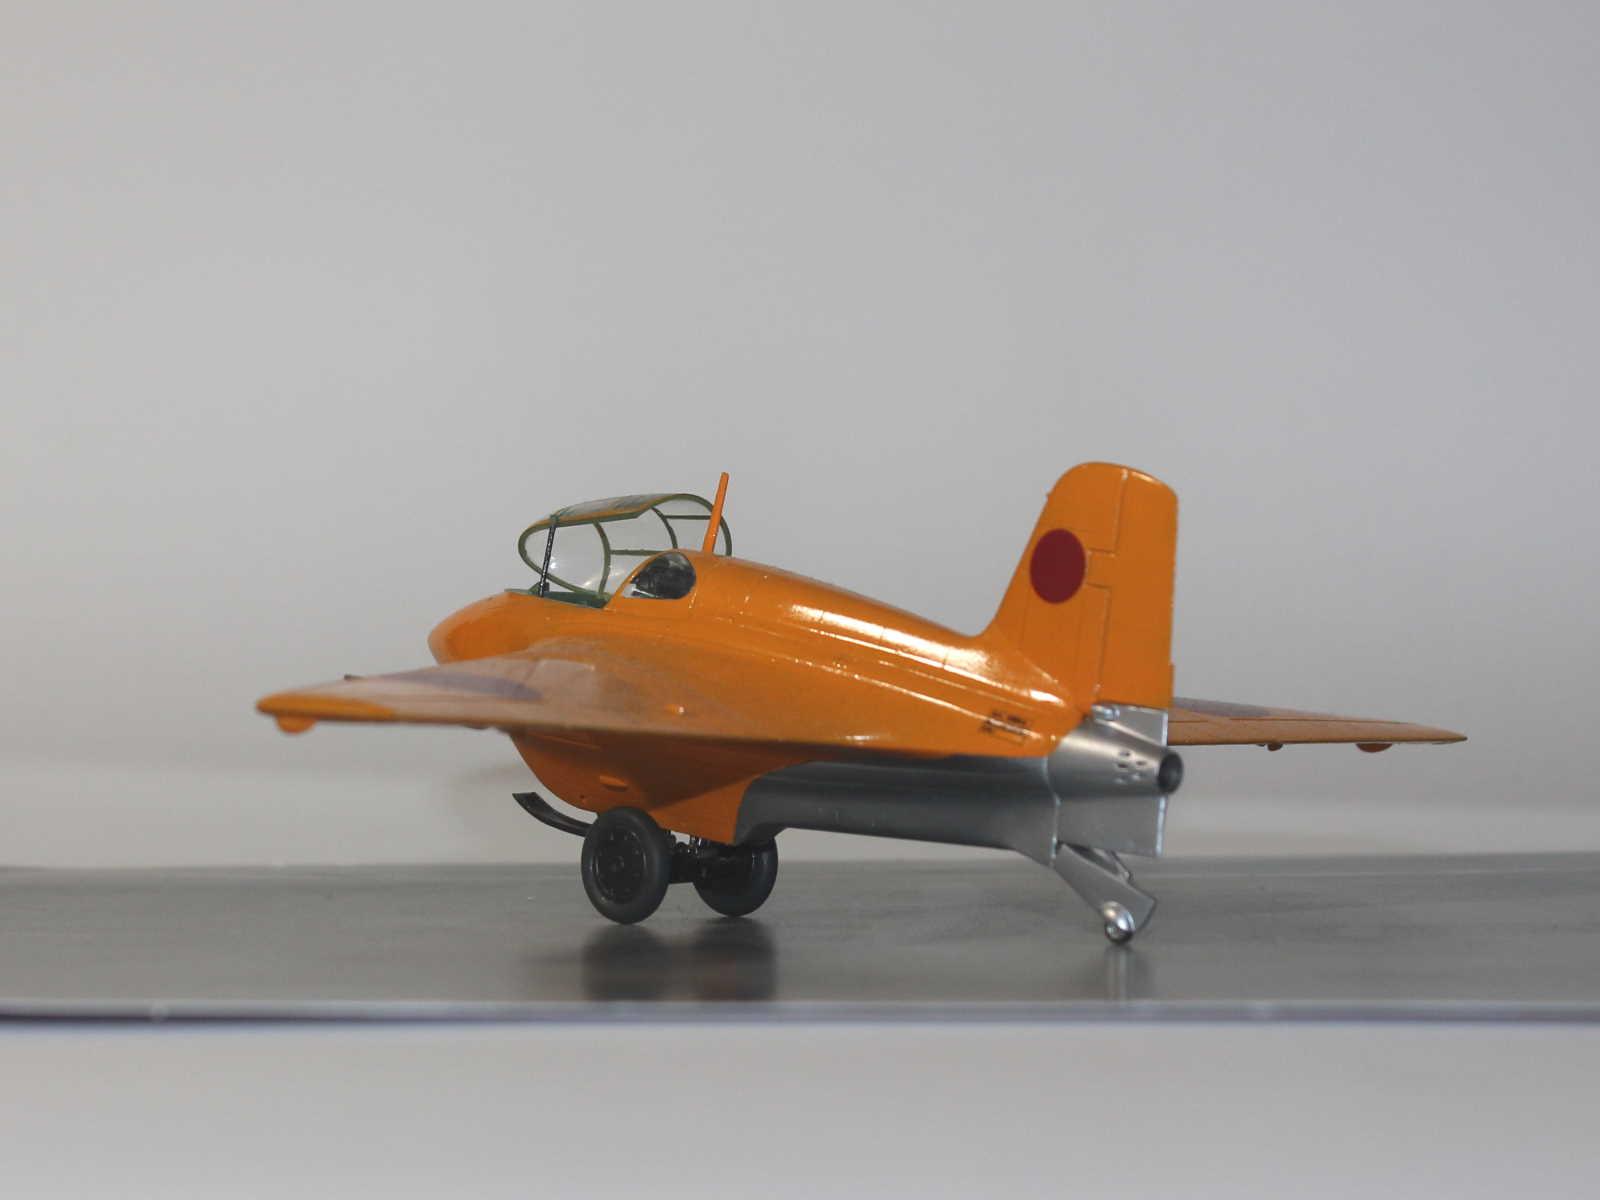
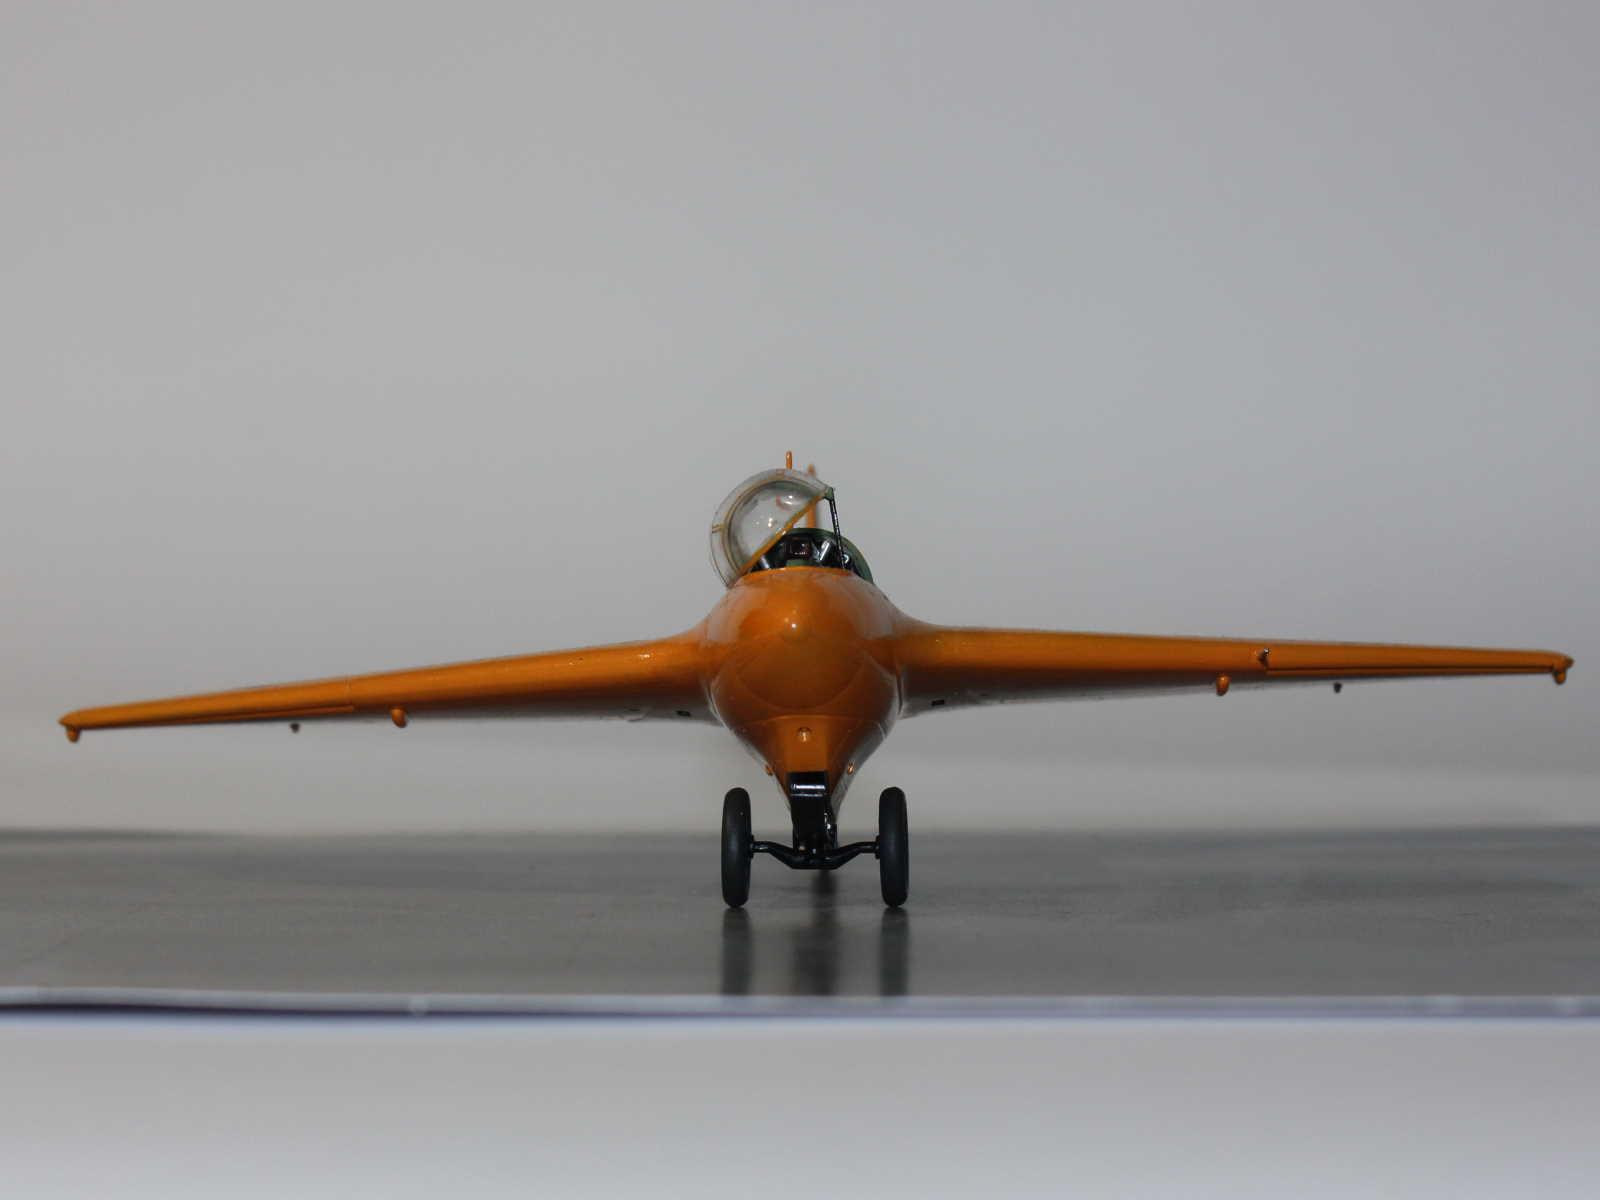
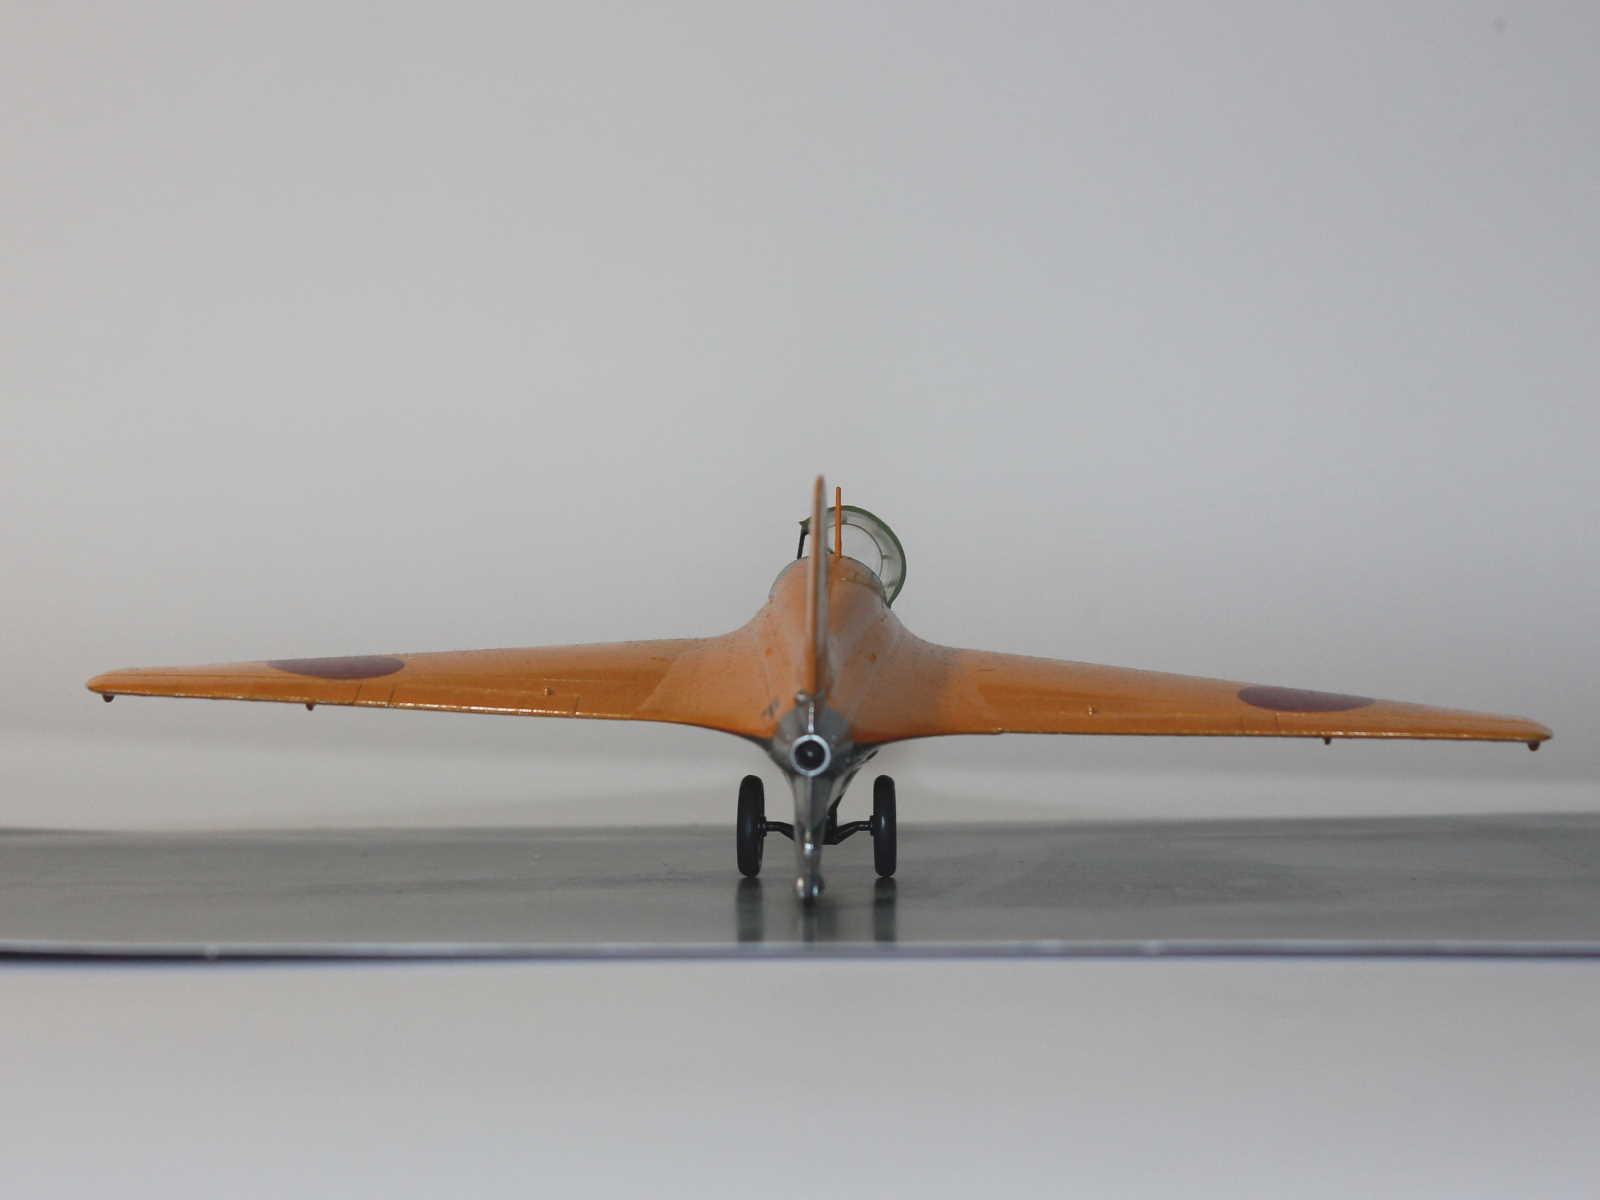
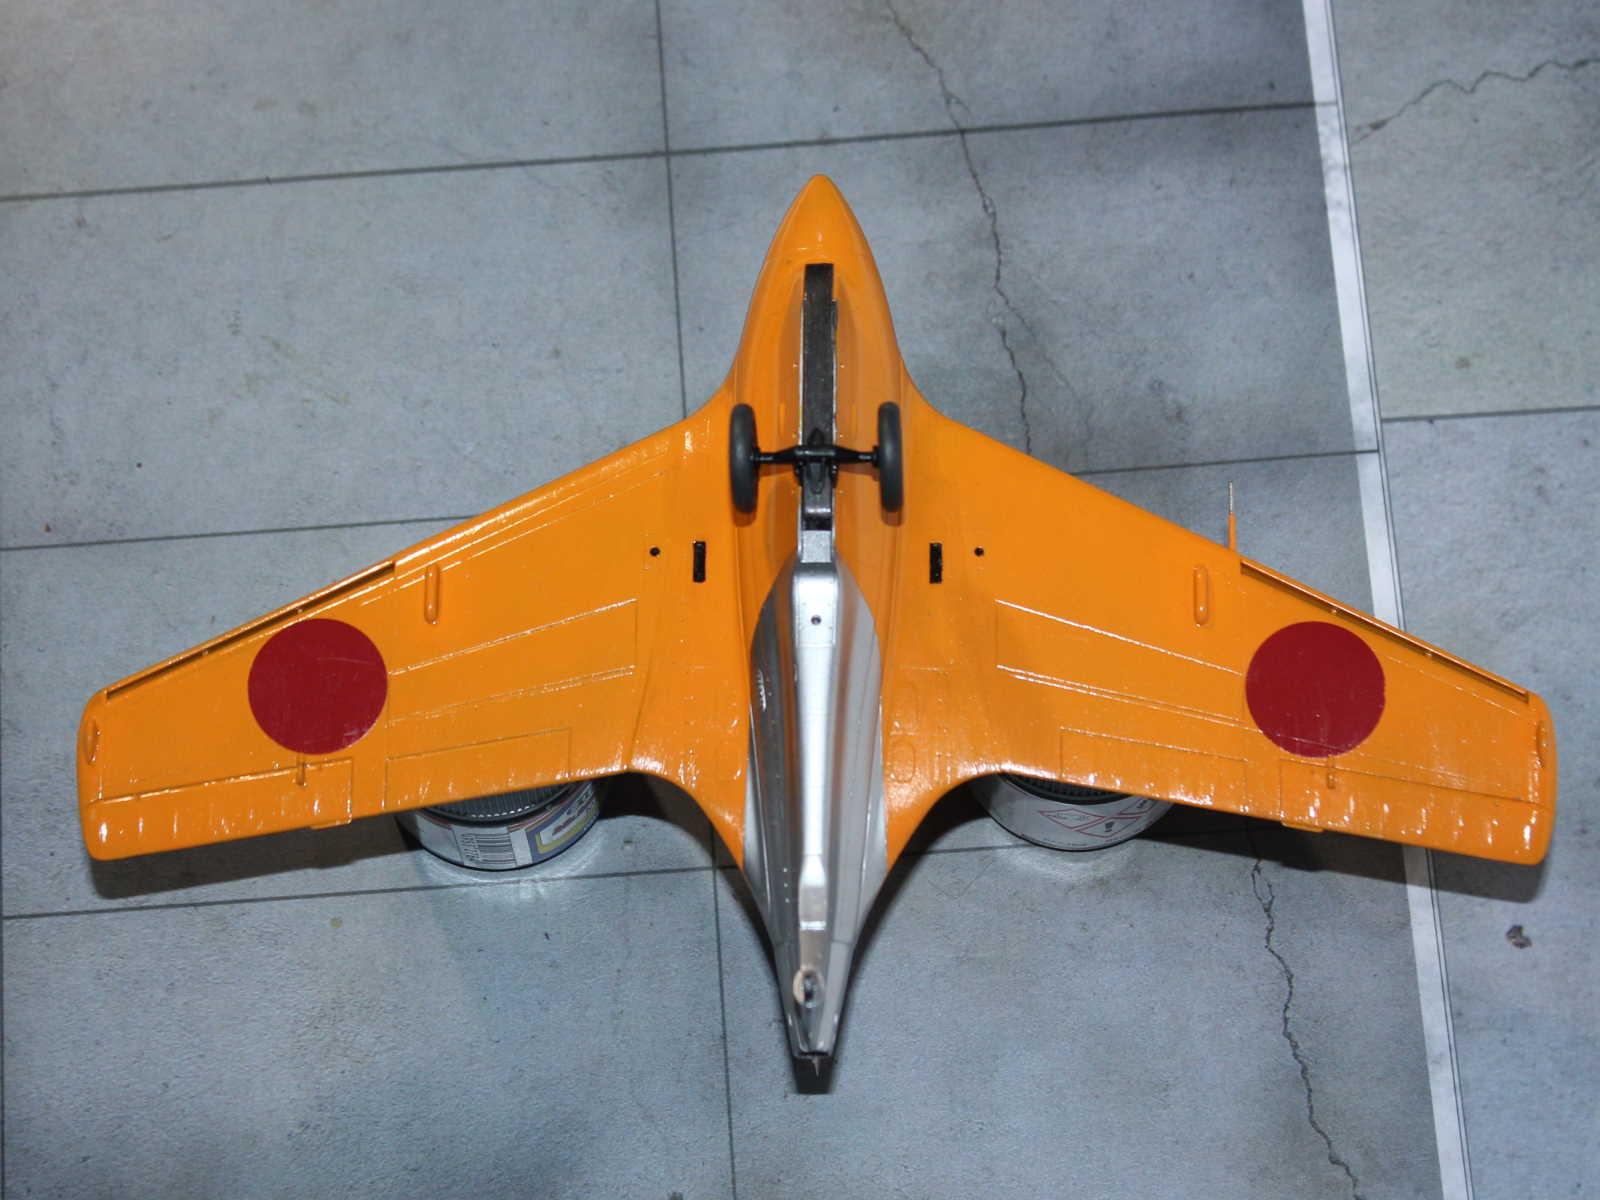
Mitsubishi J8M Shusui
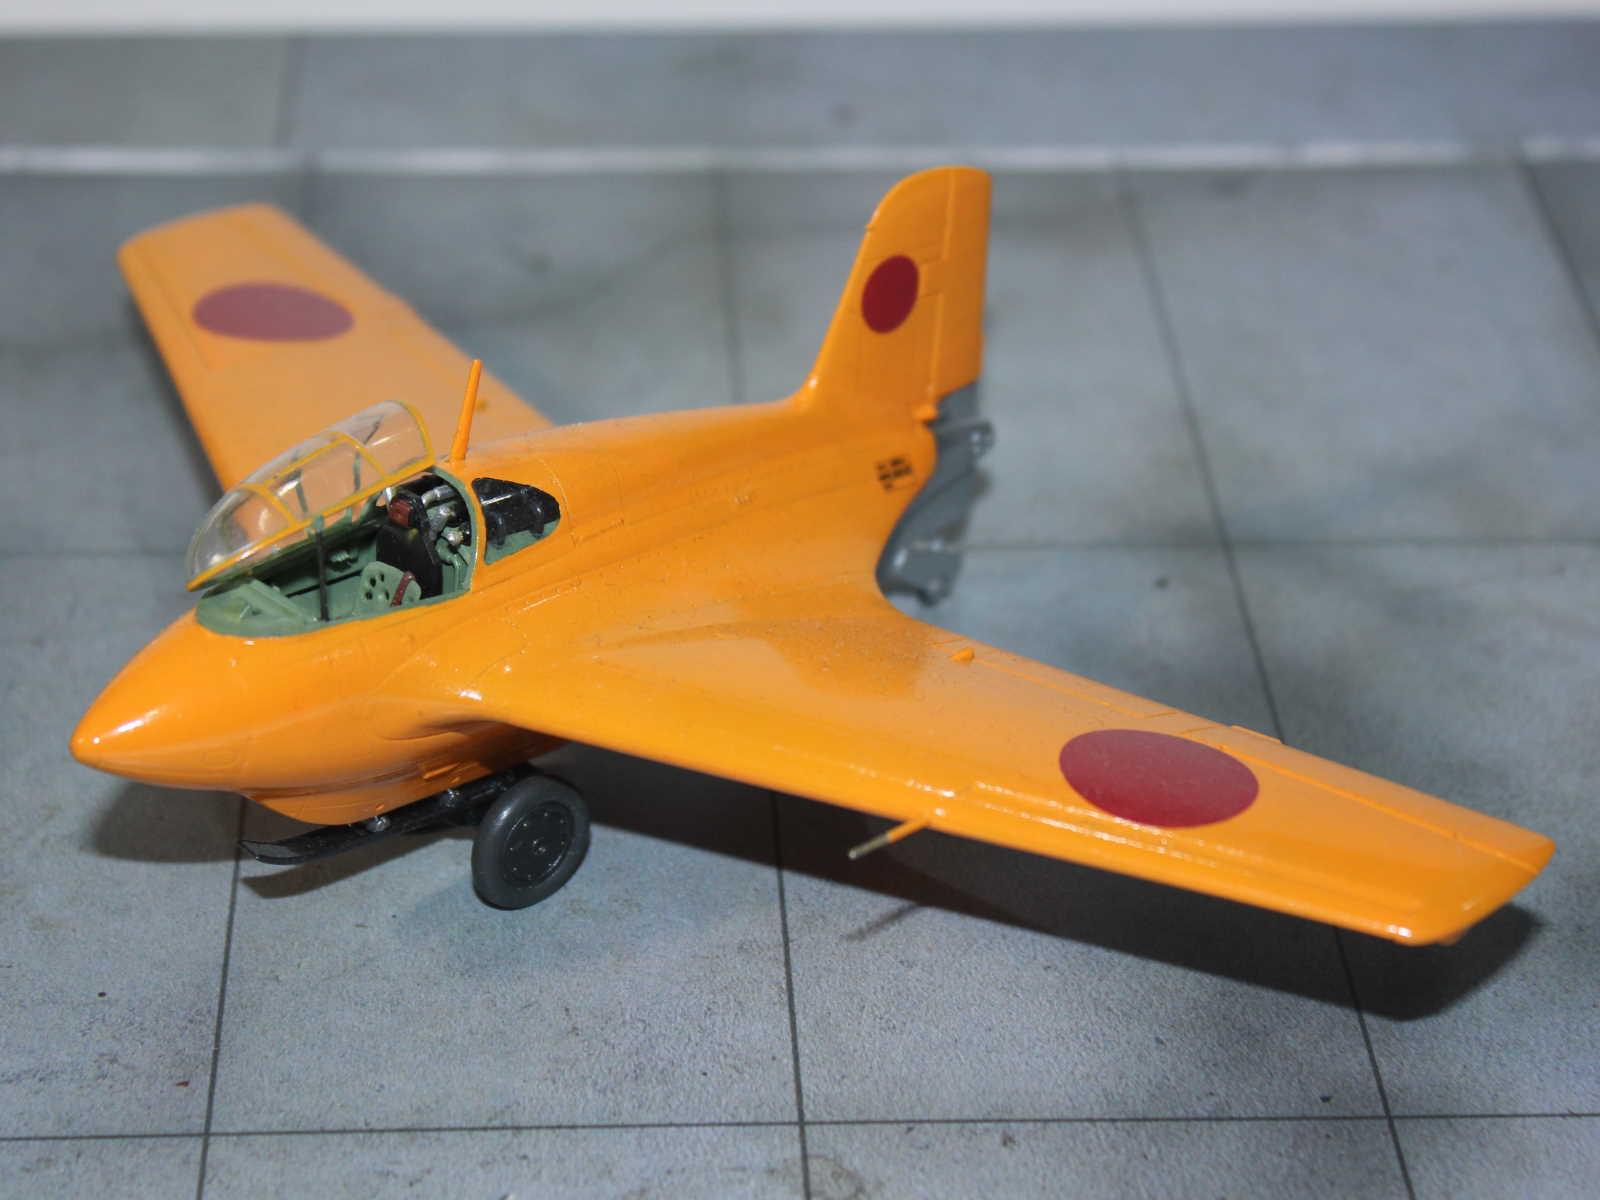
This model represents one of the unarmed prototypes for the Mitsubishi J8M/Ki-200 Shusui (Sword Stroke). It was captured post war by the Americans and is the only surviving complete airframe and resides at the Planes of Fame museum in Chino, California.
The origin of the J8M/Ki-200 lies in a demonstration in 1943 of the German Me 163 to Japanese Army and Navy attaches. Plans were made to build the Messerschmitt under license, but the submarines carrying a full airframe and technical documents was sunk by the Allies. A second sub carrying manuals and three rocket motors made it to Singapore and these were then transported to Japan.
With only minimal documentation to go on, the engineers at Mitsubishi reverse engineered the Me 163B and its rocket engine to produce the J8M for the Navy and similar Ki-200 for the Army. The Navy also commissioned the development of a glider version, the Yokosuka MXY8 Akigusa (Autumn Grass), which was used both for test and development and pilot training.
The prototype aircraft were unarmed but production aircraft were to be armed with two 30mm canon. The J8M2 was to be armed with one cannon plus increased fuel. A further development was planned with larger wings and longer fuselage for increased range as the J8M3/Ki-202.
The first powered prototype flew under rocket power on the 7th of July, 1945. Unfortunately for the pilot, Lieutenant Commander Toyohiko Inuzuka, the rocket motor cut out just after take-off. Inuzuka turned the aircraft around and attempted to land but, going too fast, he clipped a building and crashed. He died of his injuries the next day.
That was the sole powered flight of the type with the war ending on the 2nd of September.
Seven aircraft were completed, six J8M and one Ki-200, plus another six incomplete J8M1 were in full scale production. 50 to 60 MXY8 (Army Ku-13) trainers were also completed.
This is a very simple build.
The main cockpit elements were painted Mitsubishi Interior Green and details picked out in black and brown as indicated in the instructions. There are also some pipes and gas canisters behind the pilot seat and these were painted black with silver nozzles. The instrument panel dials are provided as a decals - one for the prototypes and another for the production aircraft. The instructions include steps for photo etch parts that are available separately, so I added small levers from thin wire instead, but these can't really be seen.
The kit included bonus Fine Molds "Nano Aviation" seat belts, which were a welcome inclusion and nicely detailed, if a little thick.
As a prototype aircraft, this aircraft wasn't armed nor equipped with a gun sight nor armoured windscreen and the instructions are clear on this.
The main aircraft parts consist of upper and lower fuselage halves, a nose cone, left and right rear fuselage and vertical tail and two wings with upper and lower halves, all of which went together with minimum fuss. The shape and fit of the nose cone was a much better that the corresponding part on the Trimaster/Dragon Me-163B. Also, the clear plastic part containing the rear quarter windows behind the cockpit was an excellent fit.
I took the risk of adding the antenna mast behind the cockpit at this stage and promptly broke it off twice while painting.
Three photos exist of this aircraft after it had been captured by the Americans, as is evident by the small sign in English. These photos show a white A25 on the rear starboard fuselage and a white G shaped marking on the starboard rear quarter window. My original thought was that this was internal wiring but I later concluded that it was a marking added at the same time as the A25. What it means, I don't know.
These markings are provided on the decal sheet. However, my guess is that they were added by the Americans so I decided to leave them off the build to represent the aircraft as it would have been when newly completed. If I'm wrong I can add them later.
I thought an essentially monotone scheme would be easy, but I had a few problems.
I first painted the gloss Orange and masked off for the silver portion and painted gloss black. When this was dry I painted the SMS Aluminium. This was the first time I've used this product and it tended to spray in spurts or not at all, giving a uneven finish in places. So, I sanded areas back and re-sprayed, but with the same issue.
The rear section was painted SMS Silver as pictures of the aircraft show this to be a little brighter, but there is little or no contrast between the two SMS paints.
Then, when I unmasked, I found that the gloss Orange was marked by the Tamiya tape, even to the point of what looked like a little glue residue in a couple of places. So, I had to lightly sand/rub down these areas as well as do a bit of careful re-spraying. However, brushing on a clear gloss coat fixed most of the issues pretty well. (I used Vallejo Polyurethane Gloss Varnish – I tried spraying this once before, but it couldn't get it to spray.)
The minimal decals were applied and glossed over.
The instructions indicate that the landing skid should be painted the same gloss orange as the airframe. but reasoned that this would have quickly worn off in operations, so I couldn't see the logic in the colour choice. So, I painted mine a dark stainless steel colour.
The final steps were to add the landing skid and trolley and attach the canopy in the propped open position.
This is my first completed build for 2021 and is my contribution to the Empire of Japan 1919-46 group build.
It isn't a competition piece, but it does brighten up the shelf.


Turned out nice, Michael!
Brightens up the shelf, indeed!
Michael, nice job on the model and interesting back story. Liked.
That's a beauty. Well done sir. Is this version a direct copy of the German Me-163 Komet? Nicely done write up too.
I love it @michaelt ! That is a cool model and looks great to me! 🙂
Nice little midget fighter. I like it.
Nice build, Michael.
This colorful plane is hard to miss on your shelf.
One not seen to often, looks great!
Nicely done Michael, nice back ground story as well.
Sweet build.
Nicely done Japanese power egg!