Worimi Hornet
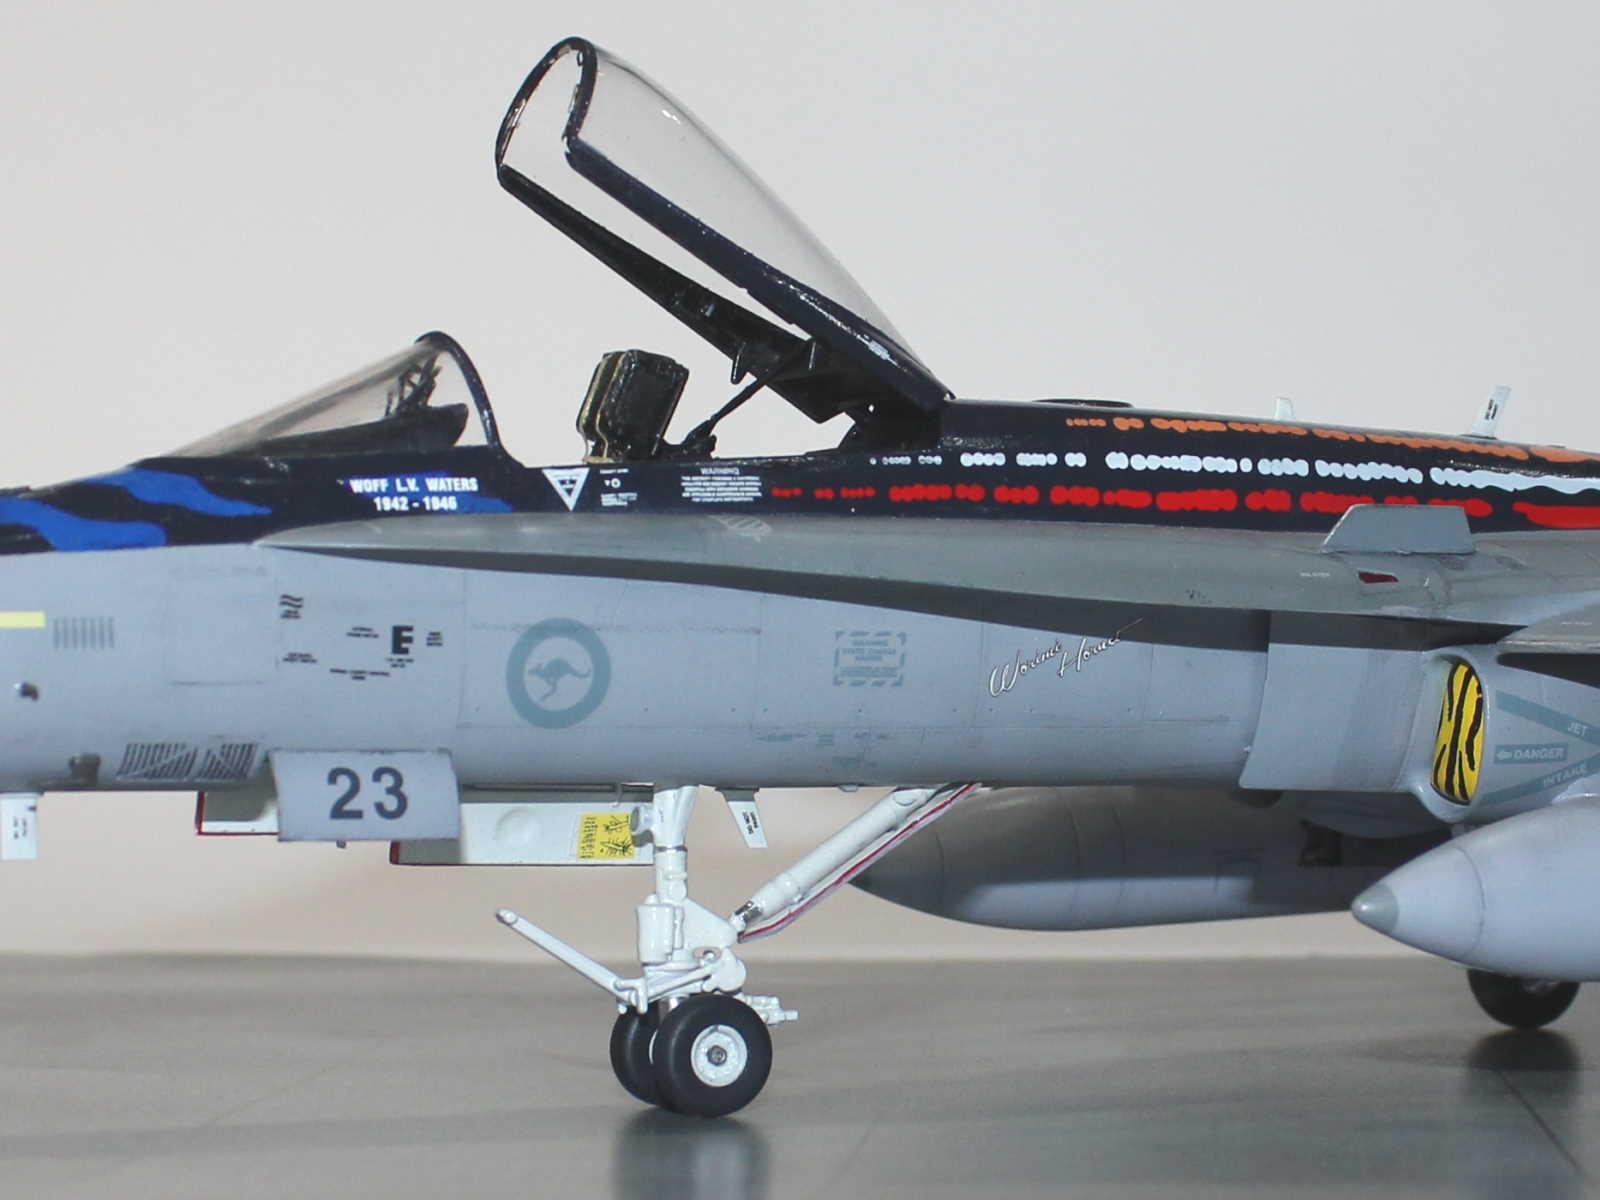
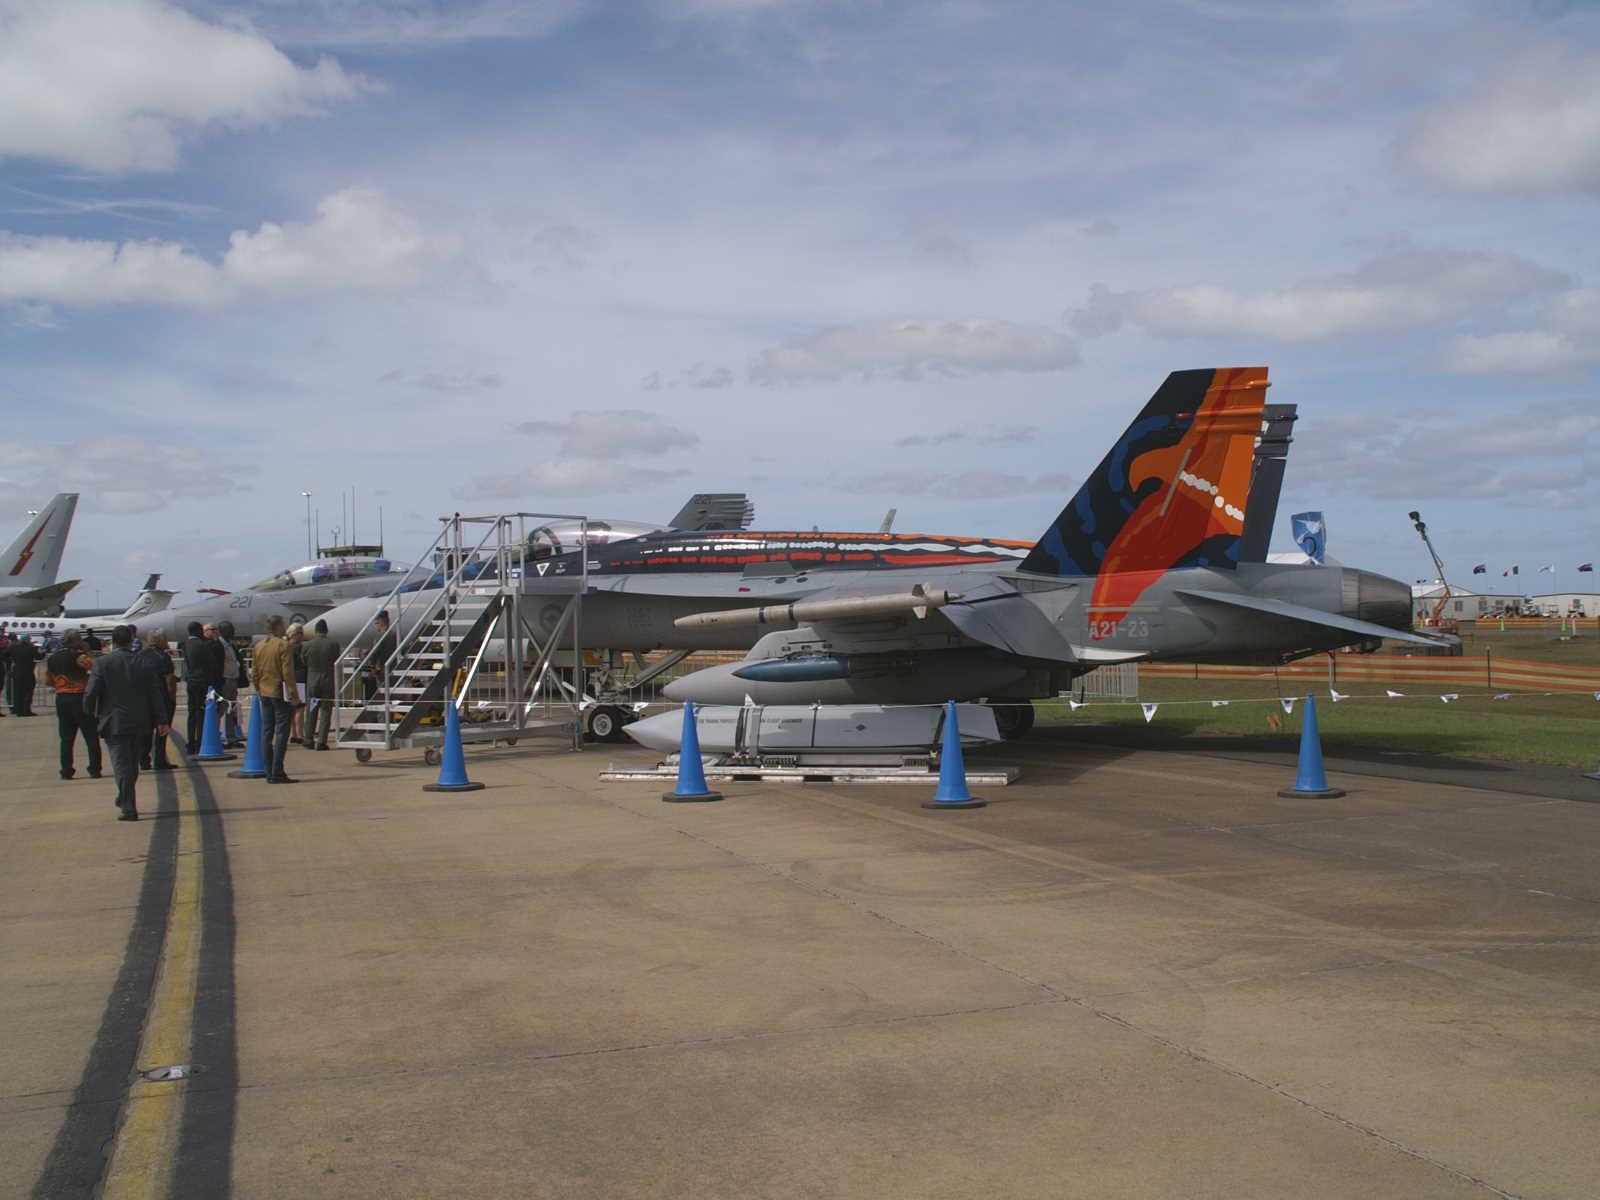
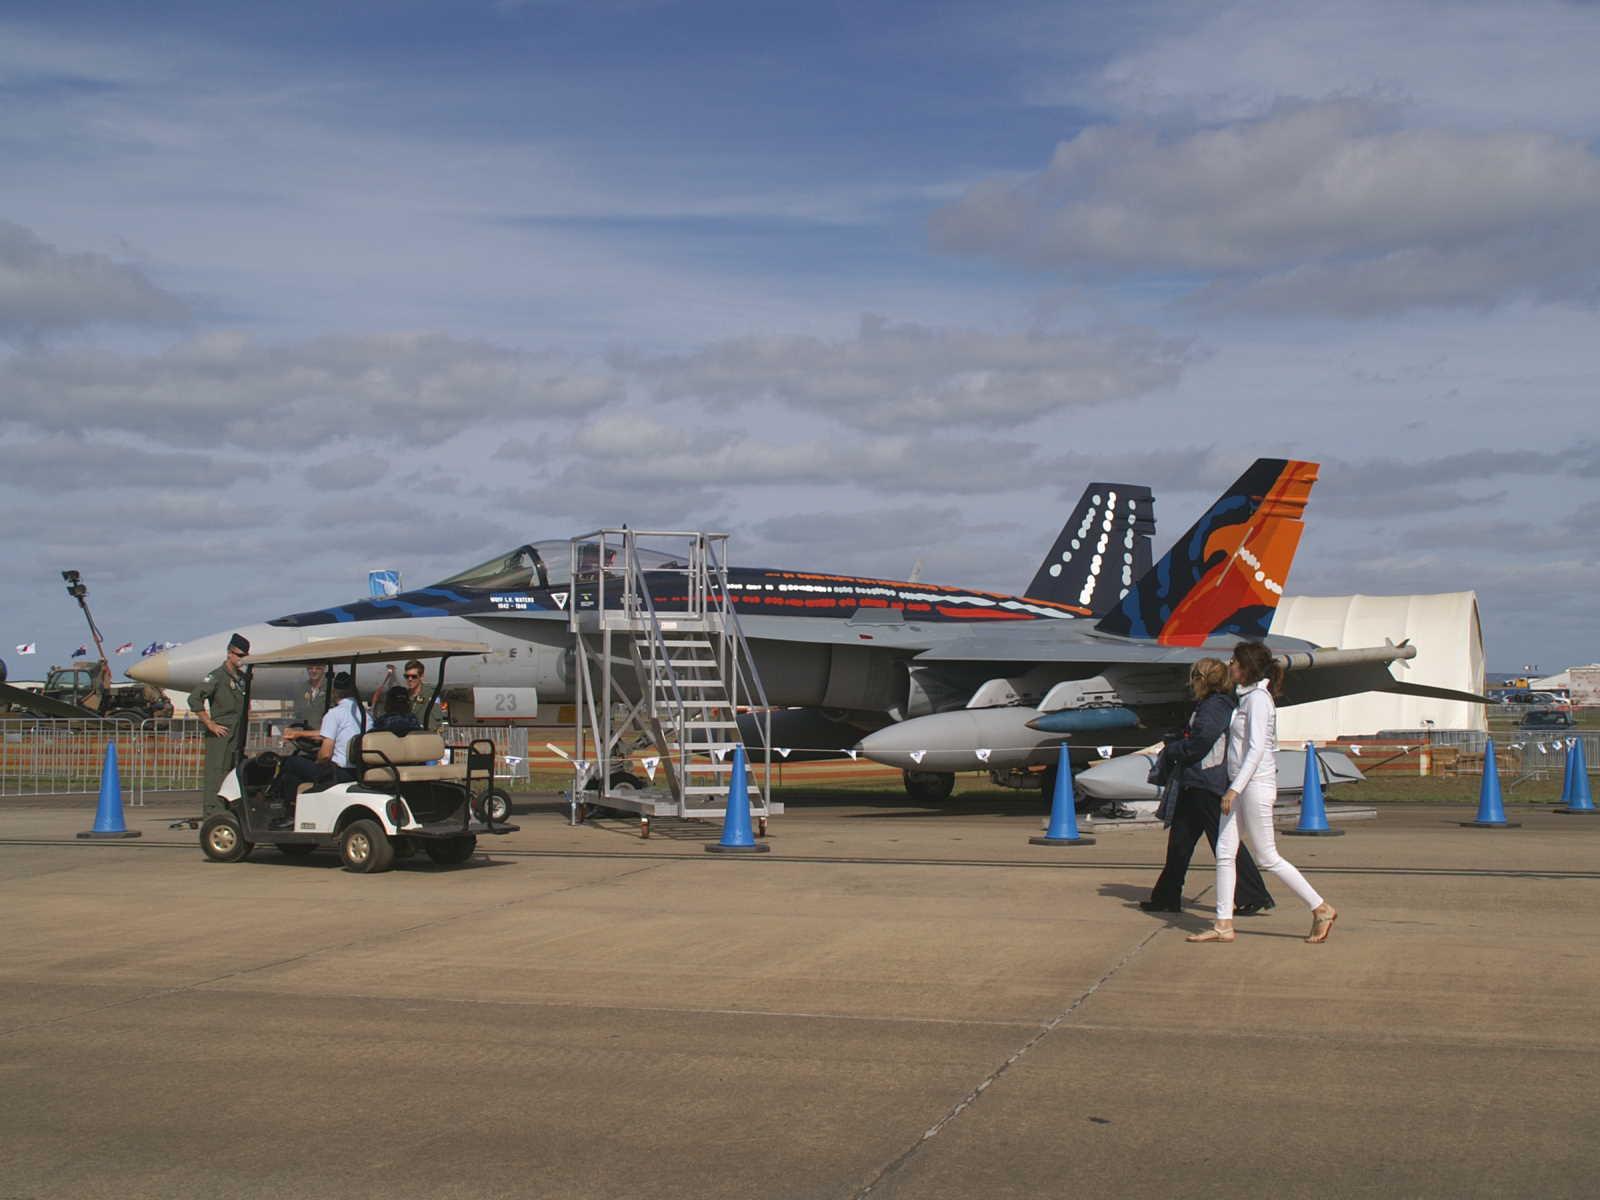
On the 24th of February, 2015, at the Australian International Airshow, the Chief of Air Force Air Marshal Geoff Brown unveiled the ‘Worimi' F/A-18A Hornet. It was commissioned by the Royal Australian Air Force to demonstrate its appreciation for the past service and sacrifices of Aboriginal and Torres Strait Islander people.
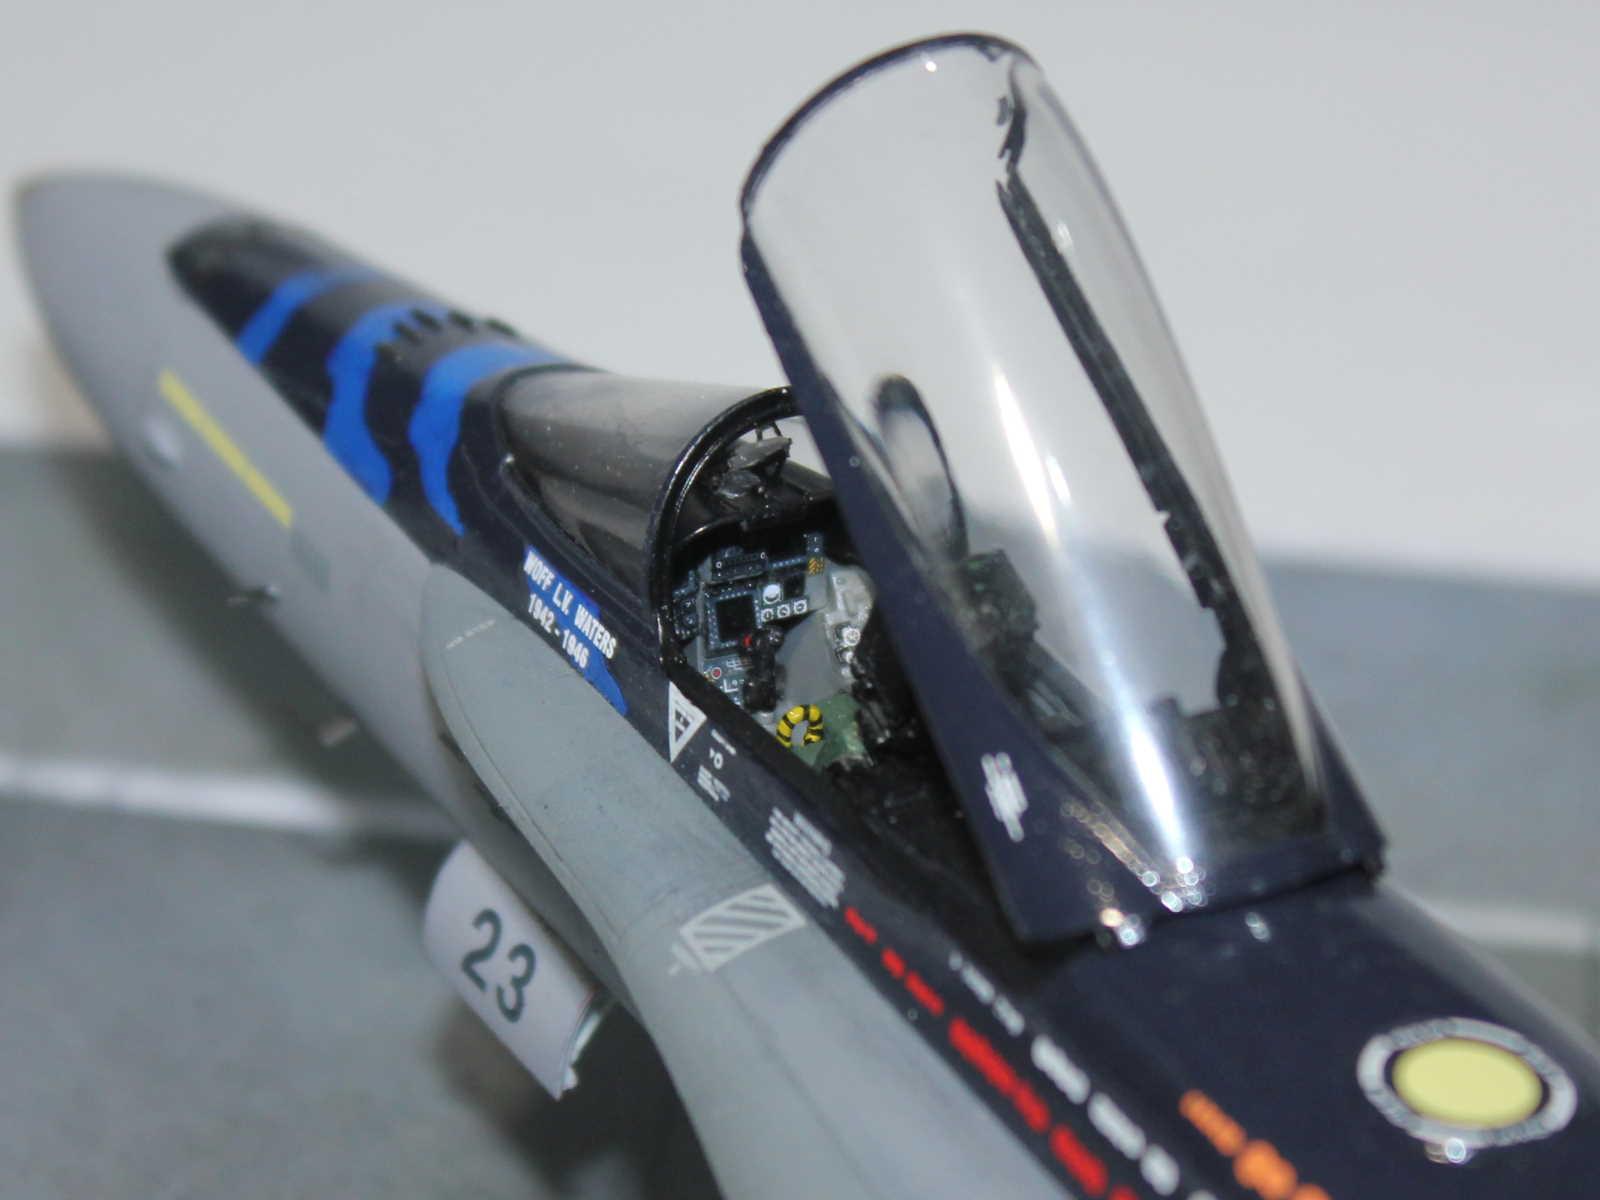
Fittingly, it carried the name of the first indigenous pilot known to have served with the RAAF, WOFF Len Waters. Present at the service were Len's family, two Elders of the Worimi and more than 20 students of the Indigenous Pre-Recruitment course.
The aircraft also honours the Worimi people, the traditional owners of the land on which RAAF Base Williamtown sits. At the time 2OCU, 3 SQN and 77 SQN operated Hornets from this base, while today these squadrons fly, or are converting to, the F-35A. The ‘Worimi' Hornet was retired from service after flying its last sortie on 10th December, 2020, and is destined to be displayed at the Fighter World Aviation Heritage Centre, located on the perimeter of RAAF Base Williamtown.
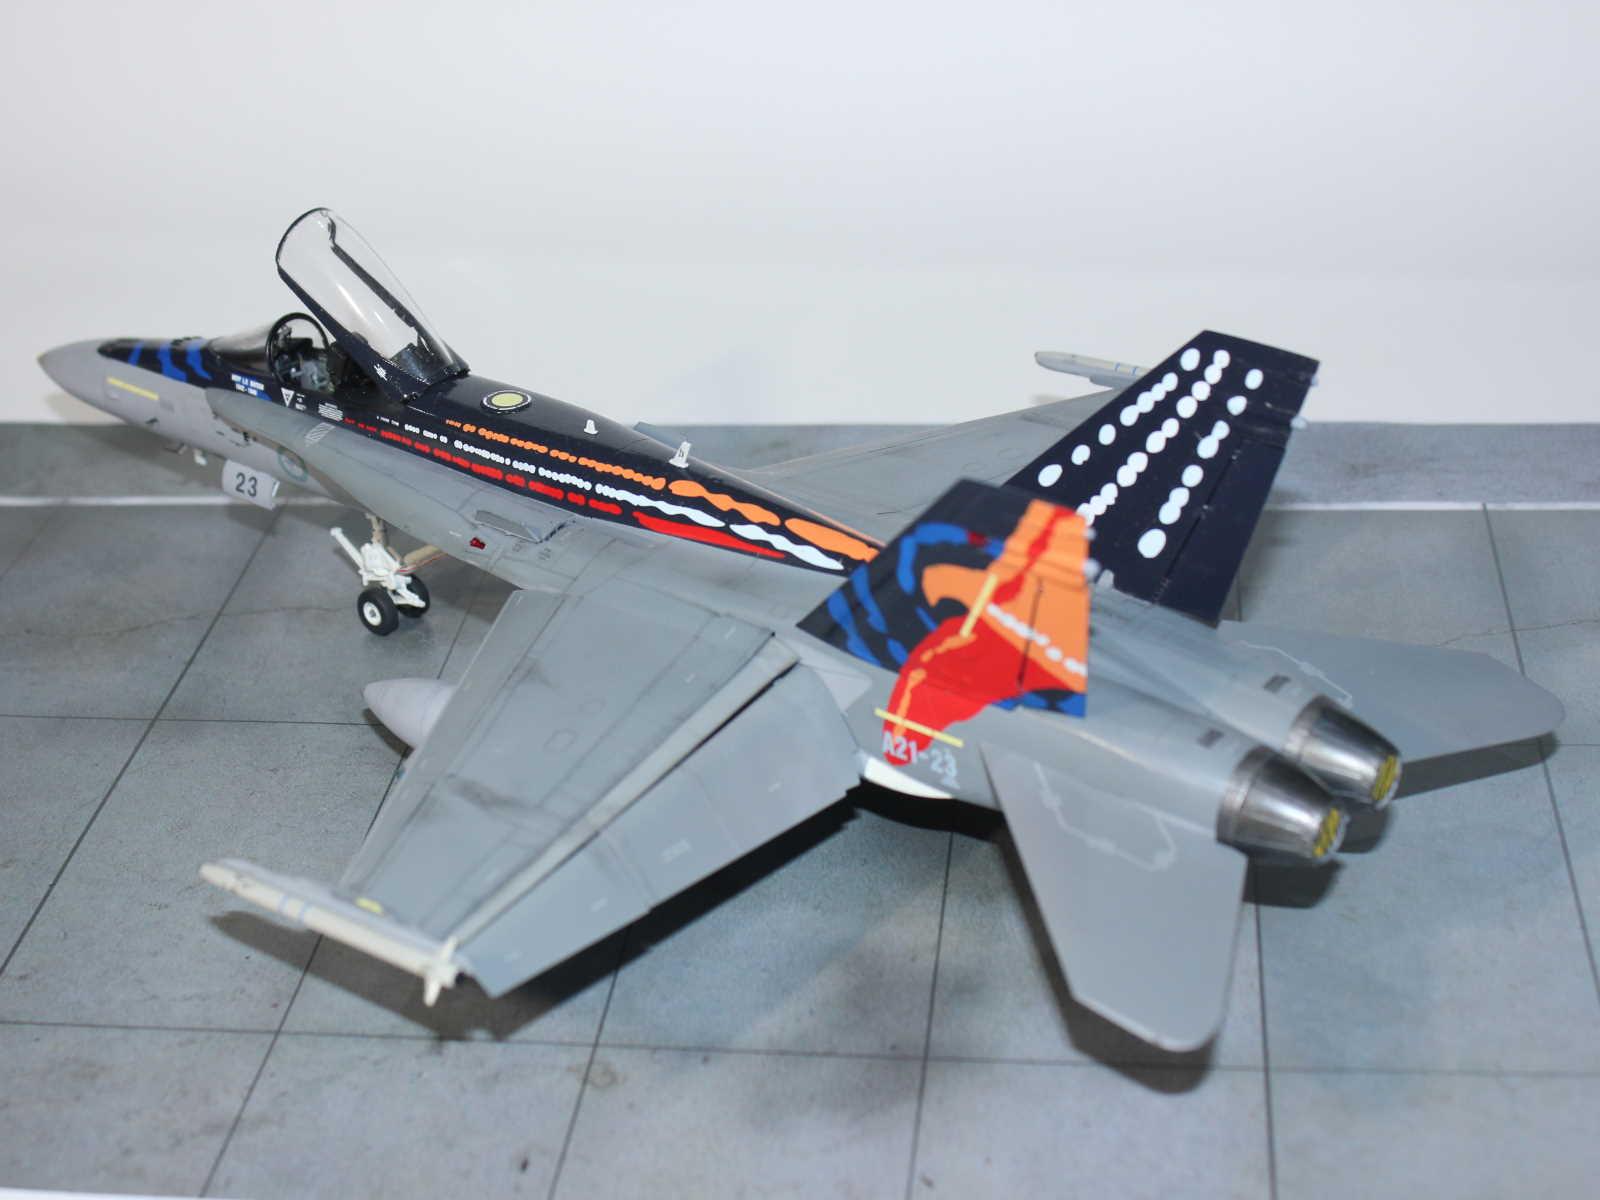
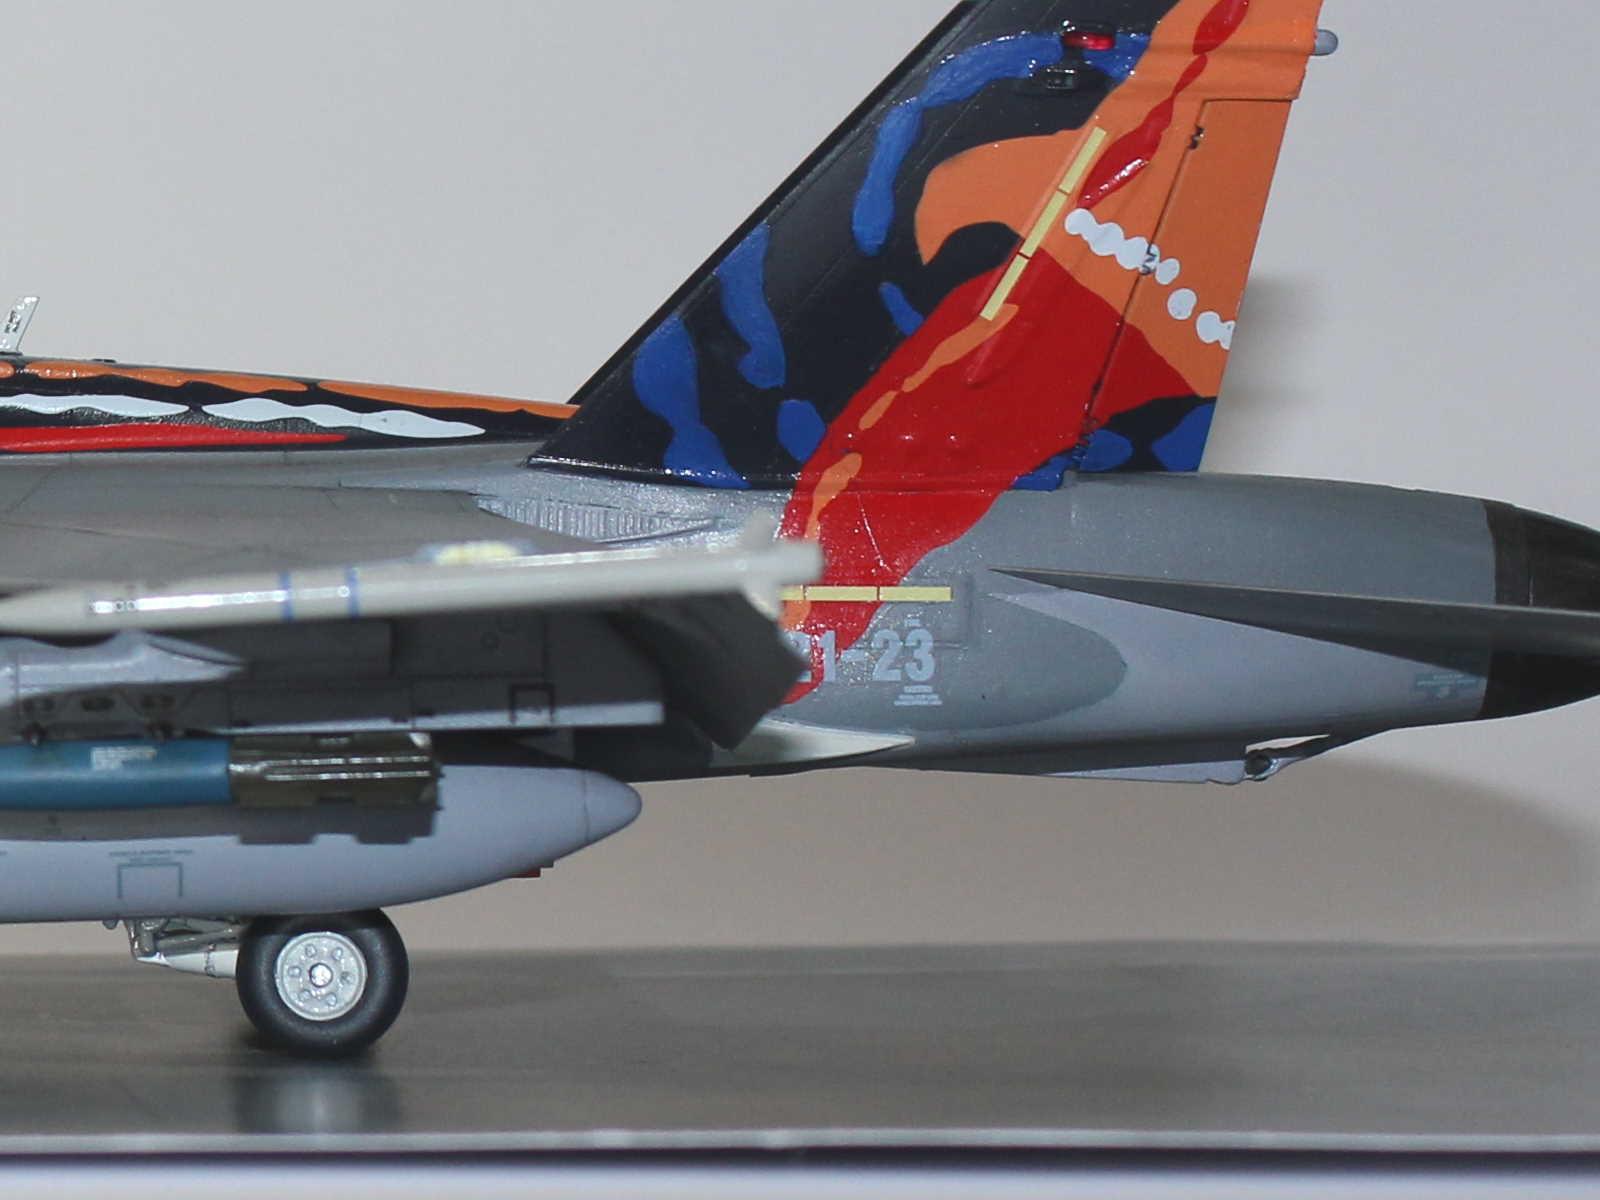
The website of the scheme's designers states that the tail artwork depicts a Wedgetail Eagle, or Kilyarr Kilyarr, representing the Sky Element, the blue rings on the tail represent the Land Element and the star trail along the aircraft spine represent the Astral Element.
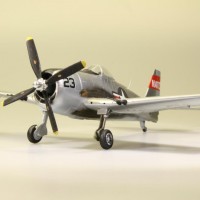
In July 1944 Len Waters became the only indigenous Australian to gain their pilot wings for service with the RAAF in World War 2. He was posted to 78 SQN, operating from Noemfoor, Morotai and, finally, Borneo in the Netherlands East Indies (now Indonesia) and flew 95 missions in his P-40N Kittyhawk “Black Magic”. His last recorded flight was on the same day that the nuclear bomb was dropped on Hiroshima.
Len was able to join the RAAF because in 1942, with the advance southward of Japanese forces, the desperate need for recruits led to the relaxing of rules that excluded those who were not white Australians or Europeans. It is telling that it was not until the successful 1967 referendum that indigenous Australians were included in the national census and therefore officially considered members of the Australian population. Nevertheless, Len himself stated that he did not face discrimination in the squadron as “everyone browned up pretty well out in the tropics”.
After his discharge in 1946, Len wanted to continue flying and dreamed of setting up a regional airline. However, he could not get financial backing nor a civilian pilot licence because of his Aboriginality, so returned to his pre-war trade of sheep shearing.
Len died in 1993 at the age of 69. His funeral was held in St. George, Queensland, with many of his former 78 SQN colleagues in attendance and a flyover by nine RAAF Hornets in his honour.
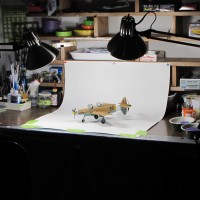
The Kit.
Having seen and photographed the ‘Worimi' Hornet at the airshow I decided that I should build a model in that livery. Not long after, Ronin Graphics produced a decal set in 1/48 scale but they sold out before I could purchase one (they are soon to be re-released). However, I found a set of decals produced by Model Maker Decals (D48065) and bought them.
This is the Kinetic kit and out of the box it may be built as a late model single seat F/A-18A or twin seat F/A-18B. The kit instructions are mostly correct for building a RAAF Hornet, but parts E34, E105 and L13 should not be used and C13 should be used instead of C18. Also, use PE4 and PE7 instead of PE5 and PE6. Otherwise, there are a number of modifications required to bring it up to the final RAAF F/A-18A+ Hornet UpGrade (HUG) configuration.
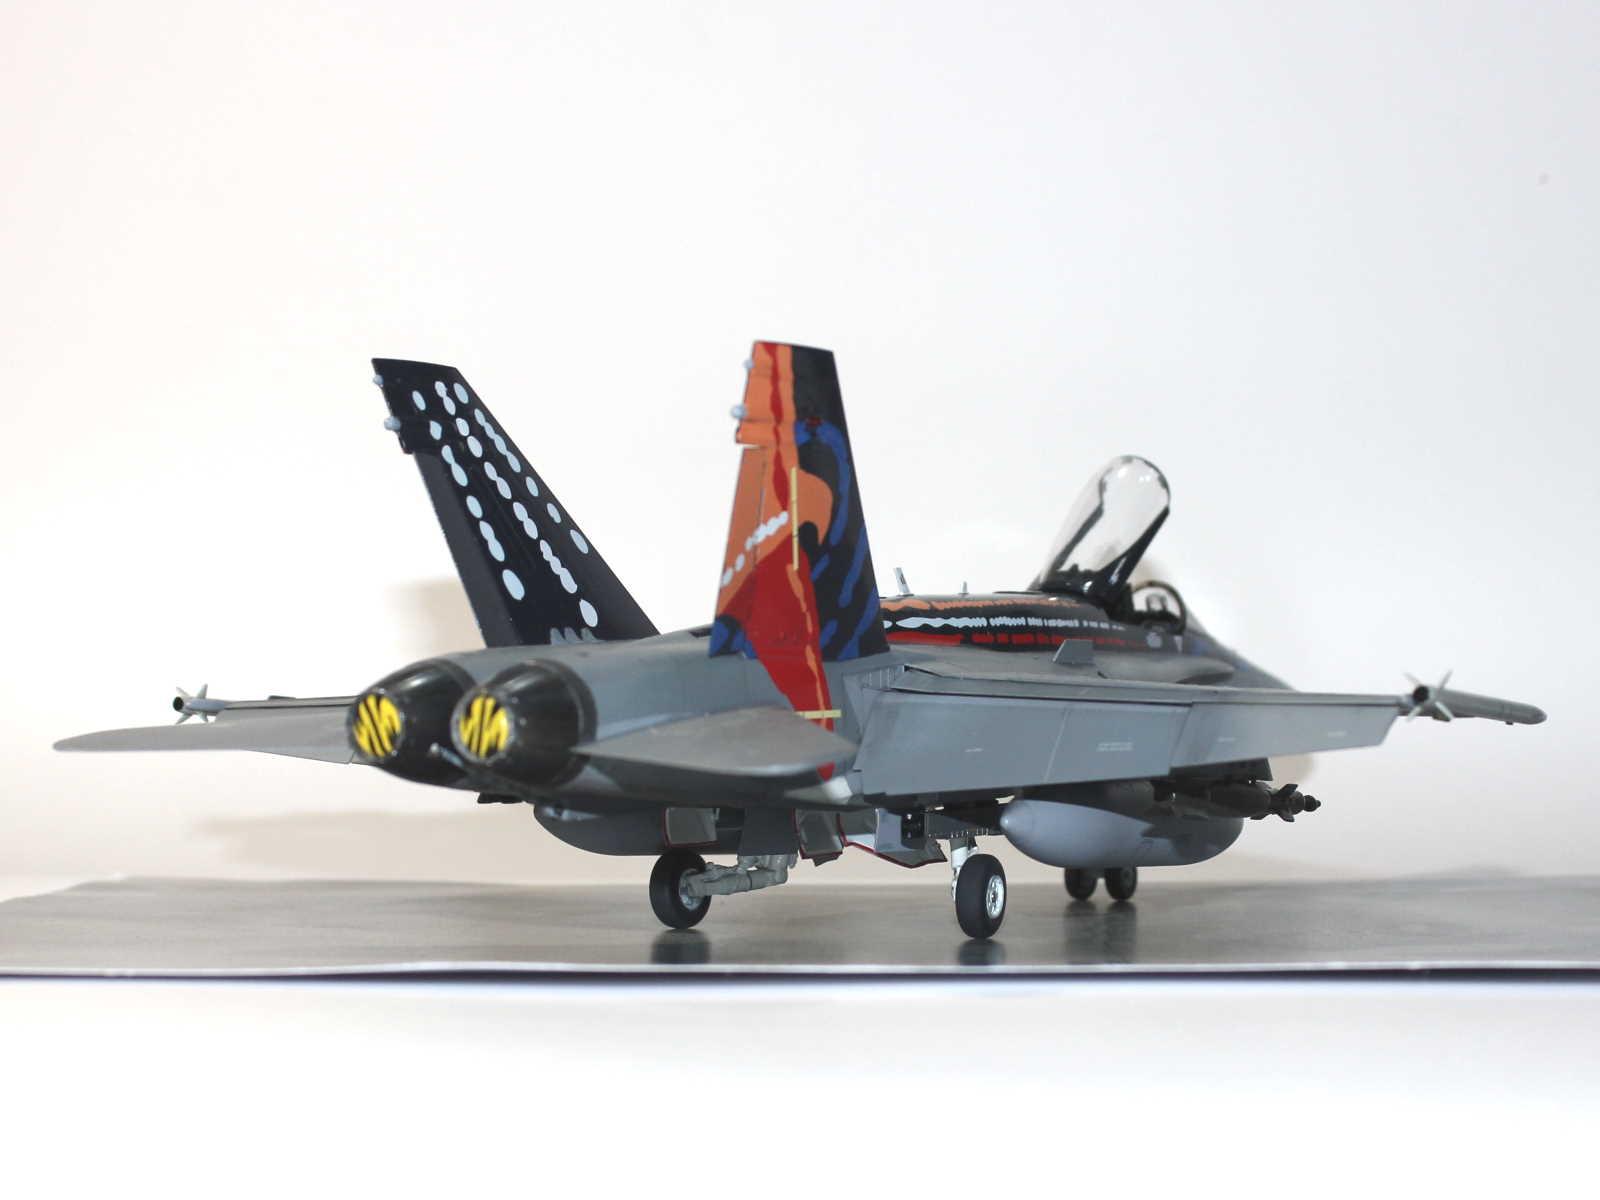
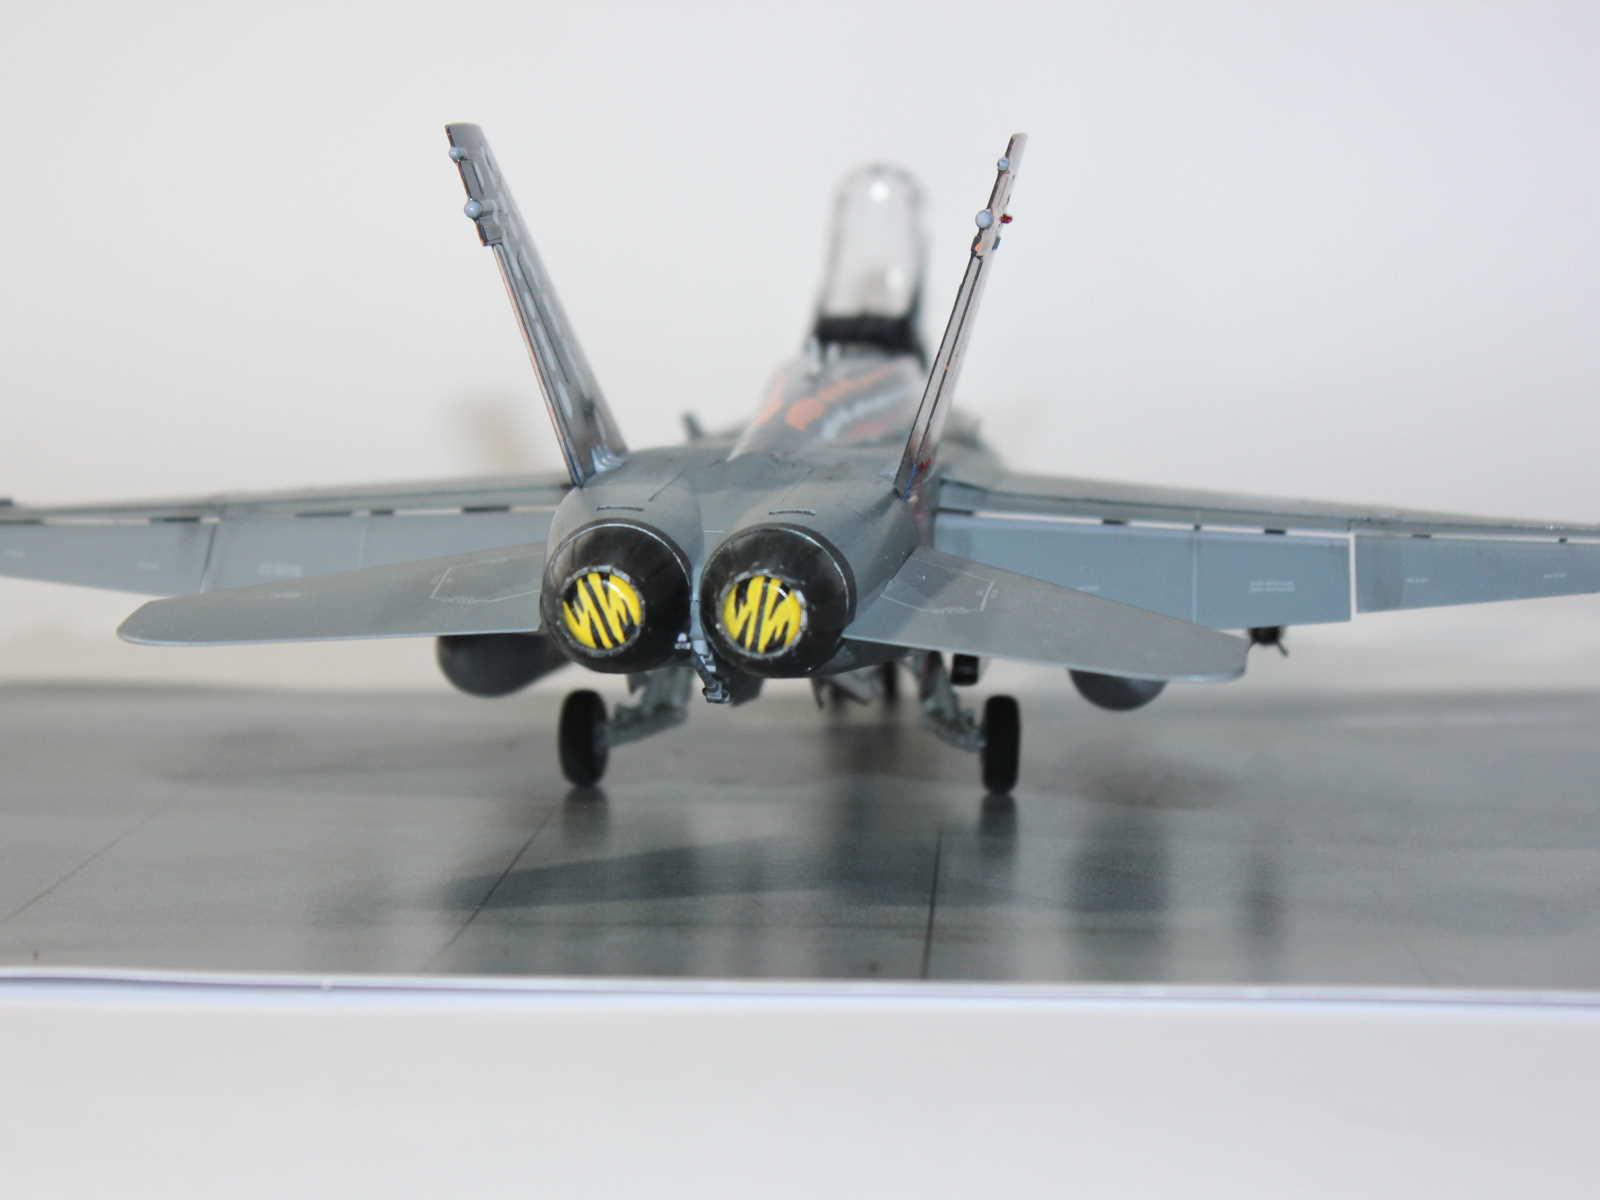
Early in the life of the F/A-18 it was determined that structural stiffener plates were required in several places. The kit provides two of these plates as photo-etch for the vertical tails. Because the F/A-18 vertical tails were designed to be interchangeable, with a few modifications, the stiffener plates are both on the same side. Two other stiffener plates were not included so I scratch built them with some thin styrene sheet and putty. These are either side of the rear fuselage under the lower formation ‘slime lights'.
One of the upgrades under the HUG program was to add a GPS antenna on the rear spine and this is included on the kit part. However, a later upgrade removed this, and added a larger antenna immediately aft of the cockpit. I removed the kit antenna but later realised that there was a raised blanking plate that I had to add. The shape of the new antenna is elusive and after study of a range of photos from different angles concluded that it is a large, slightly domed shape that I created using some more styrene sheet and a sanding stick. The kit provides a decal for this antenna without indicating that it should be used, but it lacks the four ‘NO STEP' warnings that surround it. The Worimi sheet also provides a decal, with warnings in white, but I decided that it was too small in diameter. So, I used a combination of the two.
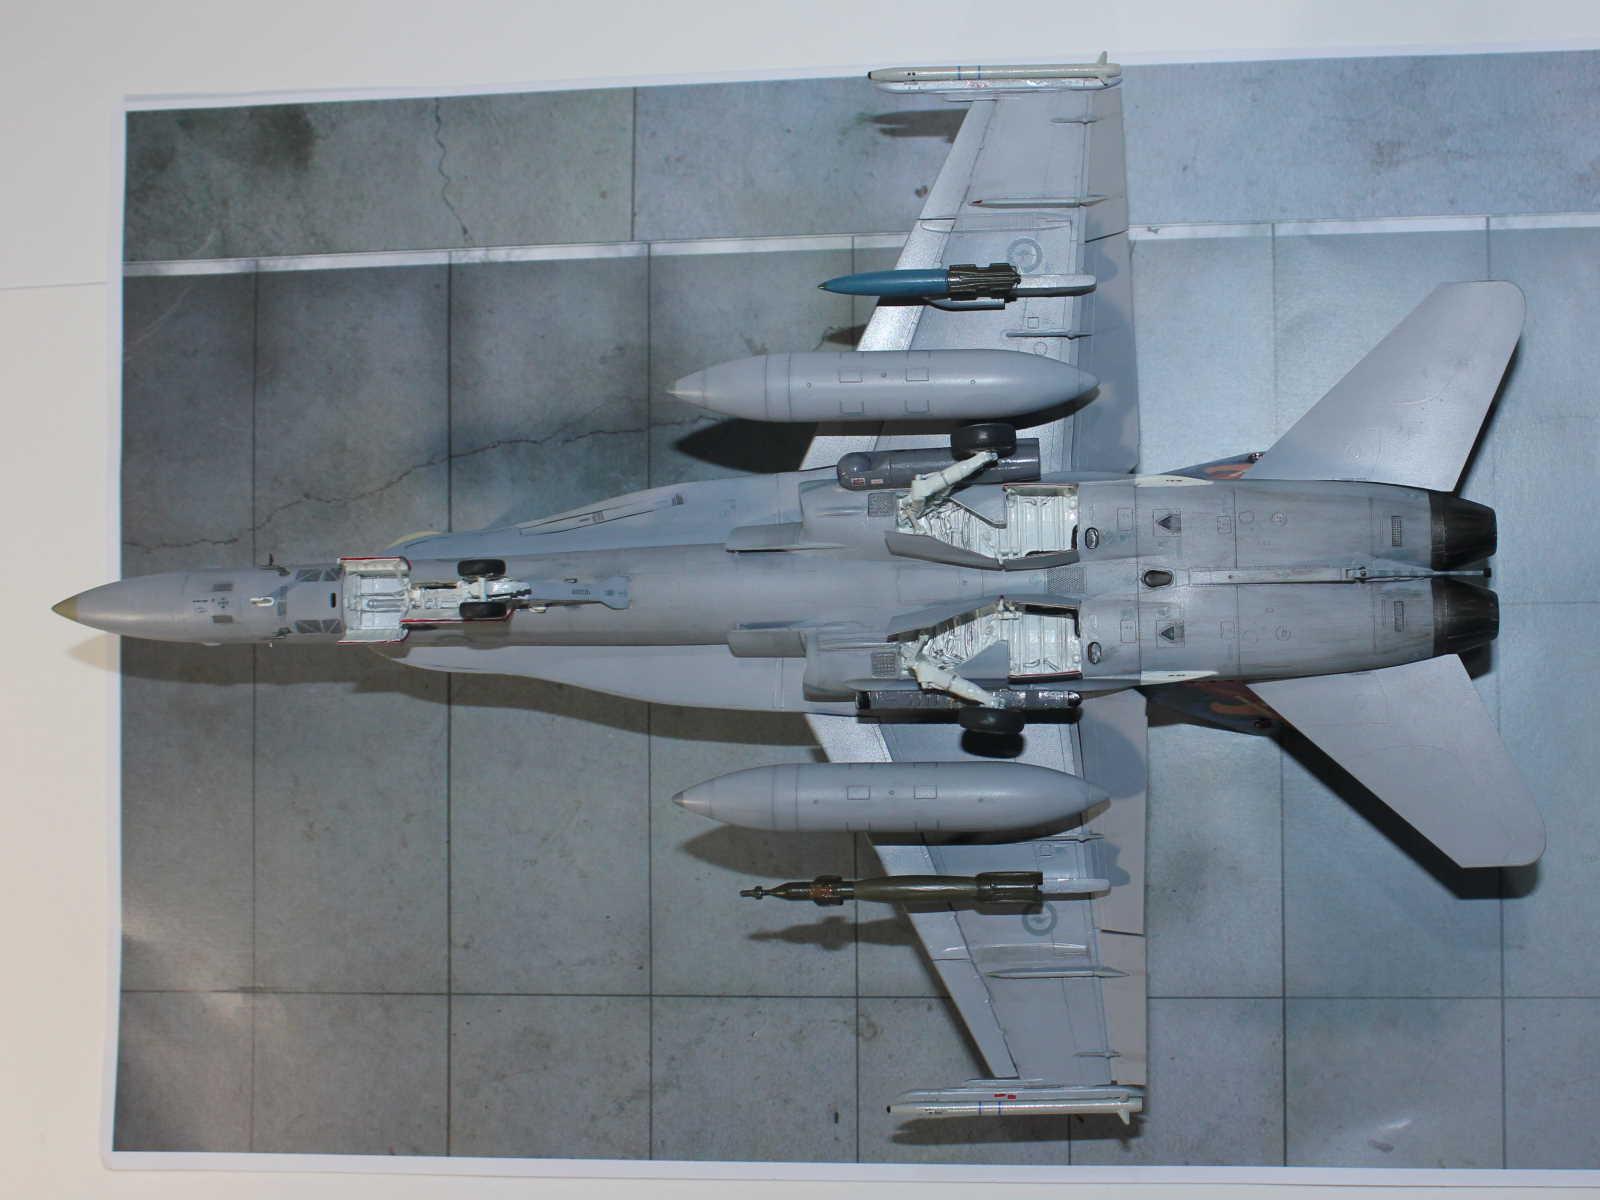
The Hornet is a naval aircraft and was designed with a catapult attachment bar on the nose gear. This was originally deleted on RAAF Hornets but vibration issues eventually led to a similar bar being added. This only required a slight adjustment. Also lacking on RAAF aircraft is the carrier landing light box (L13). The ‘Worimi' aircraft also had a smaller landing light than supplied by the kit so I made this out of clear sprue.
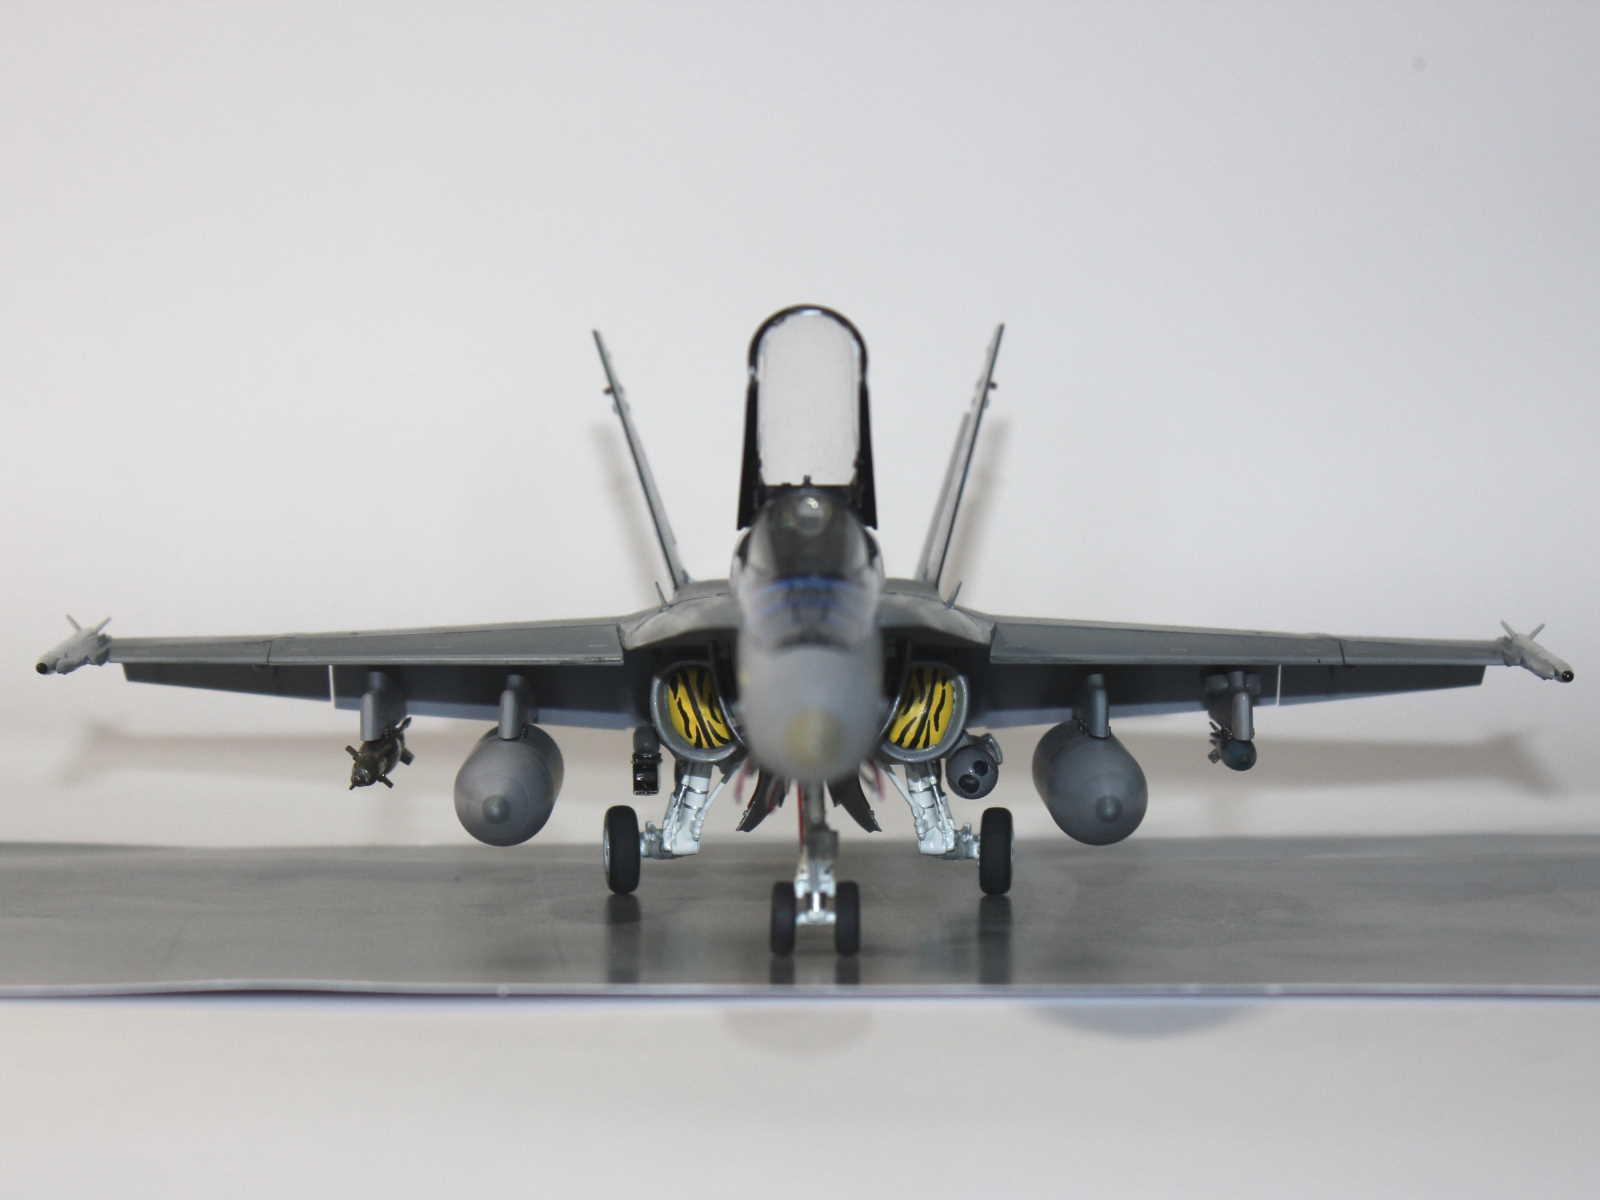
HUG Phase 2.3 saw BOL countermeasure dispensers added to the Hornet. The RAAF had a number of wing pylons modified with aerodynamic fairings mounted either side into which the BOL dispensers are loaded. At the launch, the ‘Worimi' Hornet had a modified pylon on the outer port wing station but without the BOL dispensers fitted. Using a photo, I calculated the dimensions of the fairings and shaped them out of sprue. Looking at other photos of RAAF Hornets, I think that they may be a little large.
Another part of HUG 2.3 was the integration of the Elta ELL-8222 jamming pod . However, a recent modification is the development of an aerodynamic pylon to mount the pod on the starboard shoulder weapon station. This location frees up the centreline and wing stations for fuel tanks and weapons, although at the expense of an AMRAAM. Again, I shaped the pylon out of sprue using photos as references. However, the exact manner of attachment is unclear so I just pinned it in place. The Elta pod is by Wolf Pack (WP48048).
In the late 1990s the RAAF selected the MBDA AIM-132 ASRAAM to replace the AIM-9L Sidewinders and the ‘Worimi' Hornet had a practice round, as indicated by the blue bands, on each wingtip pylon. I sourced these from the Revell Typhoon (04568).
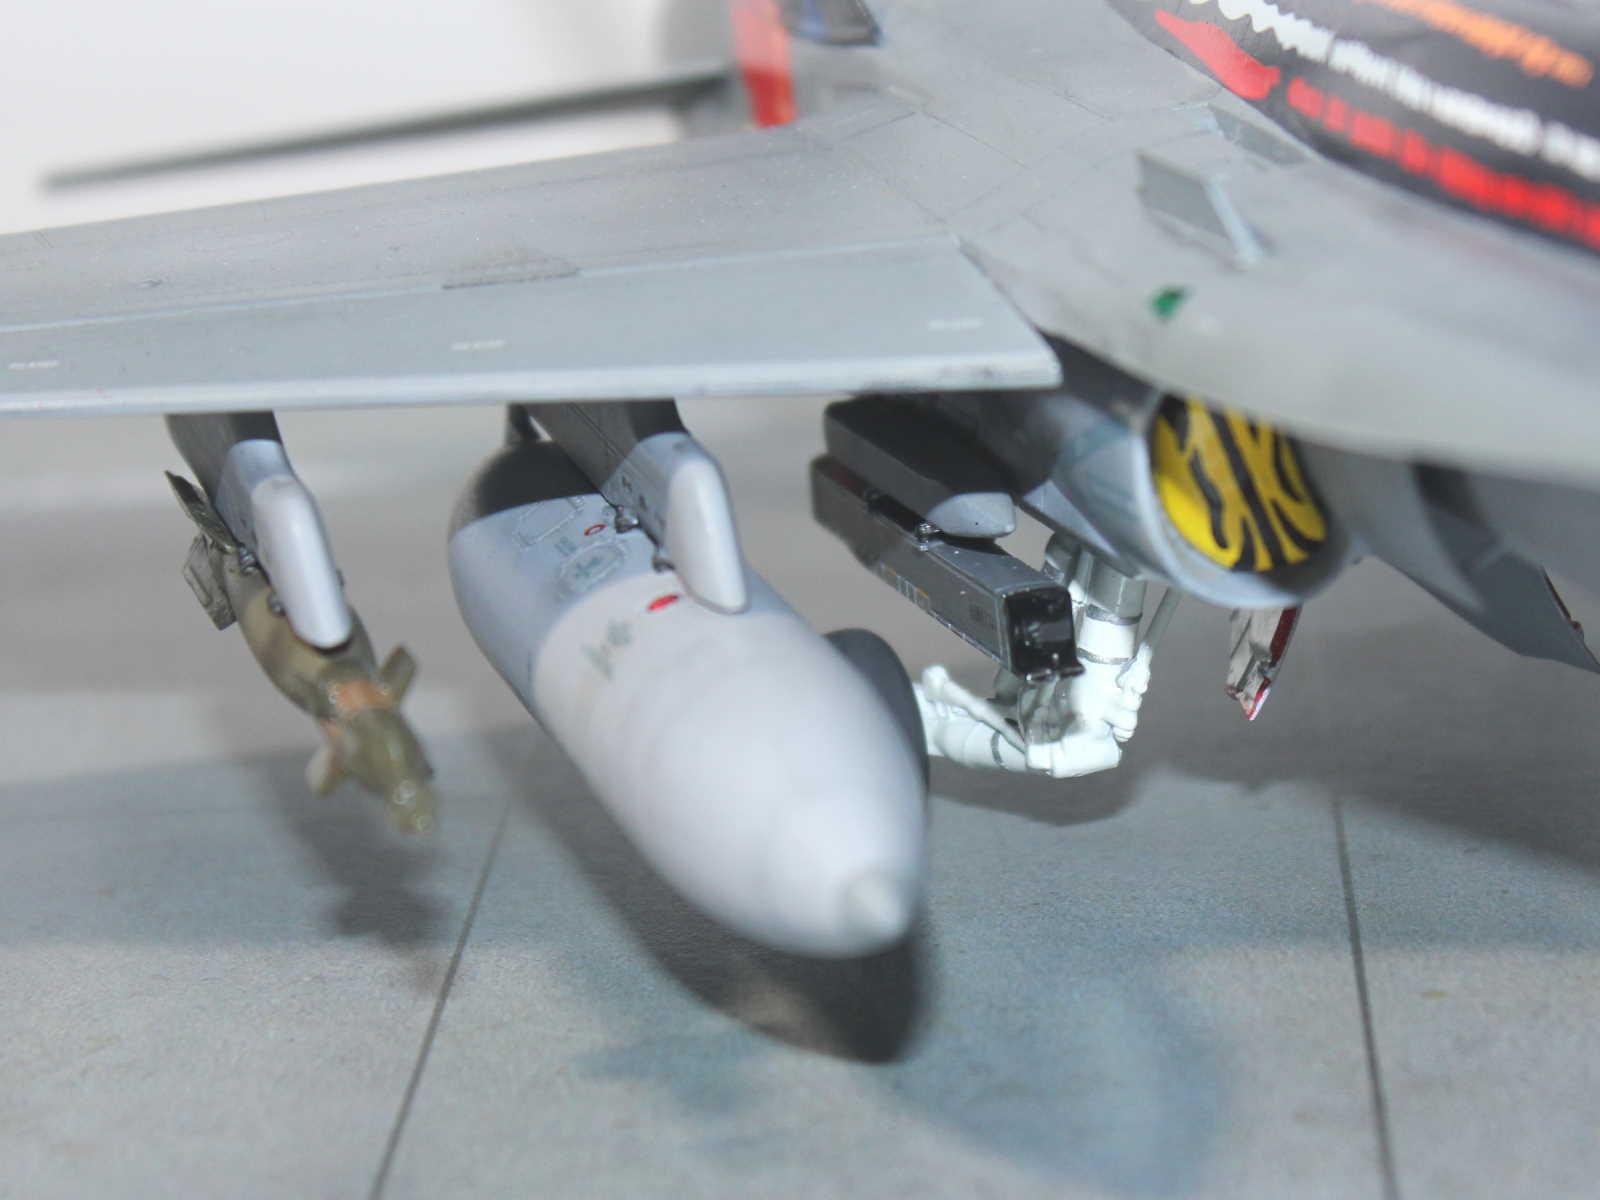
While the kit claims to include an AN/AAQ-28 Litening pod as used by the RAAF Classic Hornets, it is in fact an AN/AAQ-14 LANTIRN as used by F-16 and F-15s. So, I purchased a lovely Eduard Brassin Litening pod (648 237) but unfortunately the head section of the pod, which mounts the seeker ball and can rotate 360 degrees around the pod's long axis, is fixed in the wrong orientation for being mounted on a Hornet port shoulder station. So, I used a not-so-lovely pod from a Hasegawa Aircraft Weapon: E set (X48-17) which had a separate, posable head section.
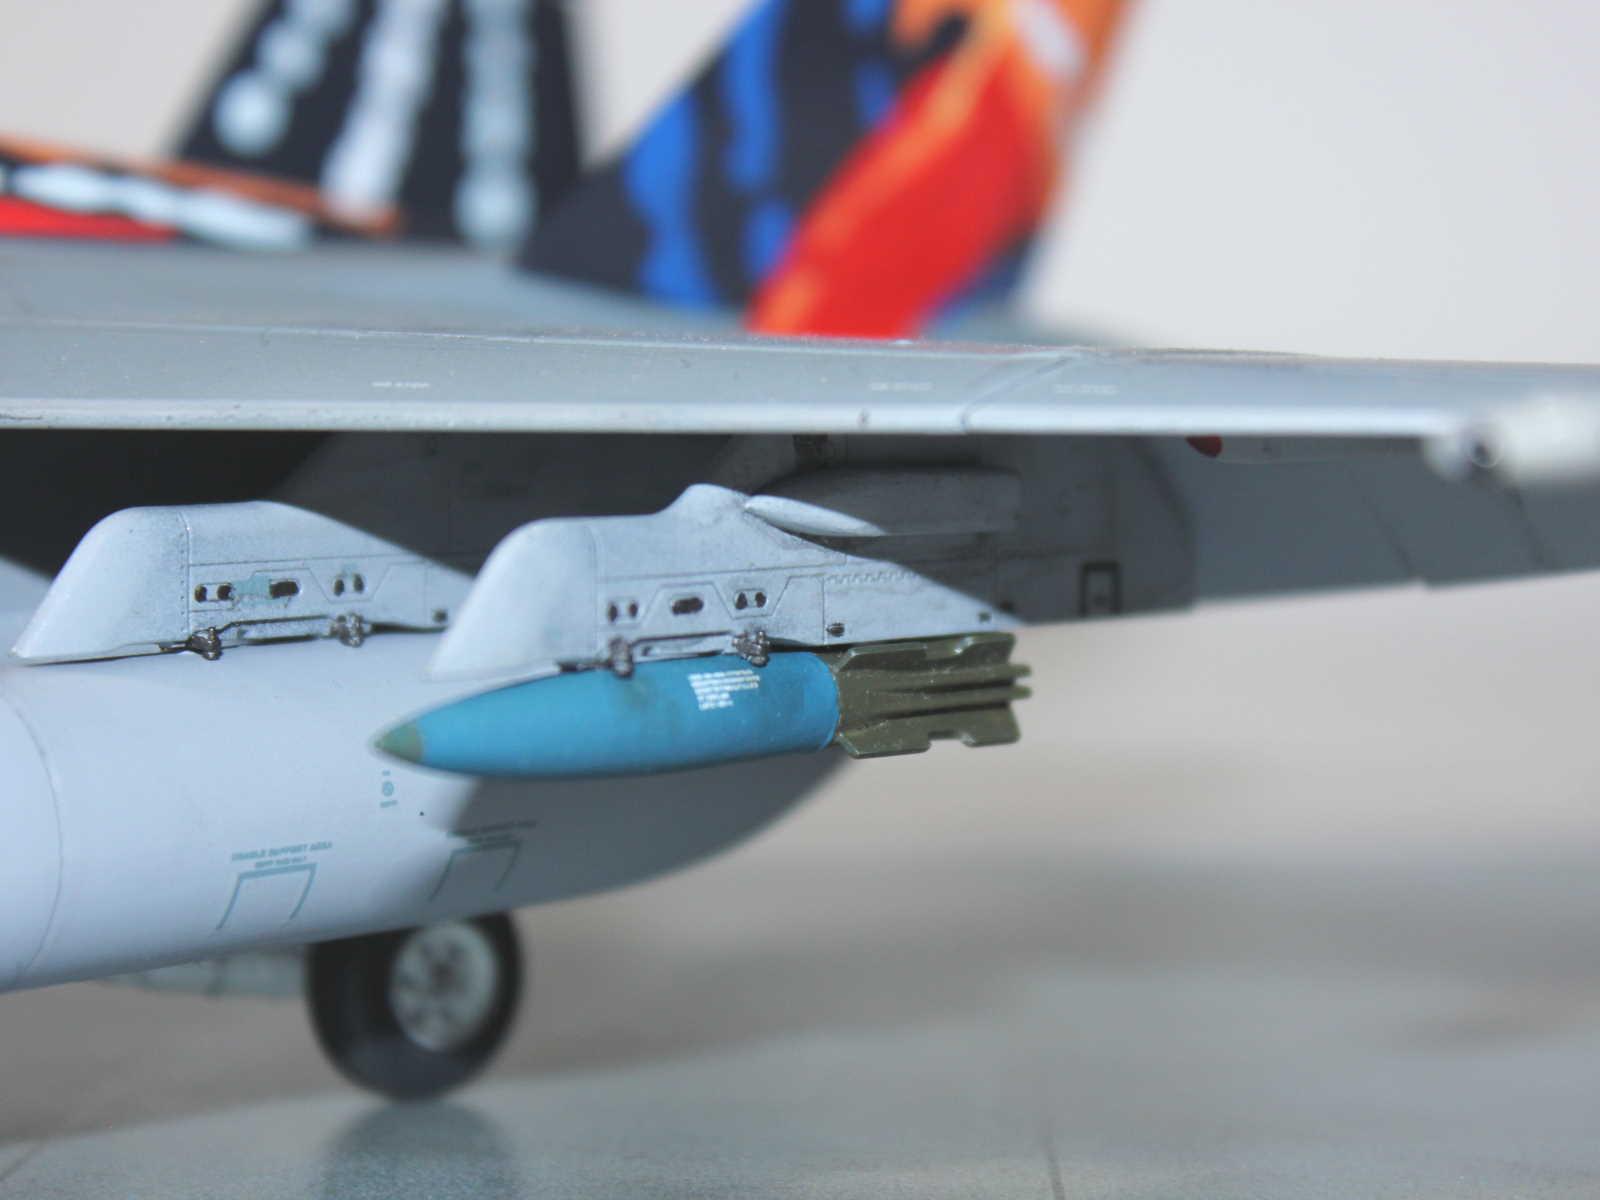
Finally, the GBU-12 on the starboard outer station came from the kit, while the Mk.82 Snake-eye practice bomb on the port outer station came from the Kinetic Mirage III (K48050).
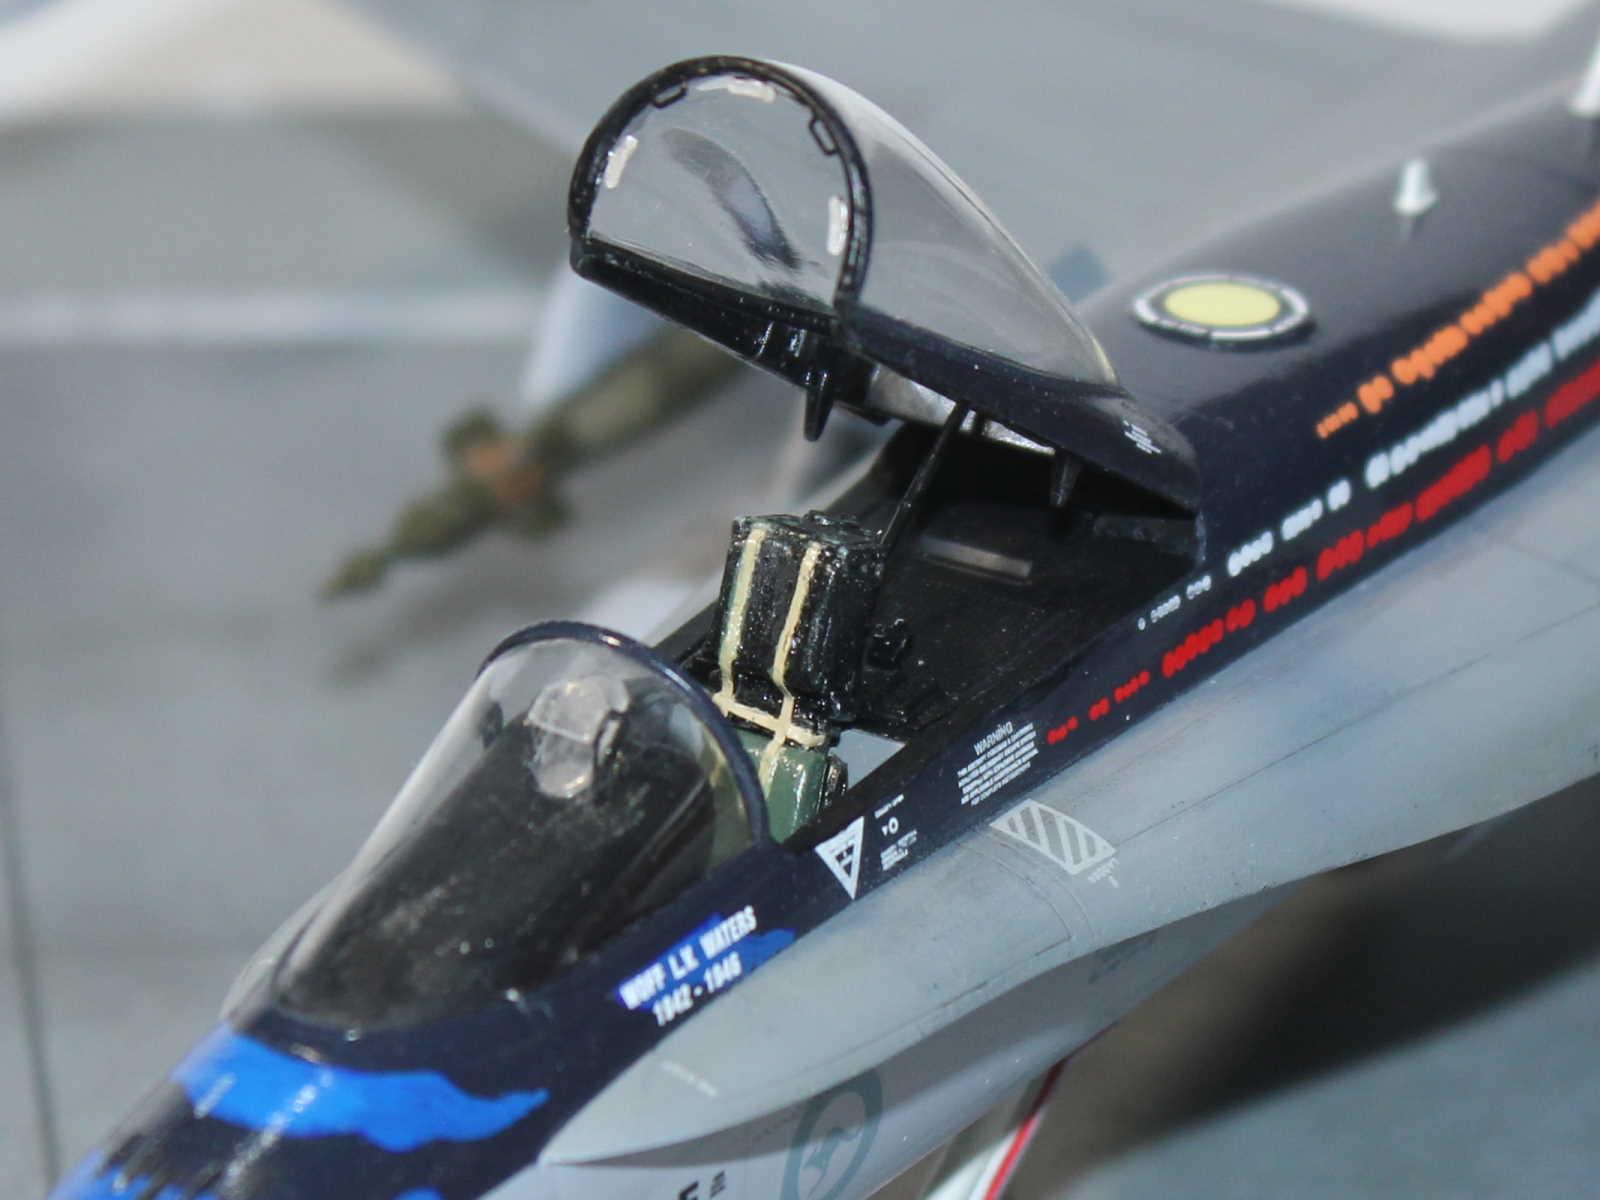
Otherwise, the kit builds up well, although when it came to gluing the nose just forward of the cockpit together it didn't fit as neatly as it had during dry-fitting. I'll be more careful on the next one I build. I don't like the decision to include the small piece of fuselage between the windshield and the in-air refuelling probe door as part of the windshield. Almost inevitably, this doesn't blend into the fuselage nicely, so I sanded it off and filled the void with putty and sanded it to shape.
I was worried that thee deployed flaps would be fragile but, having left them off until all painting and decaling was completed, they have proven themselves quite robust.
The quality of the Model Maker decals is good, however, the outer vertical tail decals are about 15% too large in chord. I wasn't happy with the dark blue of the decals. While this colour was most likely correct, it didn't contrast sufficiently with the main Insignia Blue colour. So, I hand painted these sections with a lighter blue.
The other problem was that the grey for the lower fuselage/wing surface decals did not contrast sufficiently with the underside grey colour, so kit decals were used instead.
Small quibbles aside, this is a great kit to build and I'm very happy with the finished product.


-

- 1. Stiffener plate


Really nice looking hornet, especially with the indigenous color scheme.
Thanks Greg (@gwfabian).
Really nice build Michael, love the theme and painting, the dots are amazing, how did you do that, and really nice interior details.
Thanks for the comments Anthony (@anthonyricco).
Most of the markings are decals.
I placed the port vertical fin outer decal on and realised that the blue of the decal didn't have enough contrast with the underlying dark blue (Gunze H326 Blue FS 15044). So, I hand painted over the decal blue with a lighter colour (Mr Colour GX 5 Susie Blue). I photocopied the starboard fin decal and cut a stencil to get the location of the blue and hand painted the rings.
The blue on the nose was hand painted by eye.
Unfortunately the GX paint didn't paint smoothly and I wasn't game to try and airbrush it, so the blue markings are a little rough.
Everything else is the decals.
Thanks for looking.
Well it looks amazing, great making a plan and it worked really well in my opinion.
Great looking Hornet - love the markings.
Beautifully done! A a very interesting story, thanks for sharing it.
Nice build, great looking markings.
Great looking Aussie hornet.
Build, paint job and decalling, history and building details, all are excellent, Michael.
Congratulations!
Great story and an equally great model. I was really impressed that Len was honoured with a flypast at his funeral. Definitely liked.
Awesome Hornet, Michael.
Very interesting scheme.
Excellent job and perfect cockpit details!
Thanks Allon (@allonkira67).
The cockpit is very good out of the box.
It includes decals for the instruments, although I chose to have the screens dark.
Because the cockpit is so good, I decided the canopy had to be up to show it off.
Thanks for your king comments.
Thanks Greg (@gkittinger), Robert (@roofrat), Bob (@v1pro), Haslam (@Haslam55), Spiros (@fiveten), George (@chinesegeorge) and John (@johnb) for all your kind comments.