Leopard AS1 Engine, Engine Bay and Drivers Compartment Latest Progress
This article is part of a series:
- 1/35th Leopard Line Up
- Leopard 1A5 Bundeswehr
- Weathering, the Belgian Leopard Conversion Continues
- Leopard AS1 Aus Cam Update
- Leopard AS 1 Olive Drab Lusterless Update
- Dutch Leopard 1
- Australian Leopard AS1 Dozer
- Danish Leopard 1A5DK
- Takom 1/35 Canadian C2 Leopard Mexas
- Australian Trials Leopard Tank
- Australian Leopard AS1 with drivers and engine compartments.
- Leopard AS1 Engine, Engine Bay and Drivers Compartment Latest Progress
- Unfinished Business – Finishing Off the Belgian Leopard
- Trying New Techniques On Tamiya Leopard A3/A4
- Revell Leopard 1 A1A4 Weathering And Camnet
- Leopard 1 A1A1 With Peddinghaus Turret
- 1/35 Camouflage Nets
- Camnet Construction continued...
- Schutzenpanzer Marder 1
- Meng C2 Mexas with Dozer Progress
- Meng Leopard C2 more progress
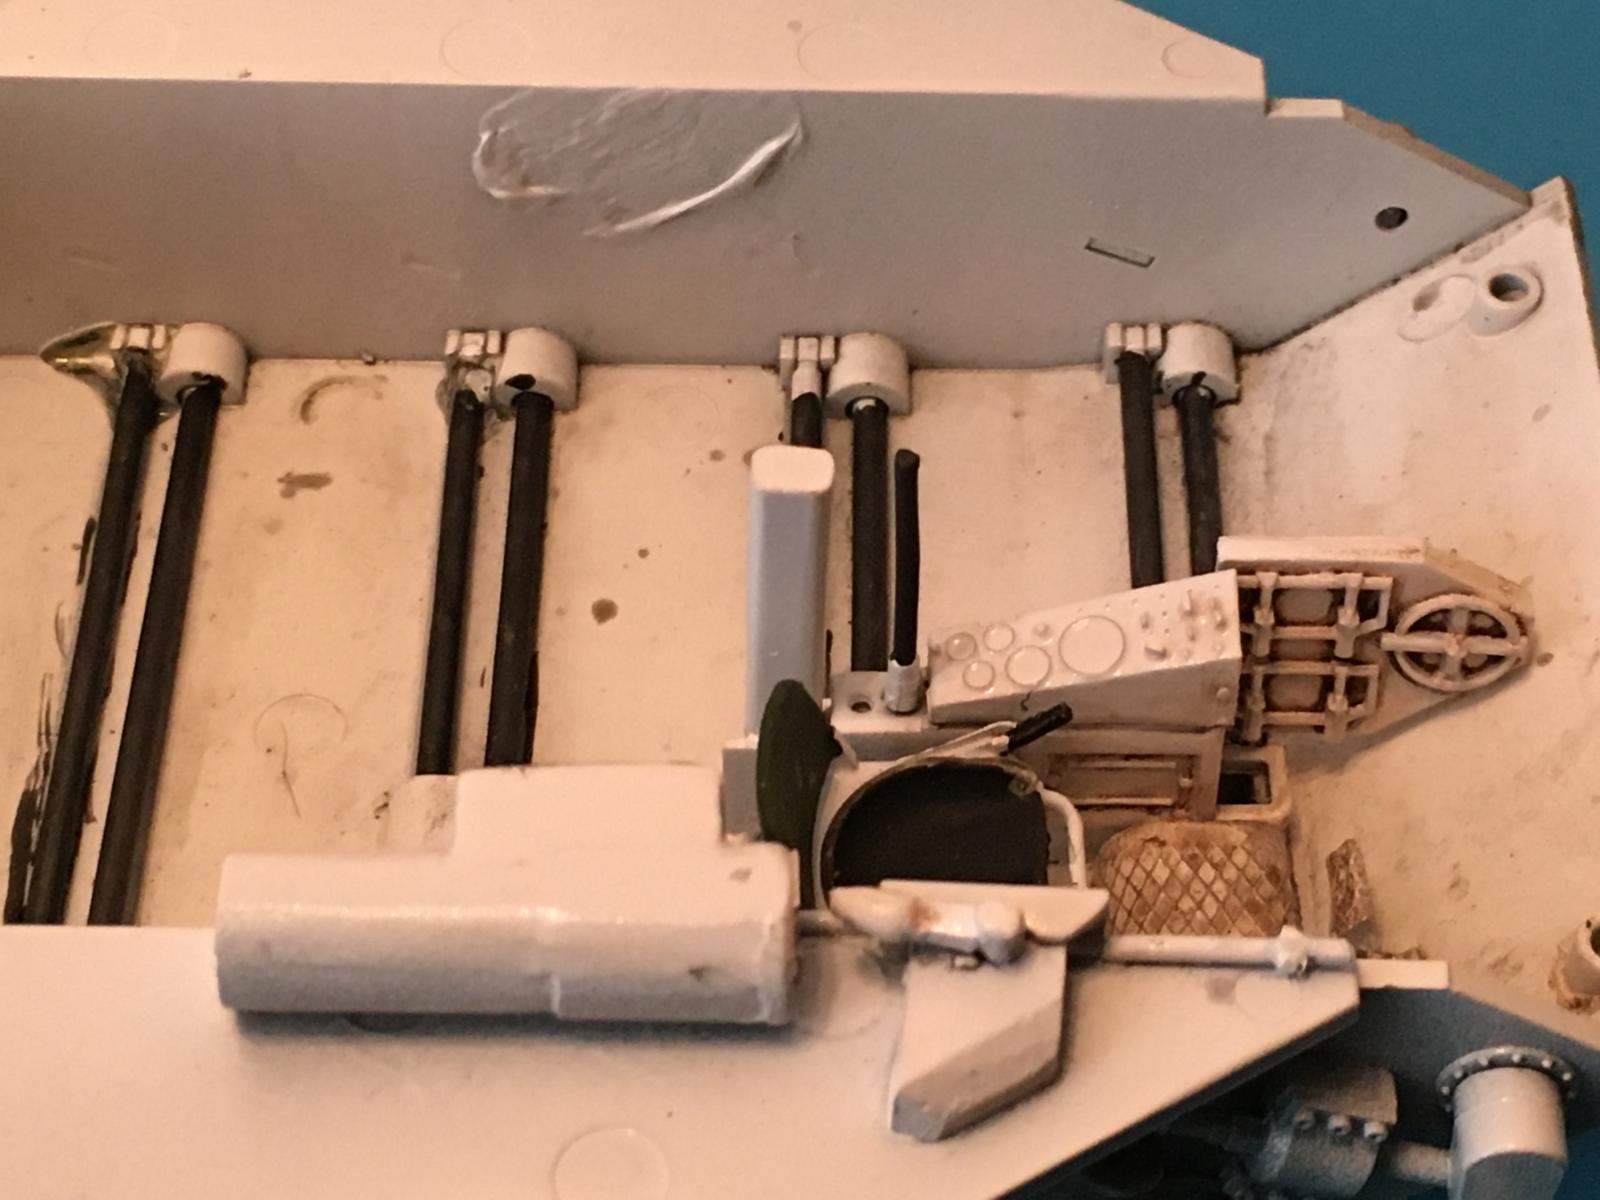
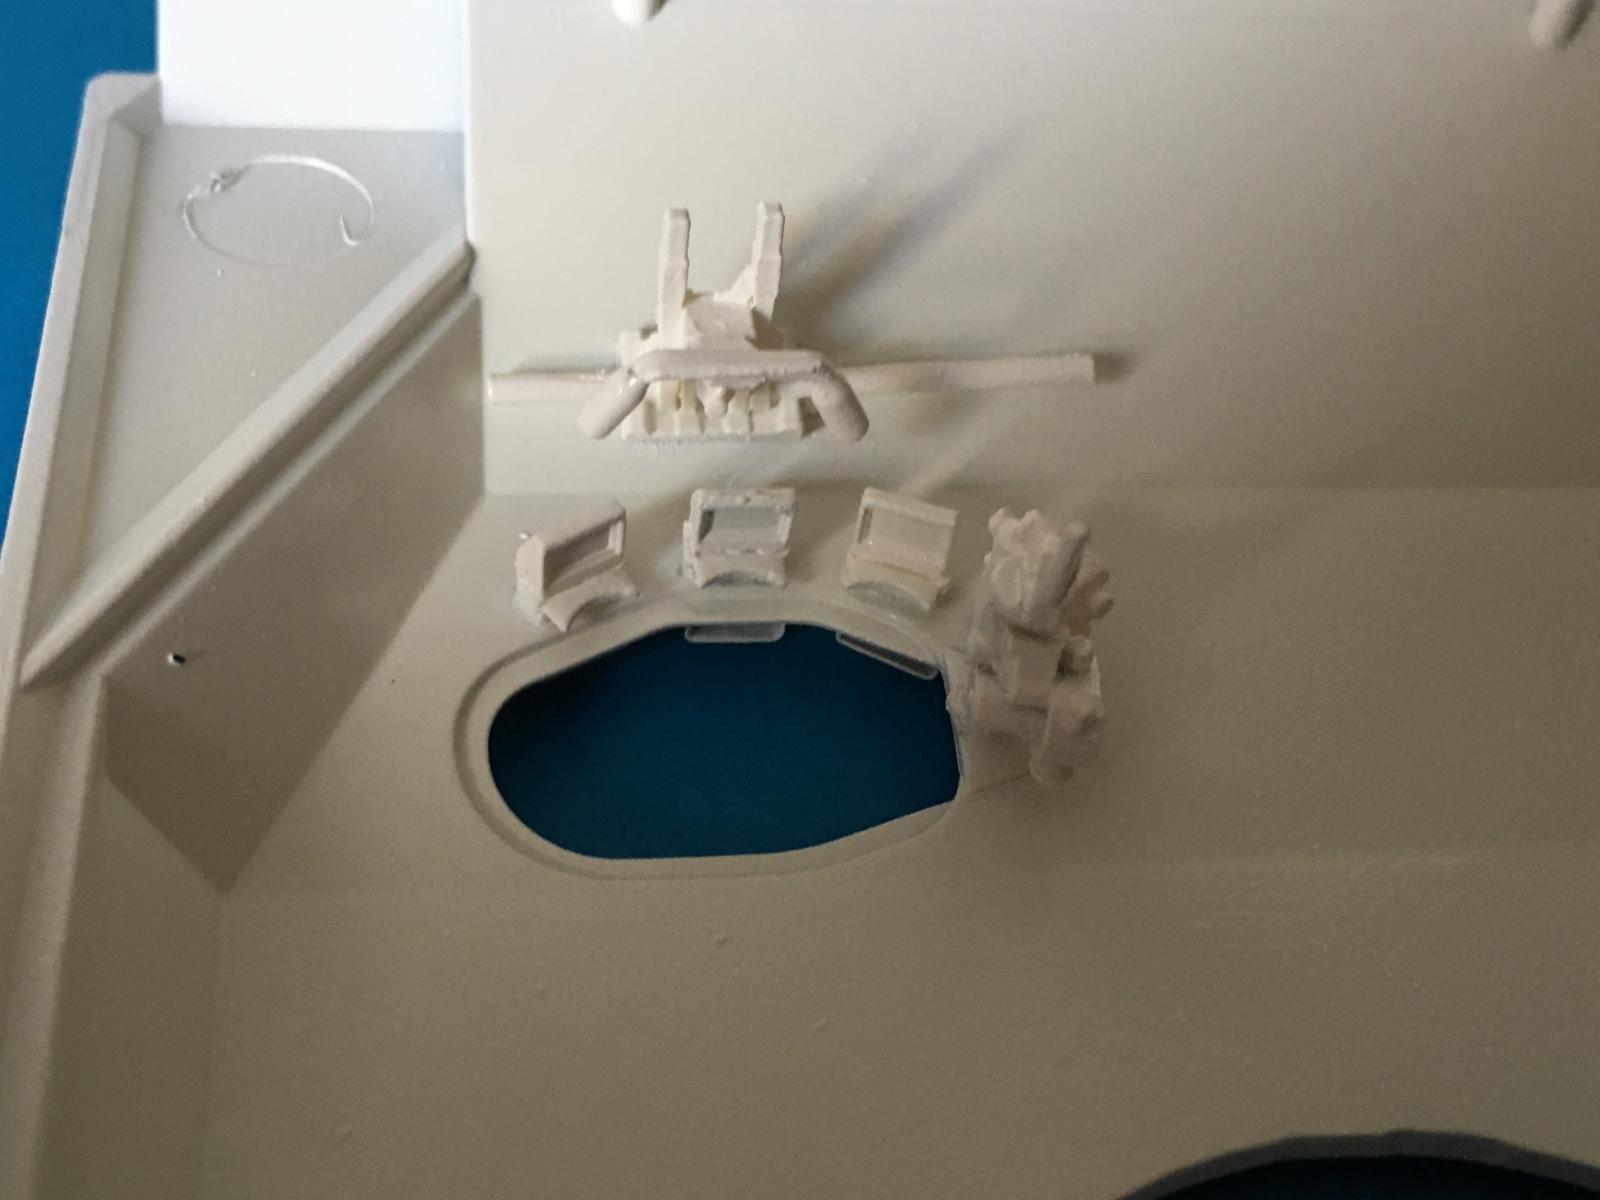
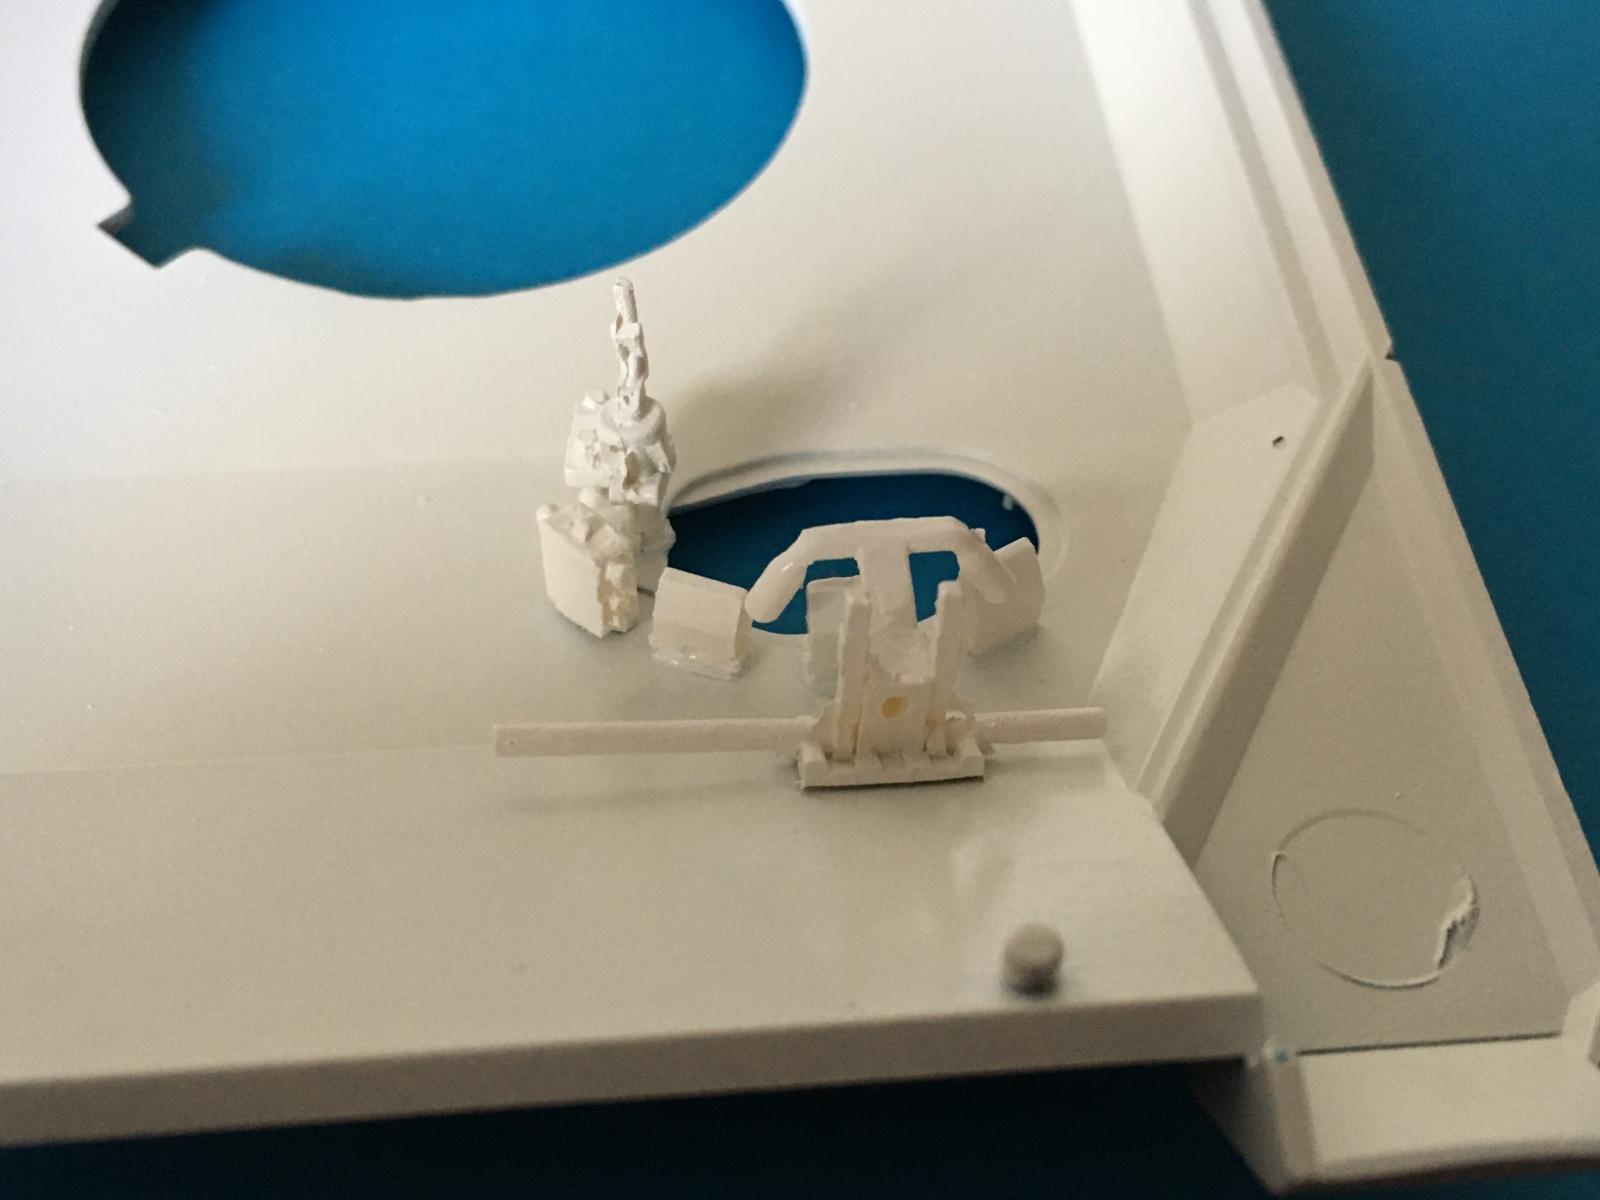
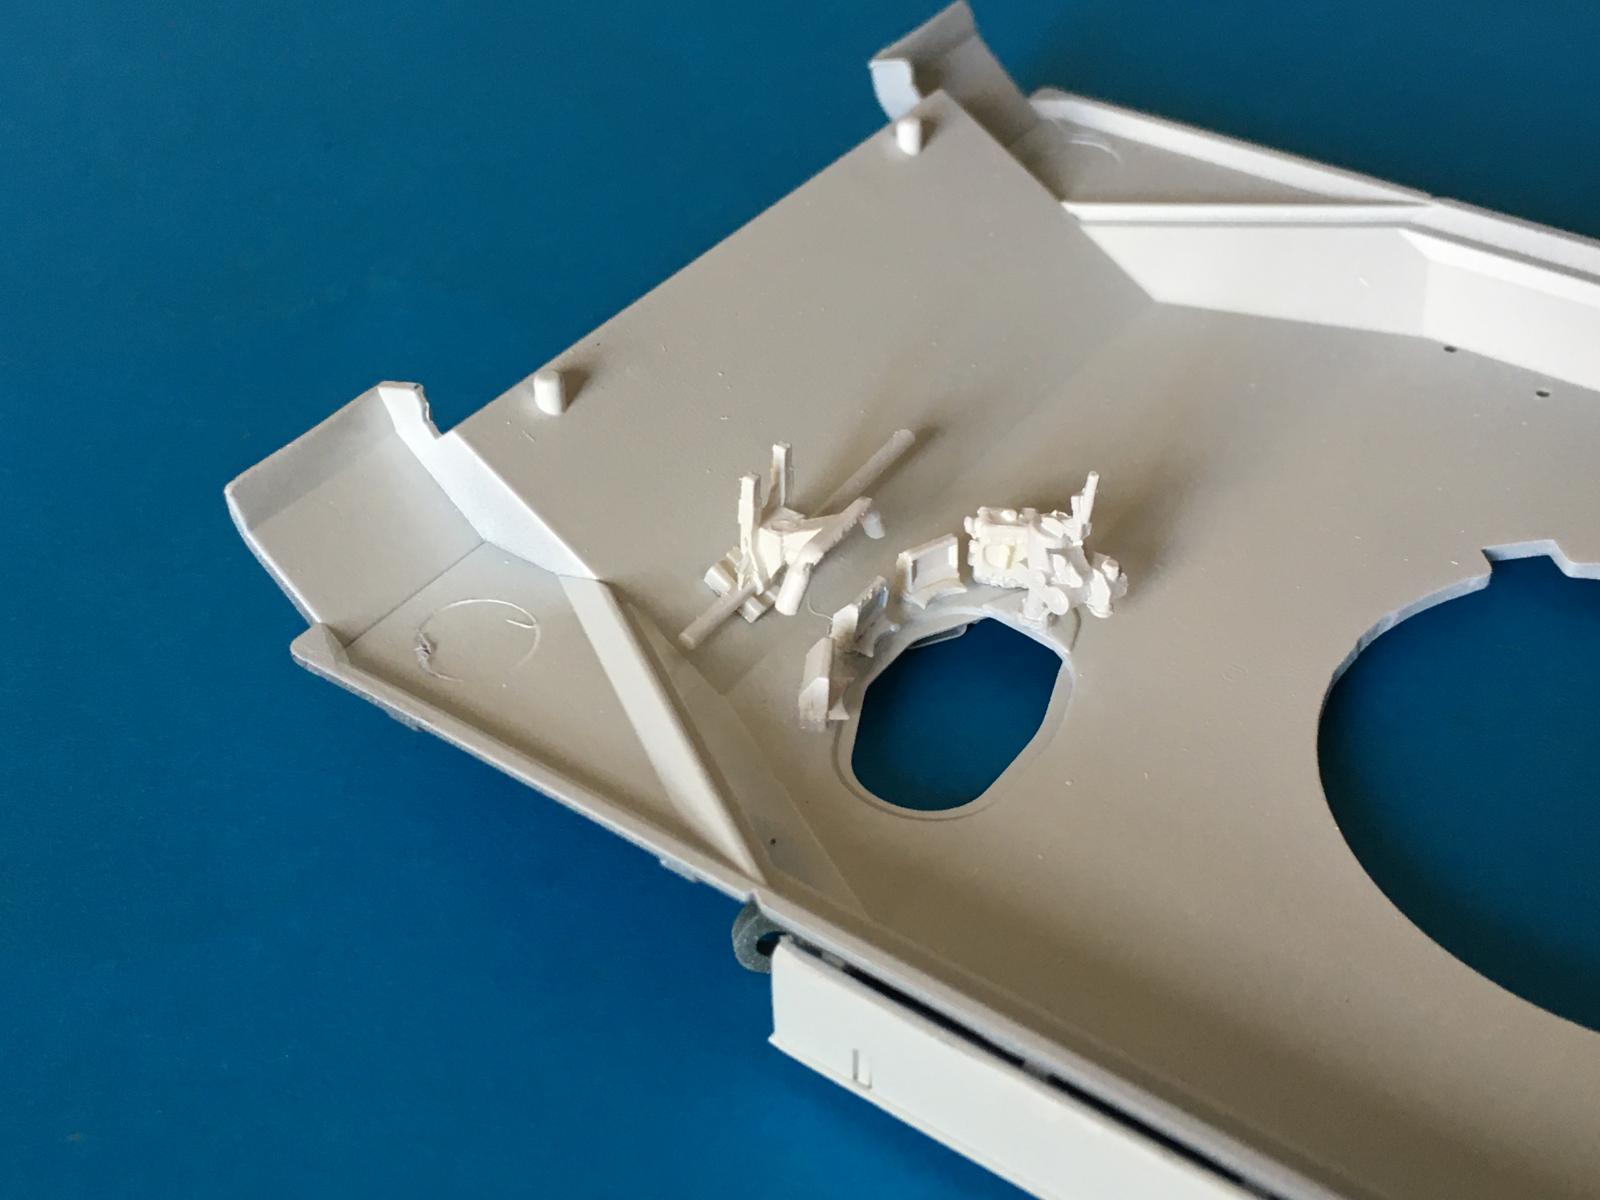
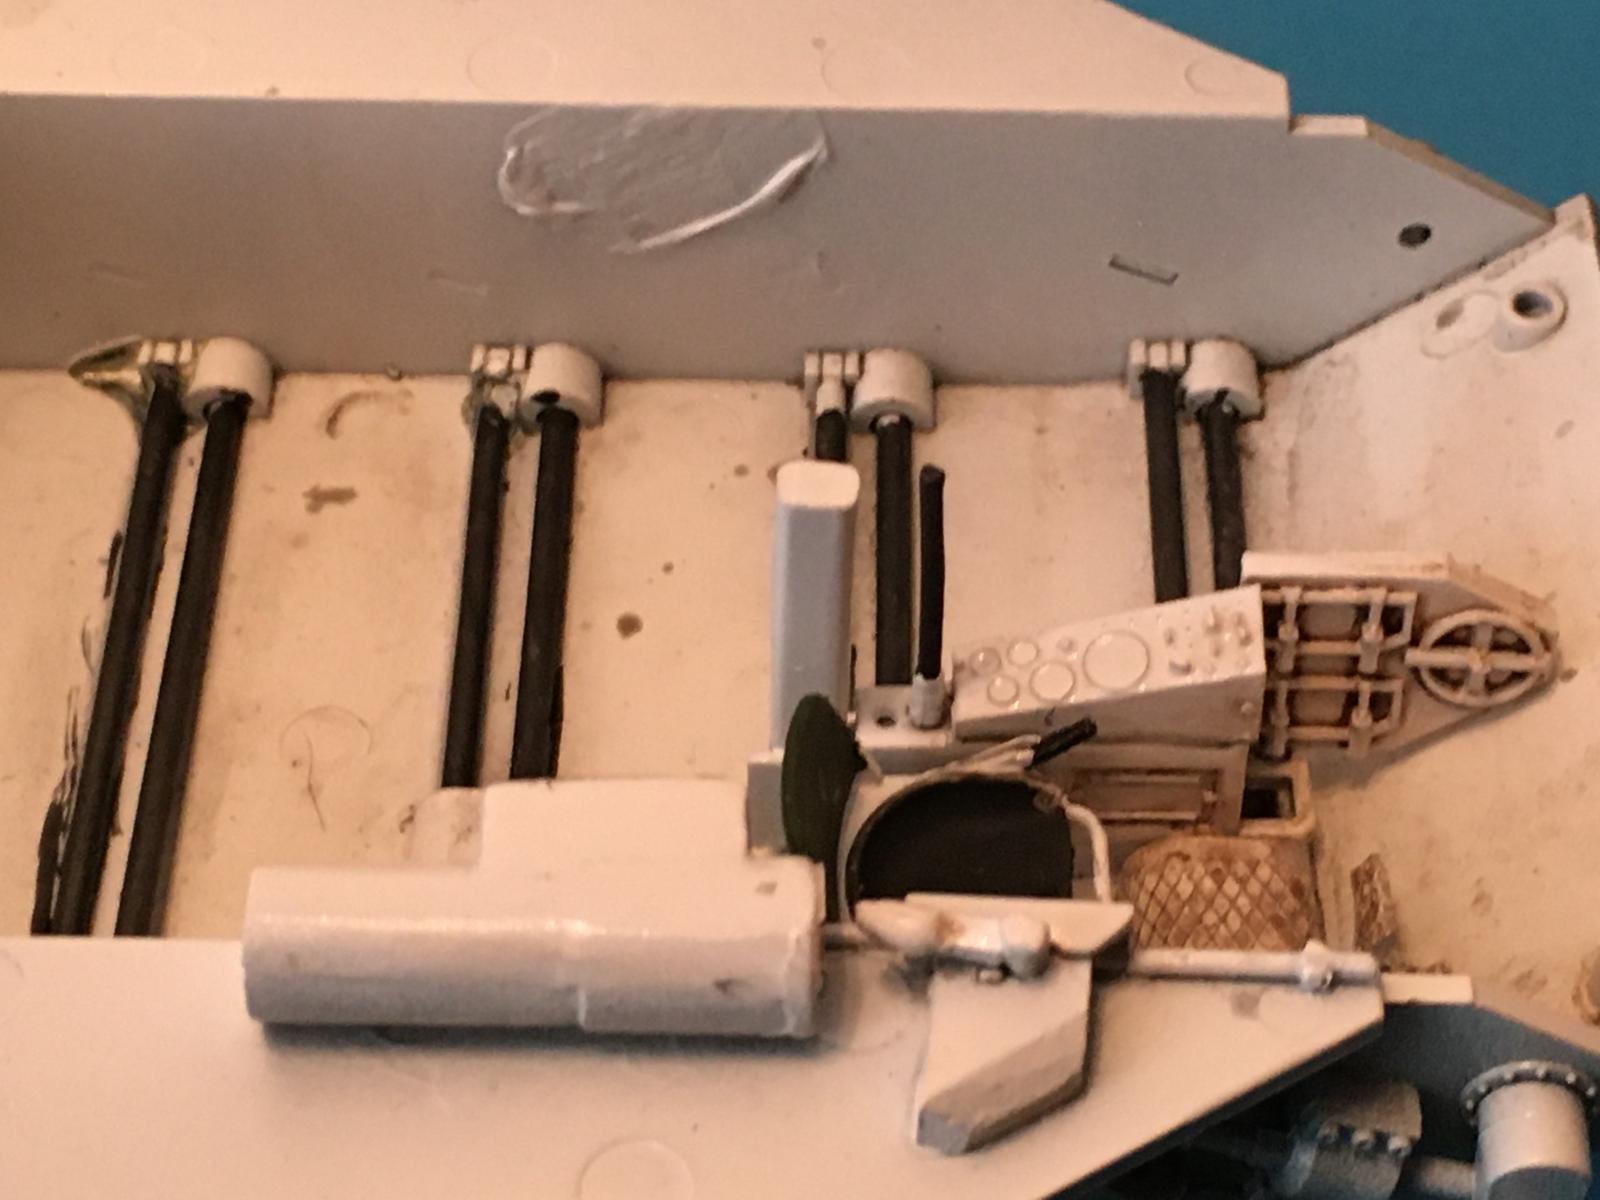
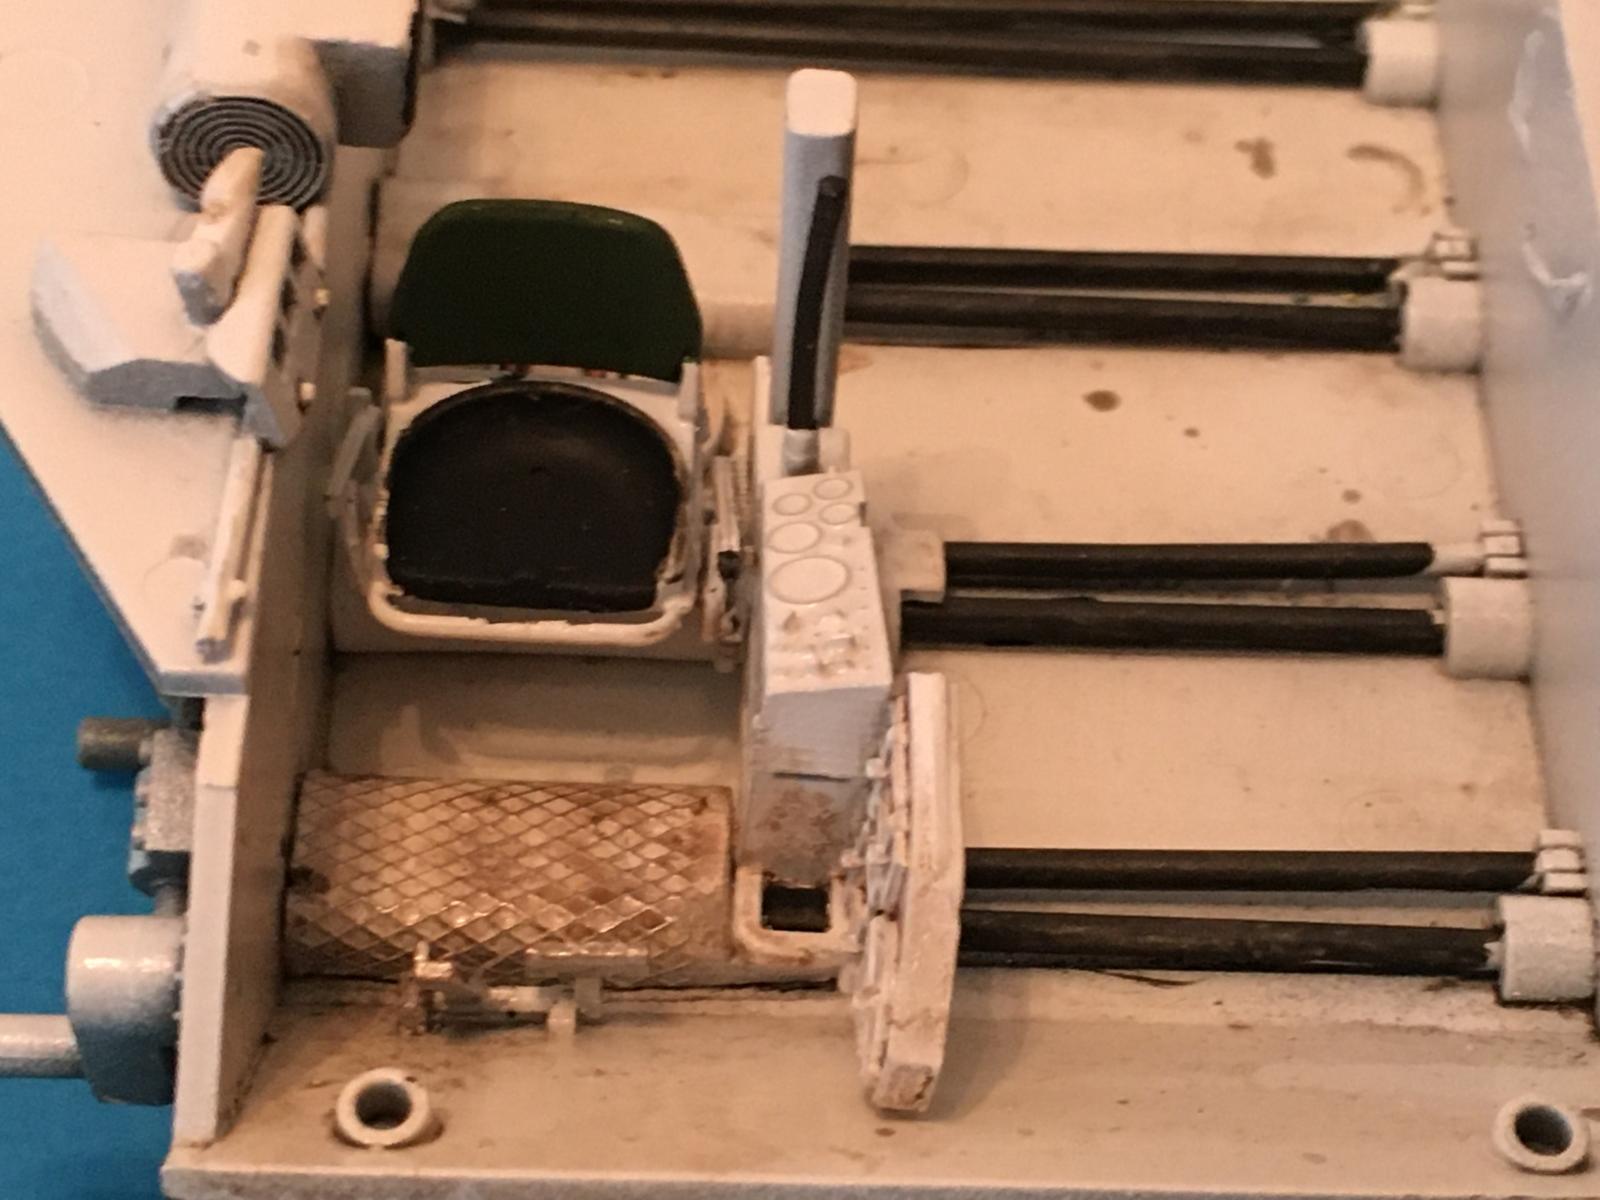
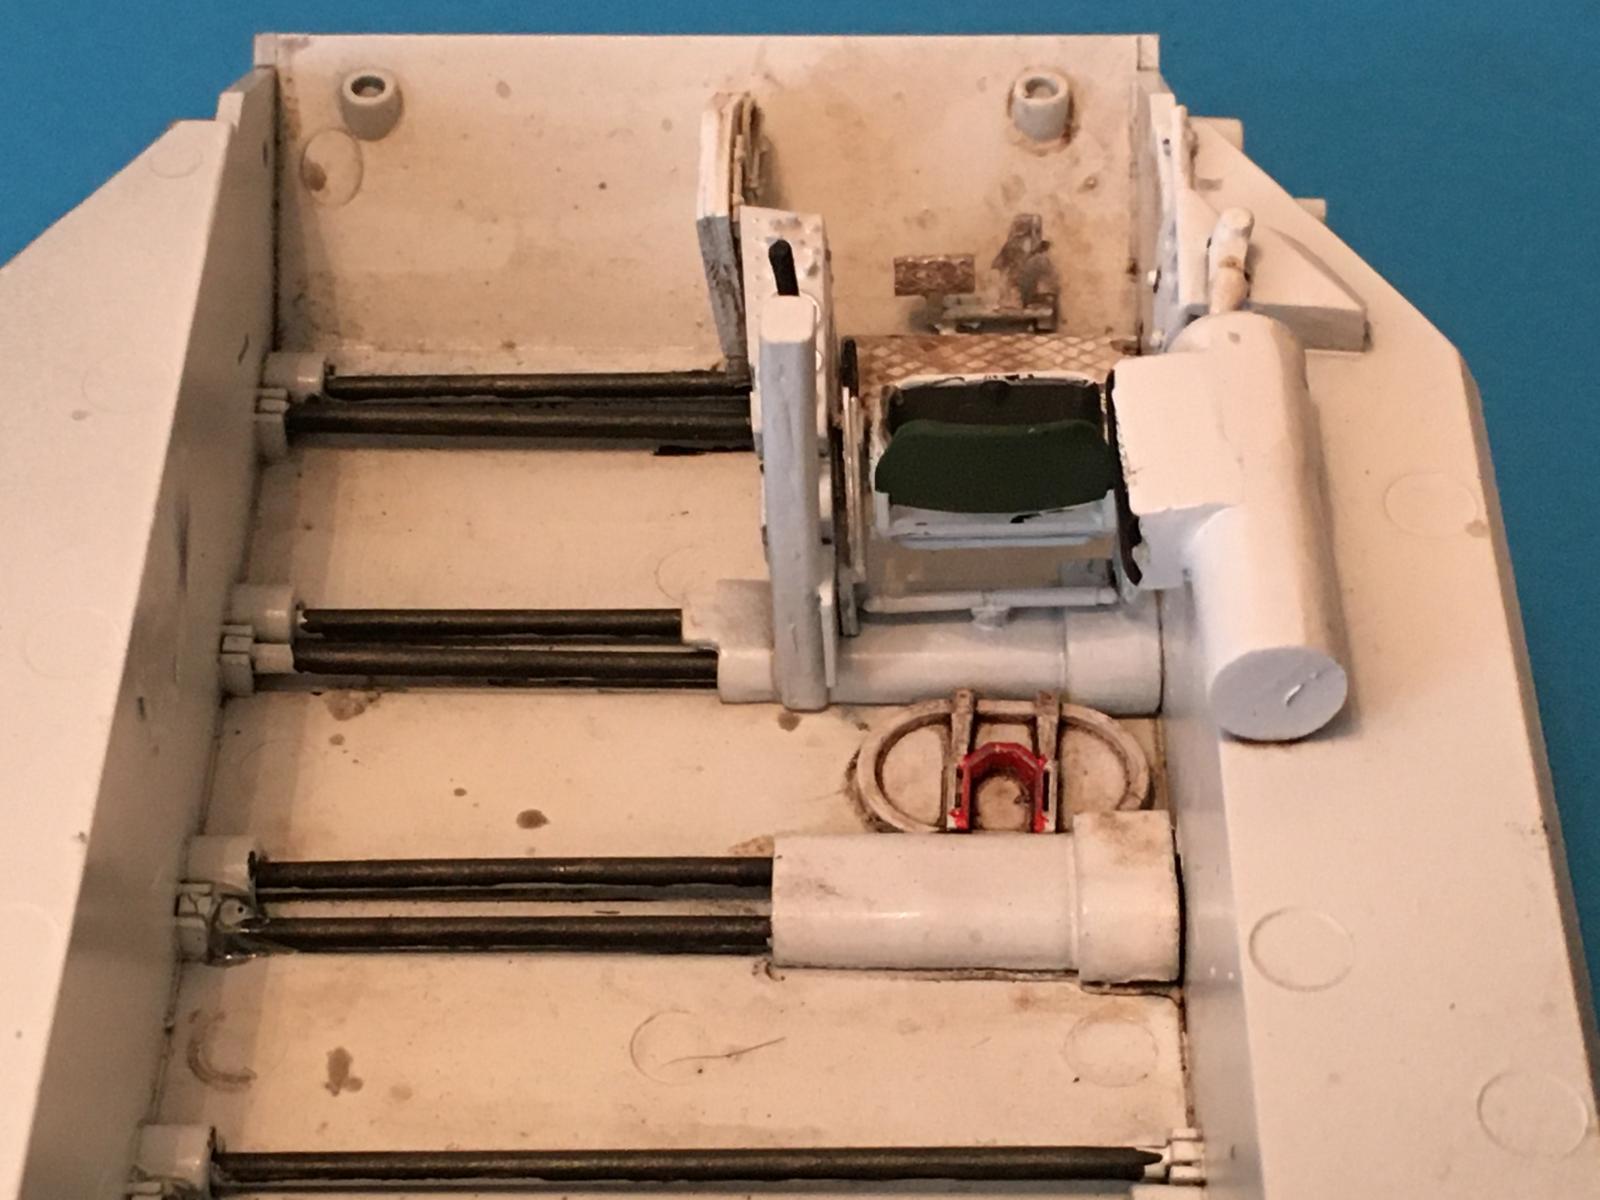
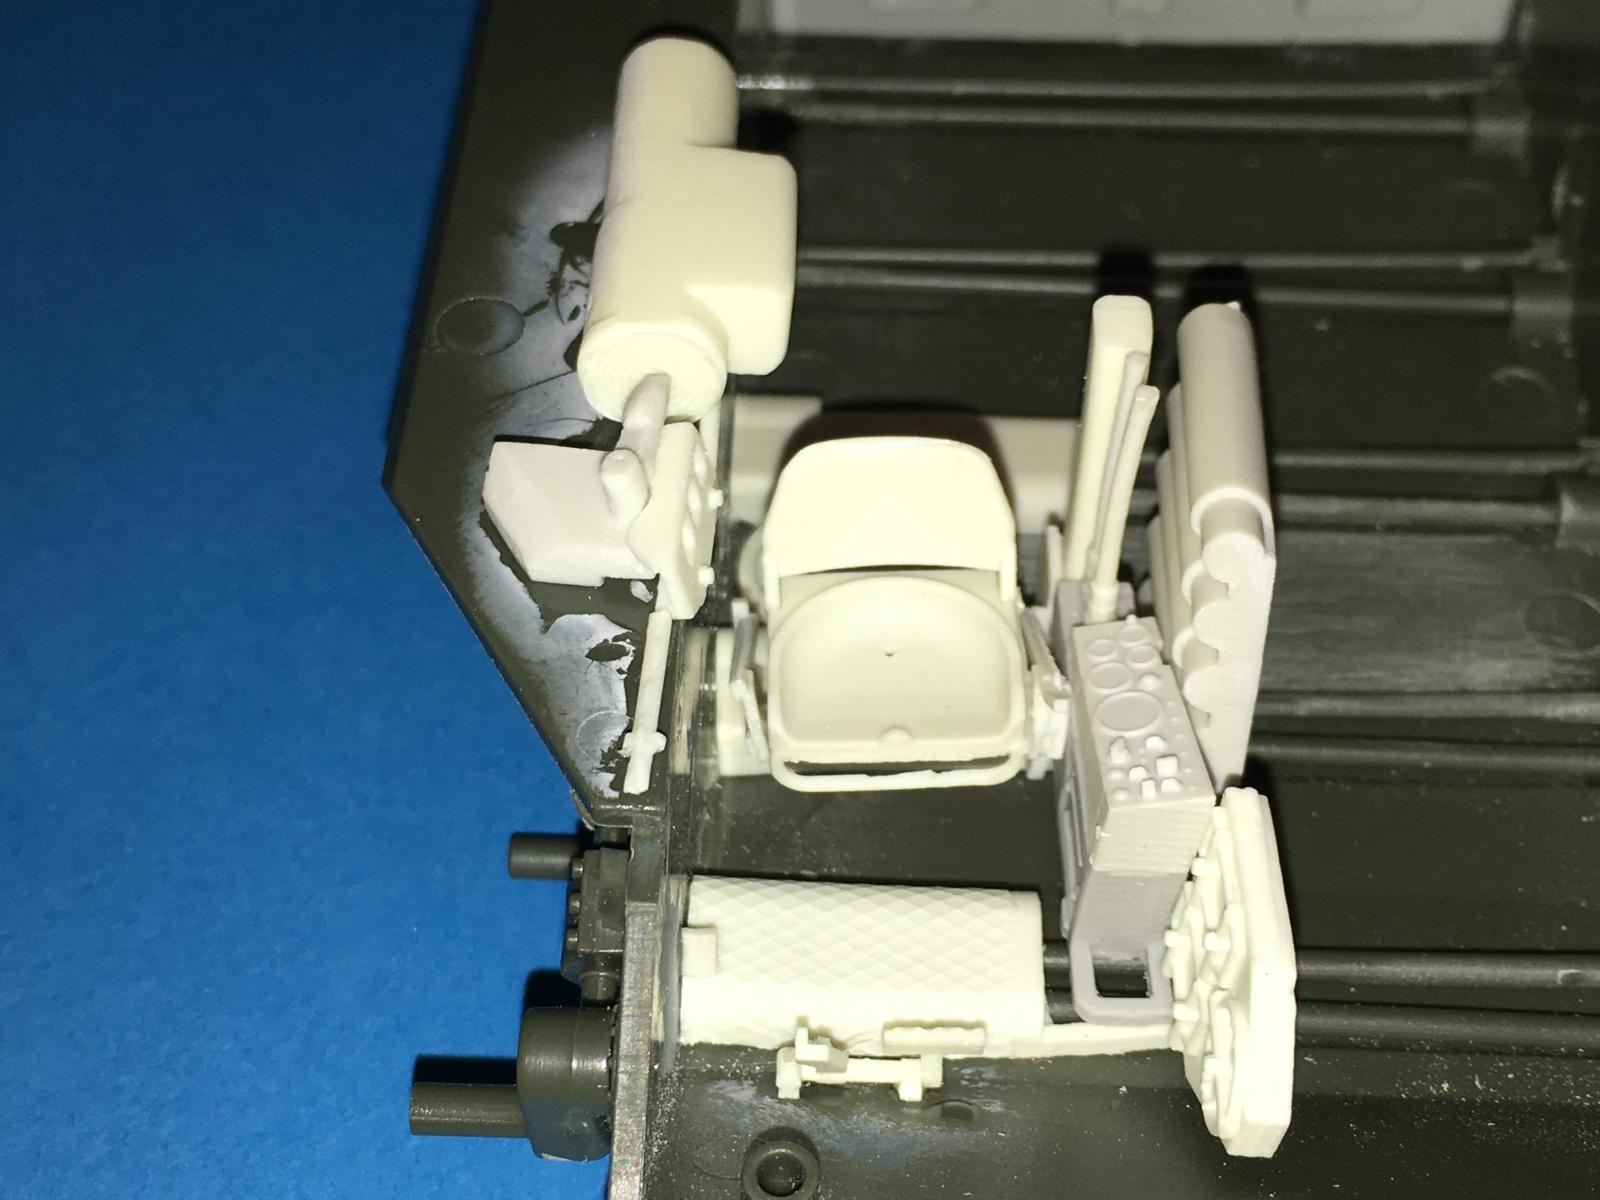
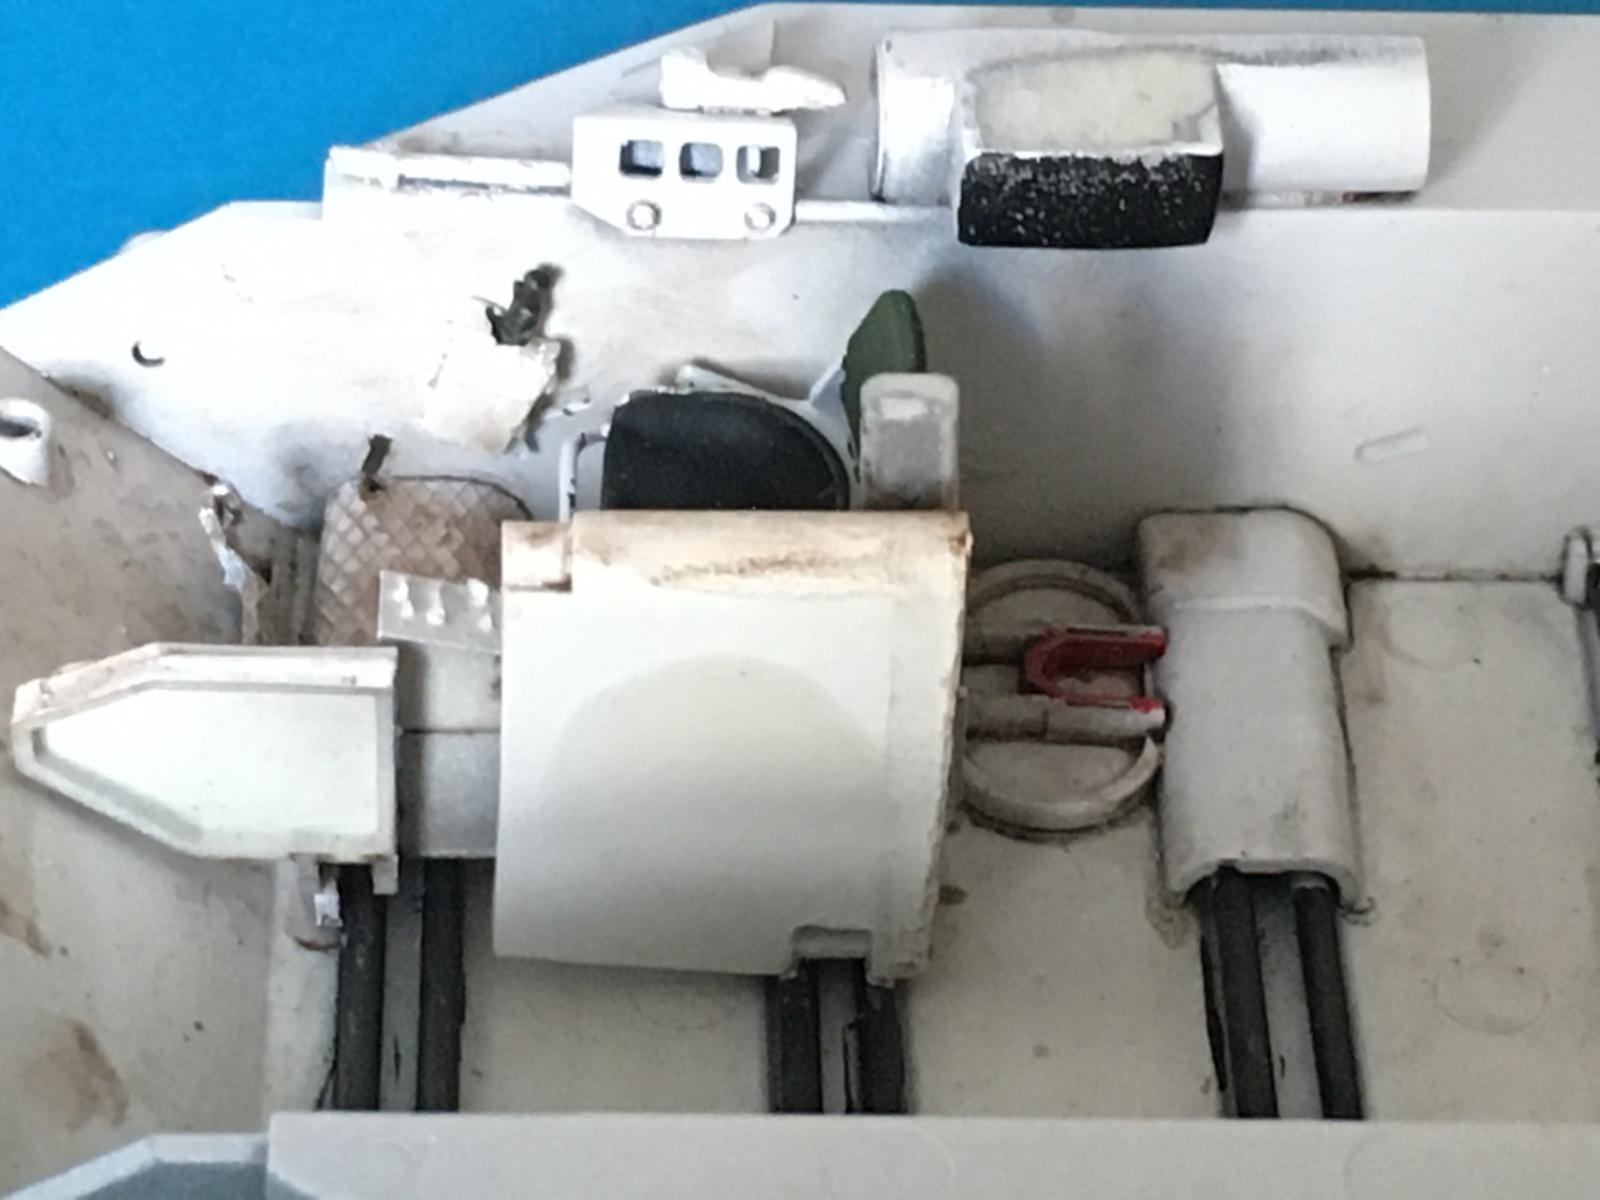
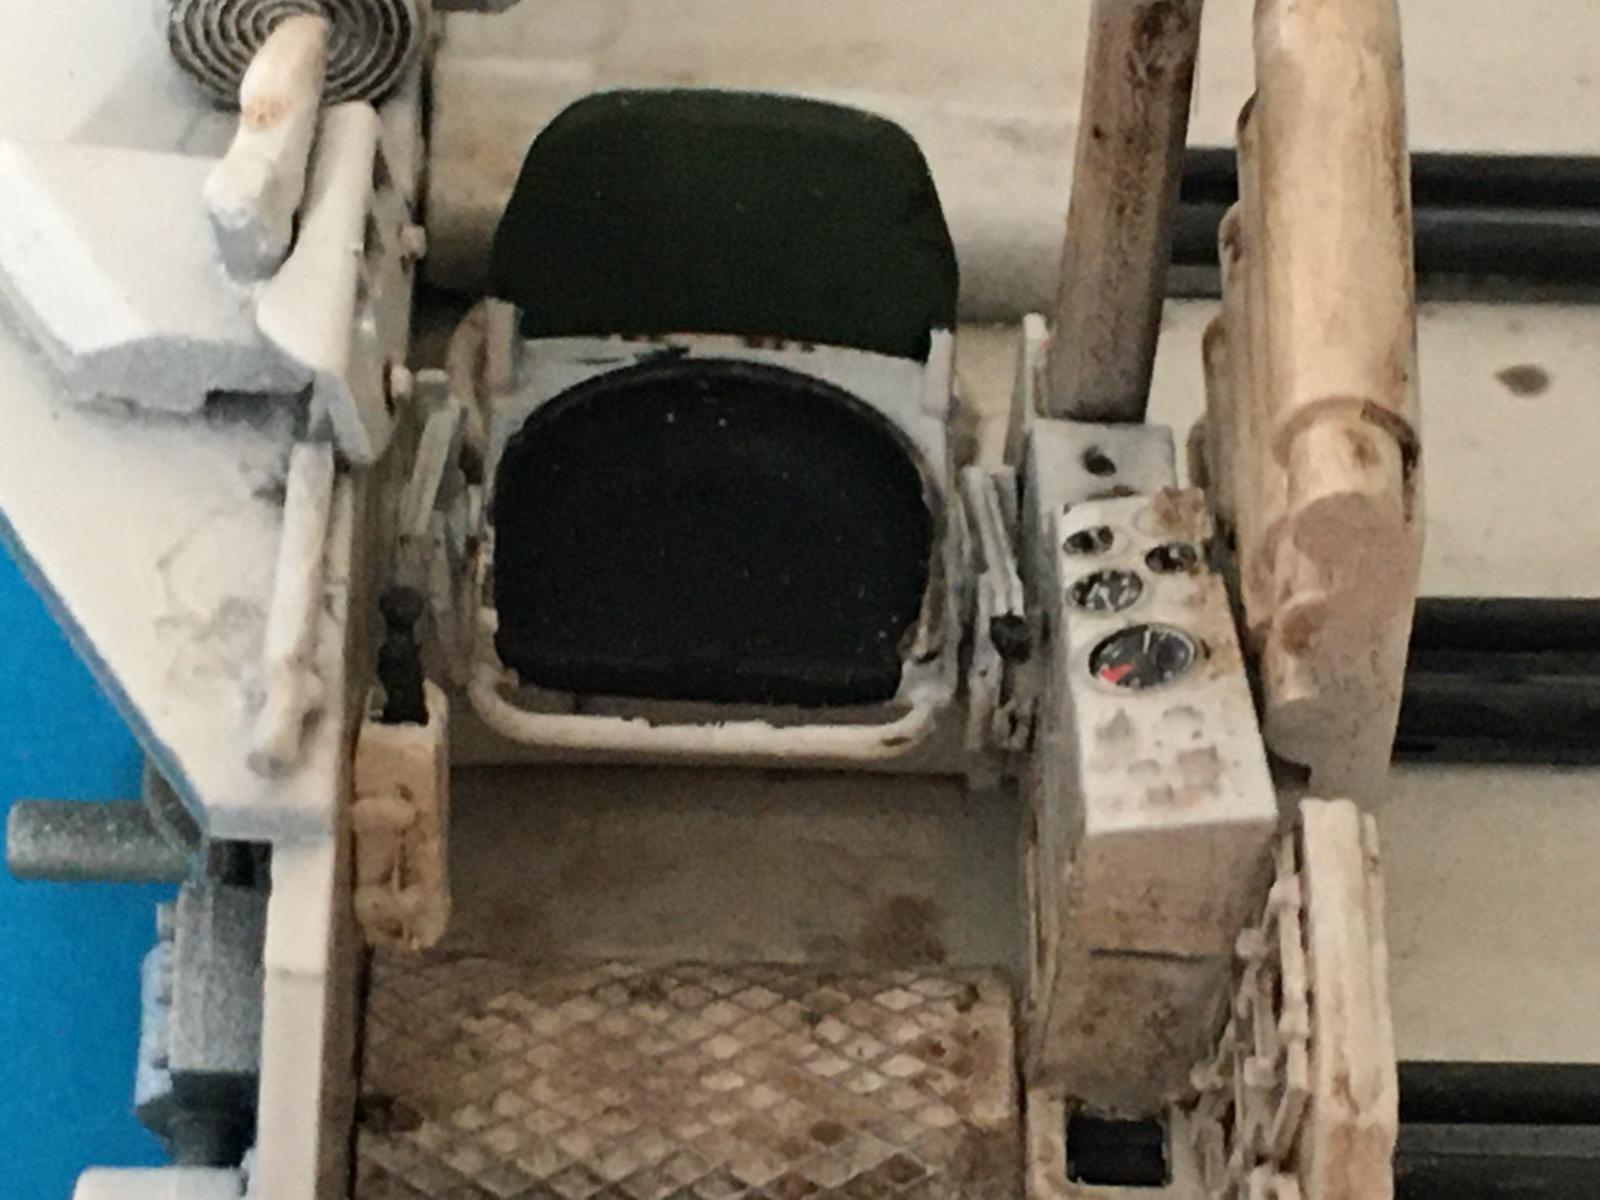
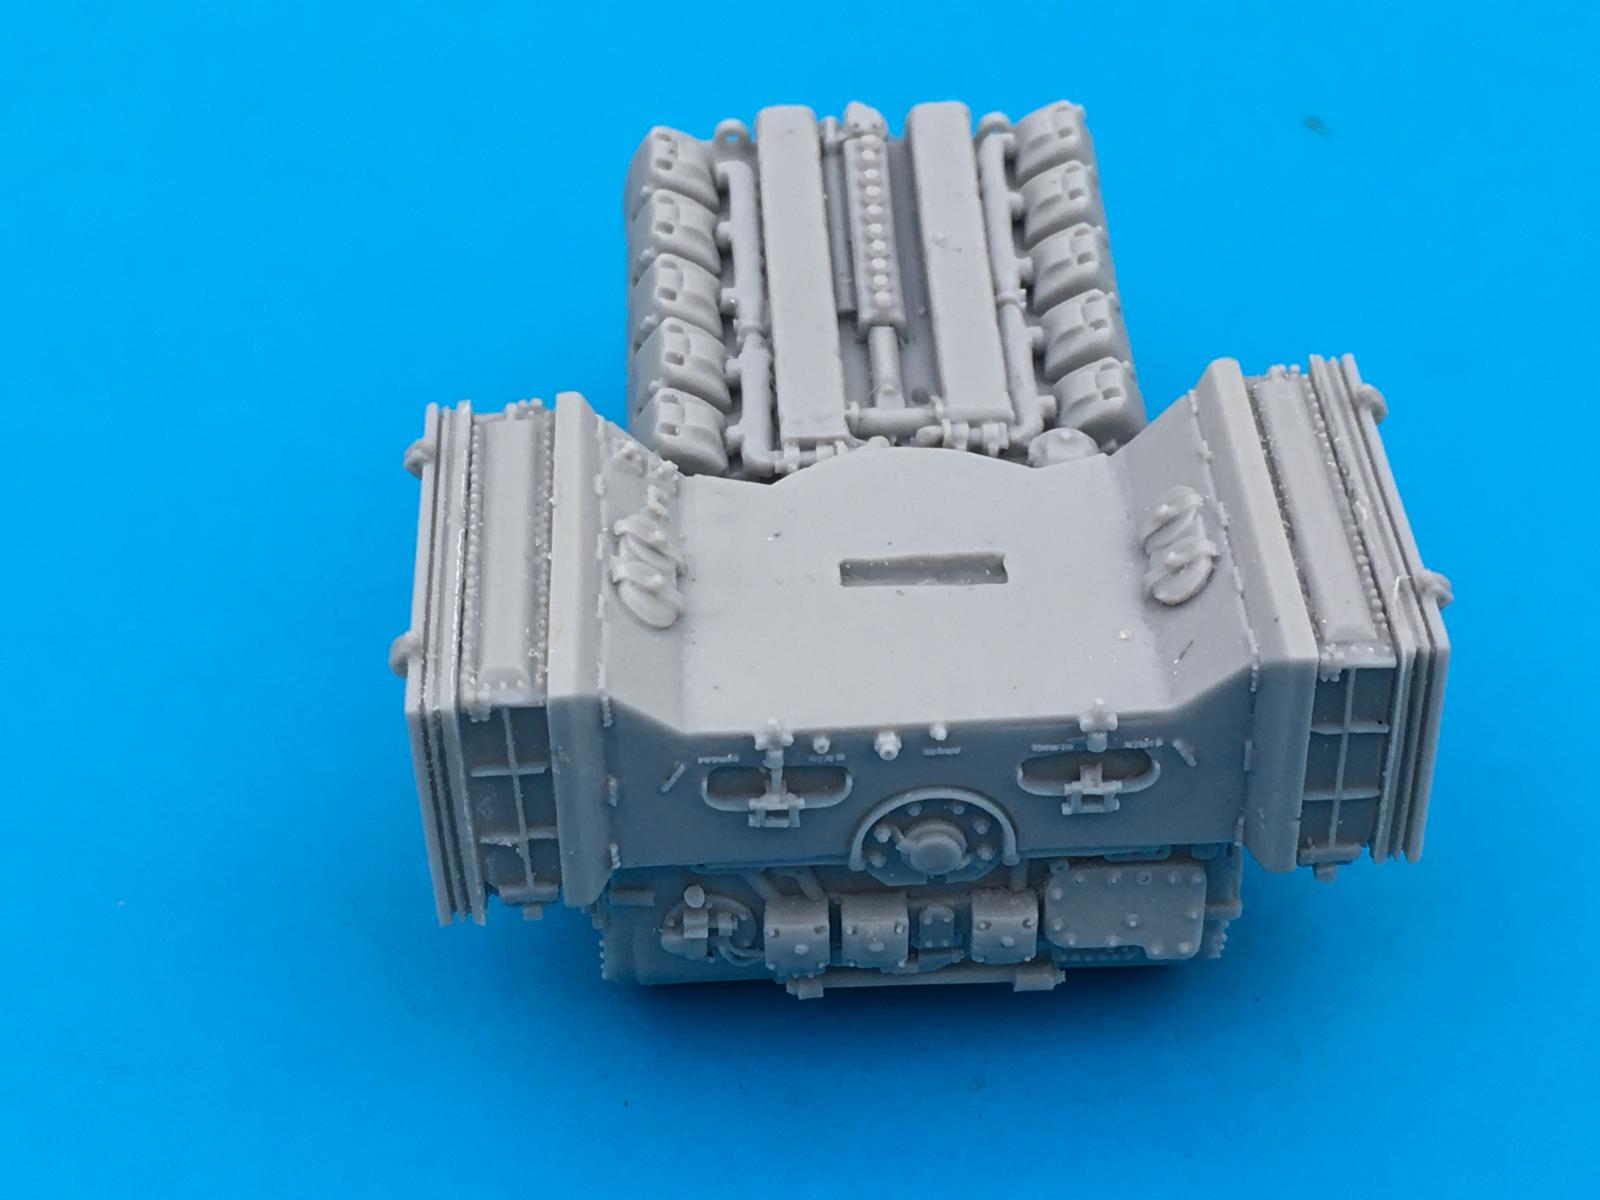
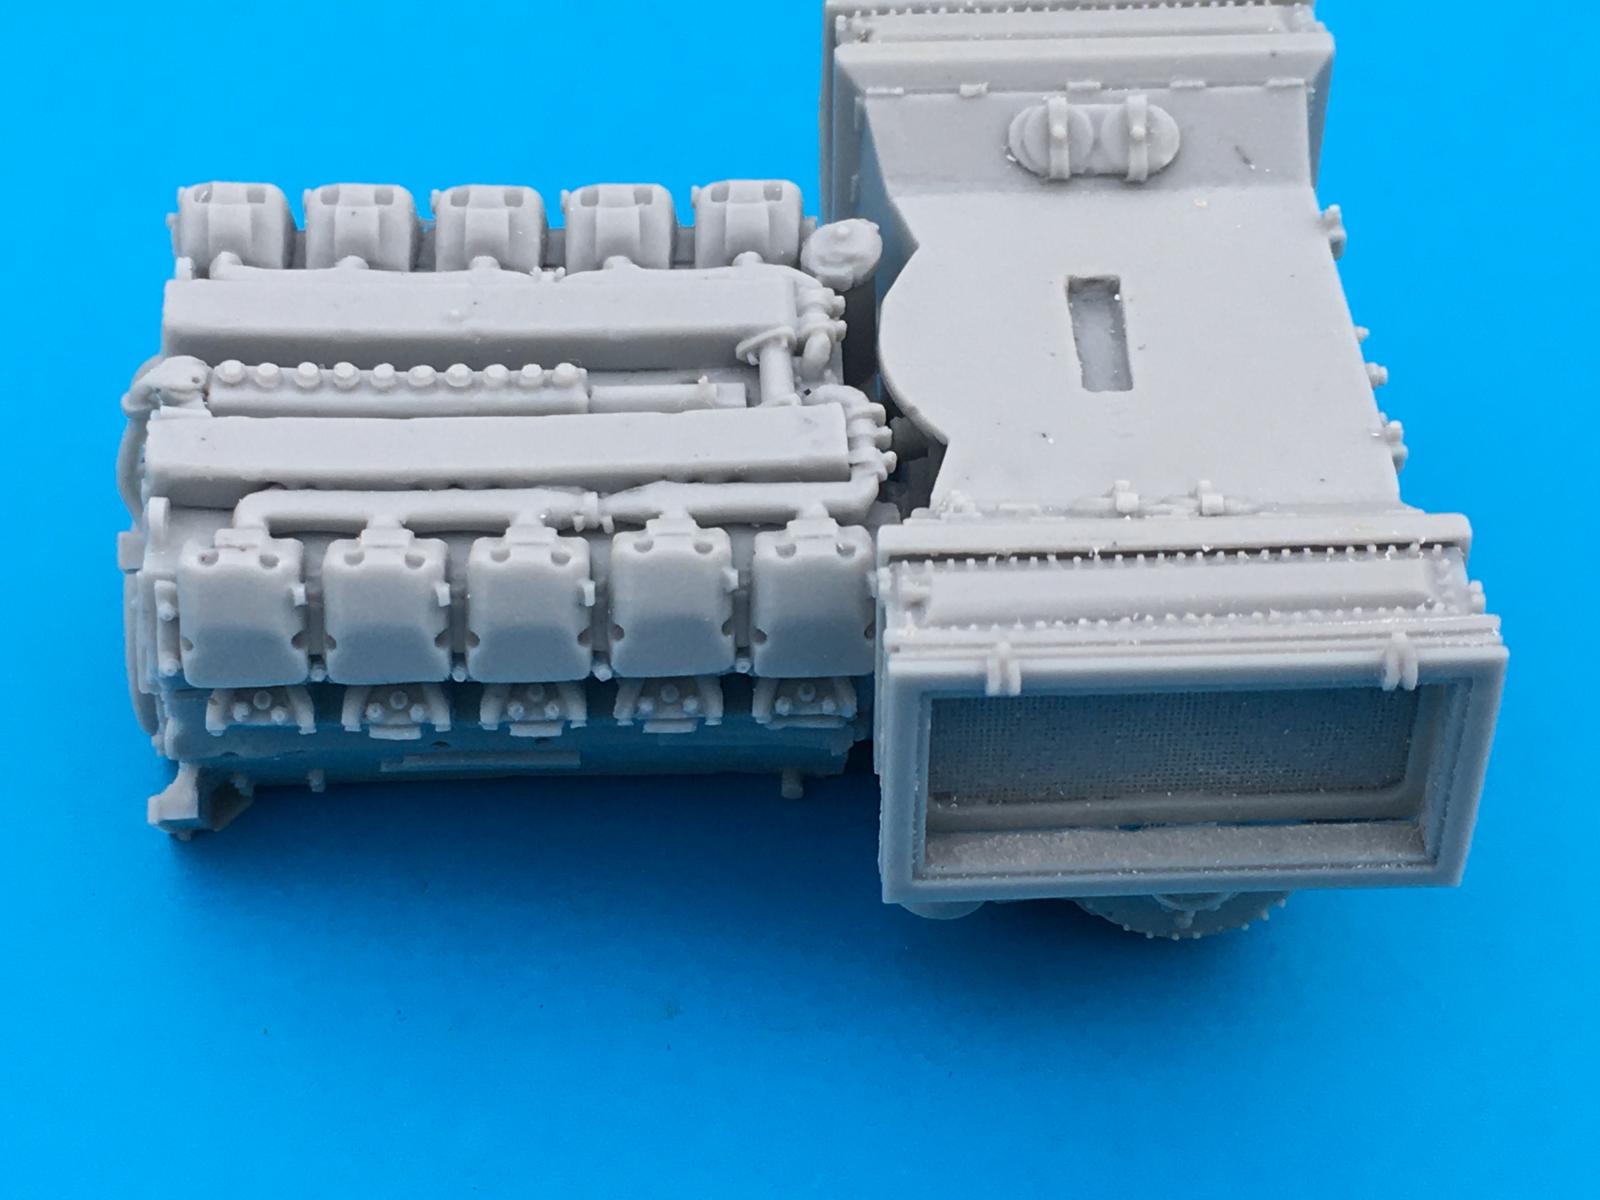
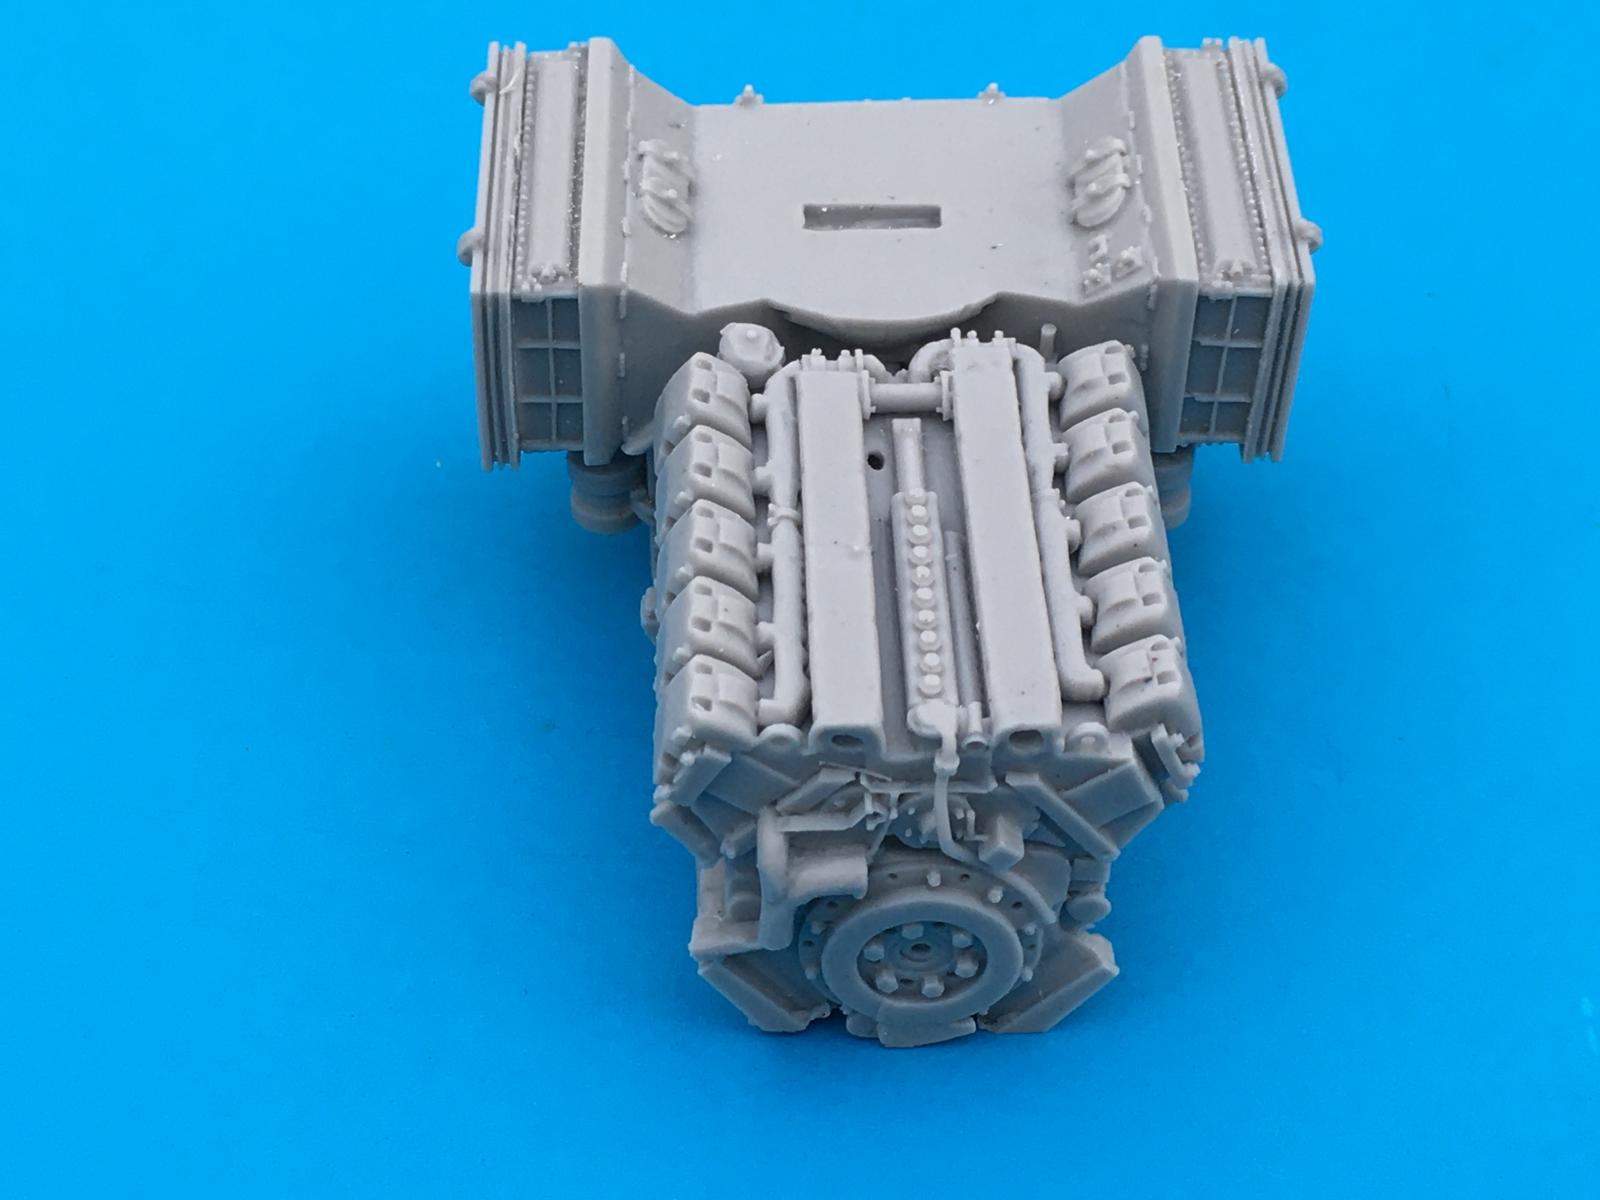
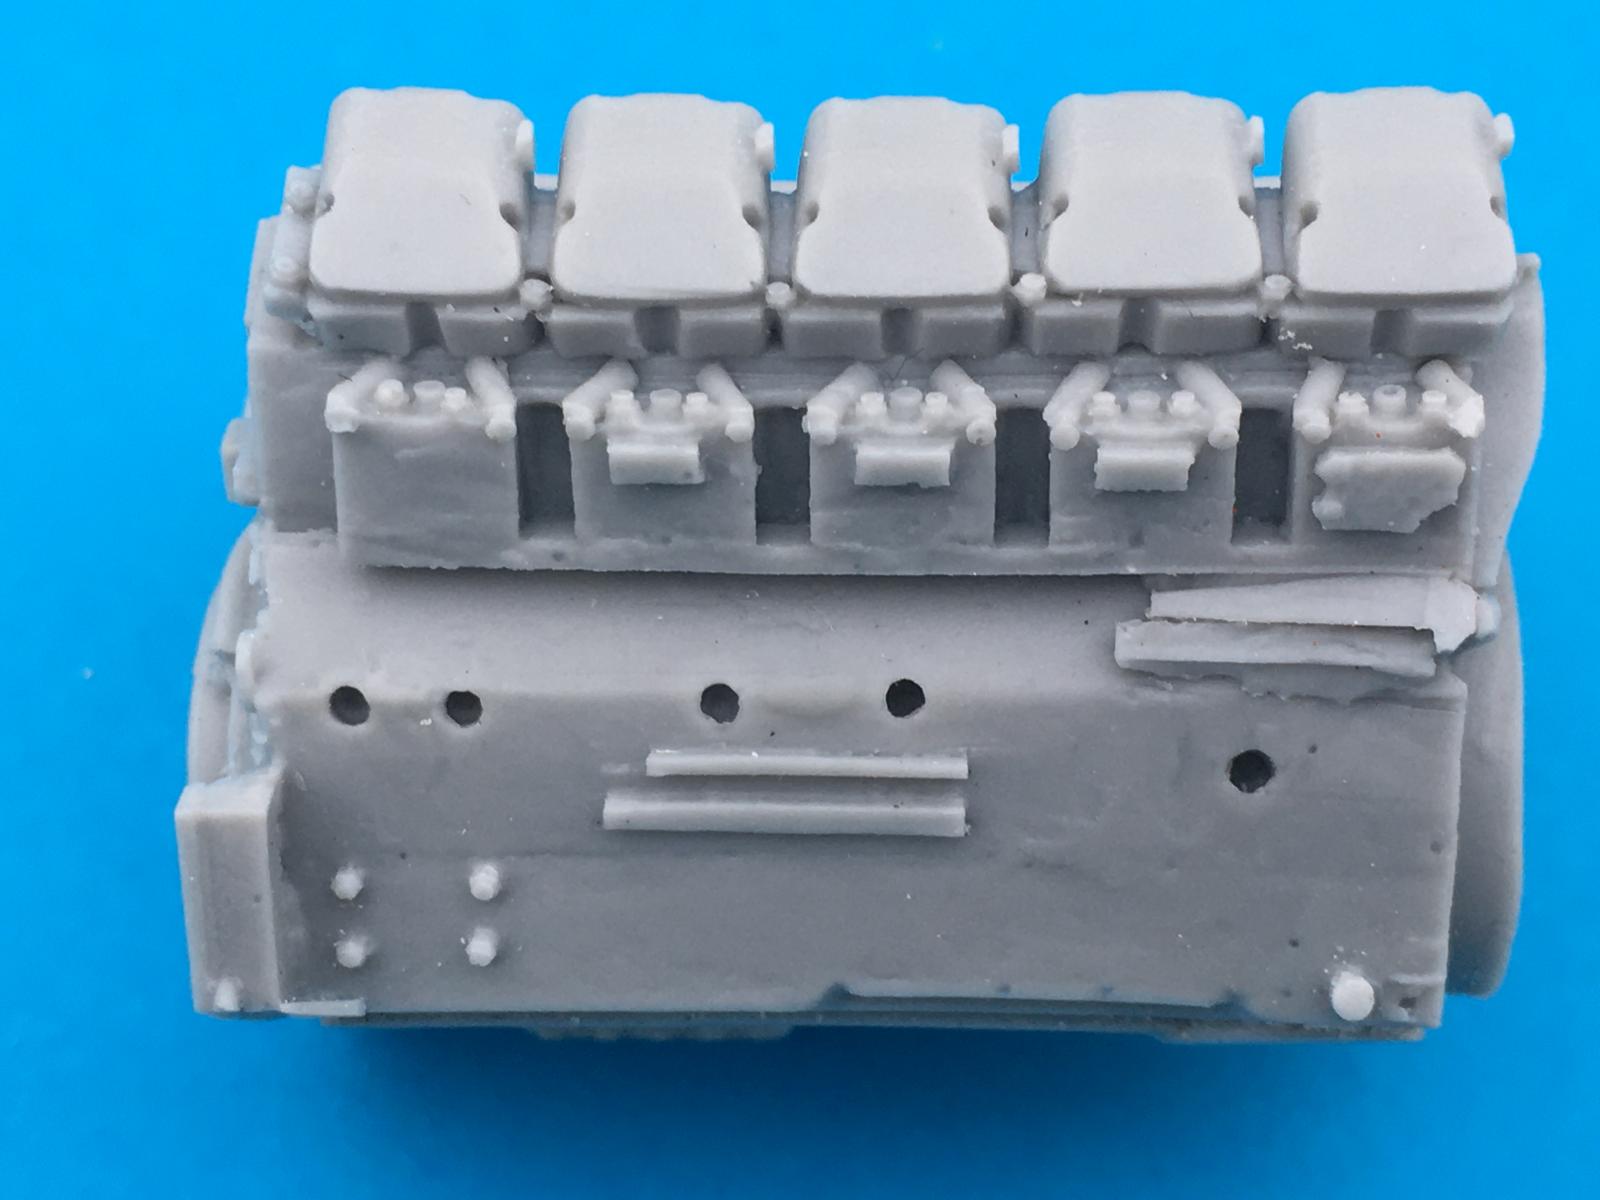
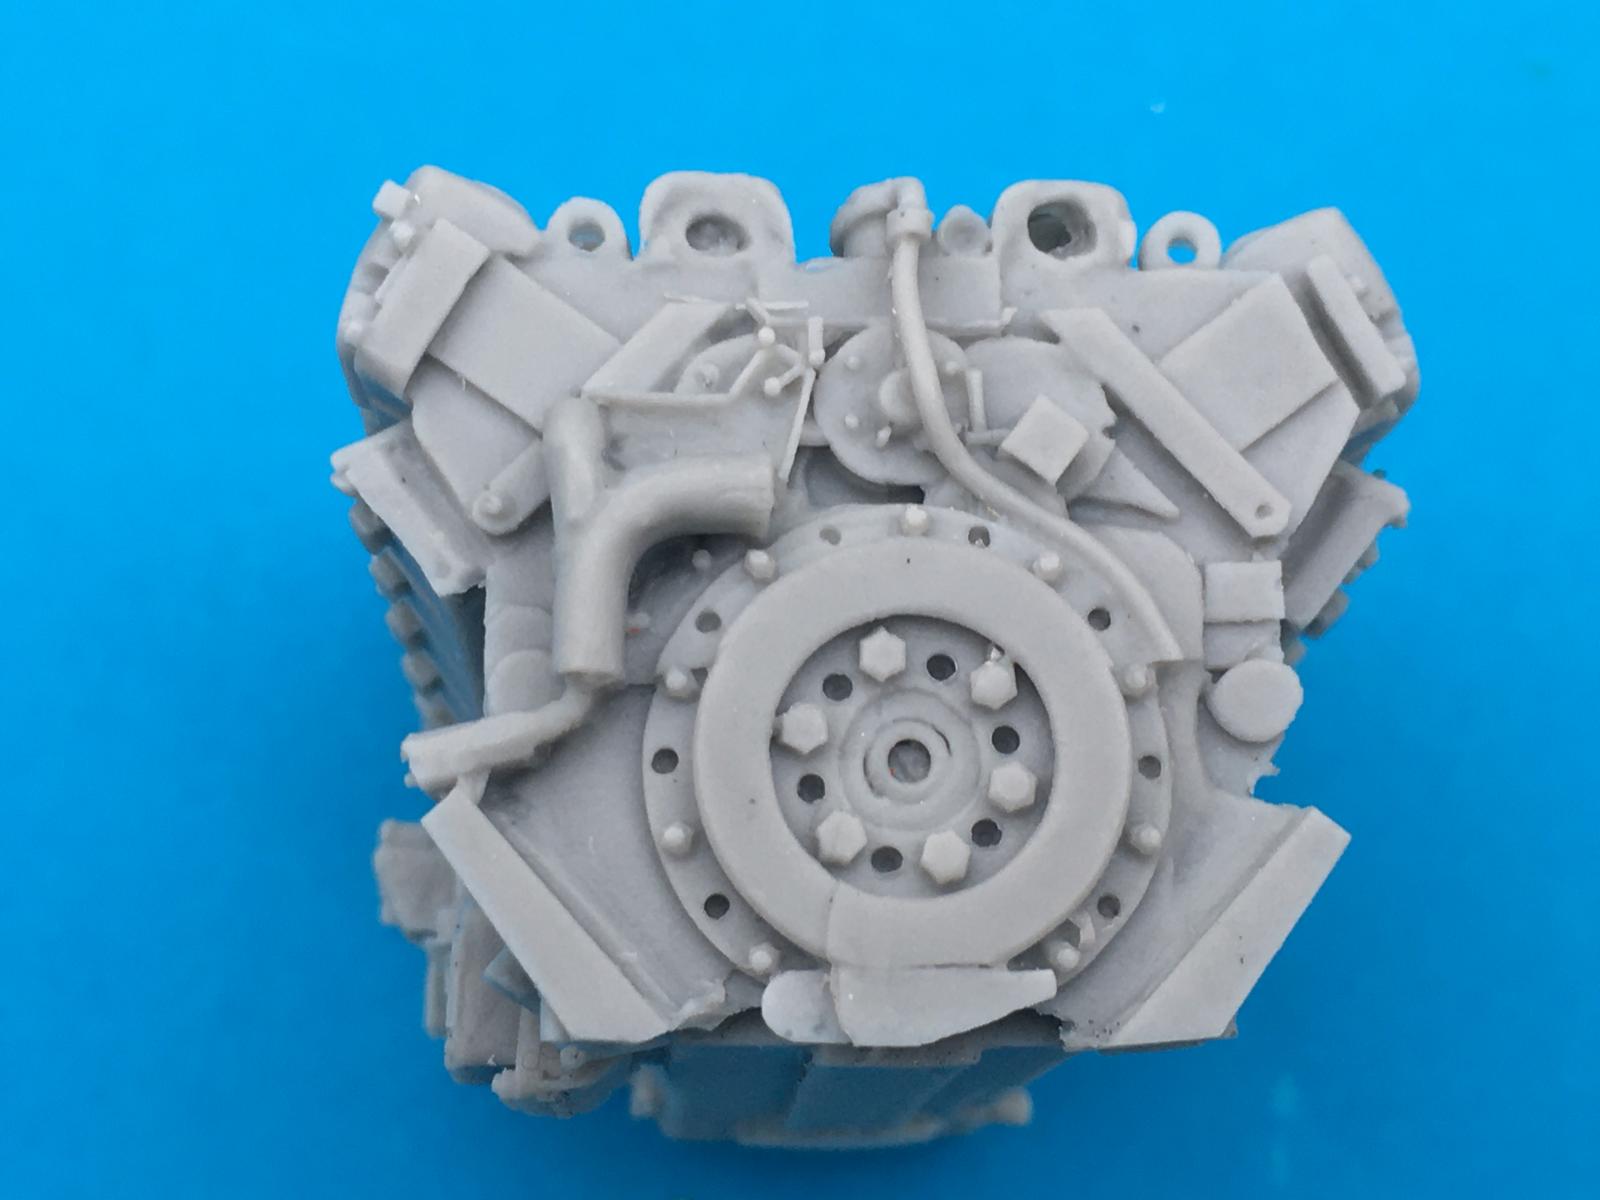
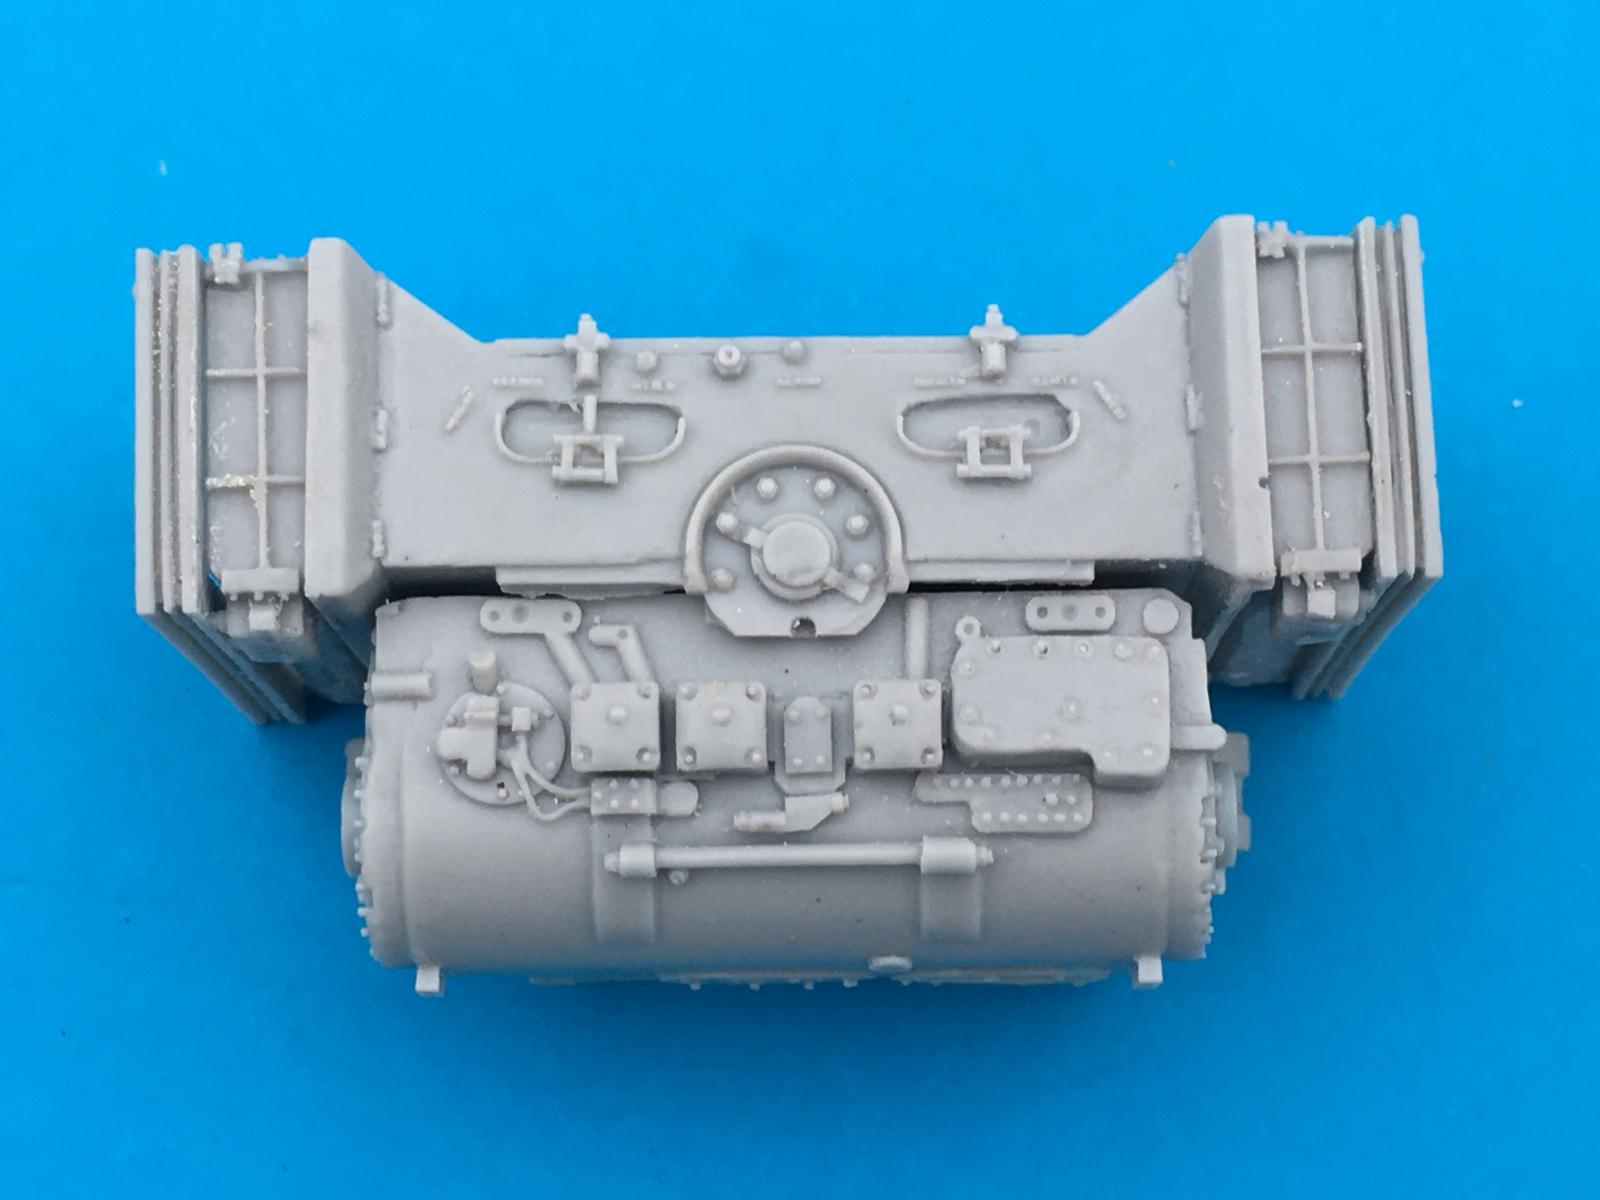
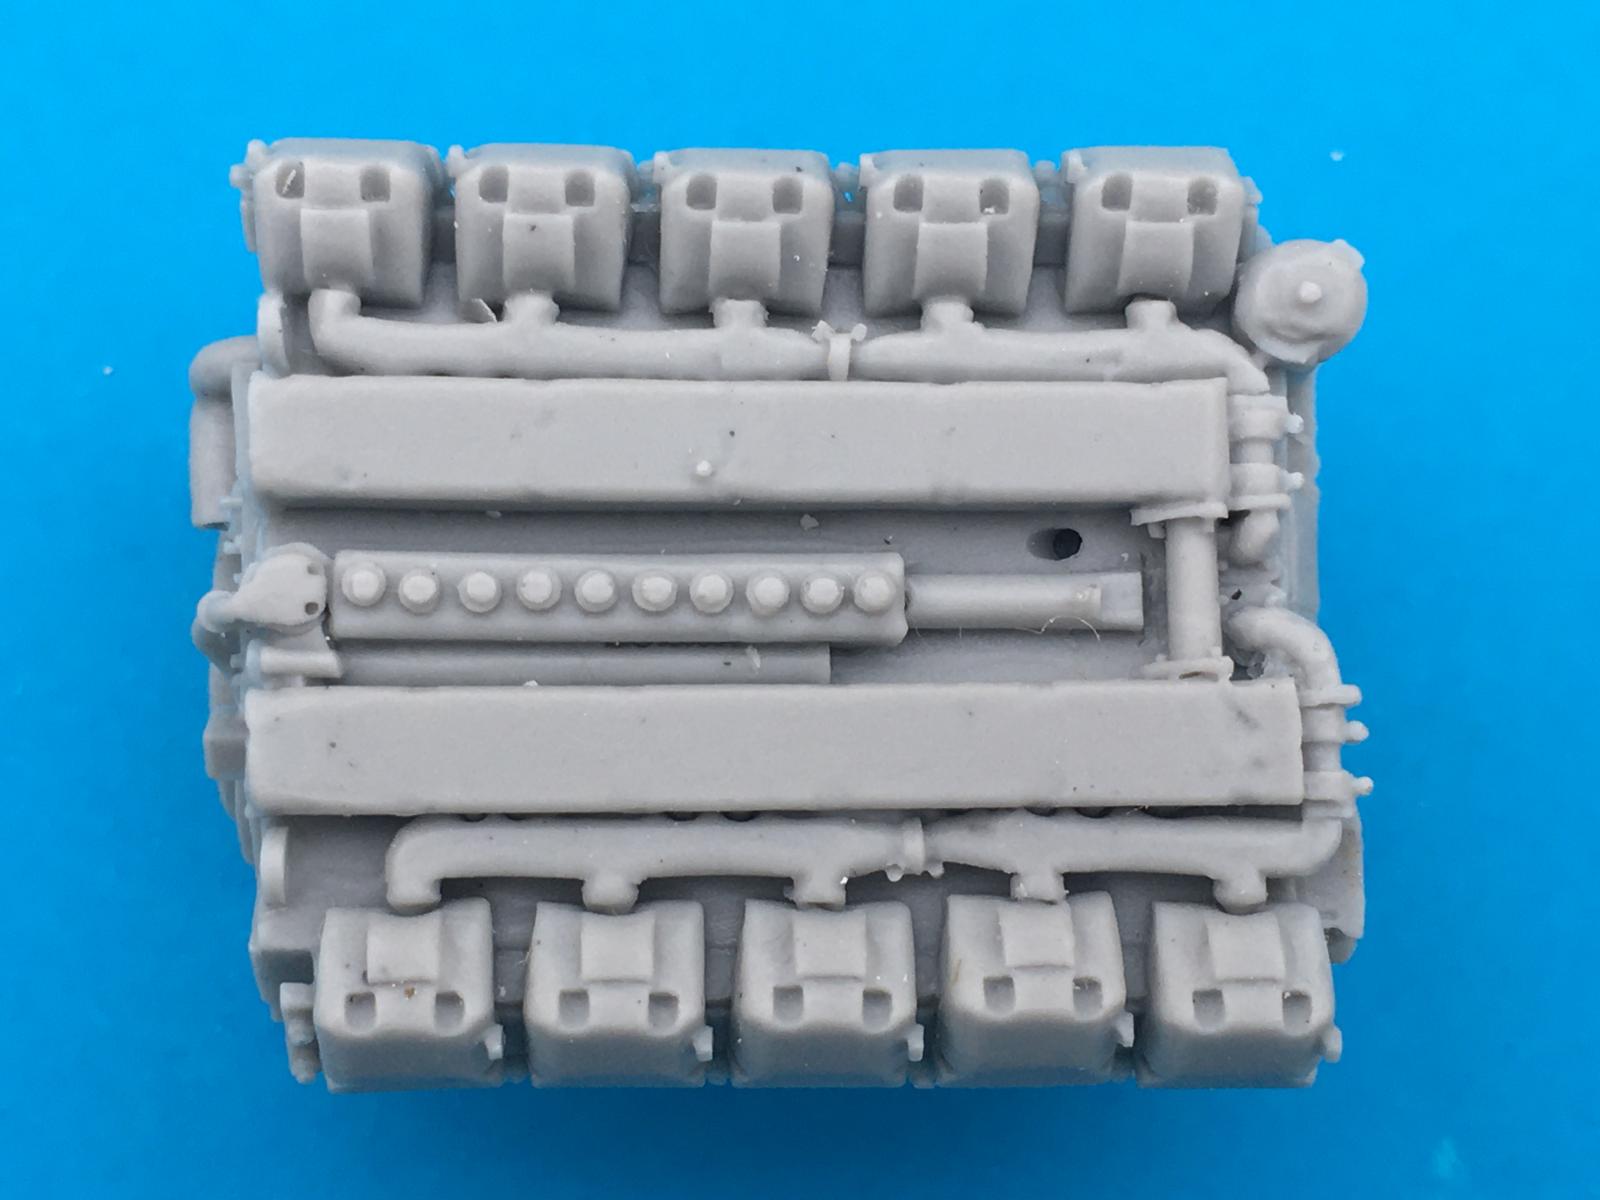
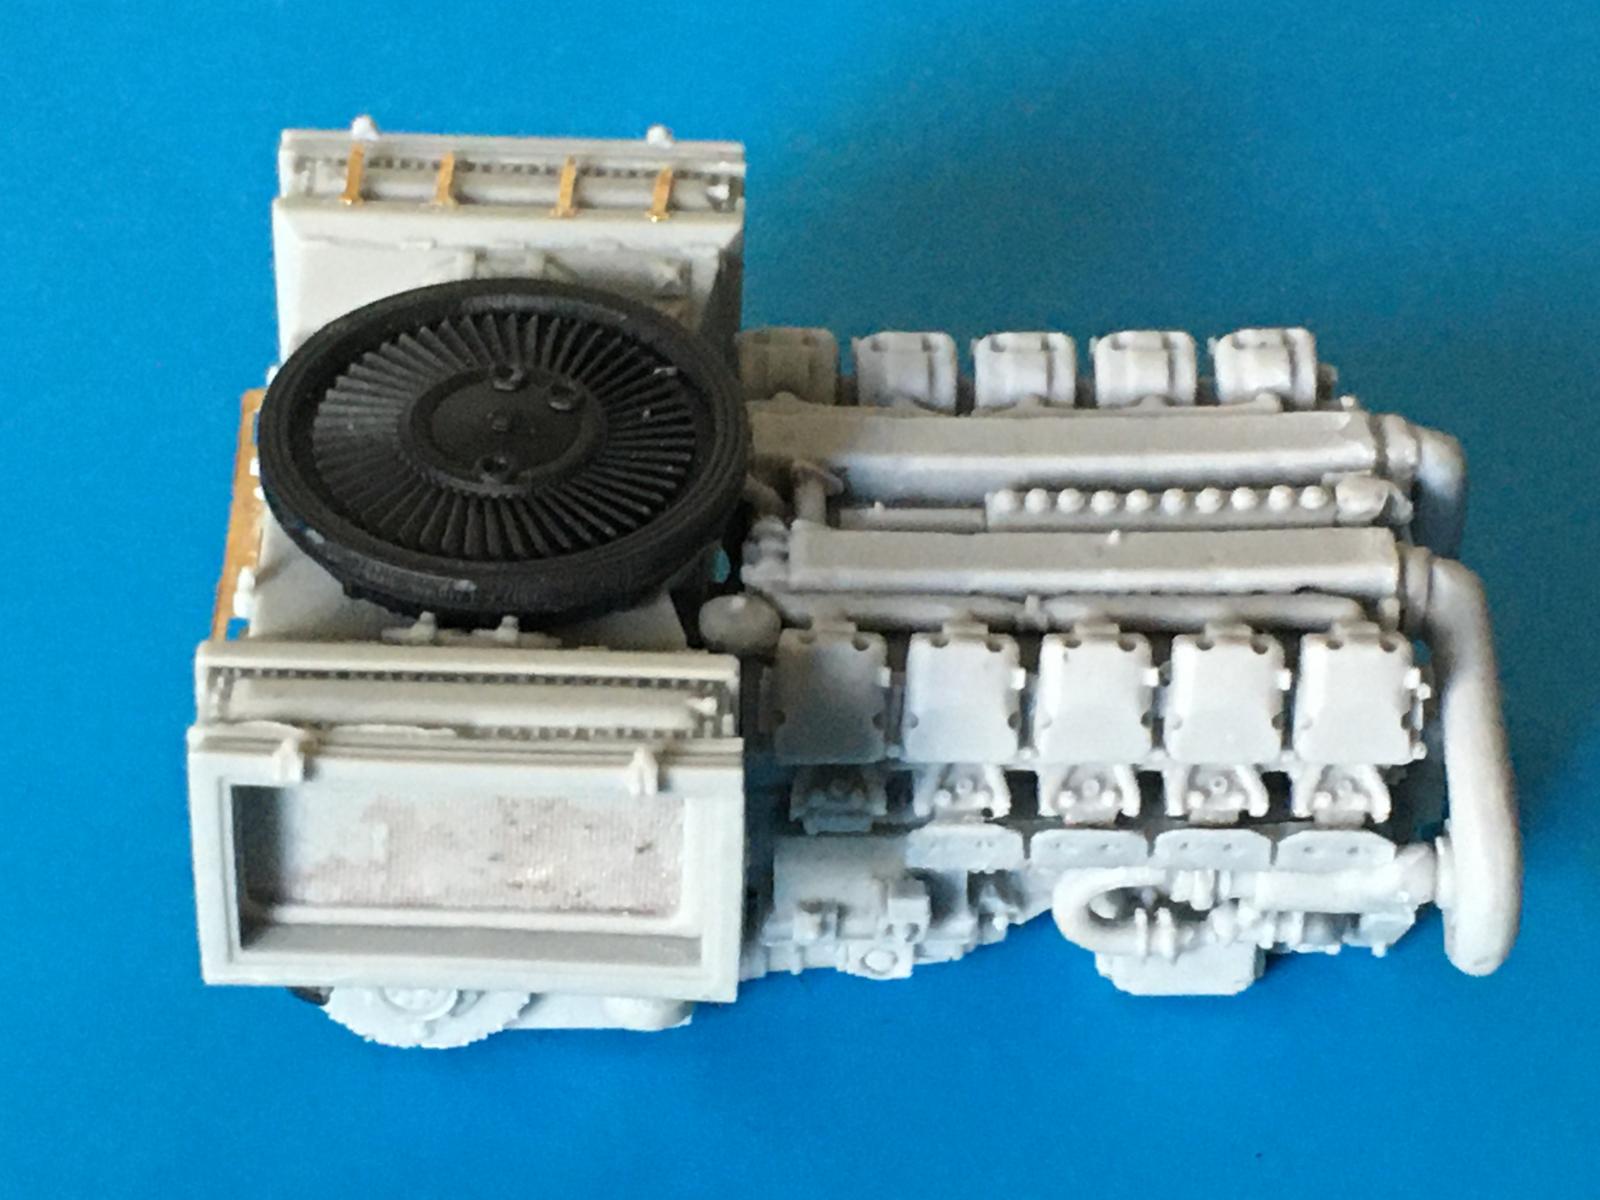
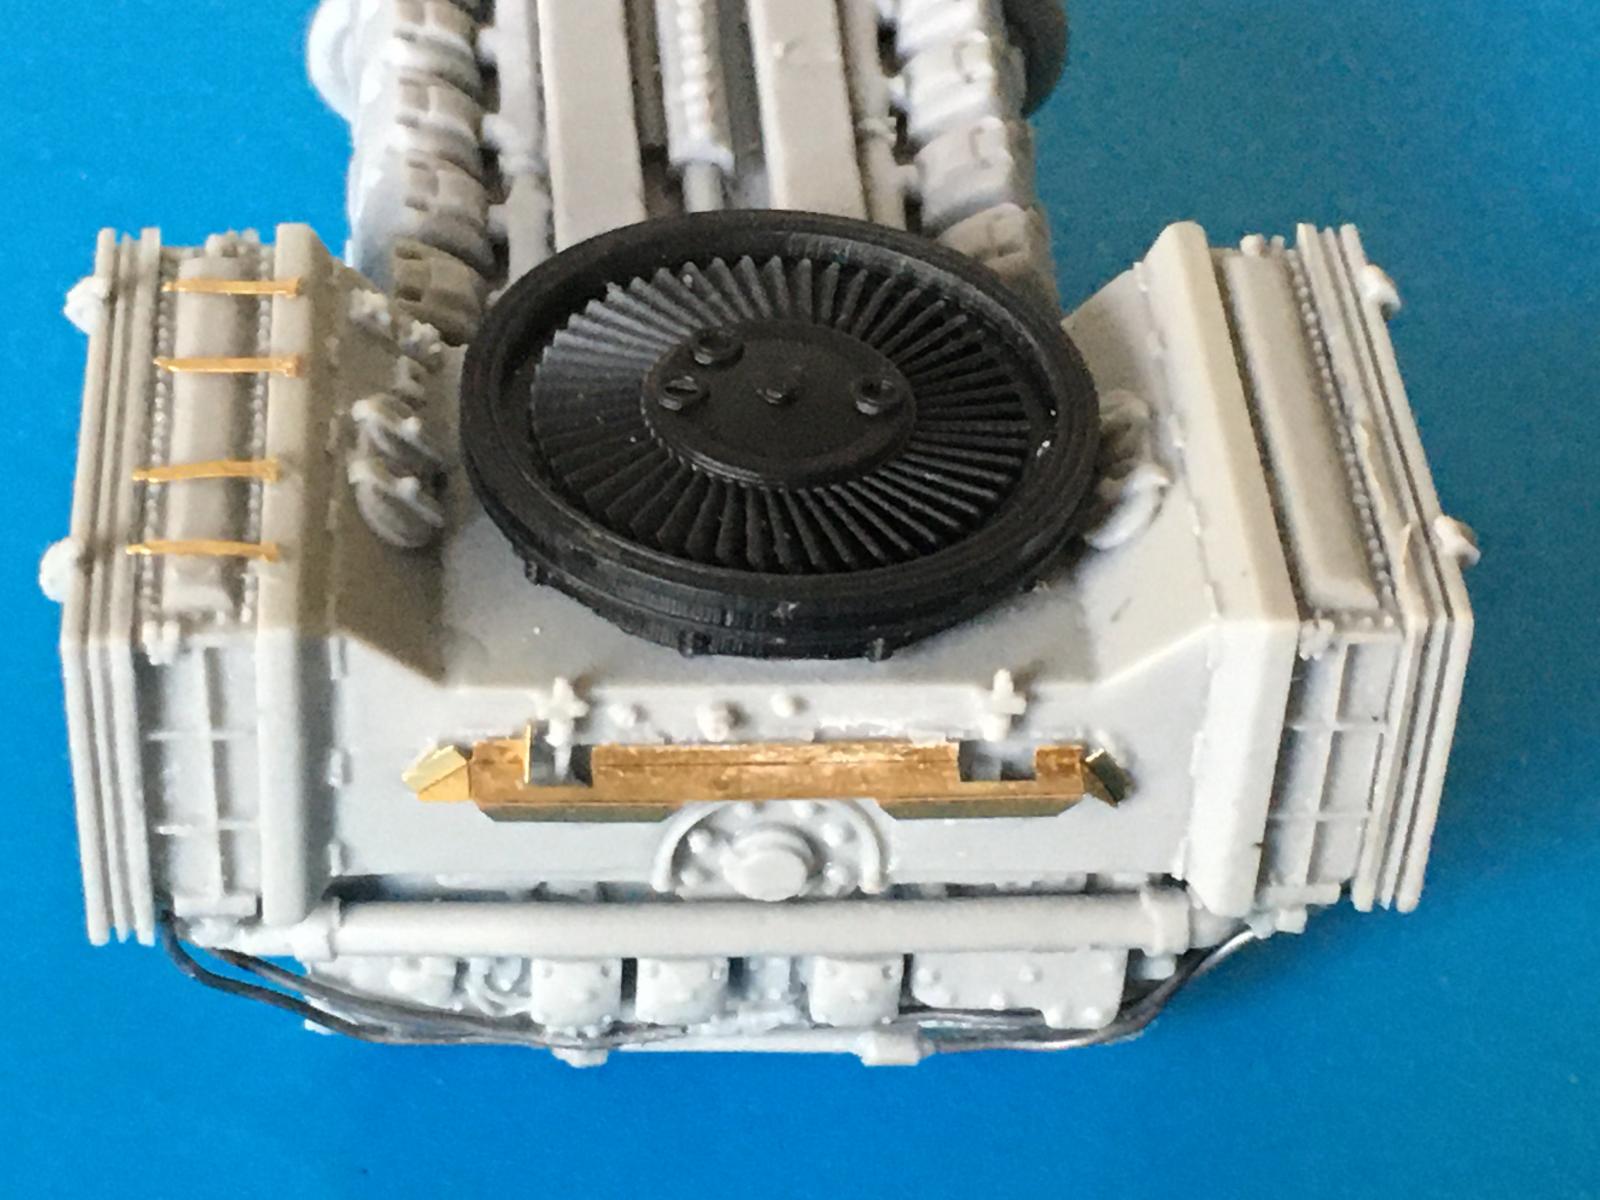
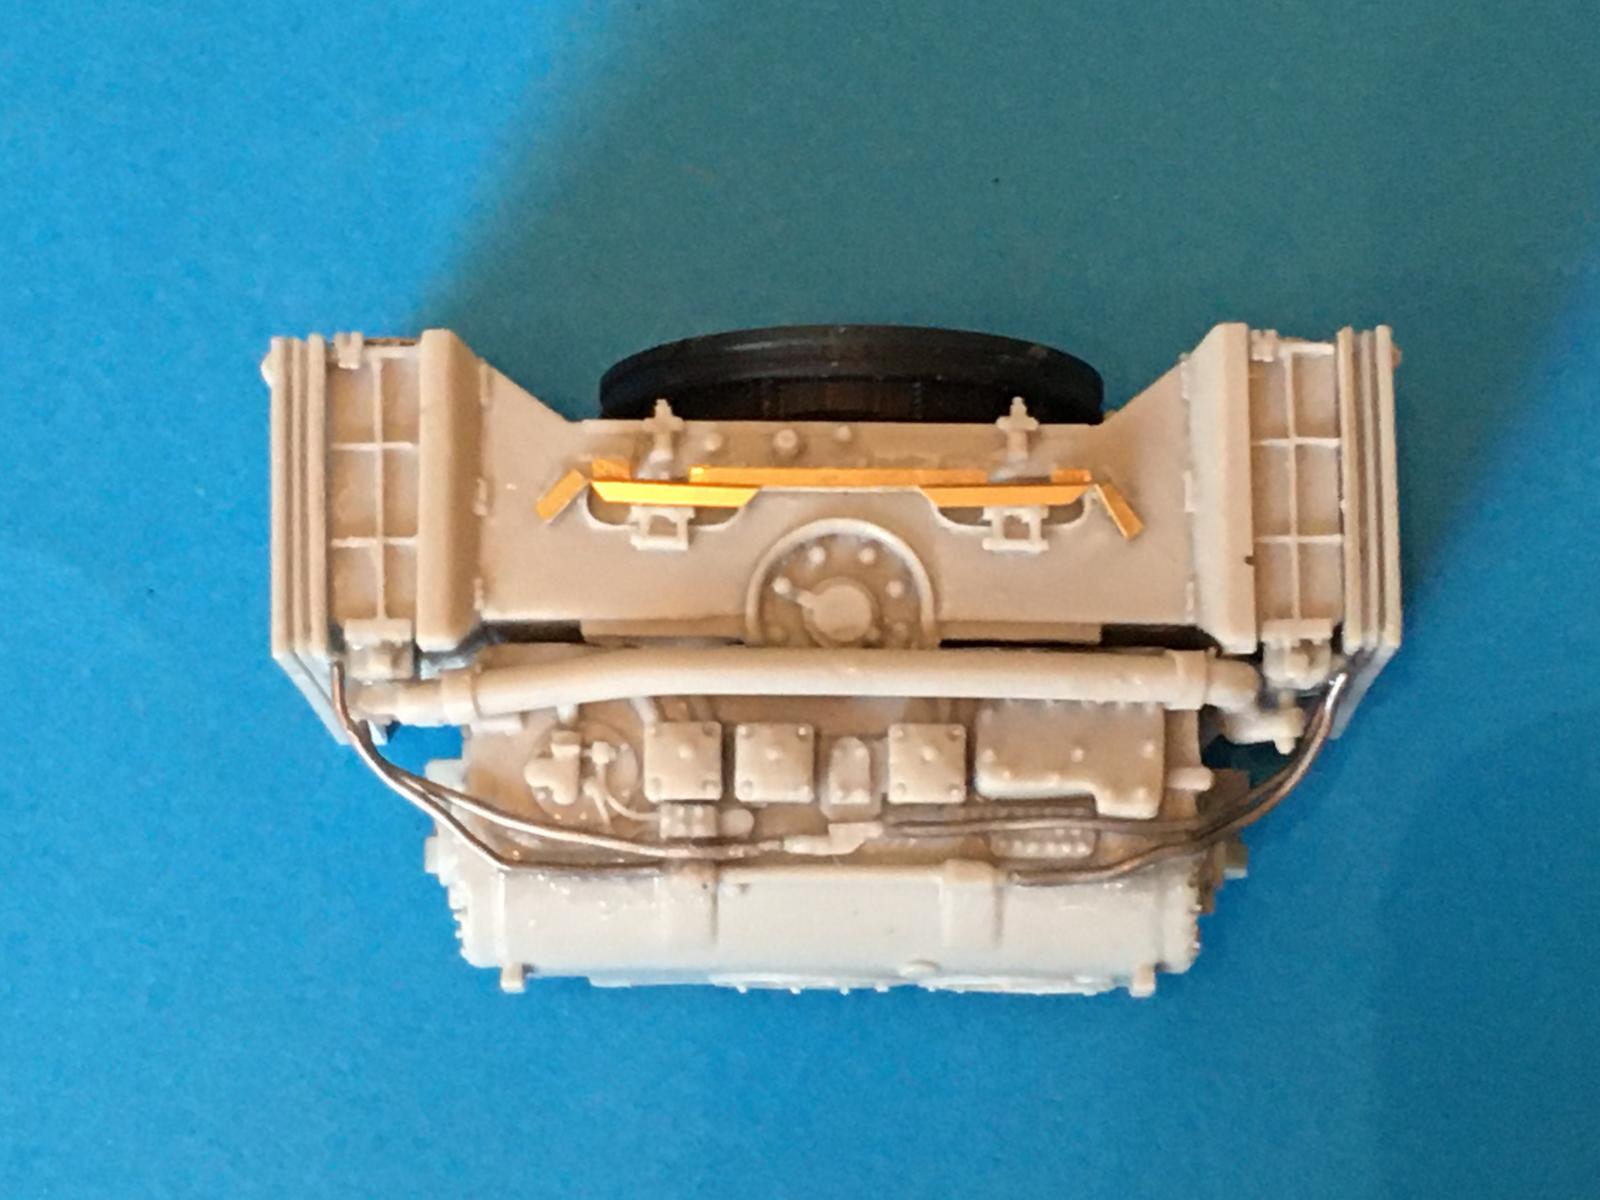
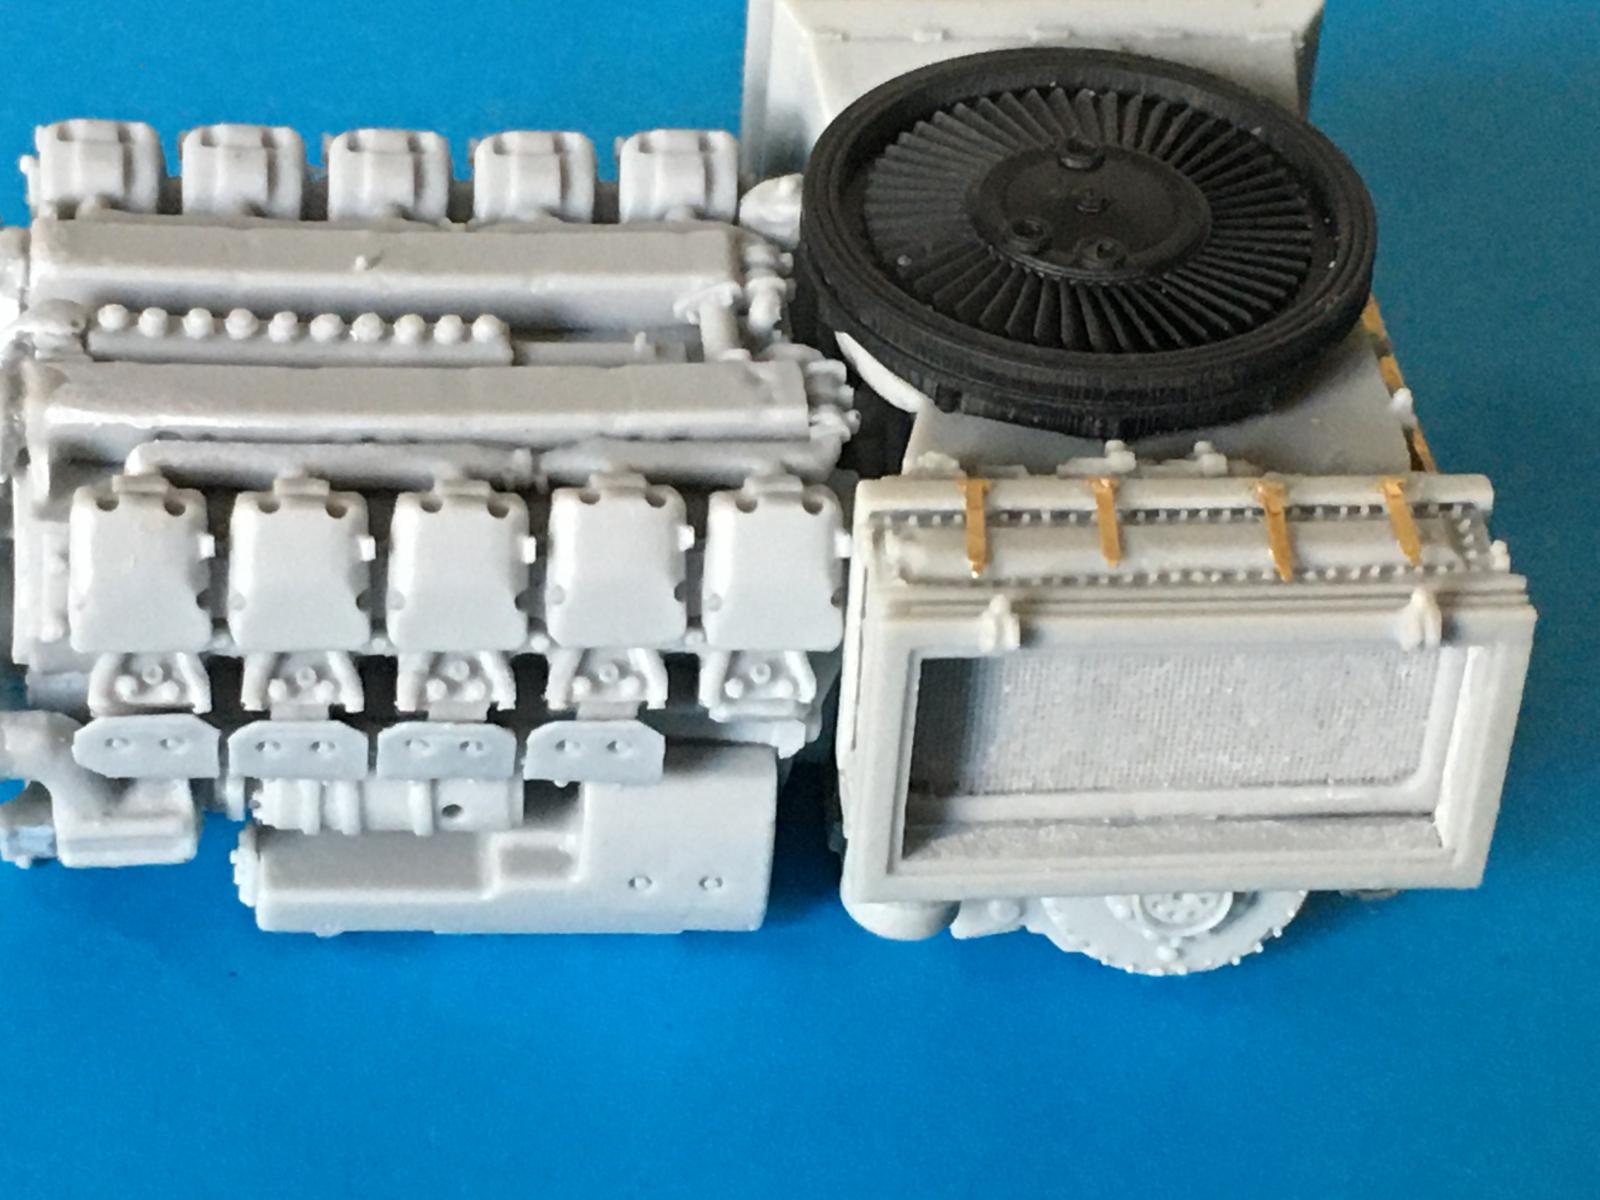
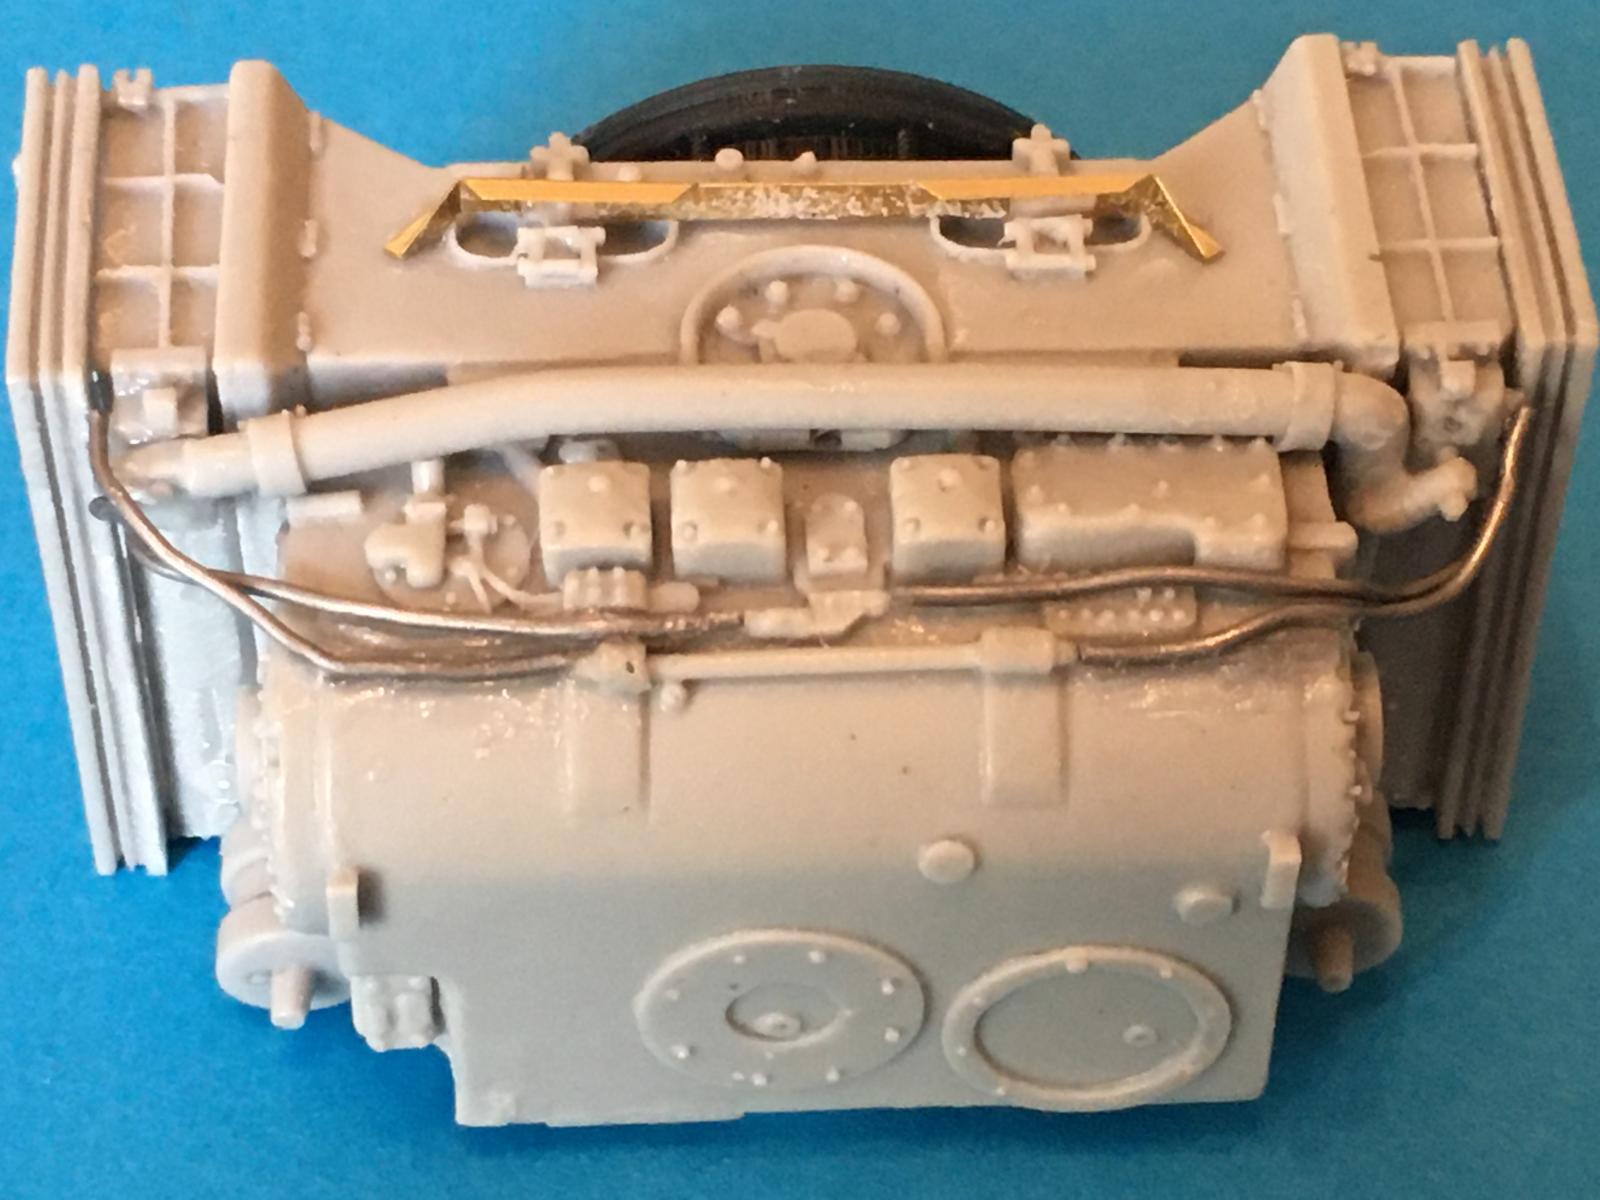
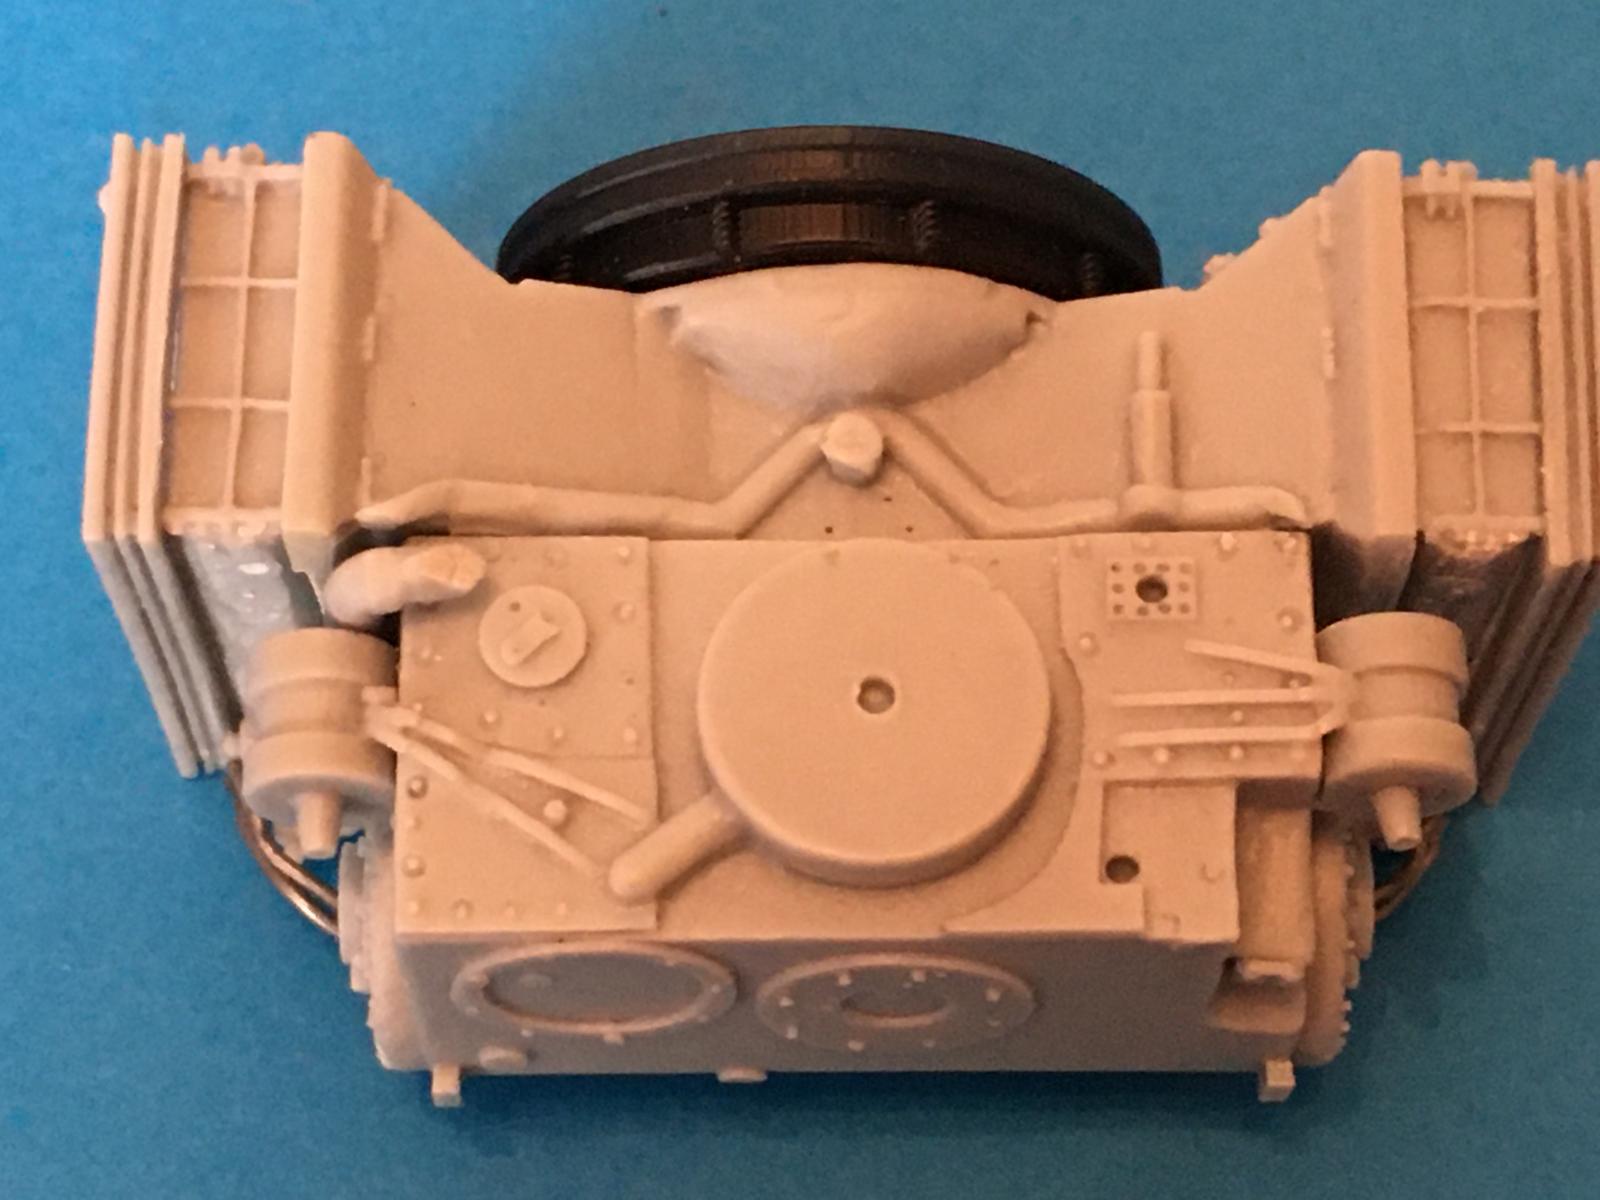
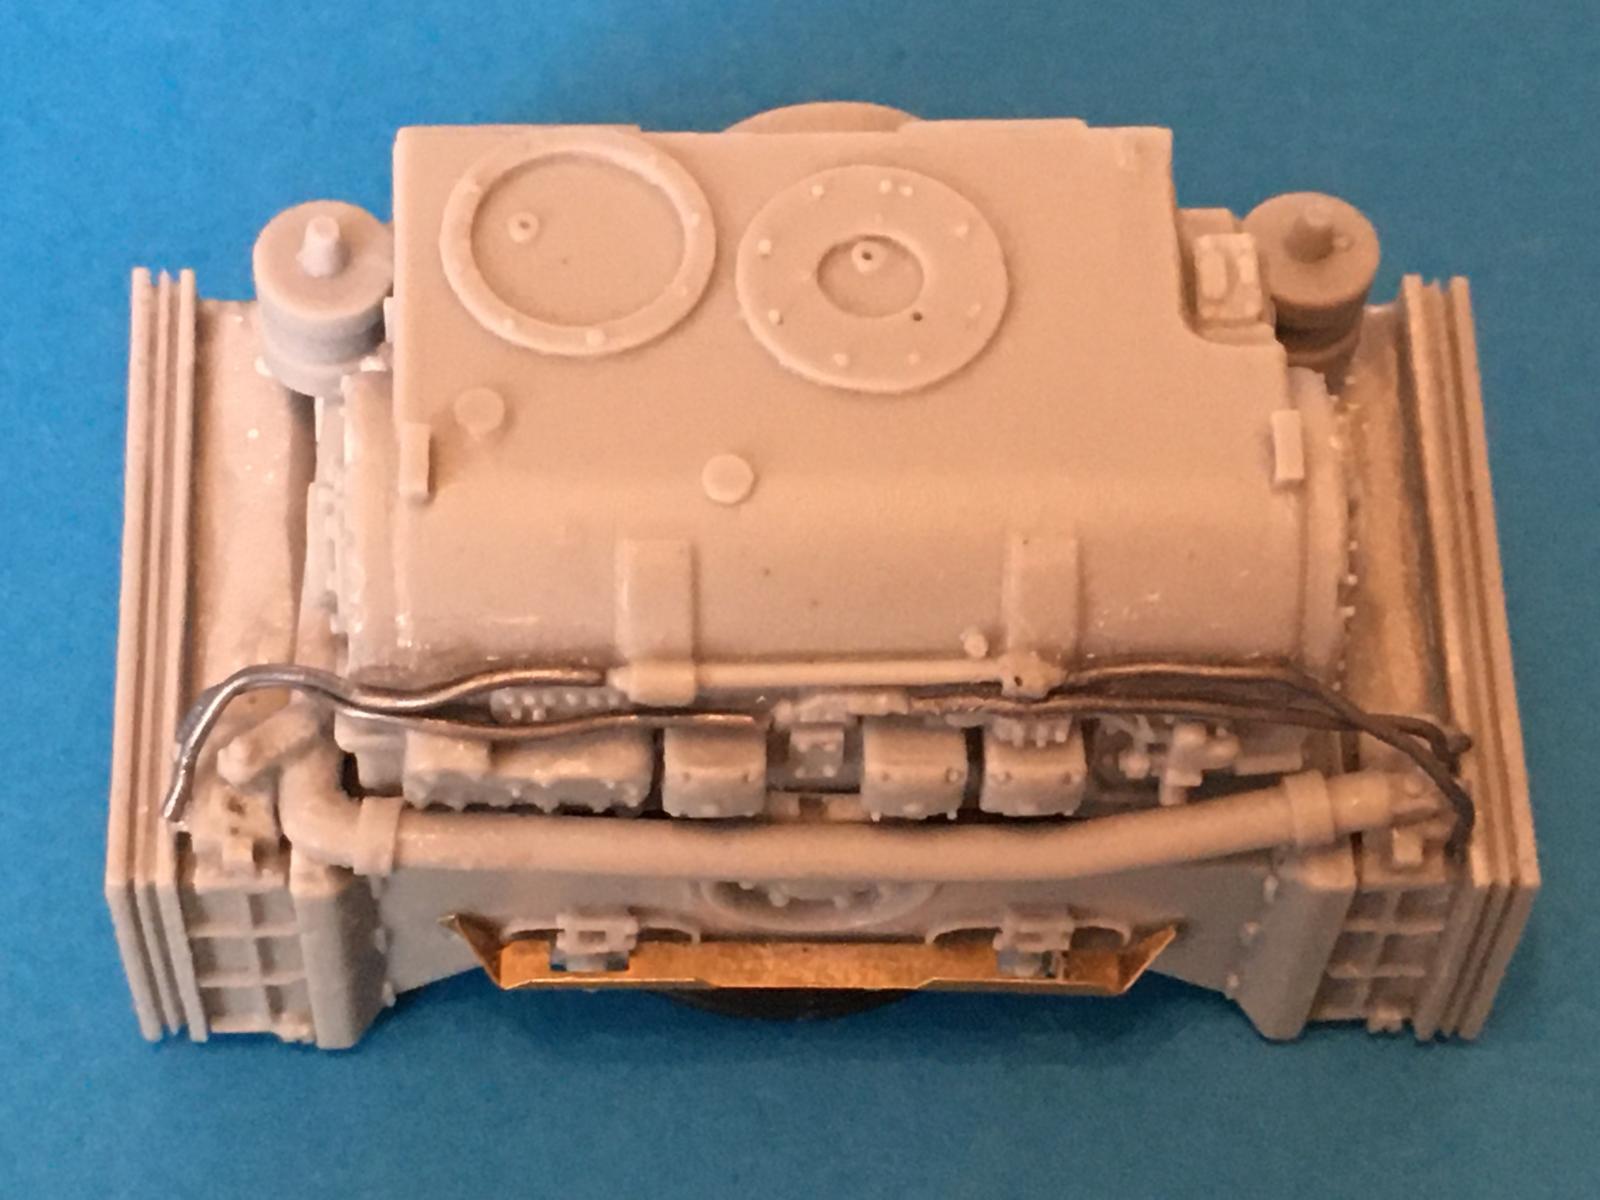
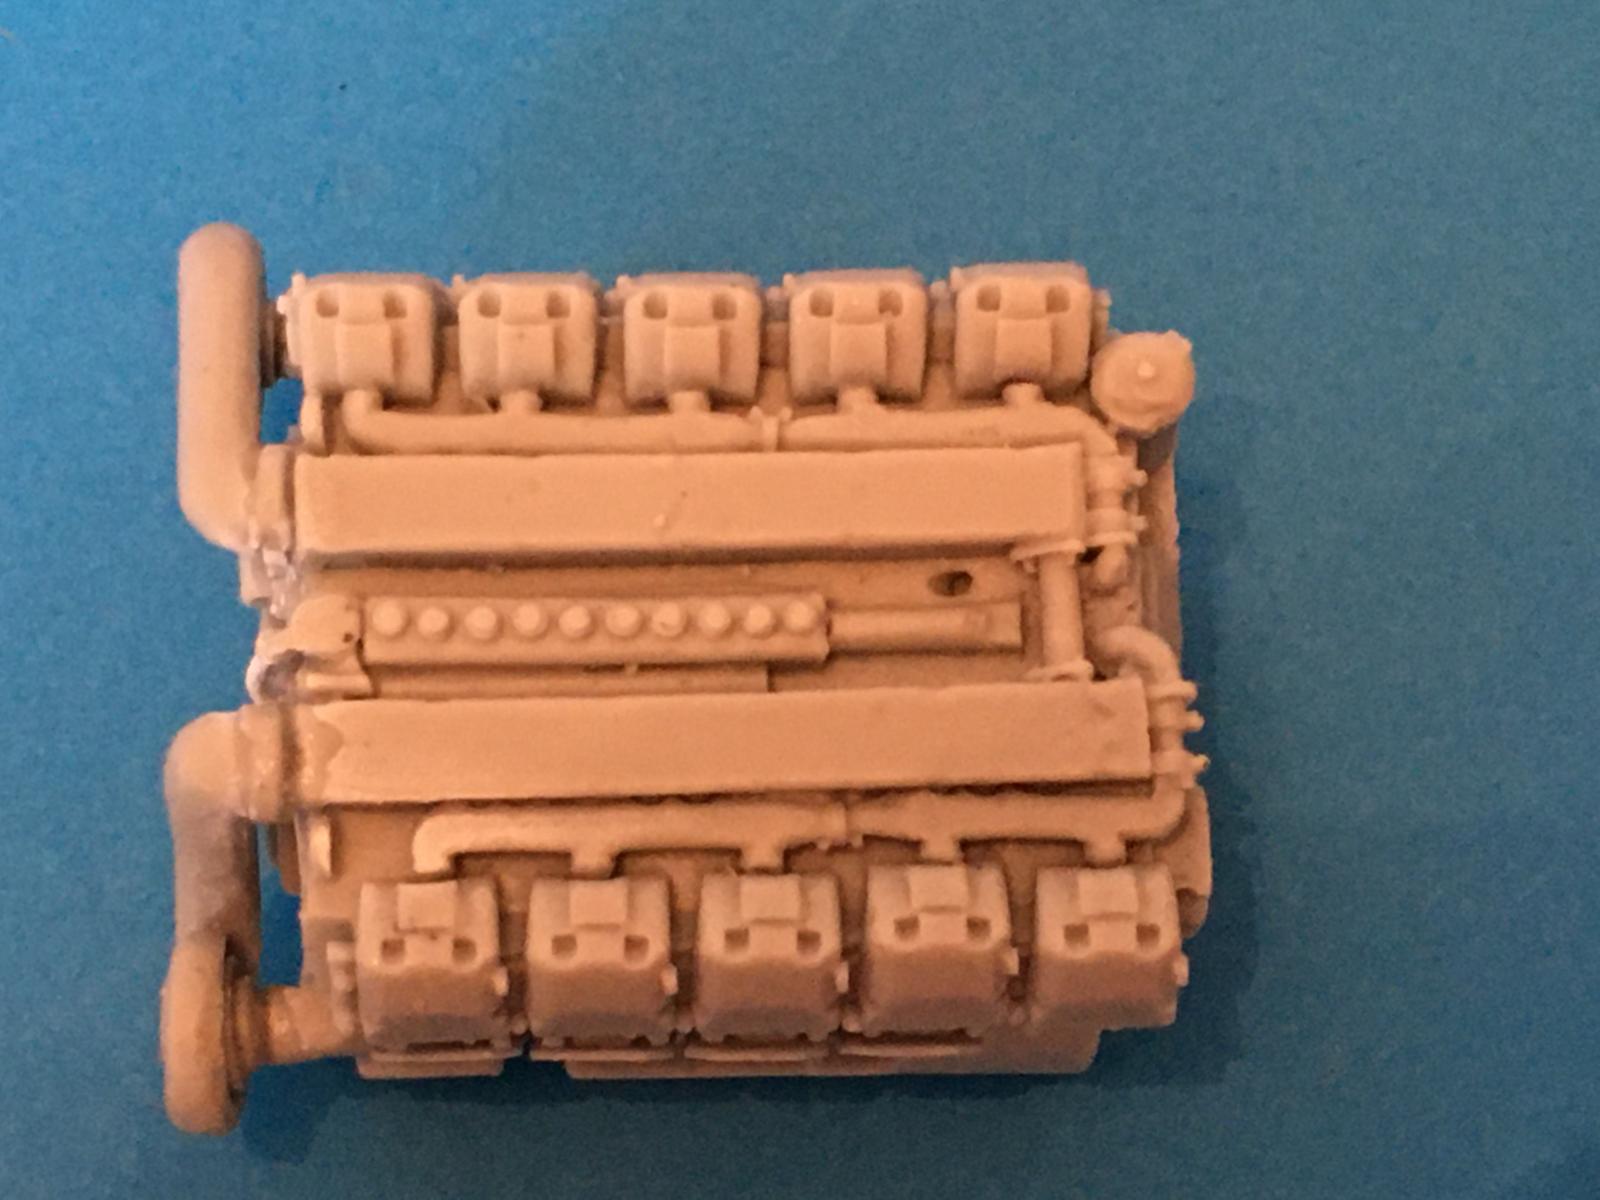
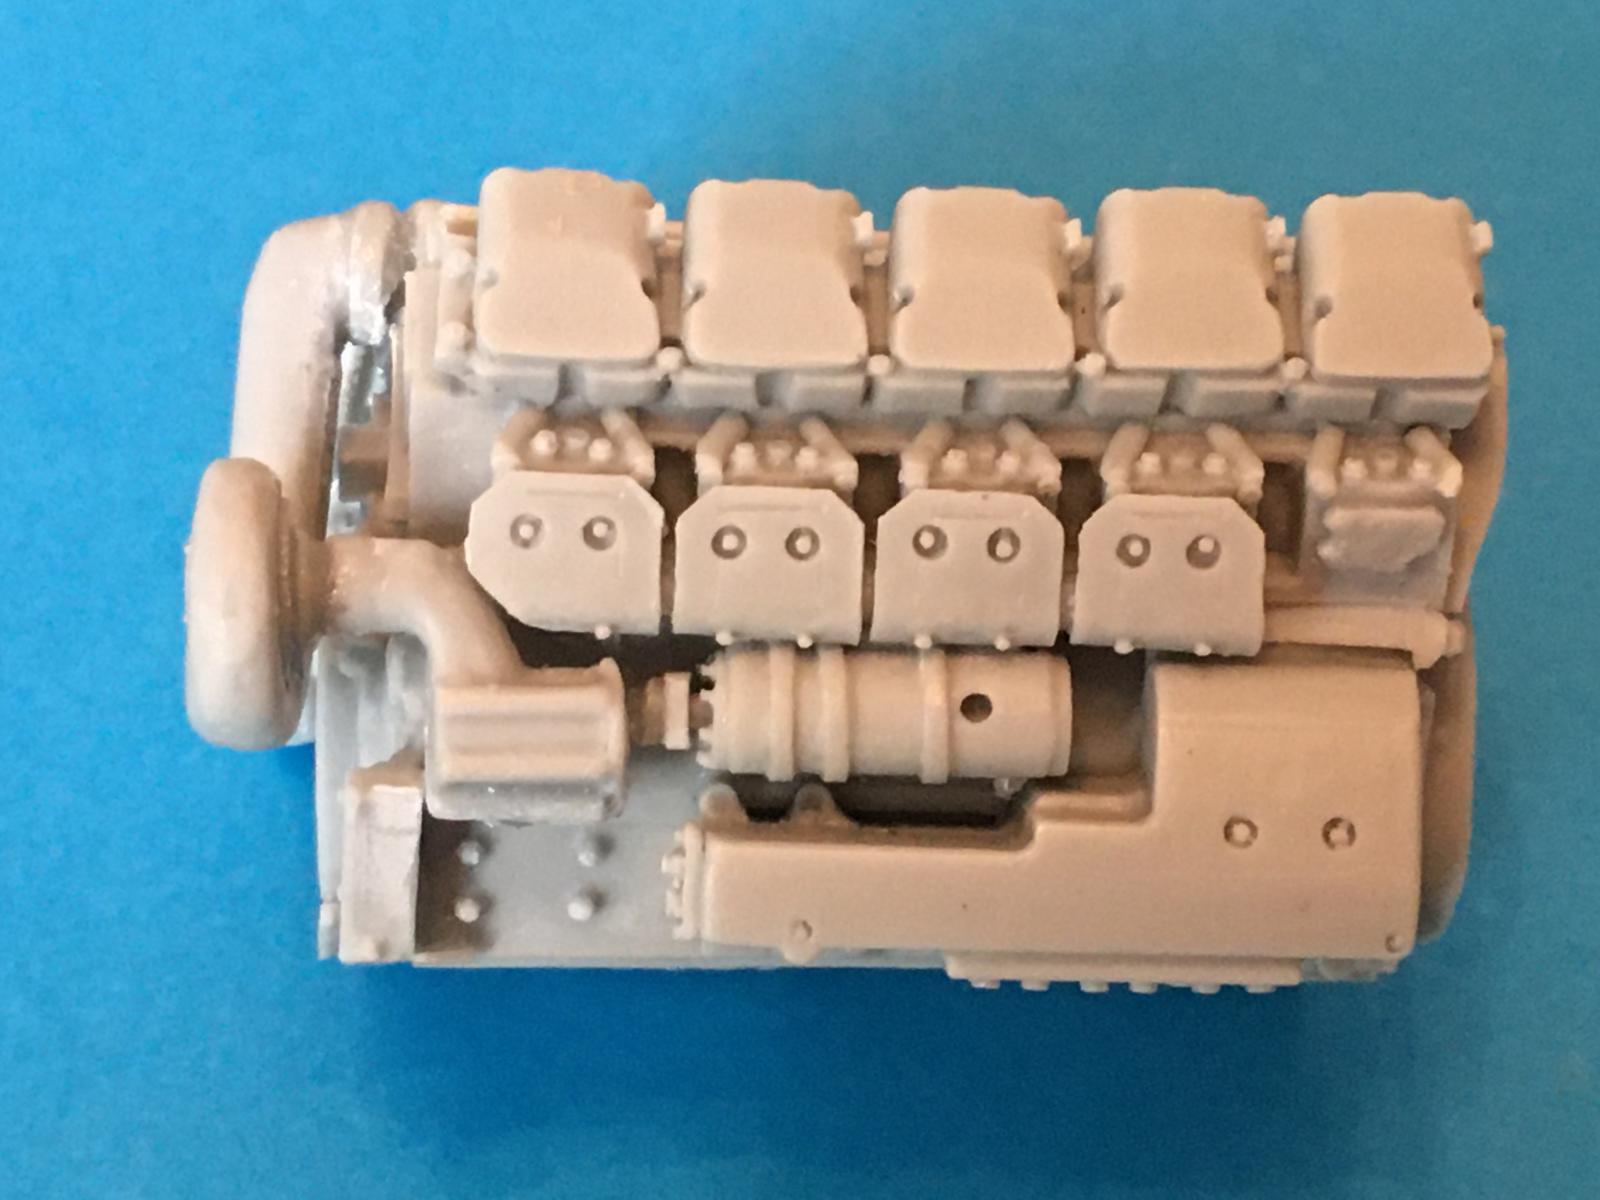
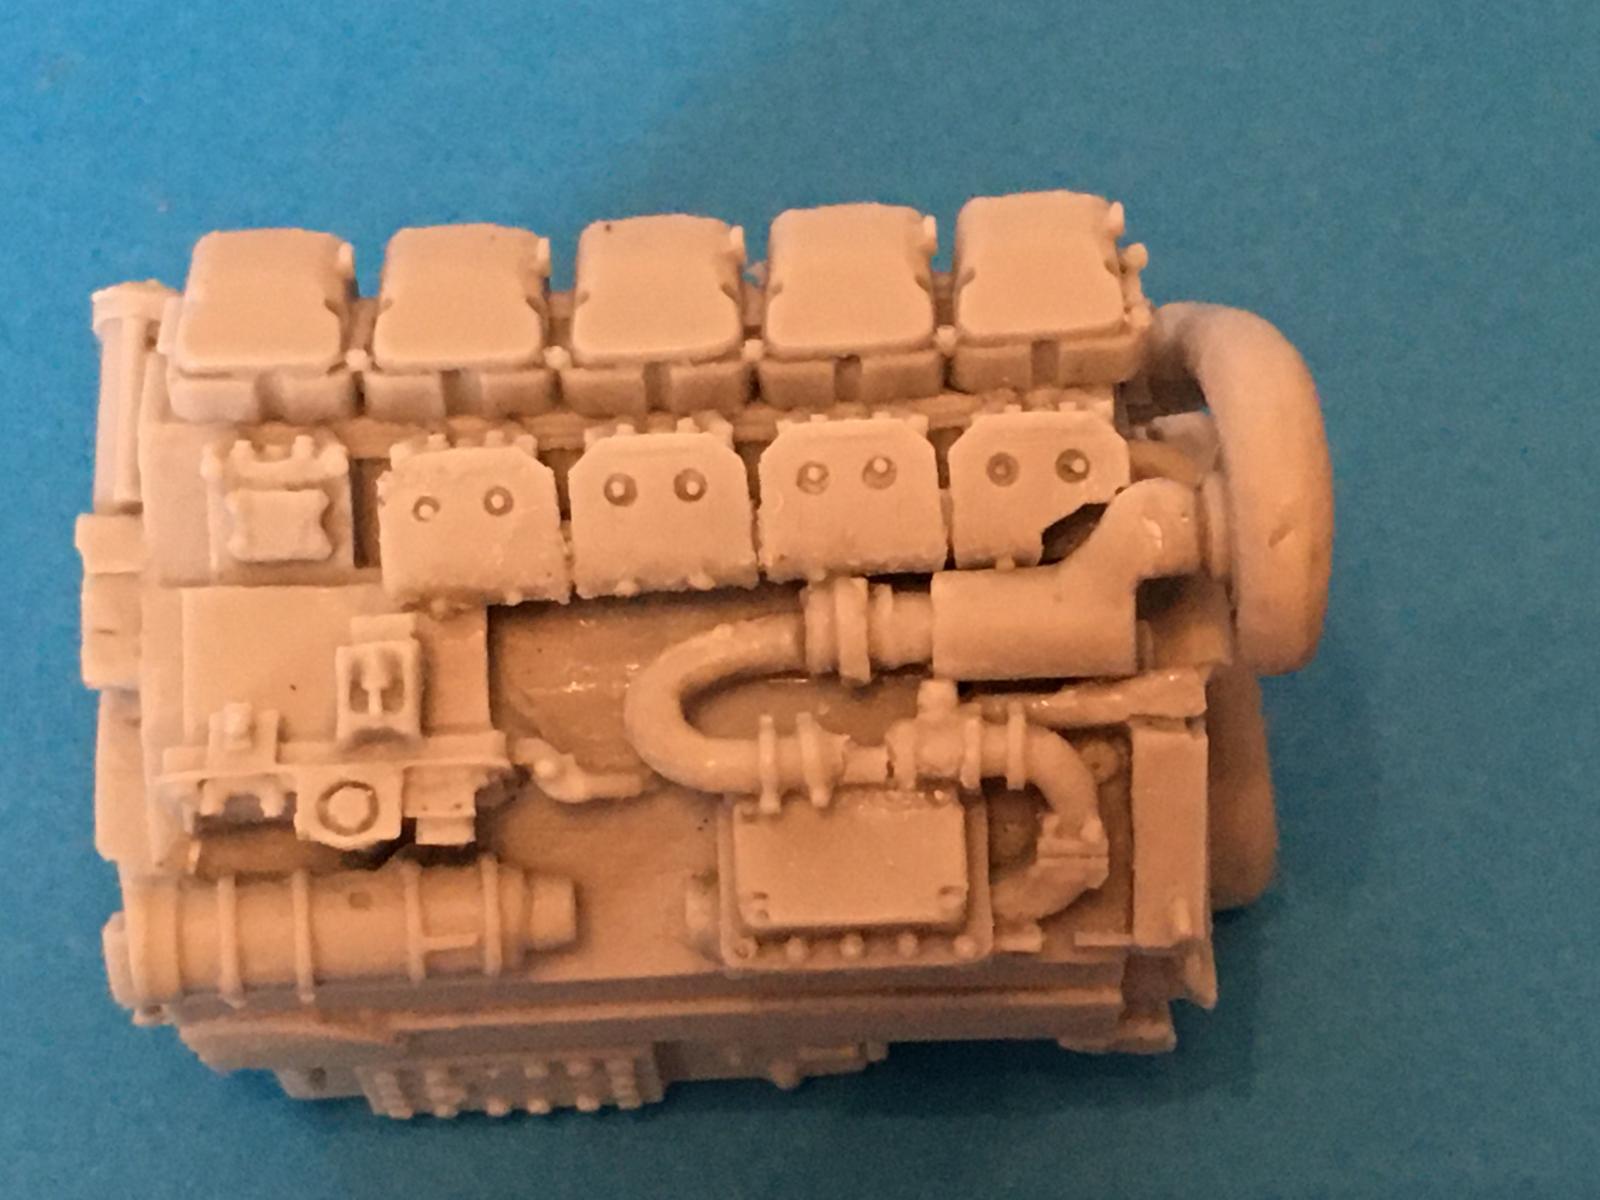
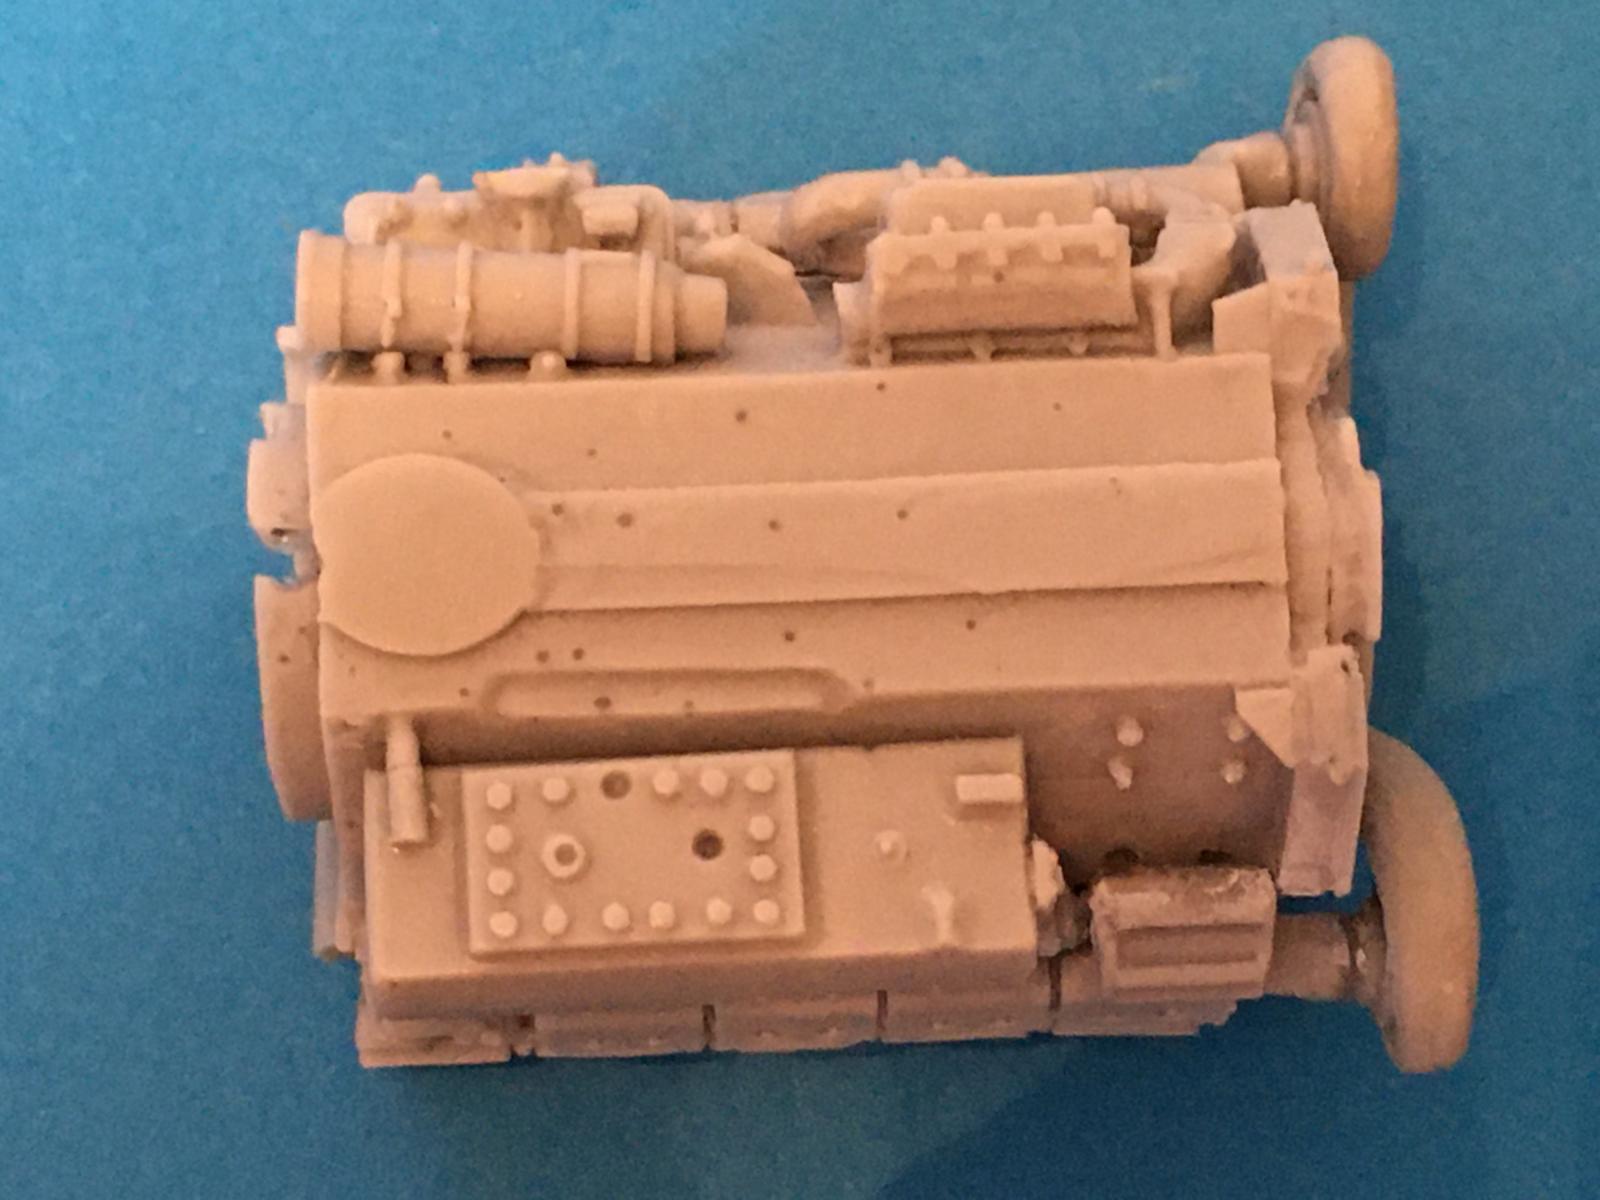
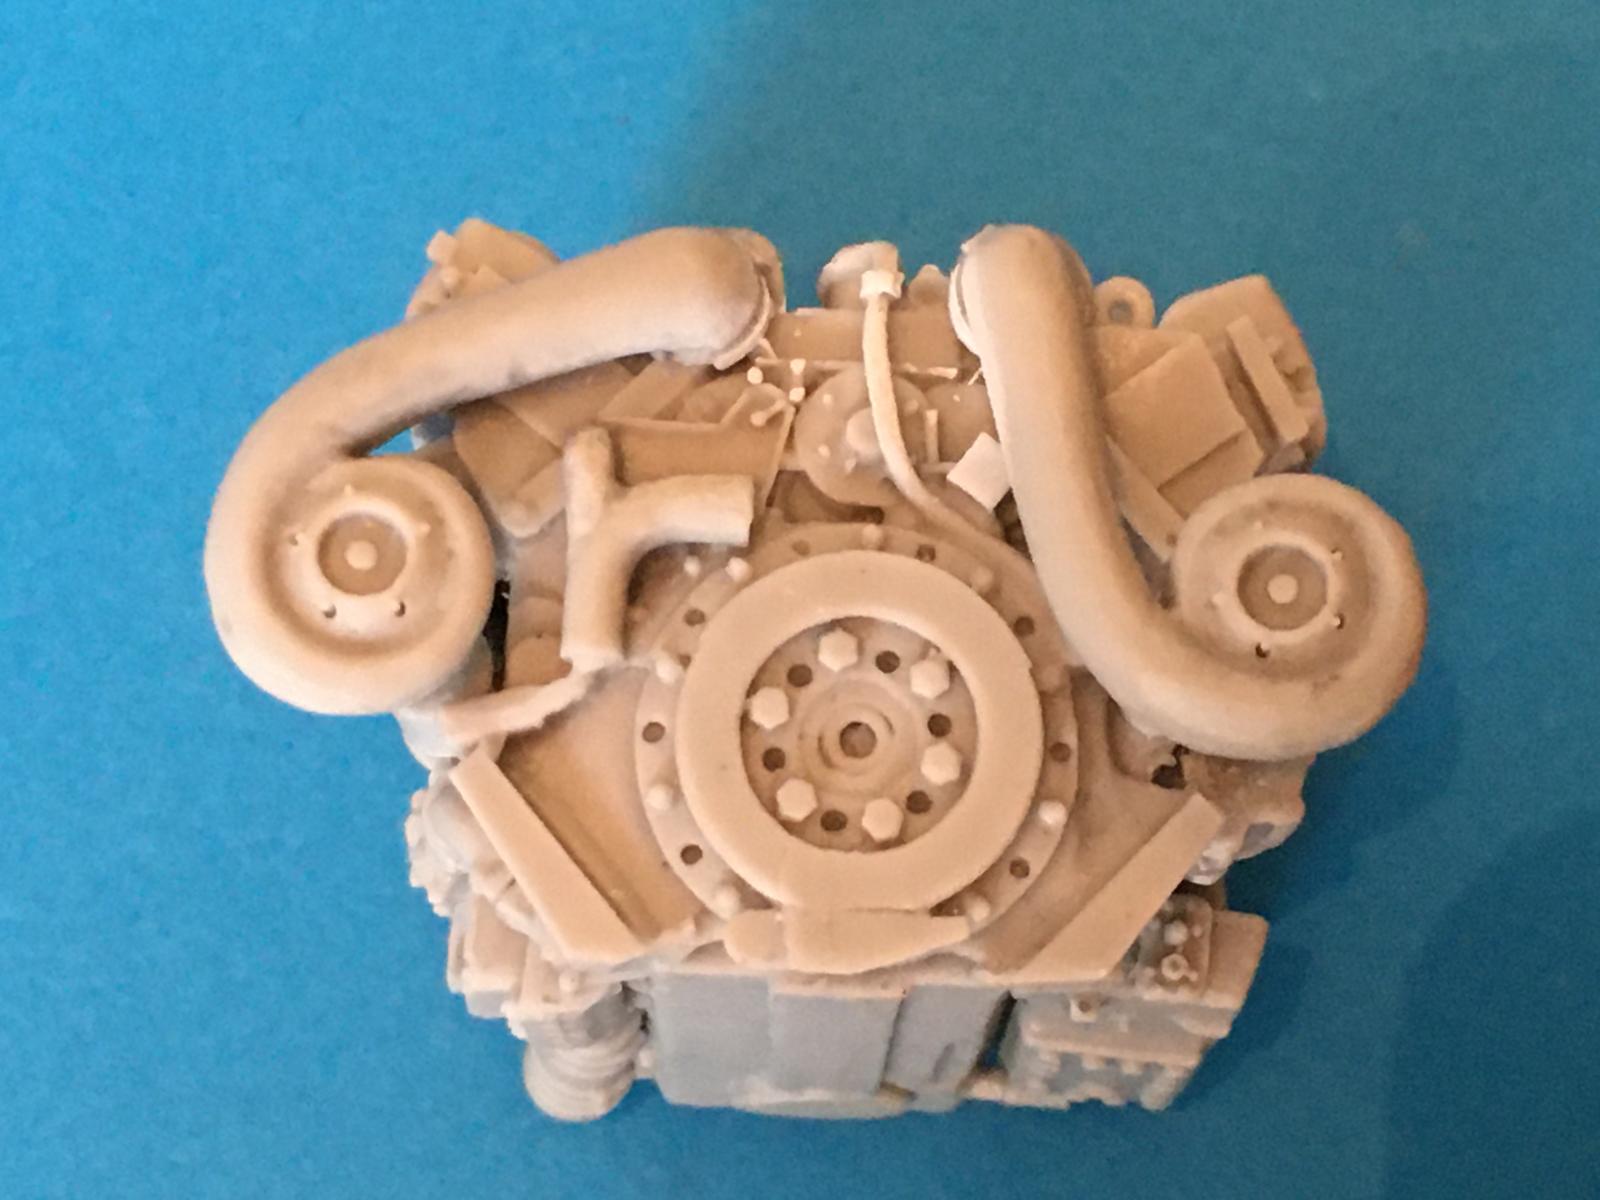
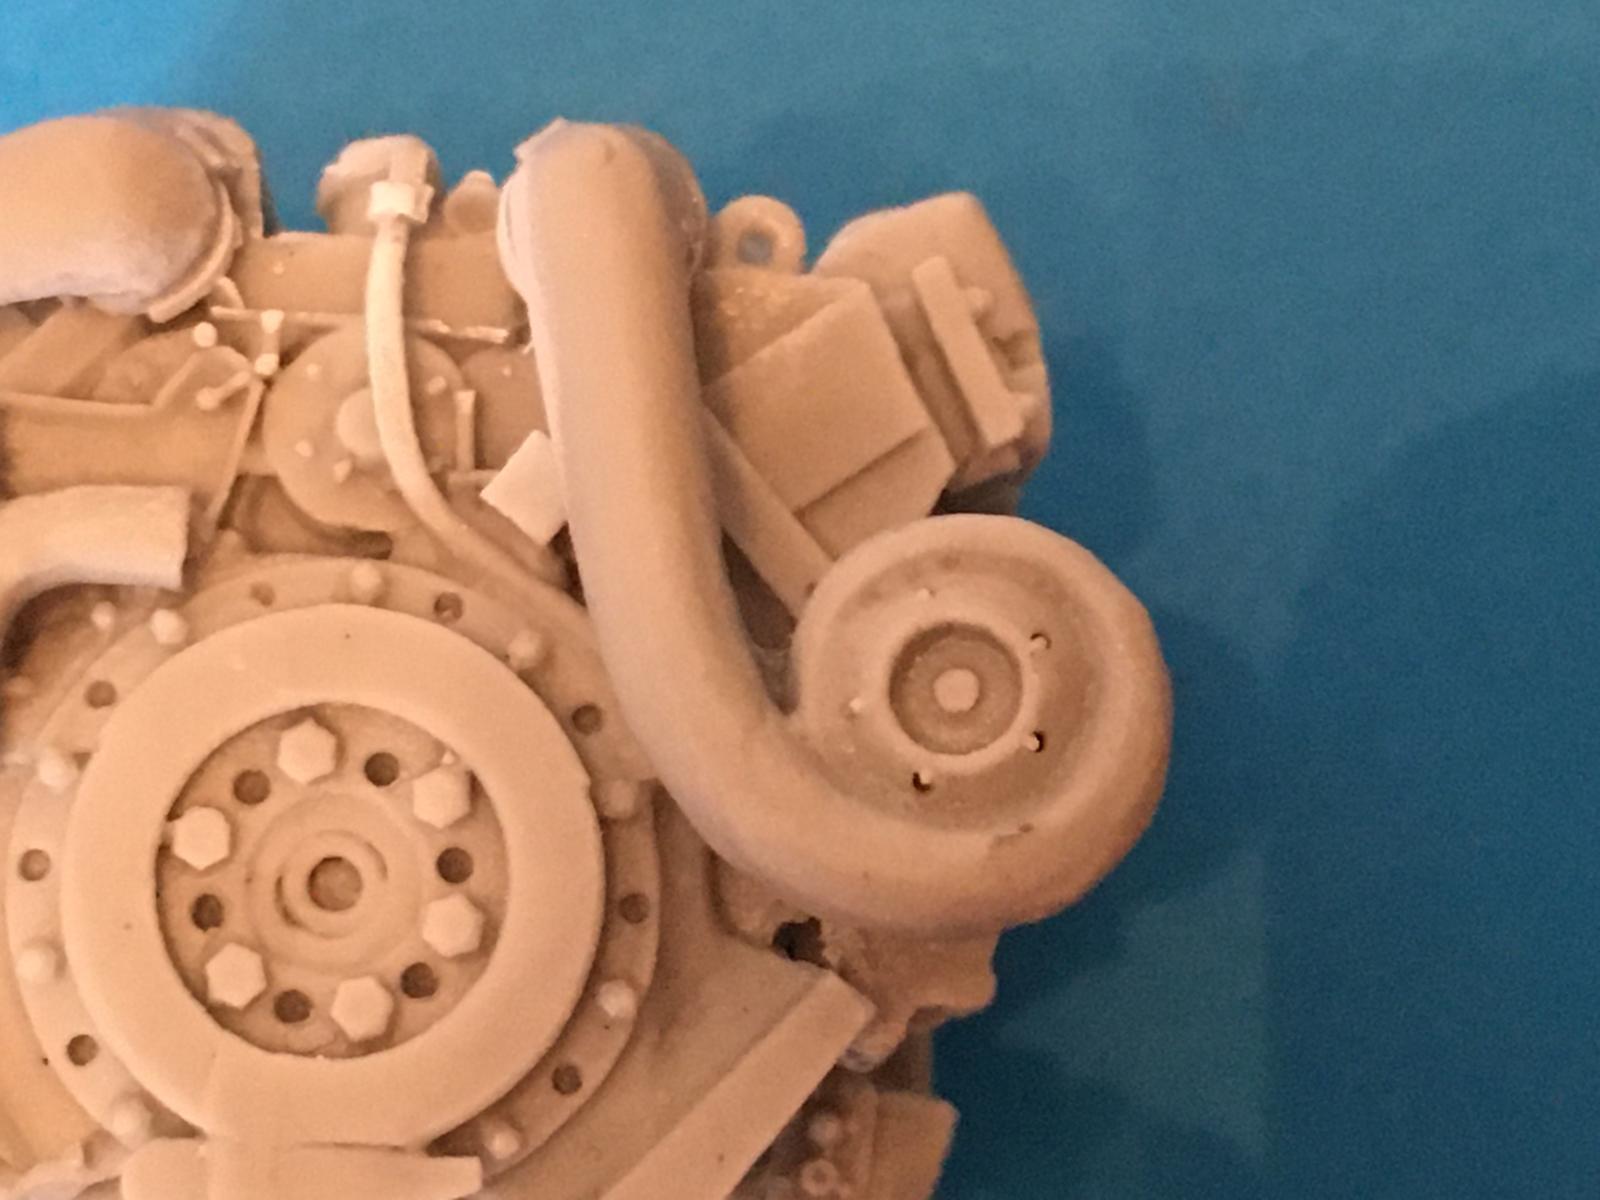
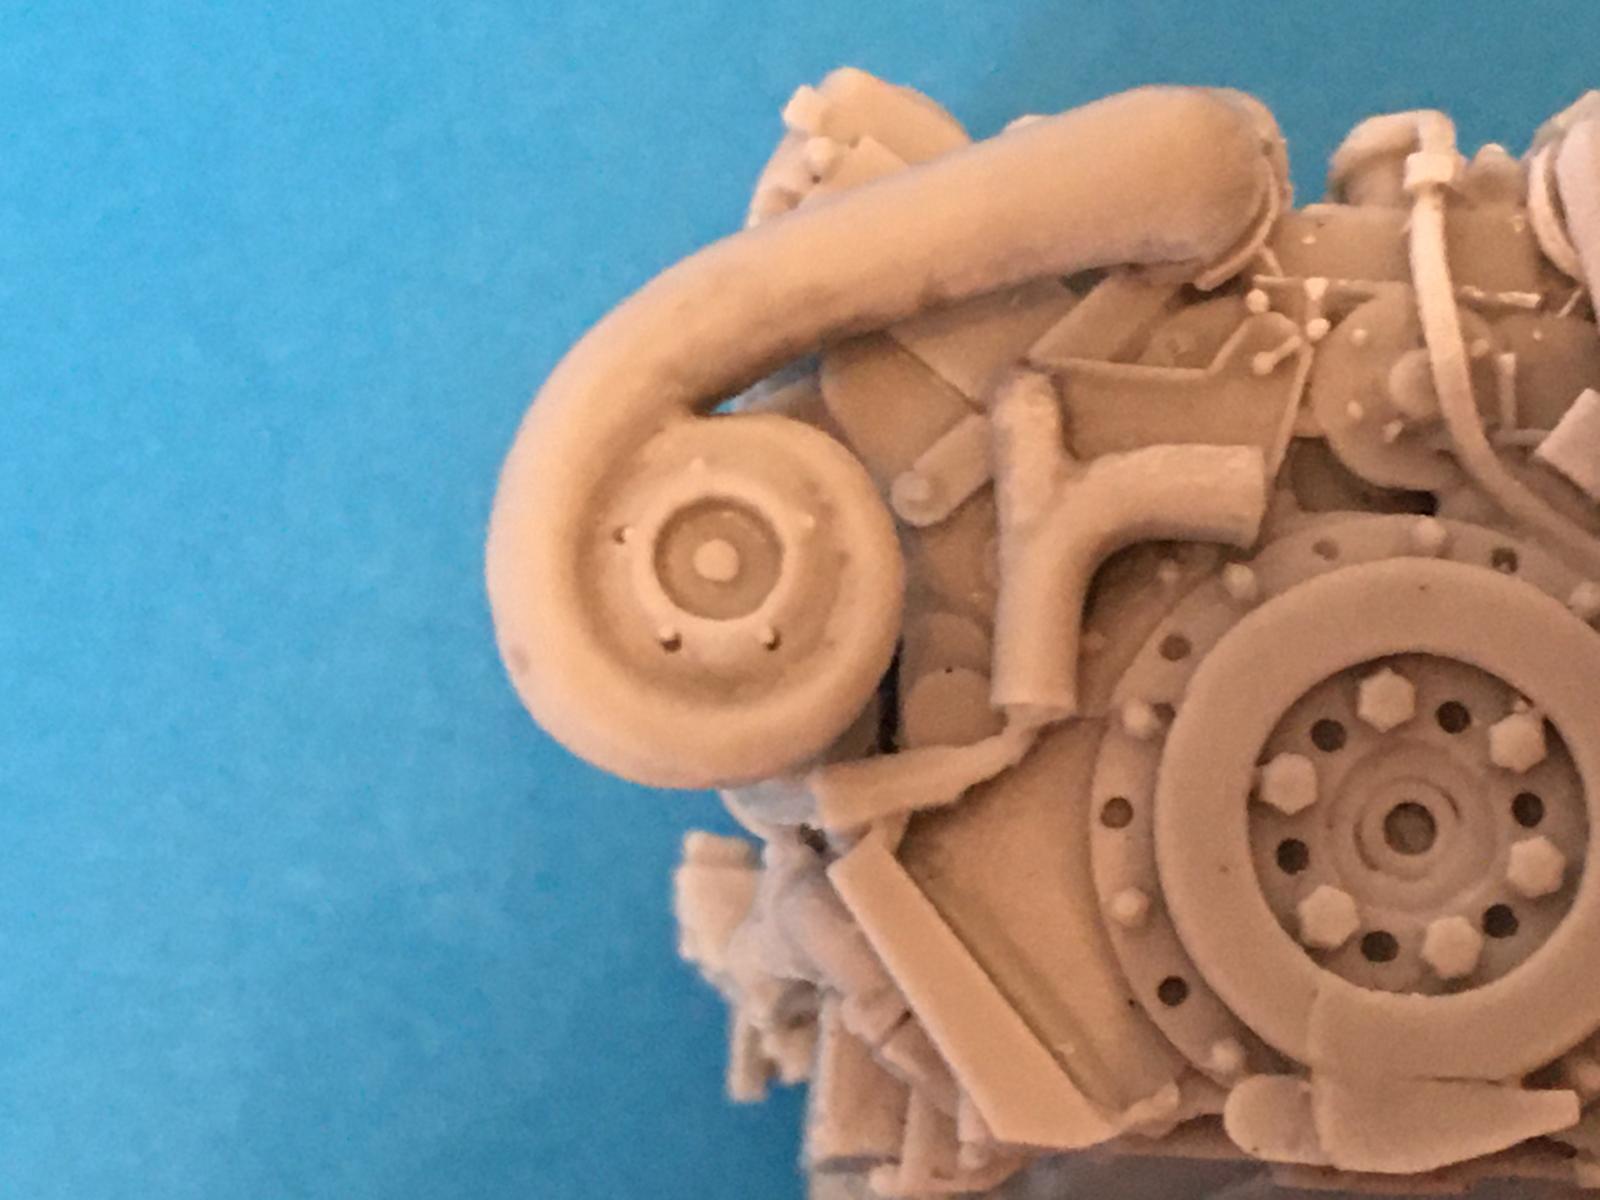
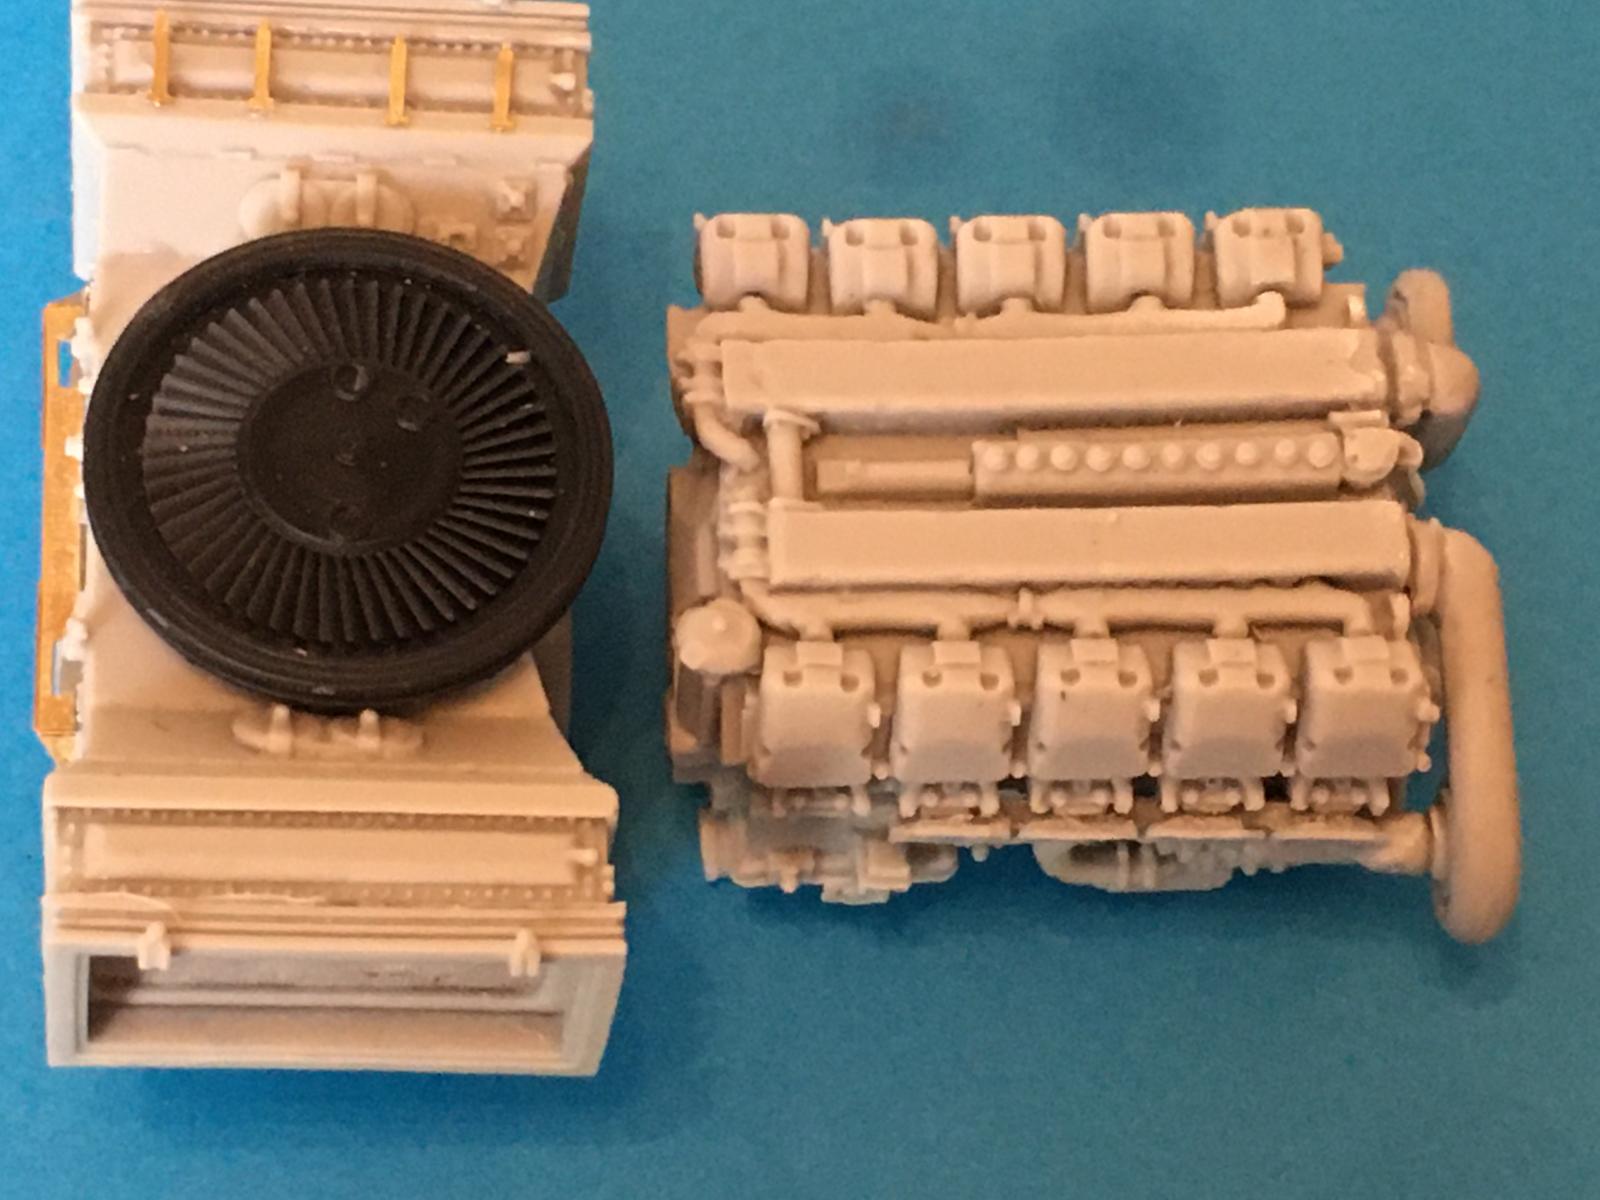
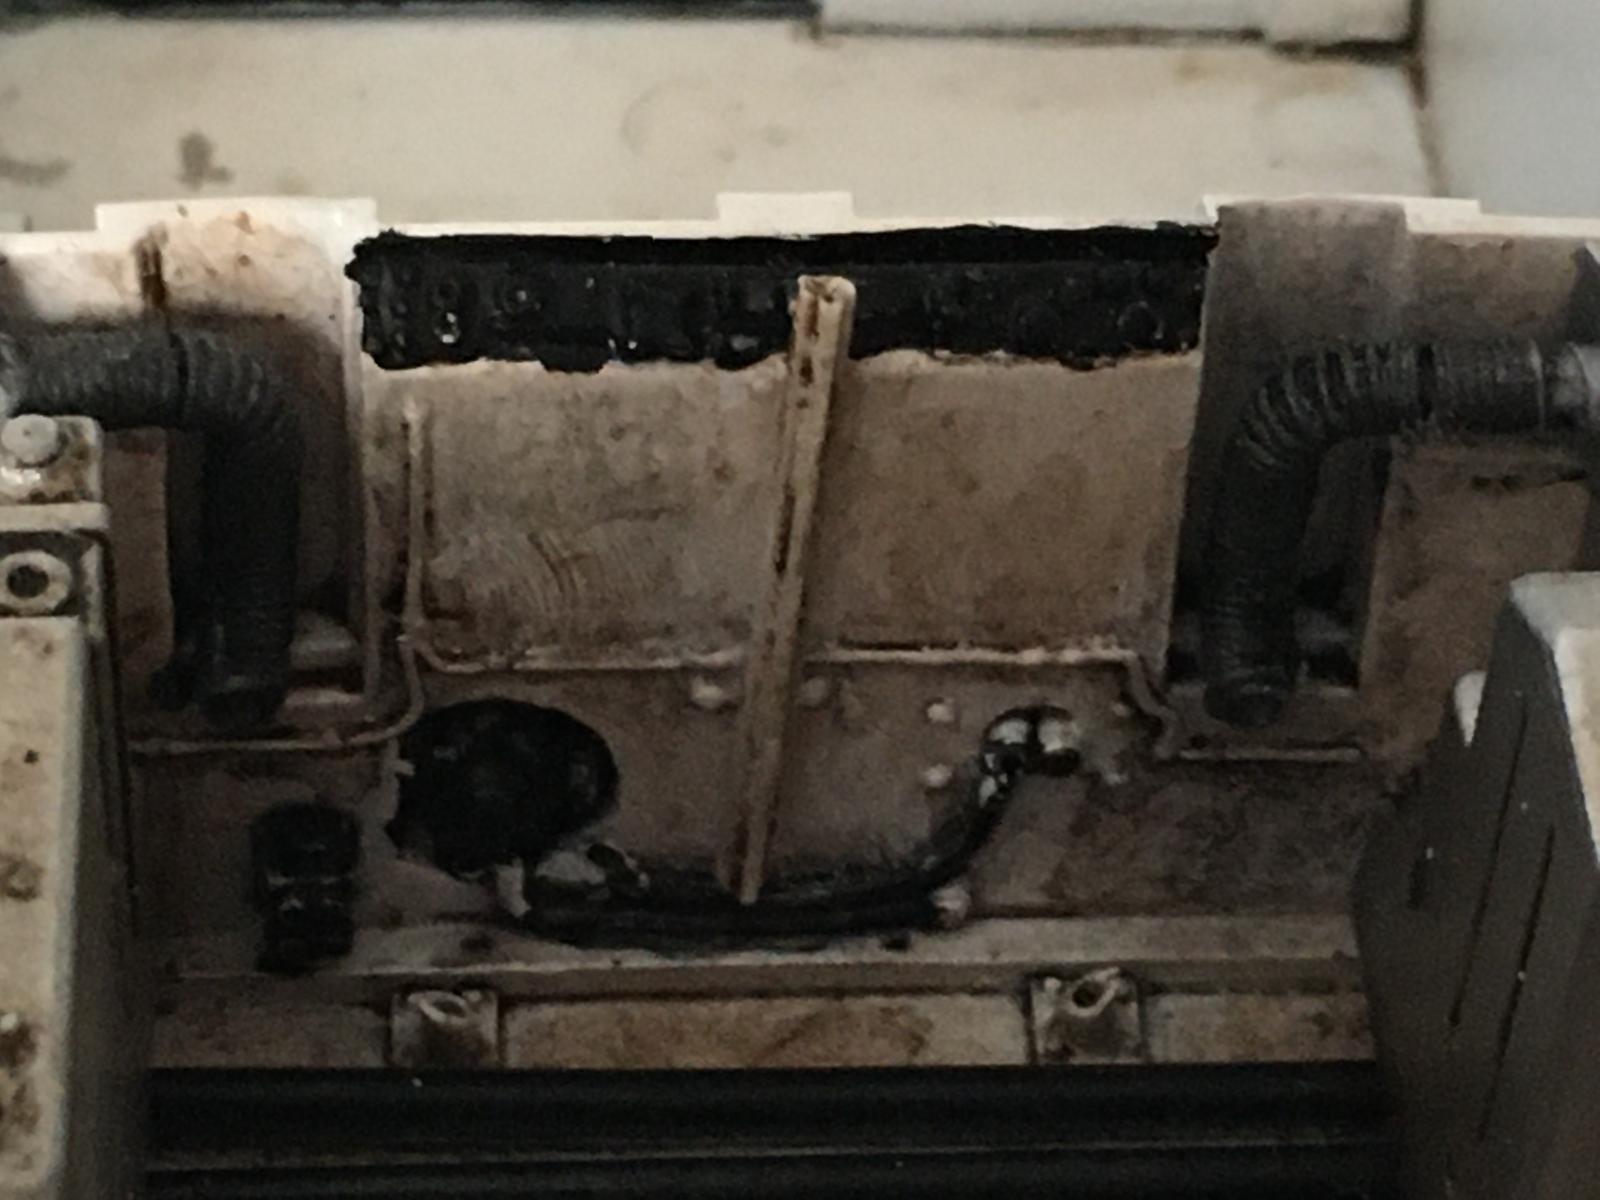
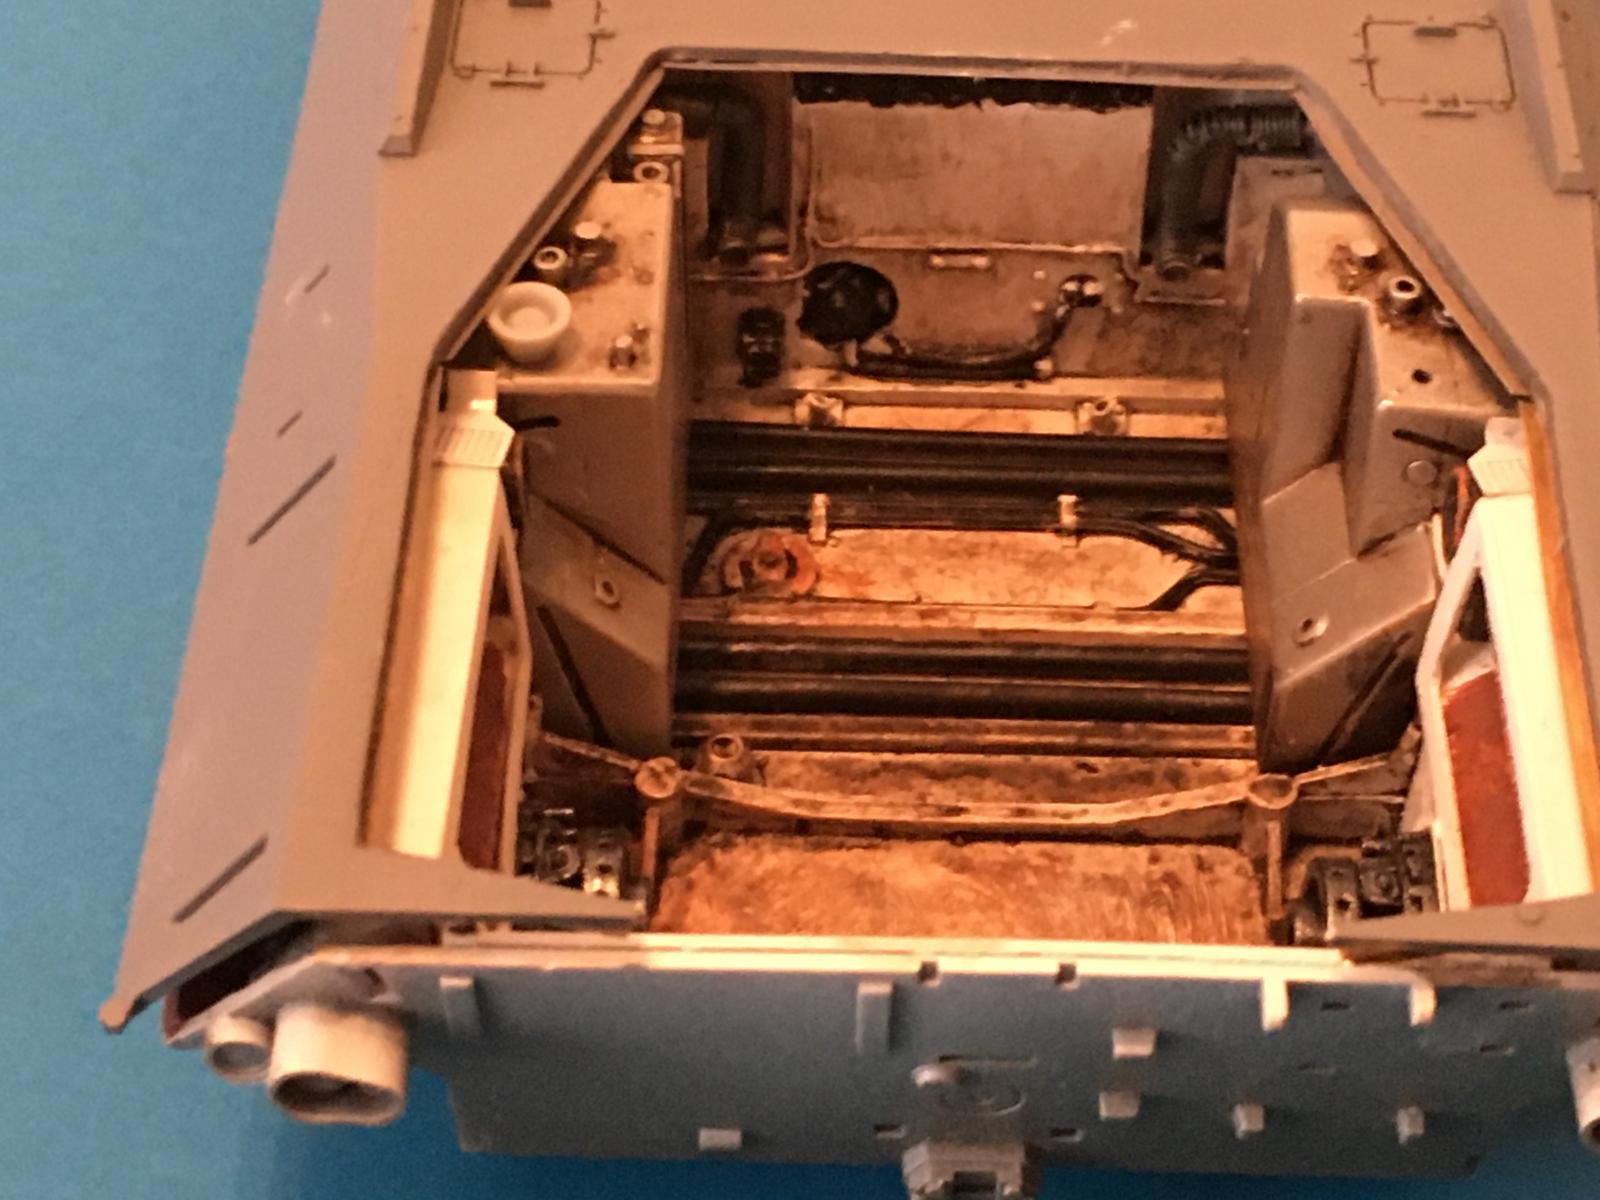
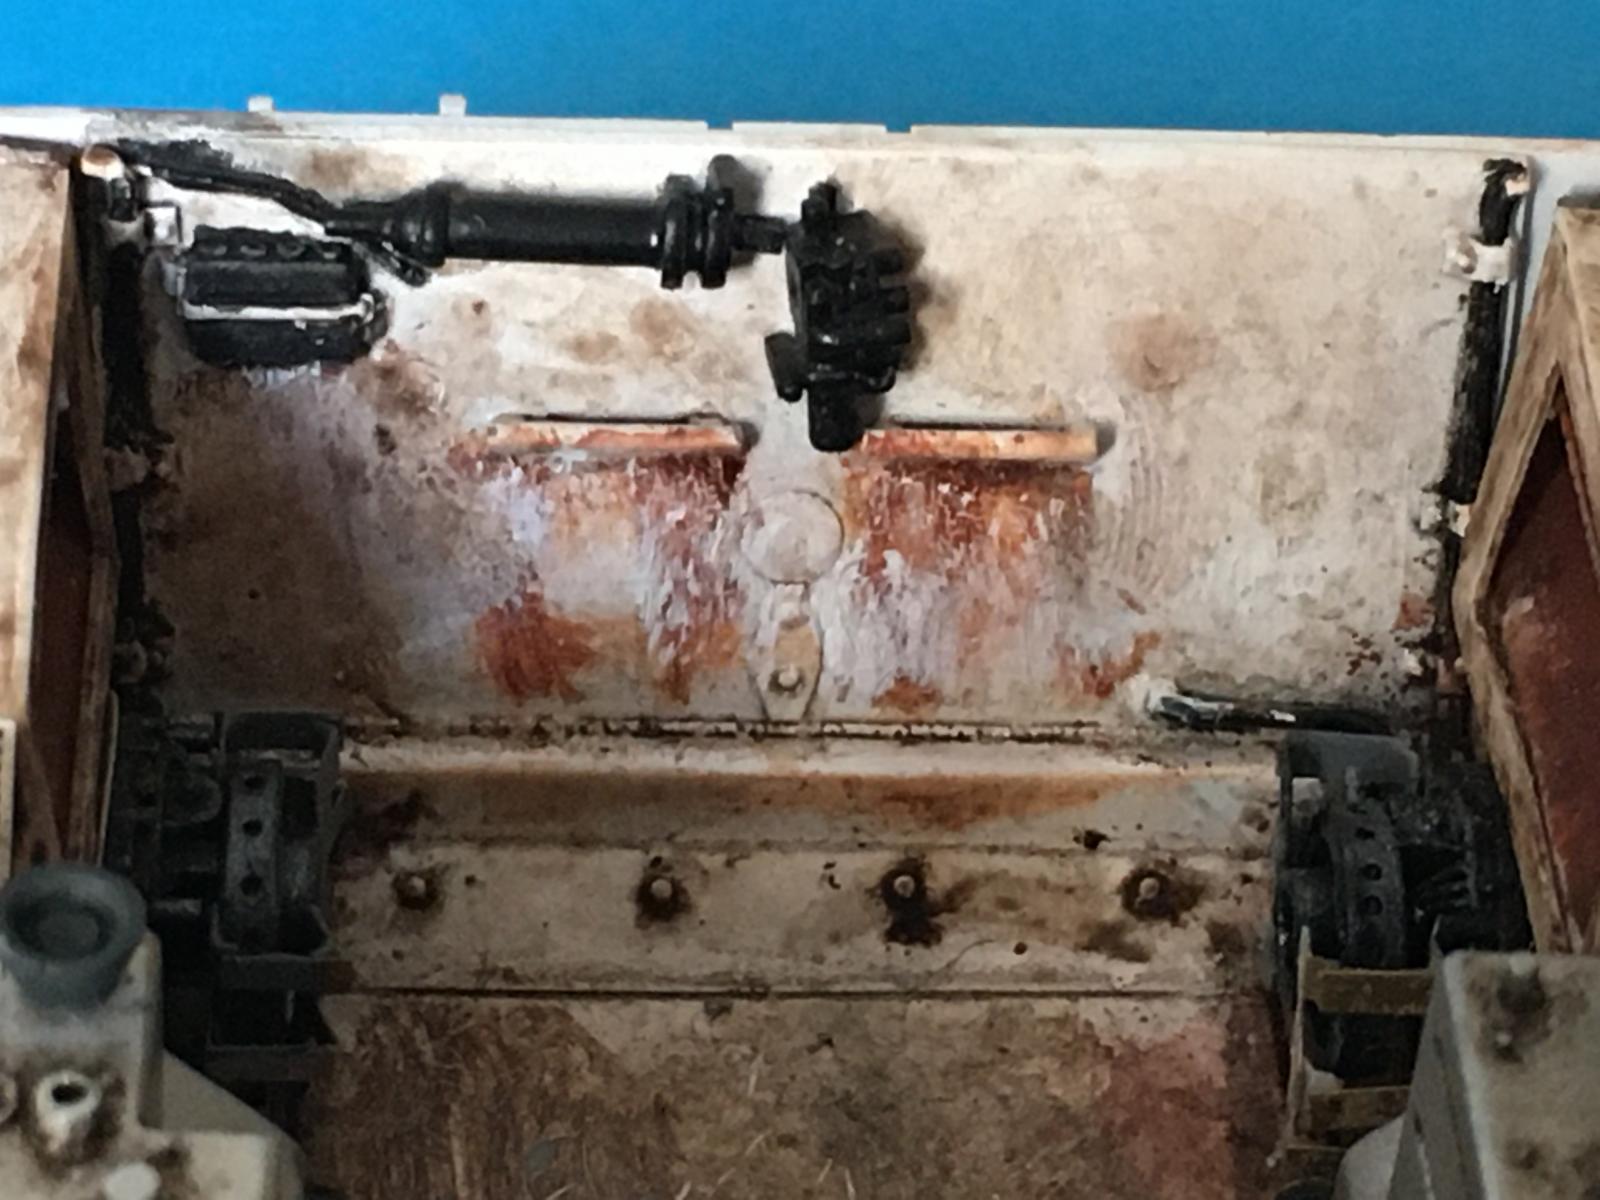
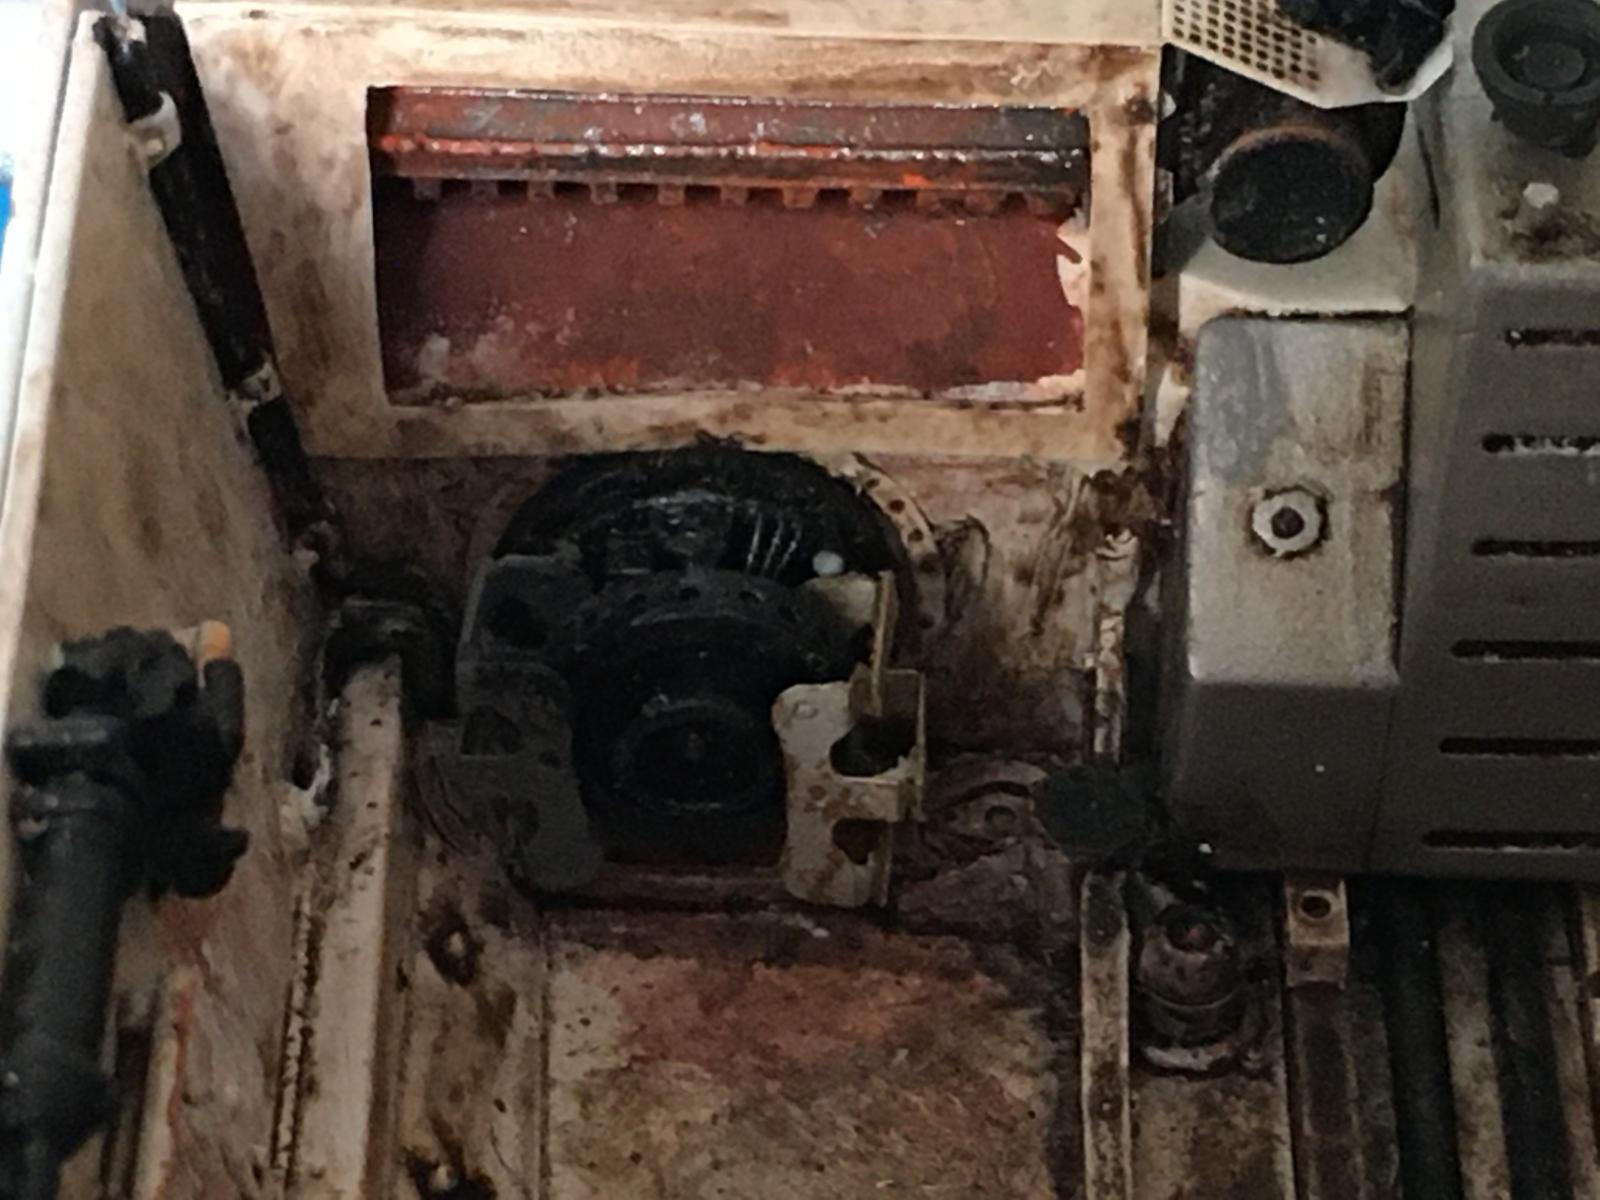
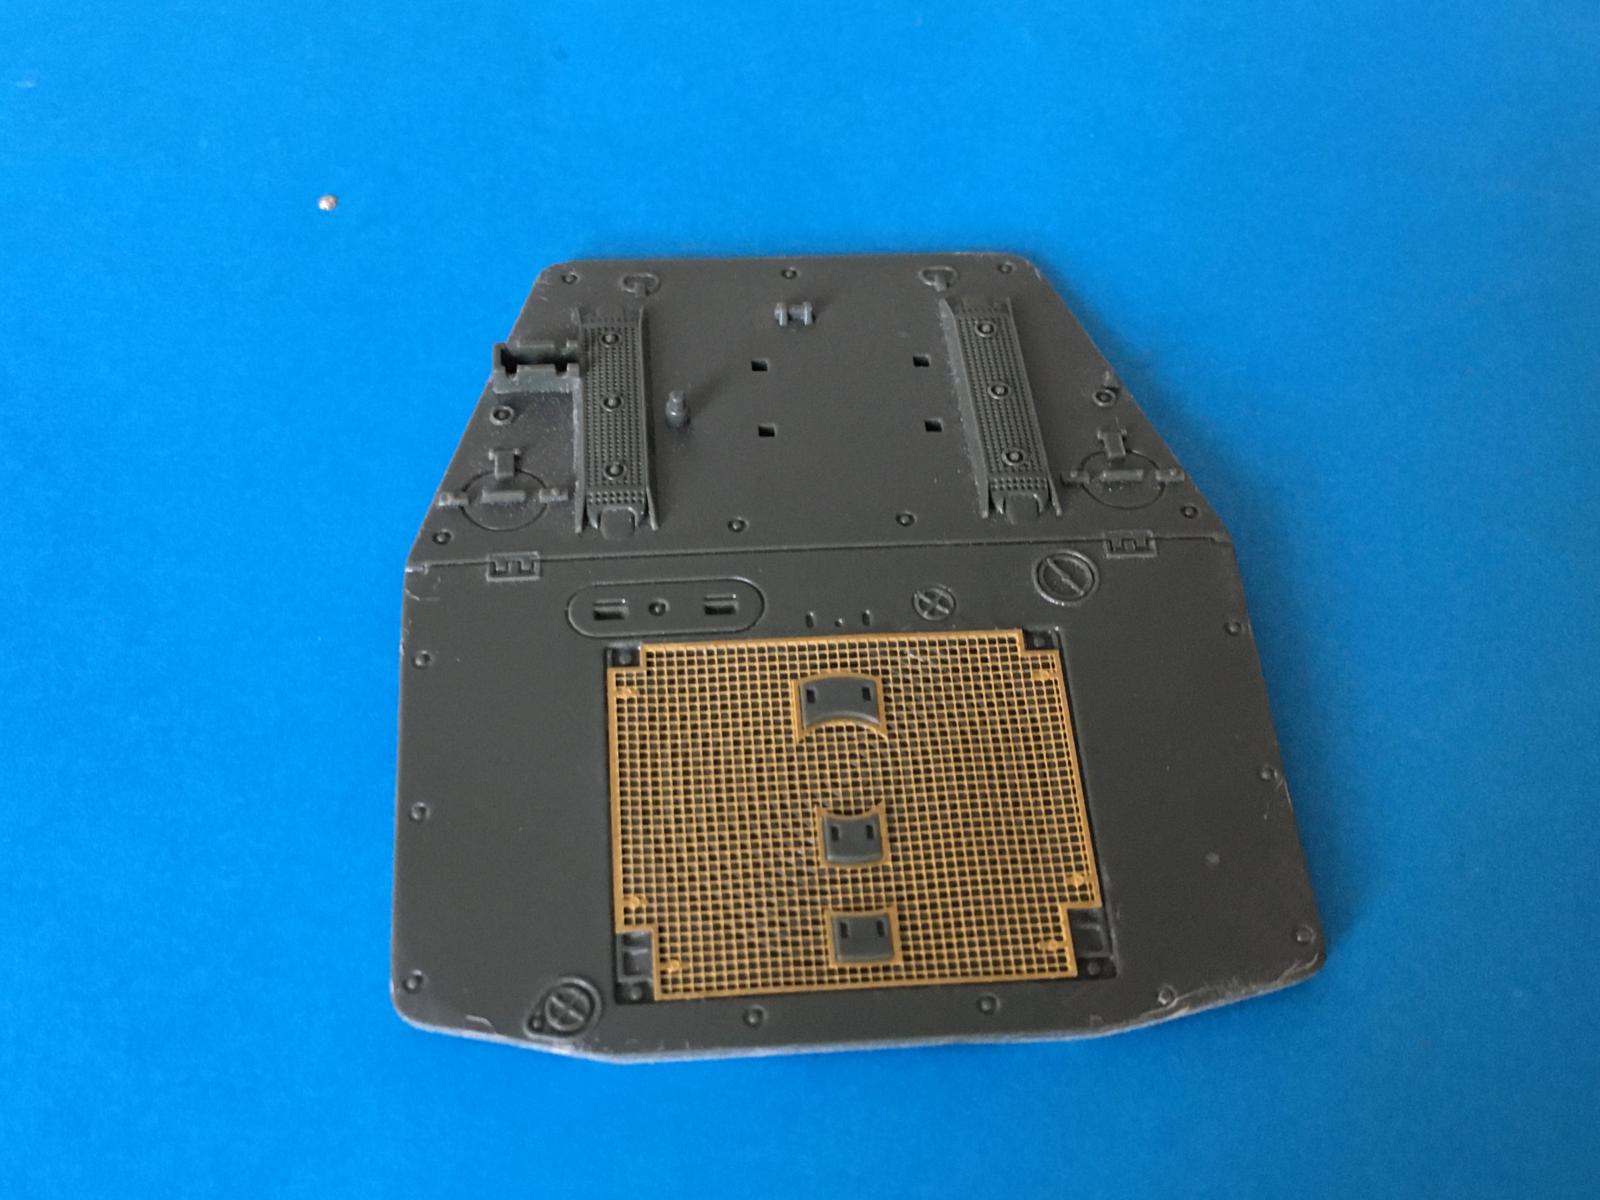
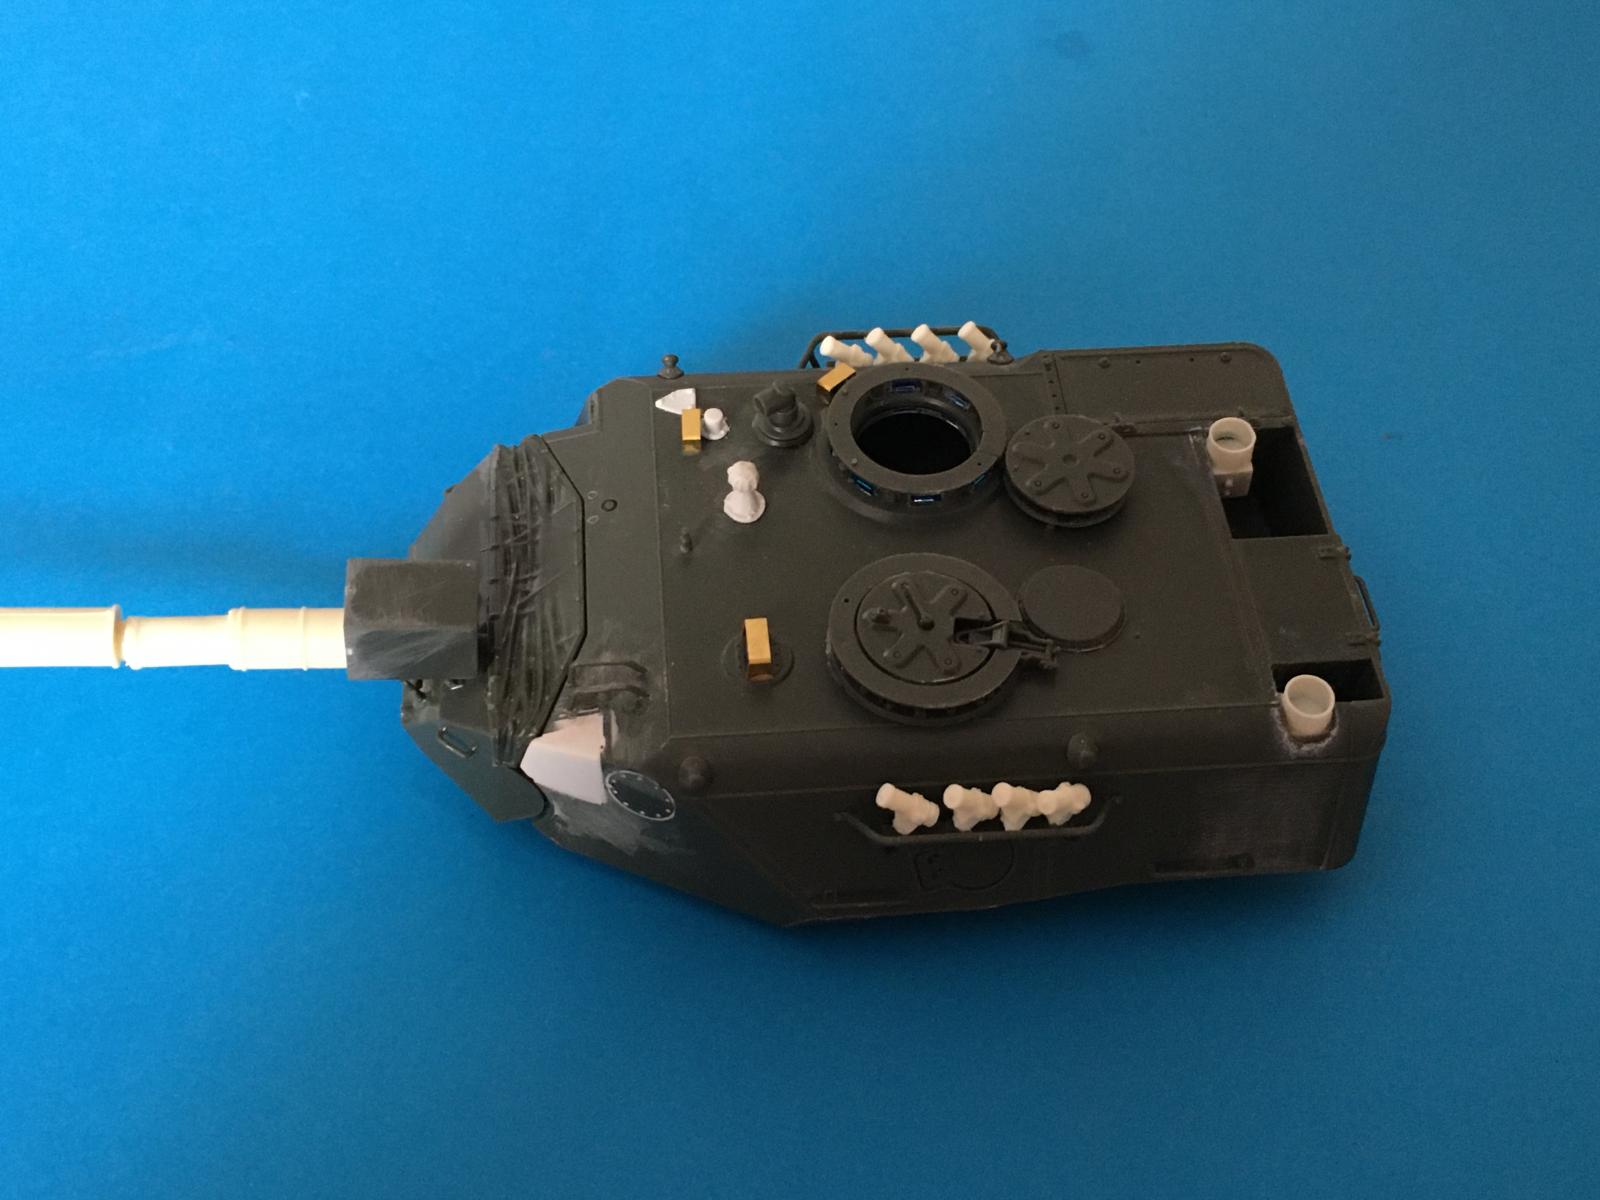
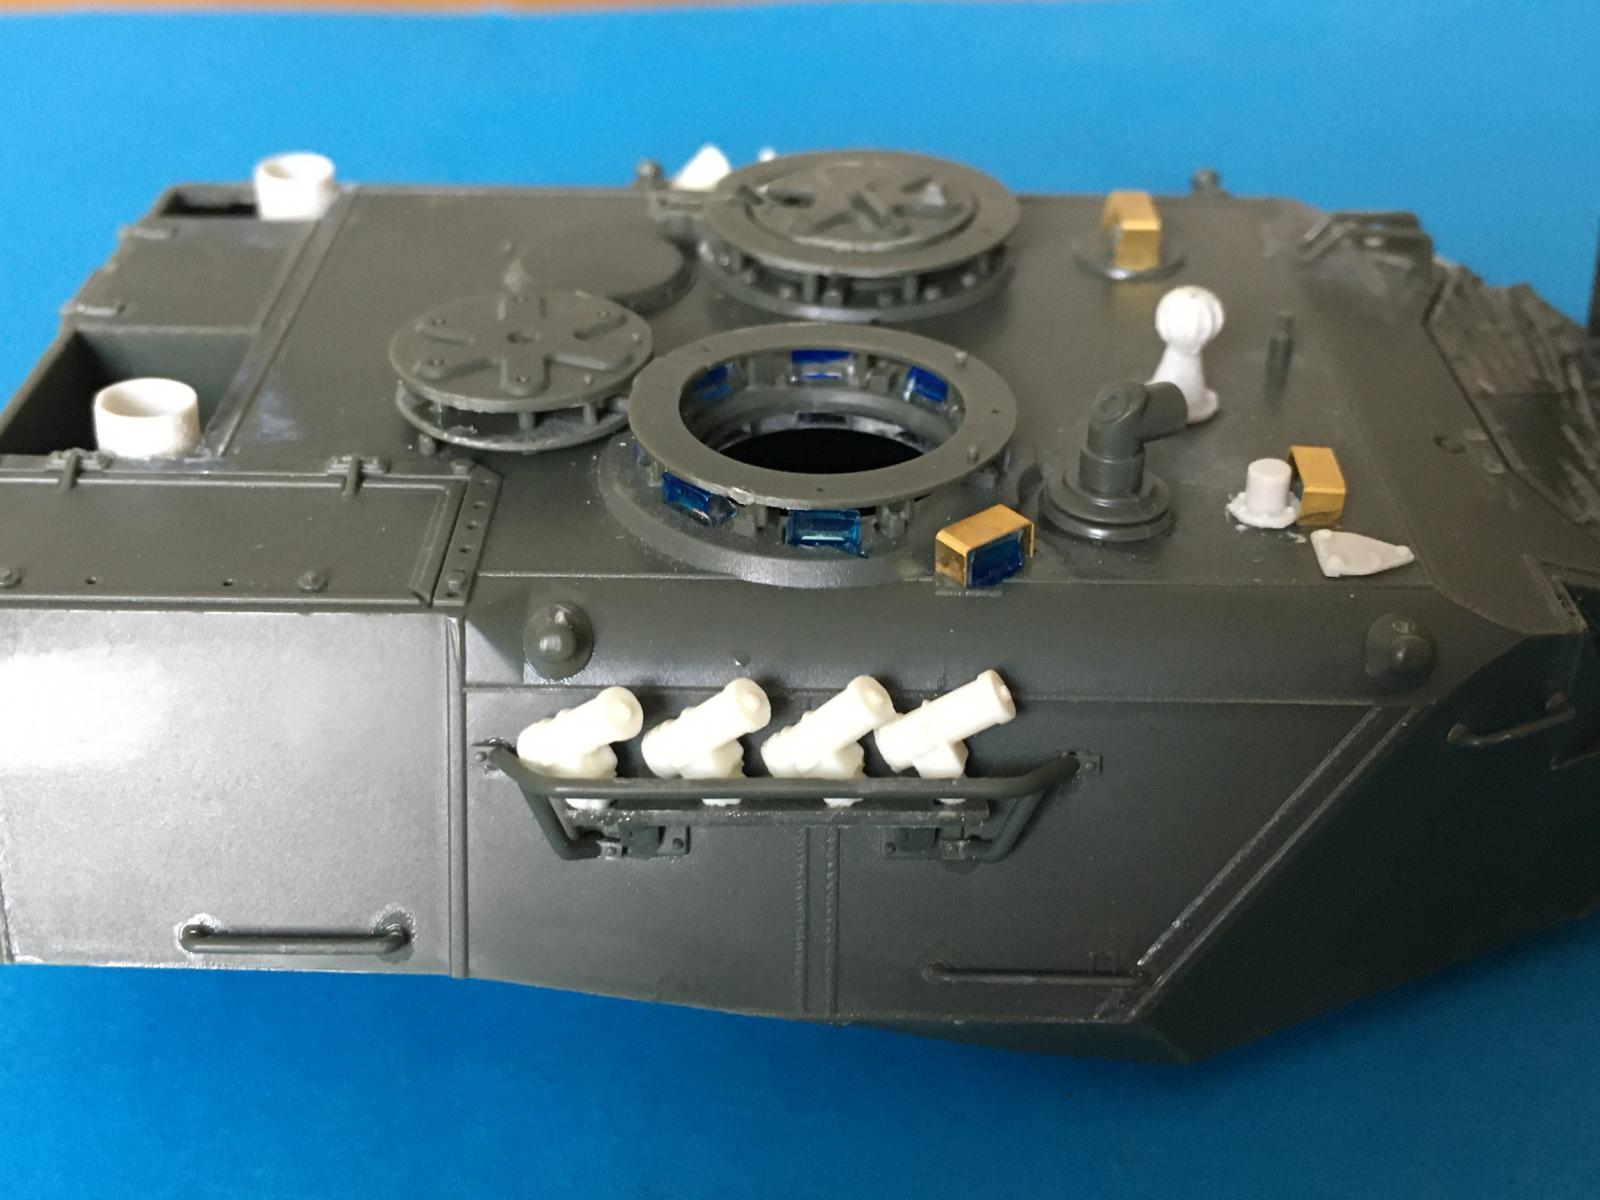
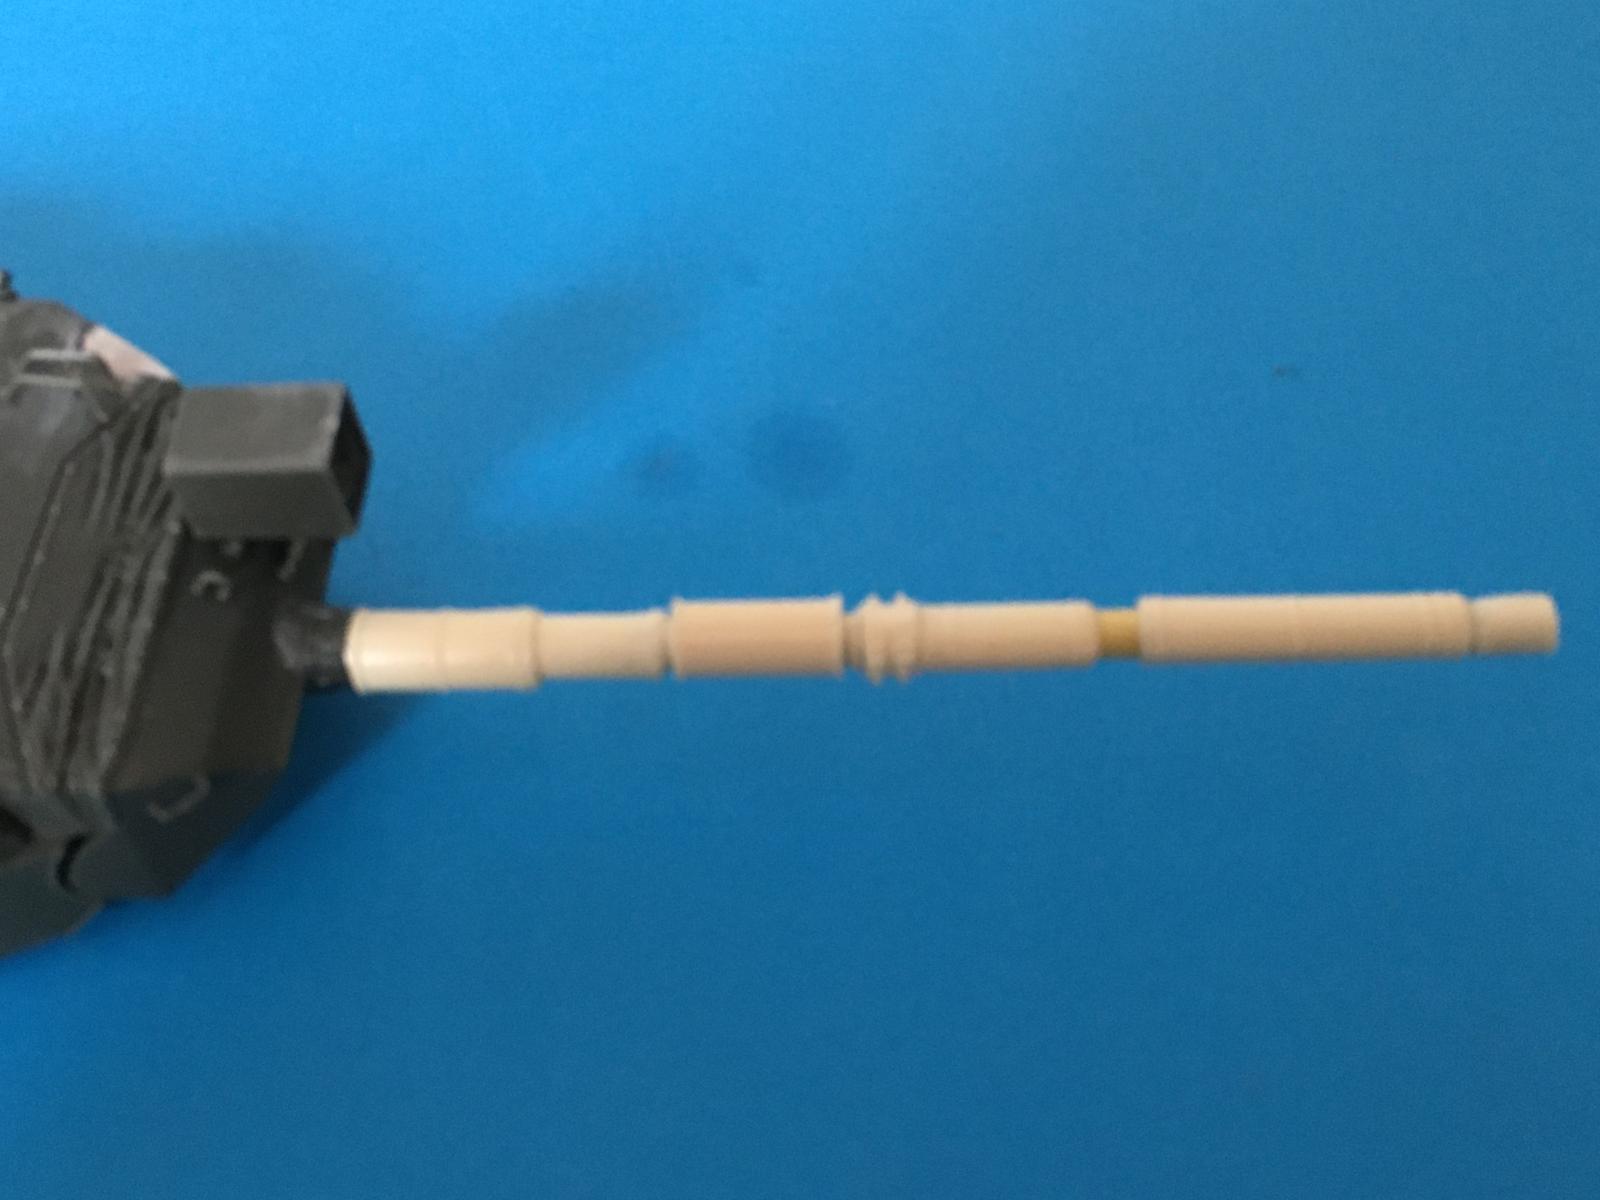
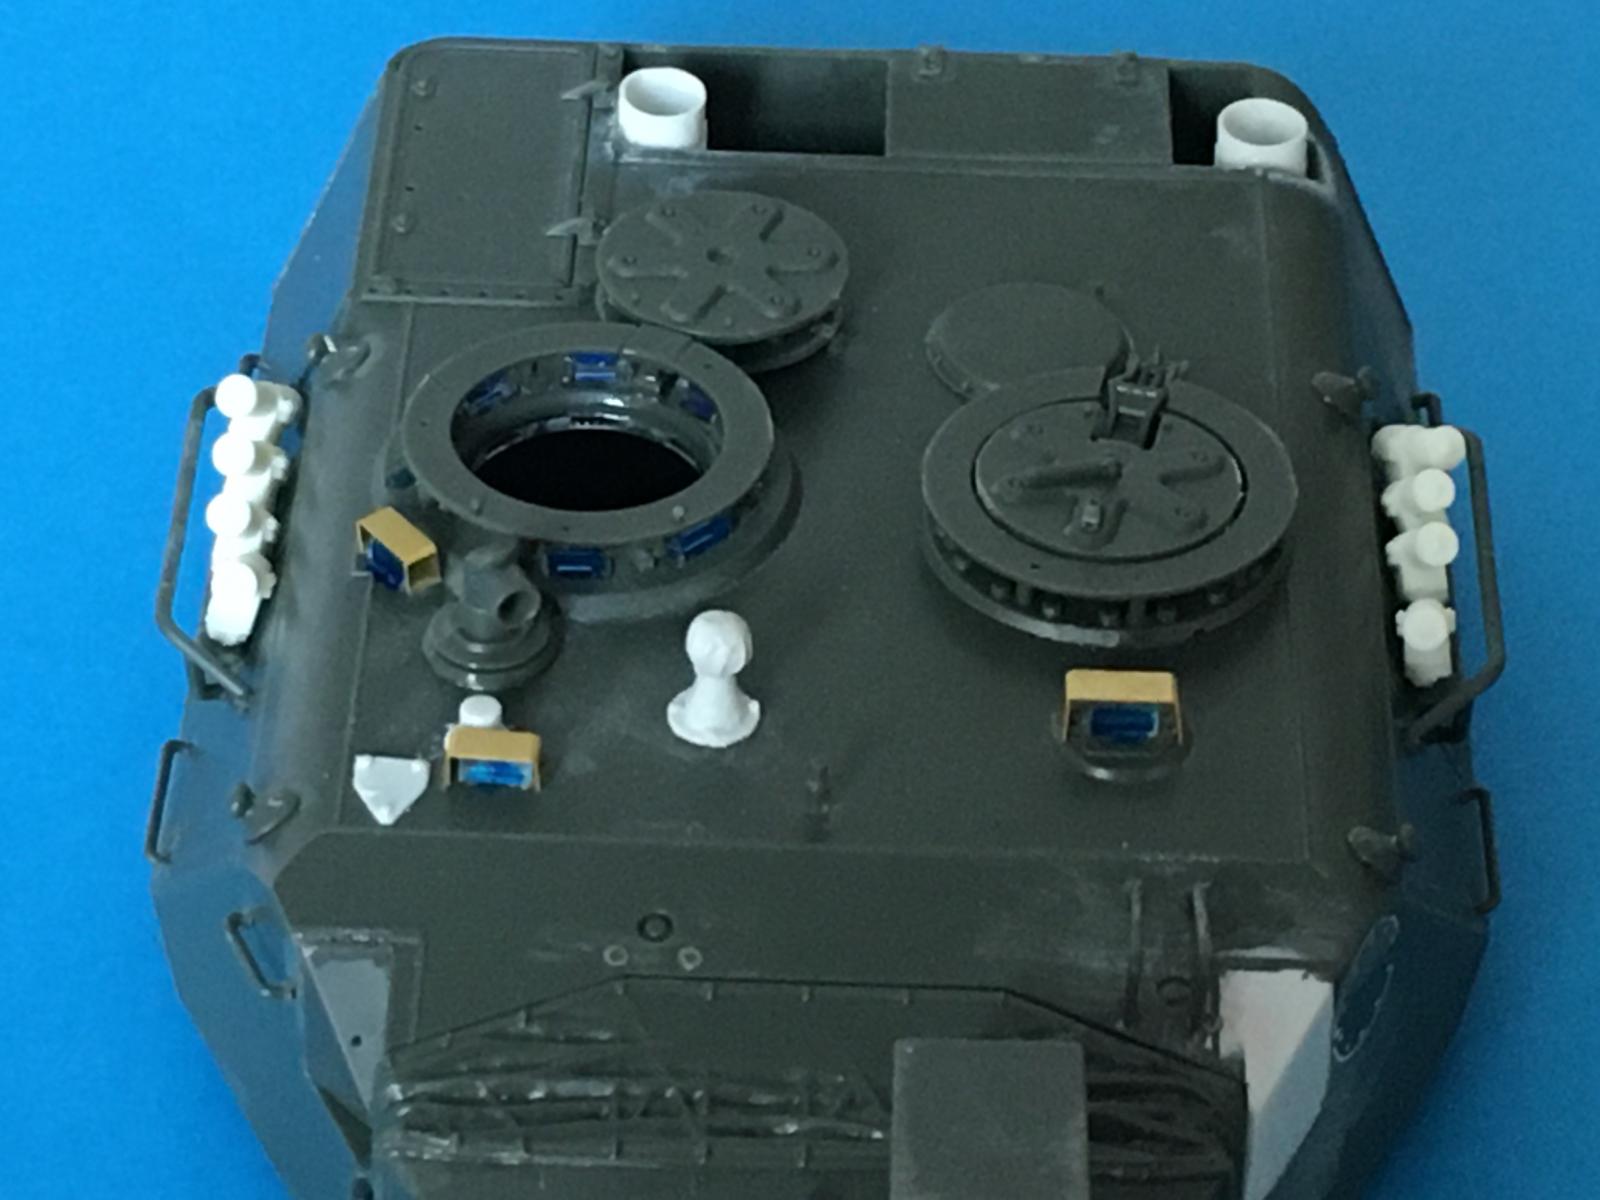
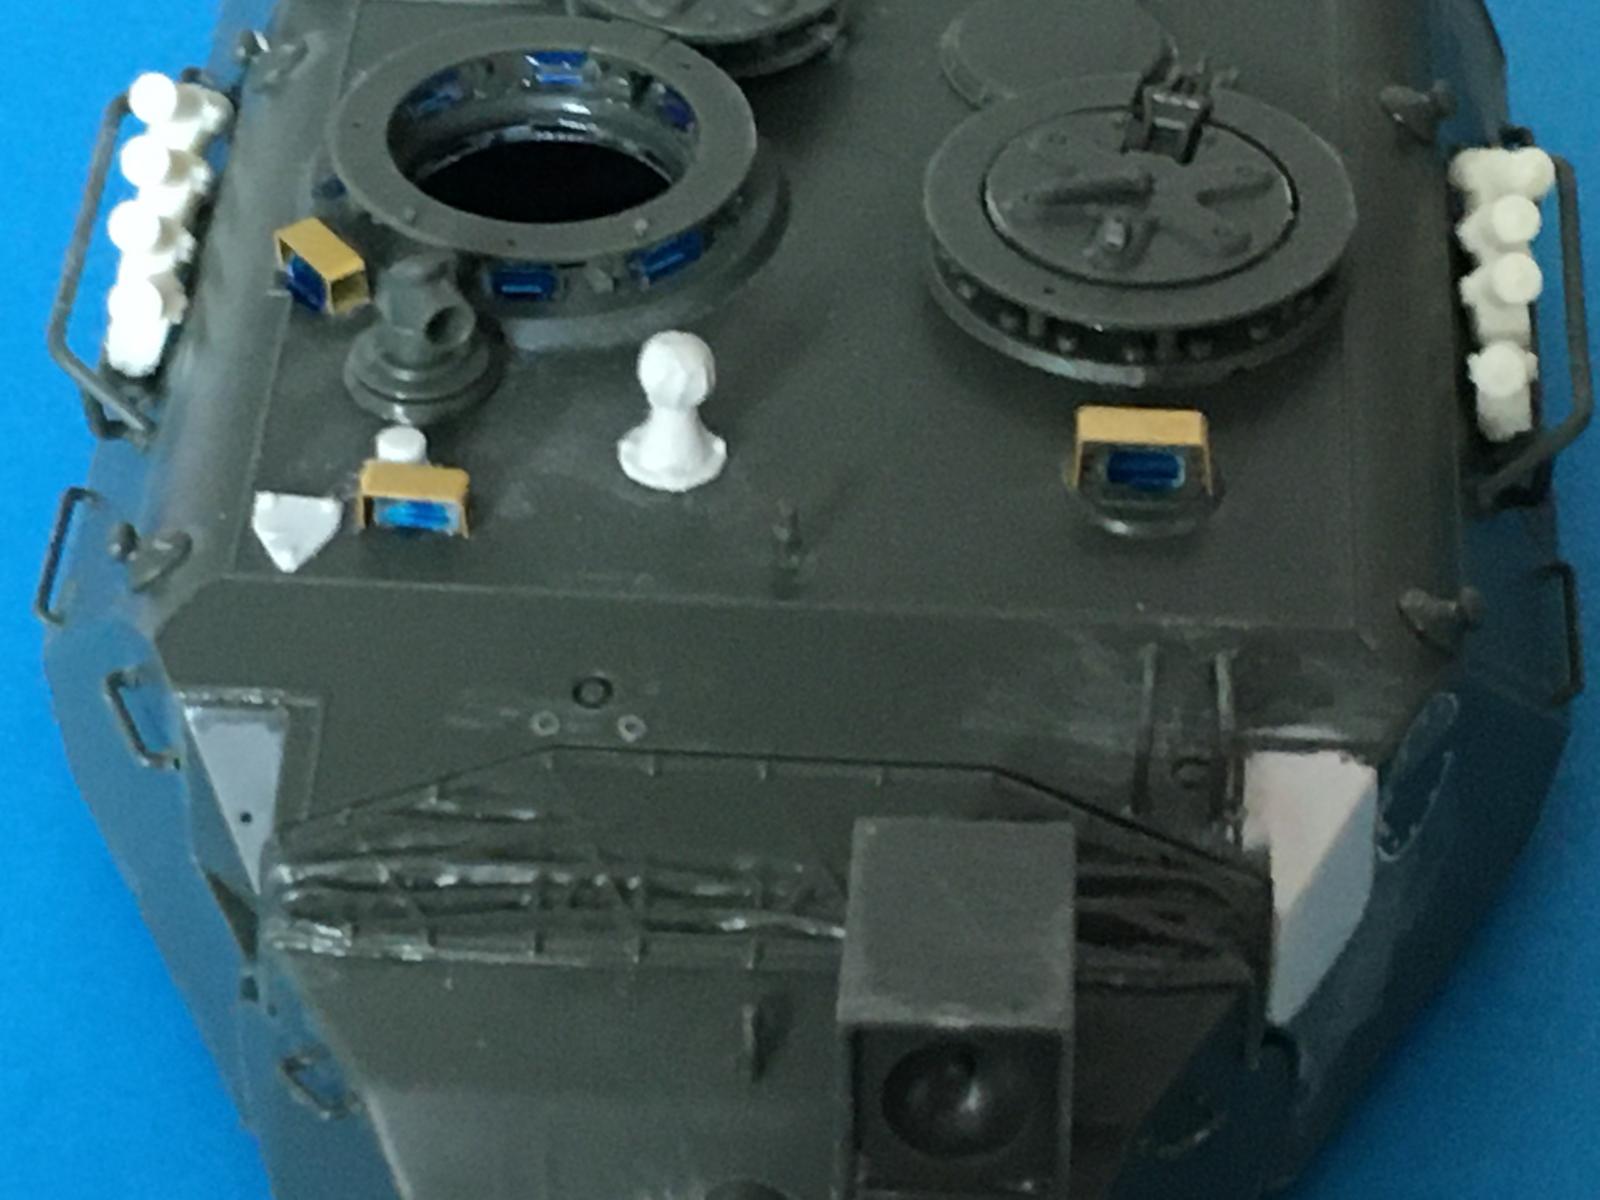
Well, my AS 1 with exposed engine bay and detailed drivers compartment has made some significant progress over the last week. The work started on the engine itself. This is a mini work of art in it's own right, well done PSM. Work is also underway on adapting the upper hull for the drivers compartment, removal of the engine upper deck cover and my favourite construction part, the turret. Here's a breakdown of the extra parts used (so far).
Engine and Engine Bay: Perfect Scale Modellbau
Barrel (replaces the incorrect kit to produce an Australian or Canadian one): Leopard Workshop
Drivers Compartment: Leopard Workshop (applicable to ALL Leopard 1s)
Smoke Grenade Launchers: Leopard Workshop (applicable to ALL Leopard 1s)
Australian conversion to AS1 standard: Mouse House (RIP)
If you want to buy any of the Leopard Workshop items, here is the link to their website: http://www.leopardclub.ca
There's loads of great stuff on there, including reviews of kits, detail sets etc, as sort of "Which Leopard" site!


Looking really amazing , Ian!
Stunning details!
Thank you Spiros. I've loved every minute of the build so far. I really do recommend giving it a go, but if you do, then do not use the Meng body. I created a whole lot of extra work because the length and width of the engine area in the Meng kit are not the same, so I had to narrow and shorten the PSM parts. That had a knock on effect on the other parts. Even so, just solving those problems has been great fun...
Indeed amazing, Ian @ianfoulk96
Details and weathering looks great.
Thank you John, I have to say that the details sets I'm using are fantastic, so much detail! They're all well worth the price