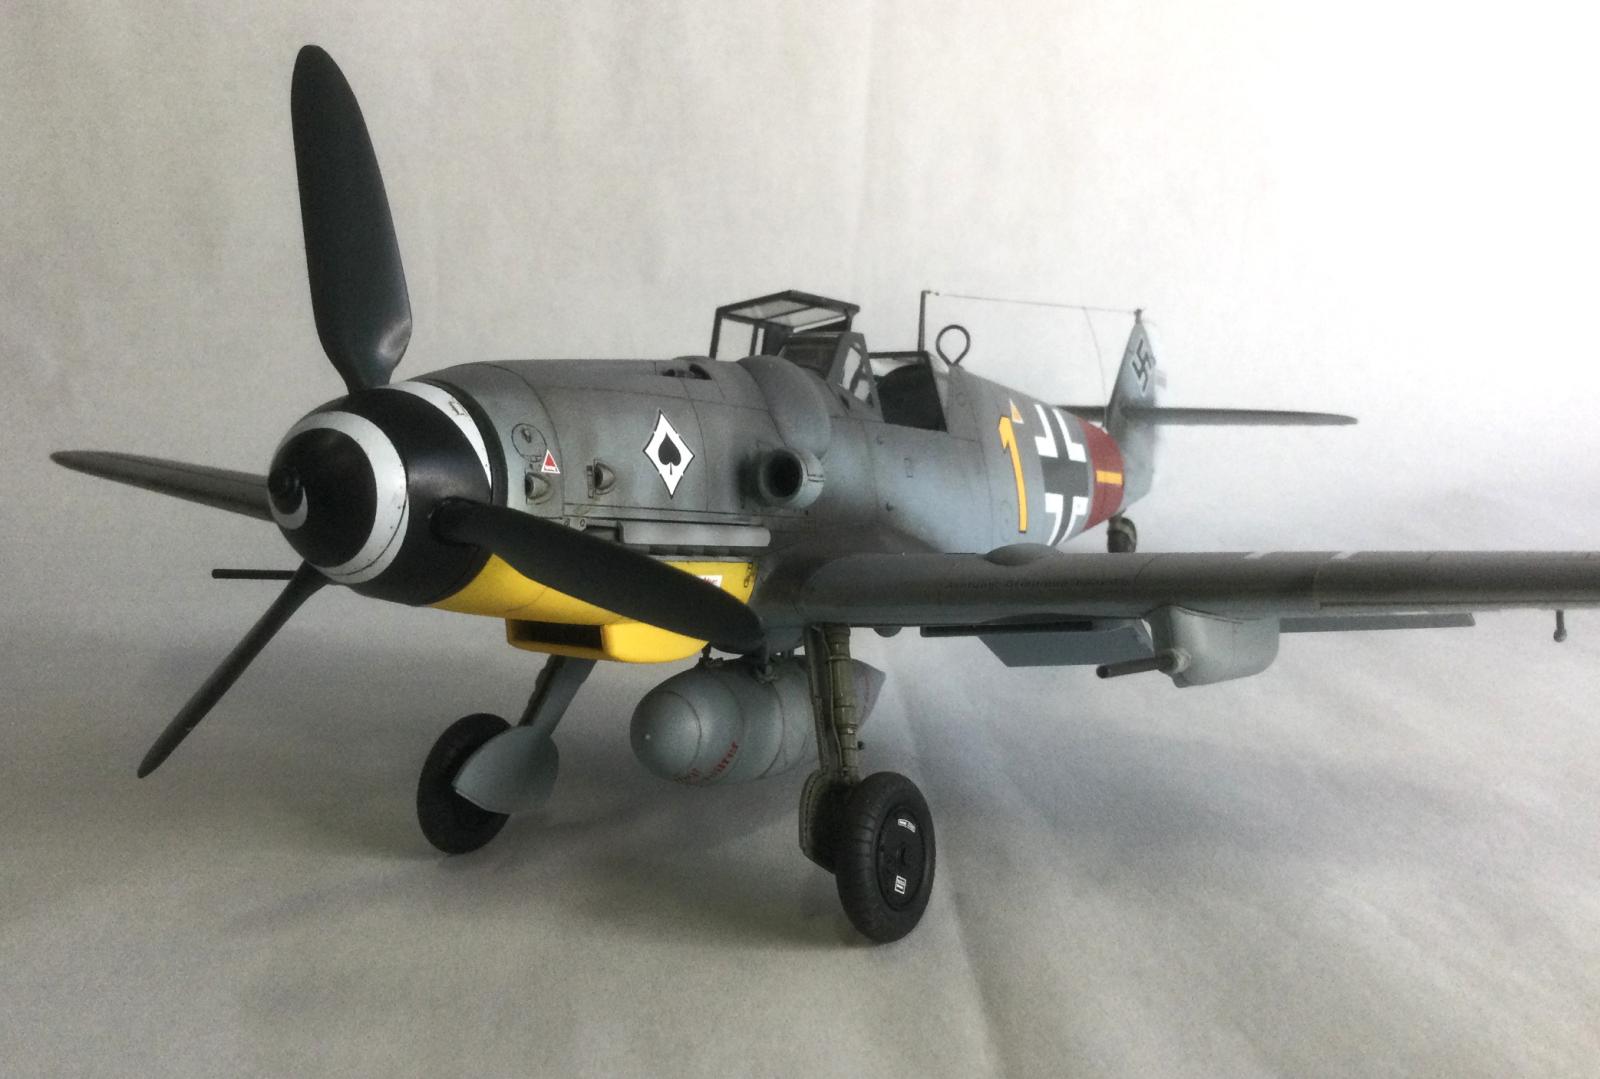
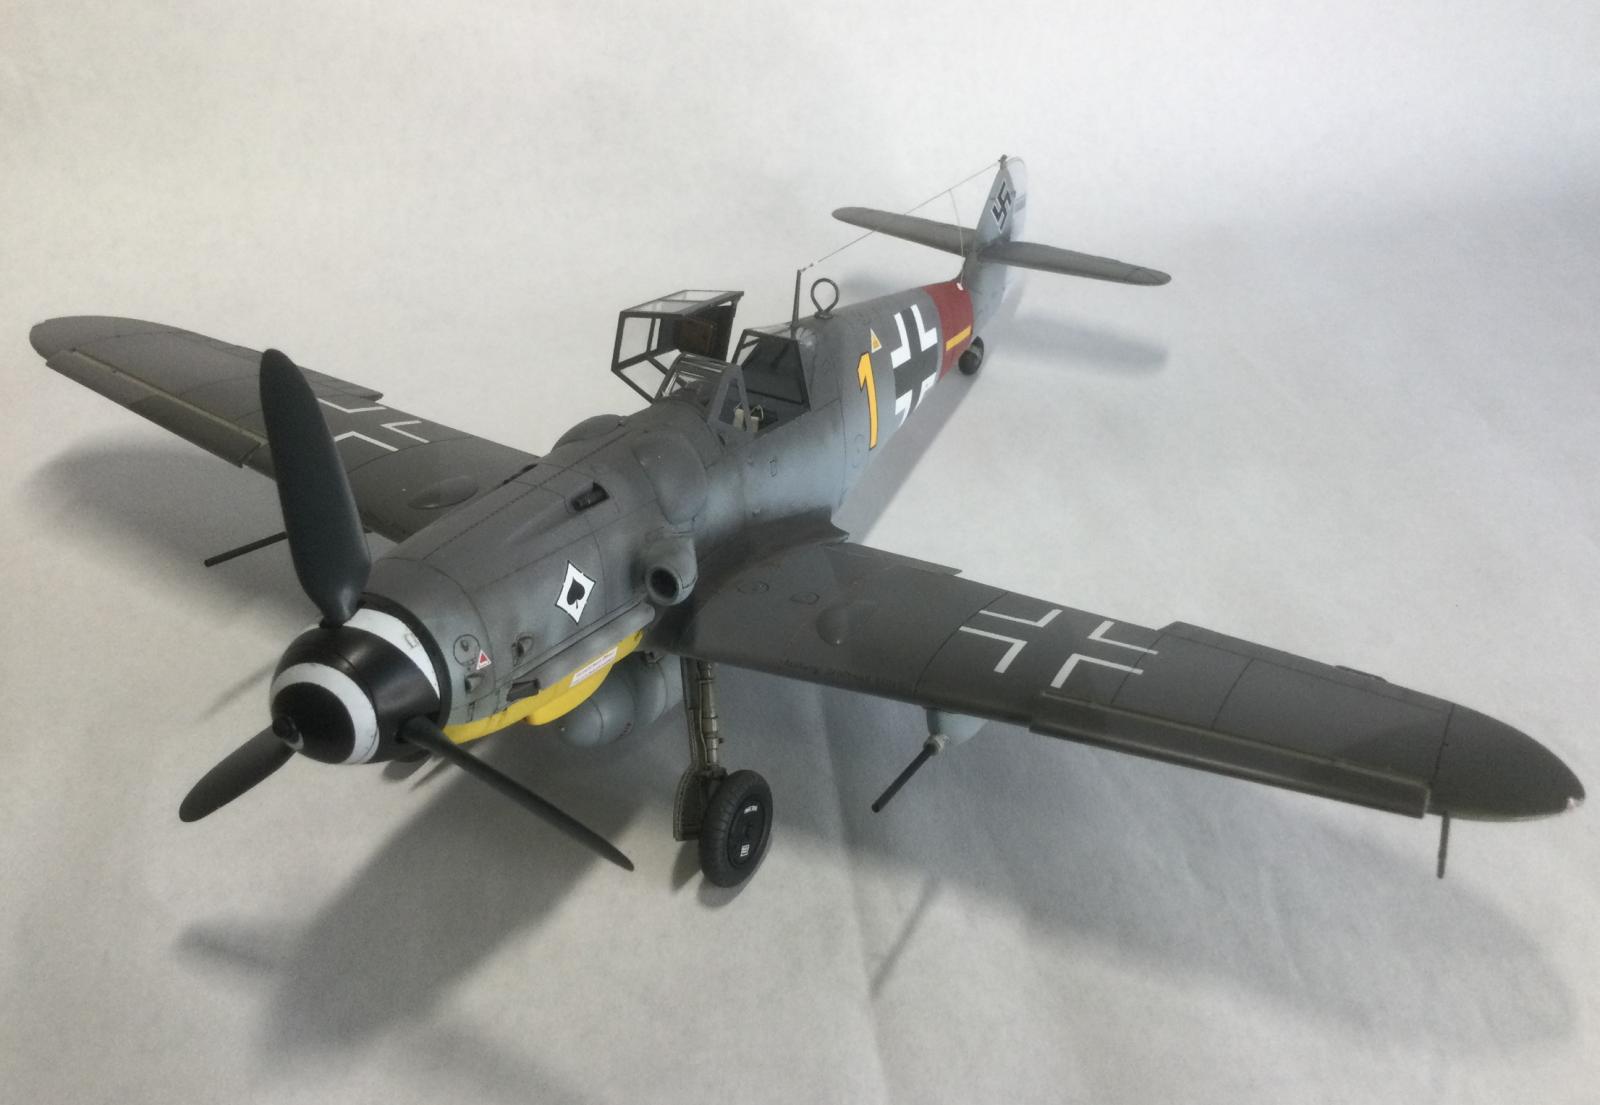
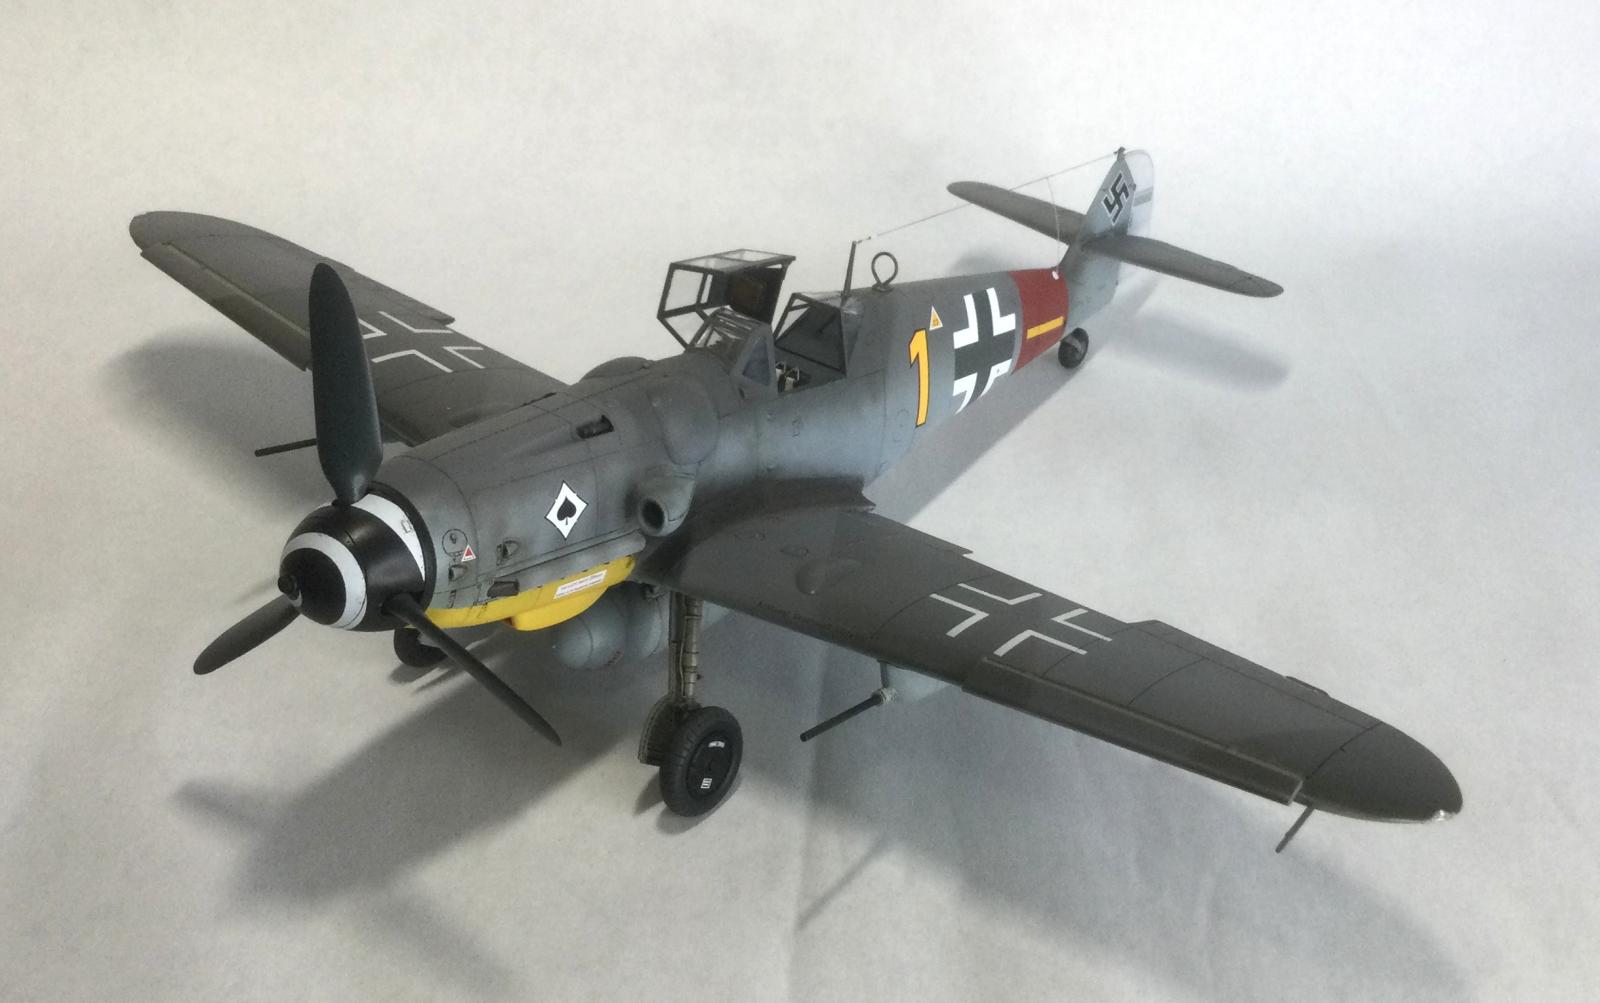
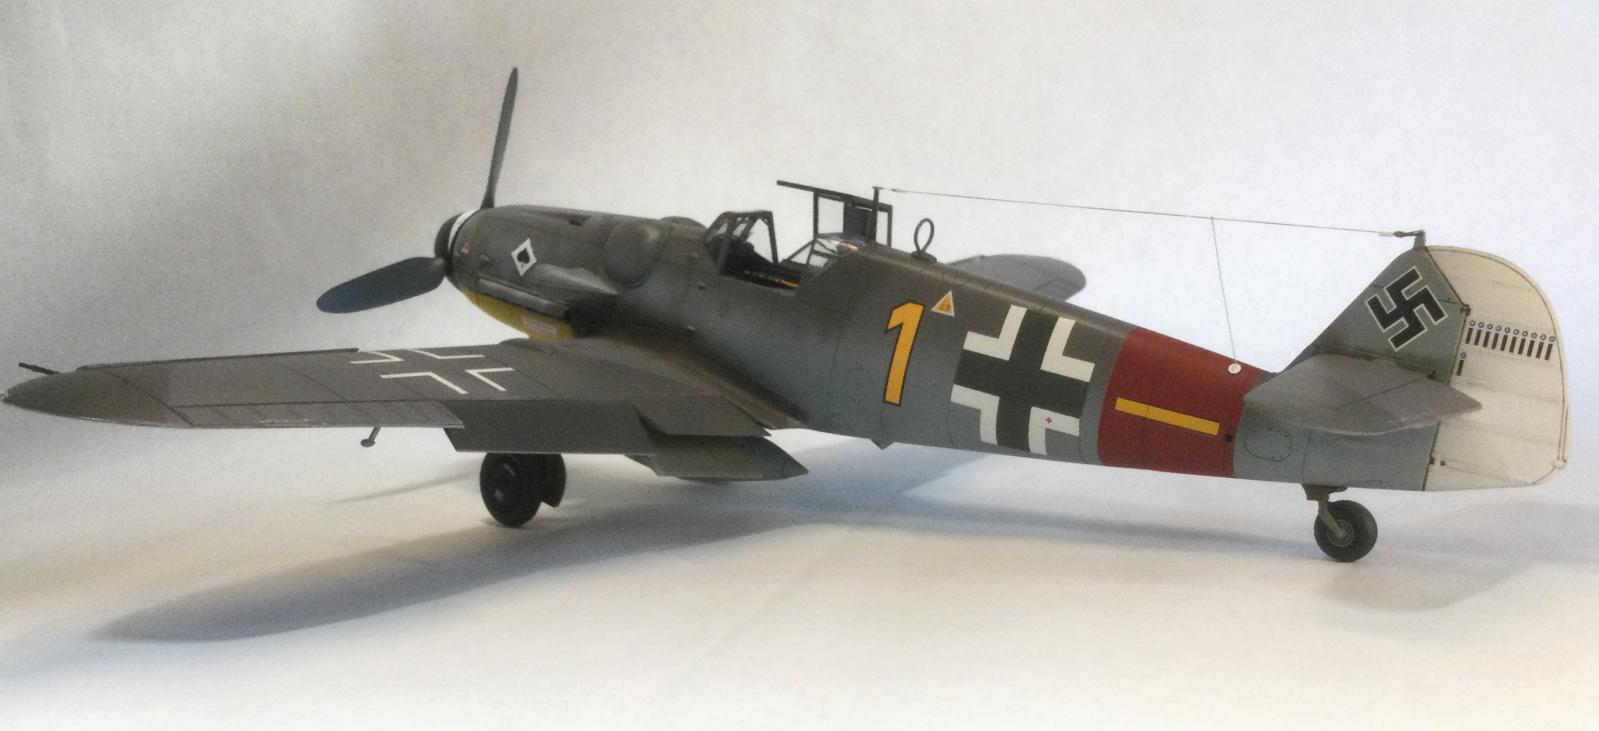
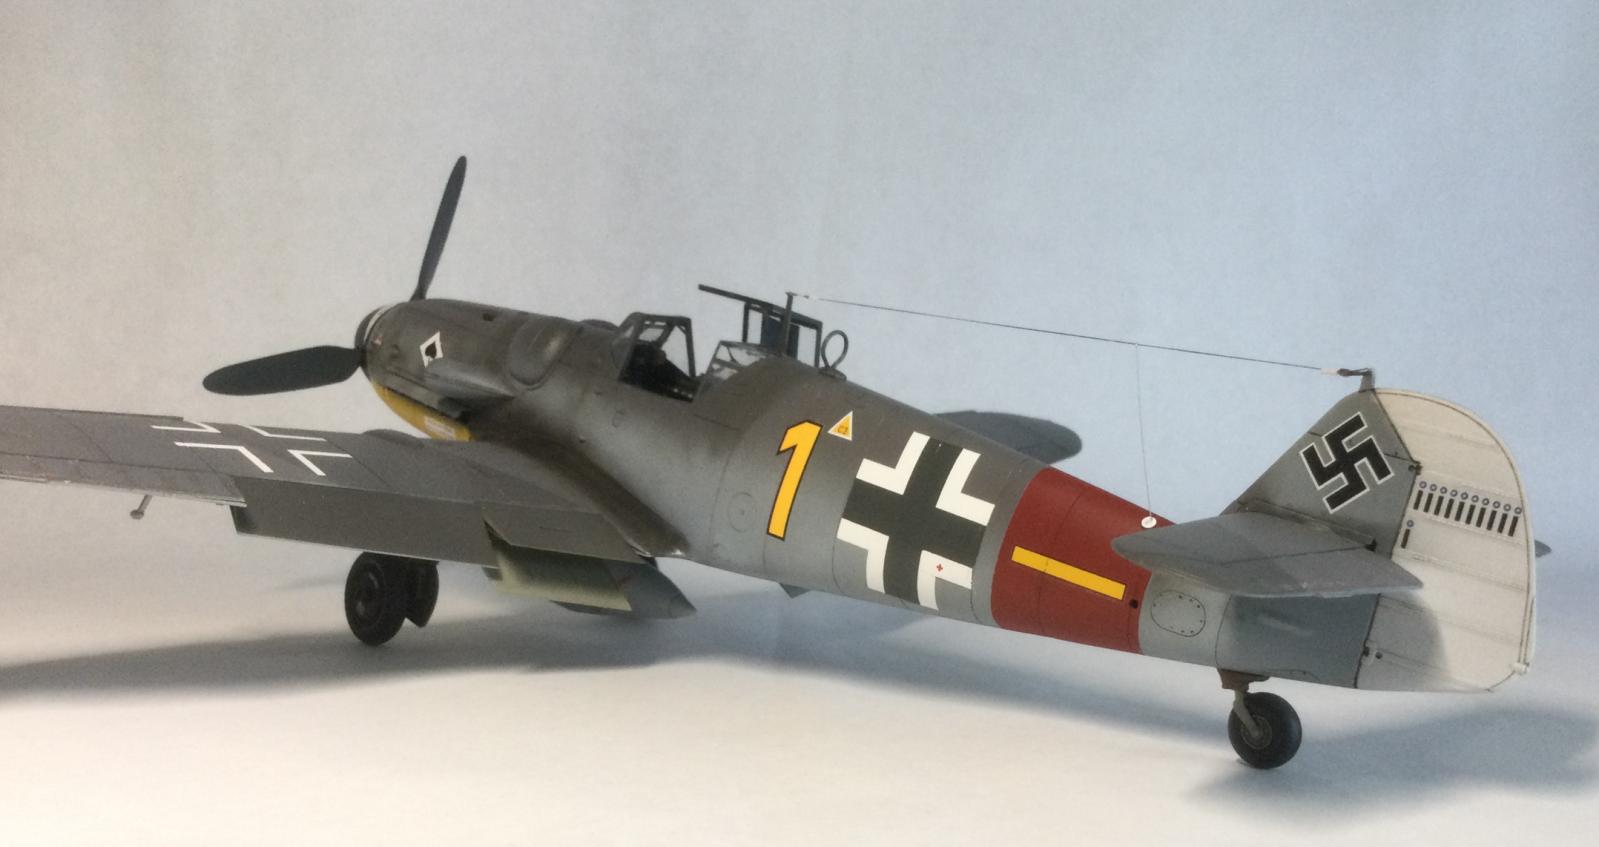
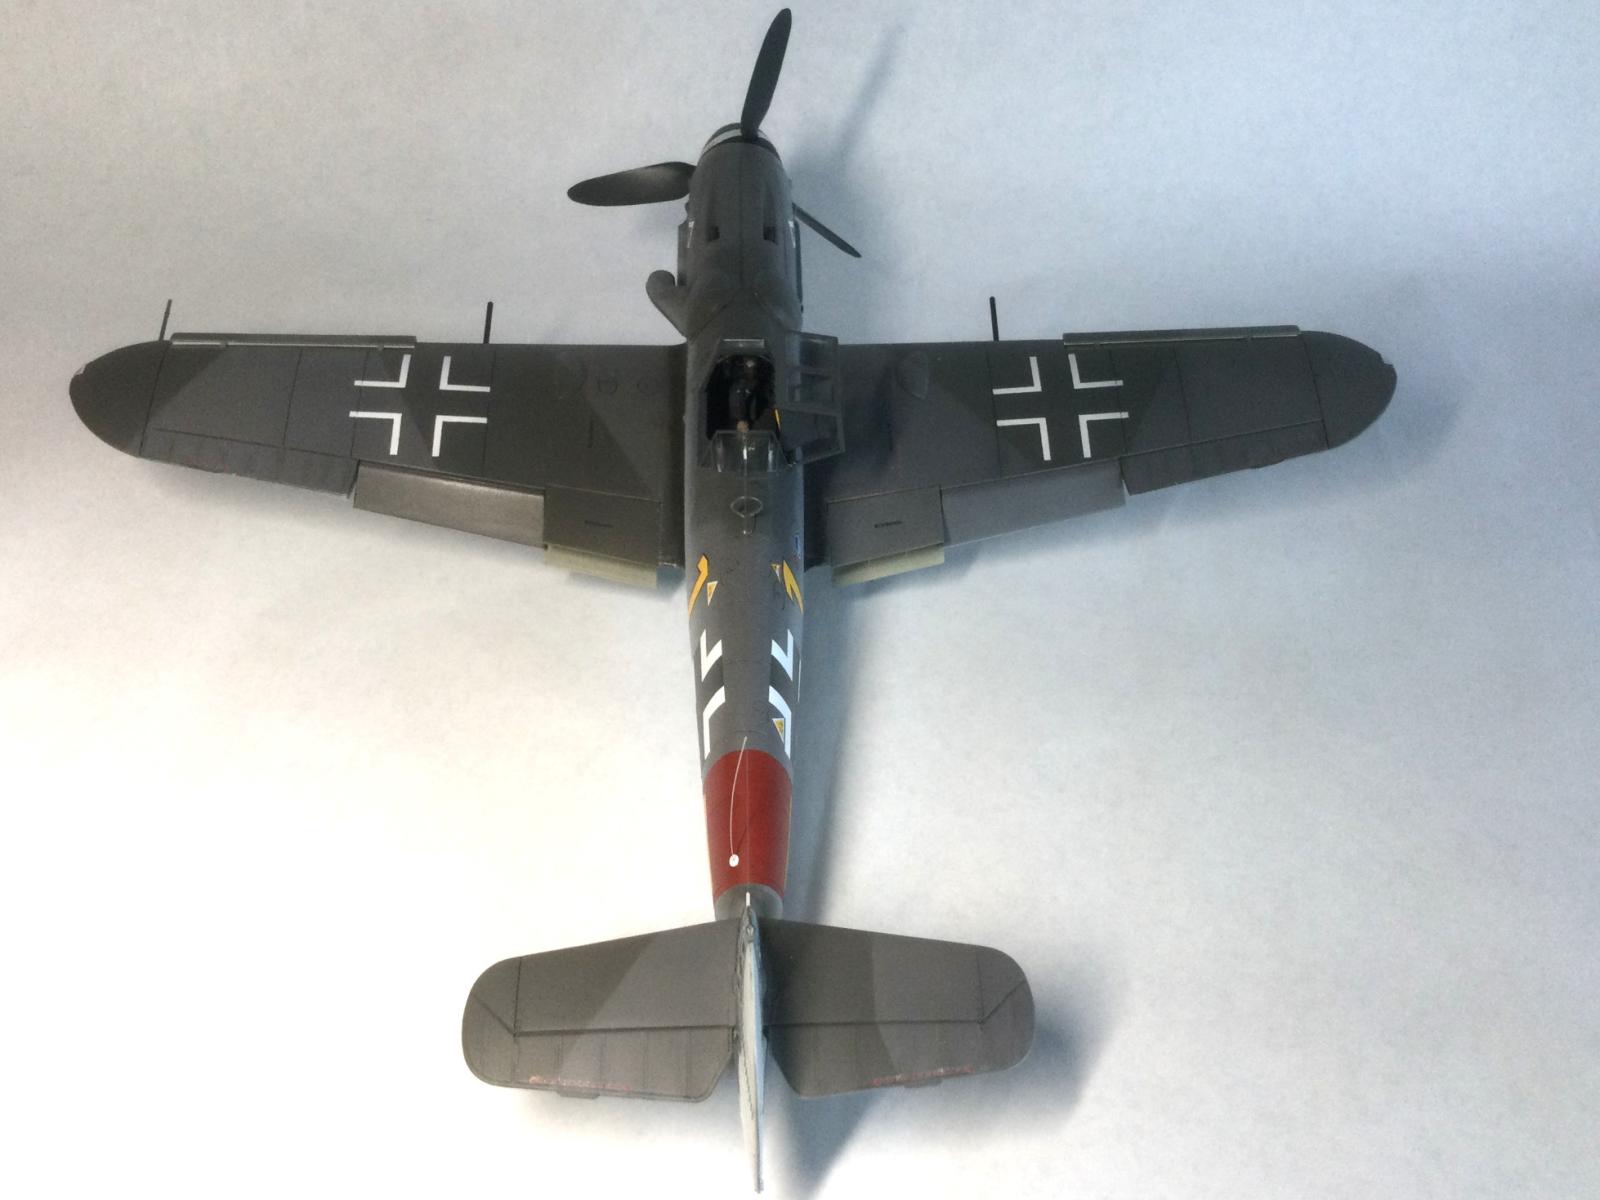
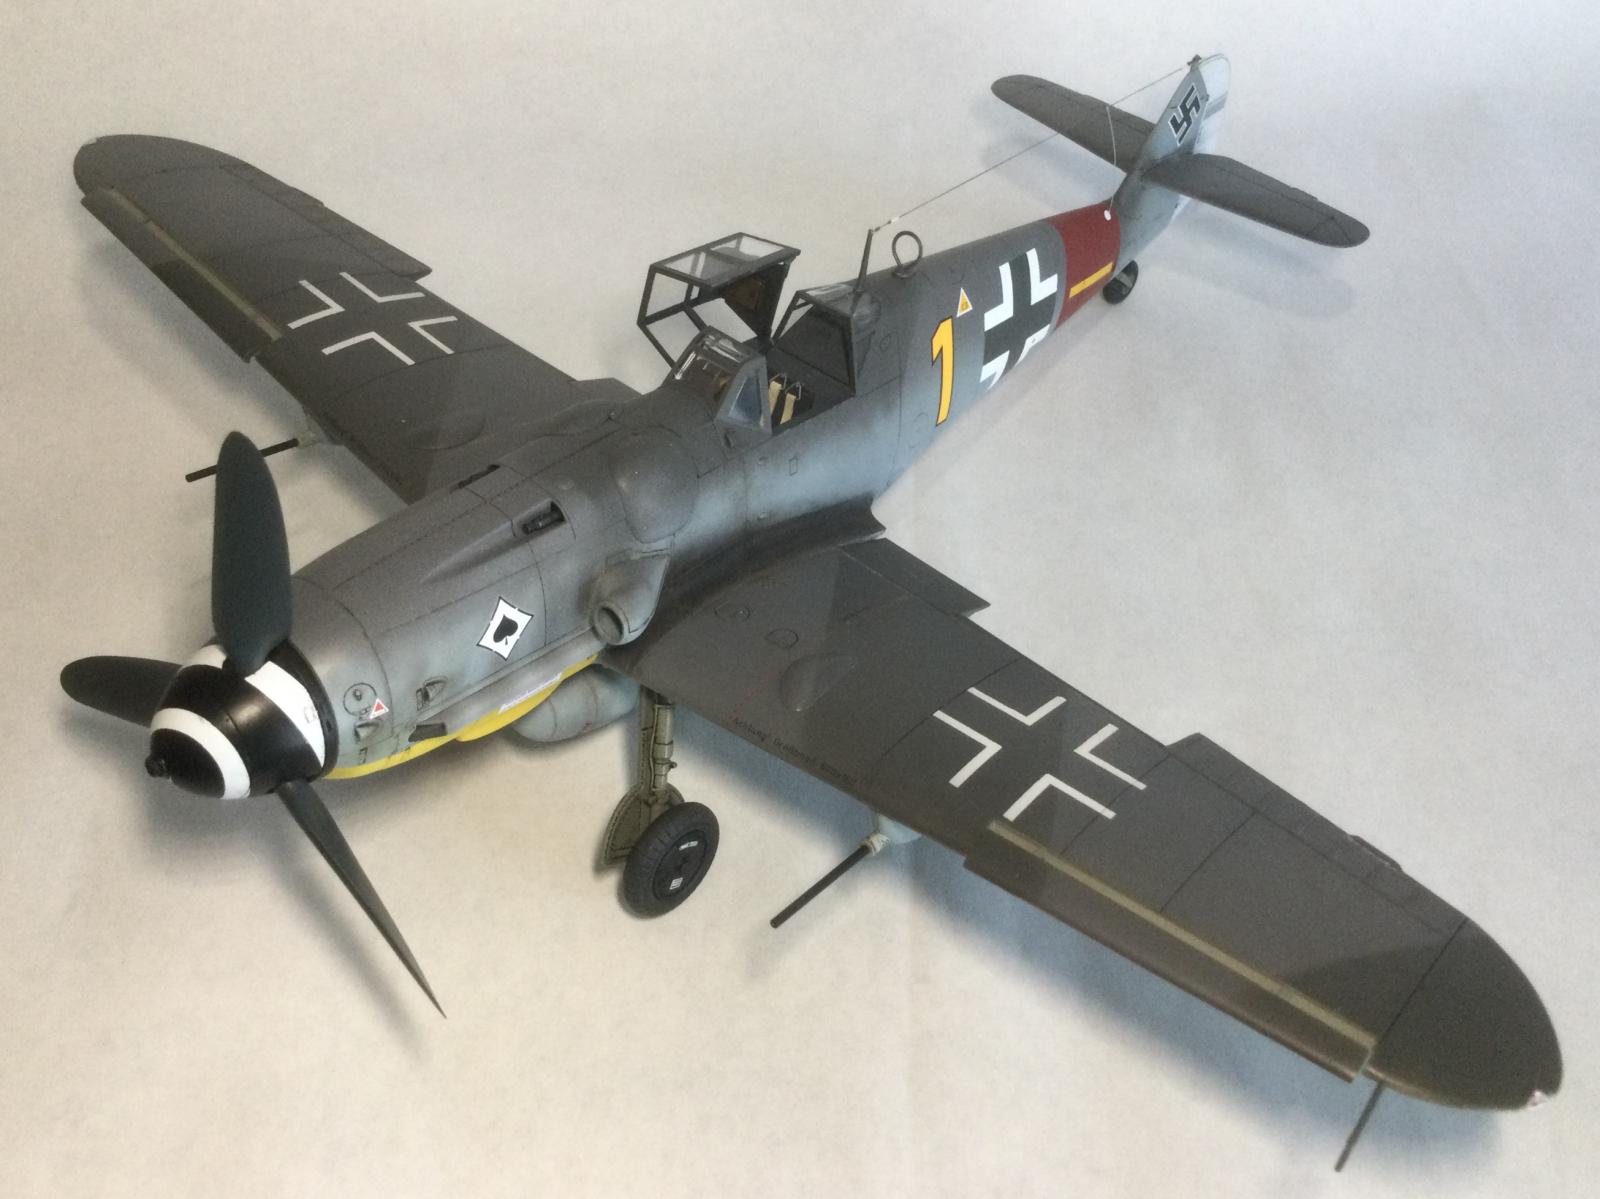
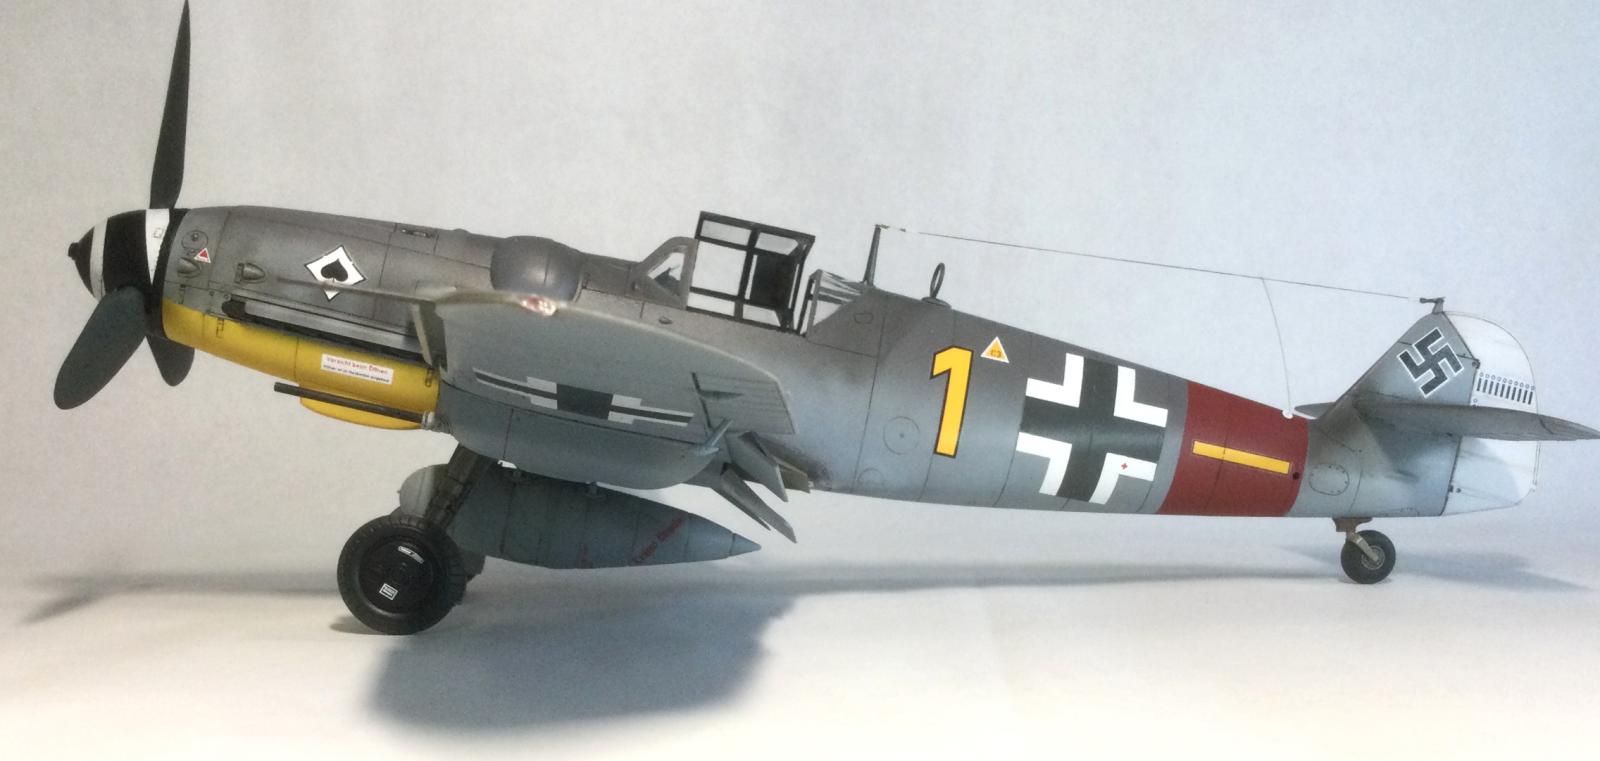
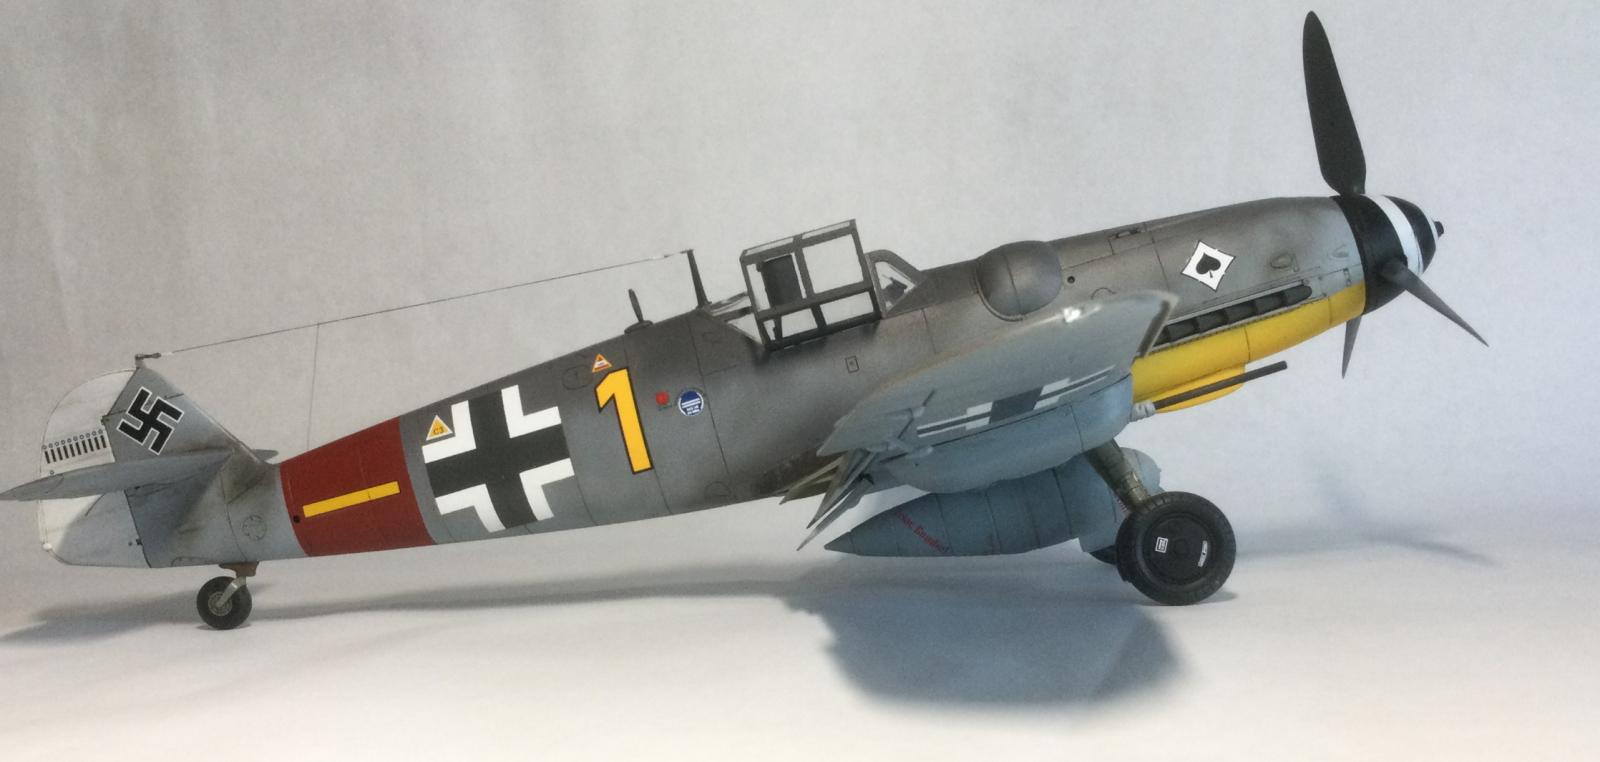
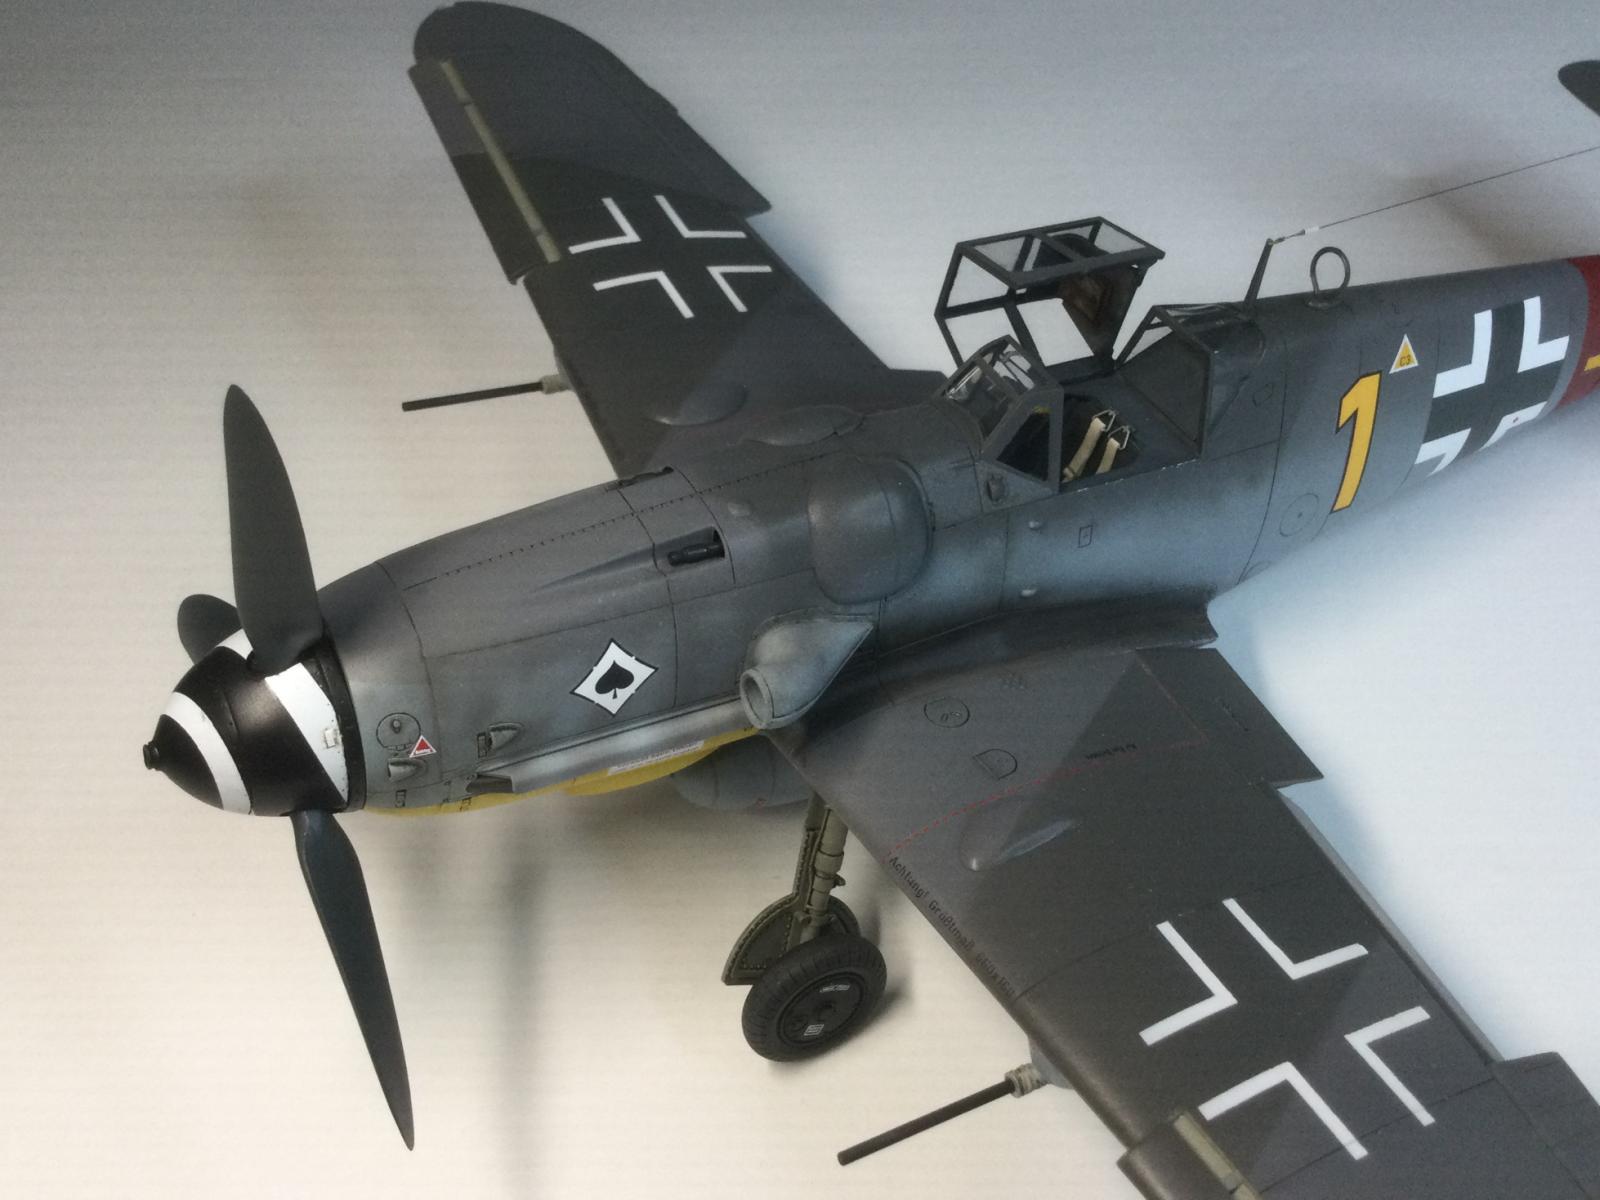
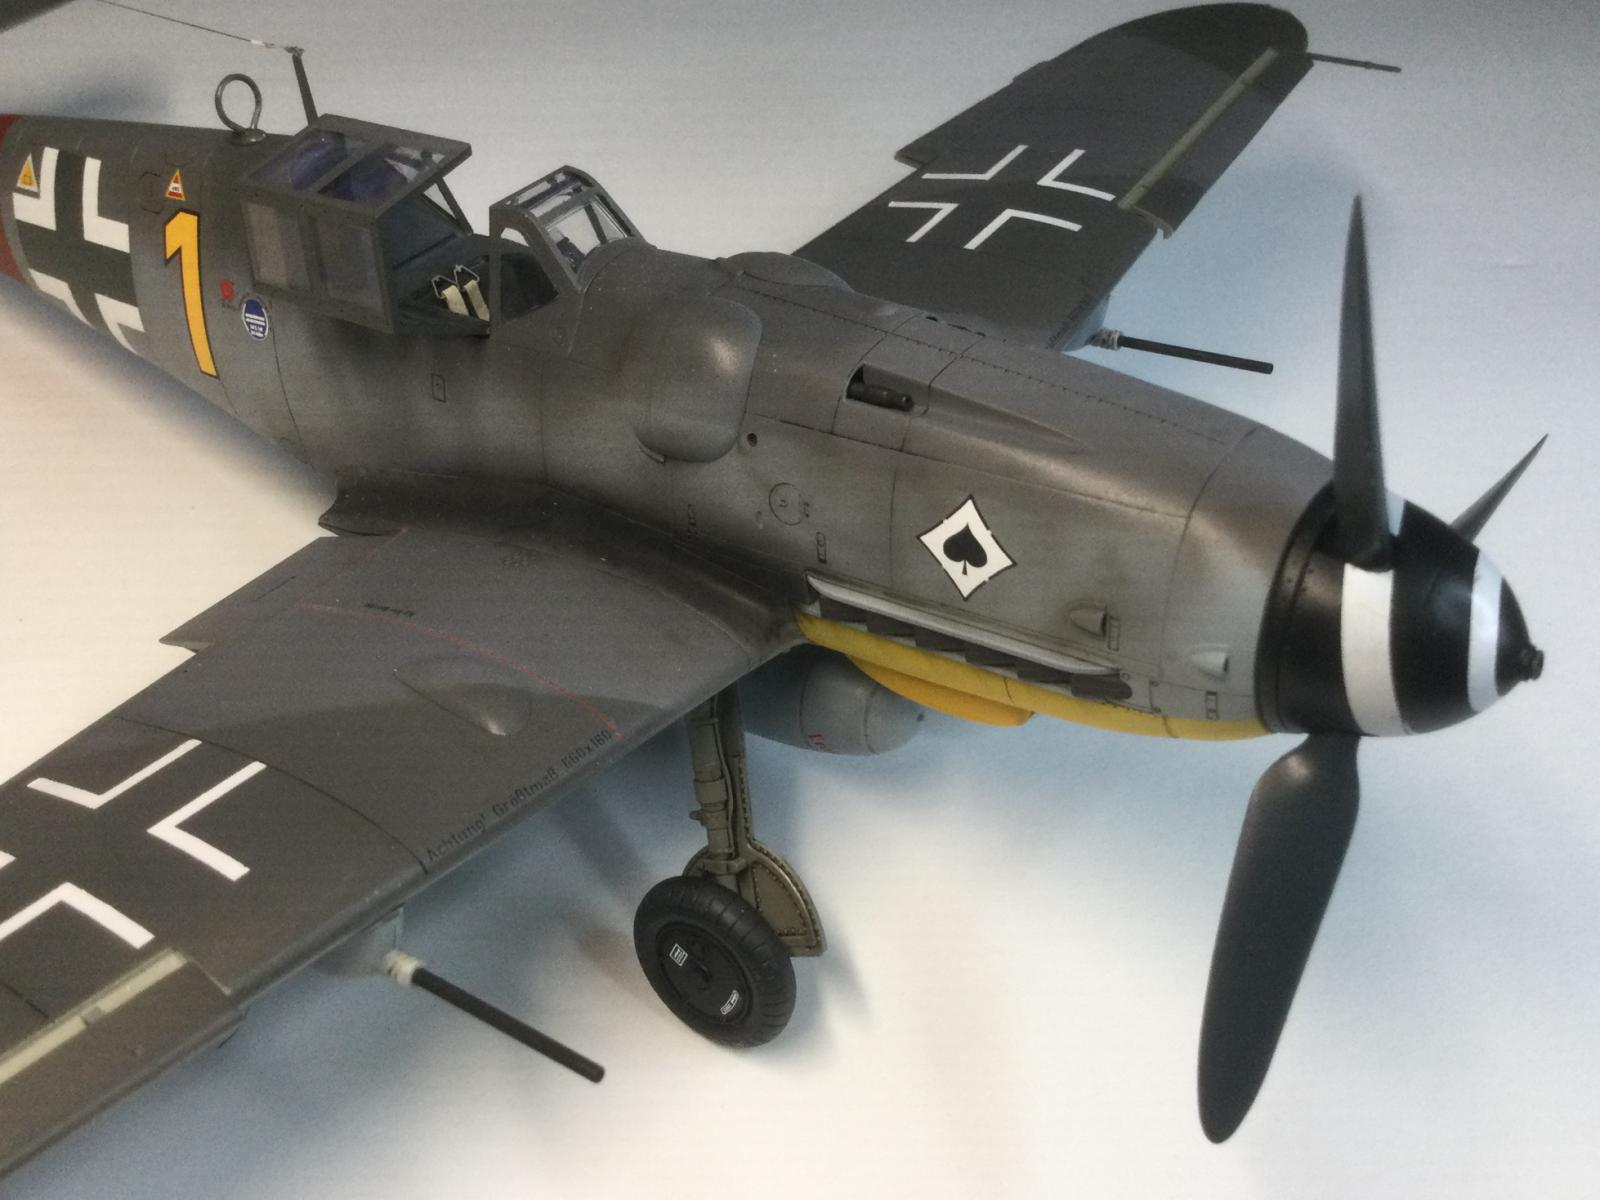
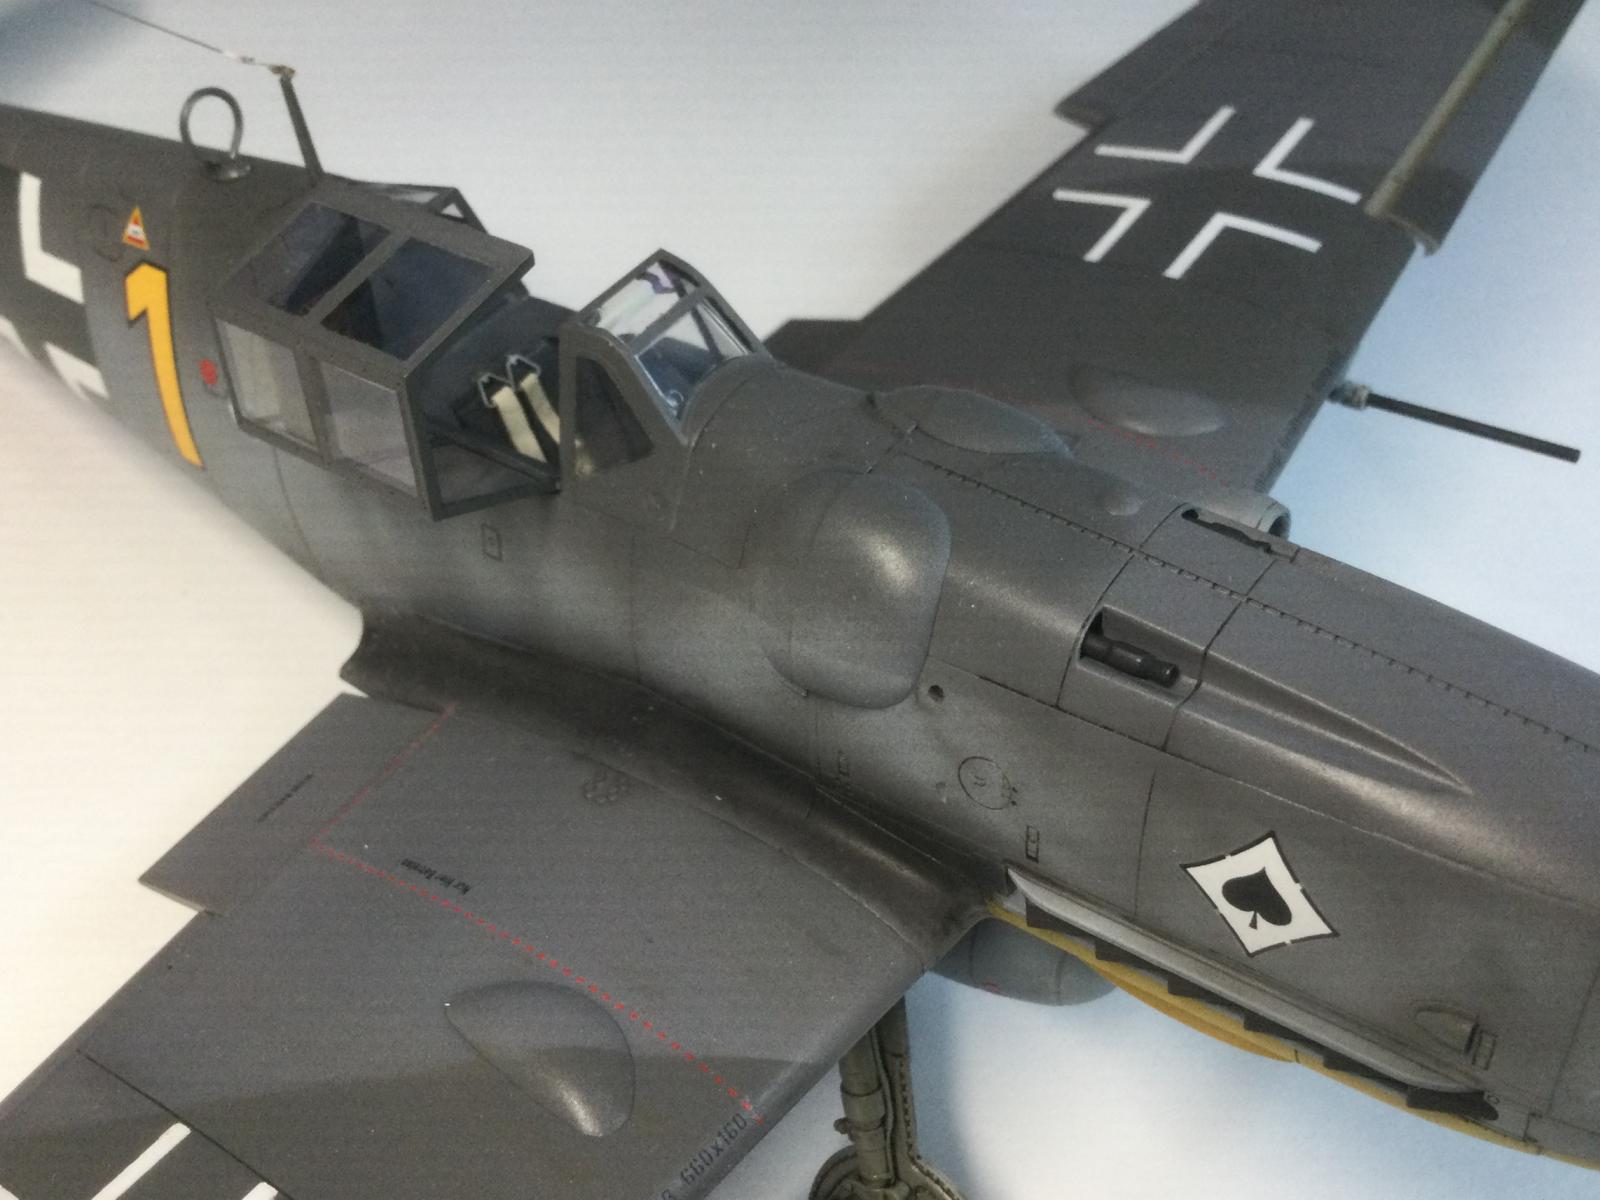
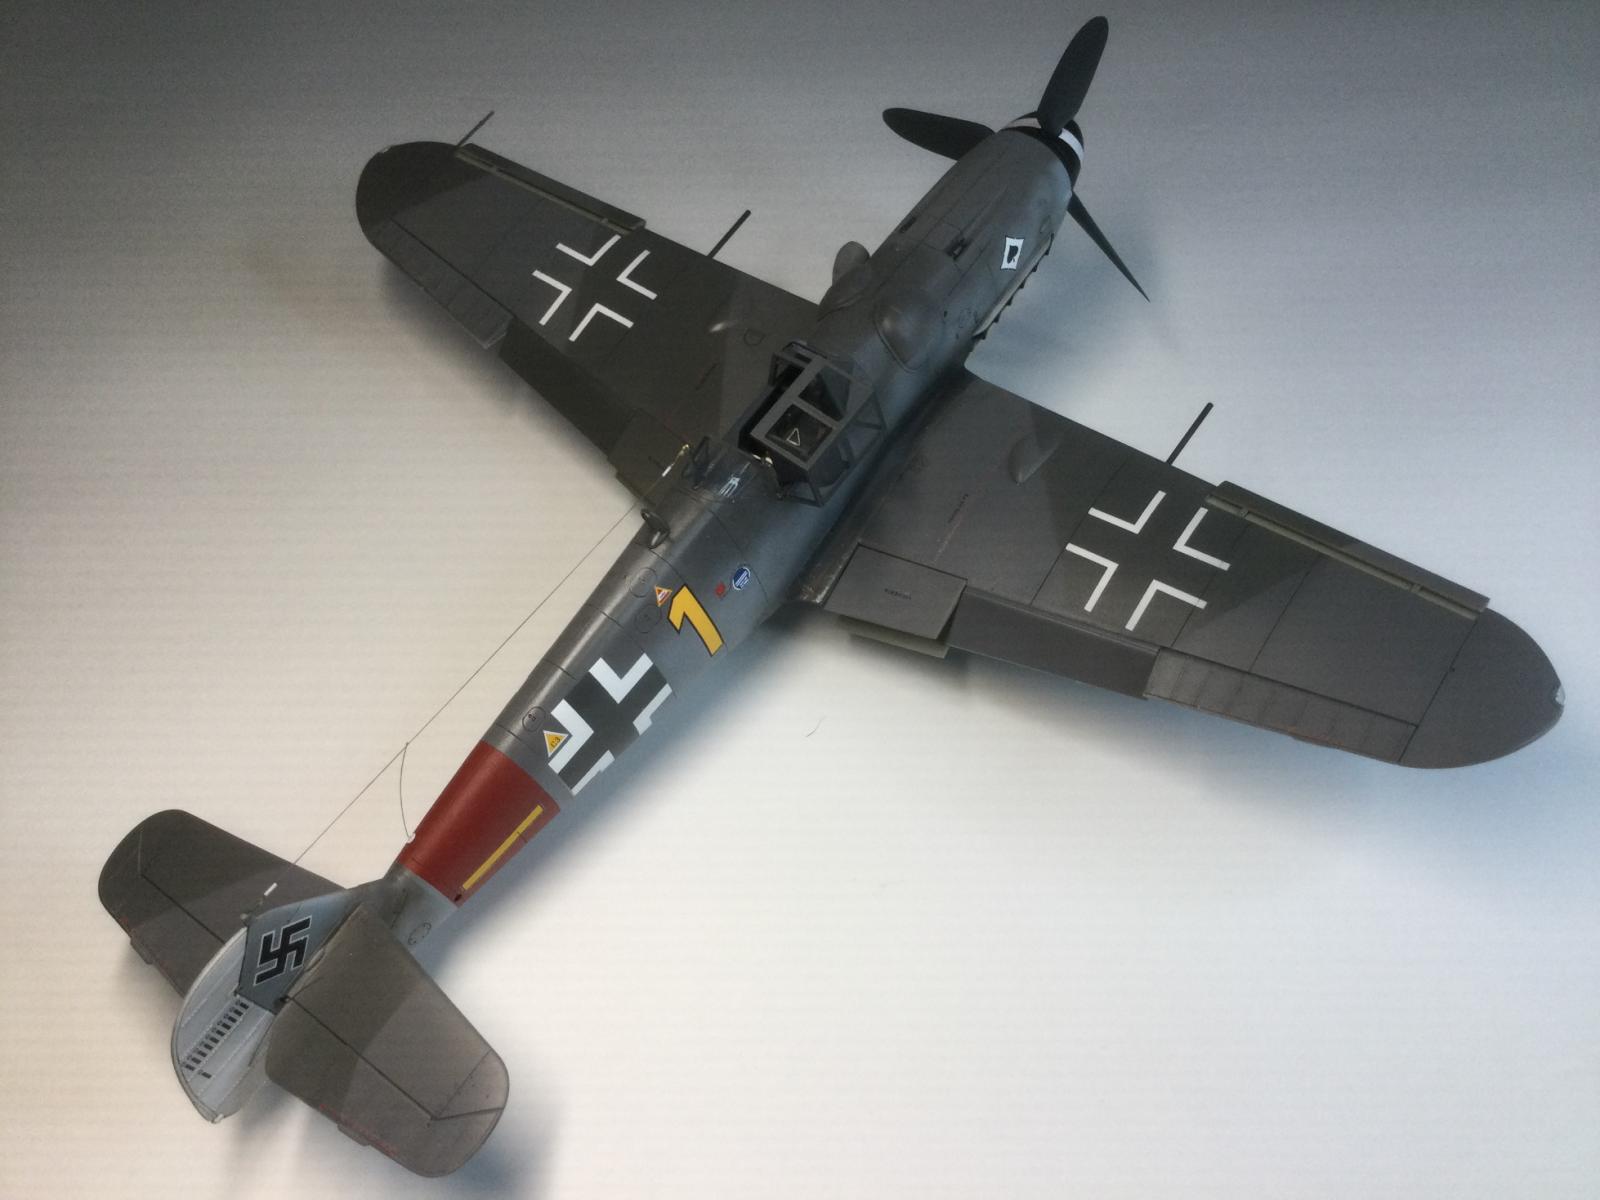
Messerschmitt Bf-109G-6 – Hasegawa 1/32
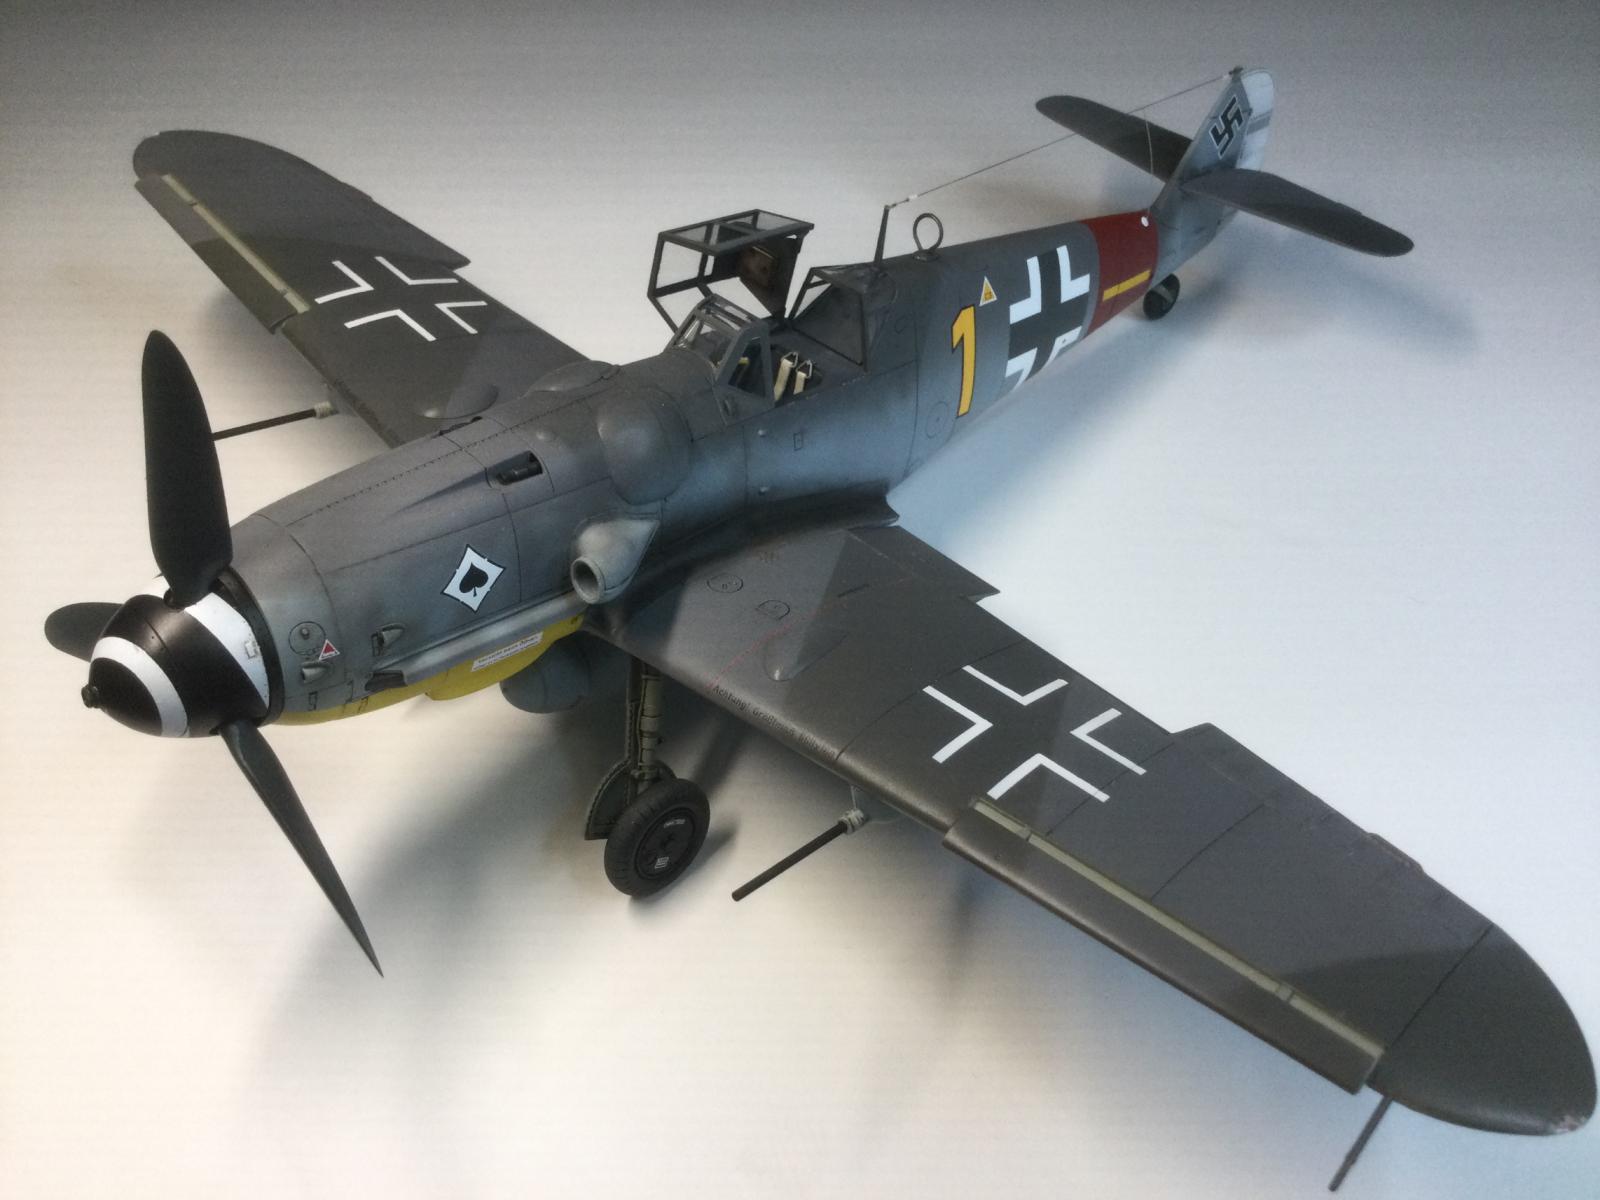
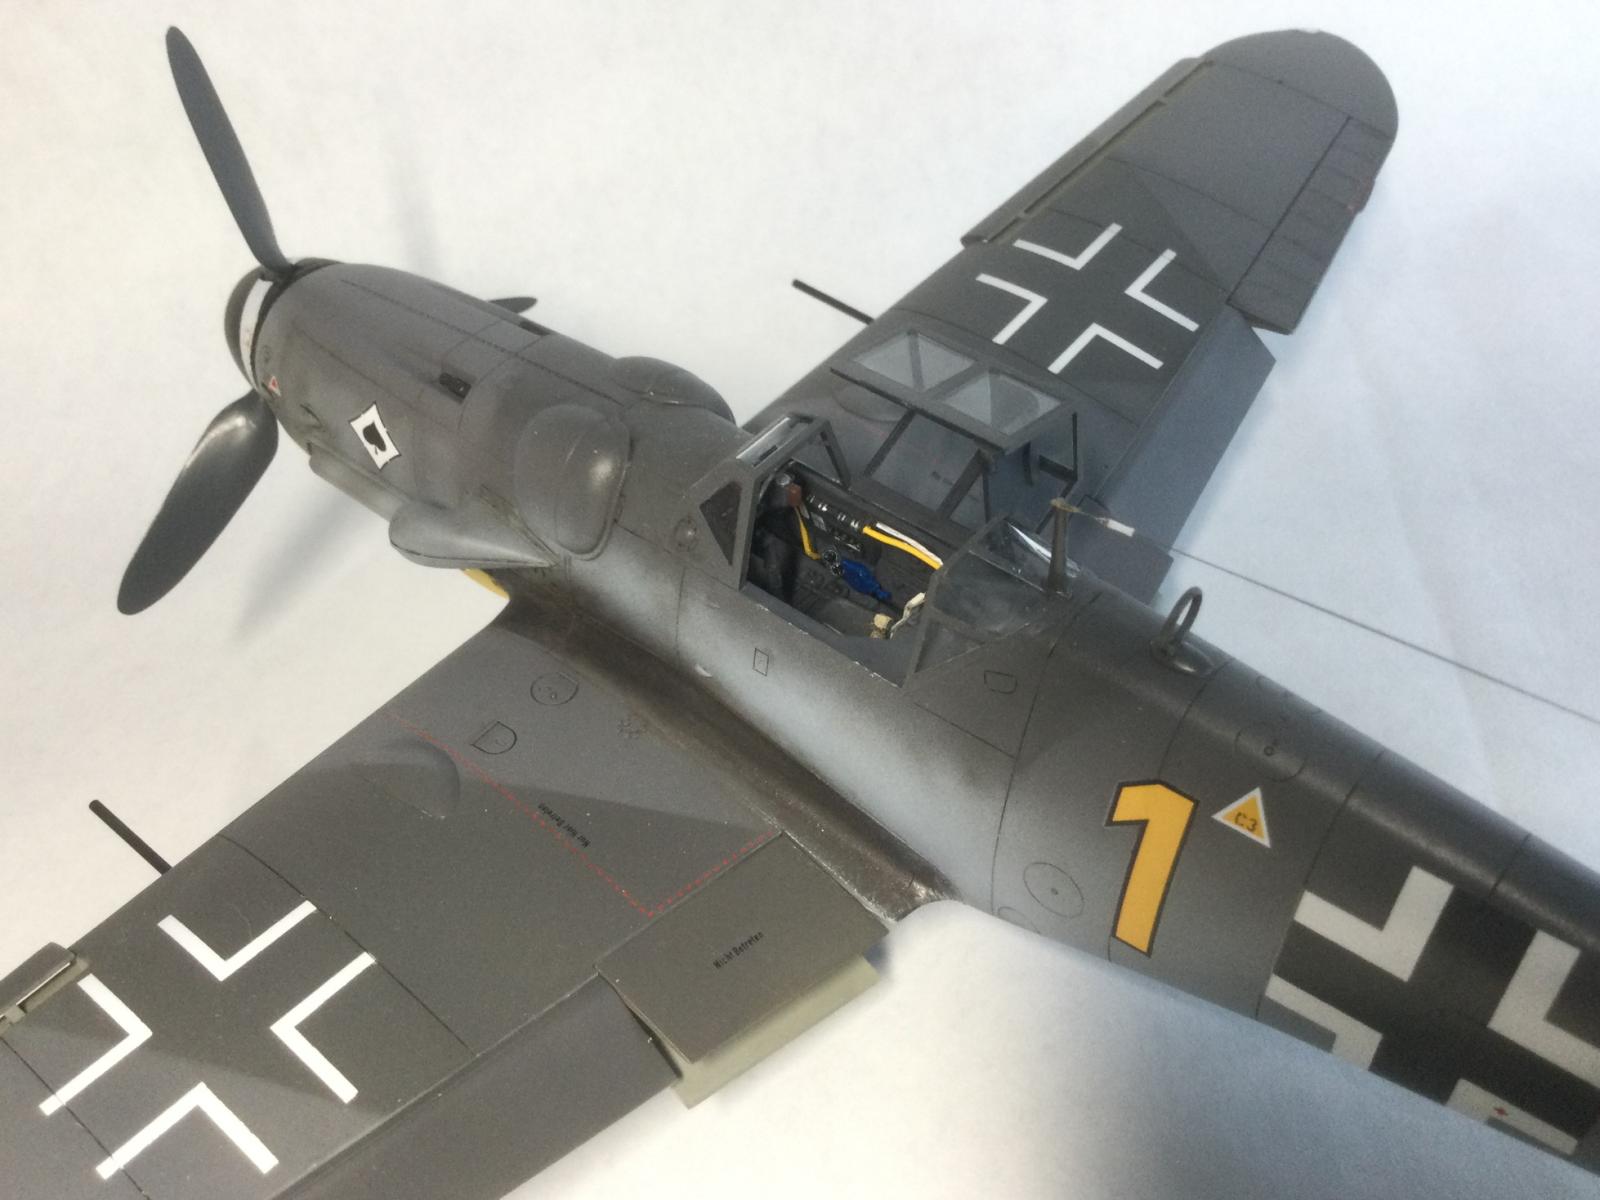
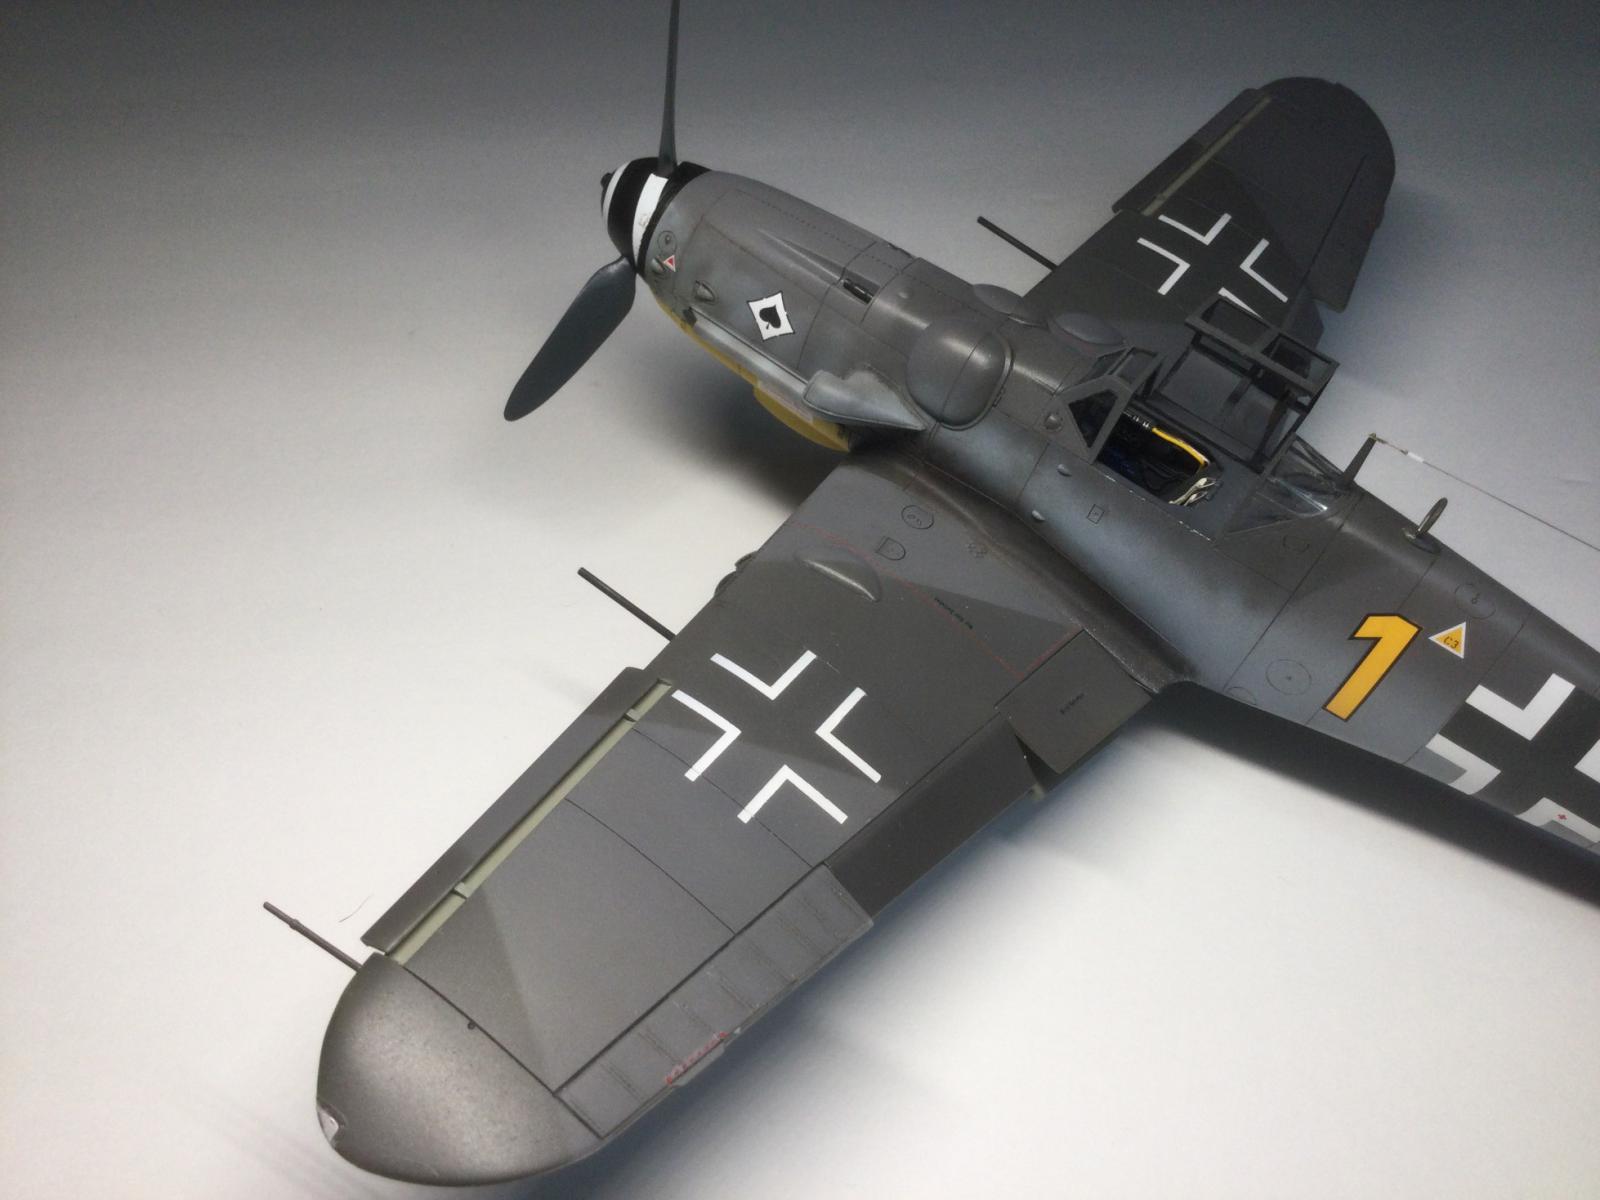
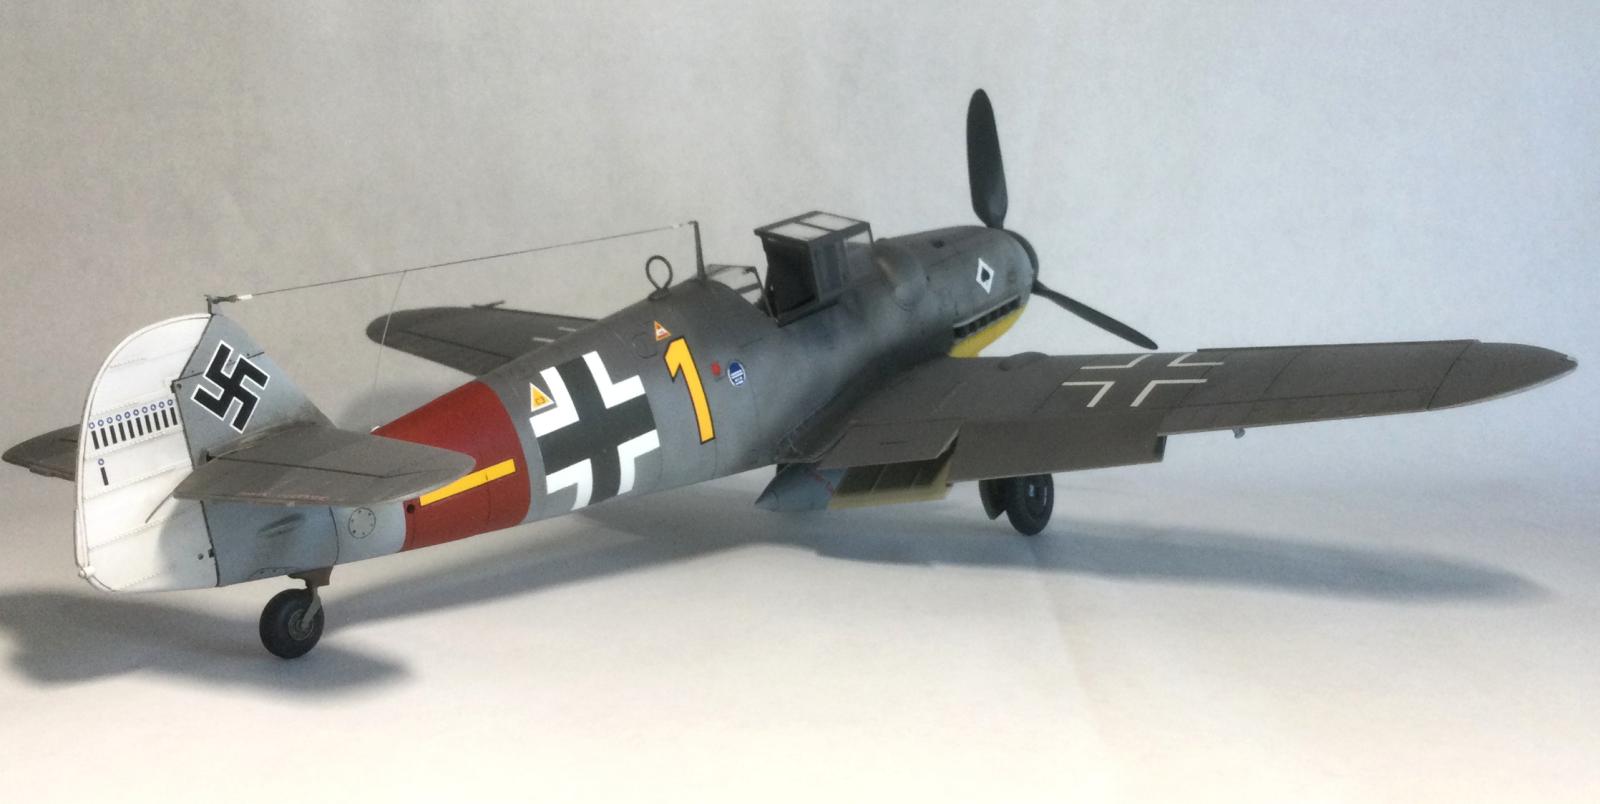
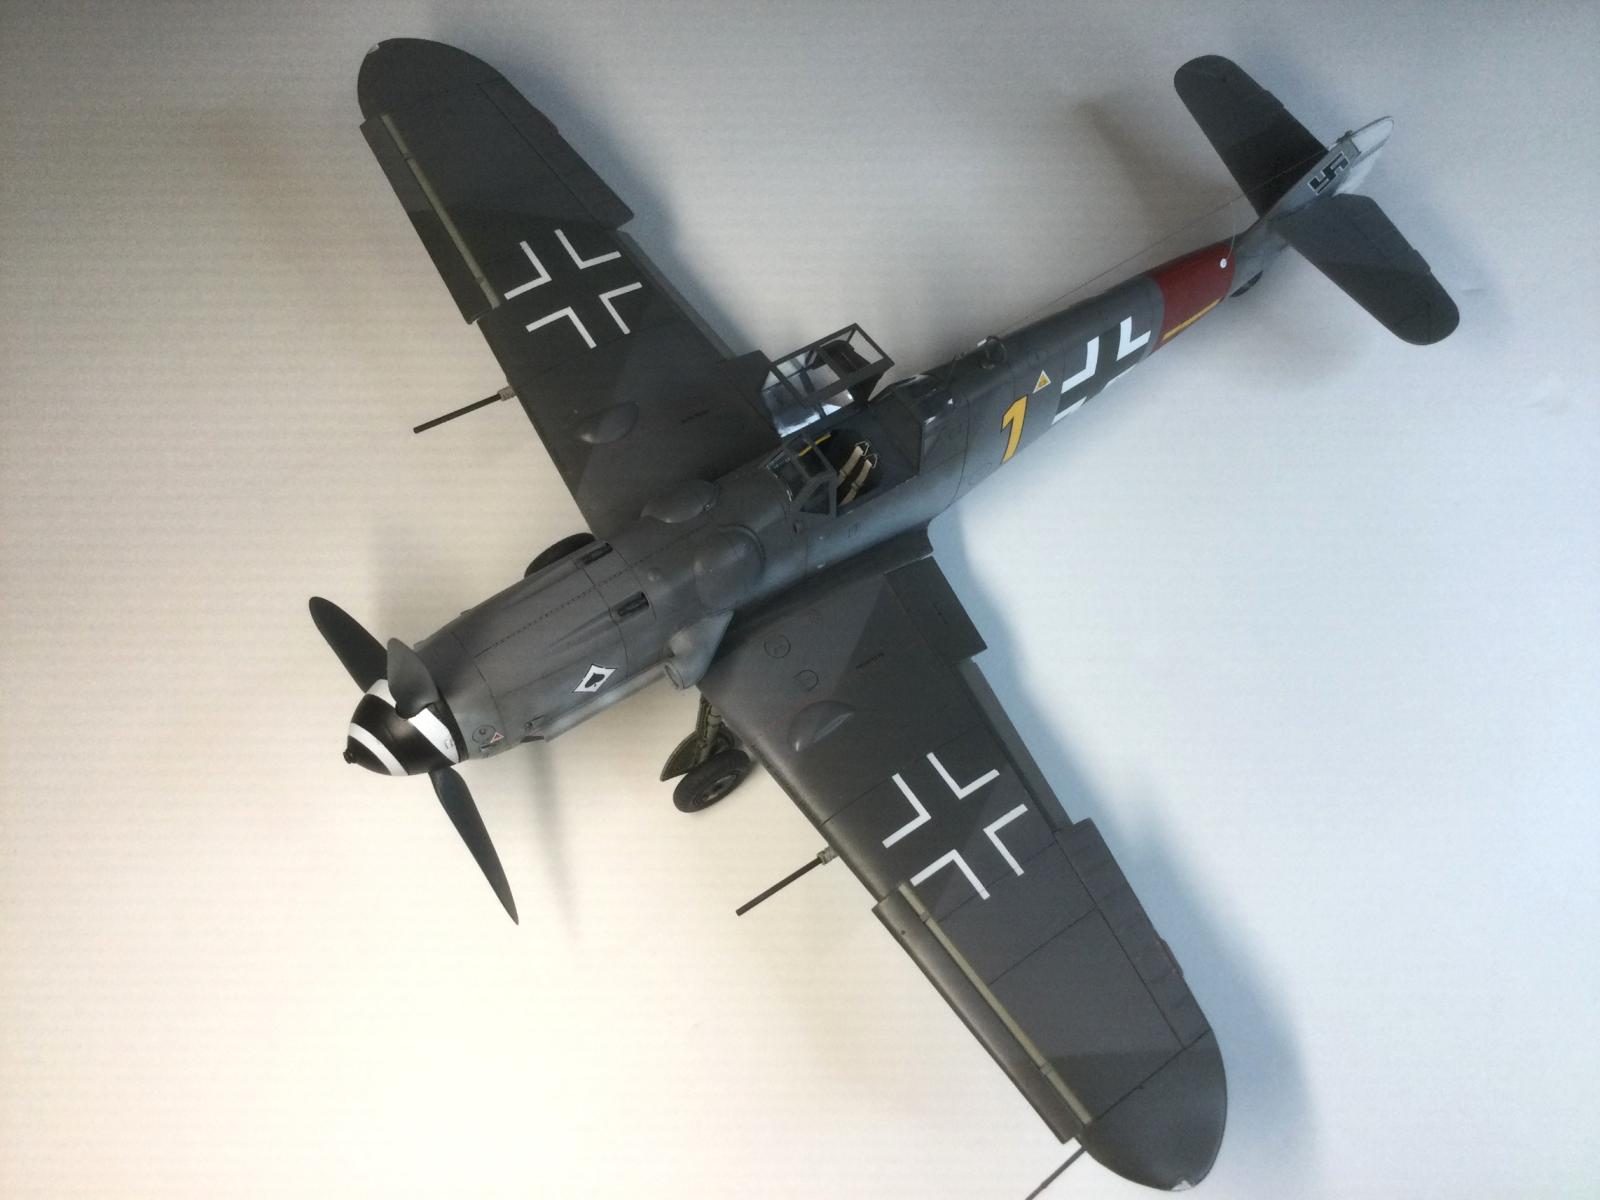
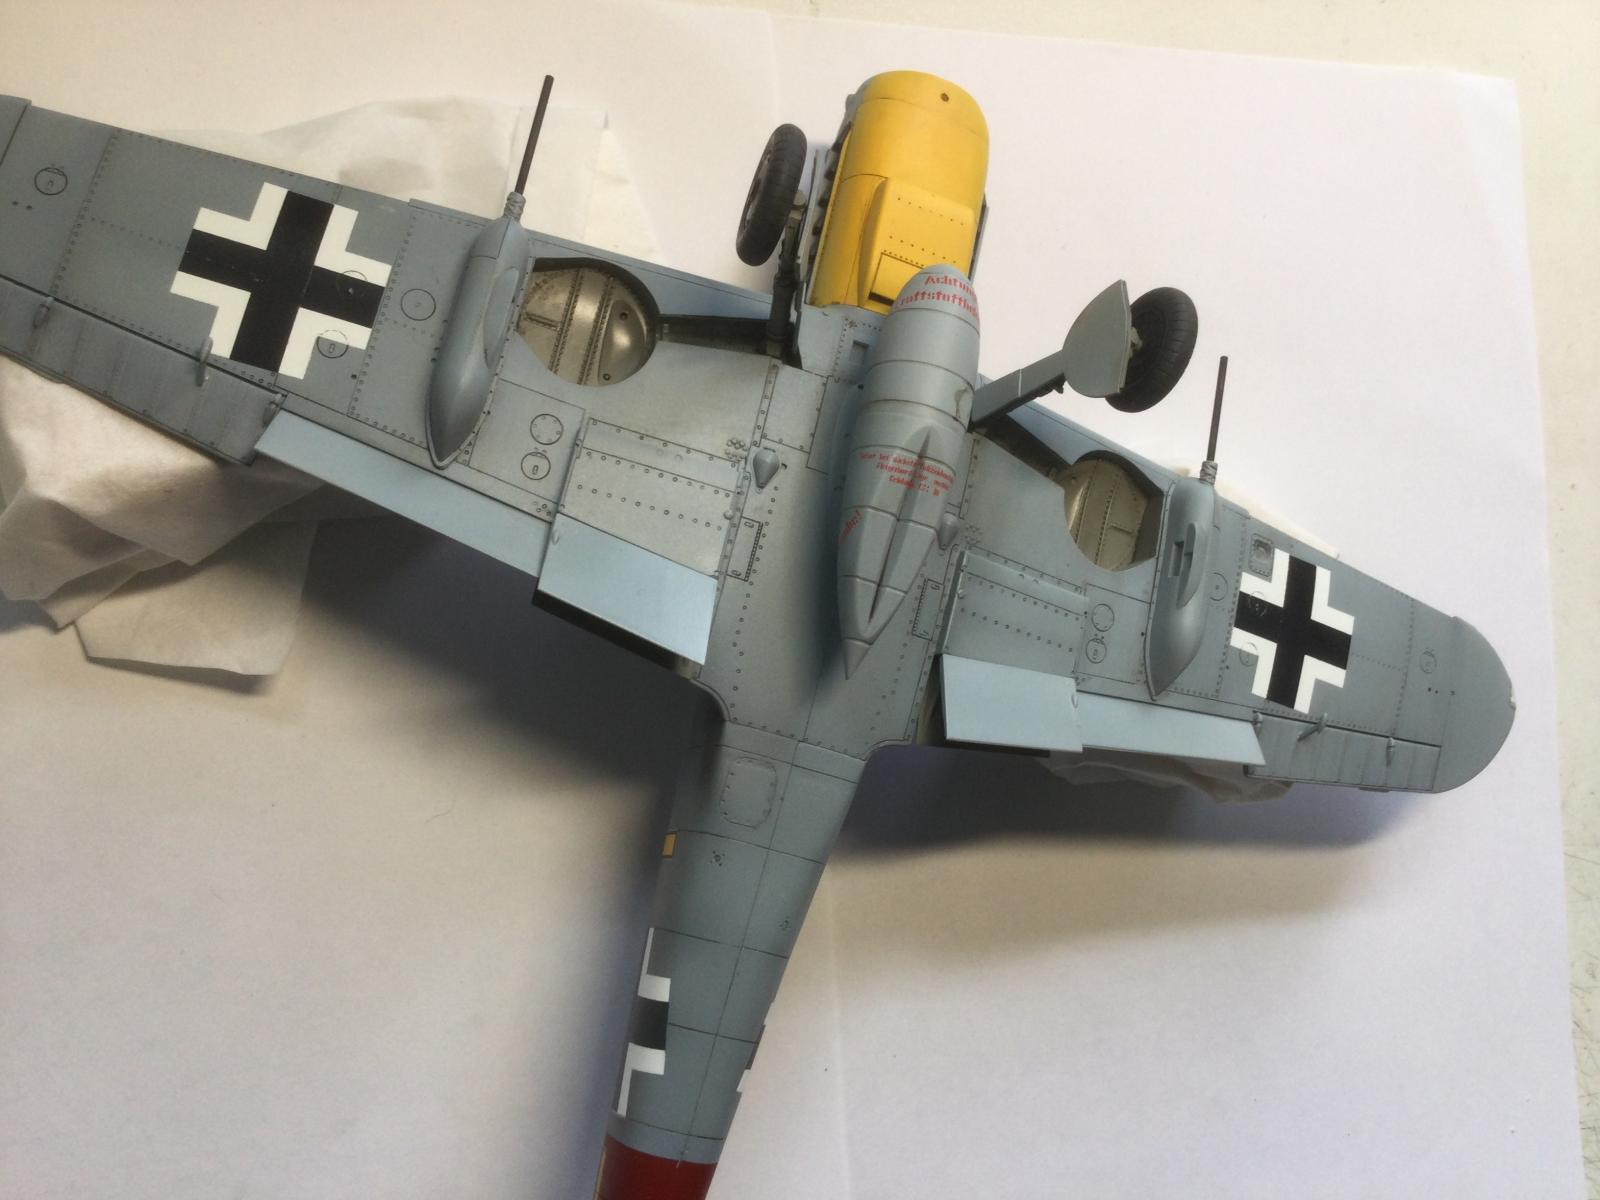
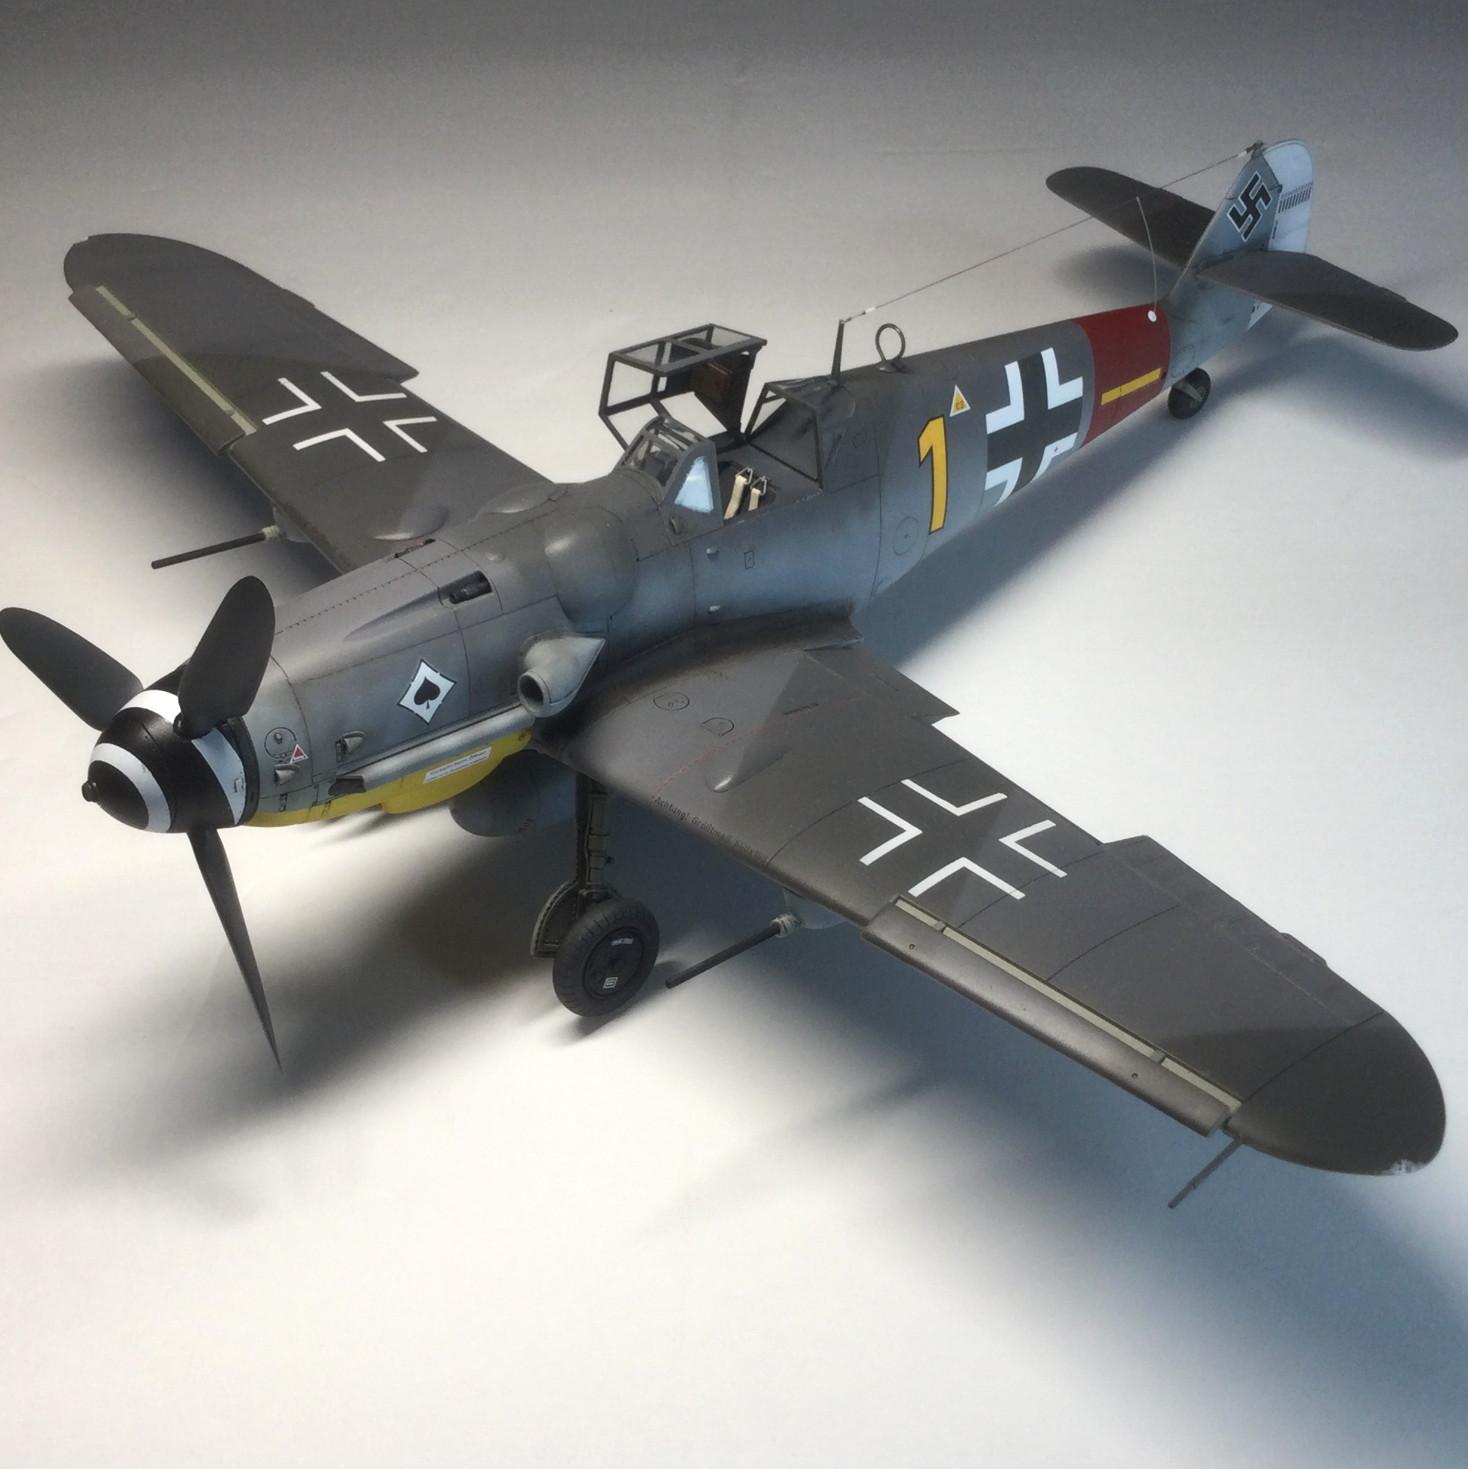
Here are the main modifications I made to the kit: I replaced the kit cannon pods with resin from Barracuda cast. The corrected spinner is from Eagle Parts.
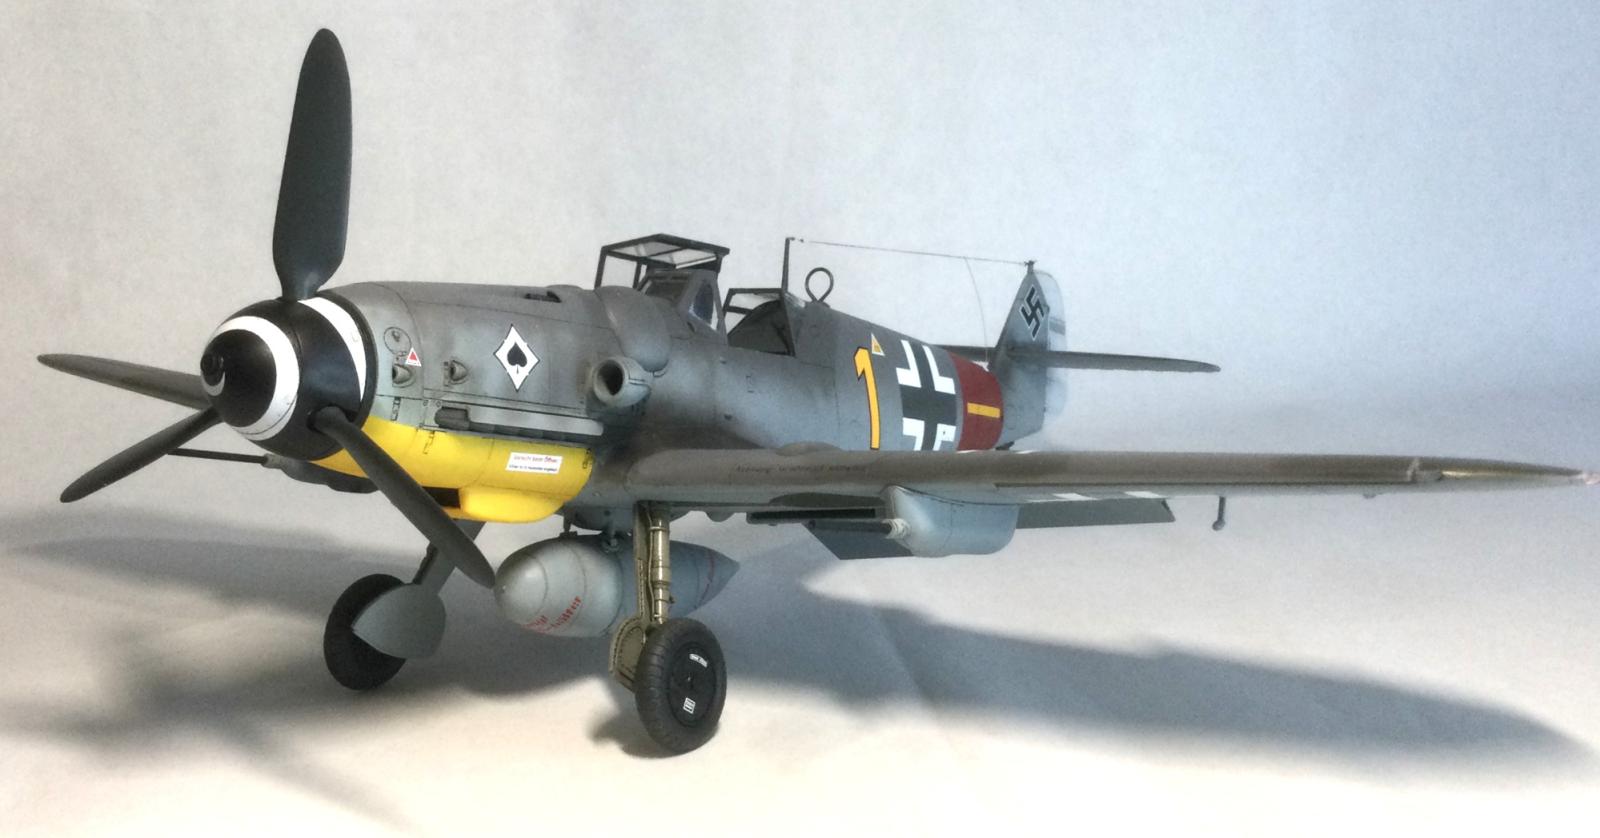
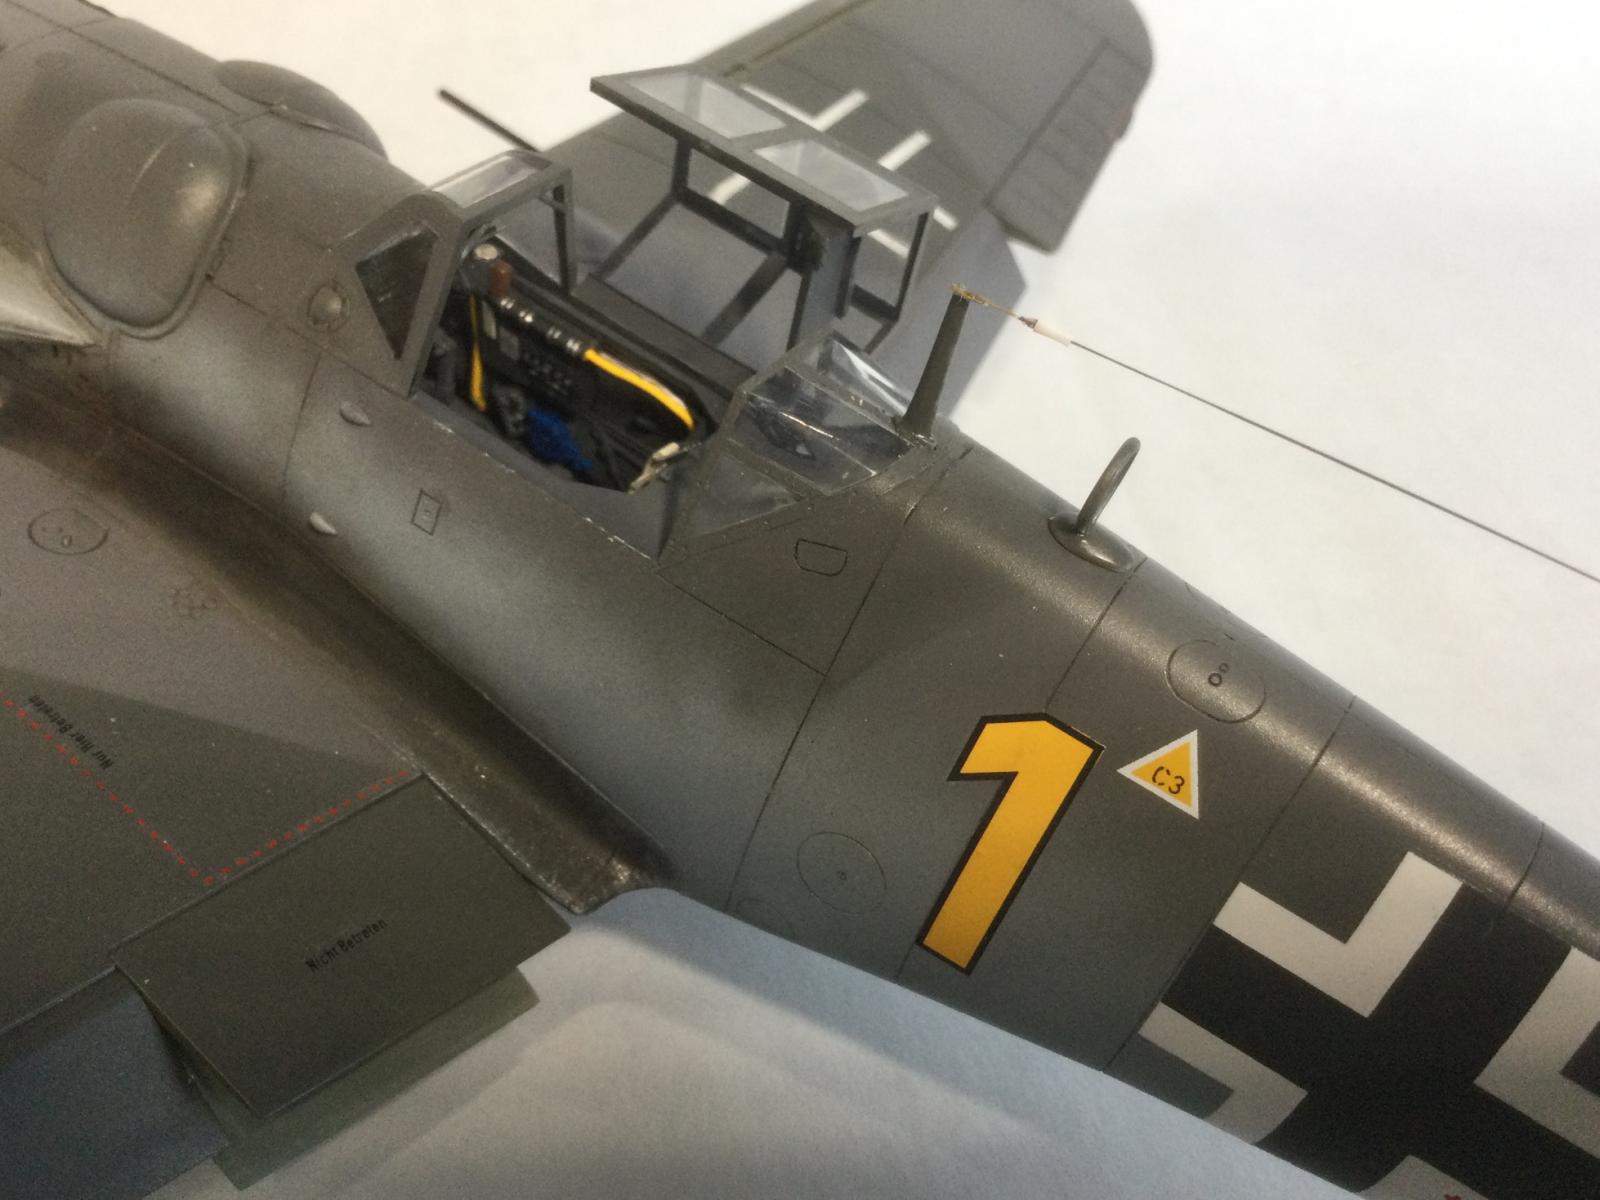
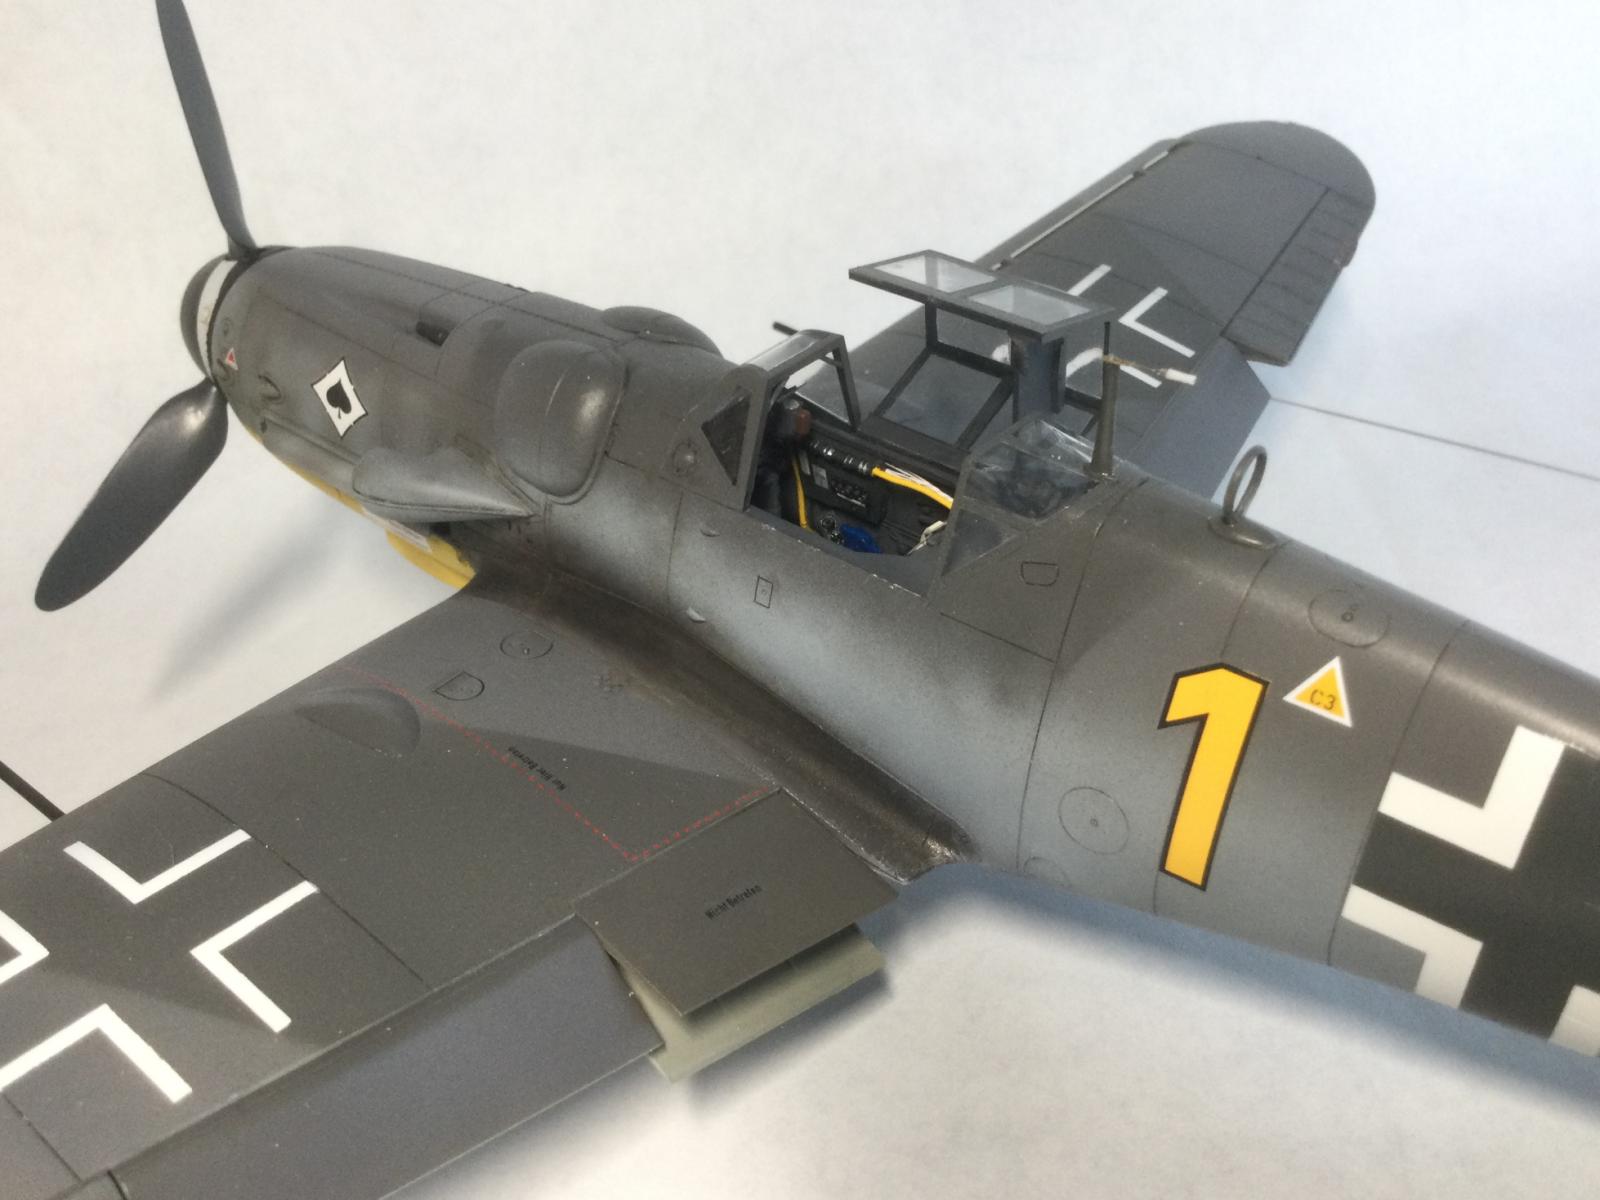
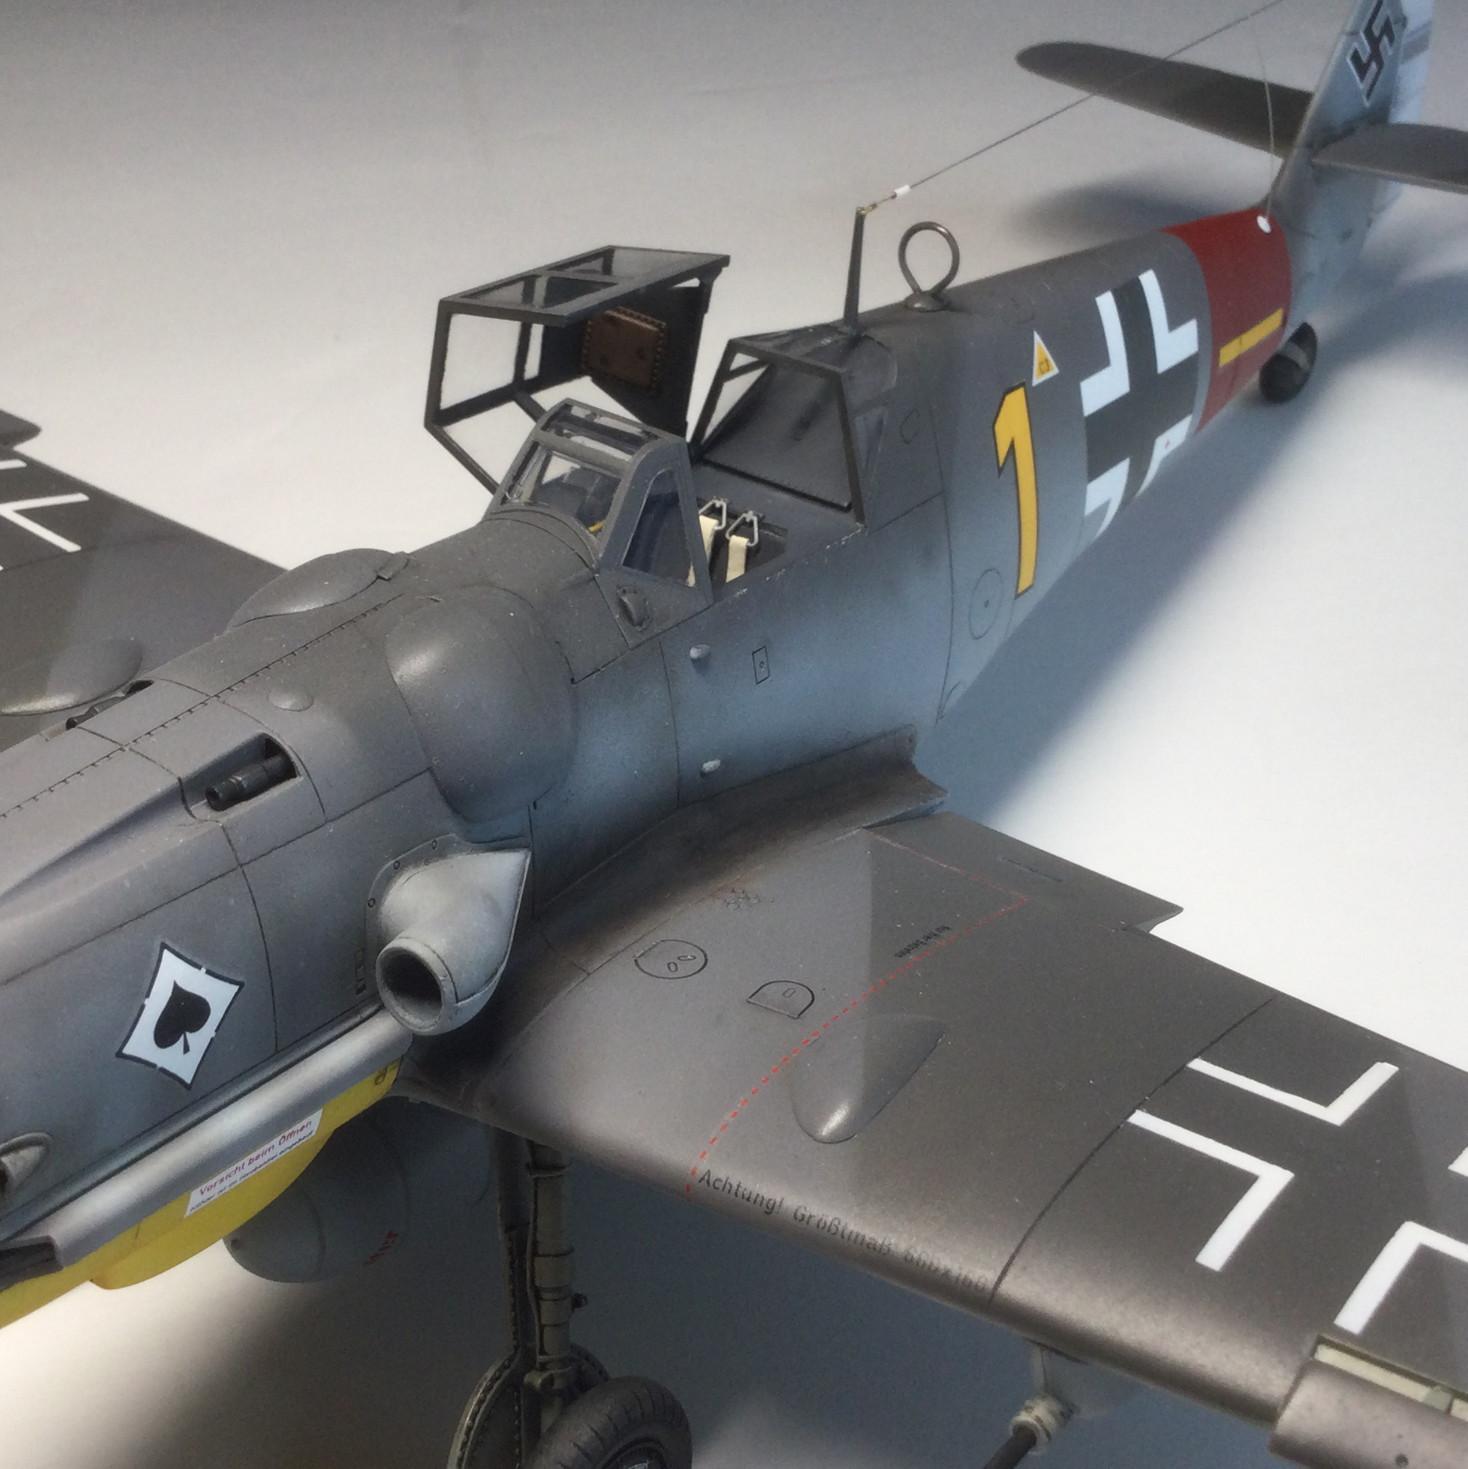
For the cockpit, I added Eduard lap belts and a shoulder harness made from paper with Eduard buckles. The kit IP was replaced with a color Yahu version.
My interpretation of the mount of Alfred "Martillo" Hammer of JG-53 was based on period photos of his plane in different periods as well as photos of JG-53 109s in general and artists' profiles. I tried to get the mottle right and also the correct sequence of the splinter, which is a bit hard to interpret.
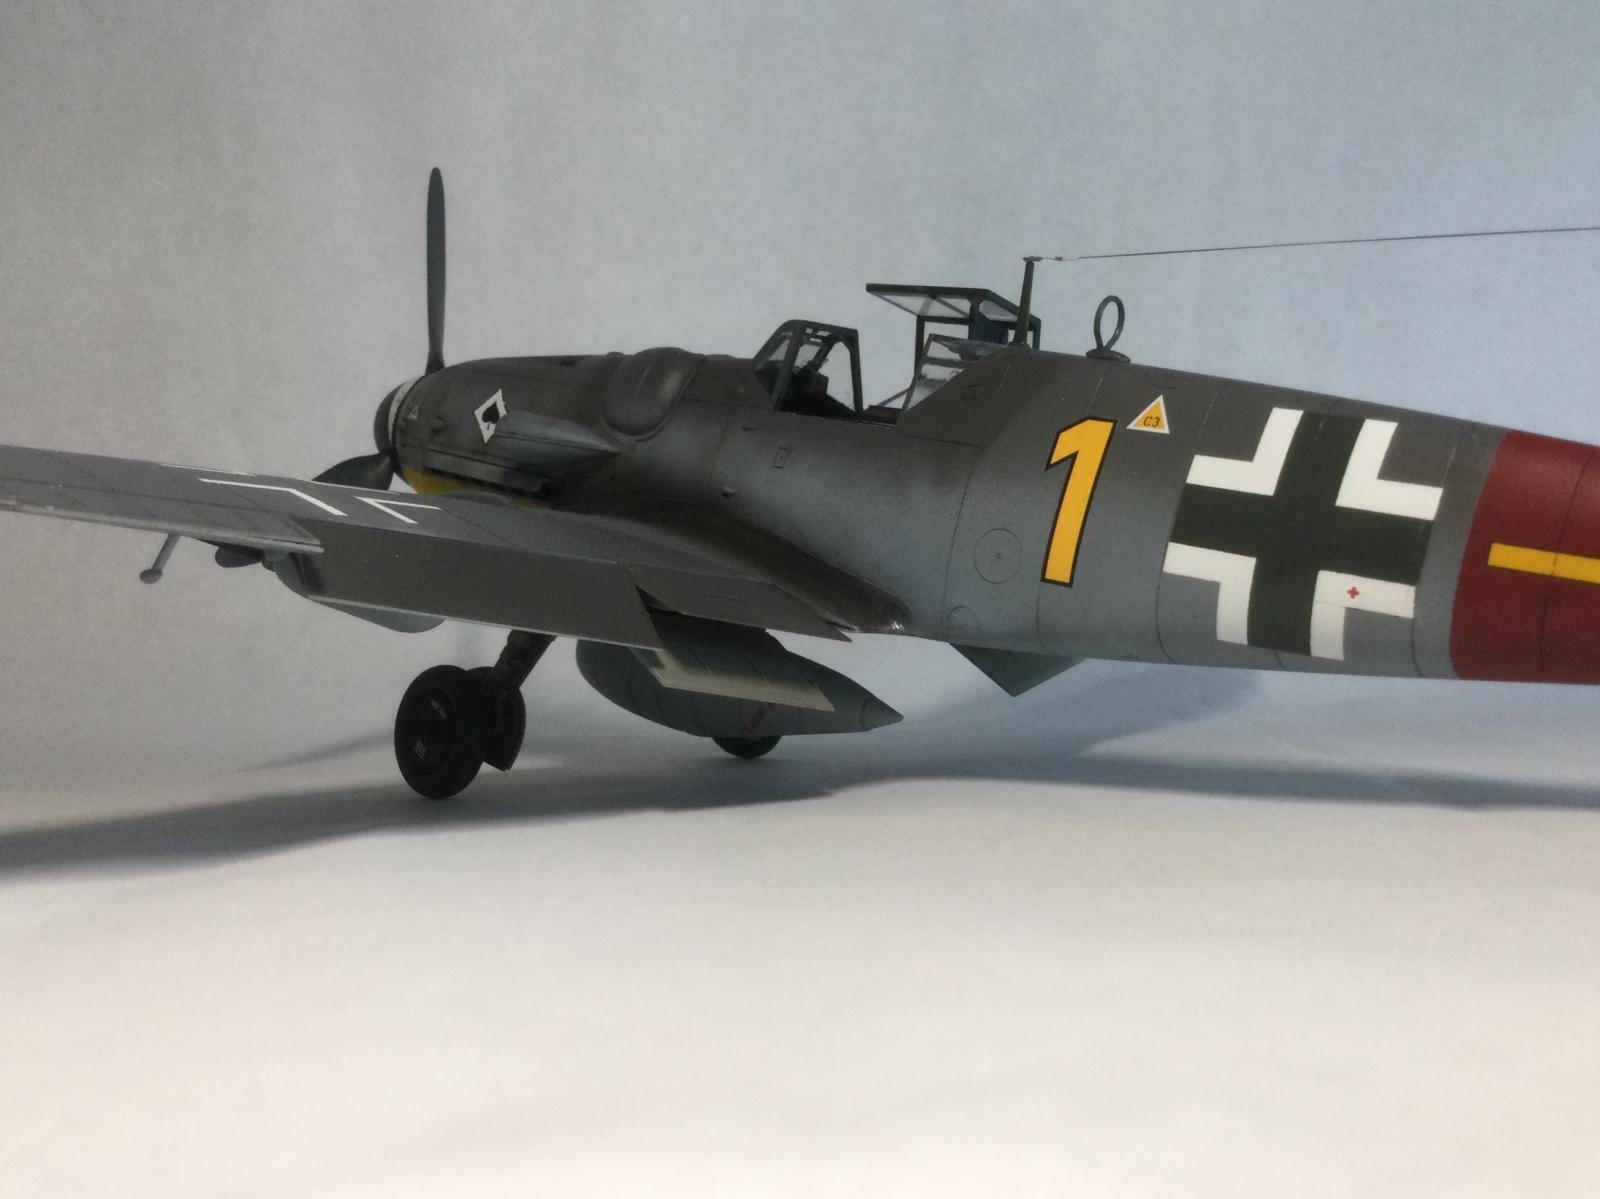
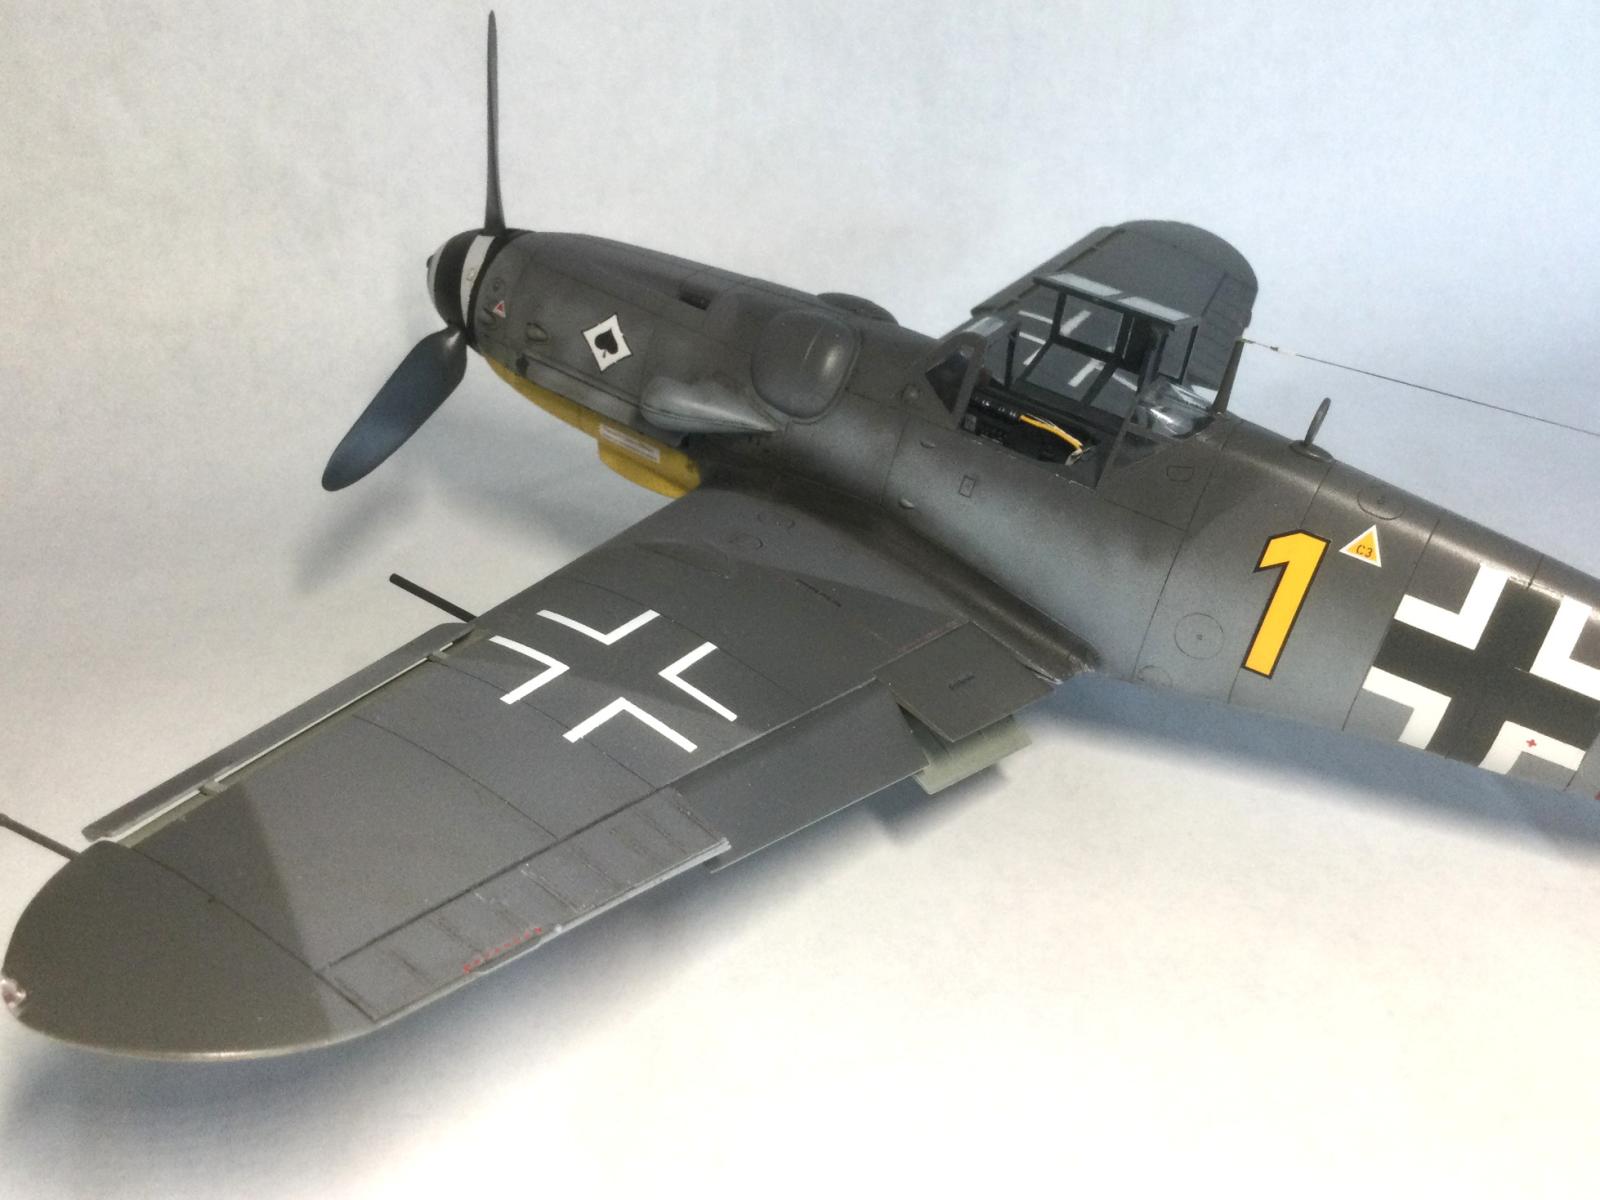
Paints were a combination of MM Acryl for the RLM 76 and matt coat and Gunze for the RLM 74/75 splinter and mottle. Decals are Eagle Cals - not so easy to work with and too thick and rubbery in places. Wing crosses are painted on using Montex masks ( I found that the Eagle Cals were silvering to much to use). General weathering was with oils and pastels with Tamiya smoke plus a charcoal and pastel finish for the exhaust staining.
The antenna wire is EZ Line. I made the attachment points with scrap photo-etch and the insulators from styrene tubing, stretched over a candle to make it thinner (while remaining hollow).
I had to really take my time to mount the open canopy - I created tiny shims at each corner so that the windscreen and rear canopy would support its weight. The framing on the inside was added using super thin styrene and bits of painted decal.
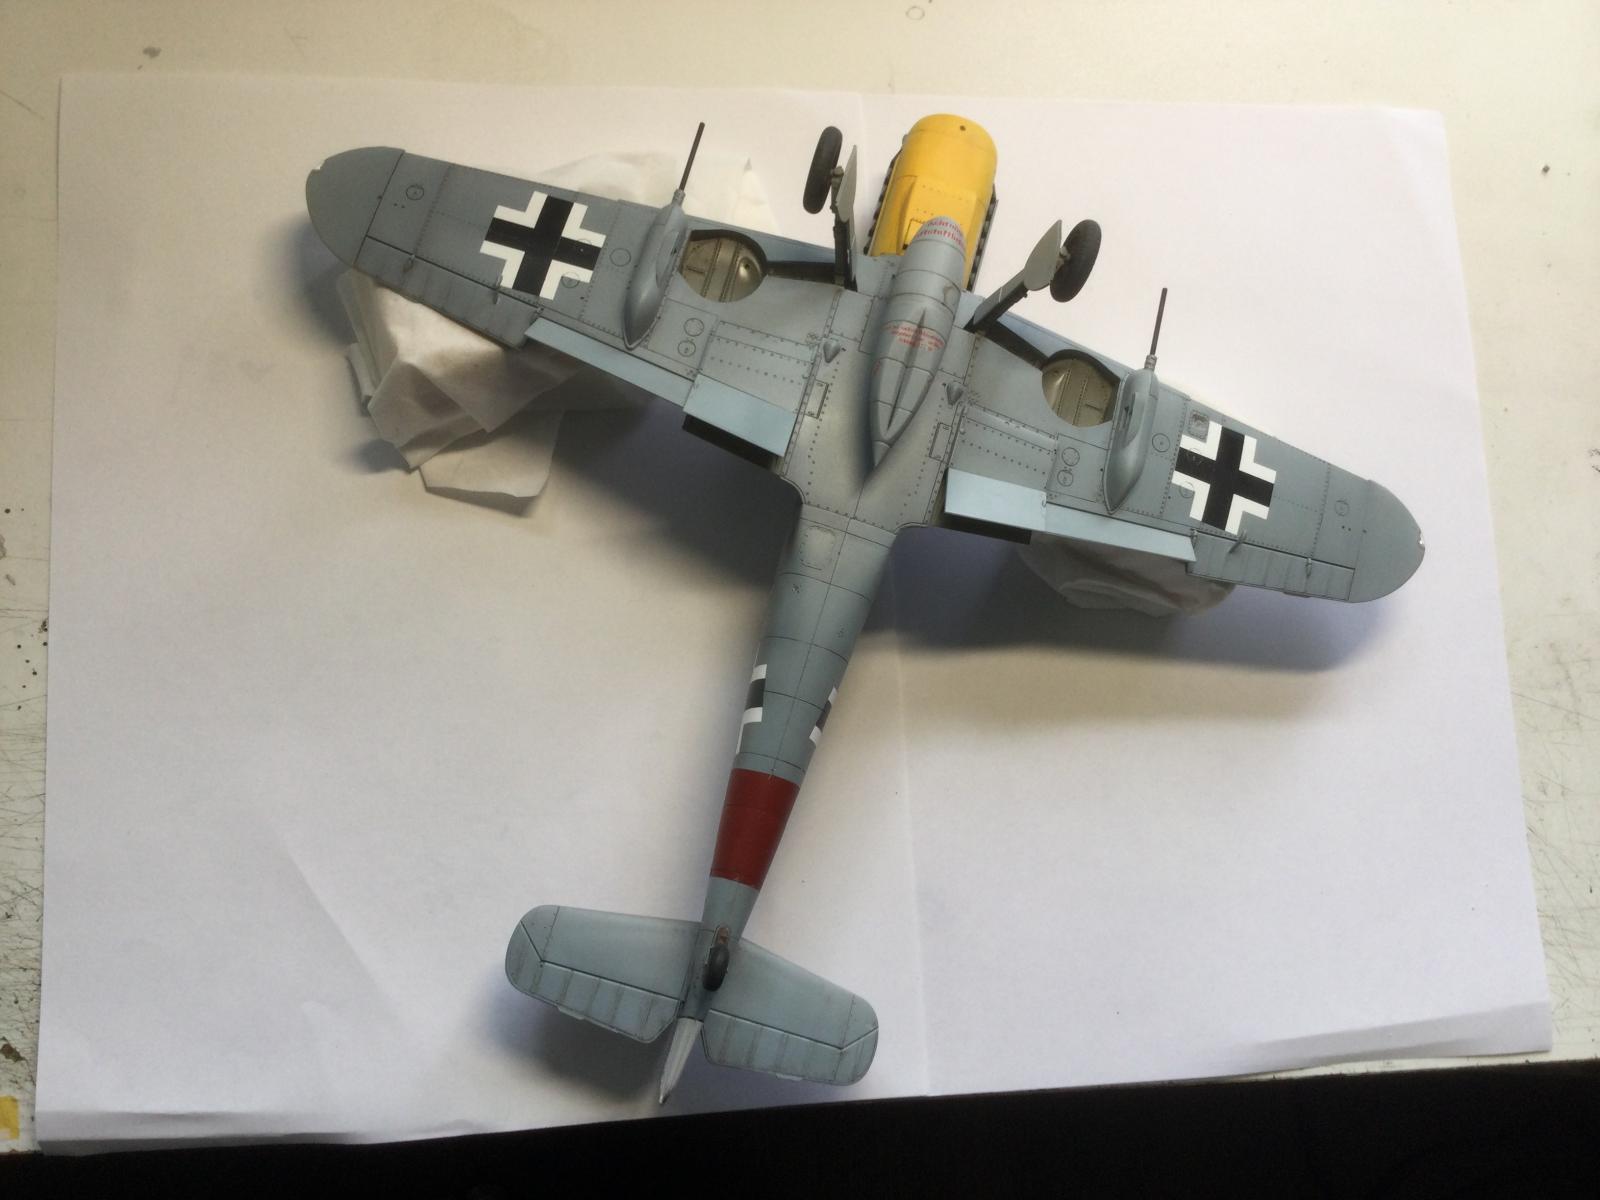
BTW the final underside shots are late in the build but still in progress. I was too nervous to flip the completed model to show the undersides, especially with a delicate aerial to consider.
This one has been a long time in the works. You can see the build progress in the Work in Progress - Aircraft GB, if you are curious. Hope you like it.


This is yet another of your amazing builds, Colin!
Quality and attention to even the tiniest of the details is evident, the result truly wonderful.
The build thread was a joy to follow.
Congratulations!
Thanks, Spiros. The painting was the greatest challenge. Getting all the layers done correctly, including pre-shading, the splinter and mottle and post-shading was a test of patience. I think I need to do a tank next!
Very nice work on this @coling. Your patience paid off.
Thanks, Tom. There were a couple of times when I needed to just hang in there on the build, despite setbacks and reservations. Patience is indeed its own reward in modeling.
Very impressive build, Colin @coling
Great build and ditto paintwork.
Thanks for the building thread, it was a pleasure to follow your progress.
Thanks, John. I kept the build log a bit simpler than usual as I have so many projects going on at once. I am glad it was worth following.
A solid build in this one Colin. Looks gorgeous
Thank you, Pedro. Given your particular interest in Luftwaffe subjects, I really appreciate your feedback.
Wow, that is an awesome Messerschmitt Colin, I can see the incredible detail you put into it. I'm sure the pictures don't do it justice vs. seeing the actual model. I didn't realize Messerschmitts had leading slats on the wings, assuming they were retractable? Congratulations, amazing job!
@jroamer - They're Handley-Page slats - they deploy automatically at low airspeed, then retract when speed is up. FWIW, you can always tell when you're building a "modern" 109 kit - they all have the separate slats.
Thanks for filling in Joe on the slats, Tom. I didn't actually know they were patented as "Handley-Page slats." It's always interesting when allied technology turned up in Axis airframes, like the Rolls-Royce Kestrel in the Bf-109 prototype.
Thanks, Joe. I am really glad you like the detail work. The main thing the pics don't reveal well is the tonal variation from pre-shading, post-shading and the oil wash. I like to weather my models to keep them realistic, but sometimes heavy weathering that shows up well in the average photo looks exaggerated in person. I may take more photos later that reveal the effects. Glad Tom answered your inquiry about the slats. As a matter of interest, it might be worth mentioning that they were spring-loaded so the deployment mechanism at low speeds was quite simple - ie reduced airflow.
An amazing build Colin, this is a great looking Bf-109.
Thanks, Bob. I am glad you like it. It is good to finally get the result I was looking for with a Bf-109G in 1/32. A Bf-109K with distinctive late war colors is on the horizon for me.
Really nice, Colin (@coling). This paint scheme, with the red tail band, is one of my most favorite paint schemes for a 109G.
Thanks, George. I have always been partial to this color scheme myself. As you know from the GB, I had to be patient when painting the red band, but it came out the right color in the end. I was especially happy with how the yellow dash decal brought out the red tone that much more.
Great looking 109!
Thanks, Dale. I really appreciate your feedback.
🙂 ... Greetings ... 🙂 :
A true modelling gem Colin.
The painting on this model is a real show stopper, nicely applied and so accurate in it's application.
Thanks for your kind words. I am really happy you like it.
What a winner, Colin @coling! All that detail looks superb. That's a great idea using tubing for the aerial insulators especially for this scale.
Thanks, Eric. Quite a bit of work there, not all of it very visible. I forgot to mention that I drilled out the exhaust stacks. That work is almost invisible under the flame dampers but heck, it was fun to do. As for the technique with the insulators, this is the second time I tried it. These little tubes were quite a bit finer than the ones I created for the Buffalo build. I went a bit cross-eyed getting them to slide over the aerial wire but the main challenge was struggling with the weird elasticity of the EZ line. Sometimes this kind of detail work can seem a bit crazy when you are in the middle of doing it.
Nice work, Colin! Very clean 109.
Thanks, John. I am glad you like it. I hope it doesn't look unrealistically clean. I always hesitate to go overboard on the weathering with a quilt-like effect on panel lines or big dark smudges. I actually did quite a bit of pre-shading, starting with dirty back along panel lines.
Very nice 109. Yea, spiral spinner decals! Especially on 1/48
Thanks, Ross. You're braver than I am doing that kind of decal in 1/48. It's a compromise with the decal material being thin/flexible and still tough enough to take repositioning and compressing around complex curves. The Eagle Cal decal was a lot of work but looked good in the end.
I have an FW 190 and BF 109G with them. None of them look very spectacular I'm afraid!
Finished at last, Colin, and all your effort has really paid off with this superb model. I enjoyed following your WIP as well, definitely liked.
Thanks, George. I am glad you liked the WIP build log.
Looks great!
Thanks, Greg. I always appreciate your feedback.