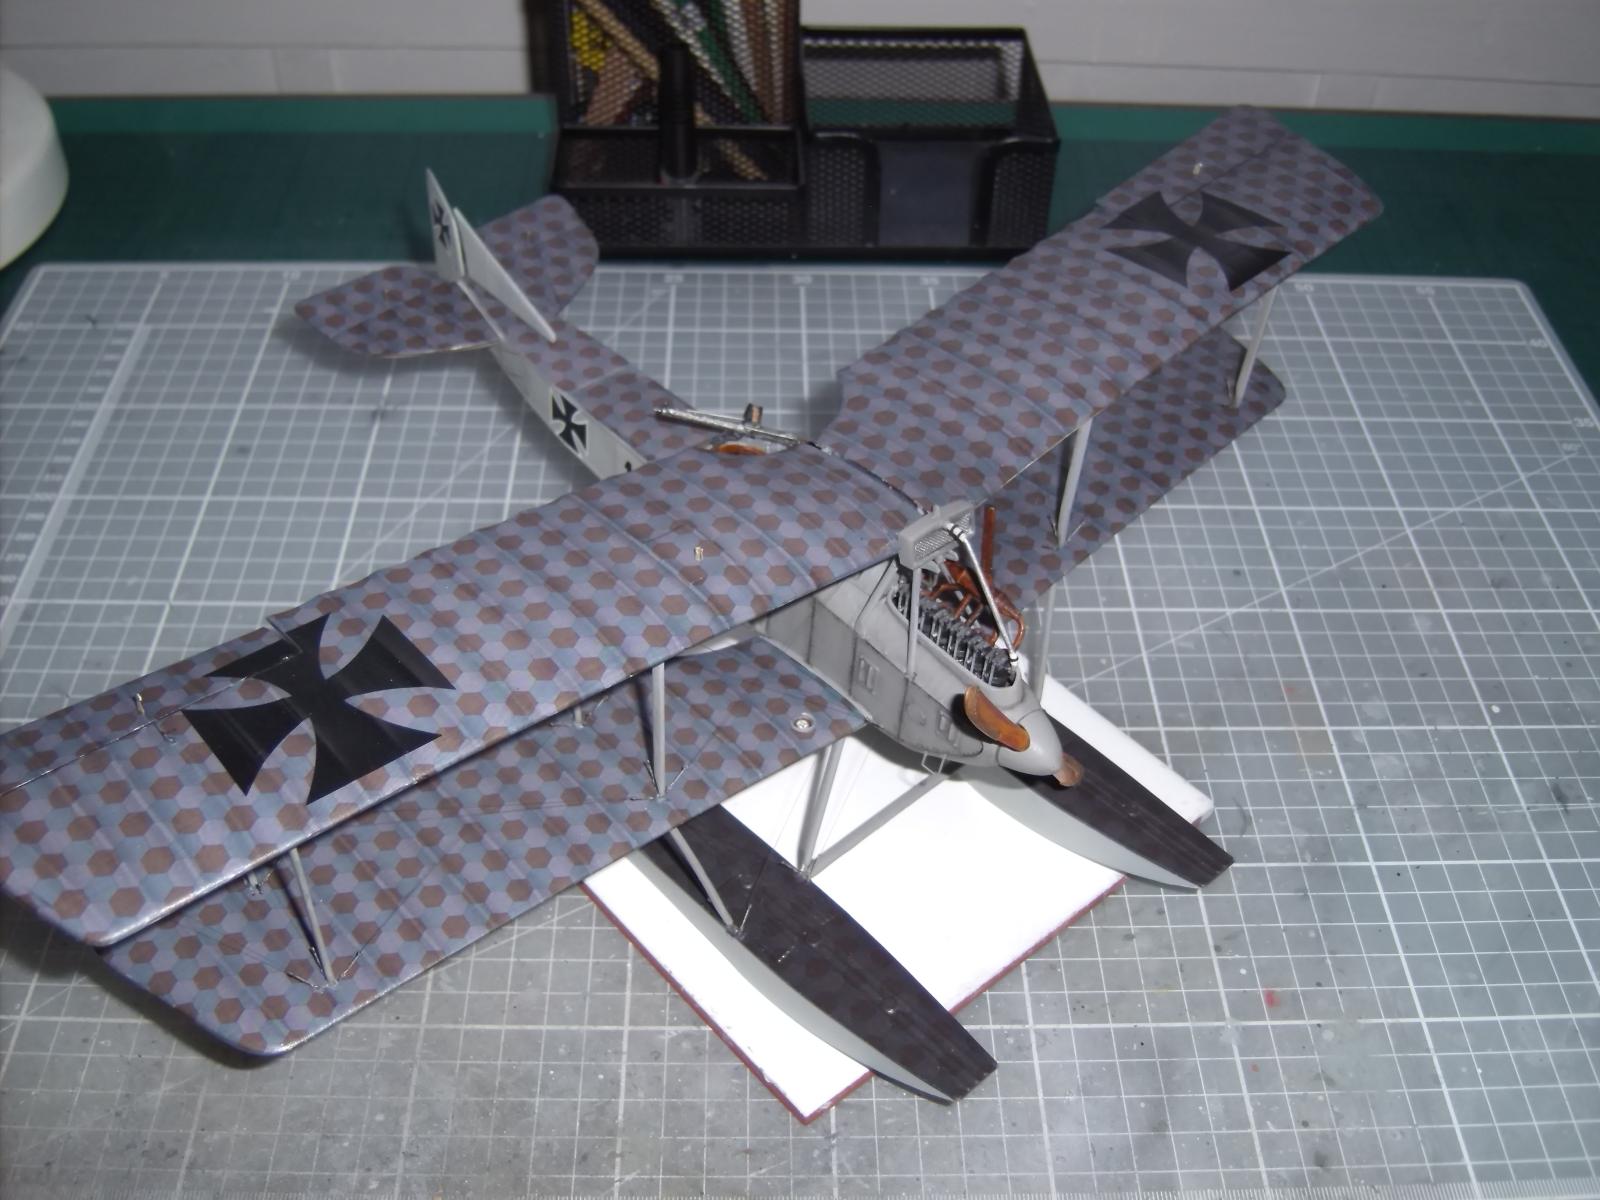
Friedrichshafen FF33L – 1/32 scale
This is my first venture into a resin model of a WW1 subject, and a floatplane into the bargain. The kit is from the Polish manufacturer Lukgraph, and is a refreshingly unusual subject, whatever the medium or scale.
The kit was built for the 'Imperial German...' group build, and the full build can be seen under that header by clicking on the 'Group' tab; I opened this article so that I could also have the model included in my blogspot.
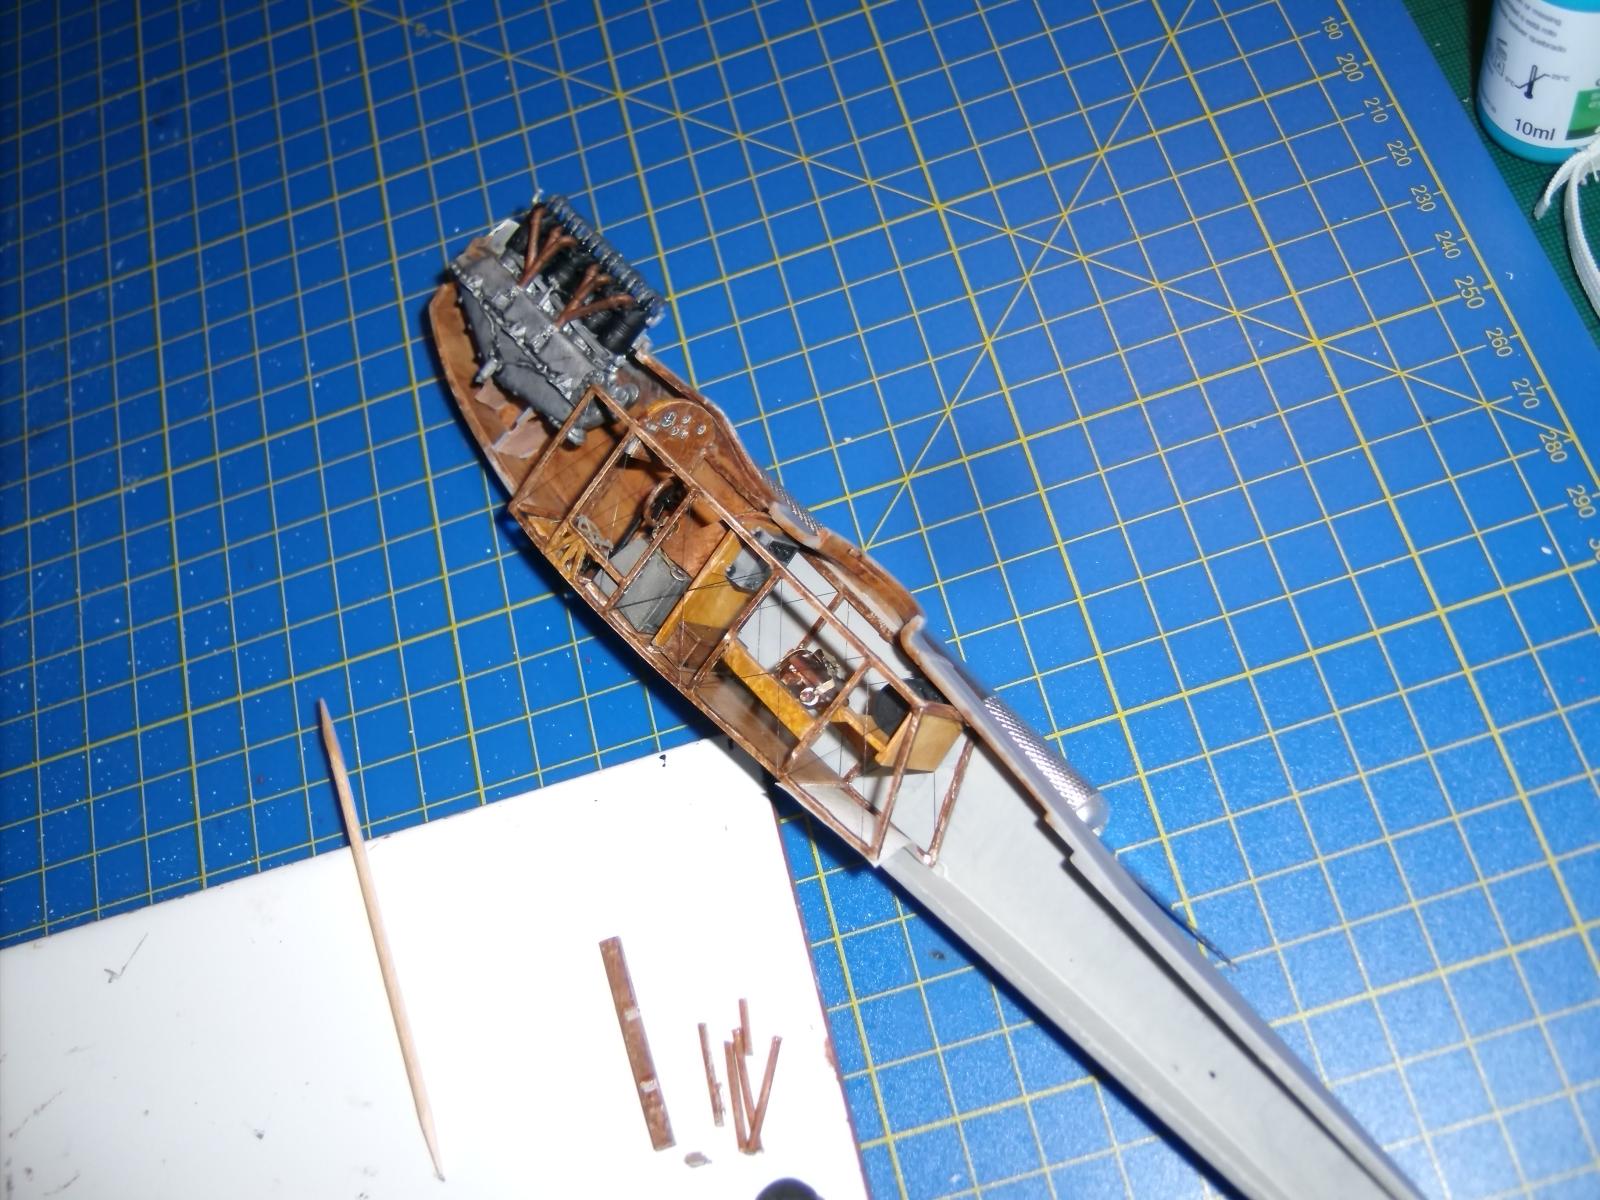
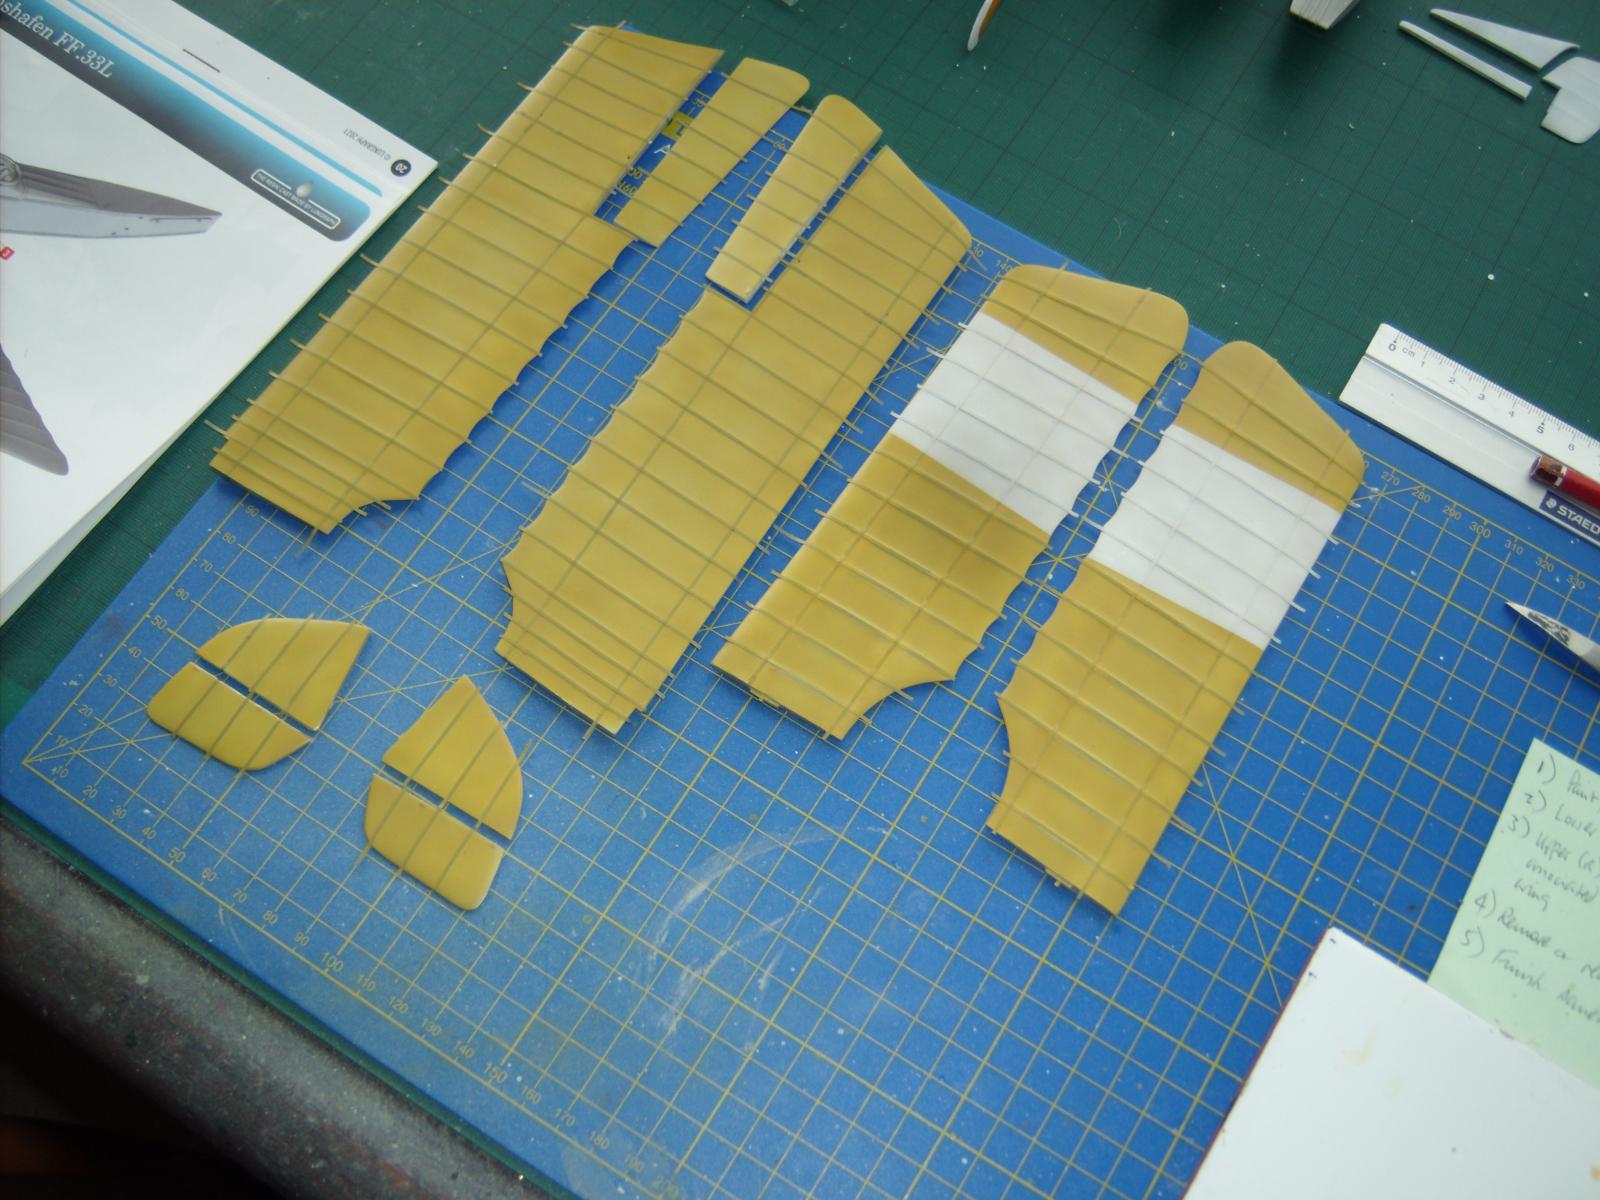
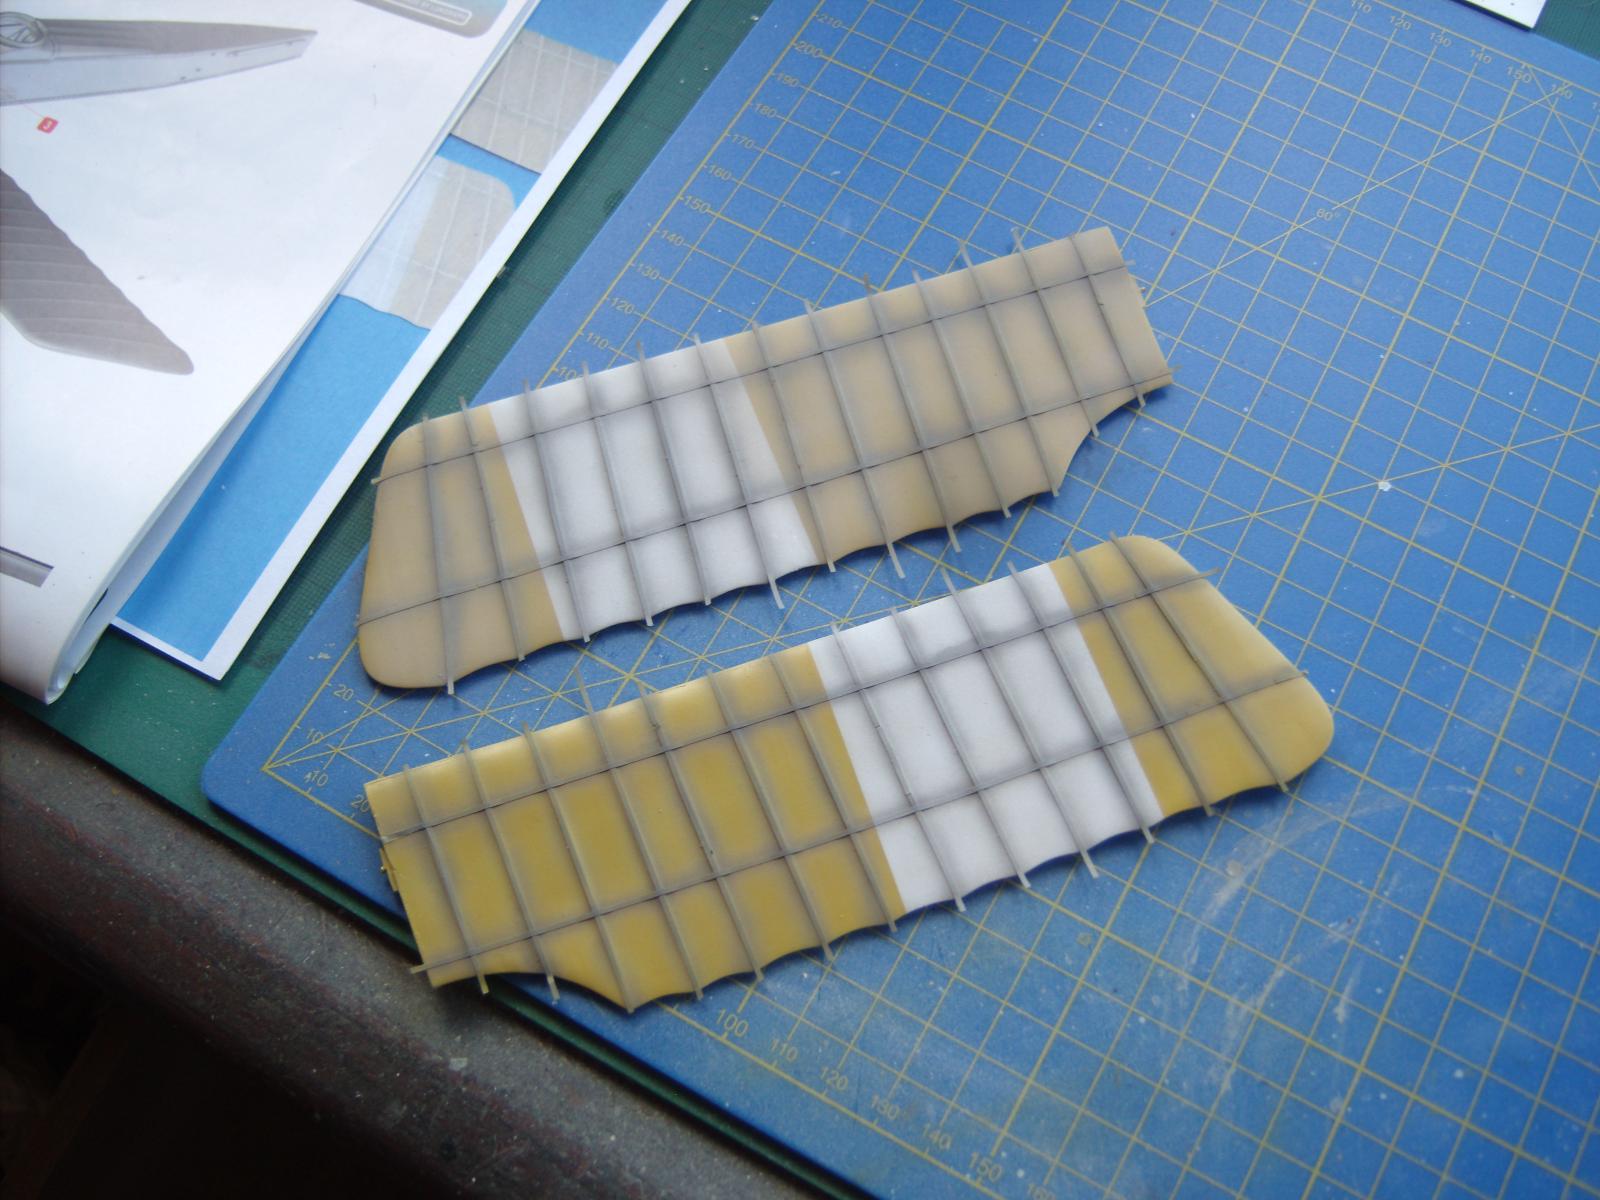
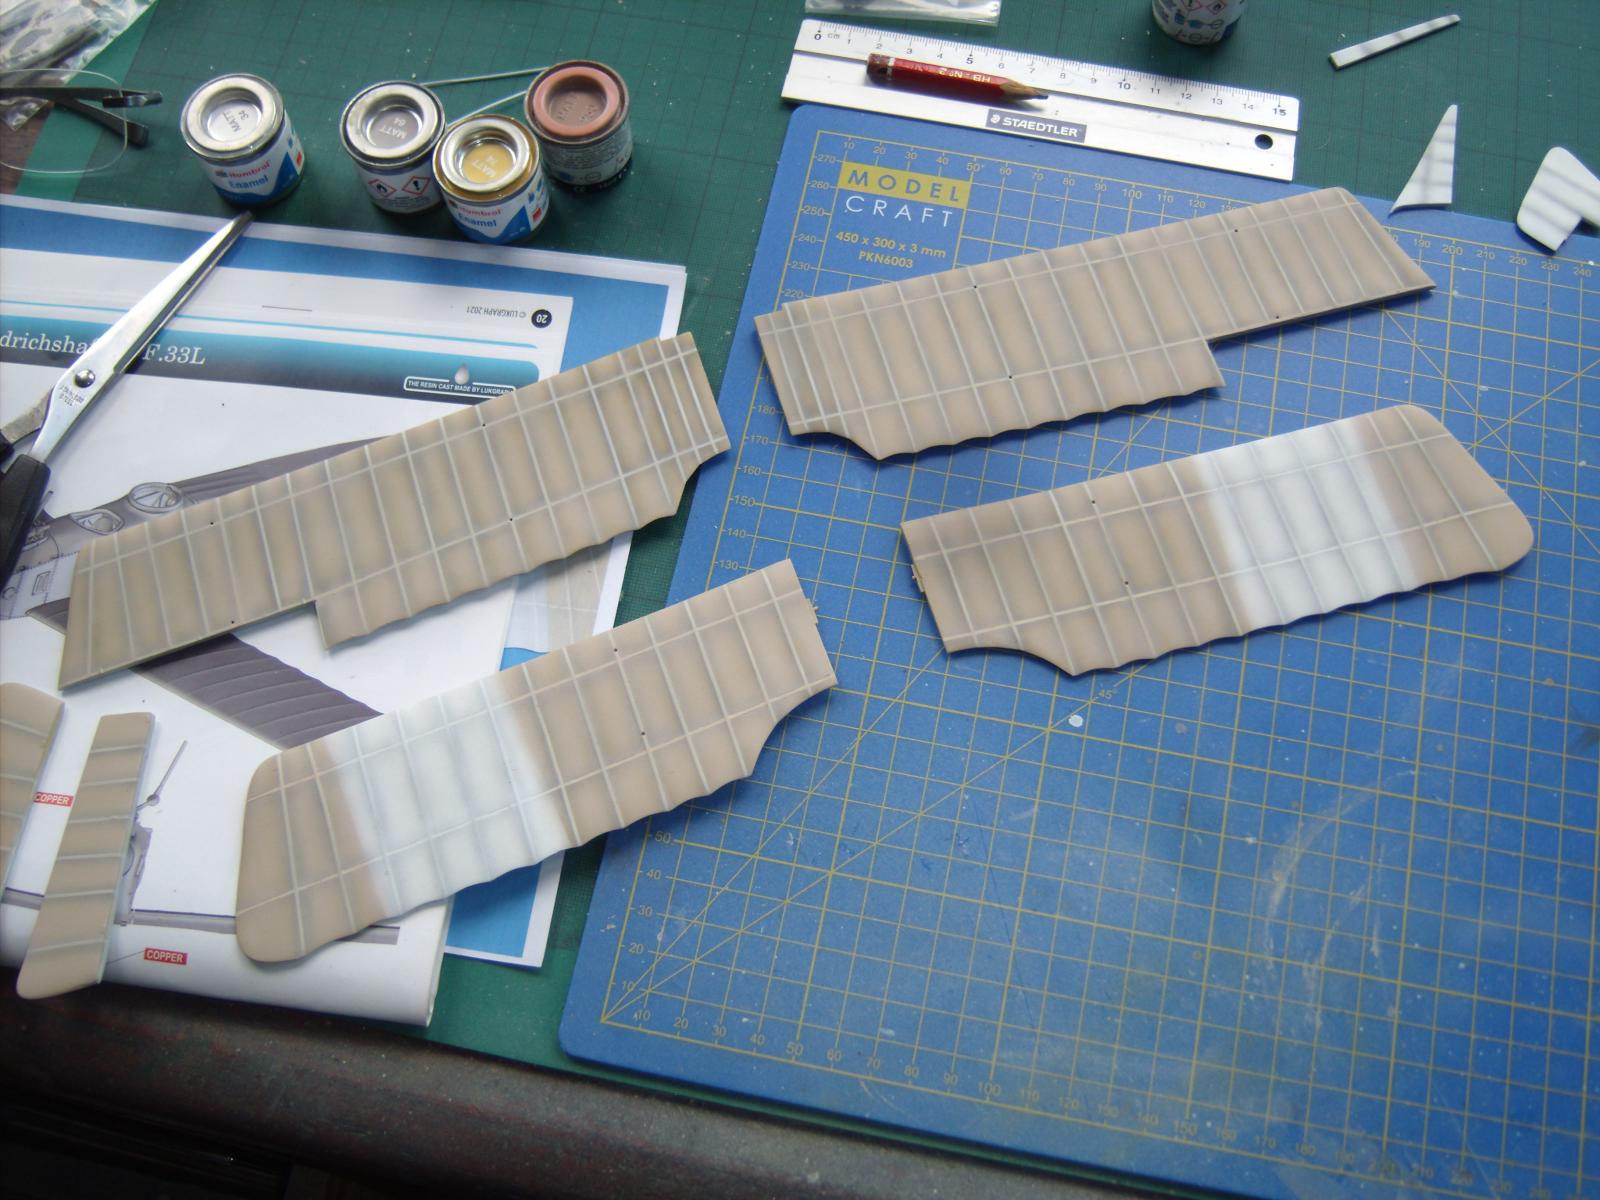
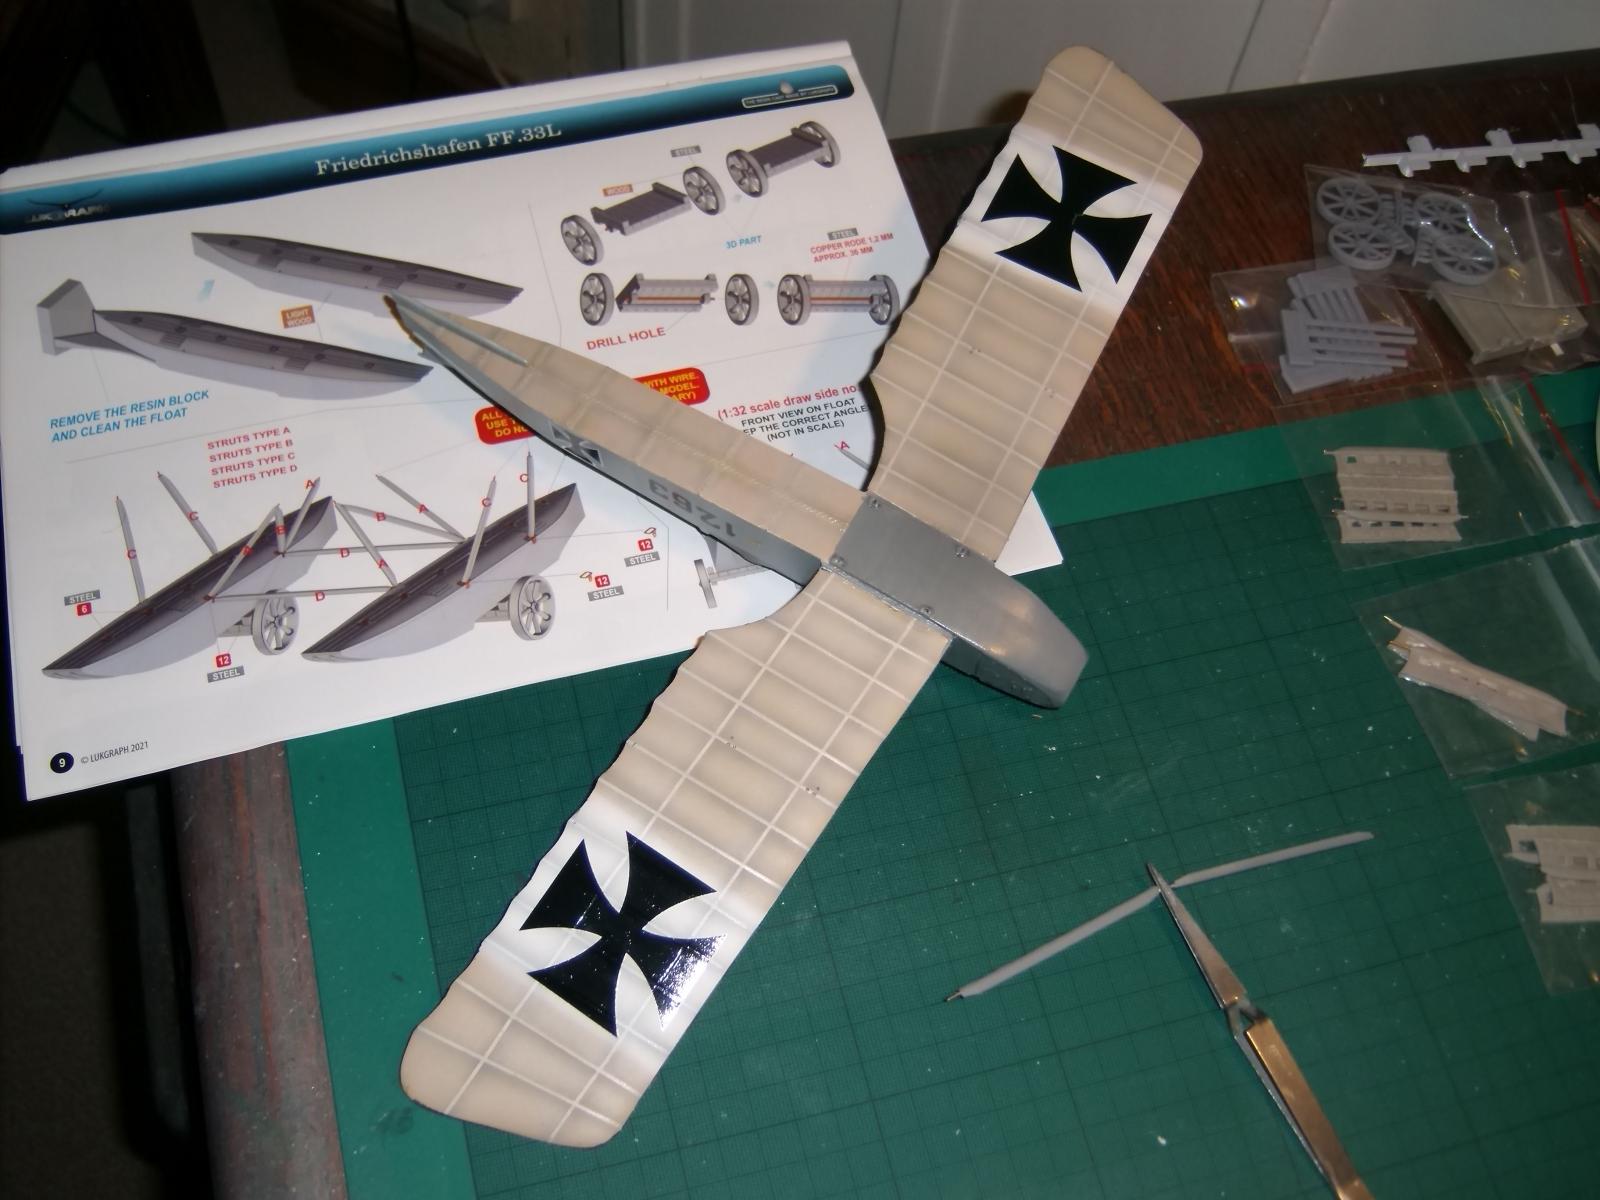
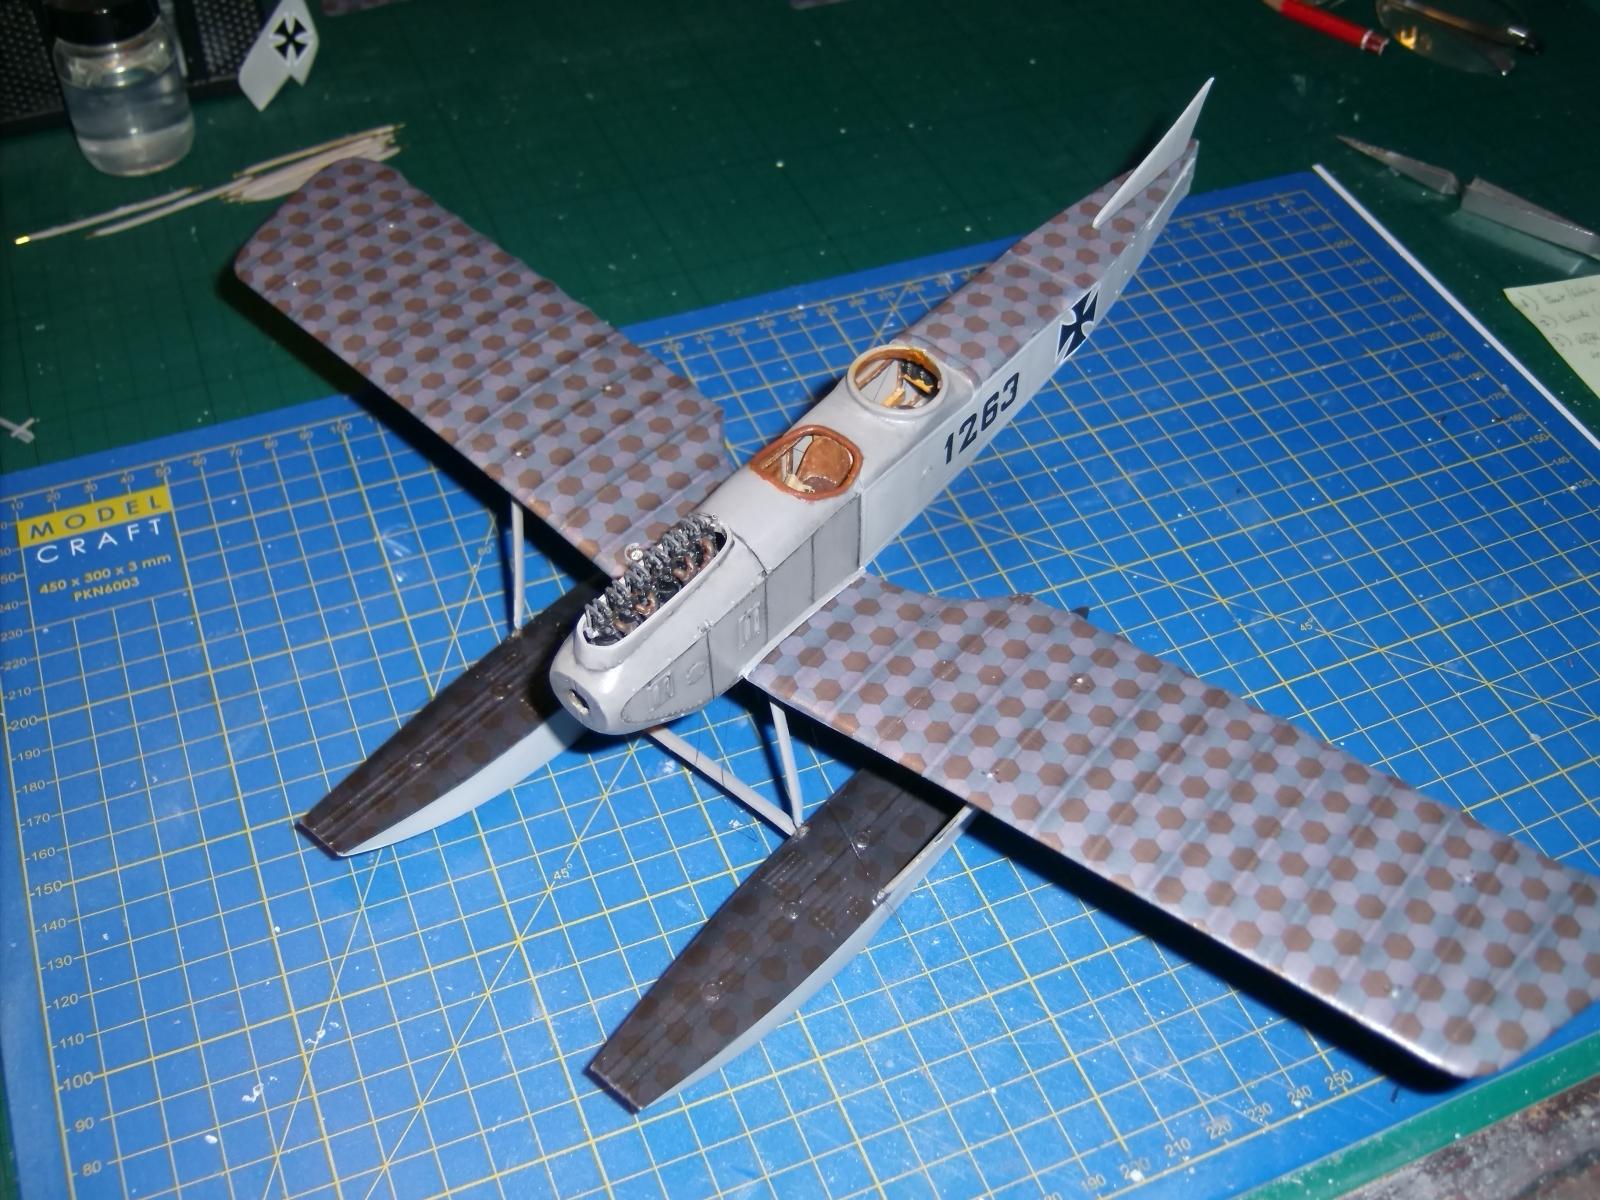
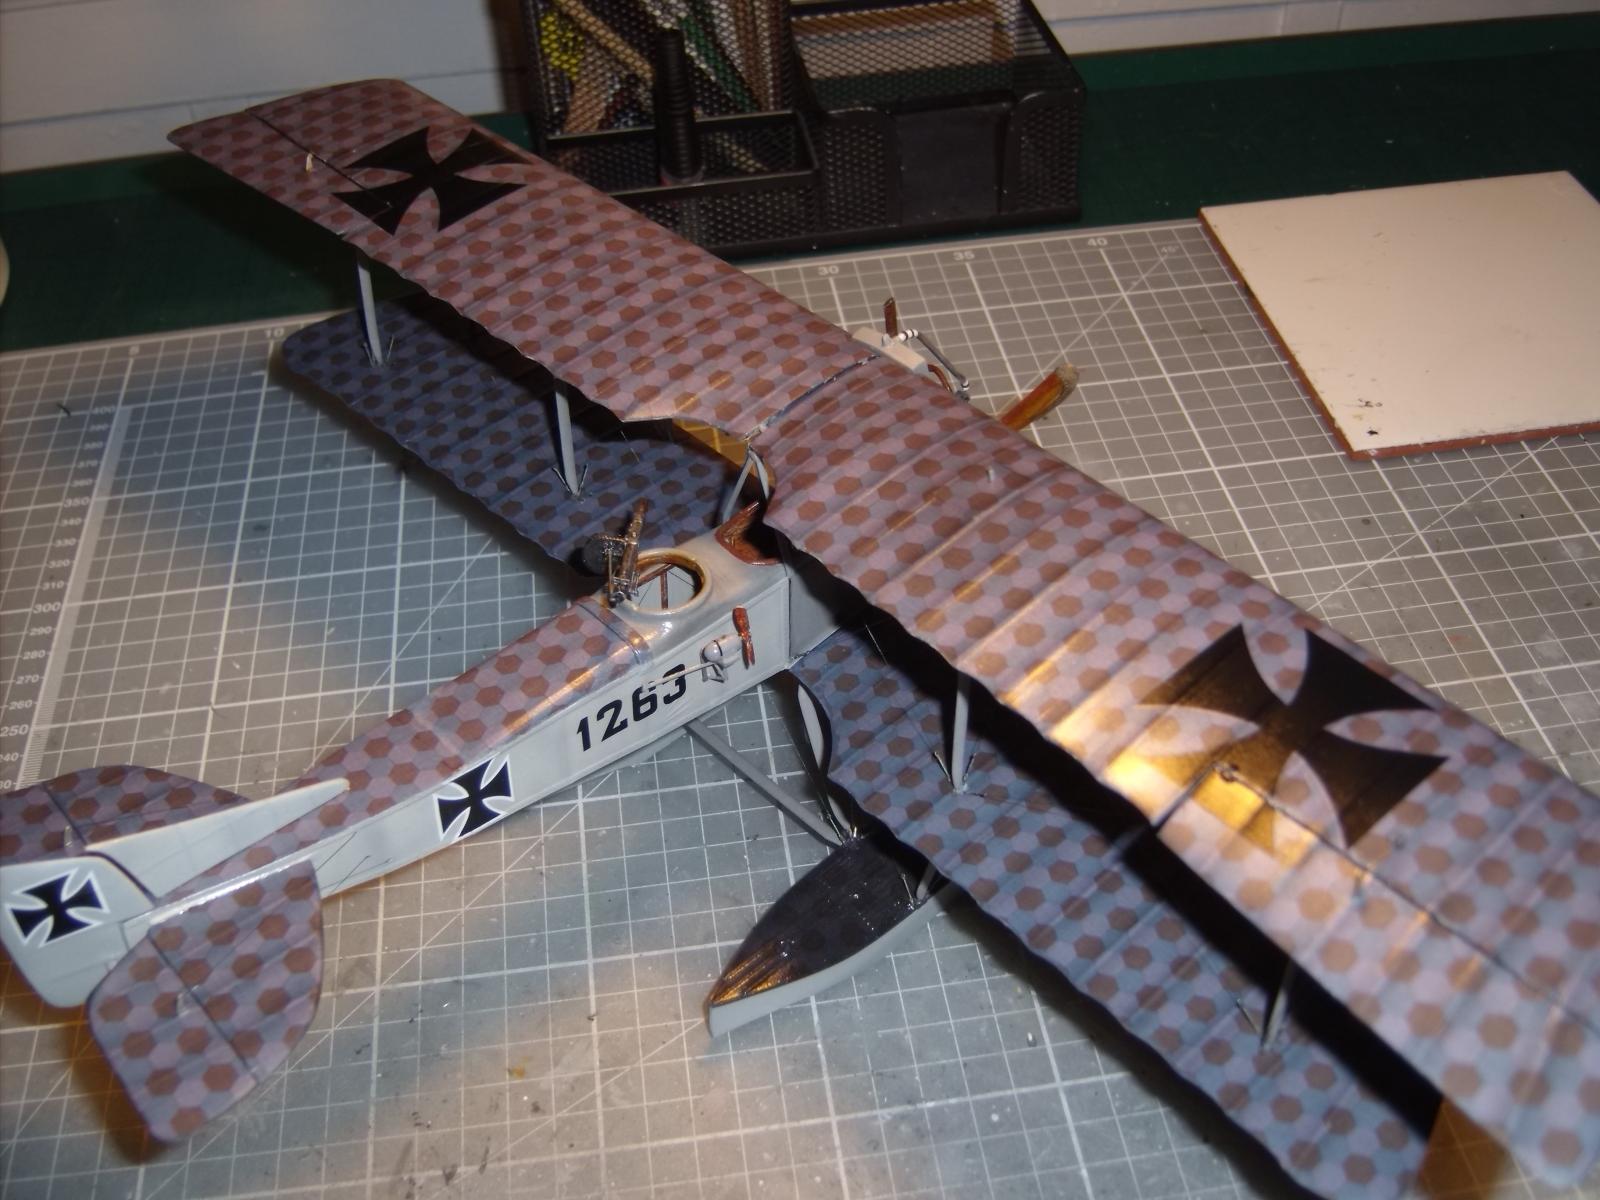
The kit comprises several media, and in addition to the resin parts, there is a small vacuformed windshield and a fret of PE parts. My kit is largely straight from the box, although I used a compass and its surround, parts for the generator and the machine-gun from a WnW kit. The turnbuckles used in the rigging are from the GasPatch range and the hexagonal camouflage pattern transfers are from Aviattic. The natural linen effect on the undersurfaces were all built up from spray painting and this process is assisted by the use of Lukgraph's own thin adhesive strips included in the kit, but also available separately from the company. The cabane struts, engine and exhaust outlet are 3D-printed items, and the struts have slender metal supports inside them to provide strength.
The kit took me about two and a half months to complete and is finished in the markings of the Marine-fliegerabteilung of the Kaiserliche Marine, and believed to have operated from Zeebrugge in Belgium in the later years of WW1.
So, I hope you like the end result, and please feel free to look in on the full article in the Group build section.
Regards,
Paul
What a great project and what a wonderful finish, Paul!
You tackled this difficult kit in an exceptional manner, paying attention to even the slightest details. The result is, simply, stunning.
I had the pleasure to follow you build thread in our very successful Luftwaffe GB, what a ride!
Congratulations!
Hi, Spiros... thank you for your comments. I am very pleased with the outcome and I'm sure the Friedrichshafen will look good alongside my other WW1 kits; it has been challenging in places, but ultimately, it will provide a great addition to any collection if a little time and effort is spent on it. Thanks again... ;-).
Regards,
Paul
Well done, Paul (@paulh). I truly admire anyone who builds planes with multiple wings and wires.
That is some excellent building and paint work to pull off such a nice looking bird. I really like it!
George/Walt...
Thanks for your comments. It is an eye-catching subject and I'm happy to have it in the collection... now, just to find a space for it!
Definitely like thisbuild, Paul @paulh
You did create a very realistic linnen look.
It was a pleasure to follow your thread, I learned a lot from your techniques.
Great work, Paul. Great subject.
Very nice.
I grew up in Oostende and worked in Zeebrugge harbour.
People talked about the names of artefacts of the wars even when gone or demolished.
There is a large turn around basin in the harbour that old timers refer to as « The water Airport « there was one in each of those 2 locations. After the Zeebrugge raid most Imperial Maritime activities, definitely for the Pocket U-boats moved to Oostende . The raid was ineffective in this way. The ships and subs moved up the canal to Brugge then came down another to set up base in Oostende.
Bernard...
Thanks very much for the additional information on the Zeebrugge and Oostende canals... nothing can beat having a little extra detail to a story. I can only claim to have fleetingly been in Oostende many years ago while passing through on holiday, having arrived by ferry.
I will certainly need to read up a bit more on the Zeebrugge raid; I have heard about it in passing, but your comments that it may have been less effective than intended interests me.
And thank you, also, for your comment on the finished kit... ;-).
Regards,
Paul
Hi Paul. Your builds are amazing looking !
I Yet have to try to delve into biplanes. Looks very daunting but with patience all is possible. Great works You did and I feel inspired by them.
John H & John vd B... thanks a lot to both of you for your comments... ;-).
Nice model, congratulations Paul. It's your first exprerience with resin, did you encounter any particular difficulties with this kit compared to injected plastic ? I plan to build the Sopwith Baby from Lukgraph and is interested in other experiences.
Hi, Christian... thanks for your comments. I've done some resin kits previously, but with larger resin offerings like this Lukgraph FF33L, and their earlier kit of the Fw56, one of the the main things to watch for is the fuselage join line; this can have gaps that can be quite extensive and/or run full length. Some time needs to be set aside to address this properly. In these two Lukgraph kits, I found the leading edges of the struts were either rough and in need of careful sanding, or had cracked resin almost along their full length, with the brass support insert showing through, thus effectively becoming the strut's actual leading edge; this could be remedied through careful sanding of the resin to blend the insert and the resin smoothly prior to painting, but so far in my experience, results can be a bit hit and miss. Perhaps replacements fashioned from a preferred medium would be worth considering, but again, that is a skill in itself which I currently don't possess.
Internal detail is good and there's always room for more to be done if super-detailing is intended; external detail is nice without being over the top. As with any kit, checking what's needed for the particular model is important. For example, the main strut attachment points are on the FF33L kit, but the turnbuckle attachment points aren't, and given that it took me some time to ascertain exactly where the rigging lines should be positioned, it was quite an undertaking. The kit instructions for rigging show the general layout, but to get a clearer 3D perspective on some of the more awkwardly-positioned rigging, I had to look online.
Overall, though, I think this kit, being a more recent release, is quite a bit better than the Fw56 kit, which was produced a few years back, so certainly some signs of improvement from Lukgraph.
Having seen some of your excellent work here on iModeler, and your propensity to cut away large sections of the fuselage to display the interior, I have little concern that you could do the same with a resin Sopwith Baby, but I'm sure it will offer up some challenges along the way, especially if you haven't tackled a resin kit before.
Lastly, manoeuvring the kit during the build can be tricky. The fuselage halves aren't likely to be much of an issue, as they will be hollow, but wings and tailplane parts, I would imagine, are single-piece resin items, so the kit will become heavier as you move through the build, moreso than building up a large plastic model.
I wish you well with your undertaking, and would be interested to see the final result.
Regards,
Paul
Very nice build, and a great (unusual) subject. Well done!
Thanks, Greg... ;-).