1/35 Camouflage Nets
This article is part of a series:
- 1/35th Leopard Line Up
- Leopard 1A5 Bundeswehr
- Weathering, the Belgian Leopard Conversion Continues
- Leopard AS1 Aus Cam Update
- Leopard AS 1 Olive Drab Lusterless Update
- Dutch Leopard 1
- Australian Leopard AS1 Dozer
- Danish Leopard 1A5DK
- Takom 1/35 Canadian C2 Leopard Mexas
- Australian Trials Leopard Tank
- Australian Leopard AS1 with drivers and engine compartments.
- Leopard AS1 Engine, Engine Bay and Drivers Compartment Latest Progress
- Unfinished Business – Finishing Off the Belgian Leopard
- Trying New Techniques On Tamiya Leopard A3/A4
- Revell Leopard 1 A1A4 Weathering And Camnet
- Leopard 1 A1A1 With Peddinghaus Turret
- 1/35 Camouflage Nets
- Camnet Construction continued...
- Schutzenpanzer Marder 1
- Meng C2 Mexas with Dozer Progress
- Meng Leopard C2 more progress

I hope that this might be of help to some of our group and that I am not "teaching my grandmother how to suck eggs!"
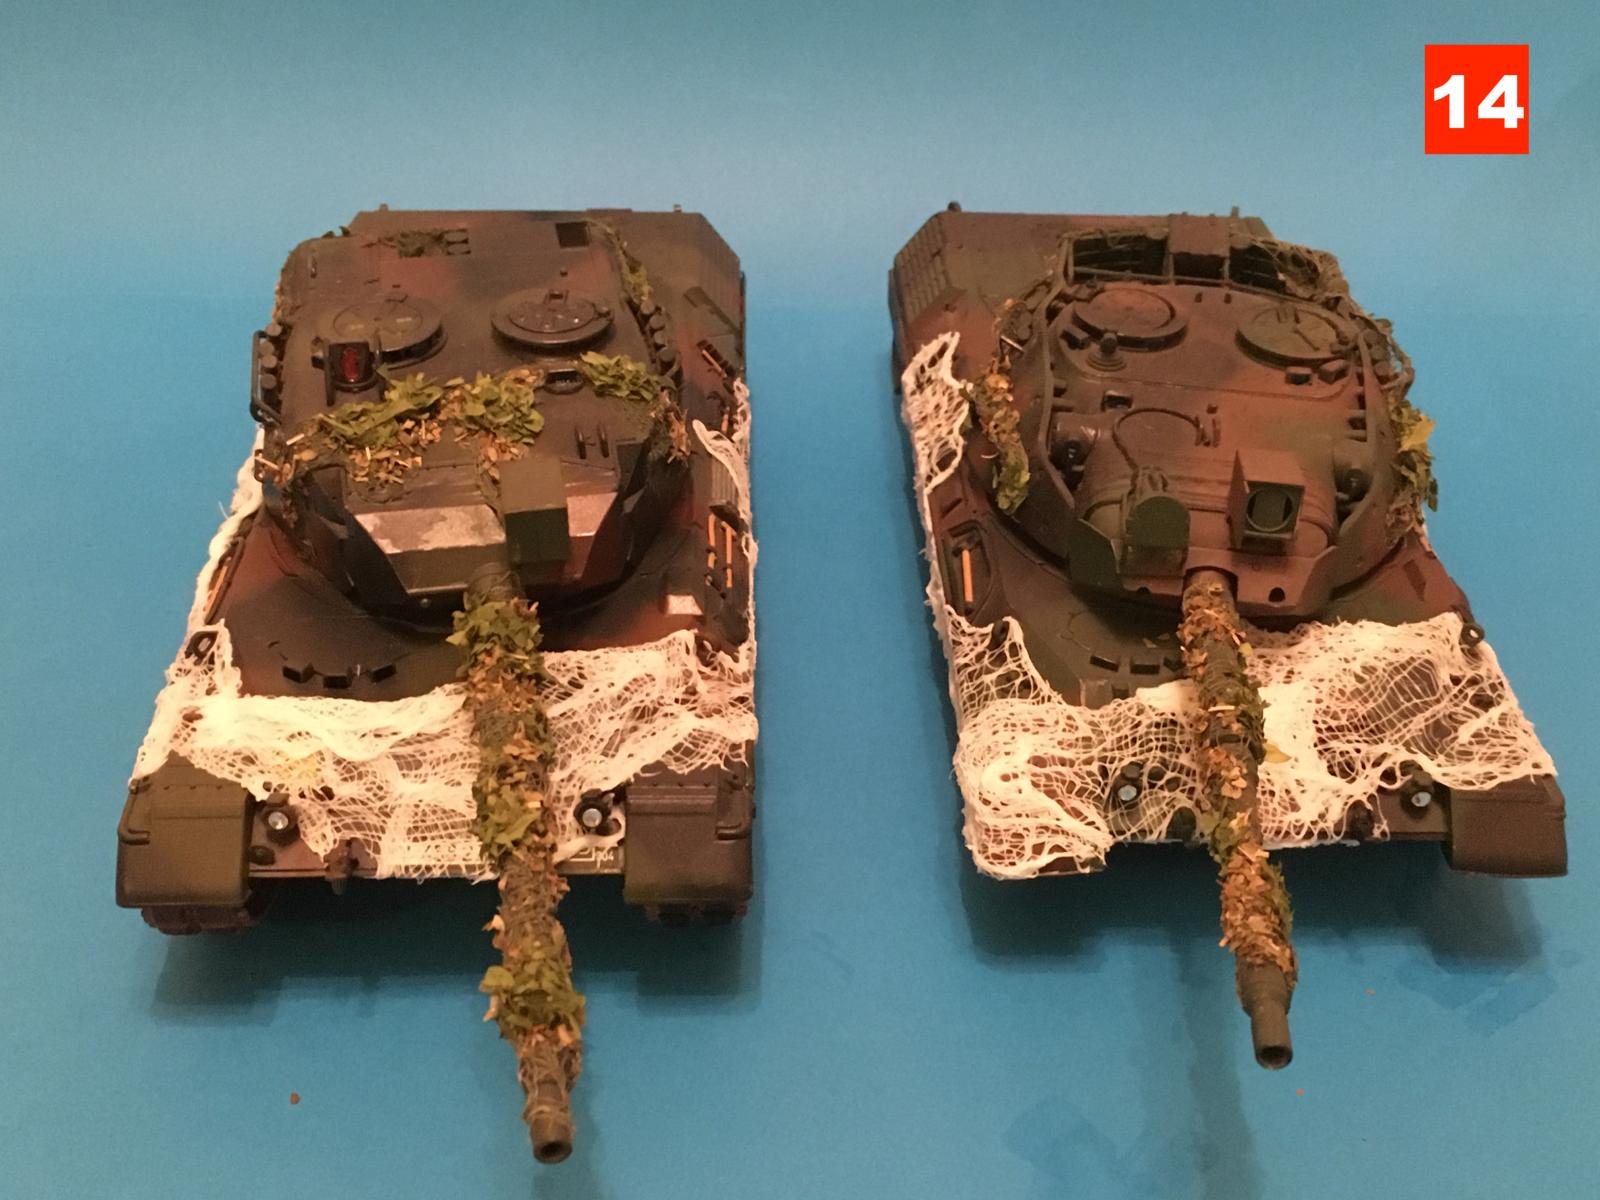
I've been trying for a while to find what I think is a better way of adding camouflage nets (camnets) for my 1/35th vehicles. It's one of those continual learning curves. For this I've used a couple of my old Leopards (Tamiya and the old mould Revell Leopard 1 which I made up as 1A1A4) that I've been using for experimenting with weathering techniques. I think that the best time to do this is after any paint weathering, chipping etc but before applying any dirt or mud. Some people apply their nets during construction before painting, it's up to you
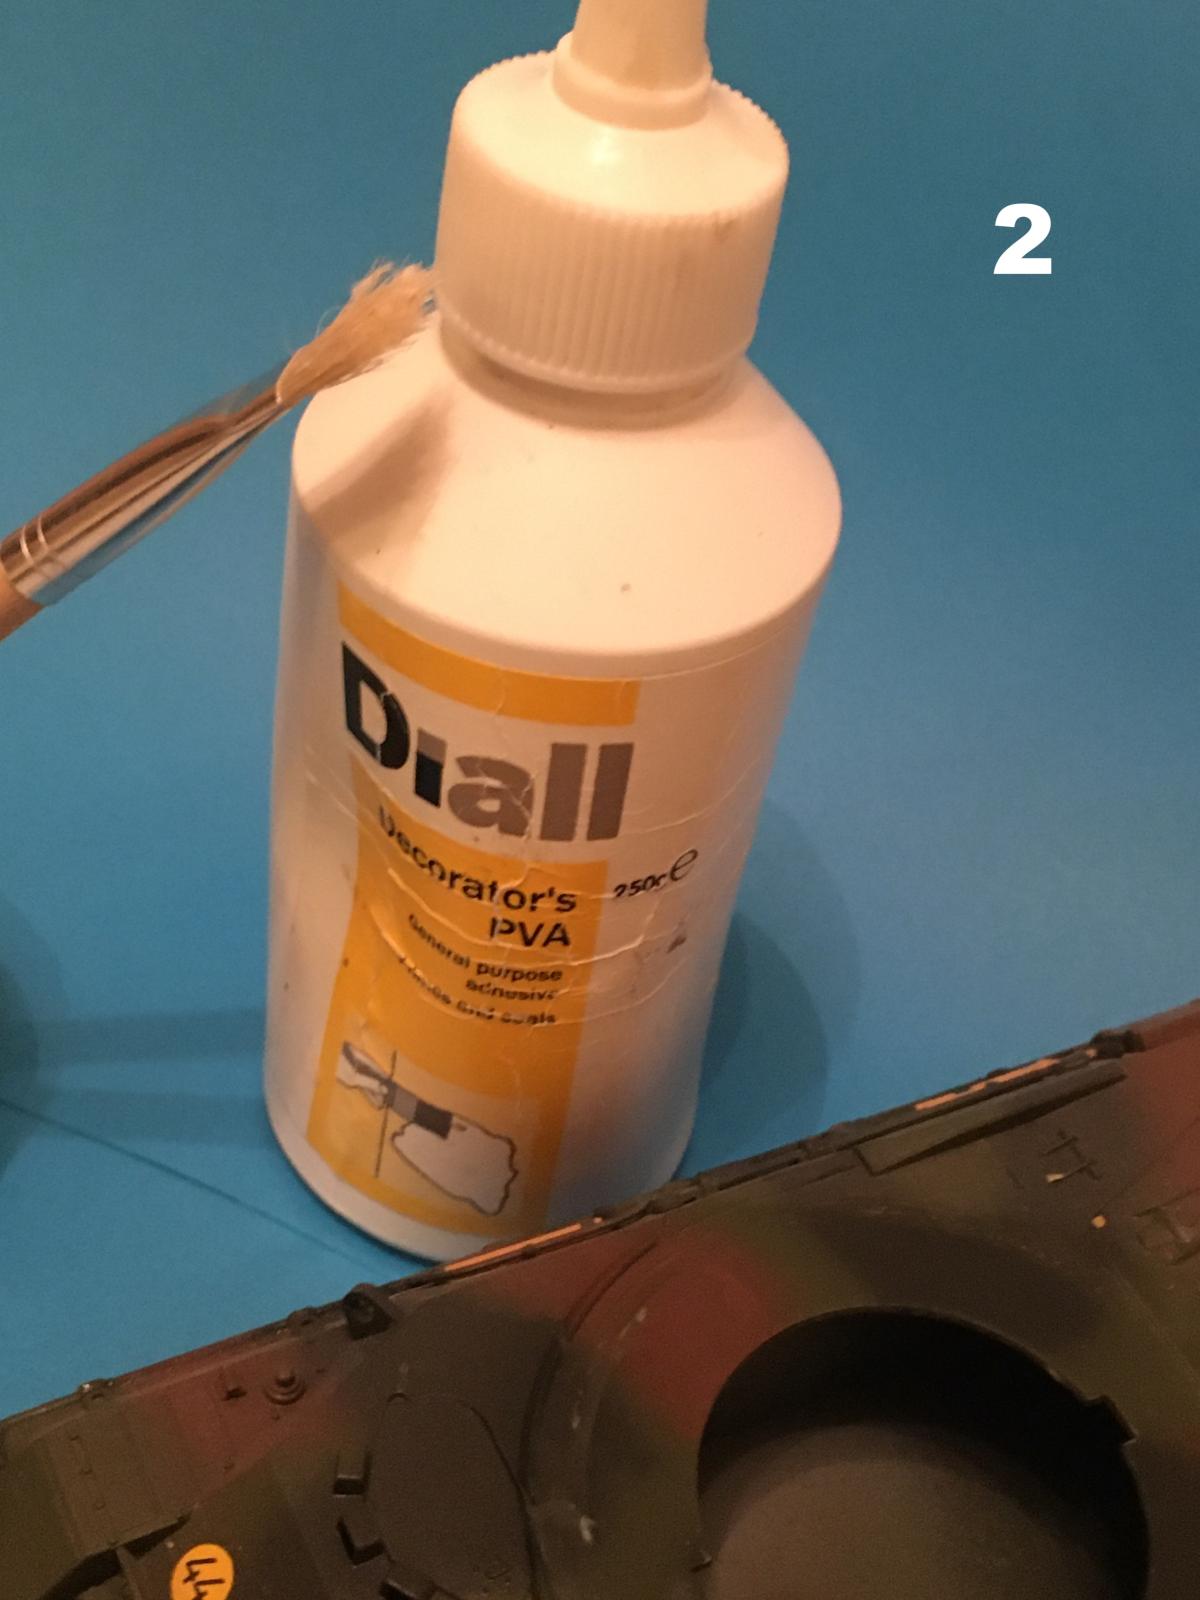
1) Materials, camnet material. For this I bought a pack of surgical gauze, stippling brush, PVA and a small jar
2) Stippling brush and PVA glue (from any DIY store)
3) Mix the PVA glue with roughly 60% water
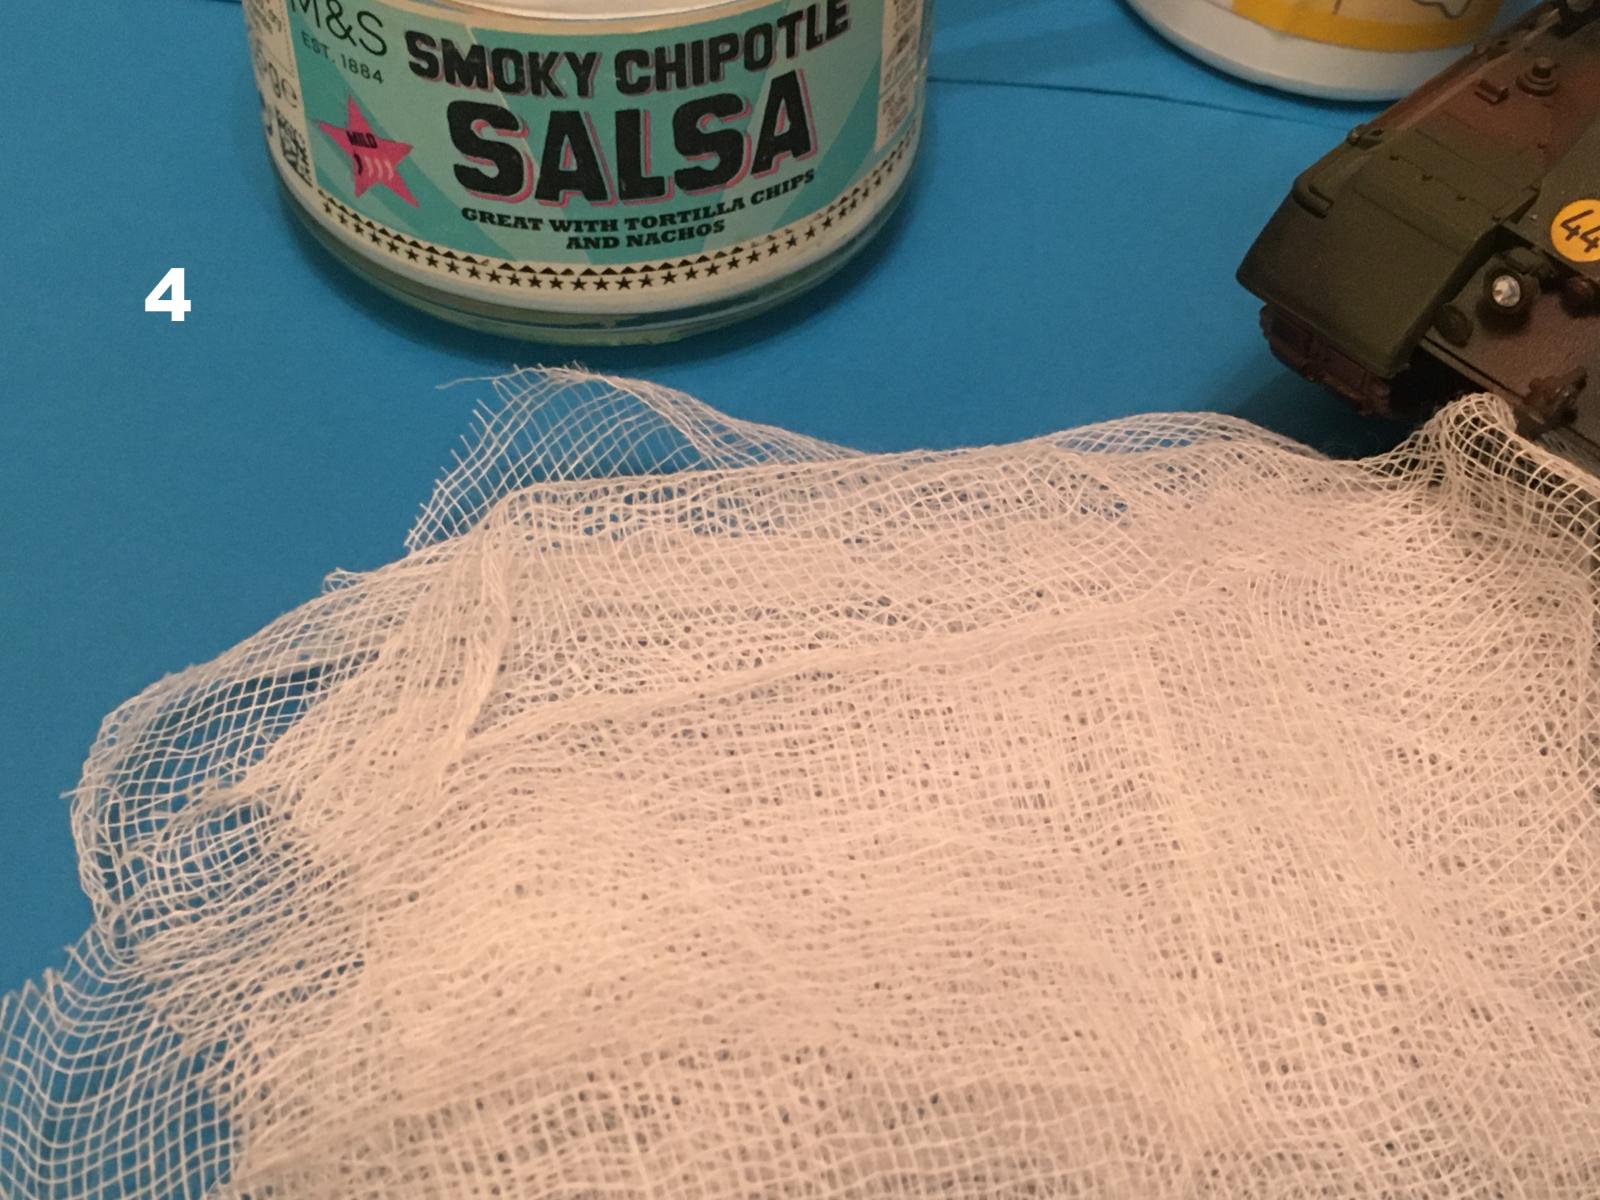
4) DON"T soak the gauze in the water/PVA mixture
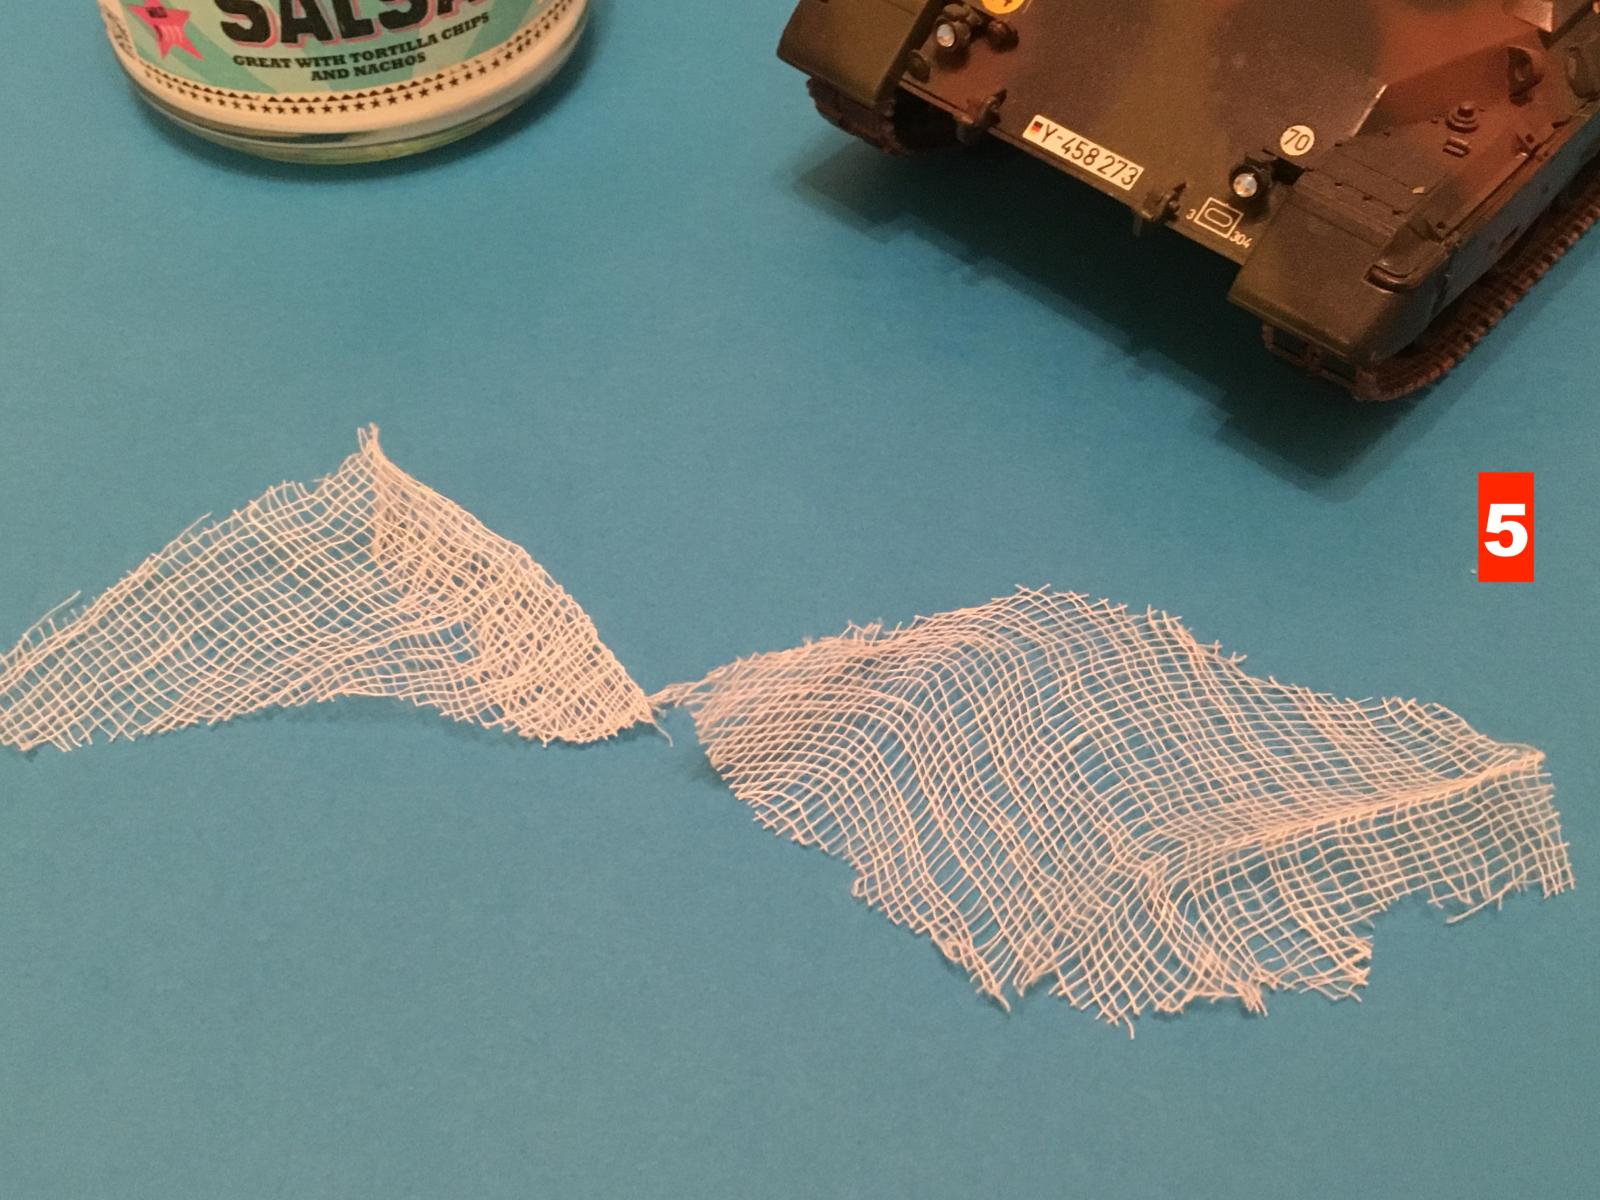
5) Cut small sections from the gauze
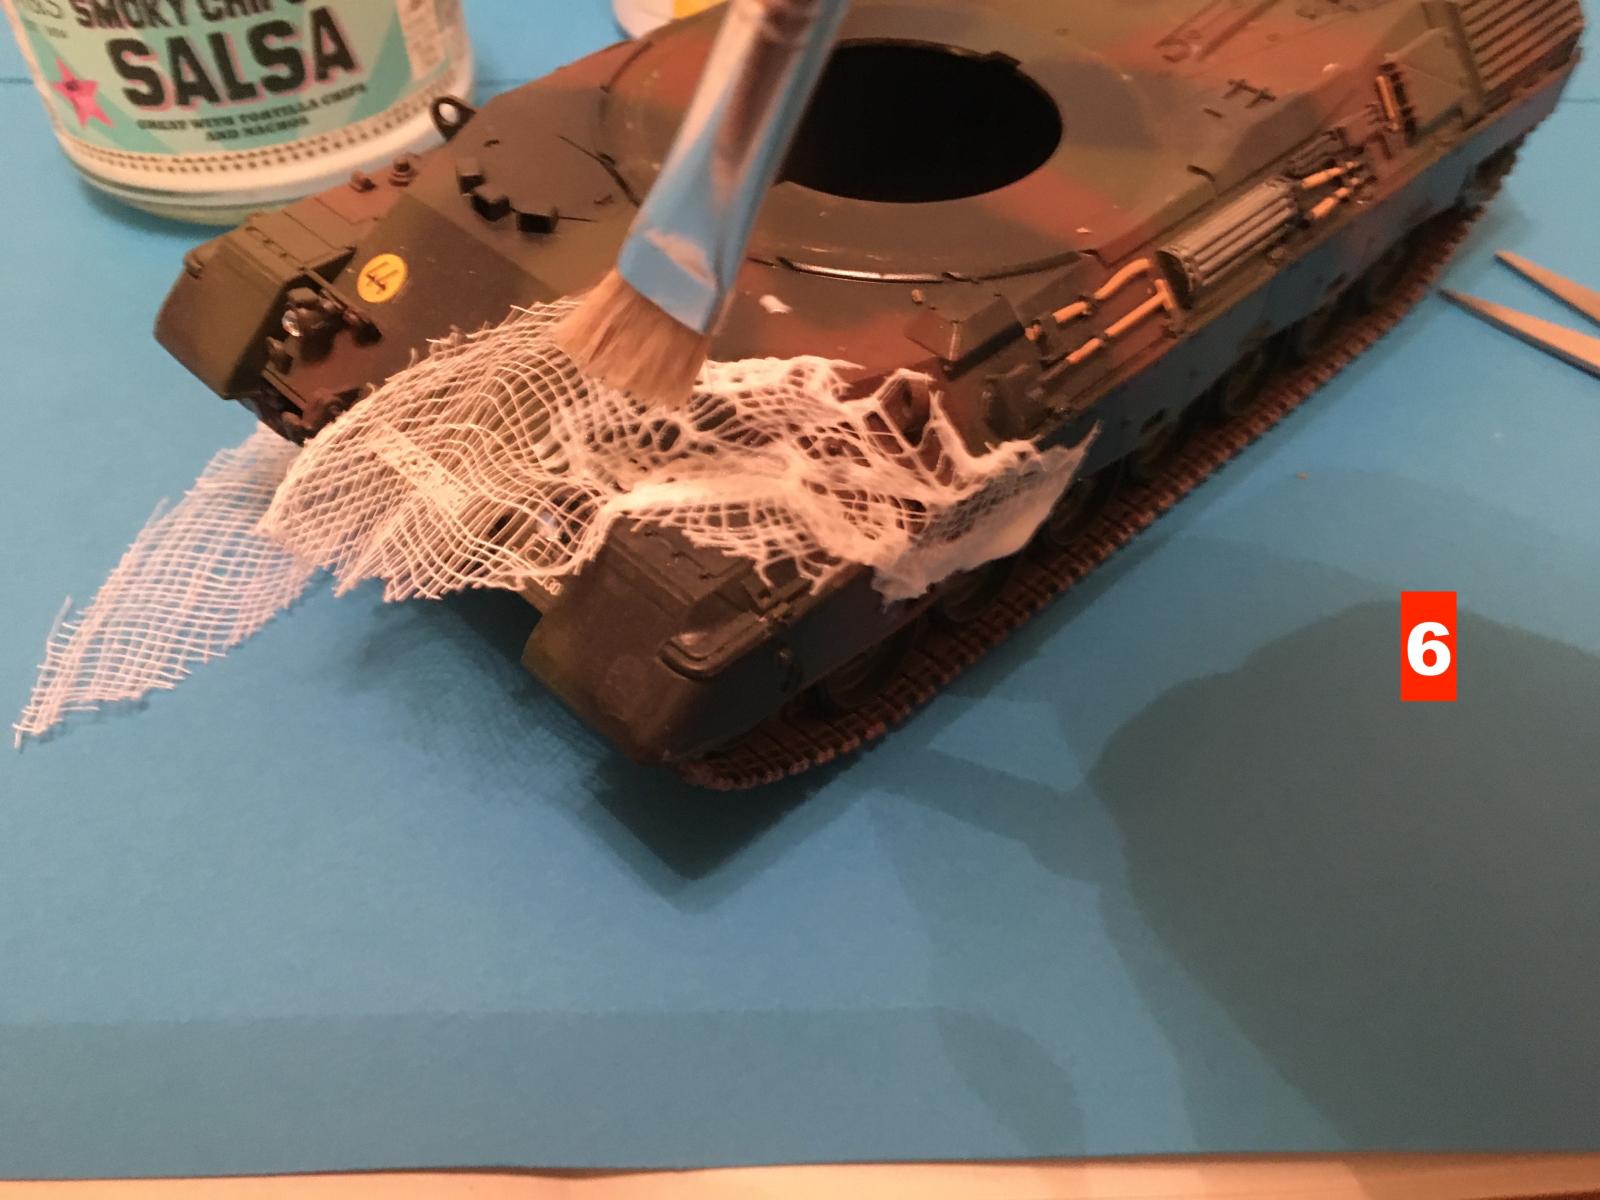
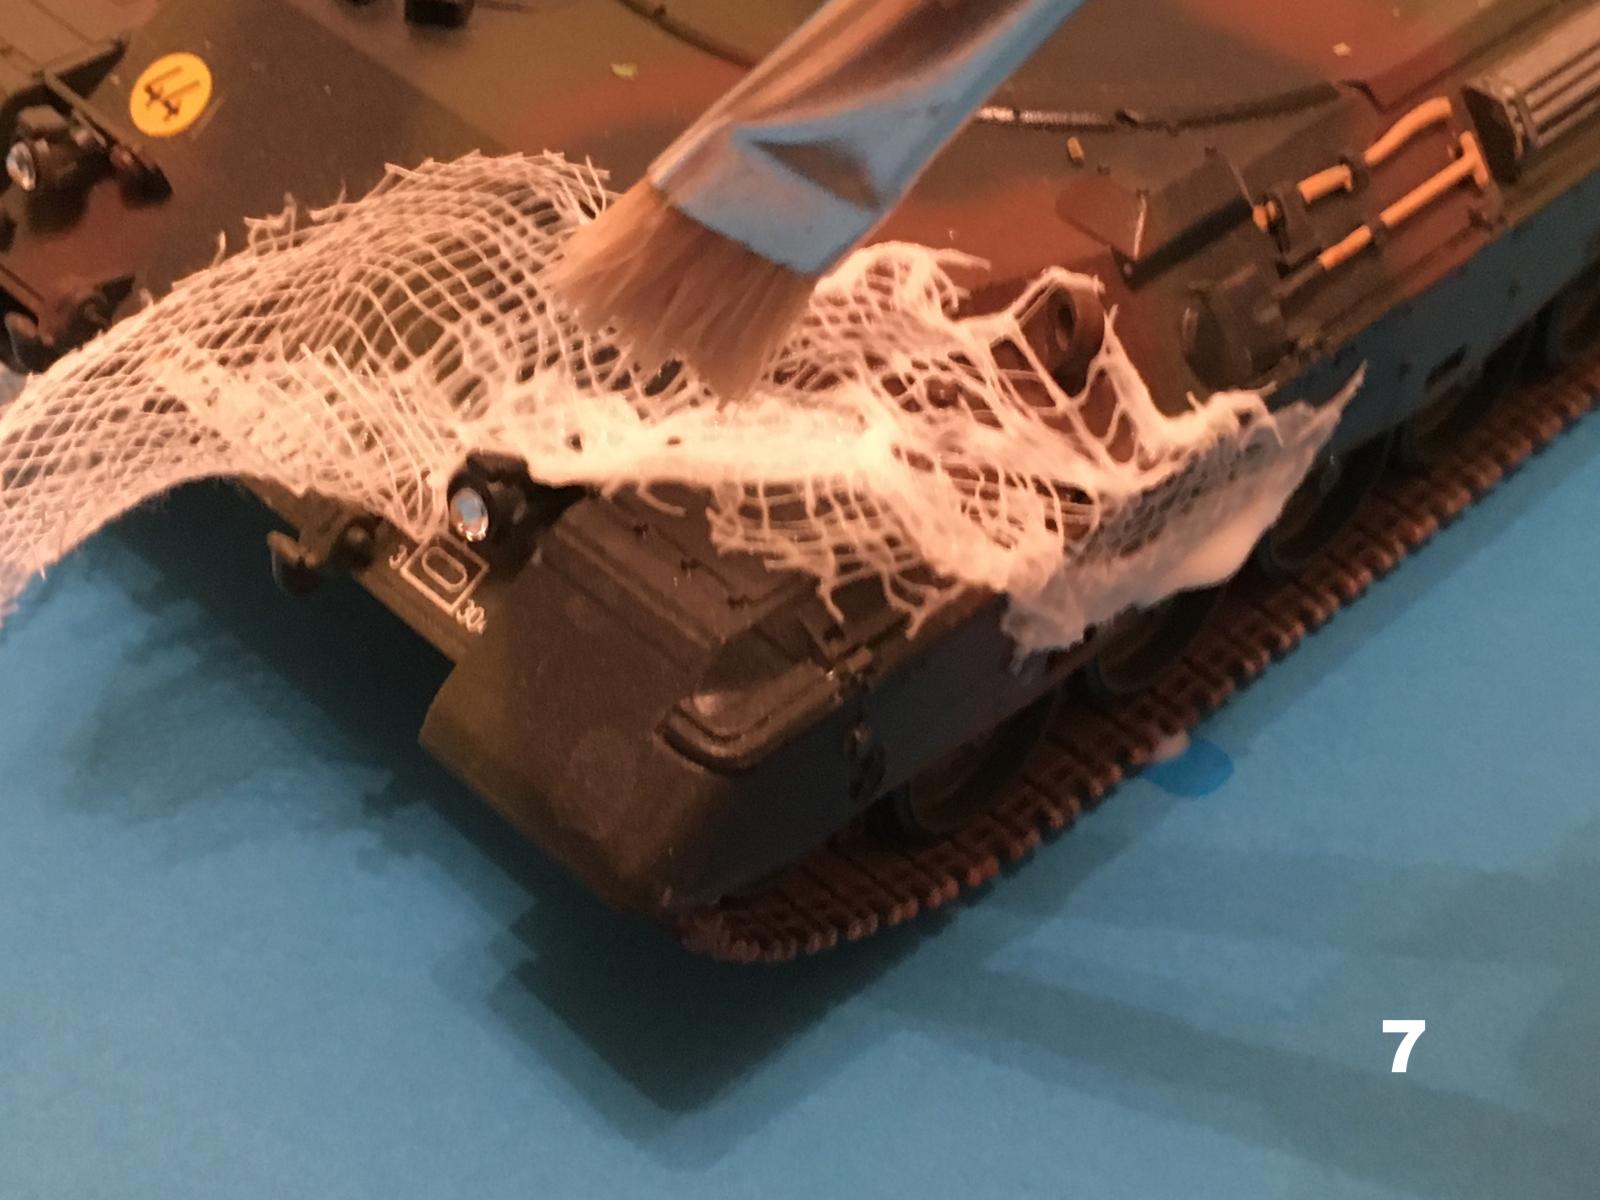
6) Place gauze where you want it and start stippling with the glue. When happy, add another section of gauze. Try and build up in layers. Roll any individual threads back onto the main net, that doesn't happen on real nets
7) Try to "hook" sections of the net over projections. Remember that real nets are very heavy, careful use of the brush will help get this look. Camnets have the habit of snagging on any profusion, including the crewmen
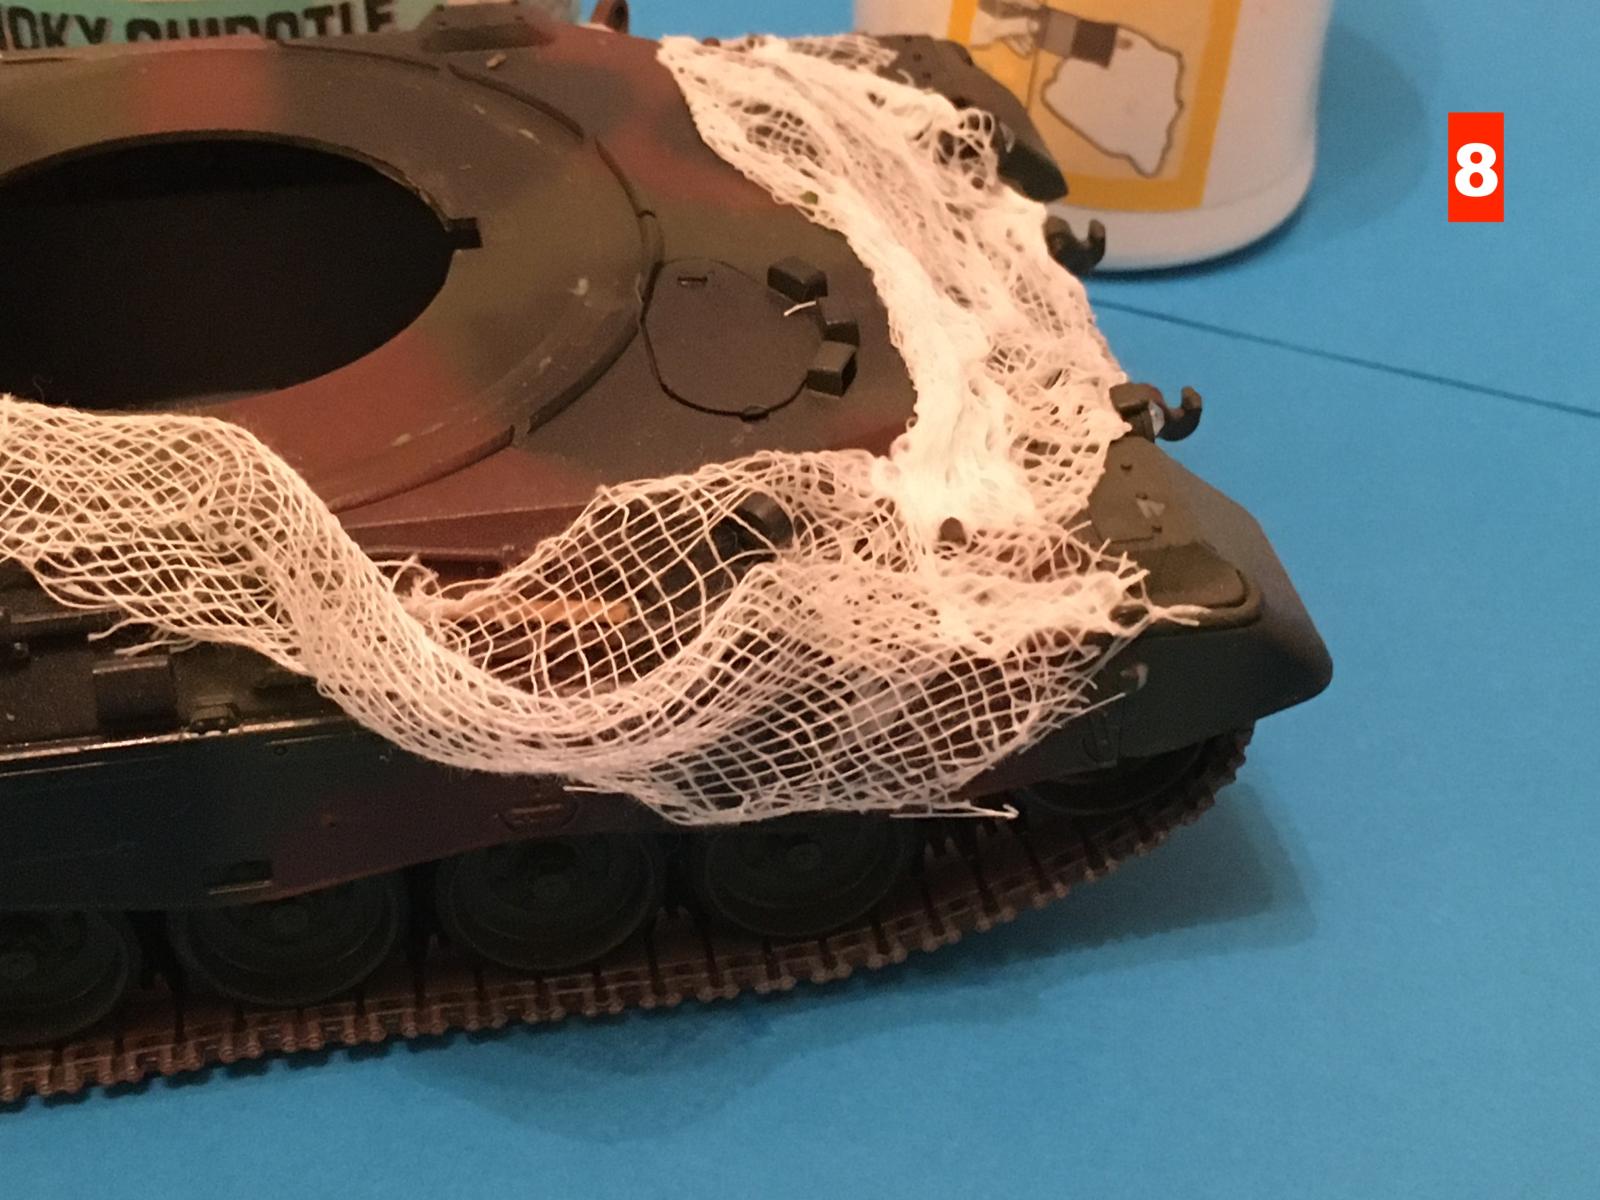
8) Continue building up the layers
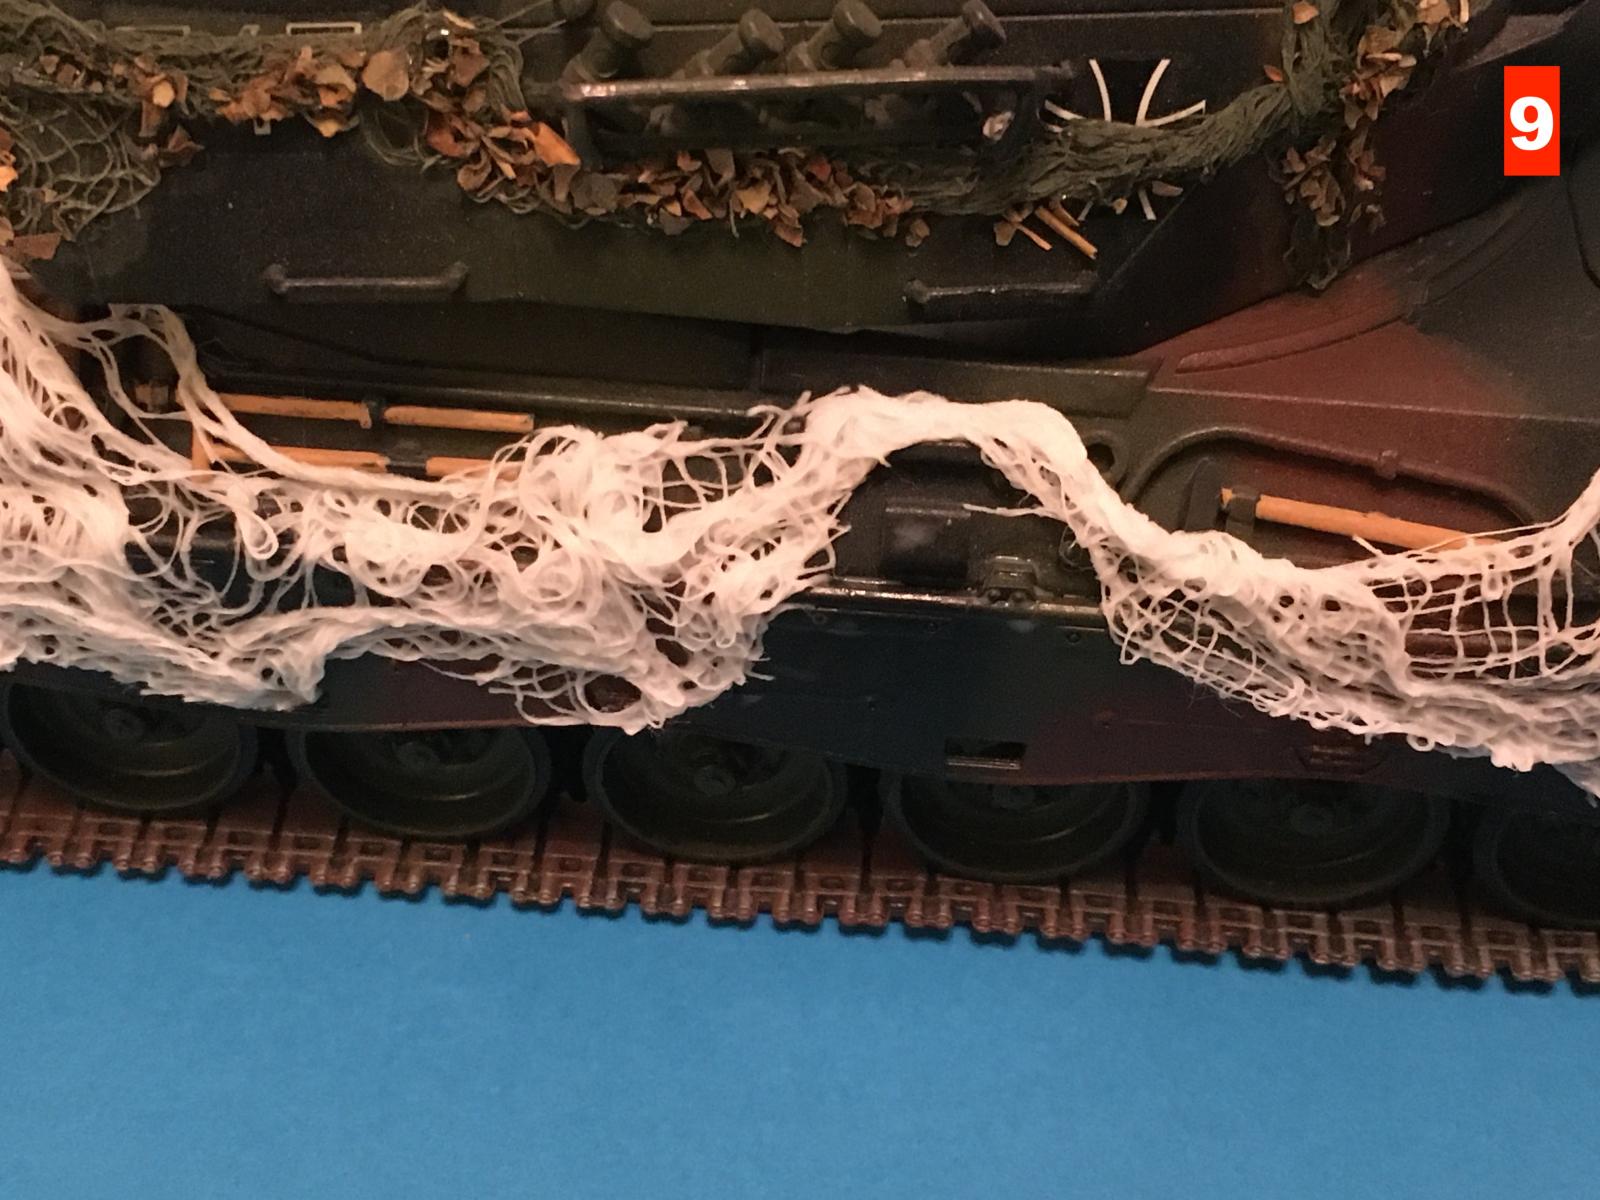
9 - 11) Carry on hanging layers of gauze until you are happy with what you have. Remember to avoid heat sources, in this case the exhausts and the crew heater exhaust. They're really great for melting camnets. Hook around any details you don't want obscured, or partially obscure them. After all, after all that hard work on painting tools etc...
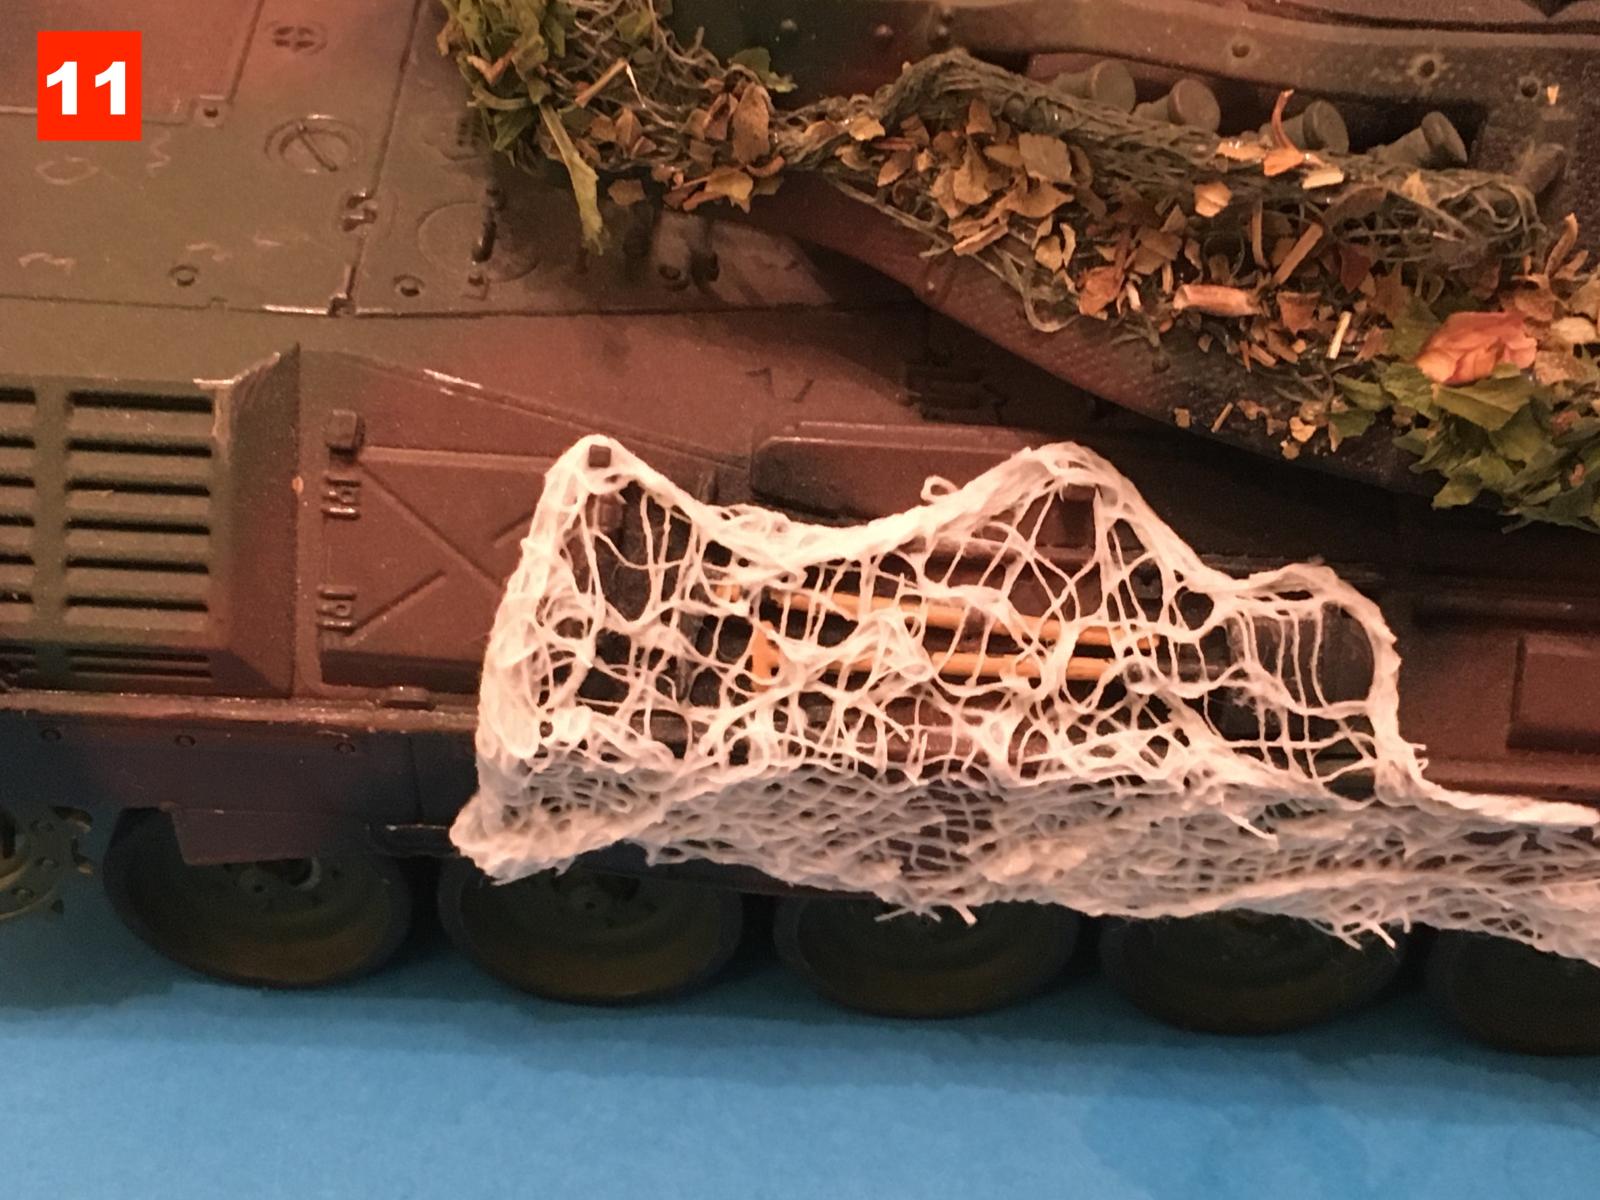
12 - 14) Don't do your next exactly the same on each vehicle try for some variety
I hope that this is of some help to you


This is really amazing technique, Ian!
Those nets look utterly realistic!
Many thanks Spiro
Nice technique, Ian @ianfoulk96
This defintely results in great looking camo nets.
Thanks John, much appreciated
Thanks for sharing. There is always something useful in someone else’s technique; using small sections is a good one !
Thanks Joost, I find it more manageable than using one or two big sections and then trying to form them in place.