Tamiya F4U-1C, 1/48. The Sky Pirates.
This article is part of a series:
Background
One omission from the plethora of Corsair models out there is the F4U-1C, in fact there isn't even a company that offers a resin conversion set for this type. Not wanting to miss out on the only -1 variant I haven't yet built I decided to work out how best to approach scratchbuilding the modification to make the aircraft.
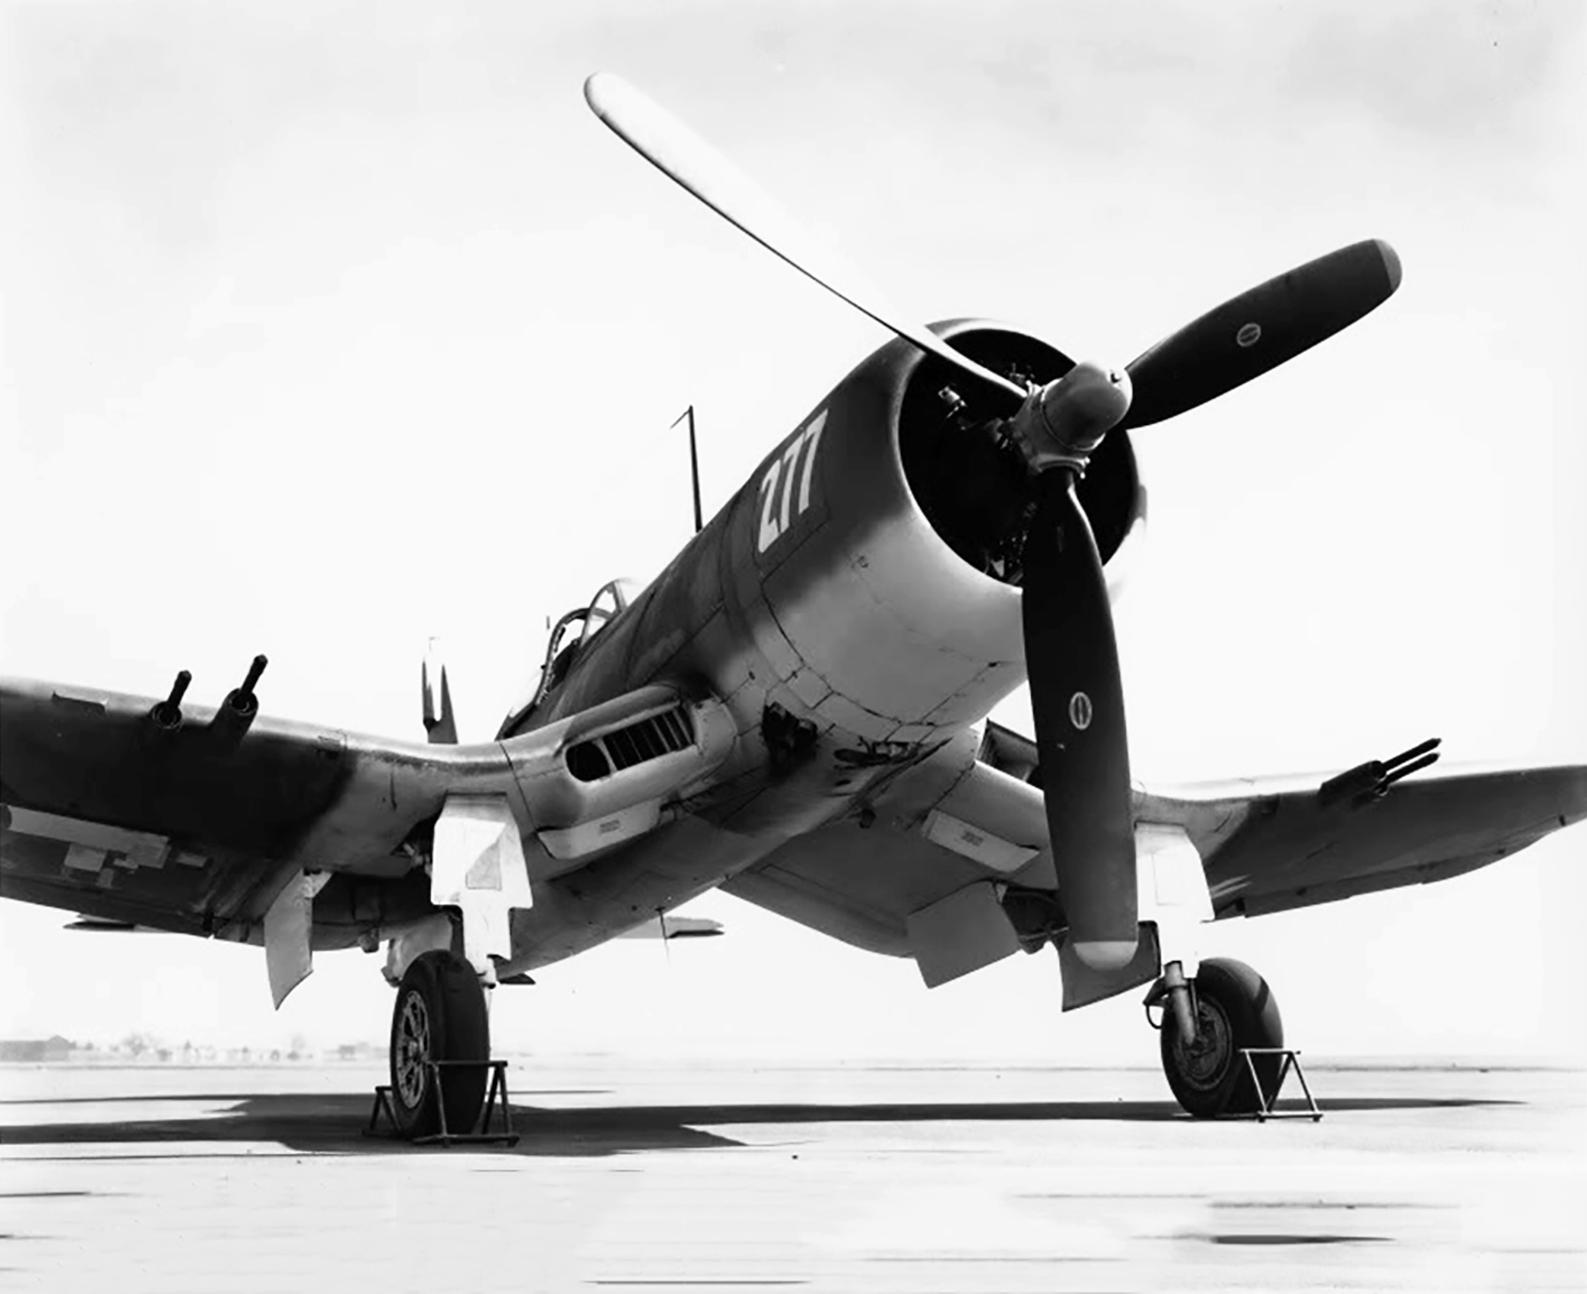
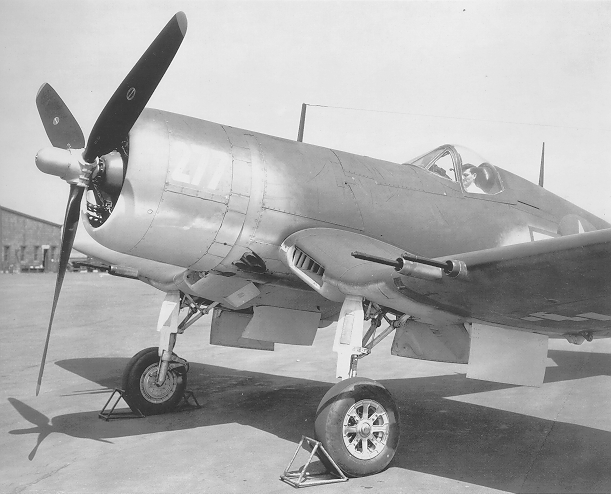
Firstly, what is the F4U-1C? Designed alongside the F4U-1D but appearing in service slightly later, the 1C is essentially just an early F4U-1D with the classic 6x 50.Cal machine guns replaced with 4x 20mm cannons. Being an early F4U-1D in all other aspects, it also has the original fuel tank plumbing of the F4U-1, plus the twin underbelly pylons and rocket stubs of the F4U-1D. Only 200 of the type were produced making it amongst the rarest of Corsair variants.
Upon entry into service the type wasn't well recieved. Pilots felt the M2 Brownings had plenty enough firepower for dealing with Japanese aircraft, and the higher fire rate and much larger ammunition capacity with the machine guns was greatly appreciated. On top of this, the extra weight caused by the cannons reportedly had a negative effect on roll rate, and finally the cannons had problems with freezing and jamming at high altitudes. Eventually the cannon issues were ironed out and the aircraft became a reliable gun platform, but it never was able to shake the pilots preference for more ammo.
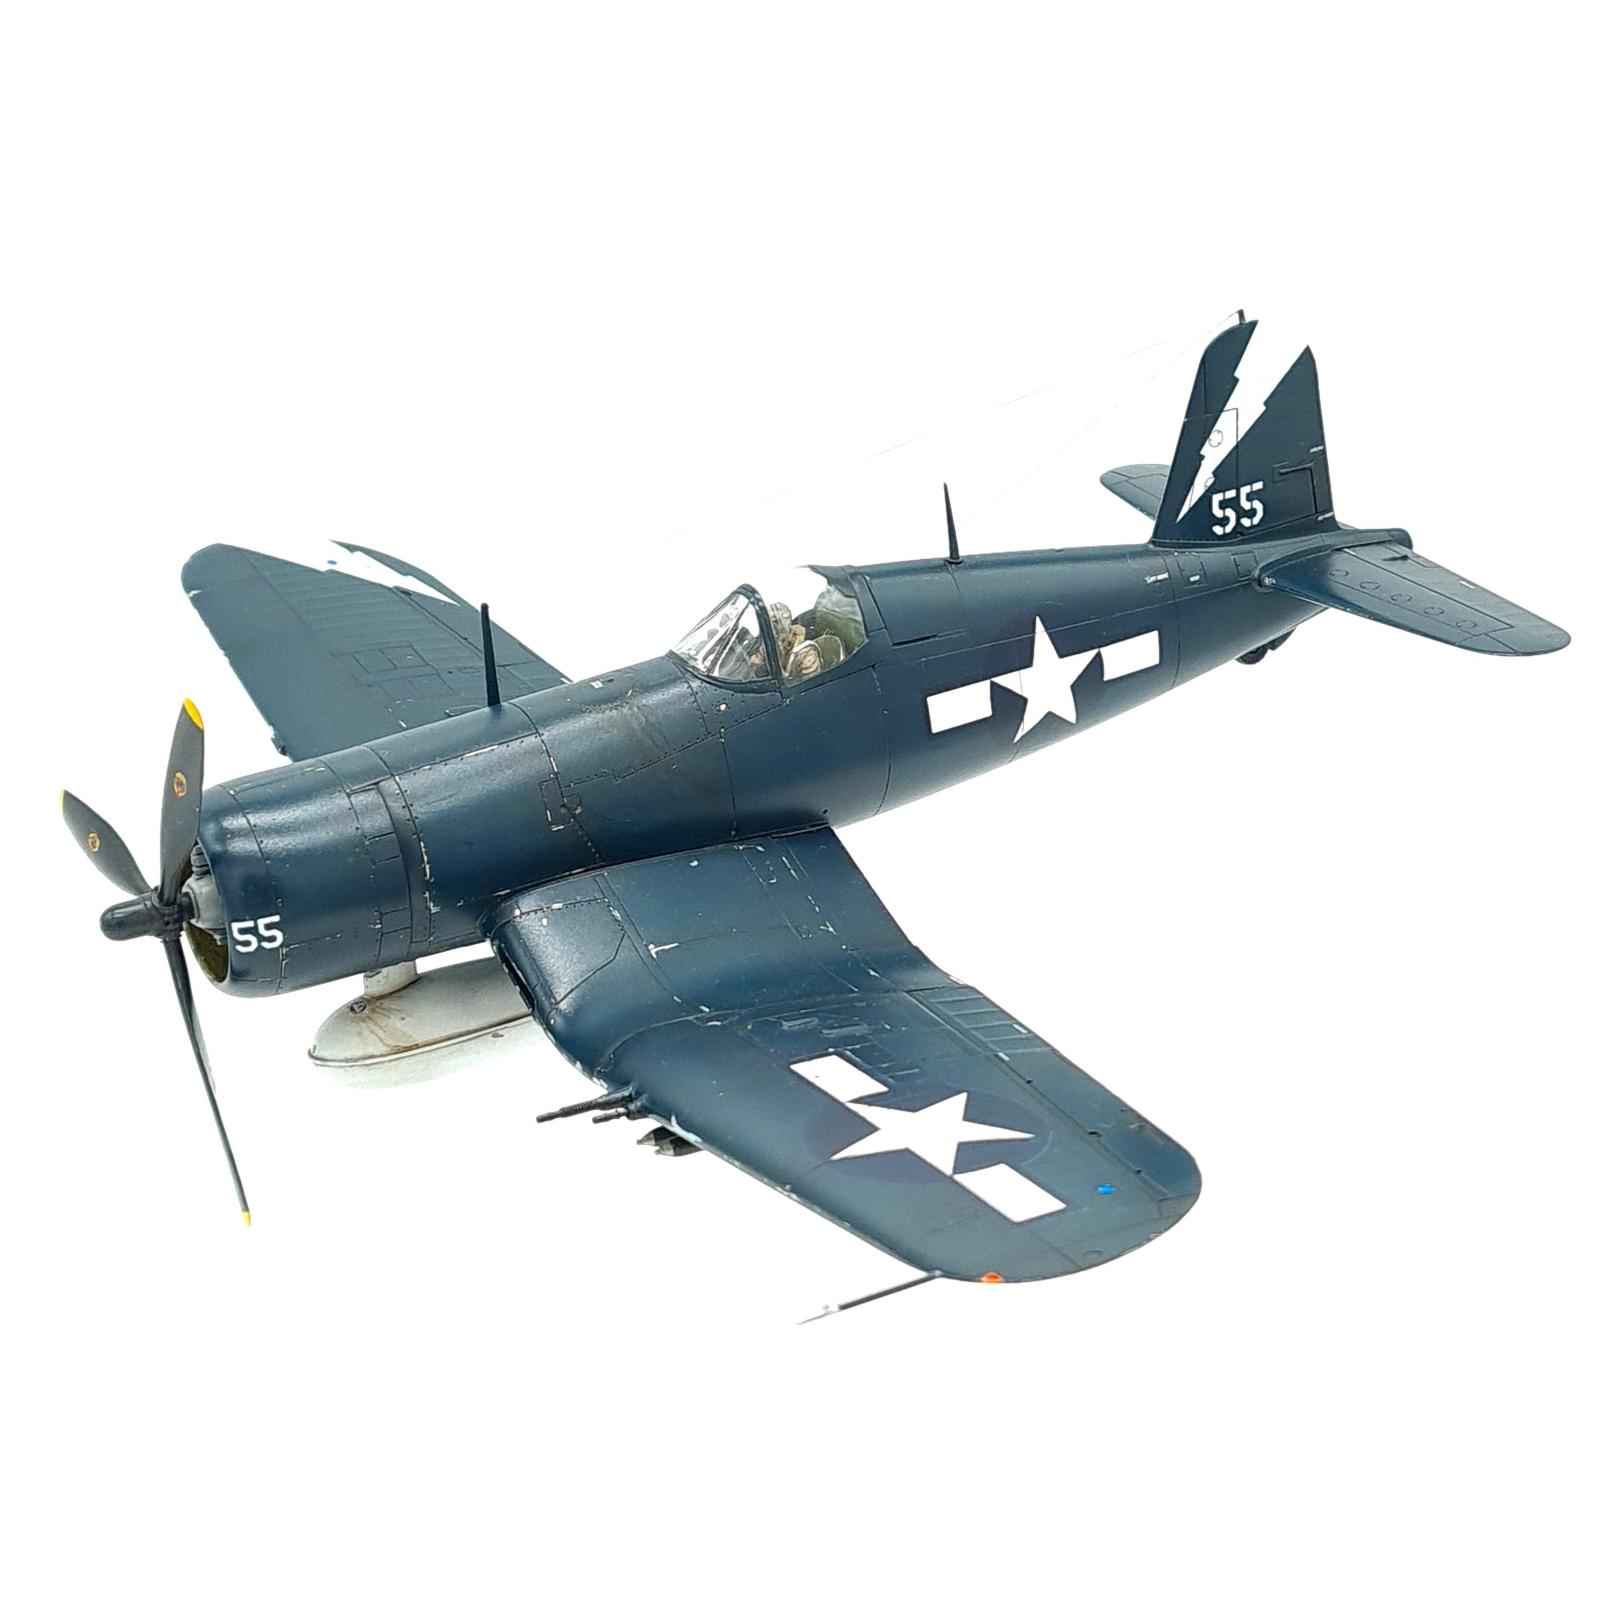
Despite this, the F4U-1C found it's niche during the invasions of Okinawa and Iwo Jima. In this, the Corsairs of squadrons such as the VF-85 'Sky Pirates' utilised the impressive firepower of the 20mm AN/M2 cannons effectively against Japanese positions. They were able to make easy work of open emplacements, and suppress enemy troops and pillboxes much to the admiration of the Marines on the ground. After this, pilots became a bit more fond of the aircraft noting how great the firepower was in the ground attack role.
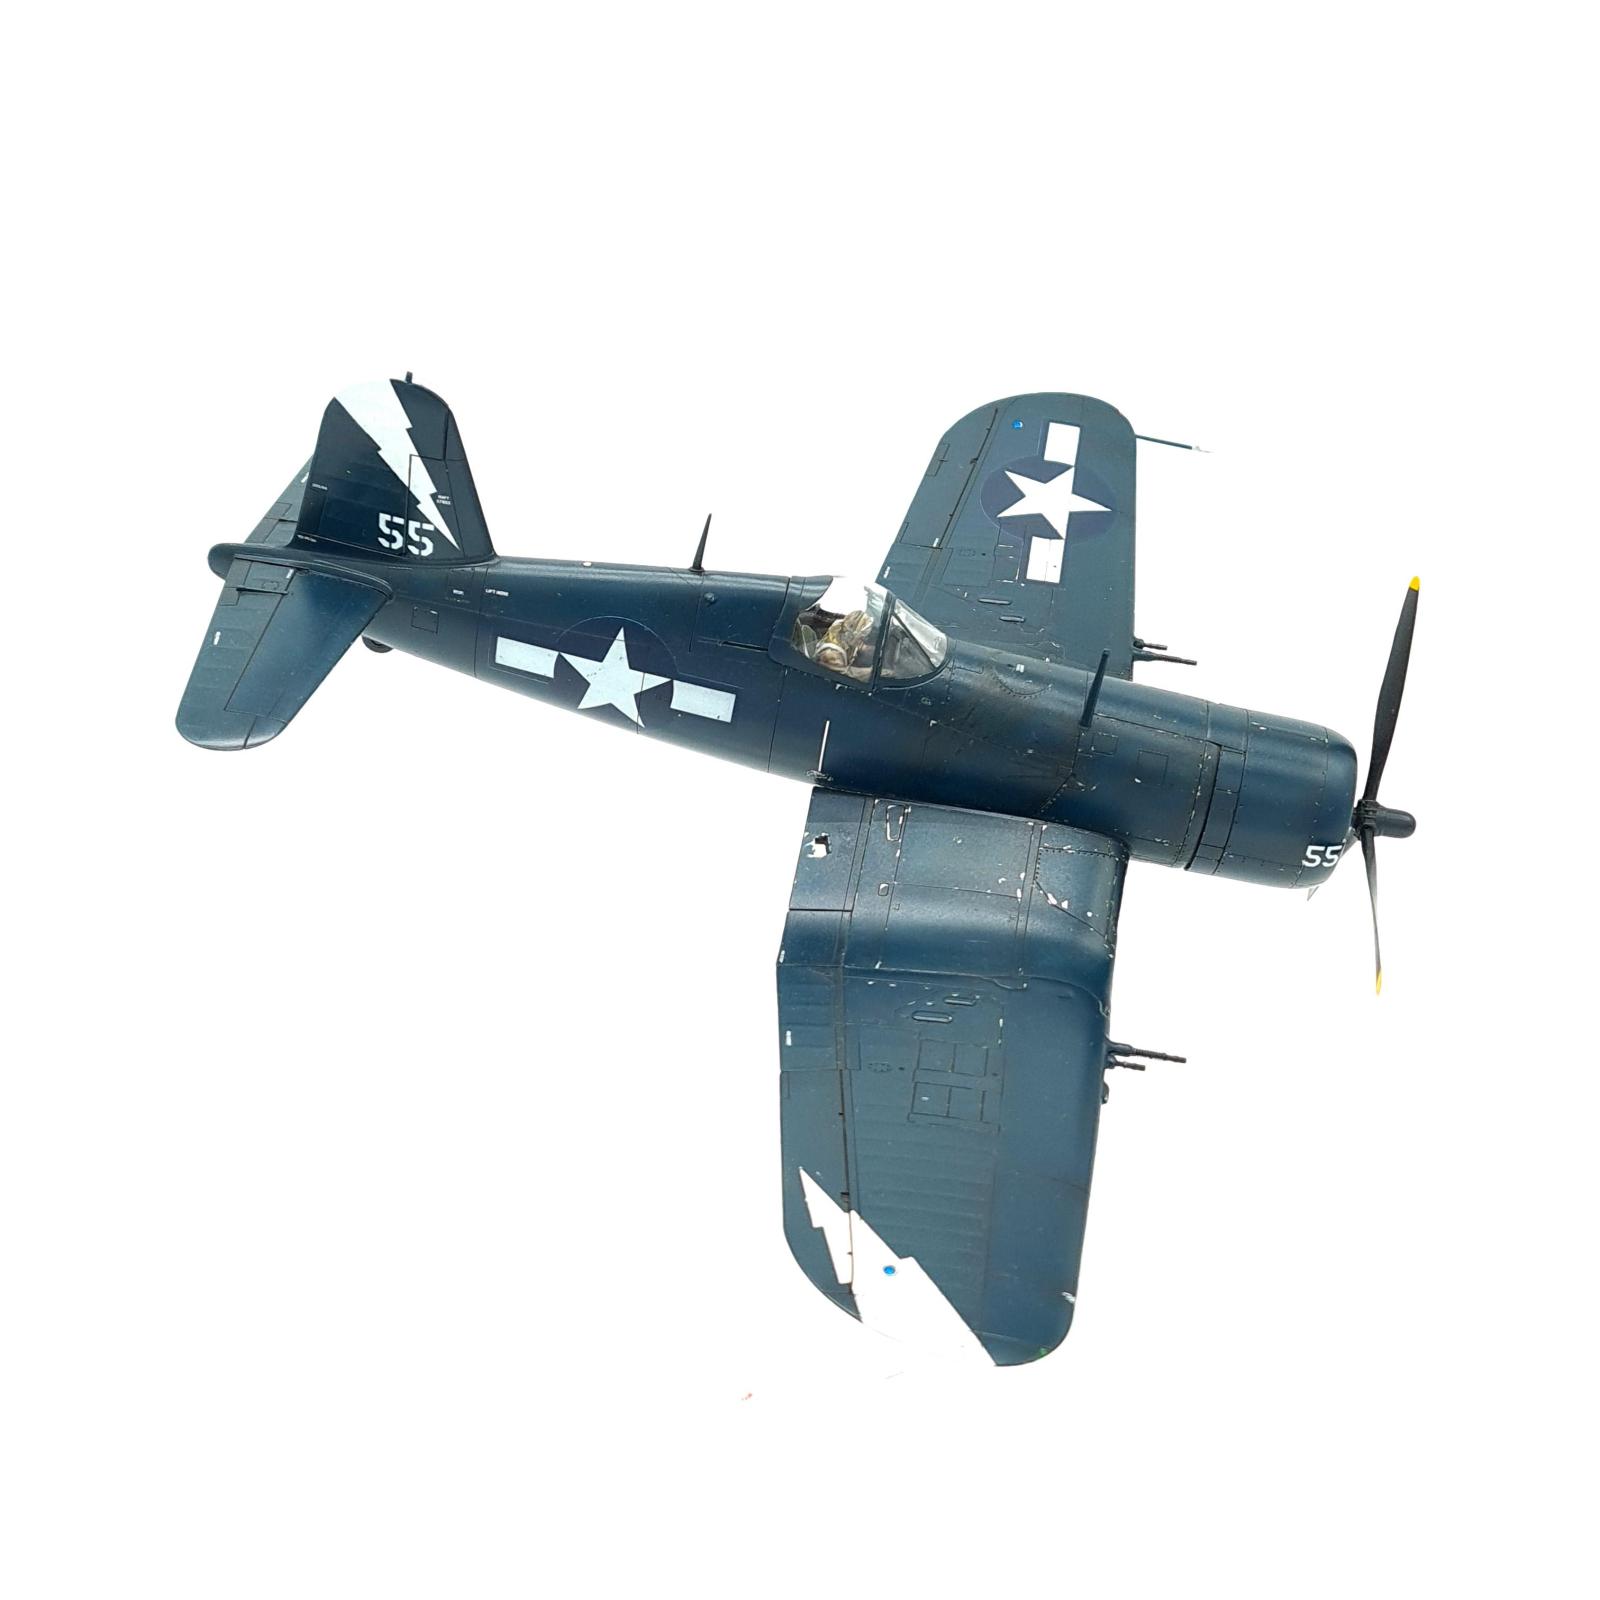
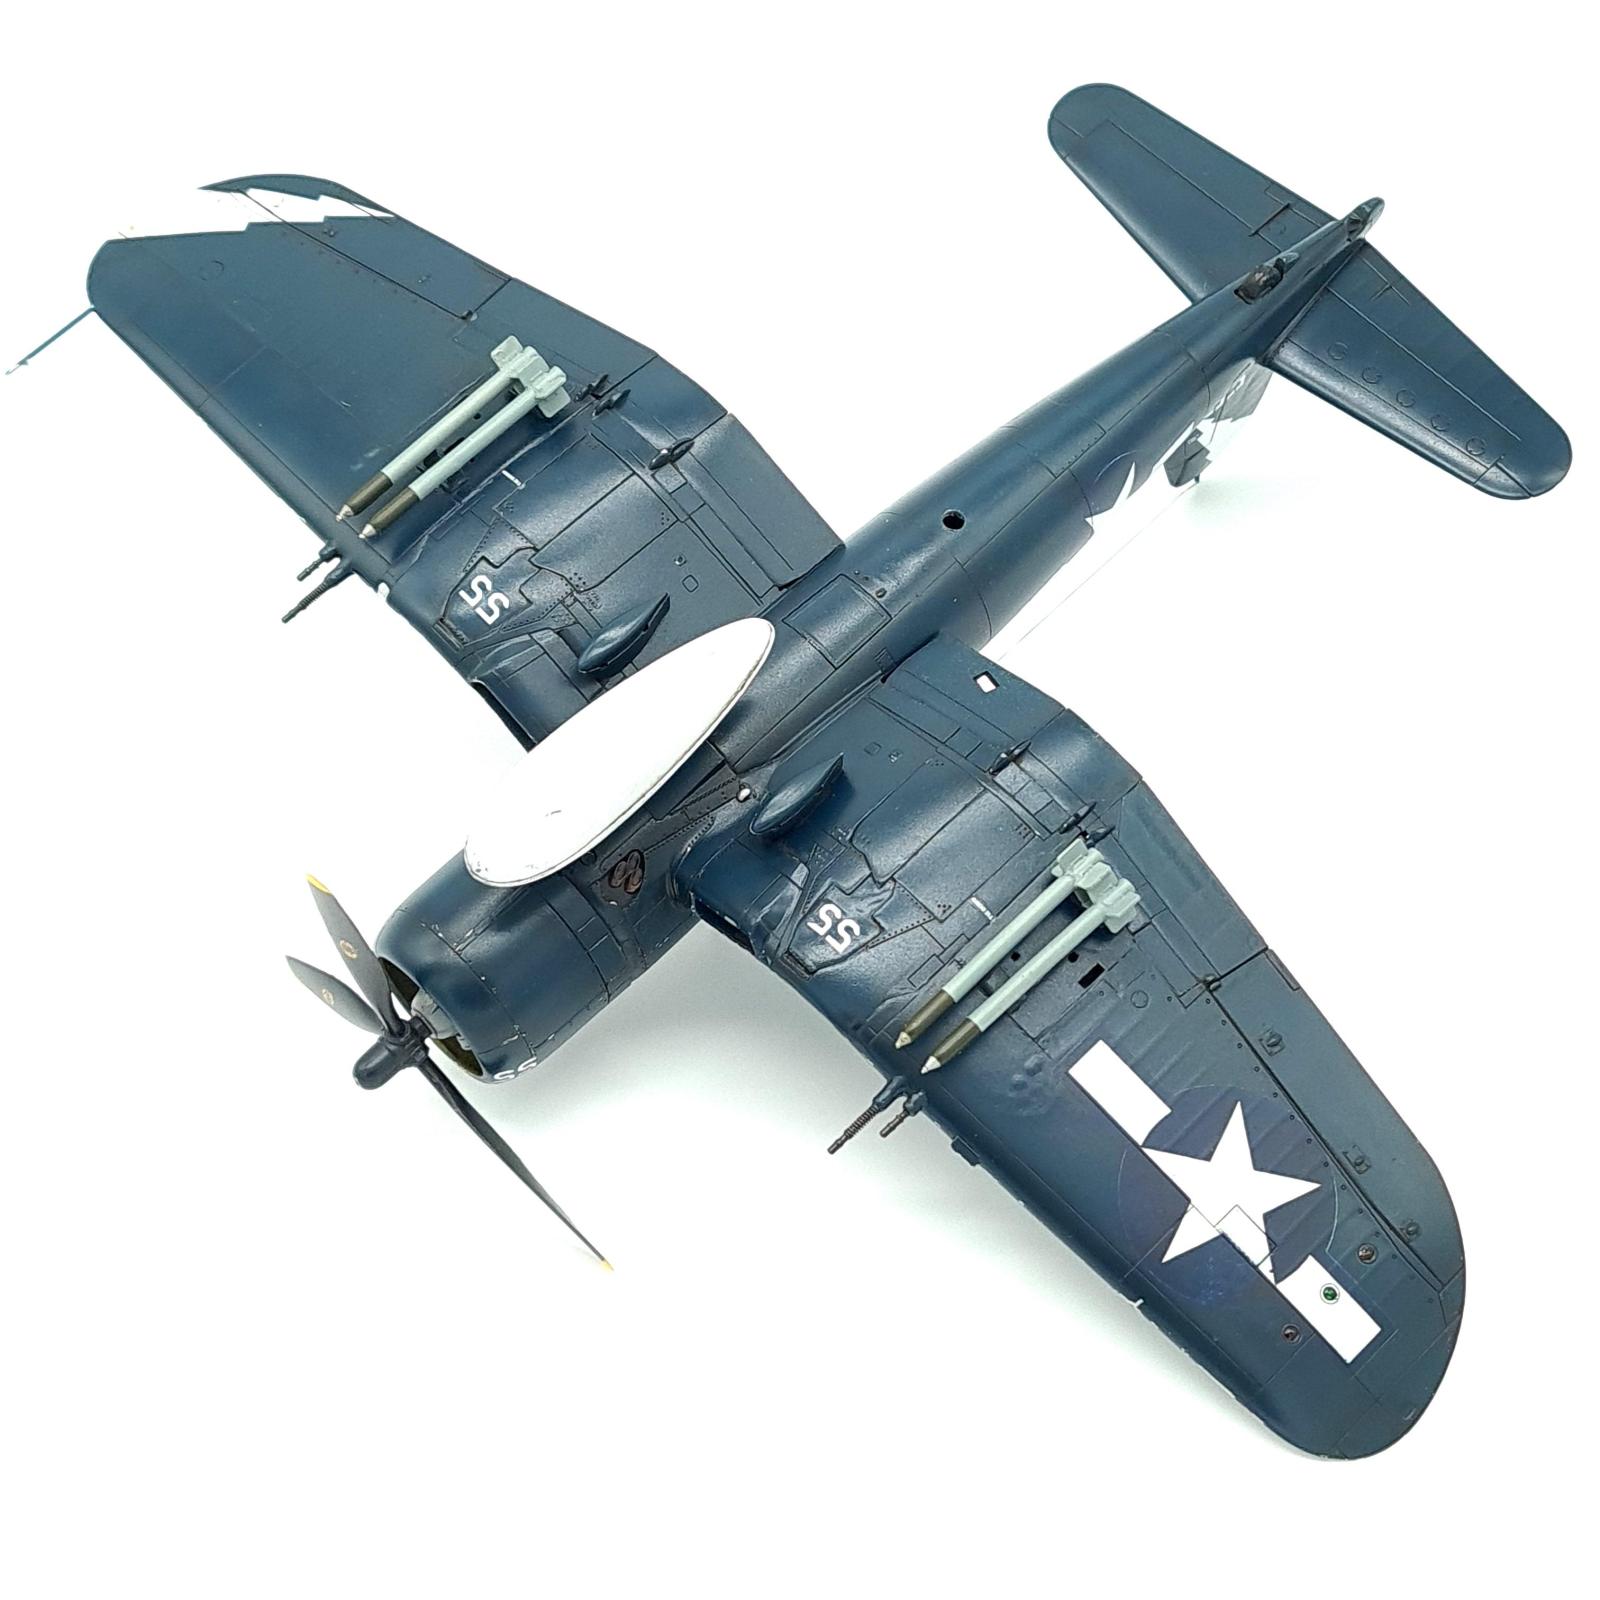
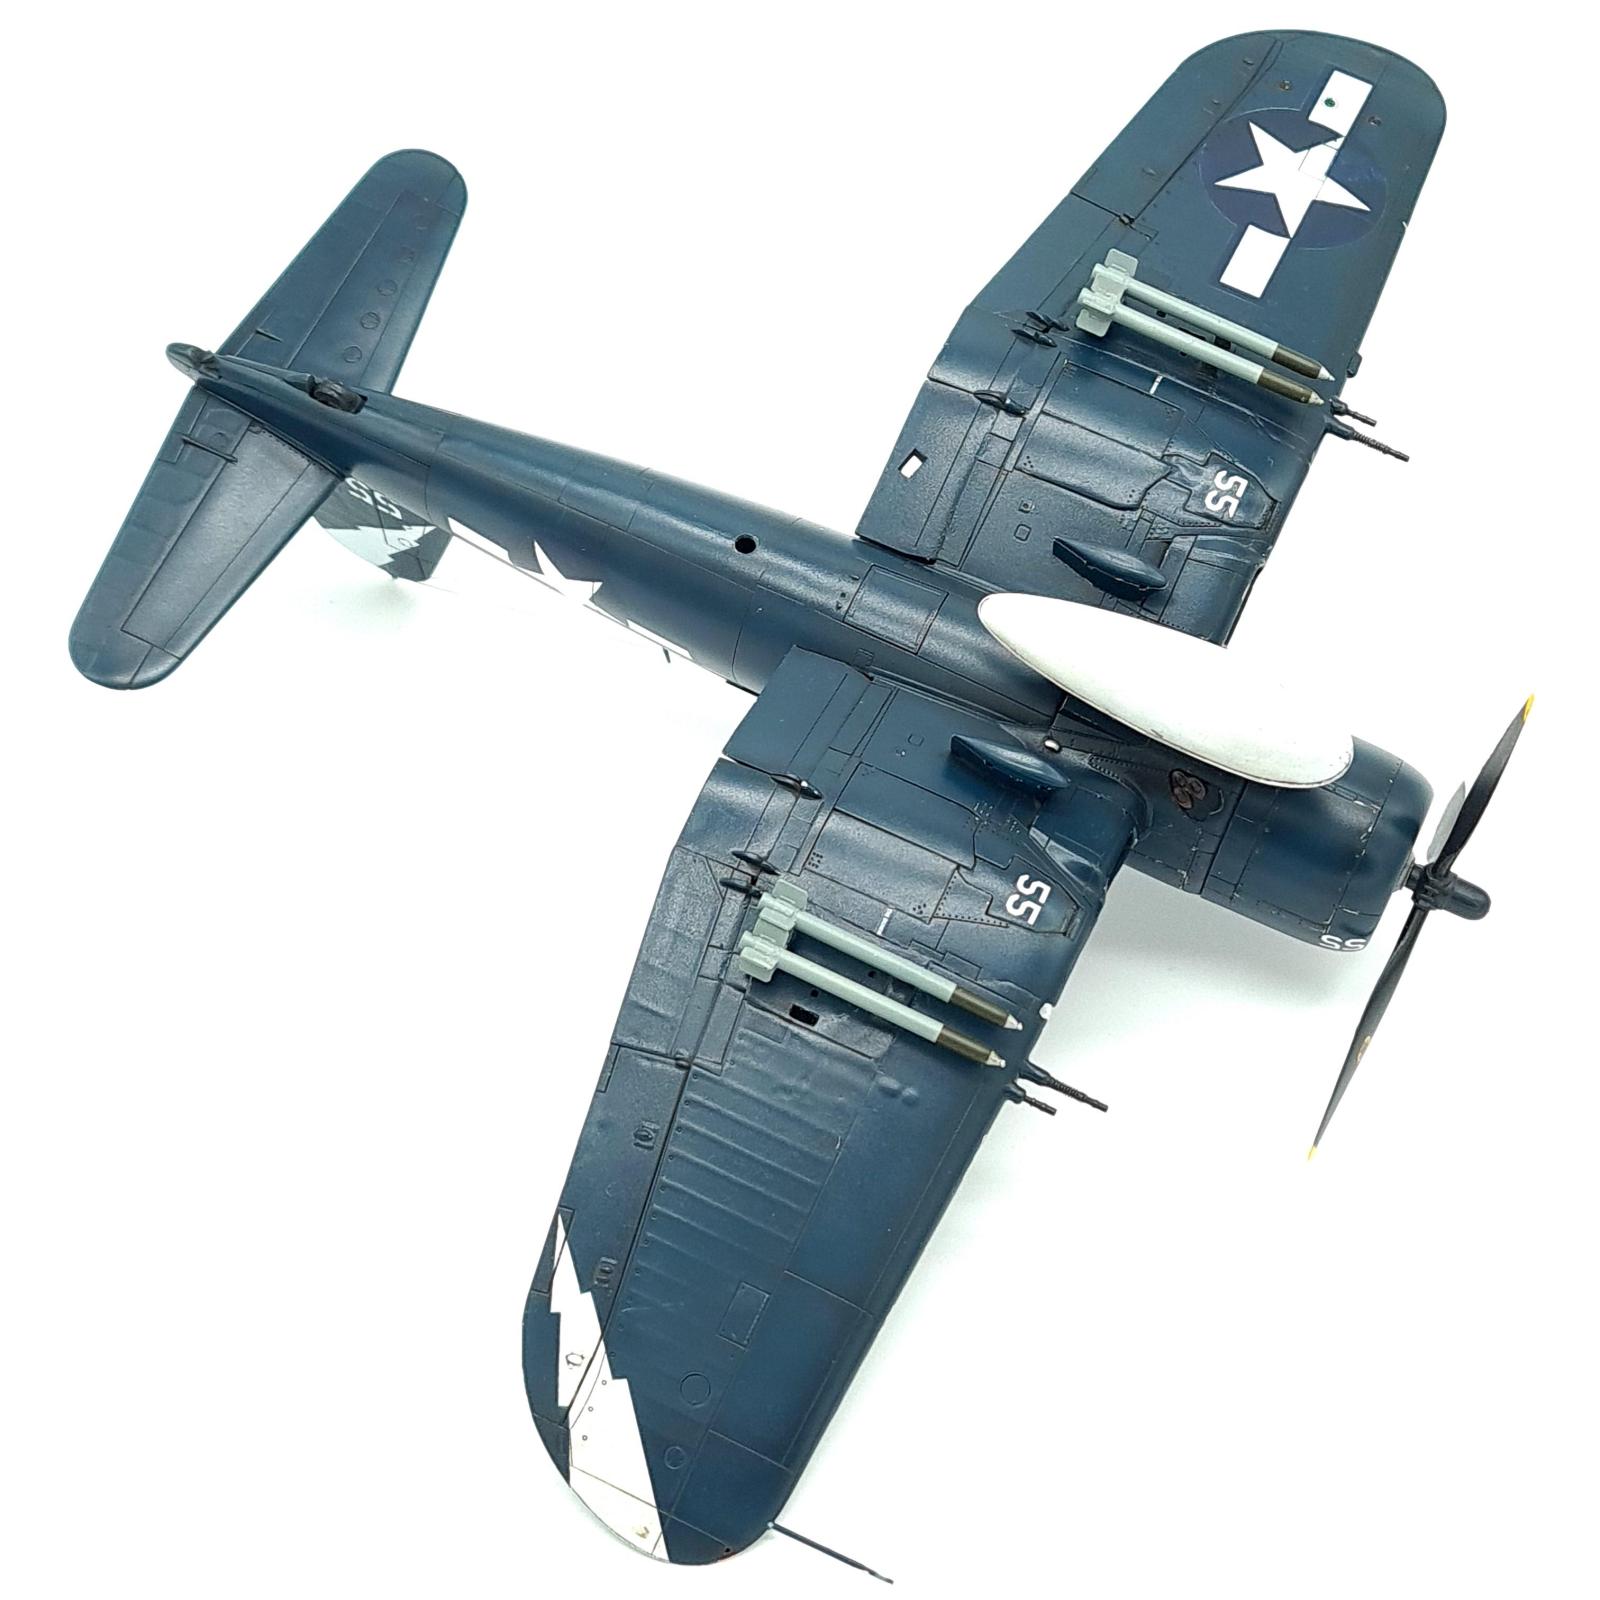
With all the capabilities of the much more well known and produced F4U-1D, the cannon Corsair could still carry bombs, napalm and rockets to further enhance its ground attack capabilities. Curiously, some photos show the Corsair with the traditional layout of 8 HVAR rocket stubs, but some also show the aircraft only having 4. I decided to model the aircraft with this more strange 4 HVAR loadout and chose an aircraft that has this loadout in photographs.
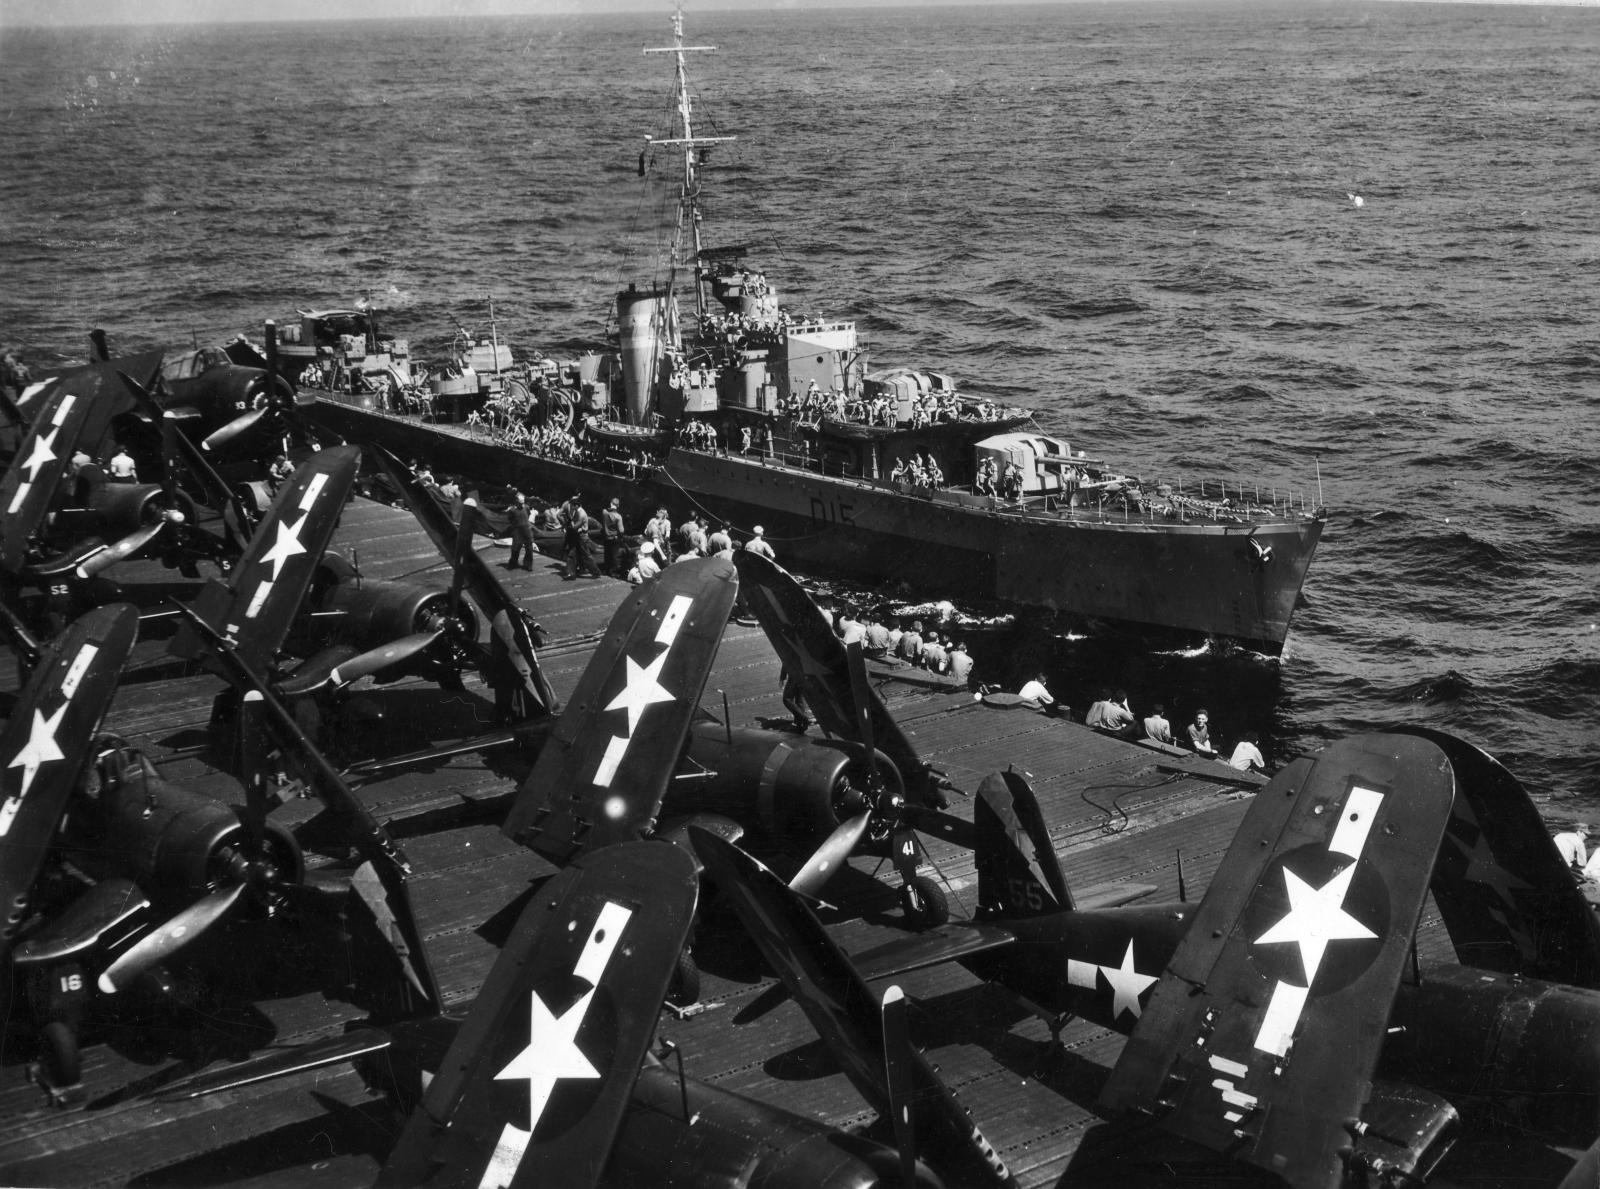

Speaking of photographs, they're pretty darn rare. Colour profiles online tend to lump anything from VF-85 as a F4U-1C, but the squadron and USS Shangri-la as a whole had both -1Cs and 1Ds at the same time. Photographs are quite hard to come across, but vbf85.com was great for this. That being said, many photographs don't clearly show the wings to reveal details such as the new cannon bulges partially due to quality of the photos but also due to the colour of the aircraft being so dark. One book I found absolutely invaluable for this project was 'The Vought F4U Corsair, a Comprehensive Guide' from SAM publications which not only has a few high detail photographs of the Corsair, but also shows an a very rare photo of the bare metal wings showing the cannon bulges and the only plan drawing I was able to find that included that detail.
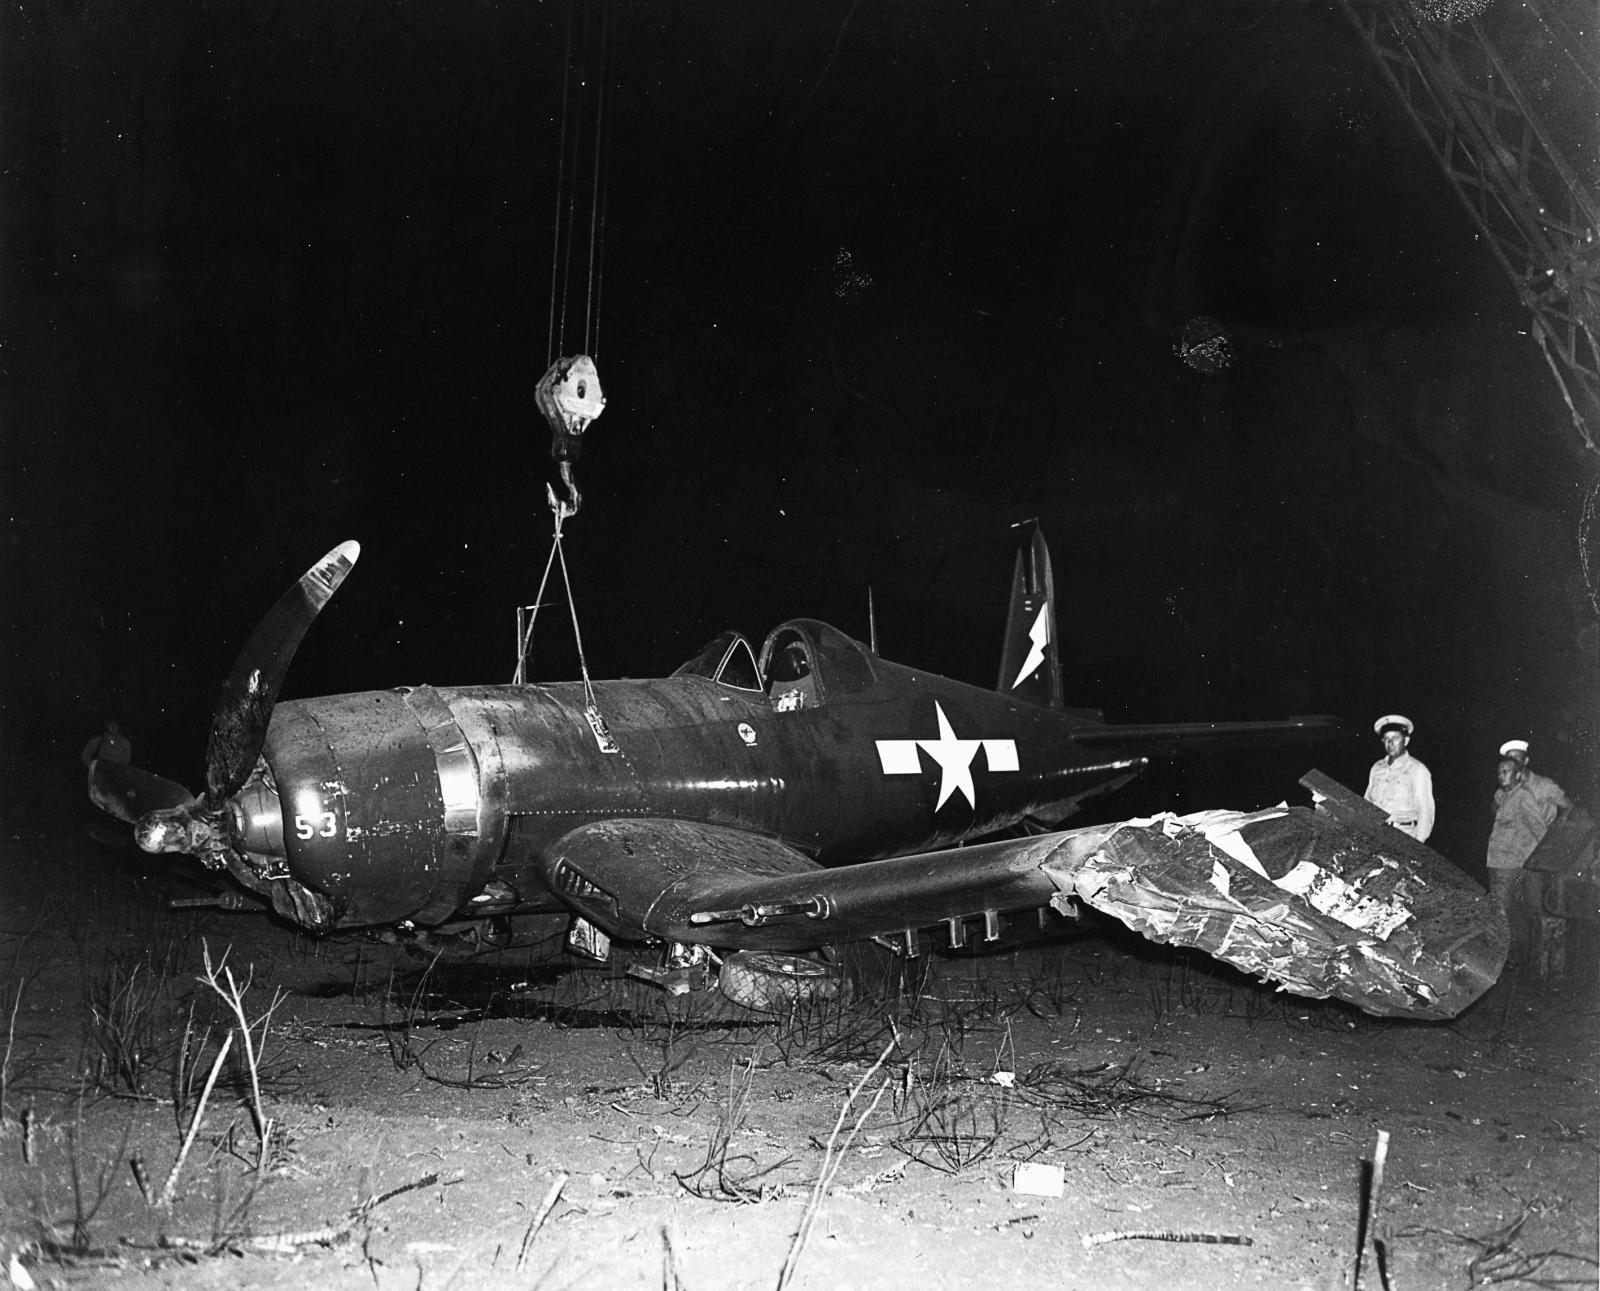
Despite the lack of love from pilots initially due to its weaponry in the air combat role, the F4U-1C did still get several air-to-air kills. Ultimately, a 20mm thrown at a plane does hurt regardless of the pilots opinions of the guns themselves. One F4U-1C of VMF-311 was credited with shooting 8 planes down over Okinawa, flown by various pilots during the time.

The Build
Full build thread located here
The build was mostly the standard Tamiya out of the box experience, no photoetch, no riveting, painting the instruments by hand. The standard. Being a popular well known kit there is nothing to add here. The only notable changes occurred on the wings of course.

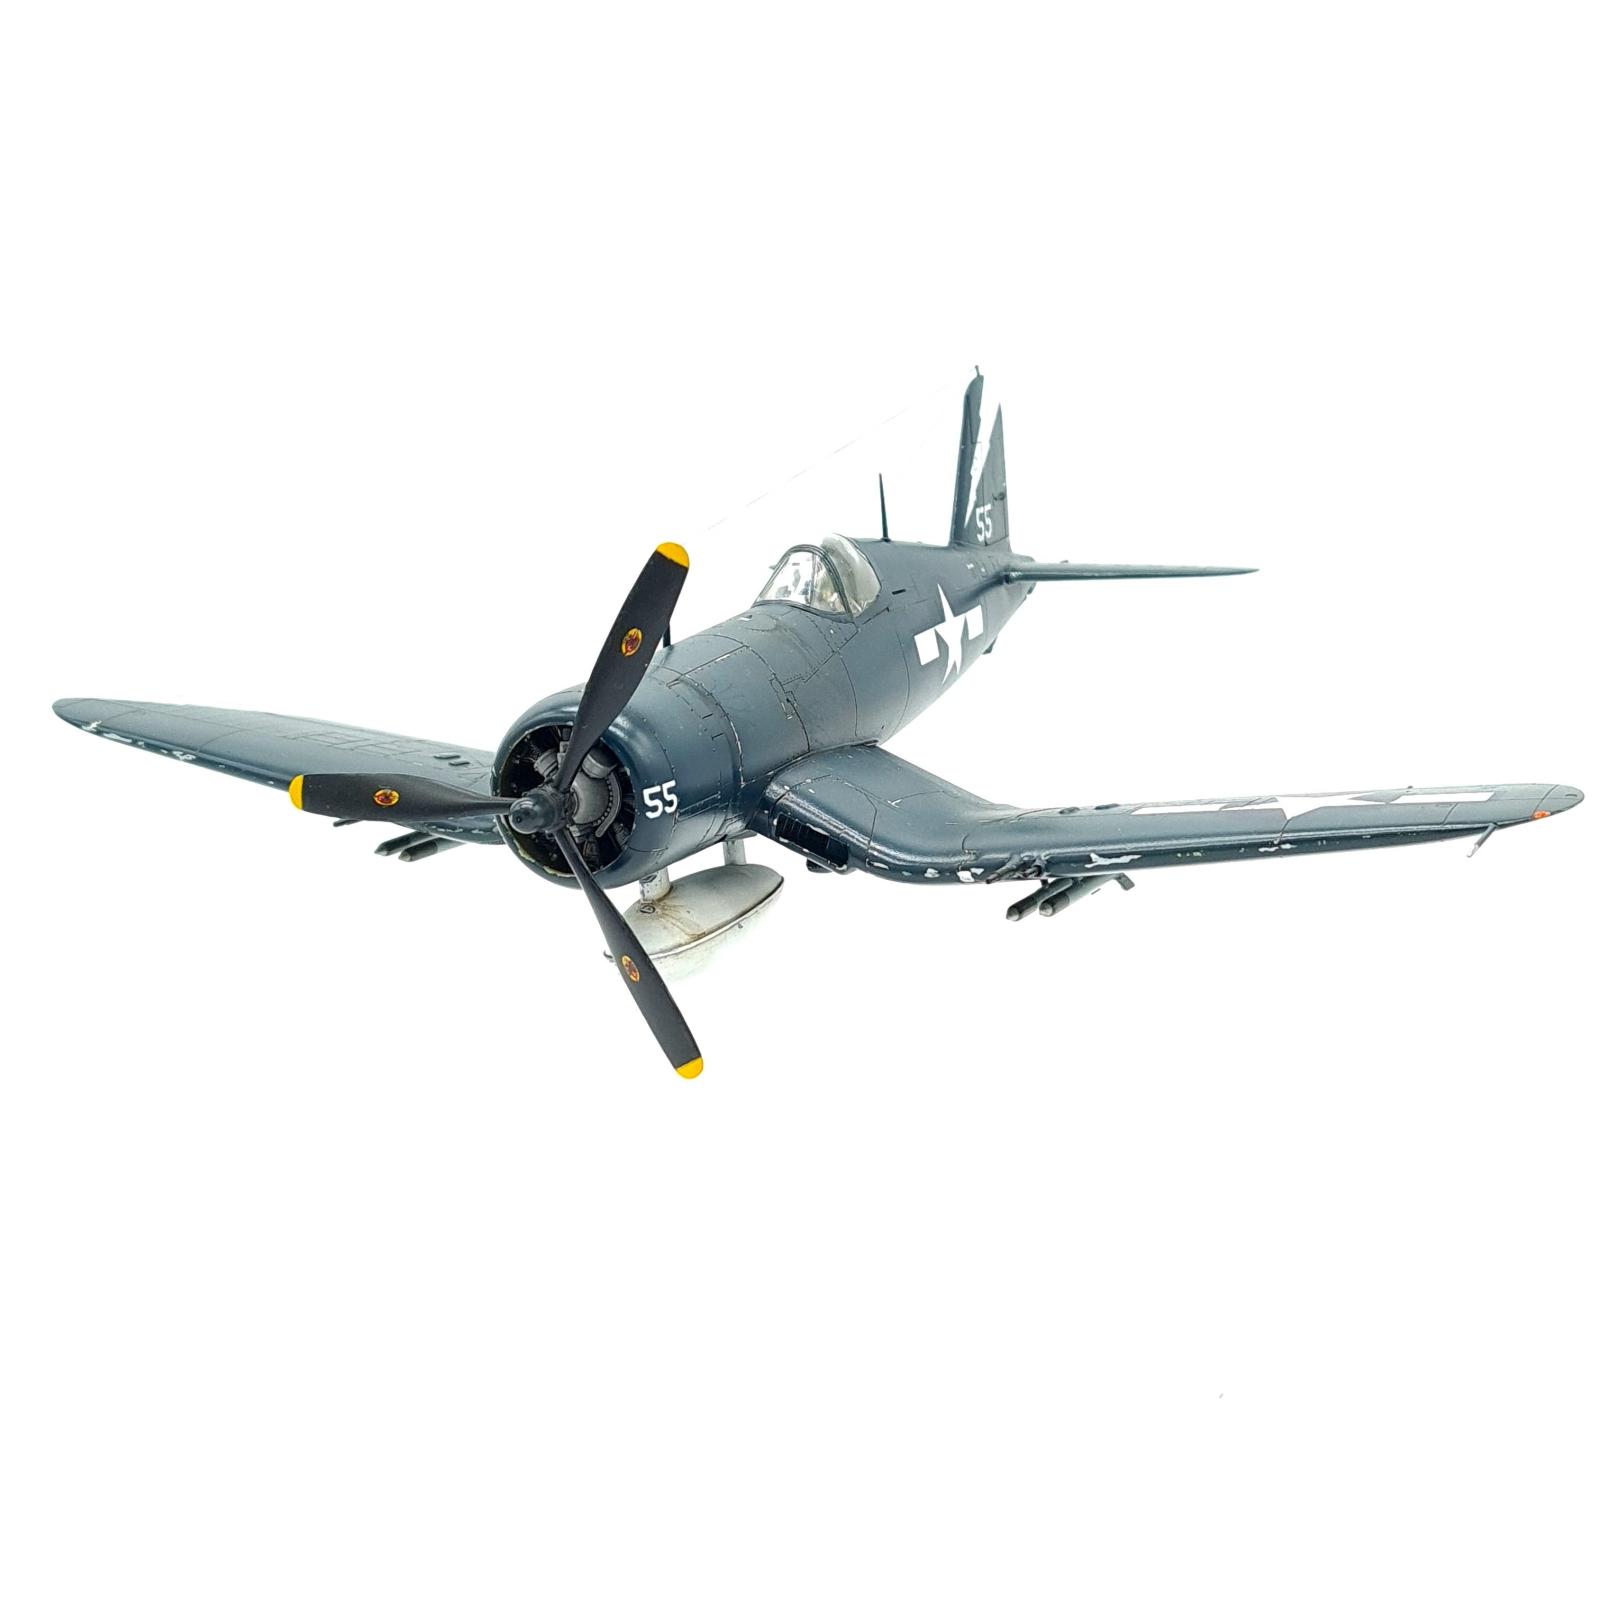
Firstly the undercarriage was made wheels up. I tried a different method of doing this from my previous builds and it worked out quite nicely, by building a framework of styrene to assist with placement I began gluing the uncarriage covers onto the wing prior to putting the two wing halves together. This ended up coming out decently, and better the second time on the other in flight Corsair of the build.
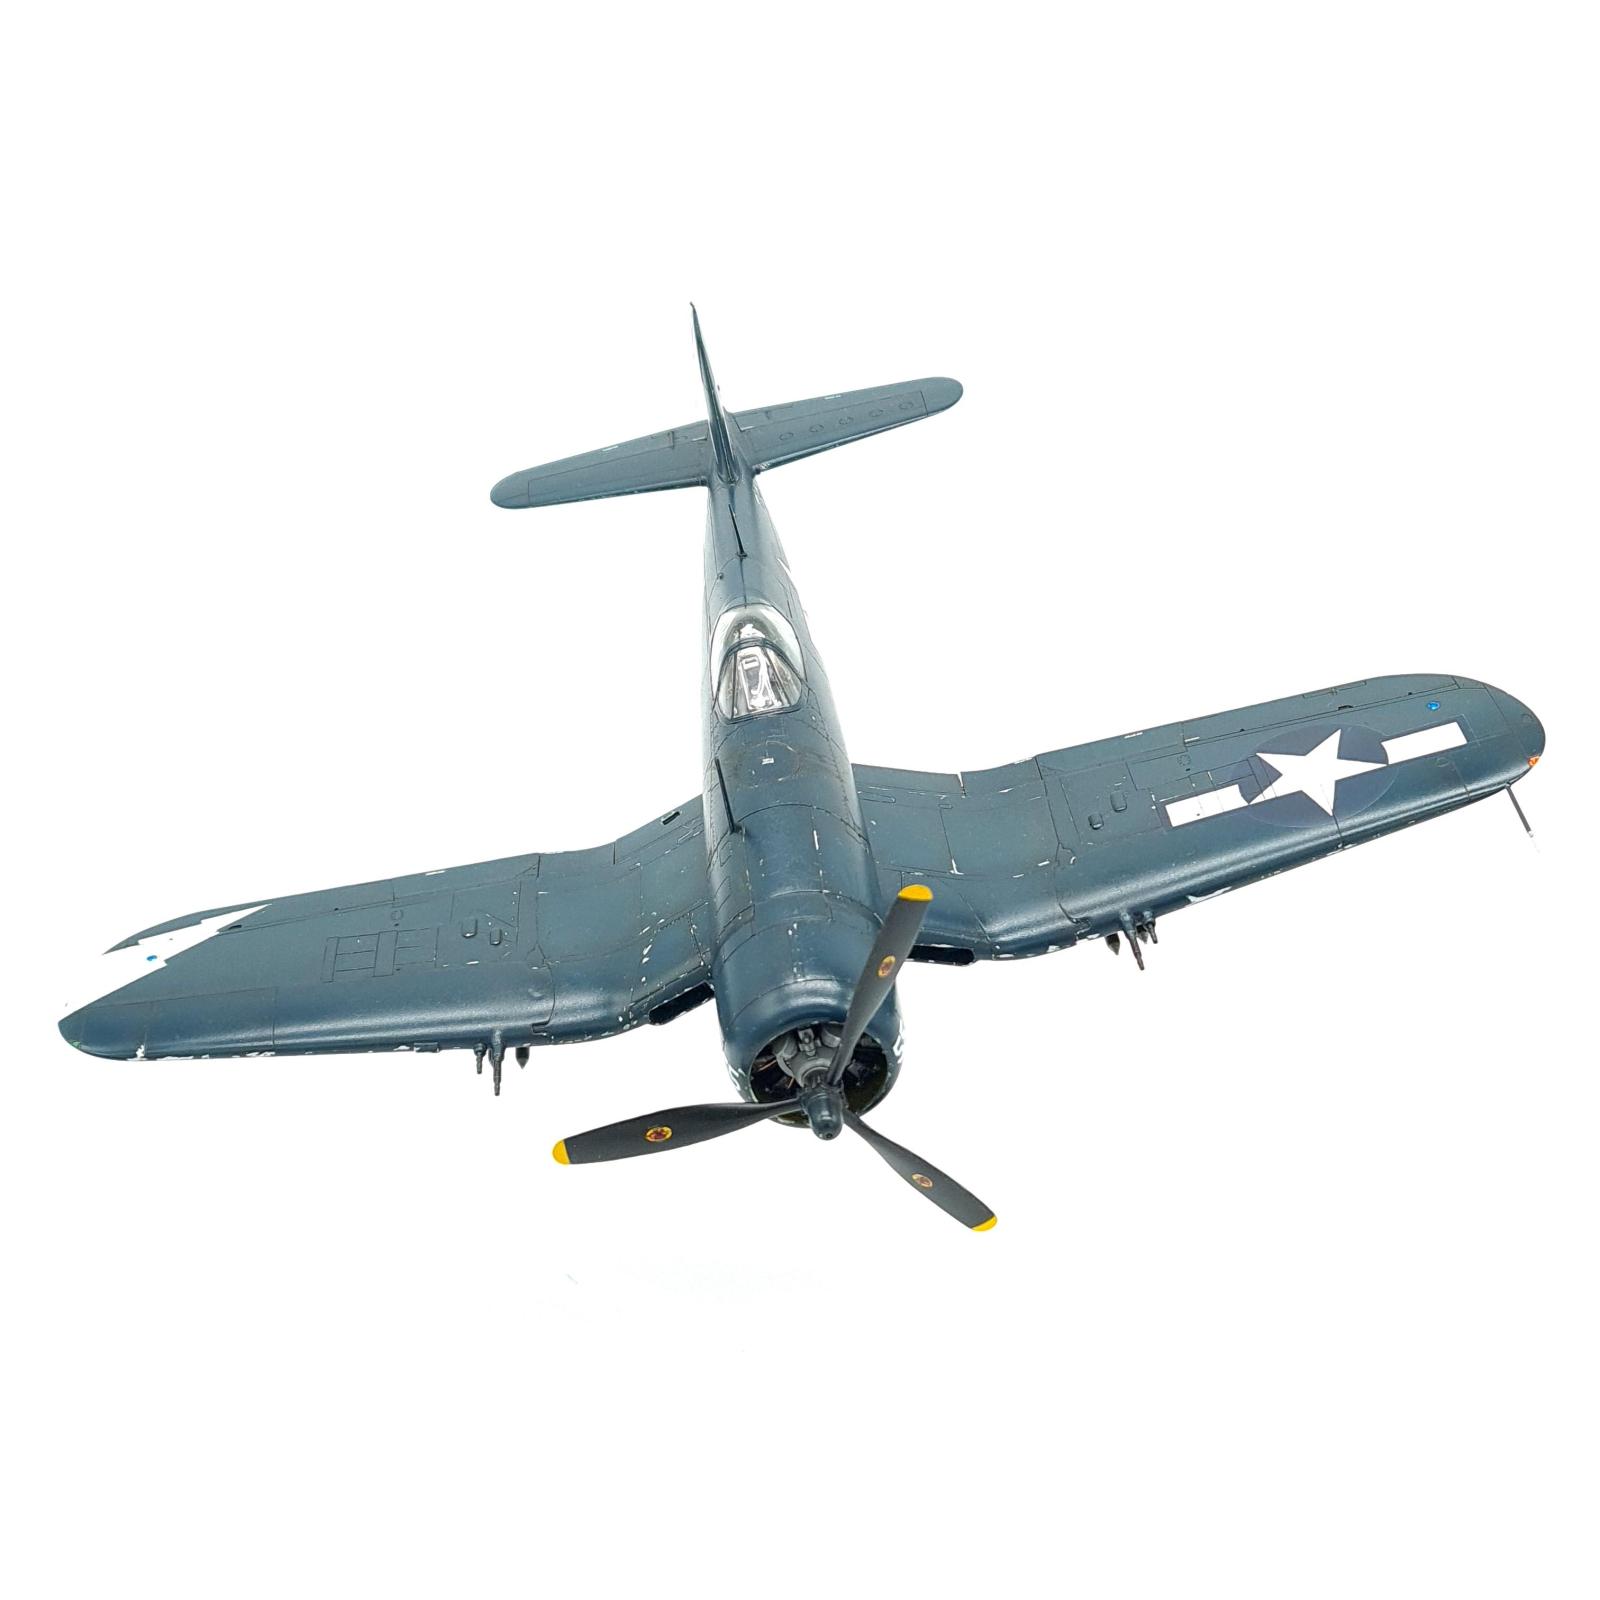
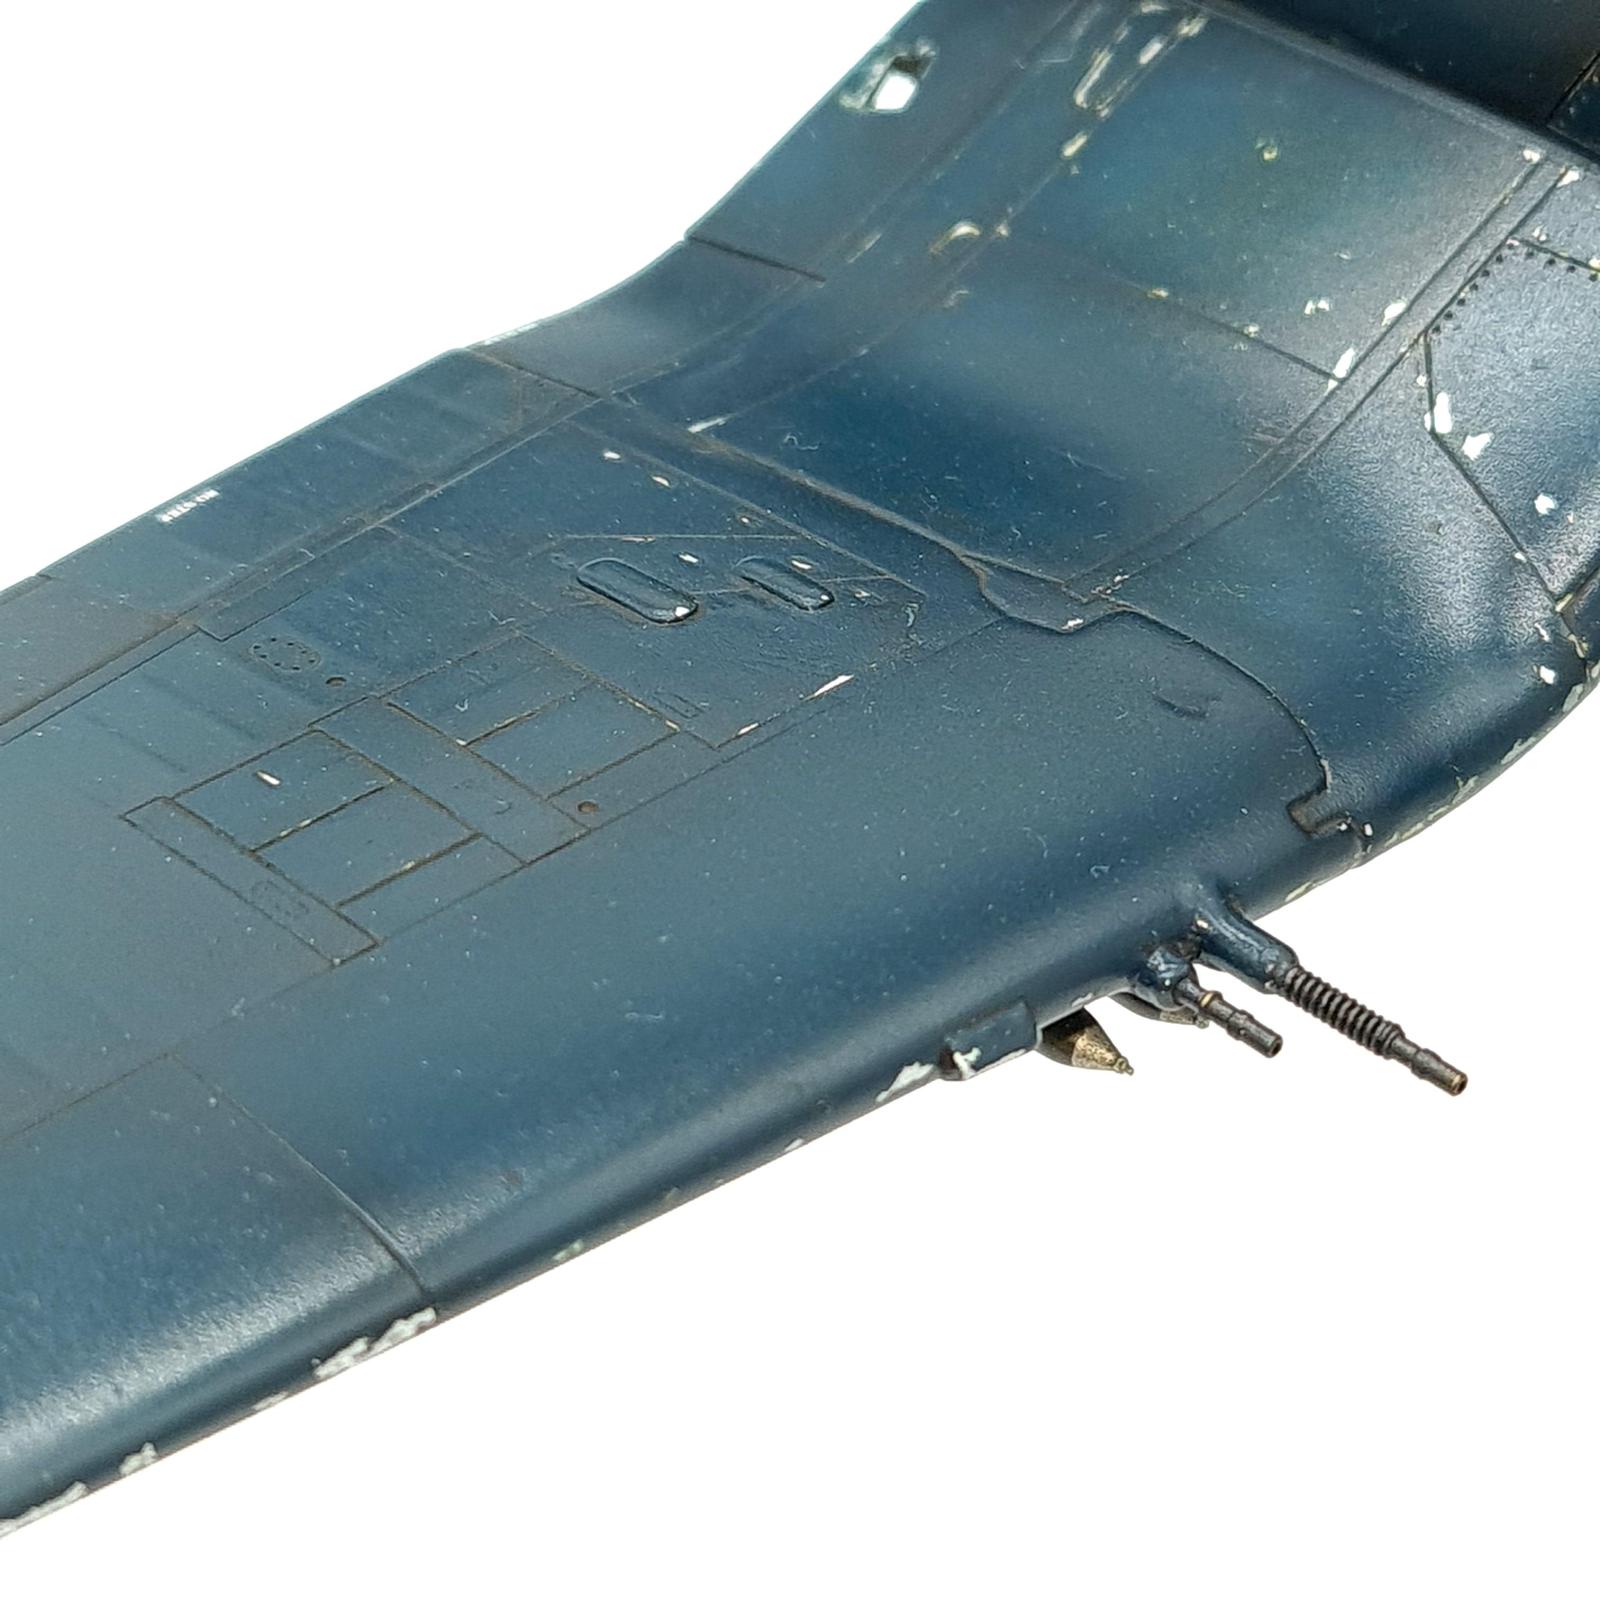
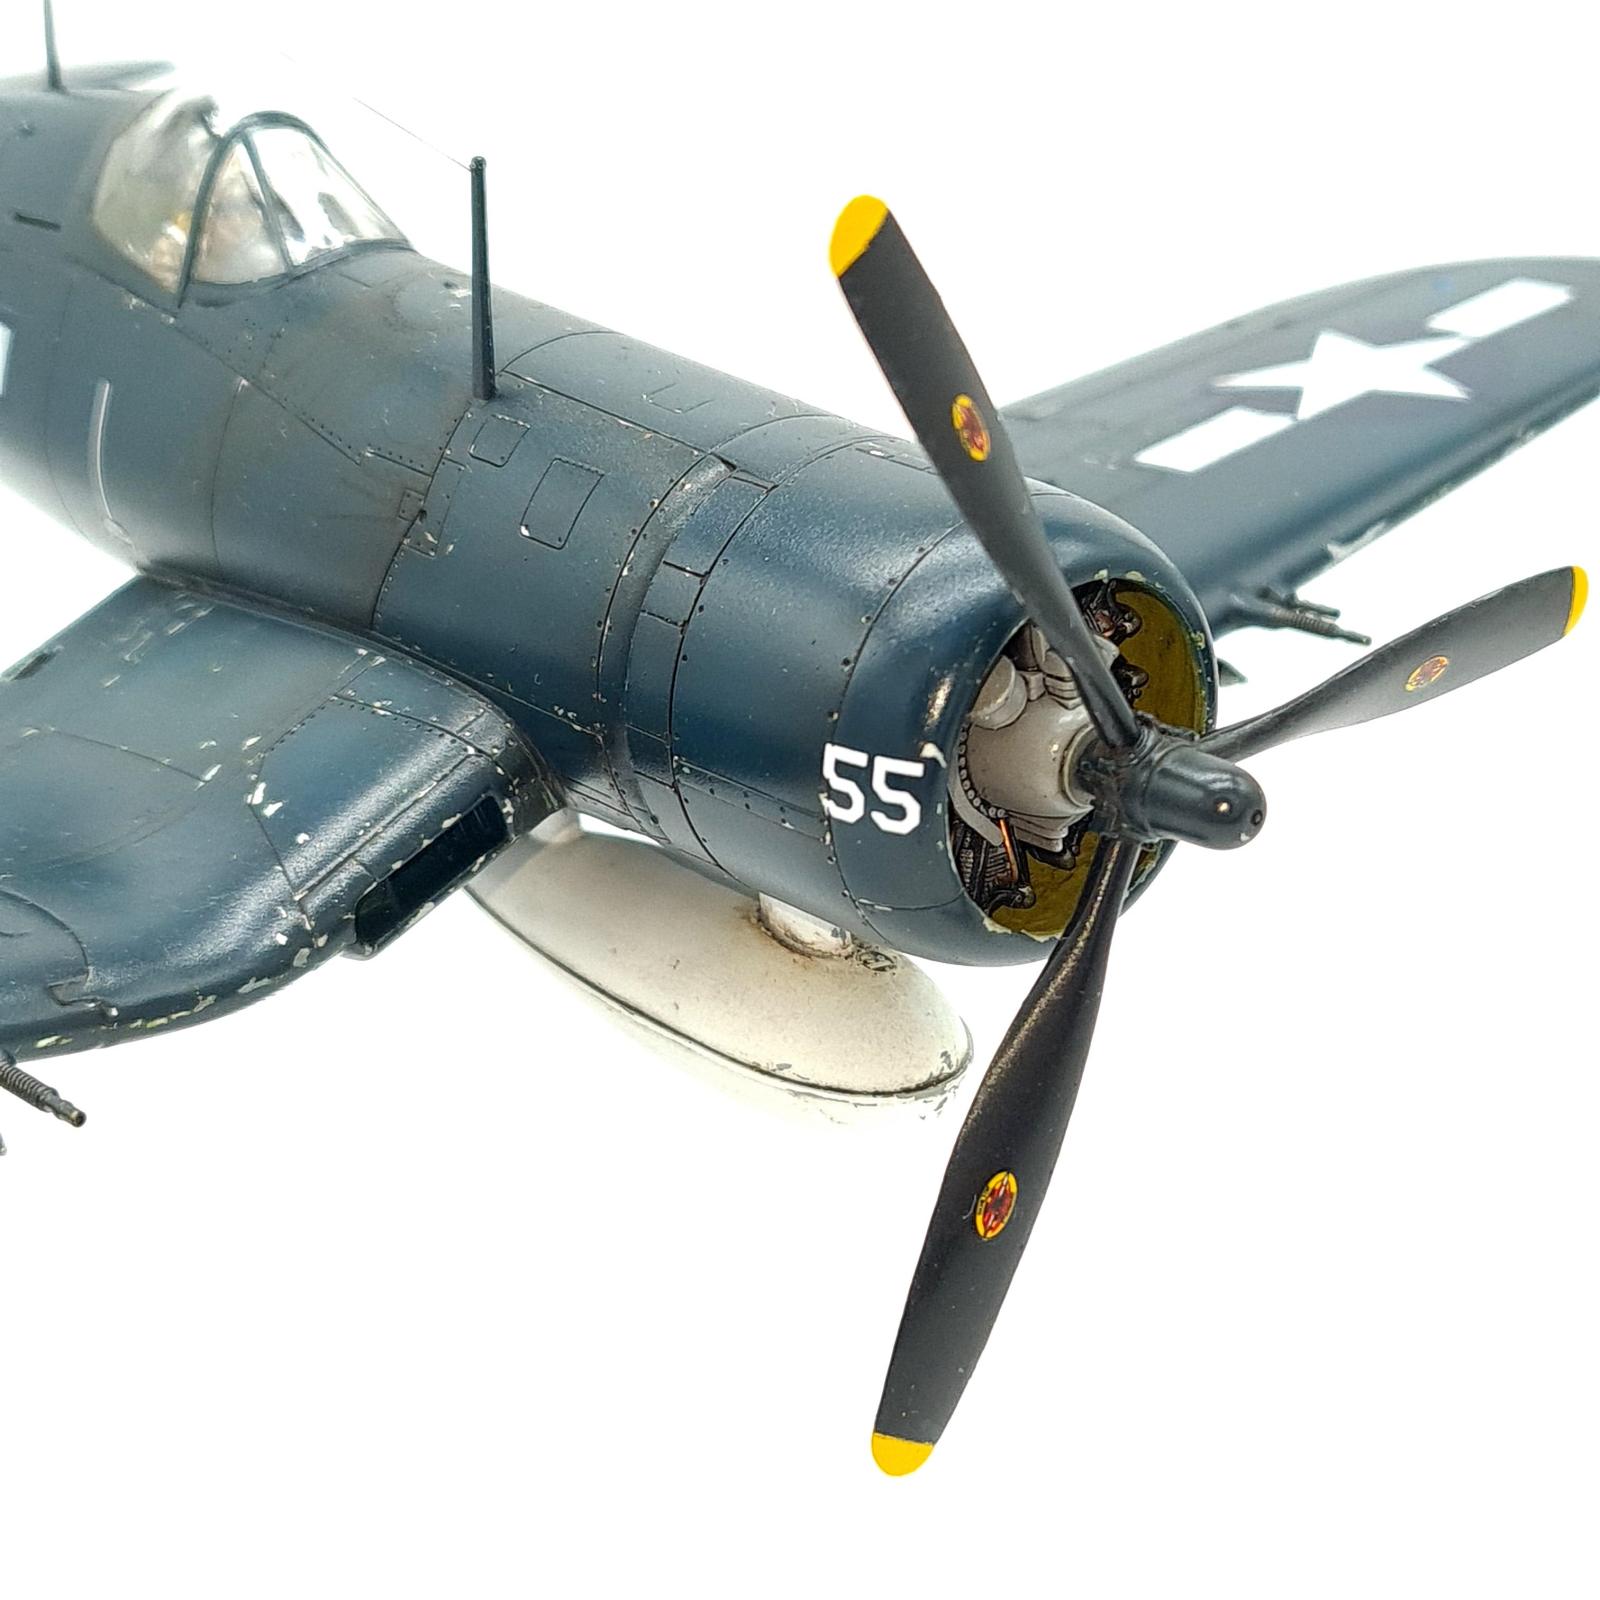
For the wings, naturally the main job was the cannons. To start off I filled in the 50. Cal gun ports by gluing unused antennas and cannons from other kits into them, then using filler over them, and sanding it all down smooth. For the cannons themselves I ended up on using a brass set designed for a Hurricane Mk.IIc, then cutting down the blast tubes to the right length for the Corsair, before gluing it all on with superglue.

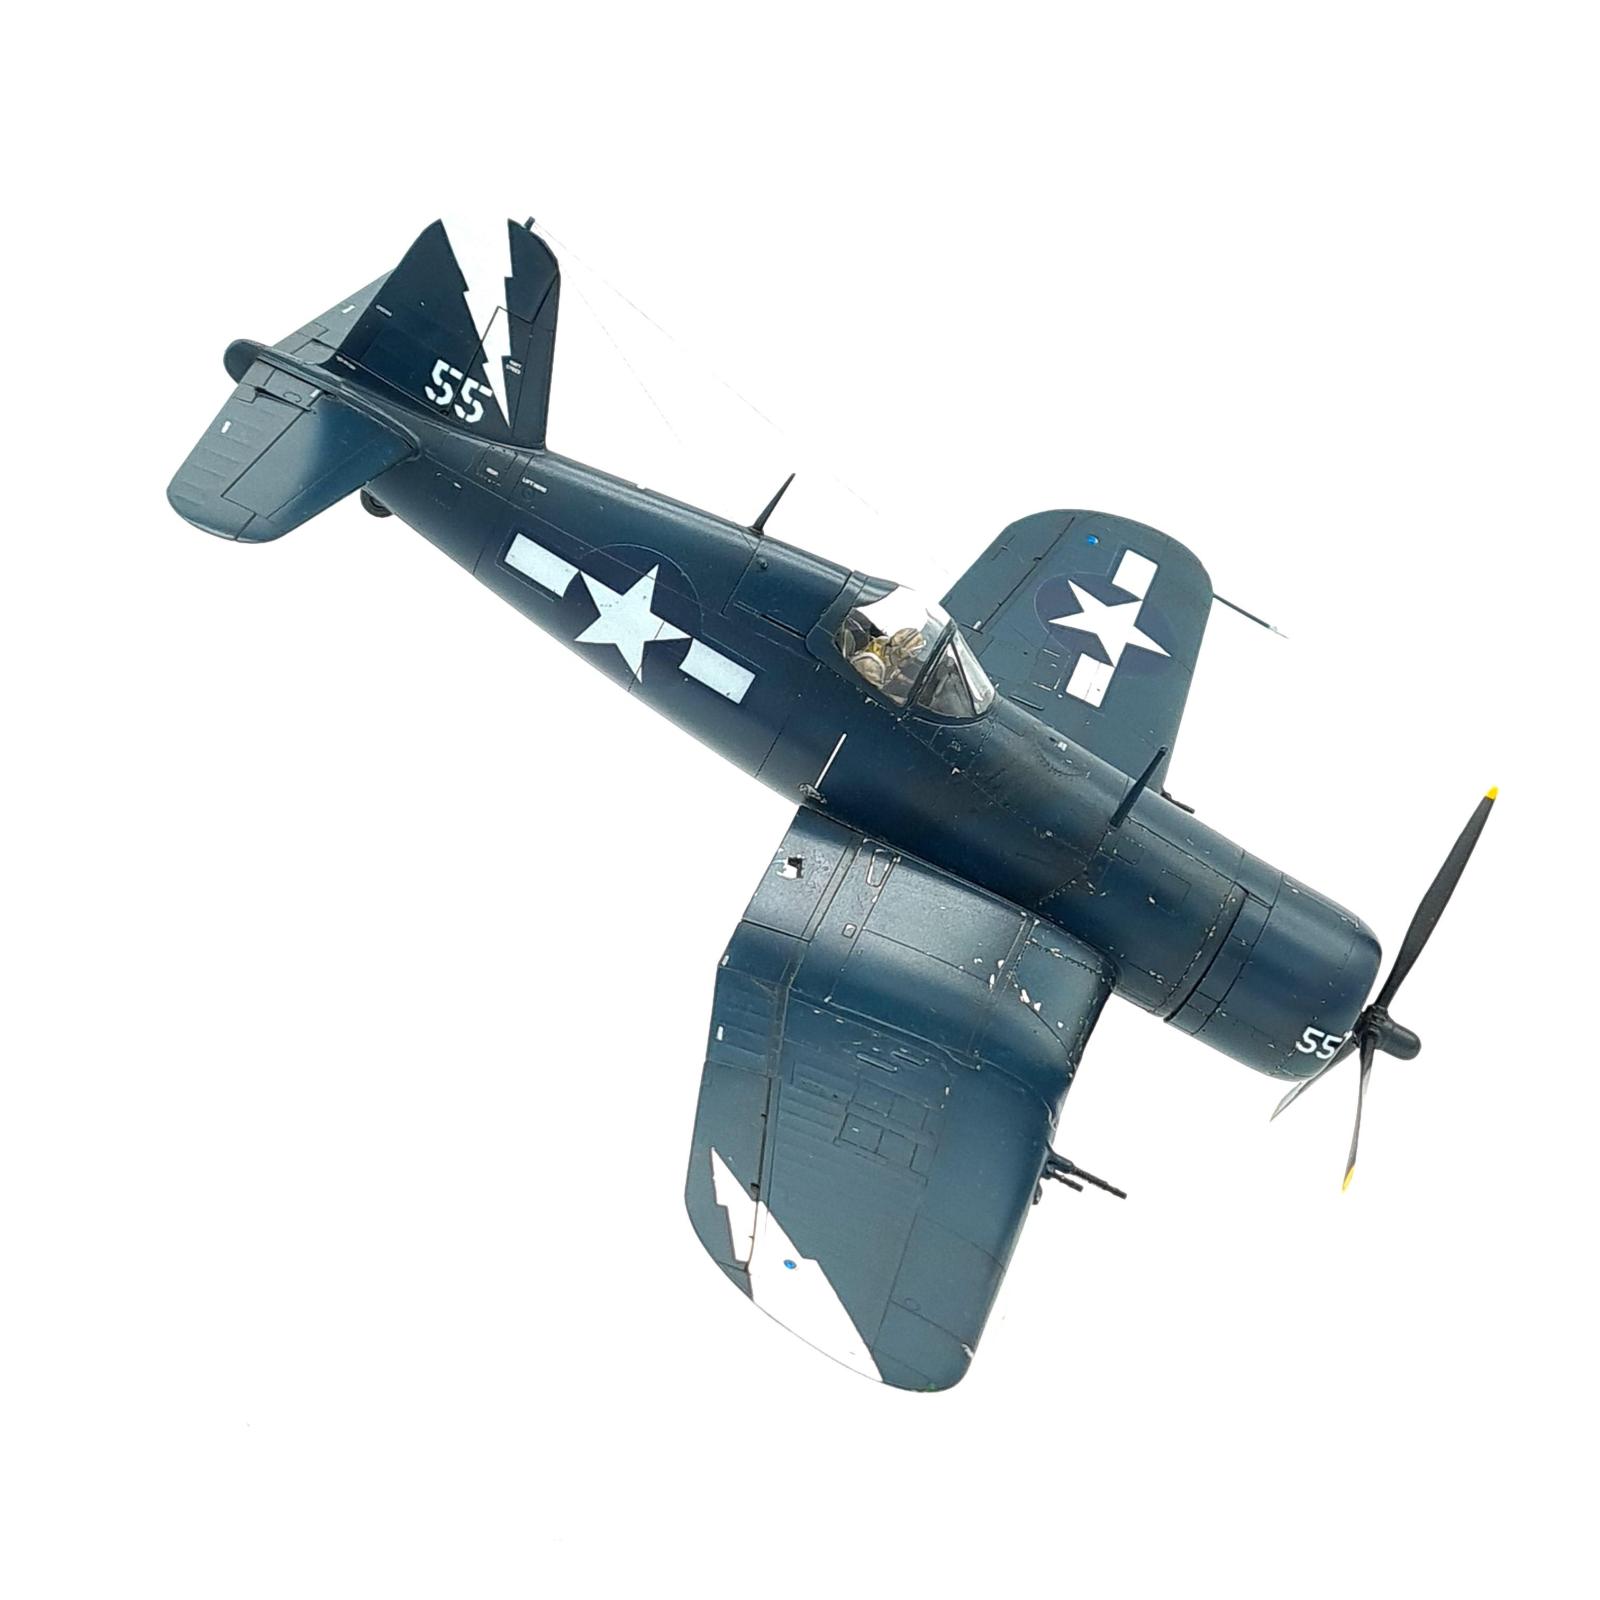
For panels, the MG armed Corsairs have 6 access panels per wing, the 1C has only 4 in this same space. As such the unwanted panel lines were filled in, a new one was scribed where it was wanted. Using some styrene card I traced the shape wanted for the bulges, cut it out roughly, then sanded it to shape before gluing it on.
For external ordinance I eventually decided to add the -1D style pylons but use the old centre mounted tank, which can be seen in some photos. Only 4 (2 forward 2 aft) rocket stubs were put on to allow for the 2 HVARs per wing. With that, the 1C modifications were complete.
Interestingly this kit comes with the mounts for rockets, but no rockets themselves. I didn't realise this until the final weeks of the build, as the Tamiya Corsair with Moto-tug I previously but does come with the HVARs so assumed this kit must have had them. In the end I went with Eduard resin rockets.
Painting
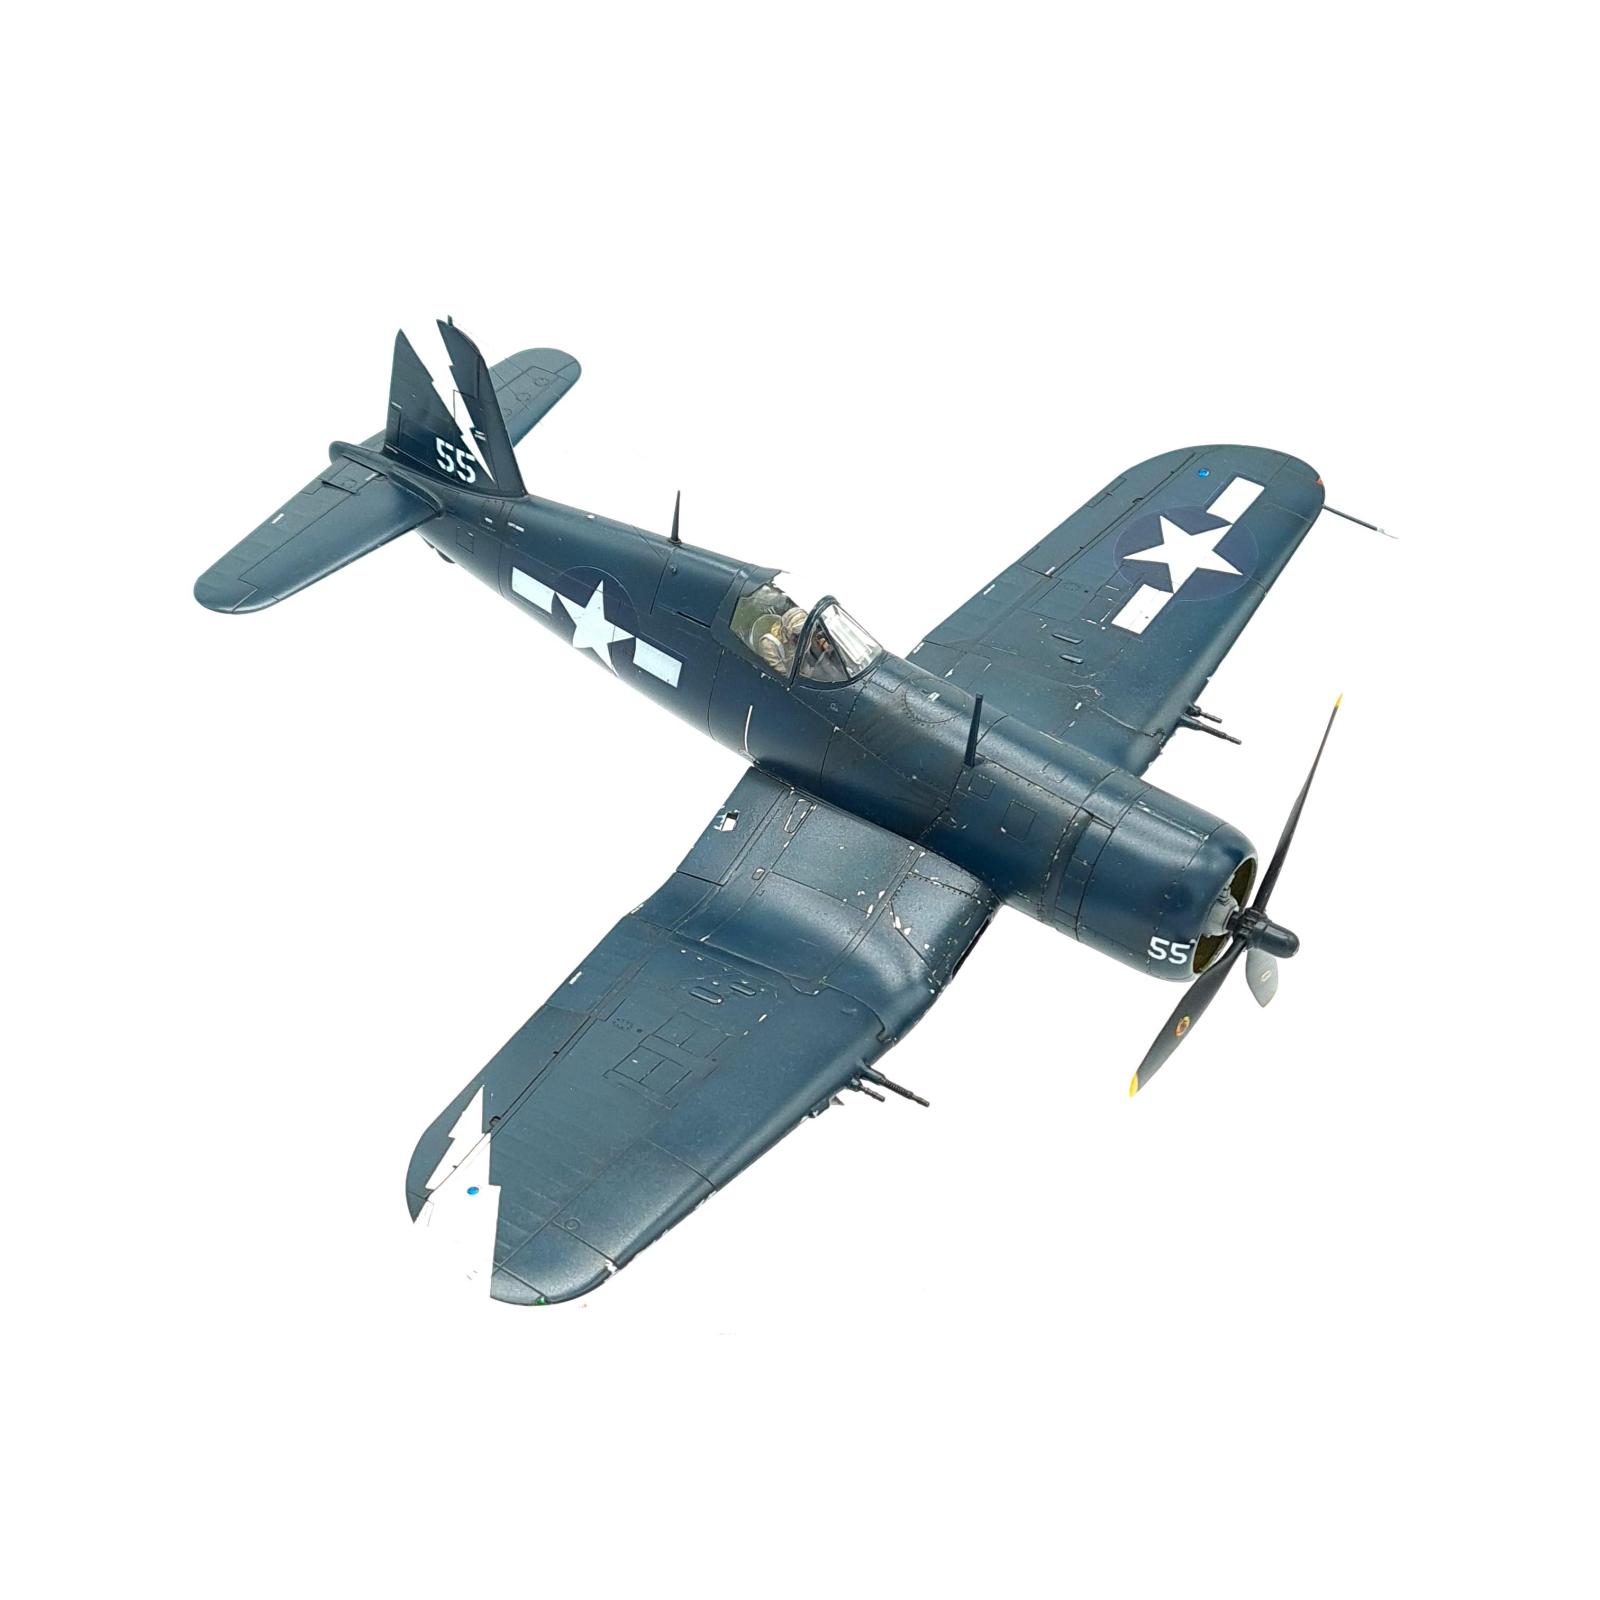
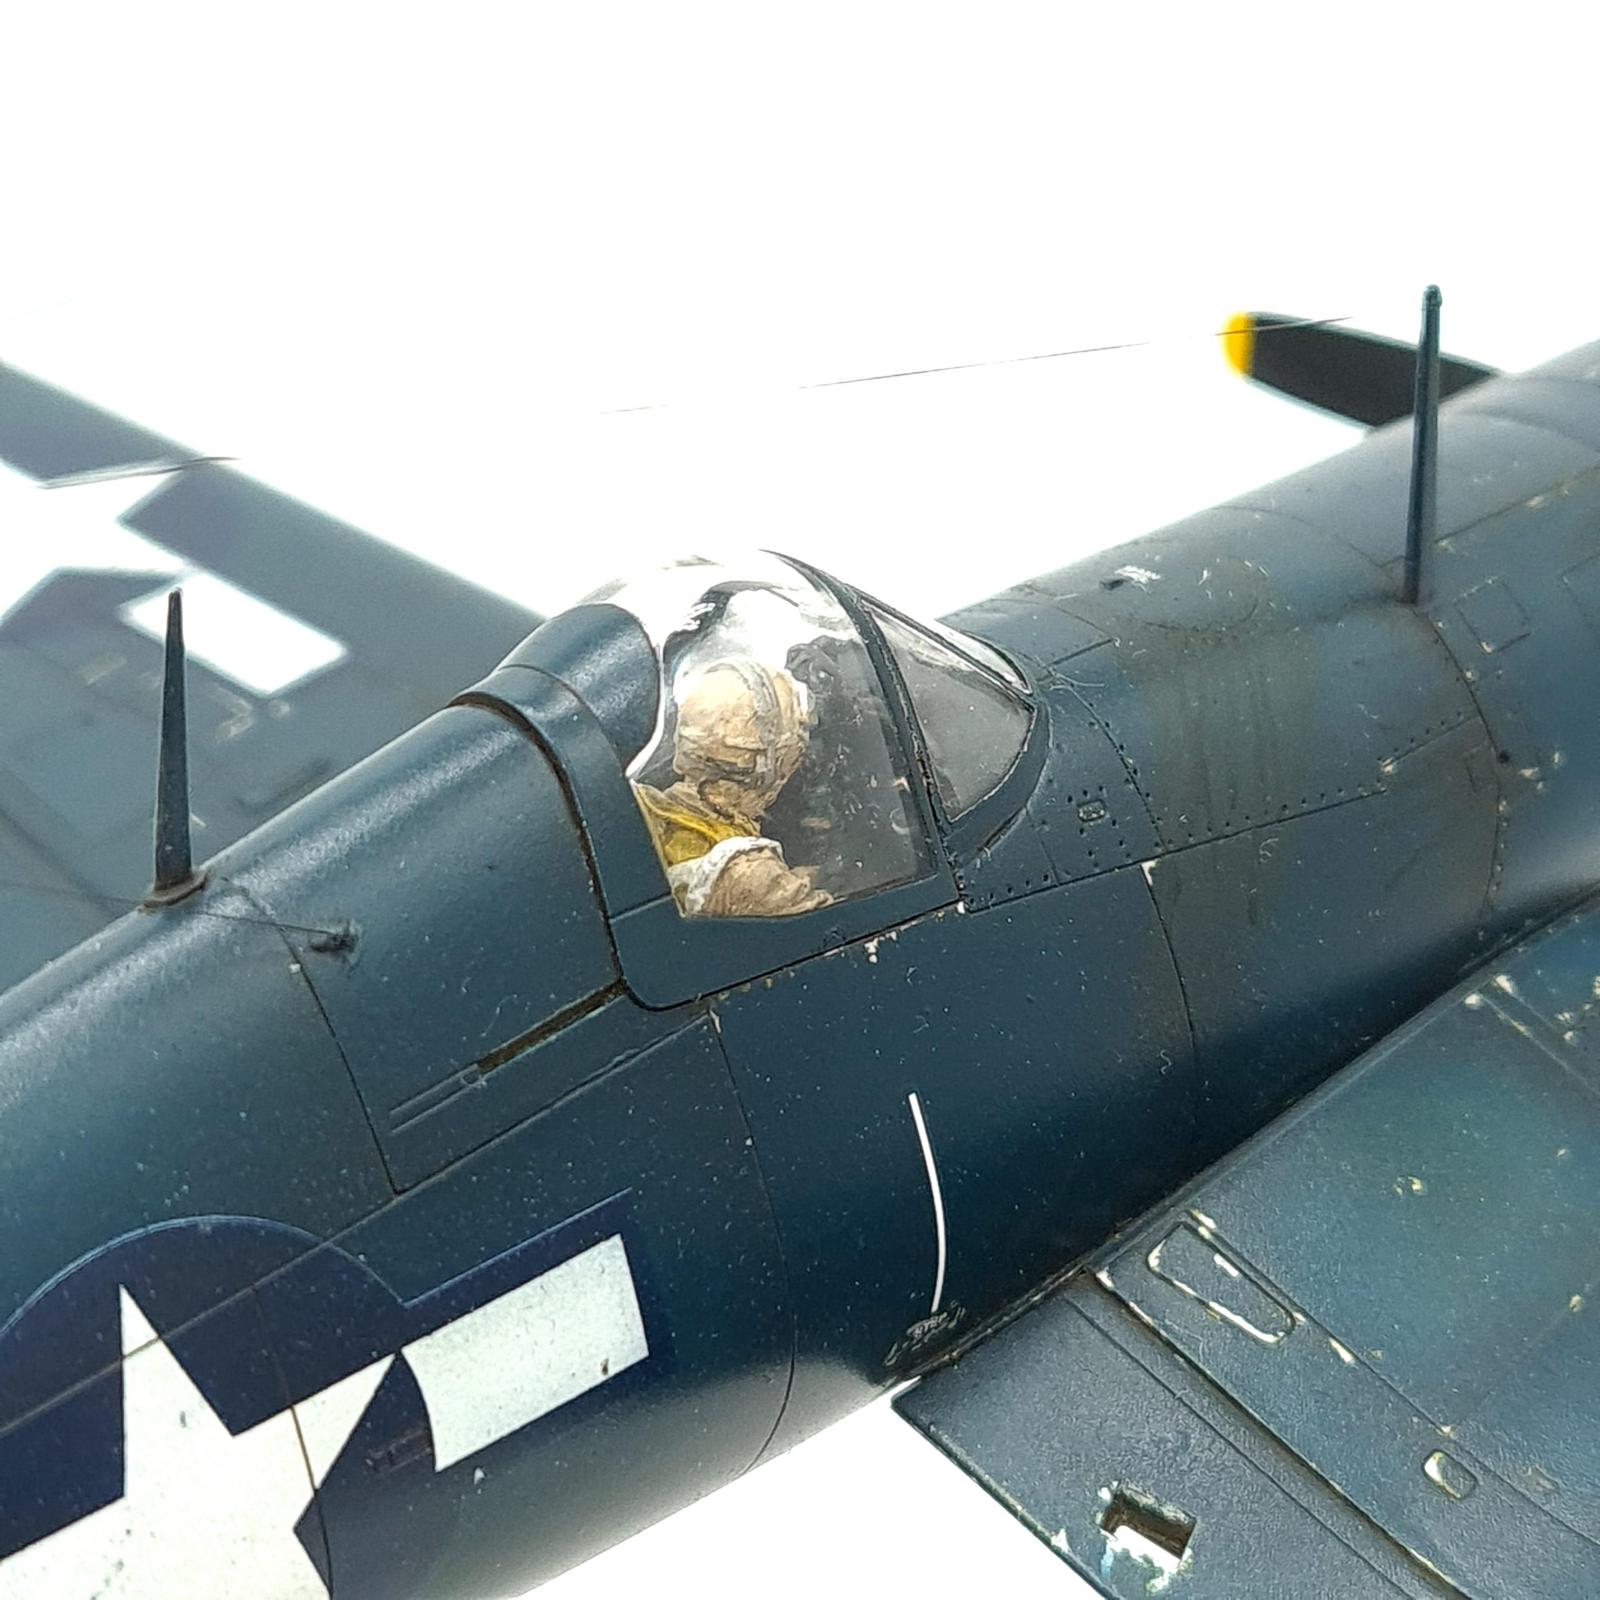
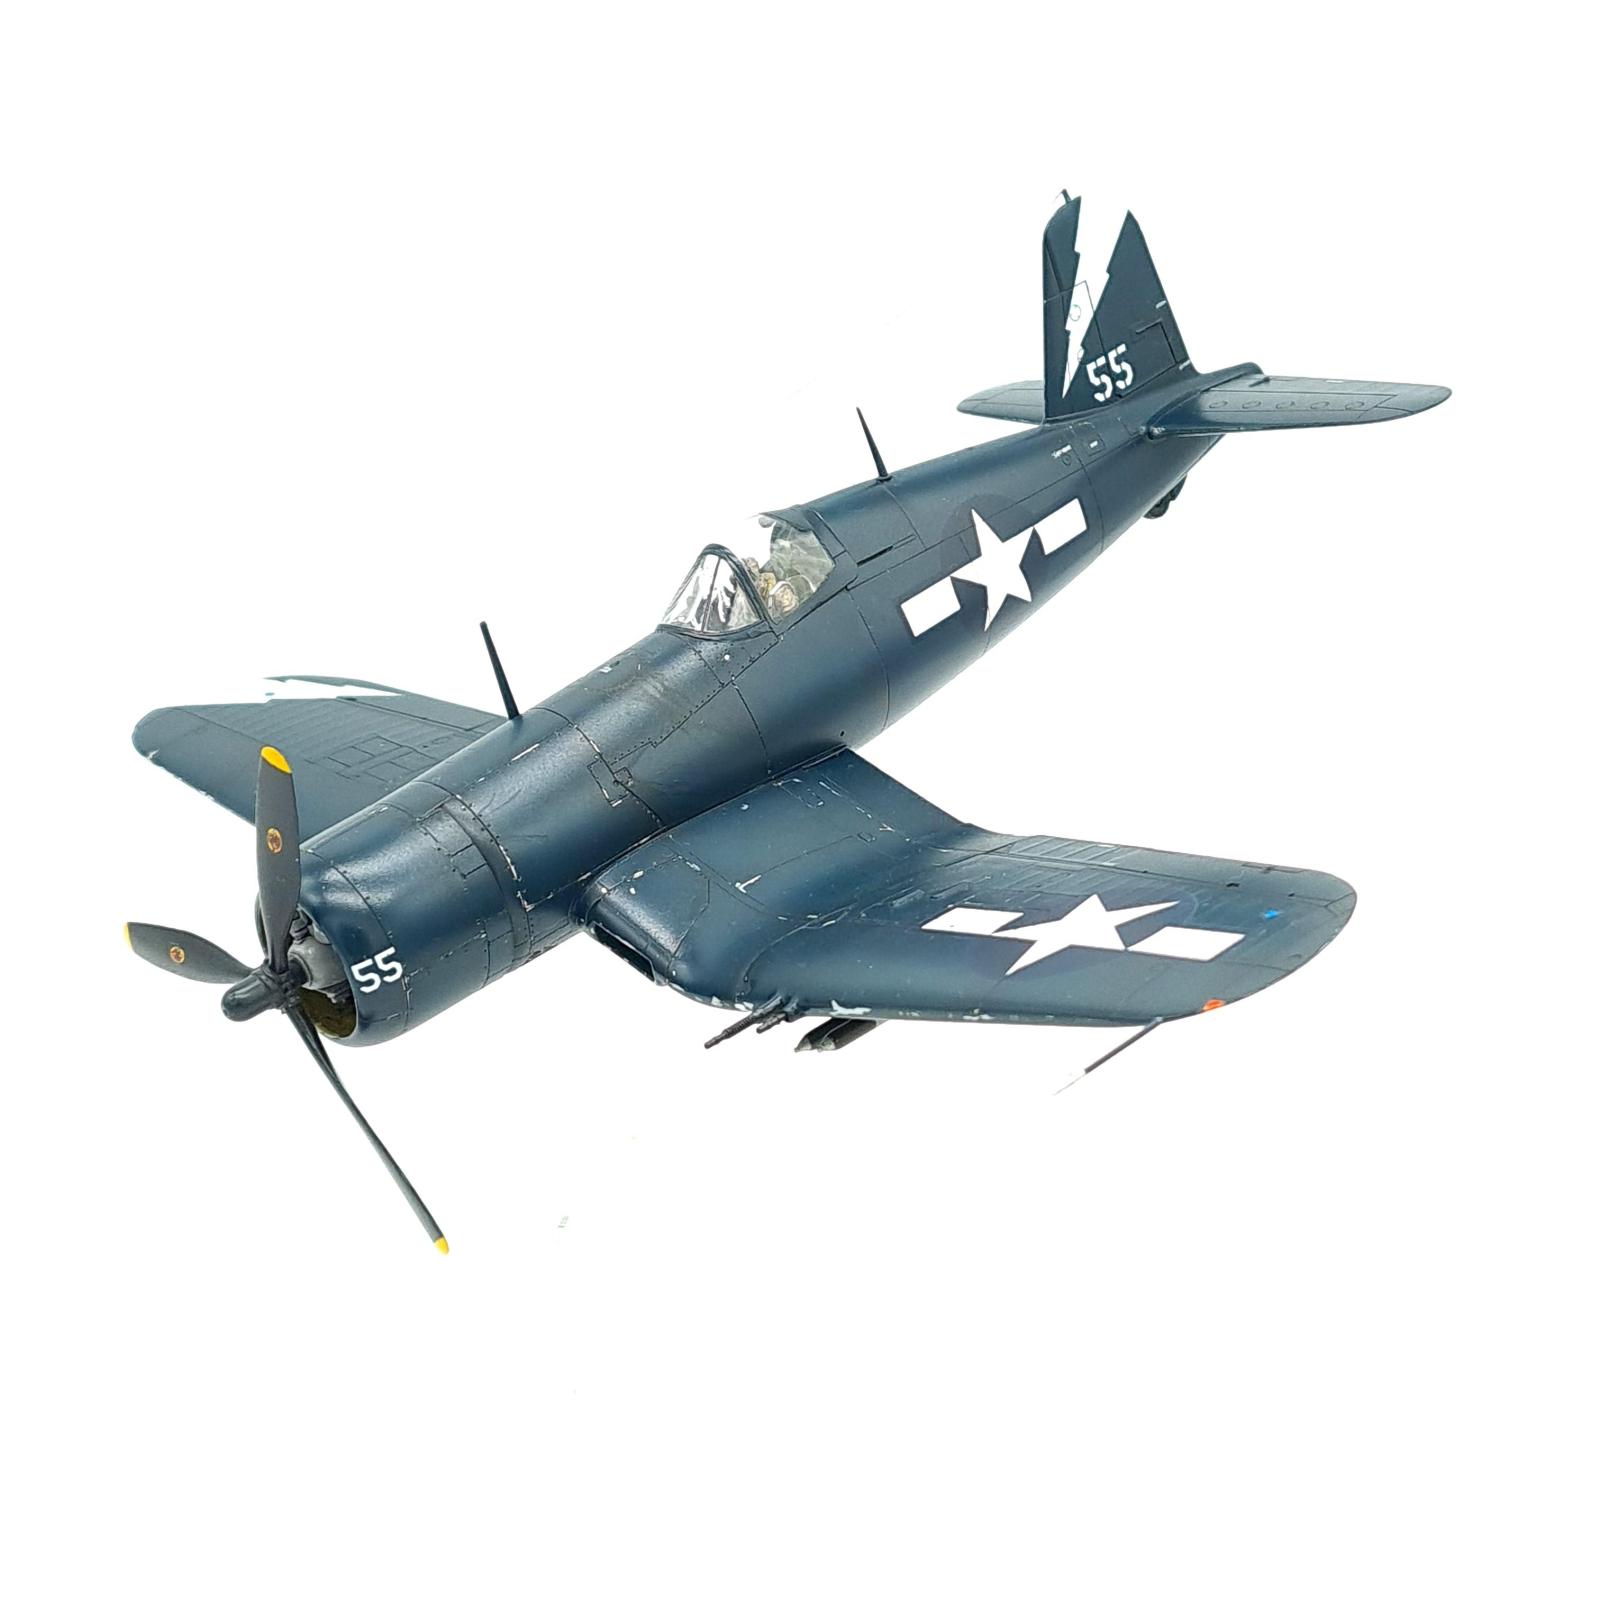
For the 1C all combat aircraft were delivered in the overall sea blue scheme, though the prototype was painted in the four-tone. I decided early on I wanted an aircraft with the 4 HVAR arrangement so Sea Blue it was. I decided on going with the US Navy as two squadrons operated F4U-1Cs from USS Shangri-la, by this point in the war all carrier aircraft were to have a marking unique to that vessel, and I felt the lightning bolt of Shangri-la was both pretty cool but also a good way to provide some interest over the bland Sea Blue.
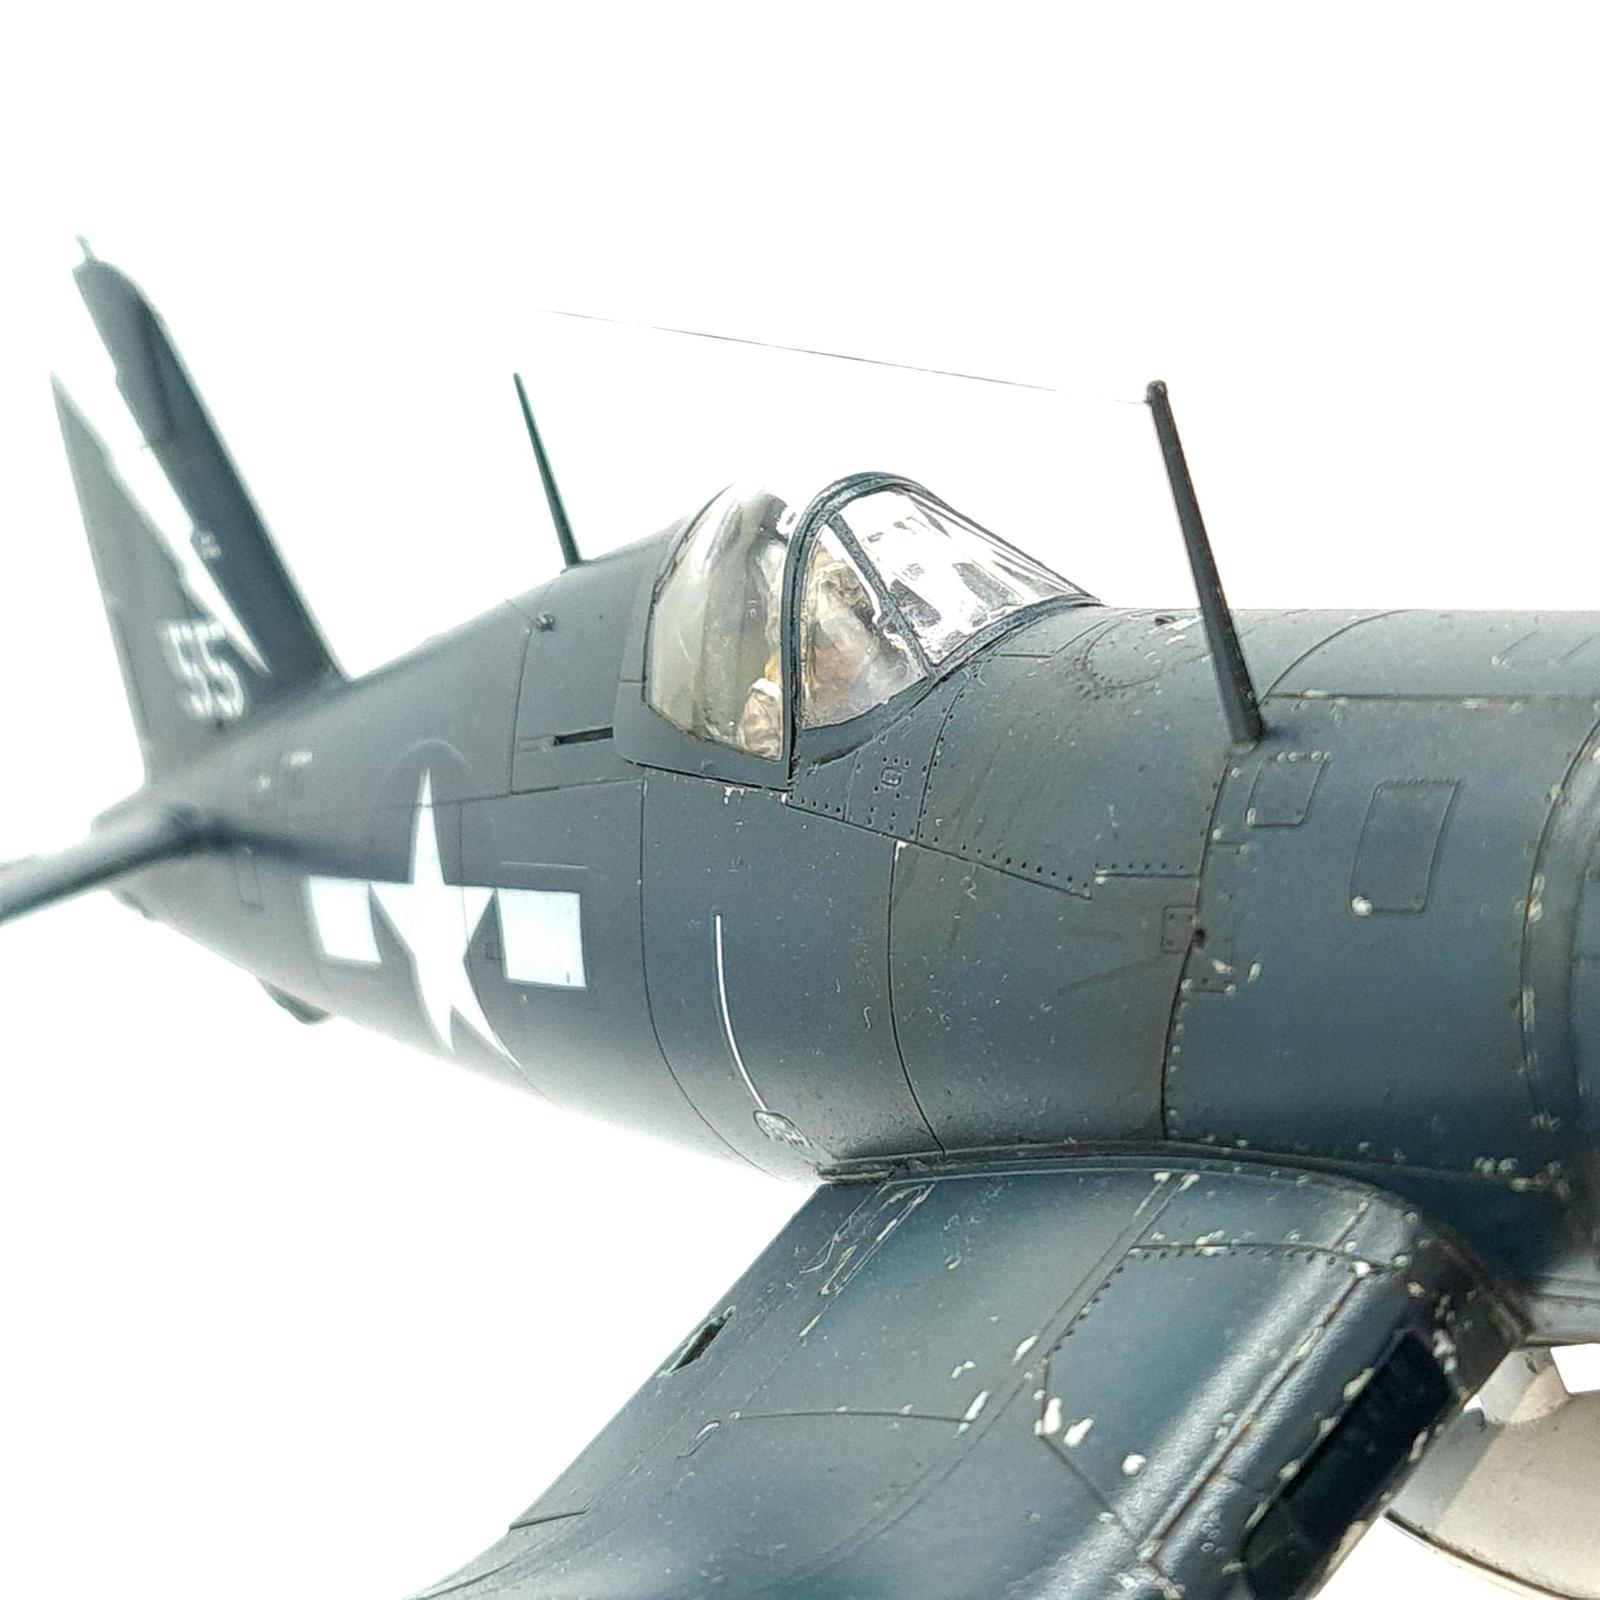
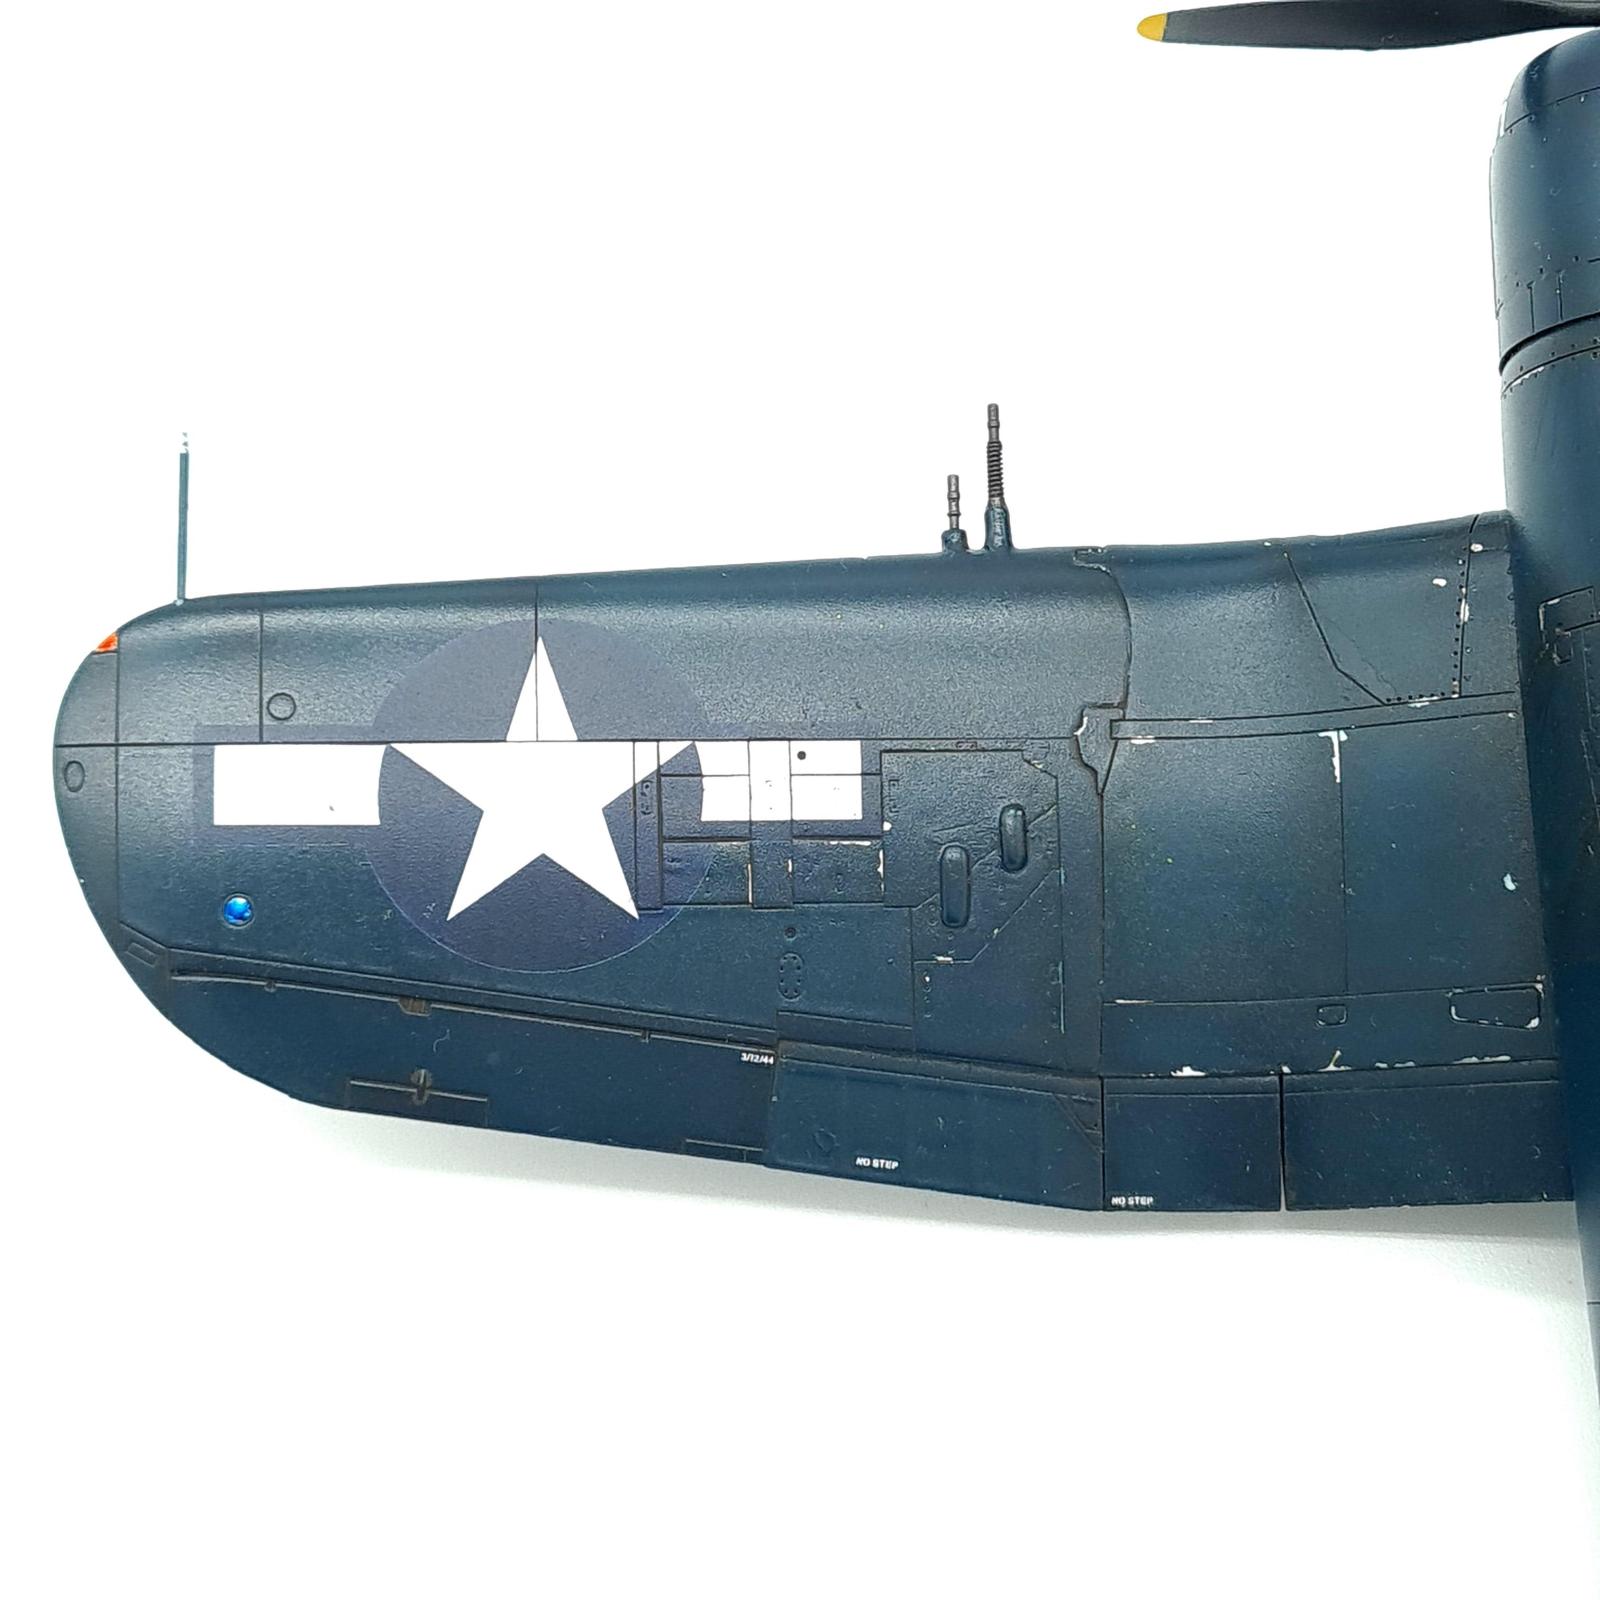
As typical, the blue was painted by fading the centres and darkening the panel lines. Chipping was provided by use of chipping fluid as the other two Corsairs recieved, and markings were made with montex masks. I did have a big issue on this stage as I either didn't wait long enough for the clear coat to dry, or spray enough of it, or both, and as such tape from masking the decals also pulled up the paintwork from where previously chipped areas were. This caused a problem and eventually I decided to sand it all down and repaint that side.

Lightning bolts were masked off with Tamiya tape into the rough shape, thankfully the real aircraft didn't have perfectly uniform markings so I didn't need to be either.
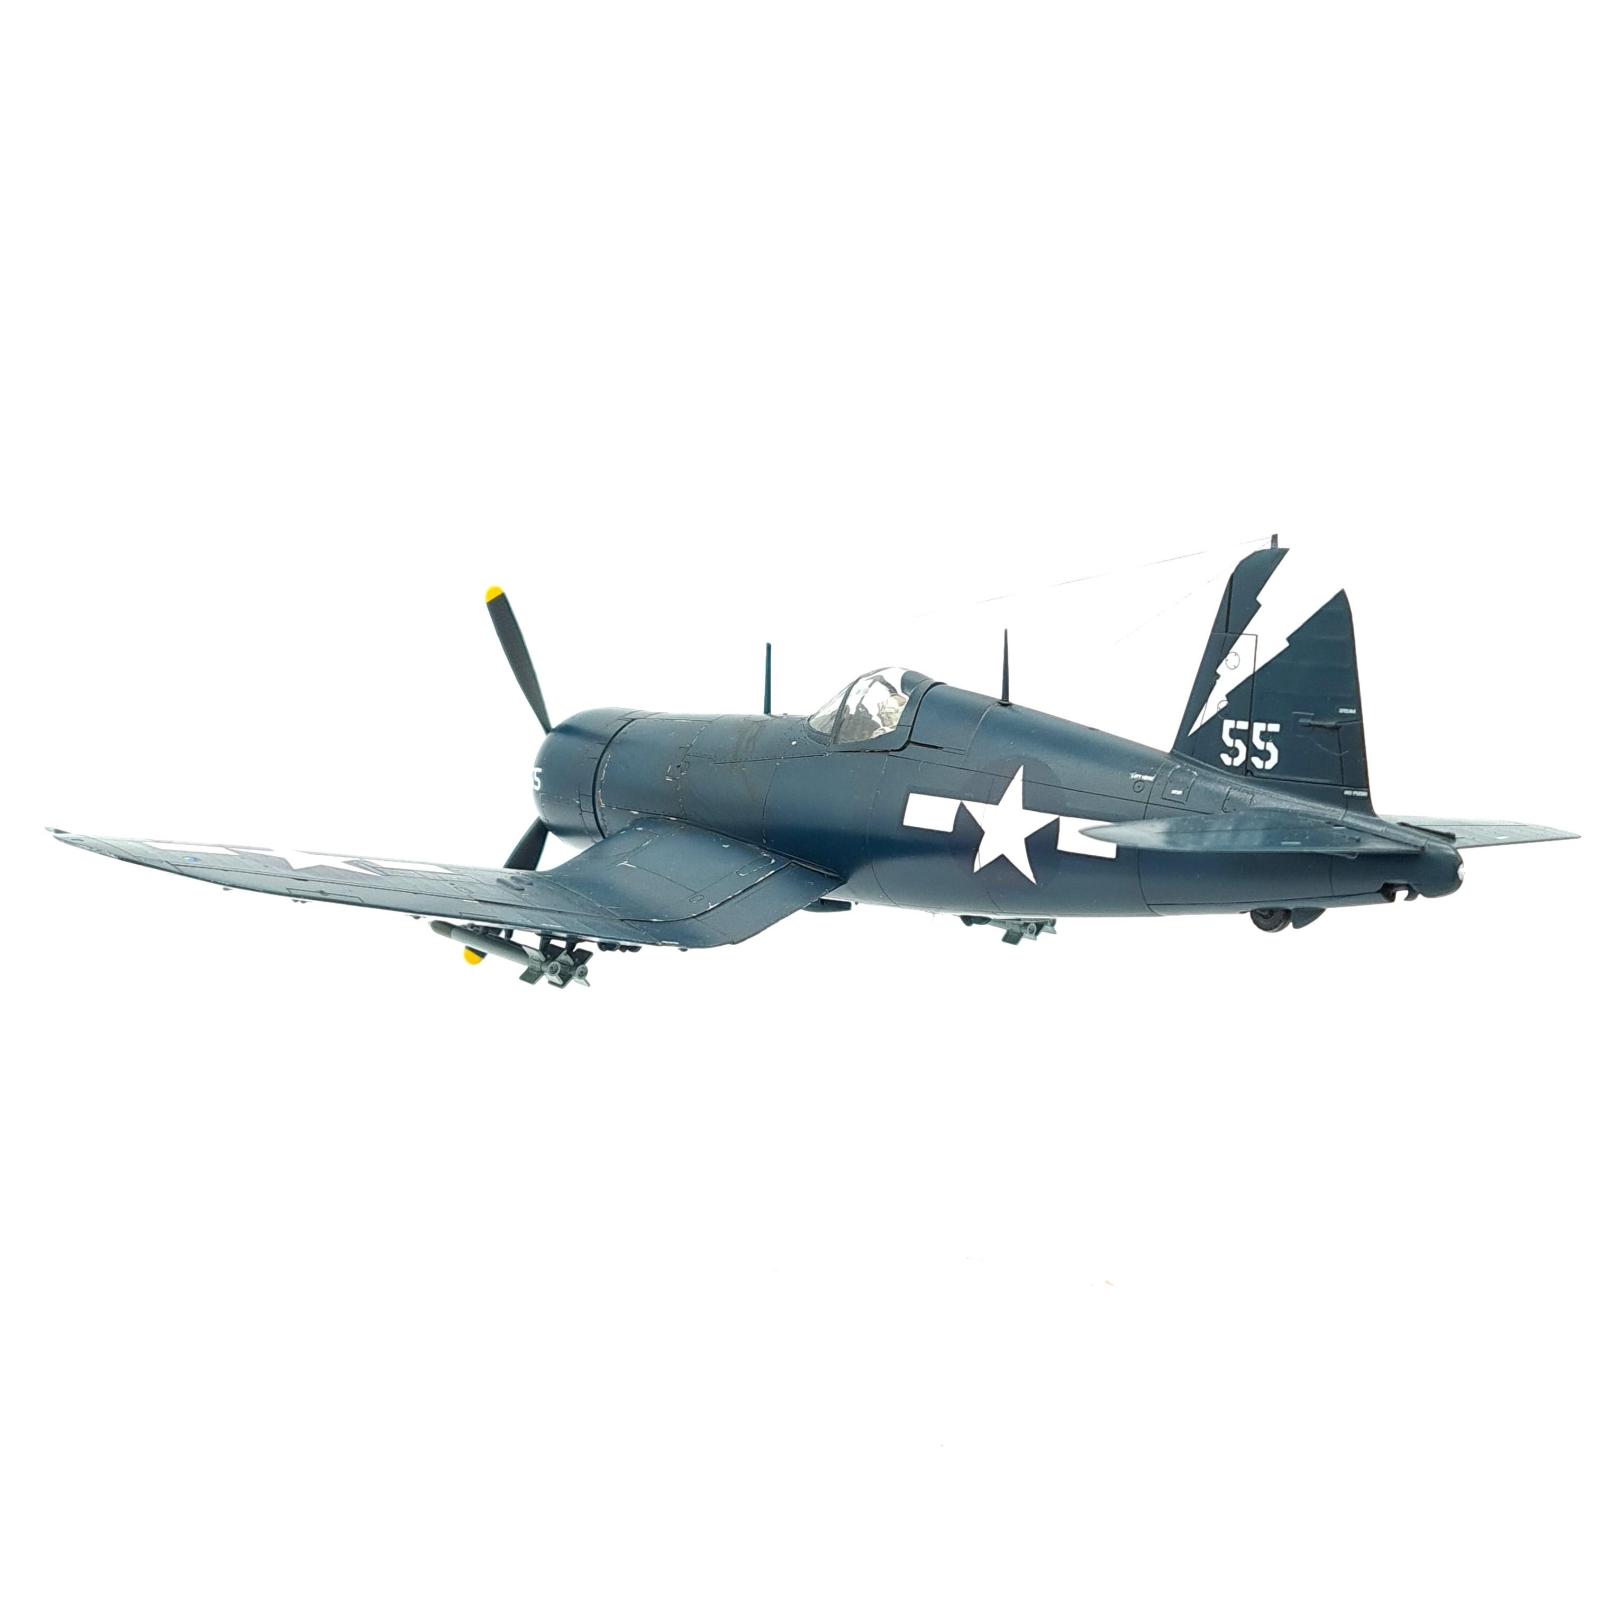
With that done it was time for decals, few stencils provided by tamiya before using a generic decal set for the '55' here. I chose '55' largely as it's in this photo here, showing off the 4 HVAR arrangement. I'm not the first to build a 1C and a few can be found online, but I didn't find any '55's so maybe I'm the only one.

I kept weathering light, avoiding a large oil stage. As a carrier bird I didn't see the sense on trying to make the model look sandy or dirty so naturally this made a lot of oil work redundant.
In Conclusion
This has been a pretty fun and interesting build, it's my first time modifying a kit to a different variant though naturally the cannons aren't the most intensive change. Researching for this build was difficult at times but very rewarding when I was able to find what I wanted, I wish more photos exist of this type but I can't control that.
I'm glad I was able to mark off another Corsair from the to do list, and I think it does look nice despite being a bit plain due to the paint scheme when compared with other builds. One thing I would change is that flap with the step, I left this as is as in 1945 the F4U-4 style flap step was beginning to appear as a spare part for all Corsairs meaning some F4U-1s recieved it in the field when the original flap was replaced for whatever reason, I should have just filled in this gap as whilst it wasn't impossible it was still very rare to happen.
It has been fun doing another in flight build though! Surprisingly whilst the majority of my builds are in flight, for some reason I only have 3 out of 10 Corsairs in flight.
Annoyingly I am still waiting for parts to make a stand for this one, so to take photos I stole one from another kit.


Great info and a superb conversion! Terrific article, thanks for posting it! ?
Thank you, glad you enjoyed it!
A beautiful result, Harvey @scalerambush
Amazing detailing, also on the pilot.
Thanks for sharing the progress on this build in your thread, very informative and helpful.
Thank you! I want to shove a quick how-to on the basic stands I make, but since those parts haven't arrived I can't put the finishing touch to that build thread
This is a truly wonderful result, Harvey!
Build, including mods to bring it to -1C standard, painting, let alone weathering are all master class!
Your build thread was an equal joy to follow.
Congratulations!
Thank you very much! Glad you enjoyed following along
Nice work on this. Thanks for sharing the details of the conversion.
Thank you, thankfully it was a fairly easy conversion though that book mentioned was pretty much a must have for anyone planning to do this for the plan drawings alone.
Excellent build and conversion. Love the end result, and the restrained weathering on a carrier bird is commendable. Hmm - to add a -1C to my build list...