SB2U-3 Vindicator (1/48 Scale, Academy Hobby): Review & Advice Needed on my Second Model Kit
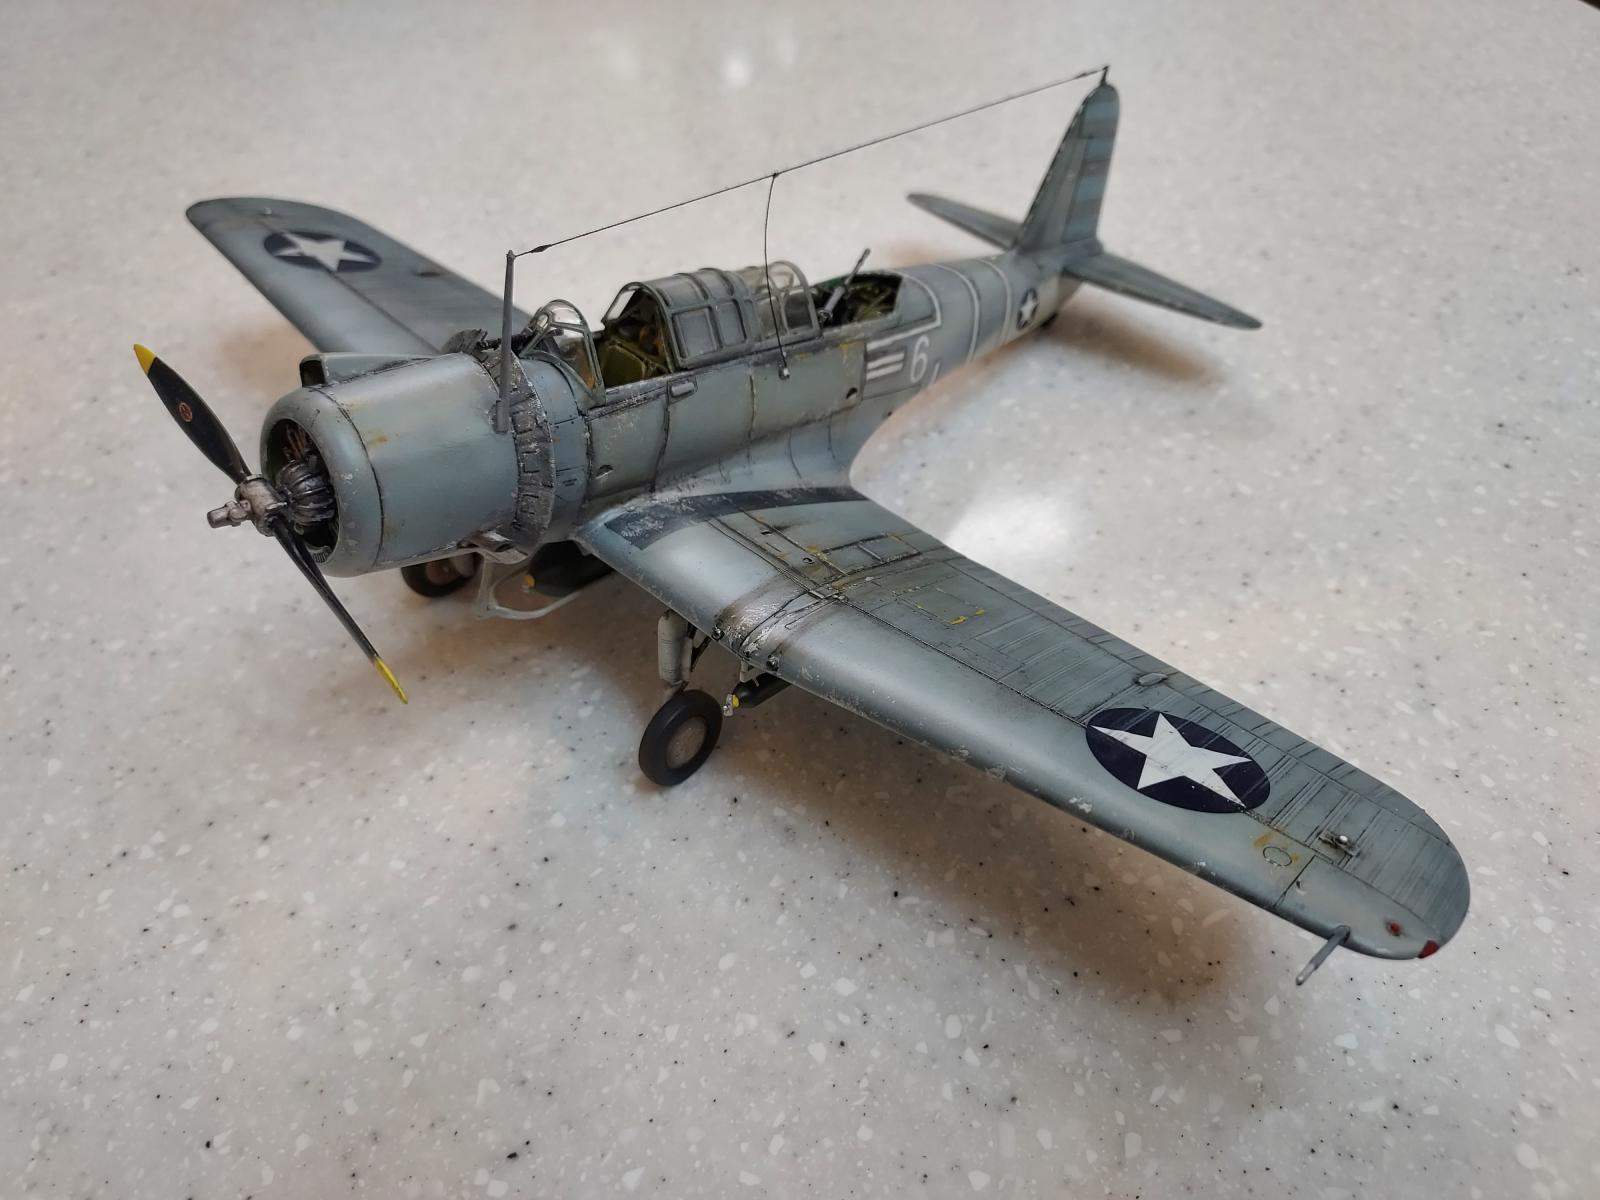
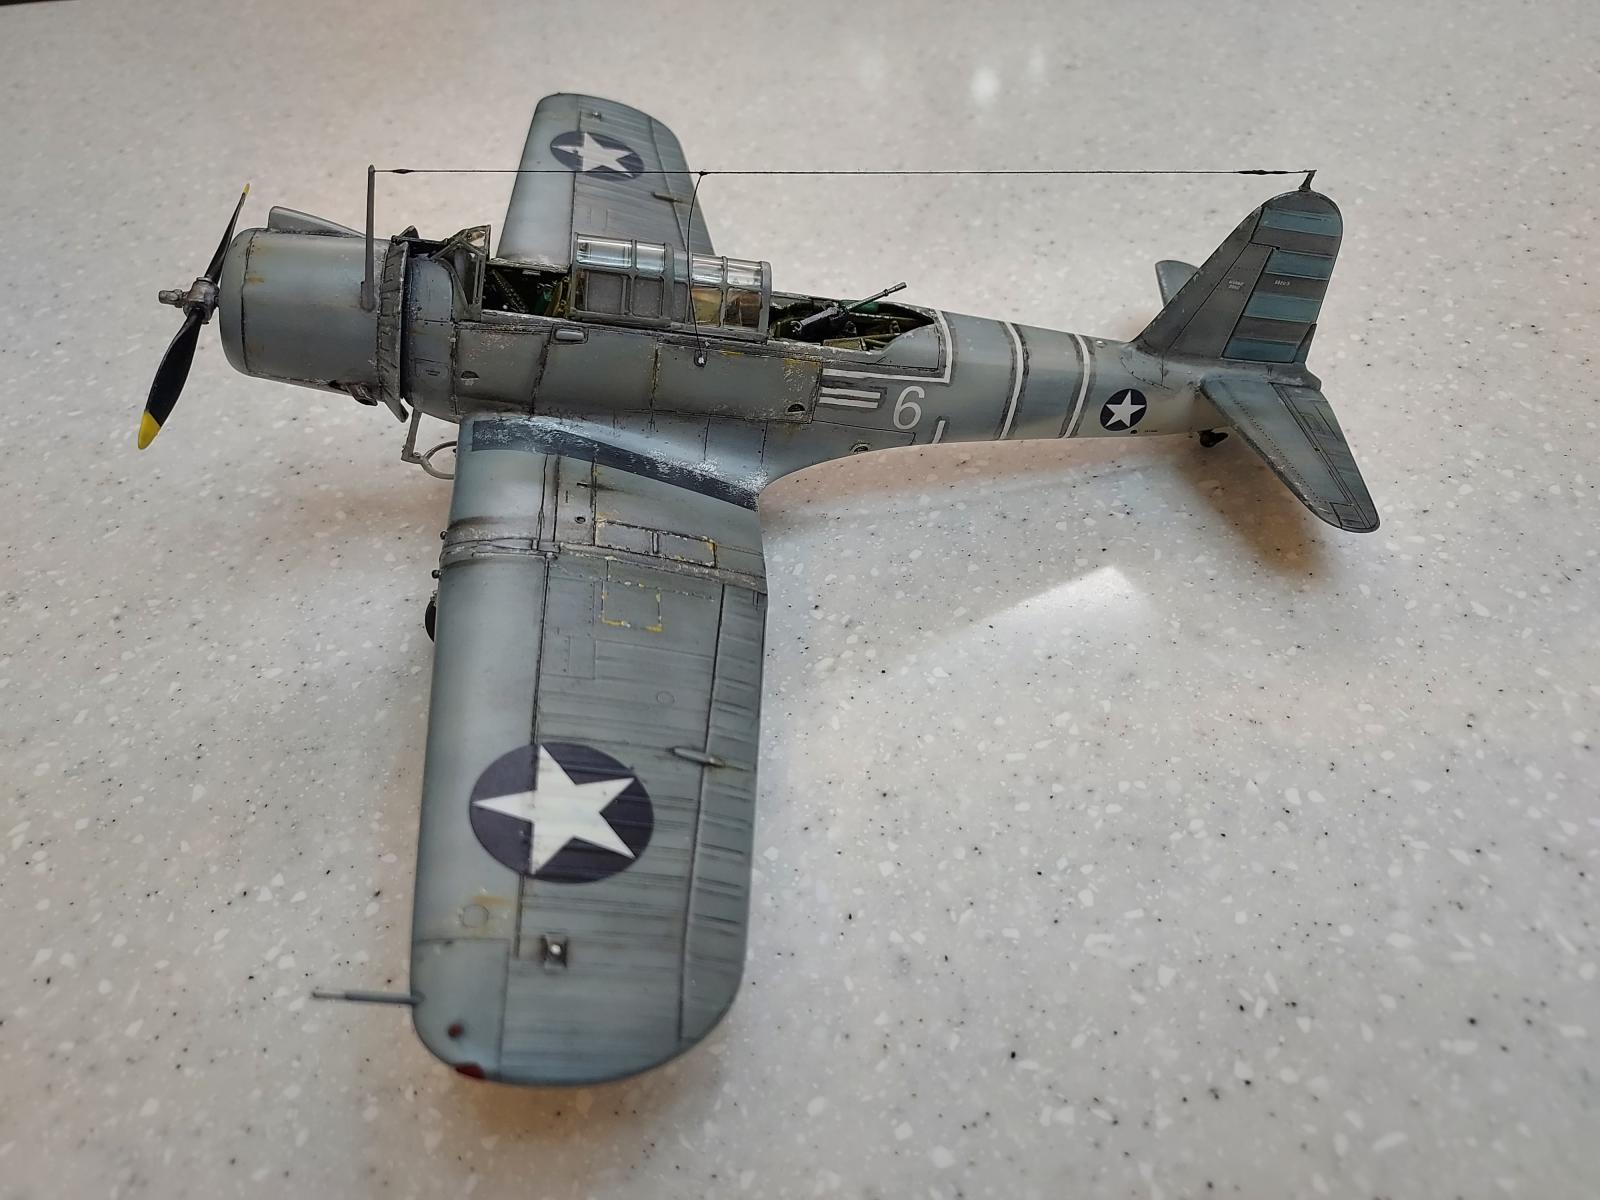
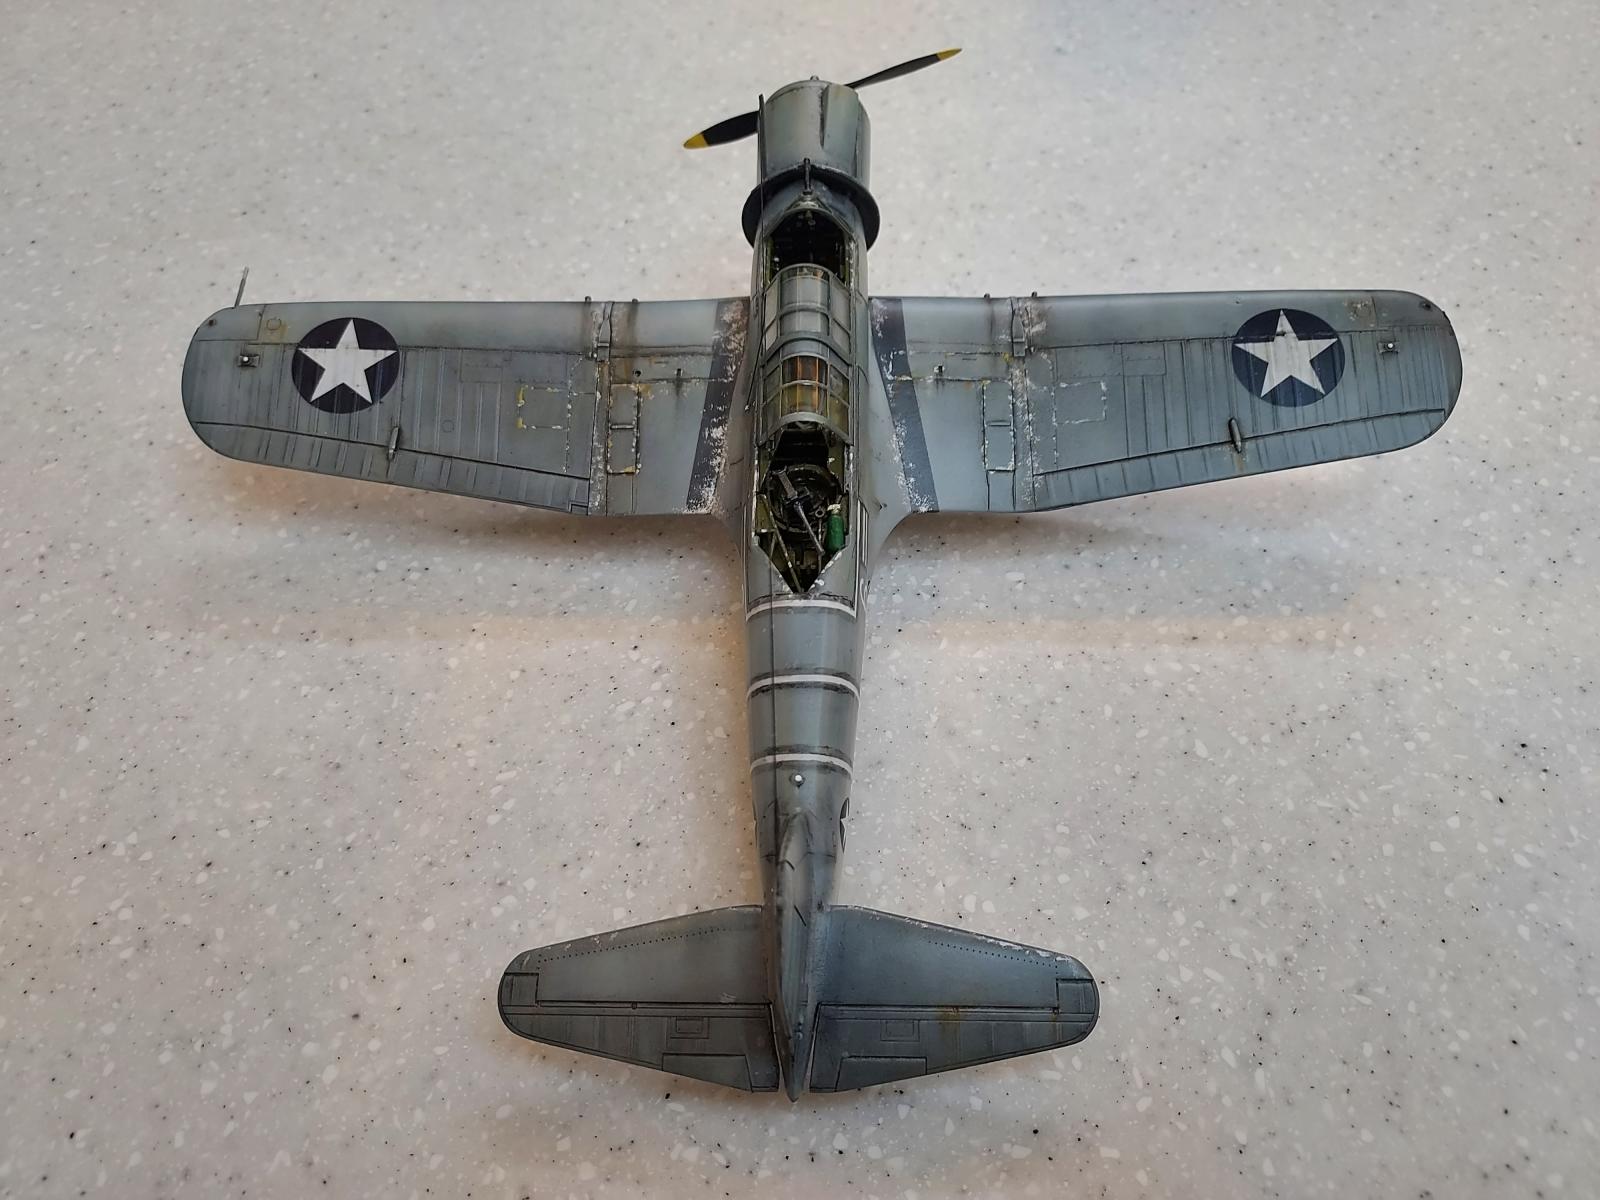
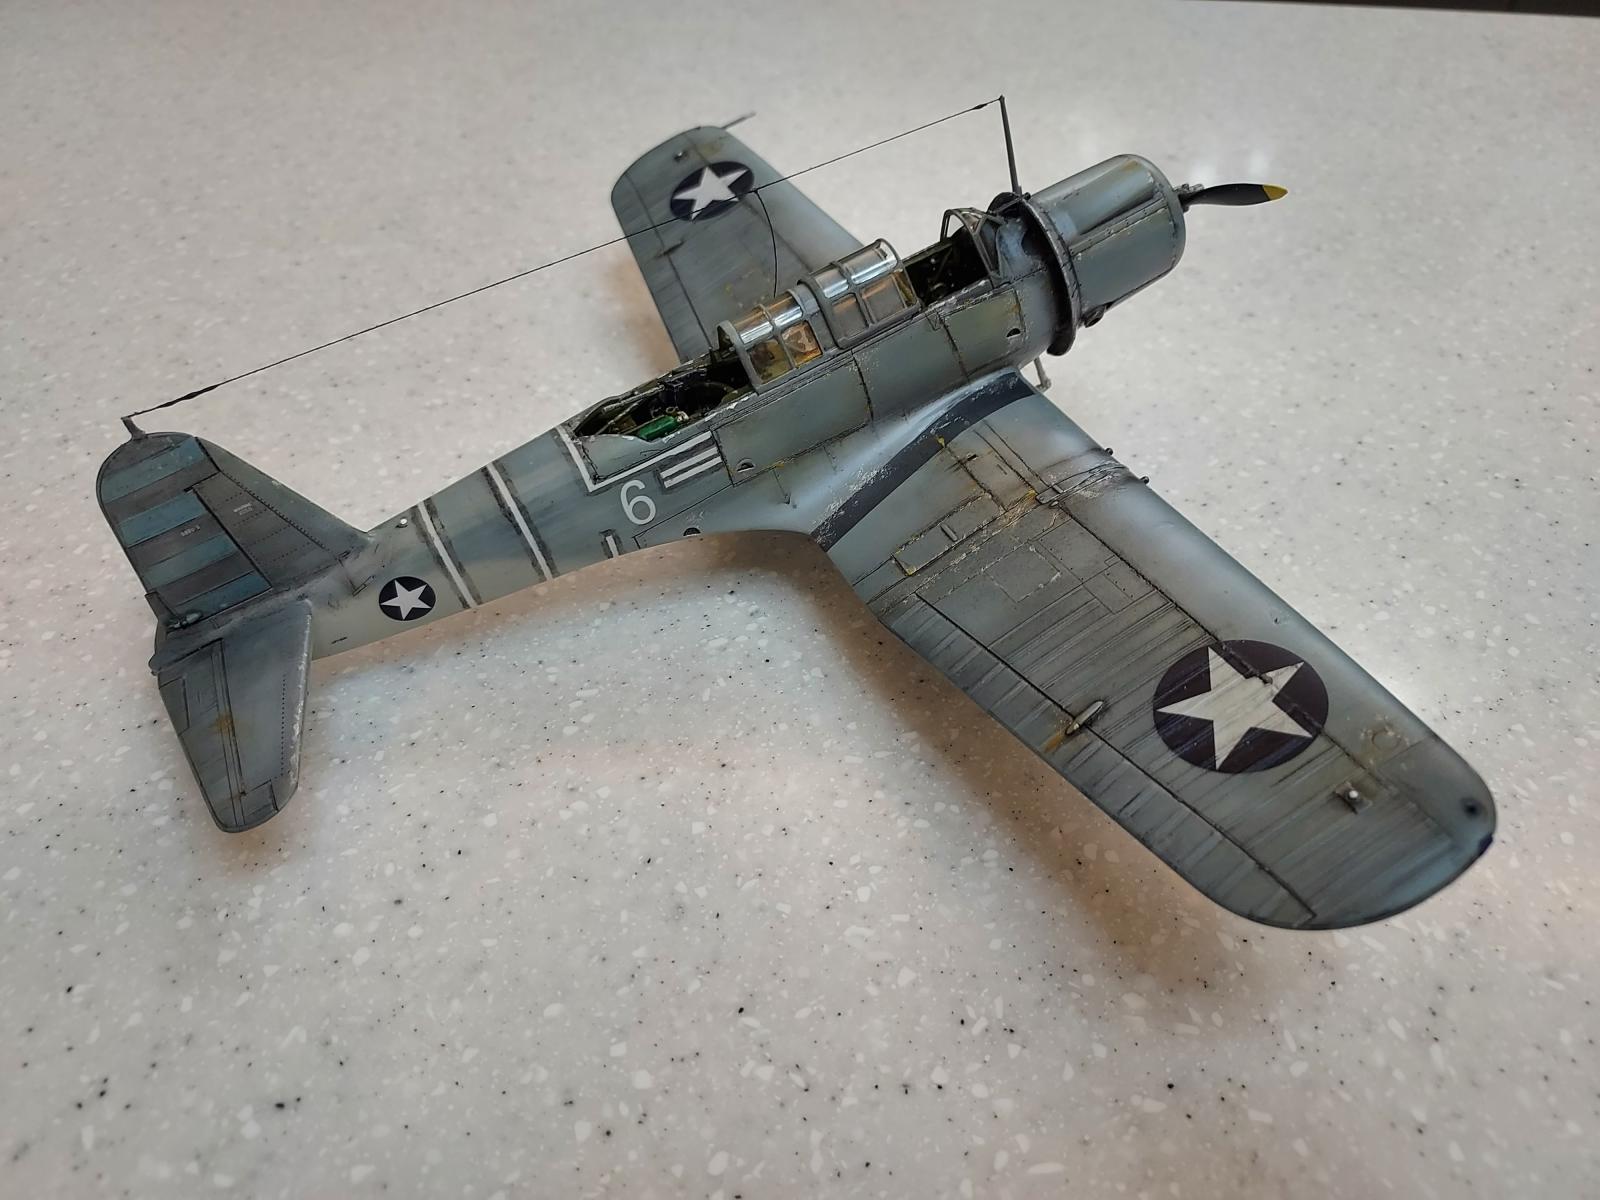
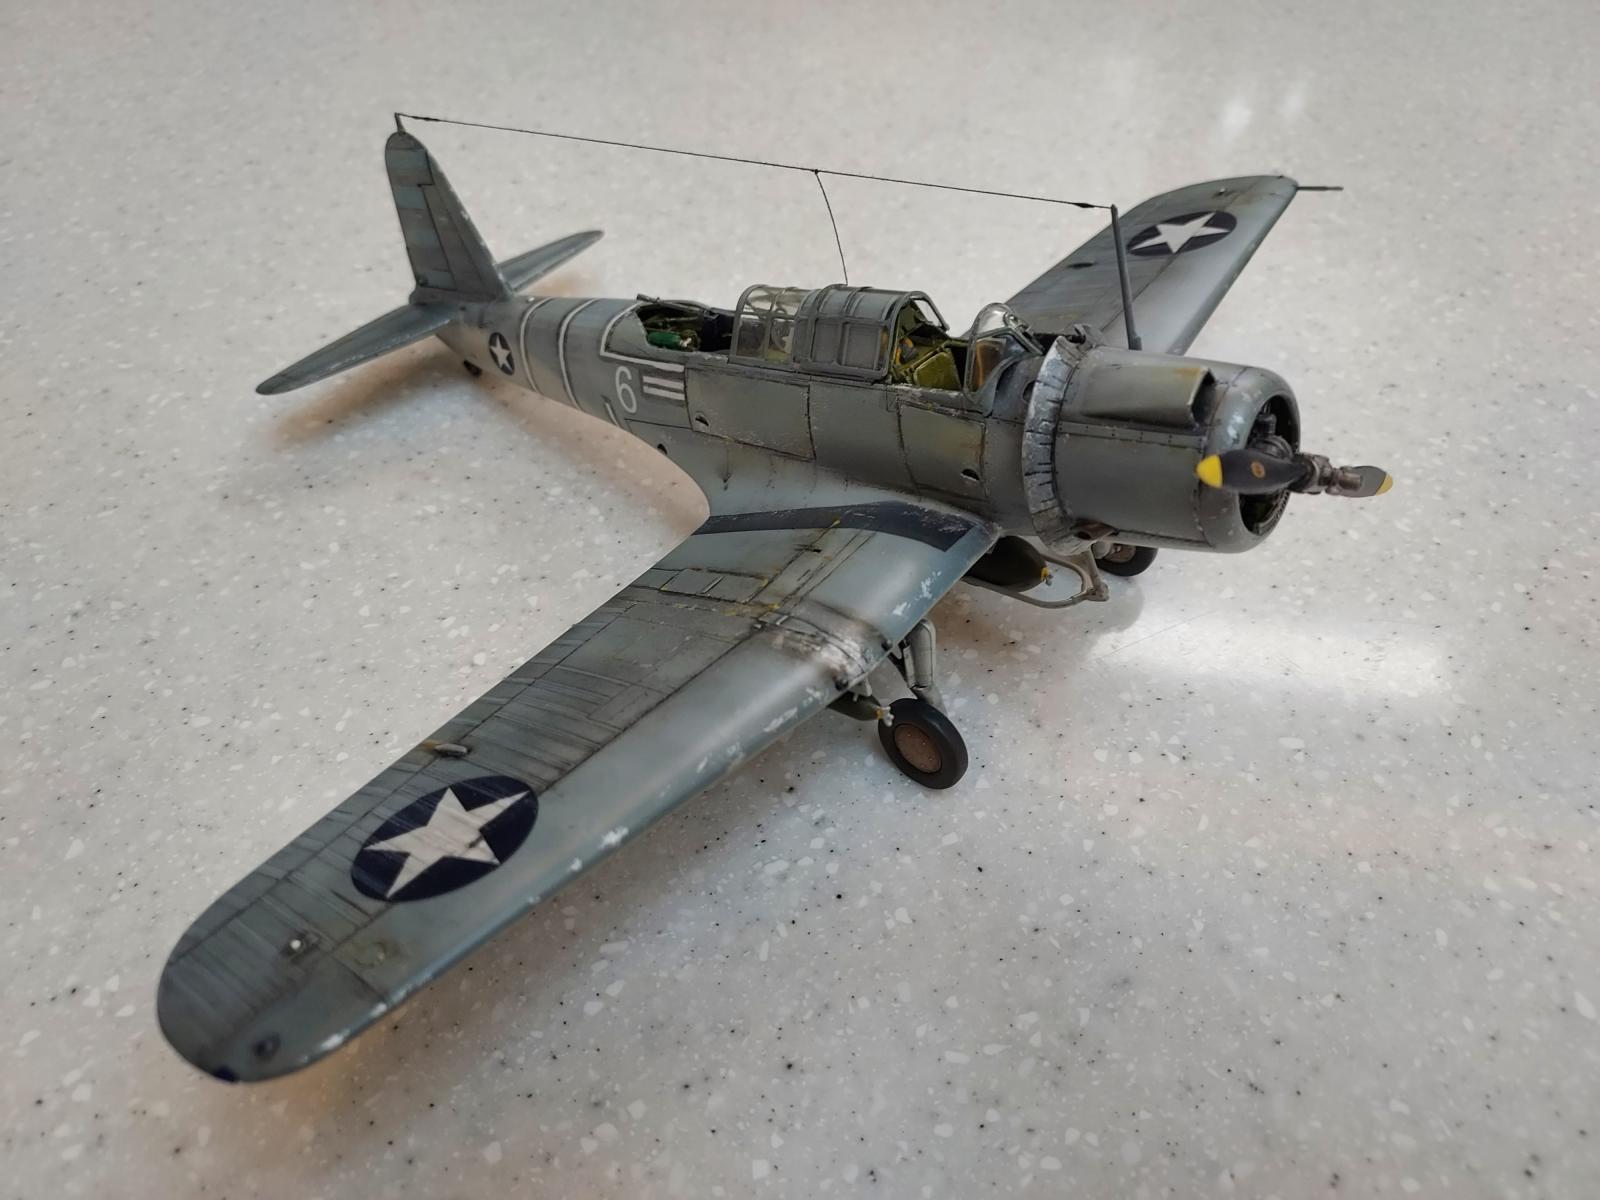
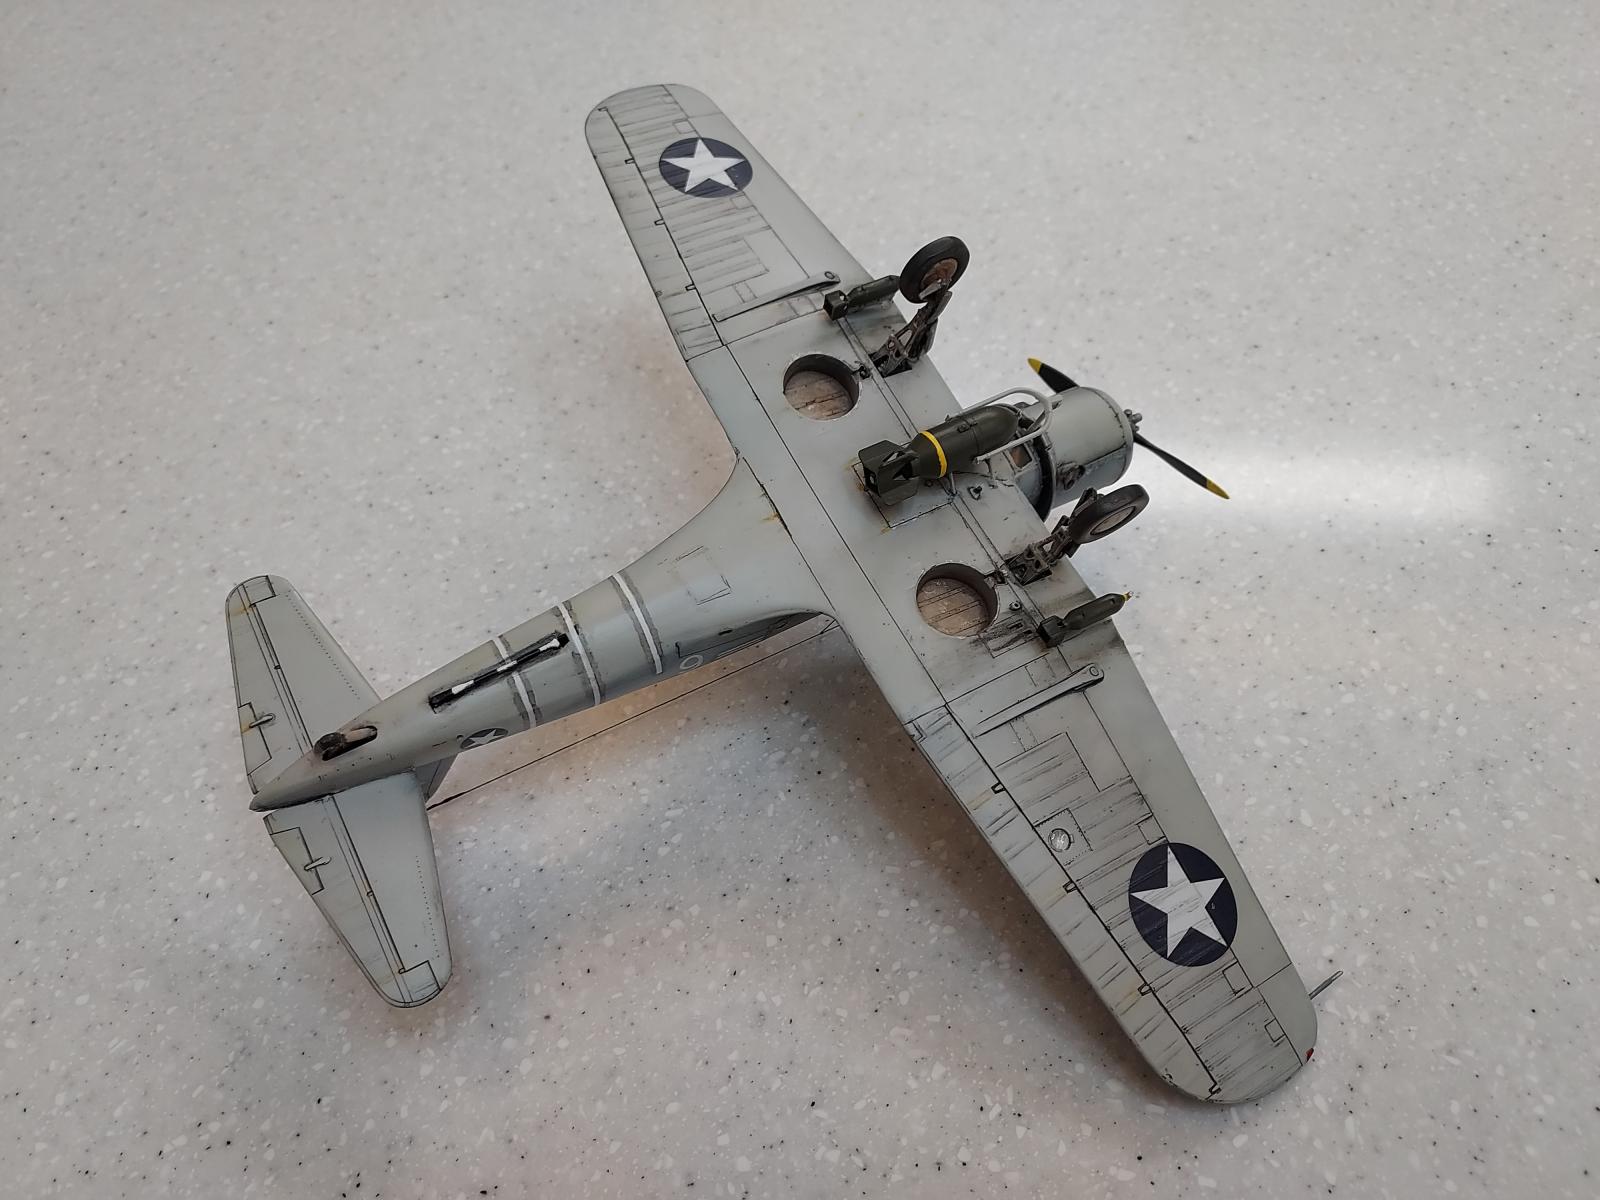
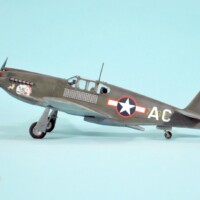
This Vindicator represents one of the USMC planes stationed at Midway Island that participated in the Battle of Midway. The white "stripes" are medical tape the crews used to patch the canvas exterior and the grey lines around the stripes represent the hand-painted dope applied to the canvas to get the medical tape to adhere to it. I tried to represent a Vindicator weathered by sun and salt water element as they were parked on an open-air tarmac without protection from the elements.
This is my second model kit so I still have a lot to learn. This kit had a lot of both engineering and design flaws. For example, one of the gun ports didn't align between the bottom and top wing sections. The gun ejection port was not molded into the left wing. The engine cowl was two pieces and the one side was molded directly over the hinge of the maintenance panel so that hinge disappears when you sand and clean up your seam line at the joint. The cockpit and gunner's station were very intricate with the modular tubing frame. The kit isn't designed to make it dummy-proof on how to install this assembly into the fuselage. Thus, I had to retrofit the assembly in order to get the fuselage halves to connect. This could partly be due to my novice skill level but it was not very intuitive on how to install it. I could not figure out how to get the instrument panel attached to the cockpit assembly so I had to shave it down with my knife and glue it in place after the fuselage was assembled. Installing the gunner's station window bays in the open position was a nightmare. I bought two of these kits with the intent of building the second one as the British or French "Chesapeake" variant. At least now I know the problems to troubleshoot beforehand. Overall, I'm very pleased with how my second scale model kit turned out but it still does have a lot of errors on it and much room for improvement.
Below are some issues I encountered during the construction of this kit. Seeking advice on the issues listed below.
-
I tried to paint a sun-bleached look but it looks more like a gray mottled camouflage pattern. Any suggestions on how to replicate a sun-bleached paint scheme?
-
When I sprayed my gloss coat in confined areas such as at the wing root or around the engine cowl flaps, white crystals would form. I used Mr. Hobby clear gloss mixed 50/50 with thinner. I had to sand off these crystals after every coat of gloss. Any ideas on what causes the crystals to form and/or how to prevent it from happening?
-
Any suggestions on how to paint photo-etched seat belts? My first attempt was pretty bad.
-
I used Vallejo chipping fluid under the black walkways at either wing root. The black paint literally peeled off the chipping fluid in a single complete layer. There was zero adhesion of the paint to the chipping fluid. How do I prevent the paint from peeling off the chipping fluid areas like that?
-
I tried doing the salt weathering technique but it is too faint to really notice it. Any suggestions on the proper ratio of paint to thinner to get a good salt weather effect?
-
I can't figure out how to do a pin wash correctly. If I kept the fluid on too long, it would create a stain that I couldn't wipe away. If I wiped it off too early, all the liquid would get wicked away and the effect would be negligible. I use the Tamiya panel line wash product. Any suggestions on how to properly use this product to get good results without staining the adjacent areas?
-
I had a massive amount of sanding to do at the wing roots. This sanding eliminated all my panel lines. I tried to rescribe them but it was next to impossible trying to do this in the tight concave joint of the wing root. Any suggestions on how to rescribe lines in awkward locations like this?

For second attempt, this is an exceptional model, Derek!
Regarding your questions, I am neither into sun bleaching nor into acrylics, so for #1 to #6 I the Experten here will tell you.
Regarding rescribing at difficult areas, one method is to use dymo tape as a guide: stick it where the line is supposed to be scribed. It will follow the area contour. Then, with your scribing tool carefully rescribe.
You're doing all those Very Advanced techniques on your SECOND model? And this is it? I hesitate to think what my second model looked like, and if this one lived here at Le Chateau du Chat, I'd be very proud of it. The SB2U is - as you discovered - one of the most complicated kits out there; that you got it completed and it looks like it does is a real accomplishment you should be very proud of. I've been doing models a lot longer, and I can tell you I had many of the same construction problems you did, and you worked them out the best way they can be.
My suggestion is that you start with some Airfix kits. They're a bit less complex with construction, but the "new" Airfix kits are as good as any out there and they have excellent results. They have good instructions that are easy to follow, which is important. They'll let you learn how to march in step around the drill field before you go invading Normandy. They're also about as comfortable on your bank account as any kits are nowadays.
As to learning, just look at reviews here, lots of us talk about what we did. The private message service works, and in my experience, anyone here you ask a question of will be happy to answer in as much detail as you need.
Thanks for your response. I thought it was my novice skill level that made the assembly of this model so difficult. I live in South Korea and they only carry Academy Hobby and Tamiya brands here. I'll have to look for some Airfix kits online.
Well, it's hard to go wrong with Tamiya kits, although some older ones like the Lancaster have dodgey areas. (Mostly pertaining to the engine cowlings.) Same with Academy. Some are really nice while some are repops of older Hobbycraft kits. (And even most of the repops fit well enough but are a bit sparse on detail.) The Academy 1/48 Su-27 and Su-27UB are STILL two of my favorite kits though! Great detail and parts breakdown, easy to make a great looking model out of one of them!
I agree with everyone here. FANTASTIC result here despite it being your second attempt. If there are things about this build you think you could have done better (or differently to ease your filling and sanding duties) I suggest building another. Maybe for an extra challenge go for a yellow wings pre-war scheme. If that suits your fancy, these guys will hook you up for decals! https://www.yellow-wingsdecals.com/
Hi Derek -fantastic job on that Vindicator. If it's any help, Hobby Link Japan carries Airfix kits plus a ton more, and with you being in Korea might make for a good option. https://www.hlj.com/
I'm impressed! You have very good skills!
"When I sprayed my gloss coat in confined areas such as at the wing root or around the engine cowl flaps, white crystals would form. I used Mr. Hobby clear gloss mixed 50/50 with thinner. I had to sand off these crystals after every coat of gloss. Any ideas on what causes the crystals to form and/or how to prevent it from happening?"
I'd have to see the crystals to be sure but I'm thinking you are spraying from too far away and/or your mix is drying before it is hitting the model. Wing roots are notorious for this problem because of the way the air bounces around and interferes with the spray from your brush. You might have to experiment a bit. It could be as simple as lowering the pressure a touch, moving the brush faster across the model and going in closer. It could also mean your air is super dry and you need a few drops of paint retardant to help out. Either way, it is fixable.
This is excellent modelling, Derek @mrocs2000
Your result on this Vindicator is far more than novice techniques which you have used.
To be honest, I wish my builds would look like yours.
Amazing work.
Thanks John. I watched YouTube videos daily for about 4 months straight to educate myself on the fundamentals before I started my first model this past December. I'm currently watching the Will Pattison Spitfire build series. Just trying to learn from the best.
Great job especially being so new to the hobby!
As for painting the photo etched seat belts. I have come to find, when possible buying the pre painted ones being superior. If unable, you need a steady hand and some thin paint. Which will need to applied in multiple layers until it looks good.
Masking and airbrushing the small PE seatbelts is very difficult since the metal itself is so delicate.
Wow - she's a beaut, and for only a second attempt - speechless!
I'm new to airbrushing, and I've also struggled with the clear coats going down rough in tight corners. Chris provided some good ideas, and an additional one I've used that has helped is to not attack a corner straight on (like a Phantom wing root to fuselage corner), but to angle the brush and spray coming down the length of the trough, so the air feeds down the trough and doesn't bounce around off the corners so much.
Just keep practicing and getting feedback!
Greg,
Thanks for the suggestion. I've only been airbrushing for 2 months and the paint and clear coats on this model are drastically better than on my first model. I've watched a lot of YouTube airbrushing videos and practicing on sheet styrene. It's definitely skill that requires a lot of patience, practice, and experimenting.
Looks great!
For a second model, that's pretty damn good. Just from your descriptions I'd say you did a good job tackling problems as they arose. Sometimes you just gotta hack something to get it to fit. It looks well weathered, rid hard and put away wet.
Sun bleaching is really as easy as adding white to the base color
Like they said, wing root fuzzing is a common problem. I would thin the paint more and lower the pressure, stay closer to avoid the paint "bouncing" around.
Clean your etched parts with alcohol first. Vallejo paints (regular not "Air") are the best brush-painting brand around.
I don't use salt on aircraft, too heavy handed for me. I just chip with alum paint on a brush, or a silver pencil.
"Washes" very much depend on the material used to wash and the base surface. On aircraft you pretty much have to wash over a gloss coat. And enamel over acrylic base and vice versa. Tamiya panel line wash is enamel based and pretty strong stuff IMHO. It won't come off any kind of flat or semigloss surface.
For everything I mentioned there is a You-Tube tutorial video out there. I watch all I can find, there are a lot of talented types out there. There's always something to learn. Let me strongly recommend this guy to start. He does it for me. Go down the rabbit hole when you can, you can get a lot of inspiration there and above all, at iModeler. 🙂
so you wanna fade and wash do ya
There is nothing wrong with that model you got there, guy. Keep it up.
Thanks for the tips. Scale-a-thon is one of the YouTube videos I watch. Definitely lots of great advice there.
G'day Derek (@mrocs2000),
Your first and second builds are great.
I've been modelling for 40+ years and am still getting the hang of weathering - my weathering looks artificial and sometimes over done while everyone else's efforts look realistic.
I've only just started using washes too, I think they are more appropriate for modern jets with all their removable panels and hatches ( I've only recently started building these) rather than WW2 aircraft.
We are always learning new techniques and skills.
Keep up the excellent work.