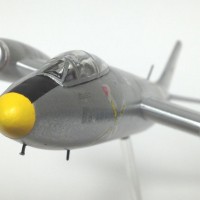
Hasegawa (x2) 1/72 F-15DJ Eagle Aggressor
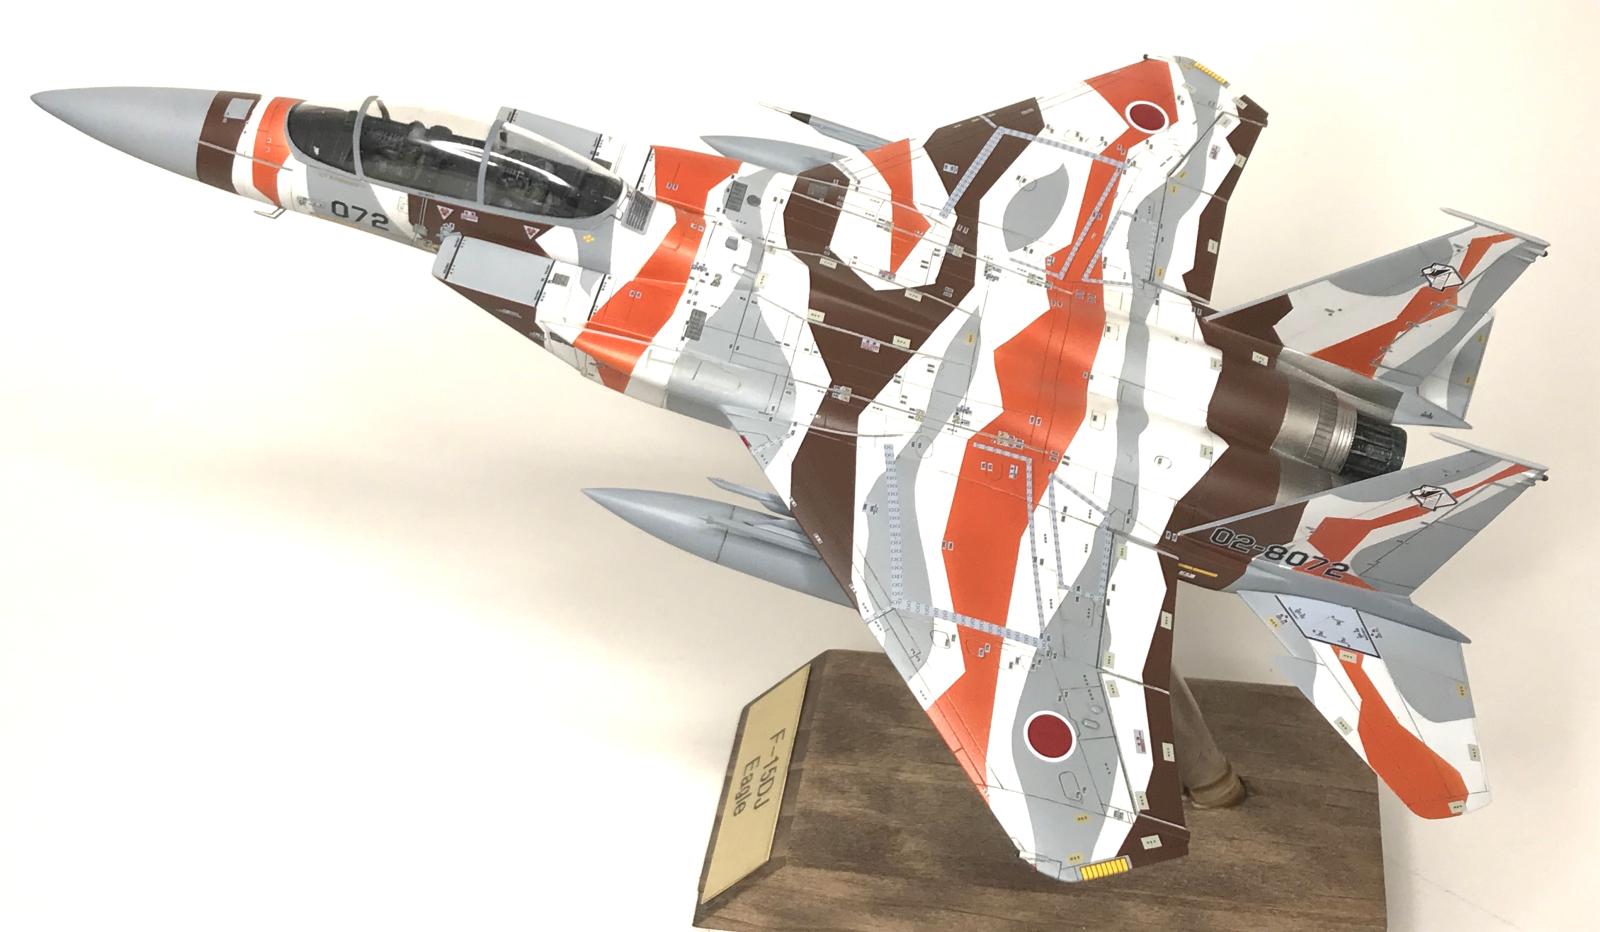
This project took a few left turns. I had secured two Hasegawa F-15C kits over the years, either from ebay or from vendors at model shows. A few years back I saw a DMX decal set for Japanese F-15 aggressors, as the color schemes really stood out to me, and I love unique or different schemes. Since our contest theme this year is Made in Japan, I decided to try to get this ready for the show in early April. I decided to build both kits at the same time - one in US livery and the aggressor.
As I got started, I realized that there were a couple of parts missing - namely the lips of the intakes of one of the C's. I decided to secure another full kit, and when I went online, found an F-15D/DJ from Hasegawa. It was an older version of molds, which I didn't realize until I opened it up - more toy-like, less detail, raised panel lines, etc., BUT it was the 2-seat DJ version that the aggressors flew, as opposed to the single-seat C's I had started with. (I didn't realize when I got started that the Japanese aggressors that I could find reference photos for were all 2-seaters).
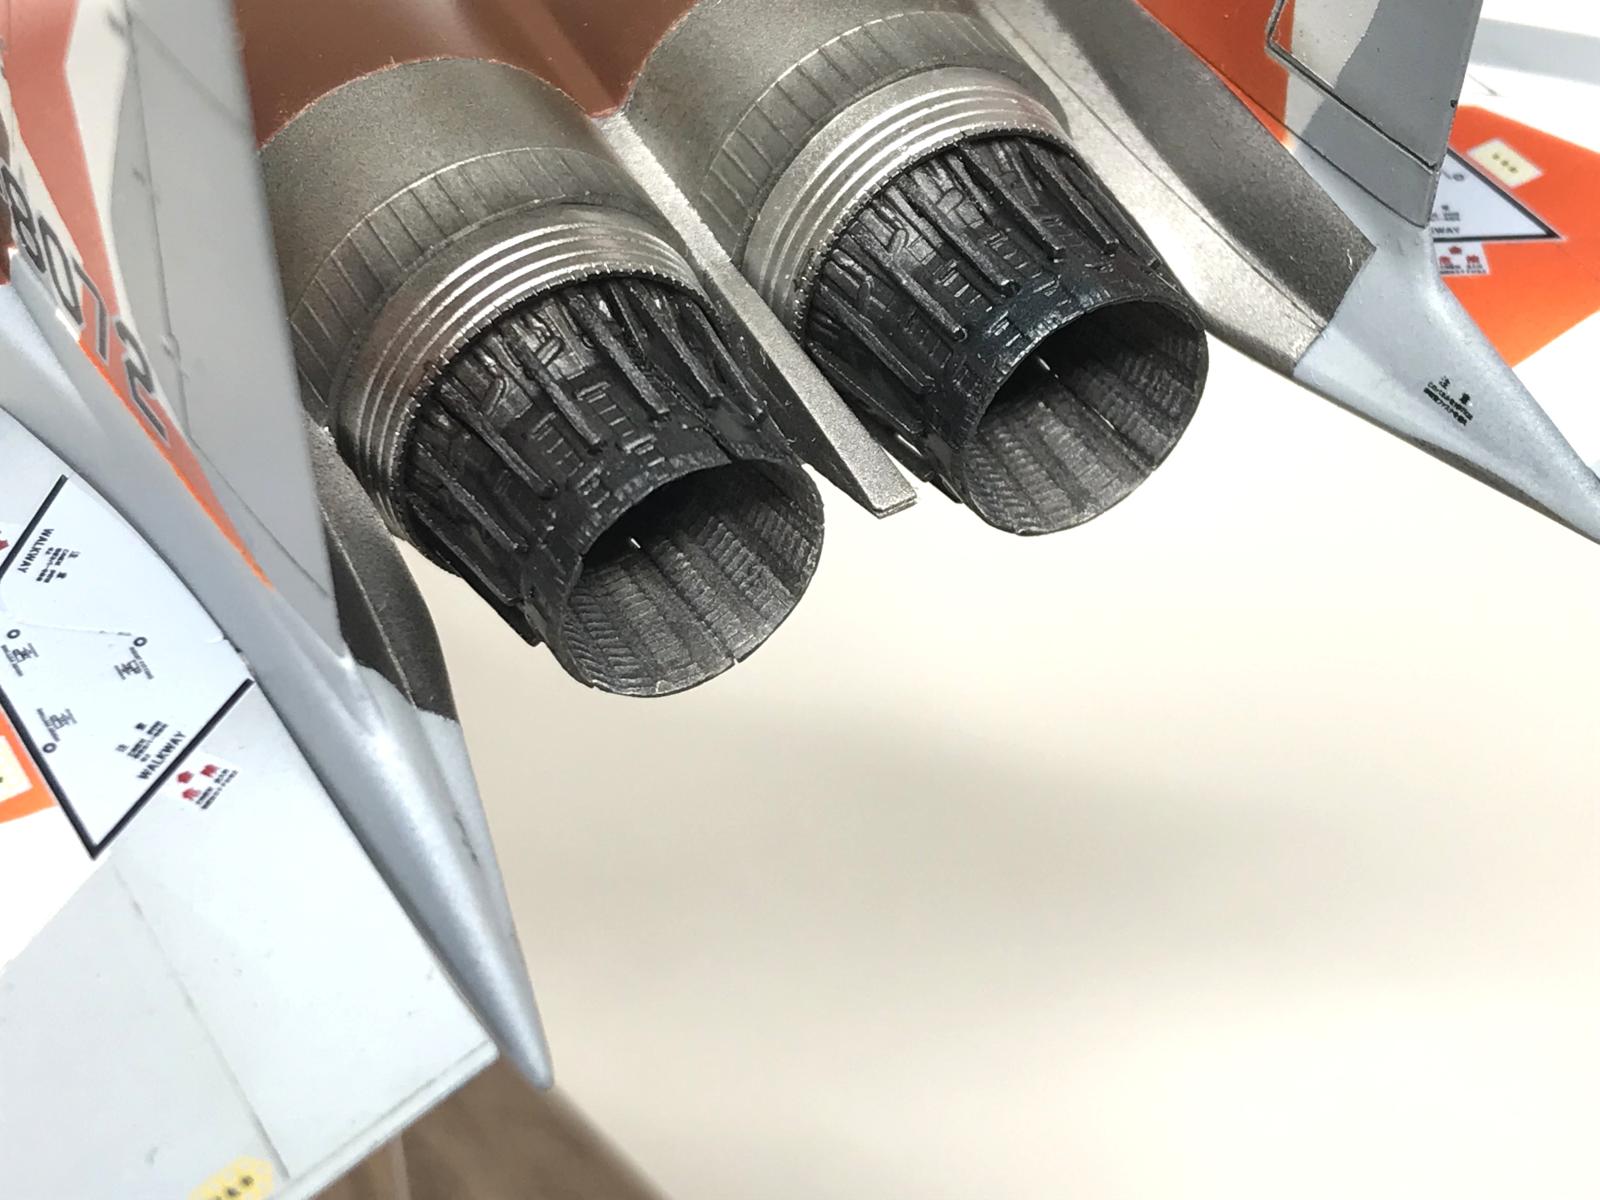
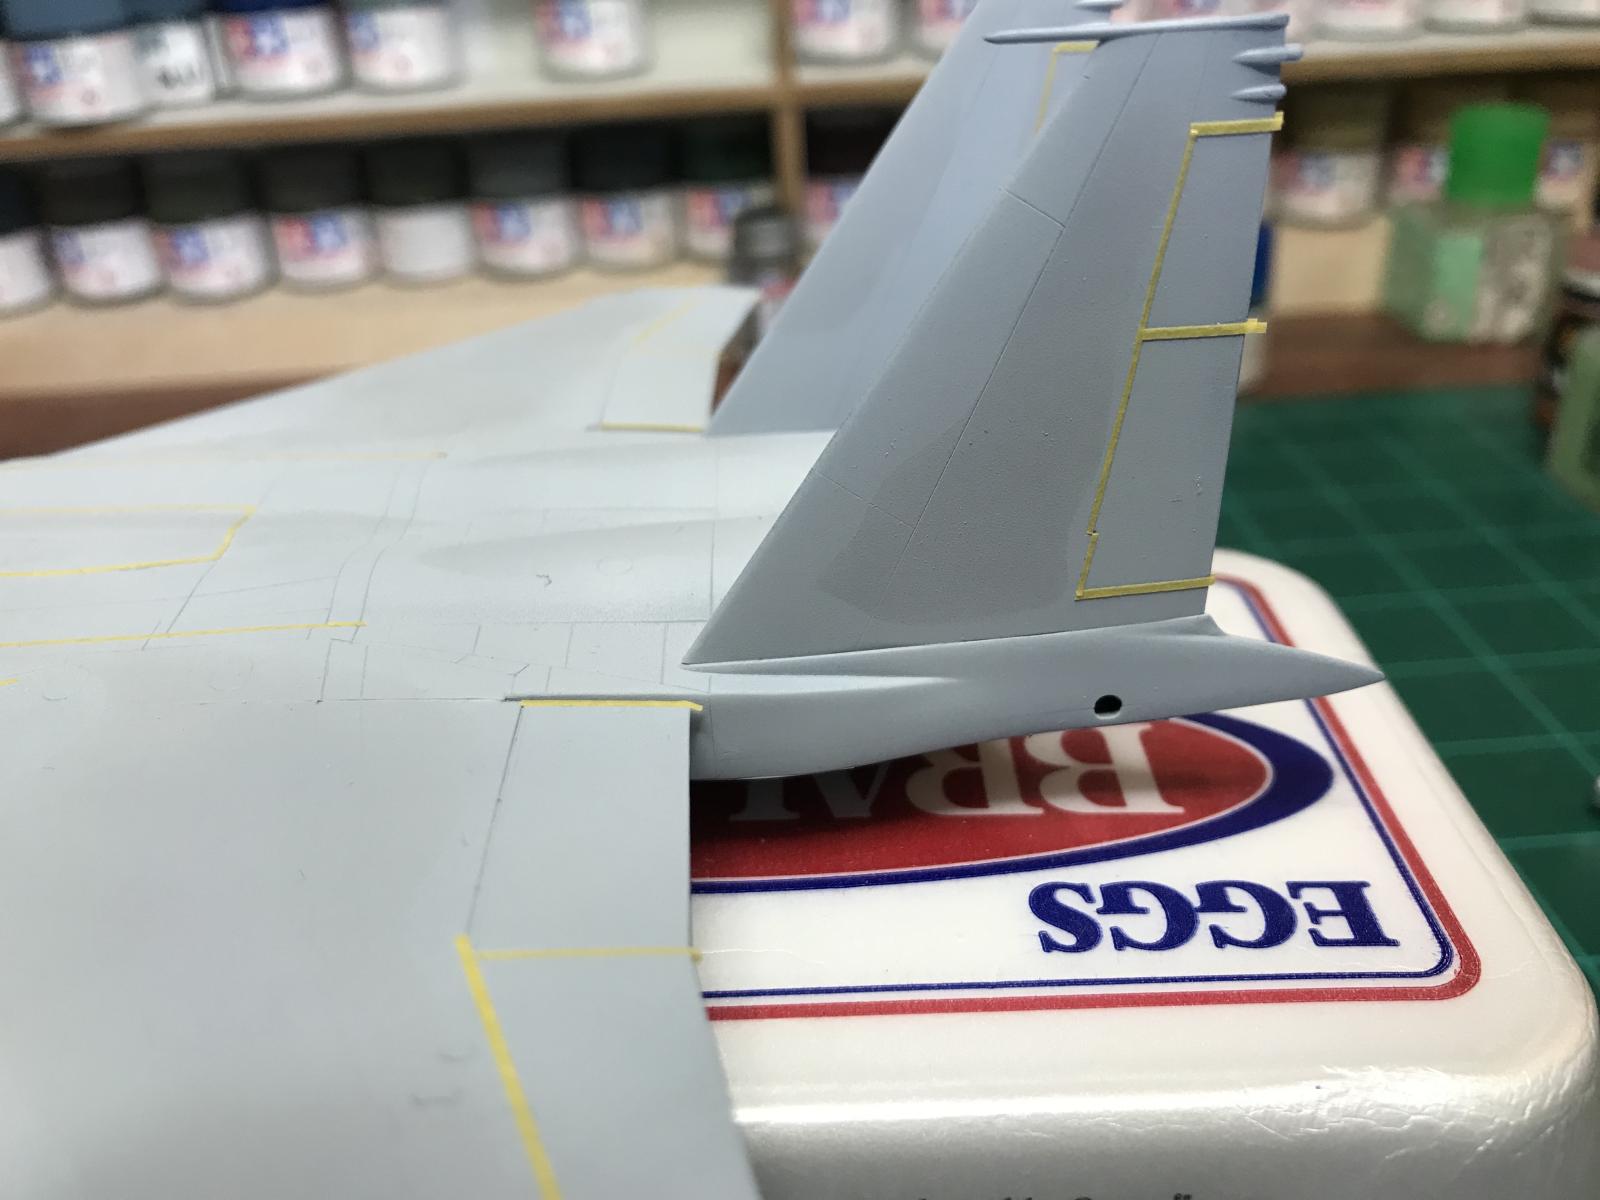
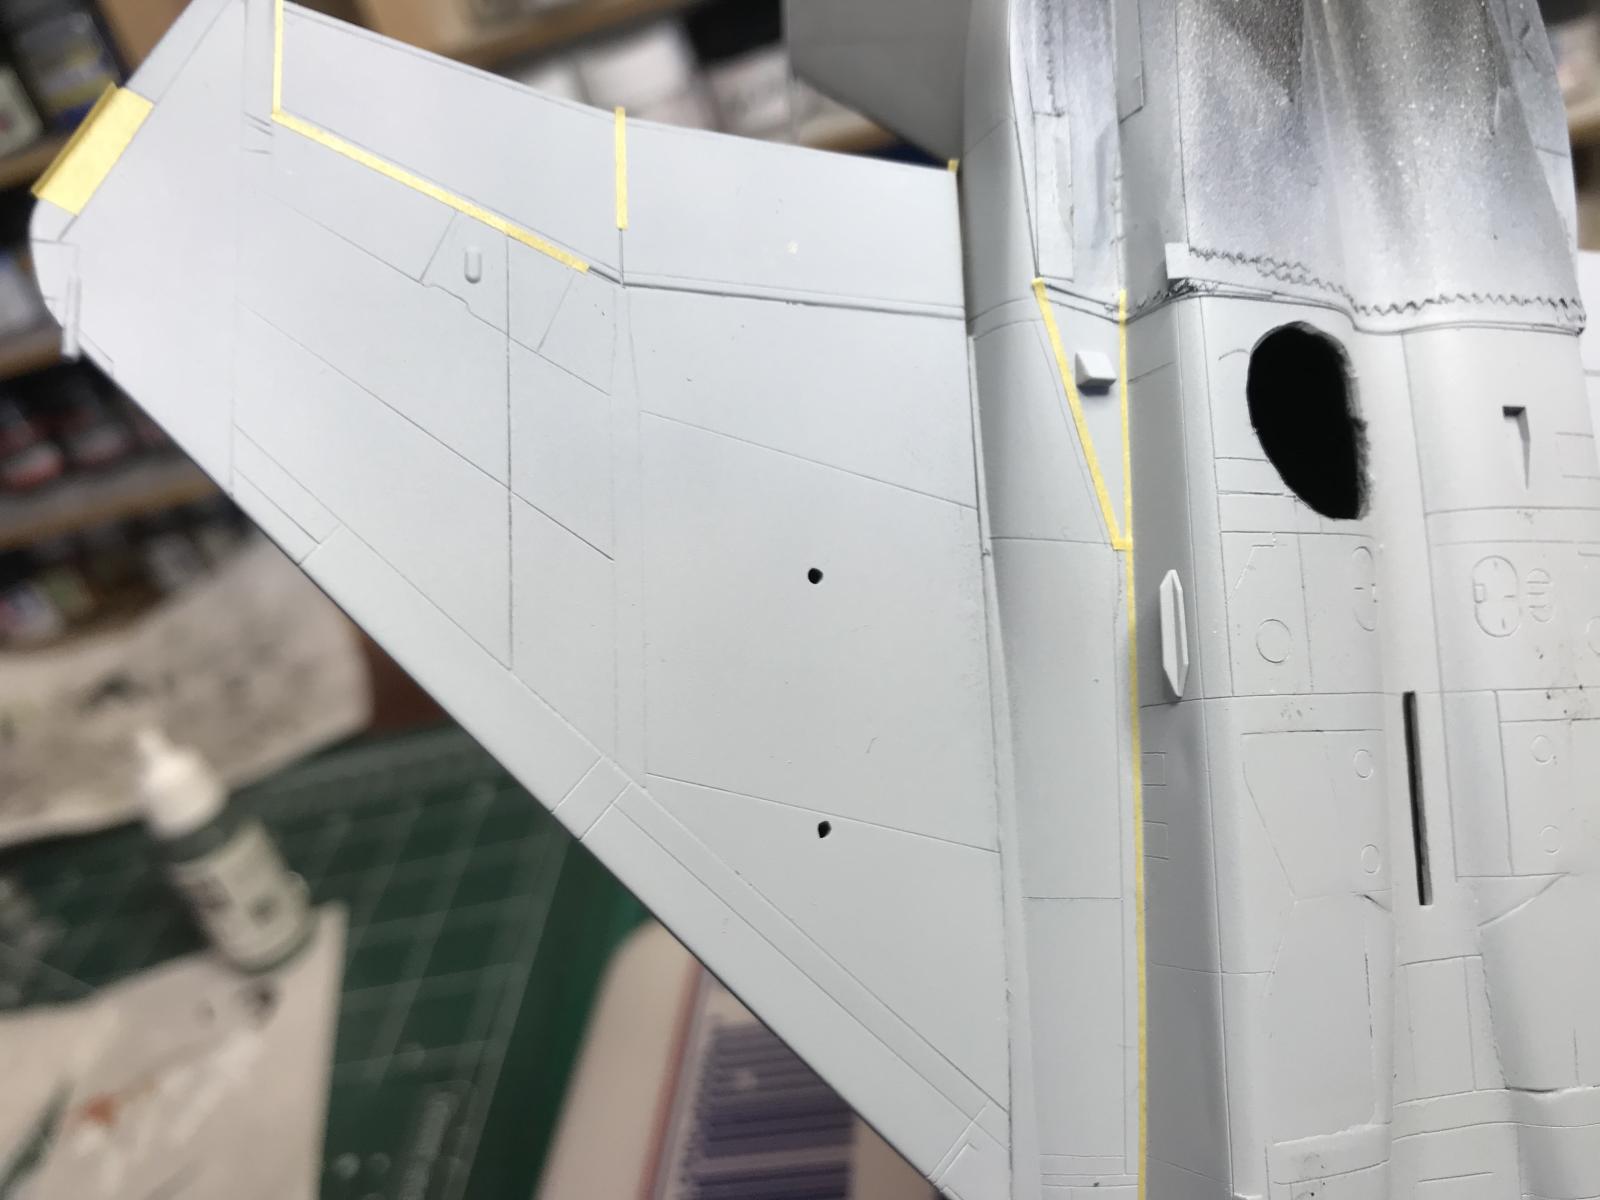
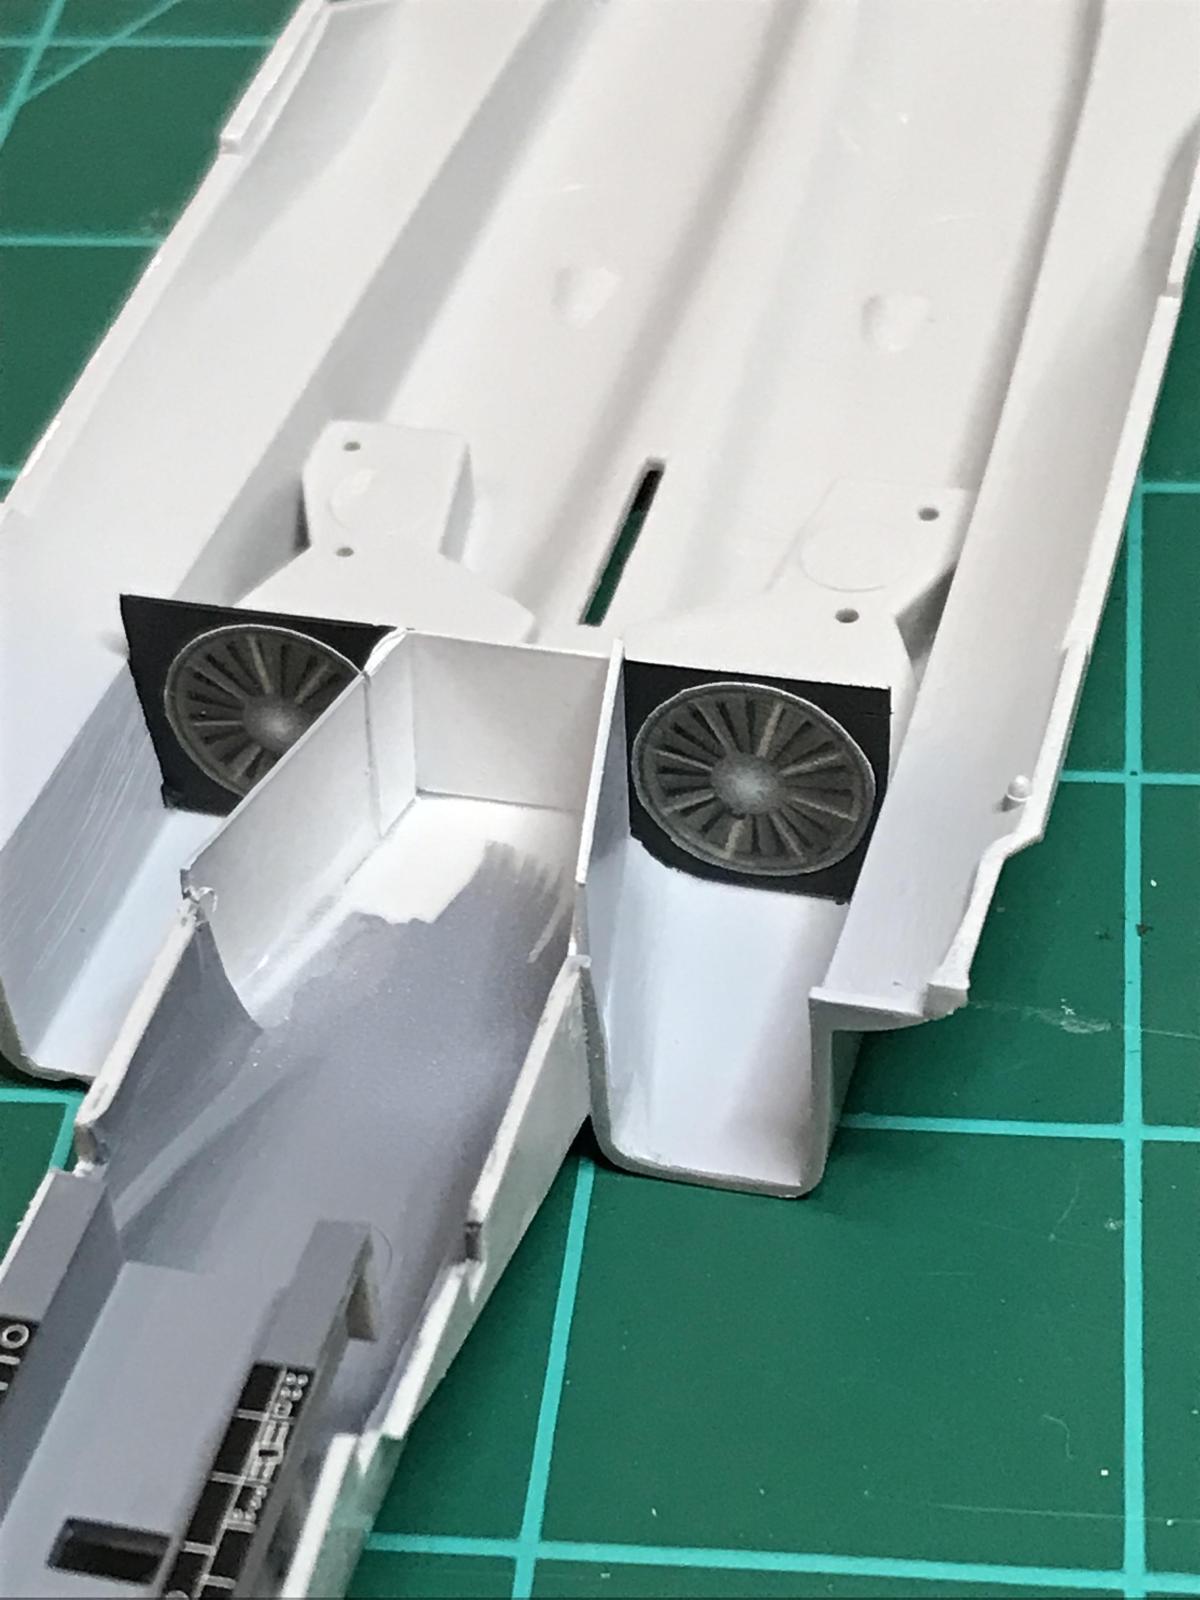
So, to make a long story (and build project) short, I started with the fuselage and verticle tails of the DJ (sanded and completely re-etched), attached the wings and horizontal tails of the C, opened up the intakes of the older kit and created the intake trunking and compressor blades (printed paper) and married the intake interior sections to the older kit, and added some of the other details from the C kit, such as the Sparrow clasps, the fuselage strakes, the pitots and AOA probes, and the exhaust nozzles. Not everything was a perfect fit, but I'm happy with the outcome.
Paintwork took forever. I first had issues with the two shades of Ghost Grey. I used AK Real Colors paints (I've been having good luck with them), and as I always do, I lighted both shades with an equal amount of white paint to achieve scale effect. I blackbased the model and laid down the light ghost grey, but when I laid down the dark ghost grey, there was absolutely no contrast! I assumed this was probably due to the lighter coat I had used on the light grey to retain some of the mottling of the blackbasing/marbling. So I Iightened the light grey, sprayed again, then tried the dark grey again. Still not enough contrast. On the third try I got close enough that I decided to live with it, knowing most of it would be covered by the aggressor scheme.
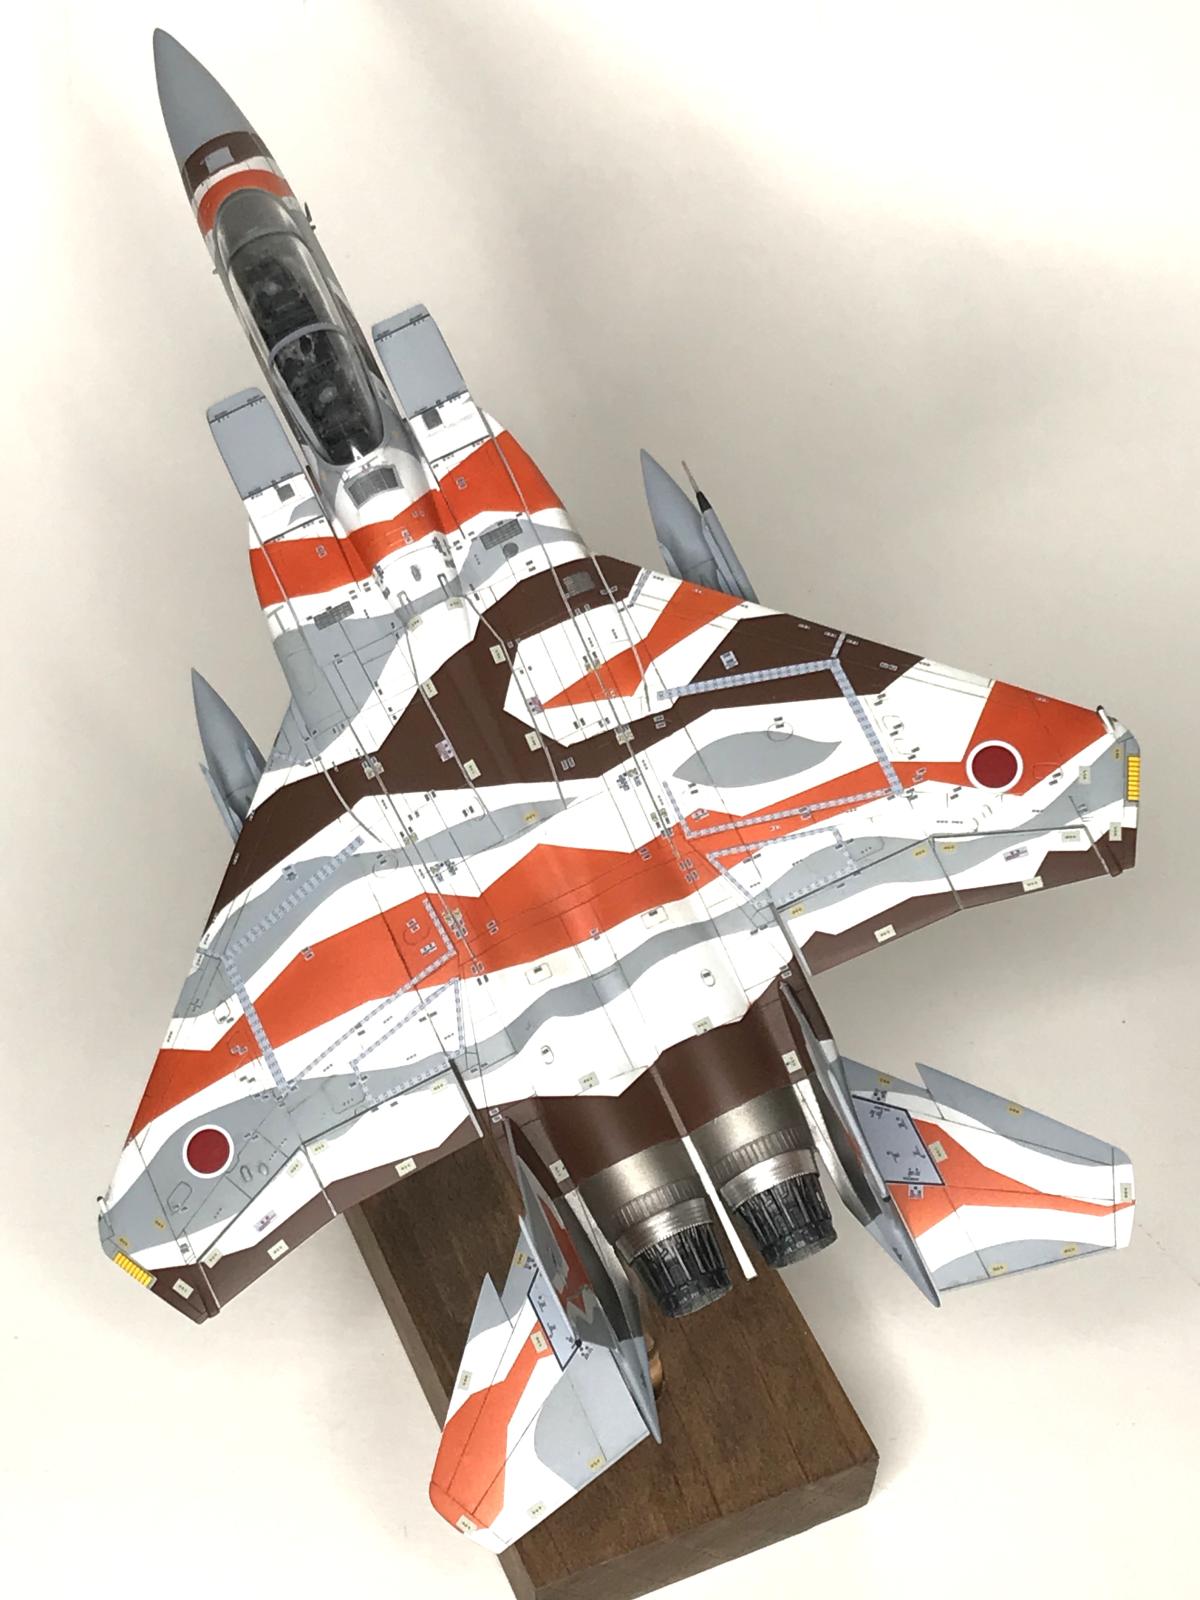
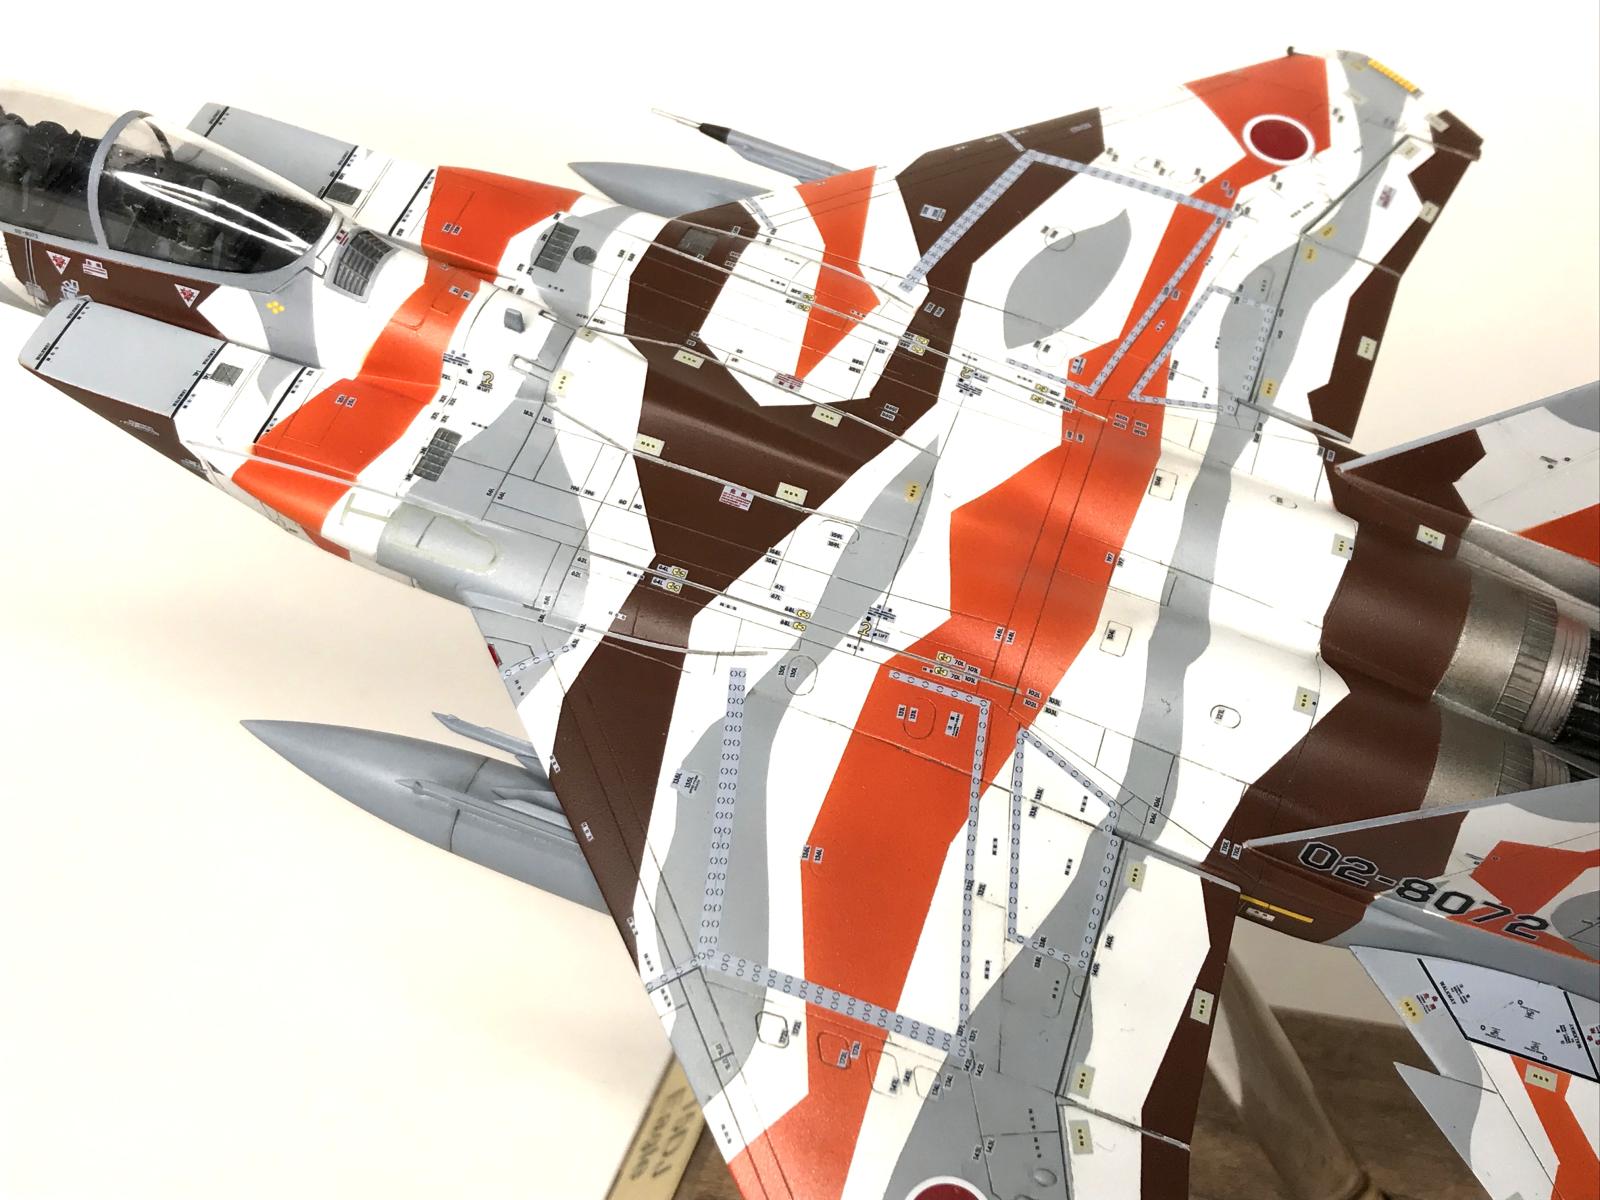
Then the masking for the 3 colors of the aggressor scheme took some careful planning and lots of tape and time! First there was a lot of "pre-masking" to do, because the aggressor scheme didn't cover over many of the panel lines (airbrake, control surface joints, etc.). Once I had that done, I printed out a scale diagram and used that to draw patterns, then lay the tape on the patterns and cut them out to use on the model. First time I've tried that technique, and it worked pretty well. In the end I only had a couple of spots to touch up.
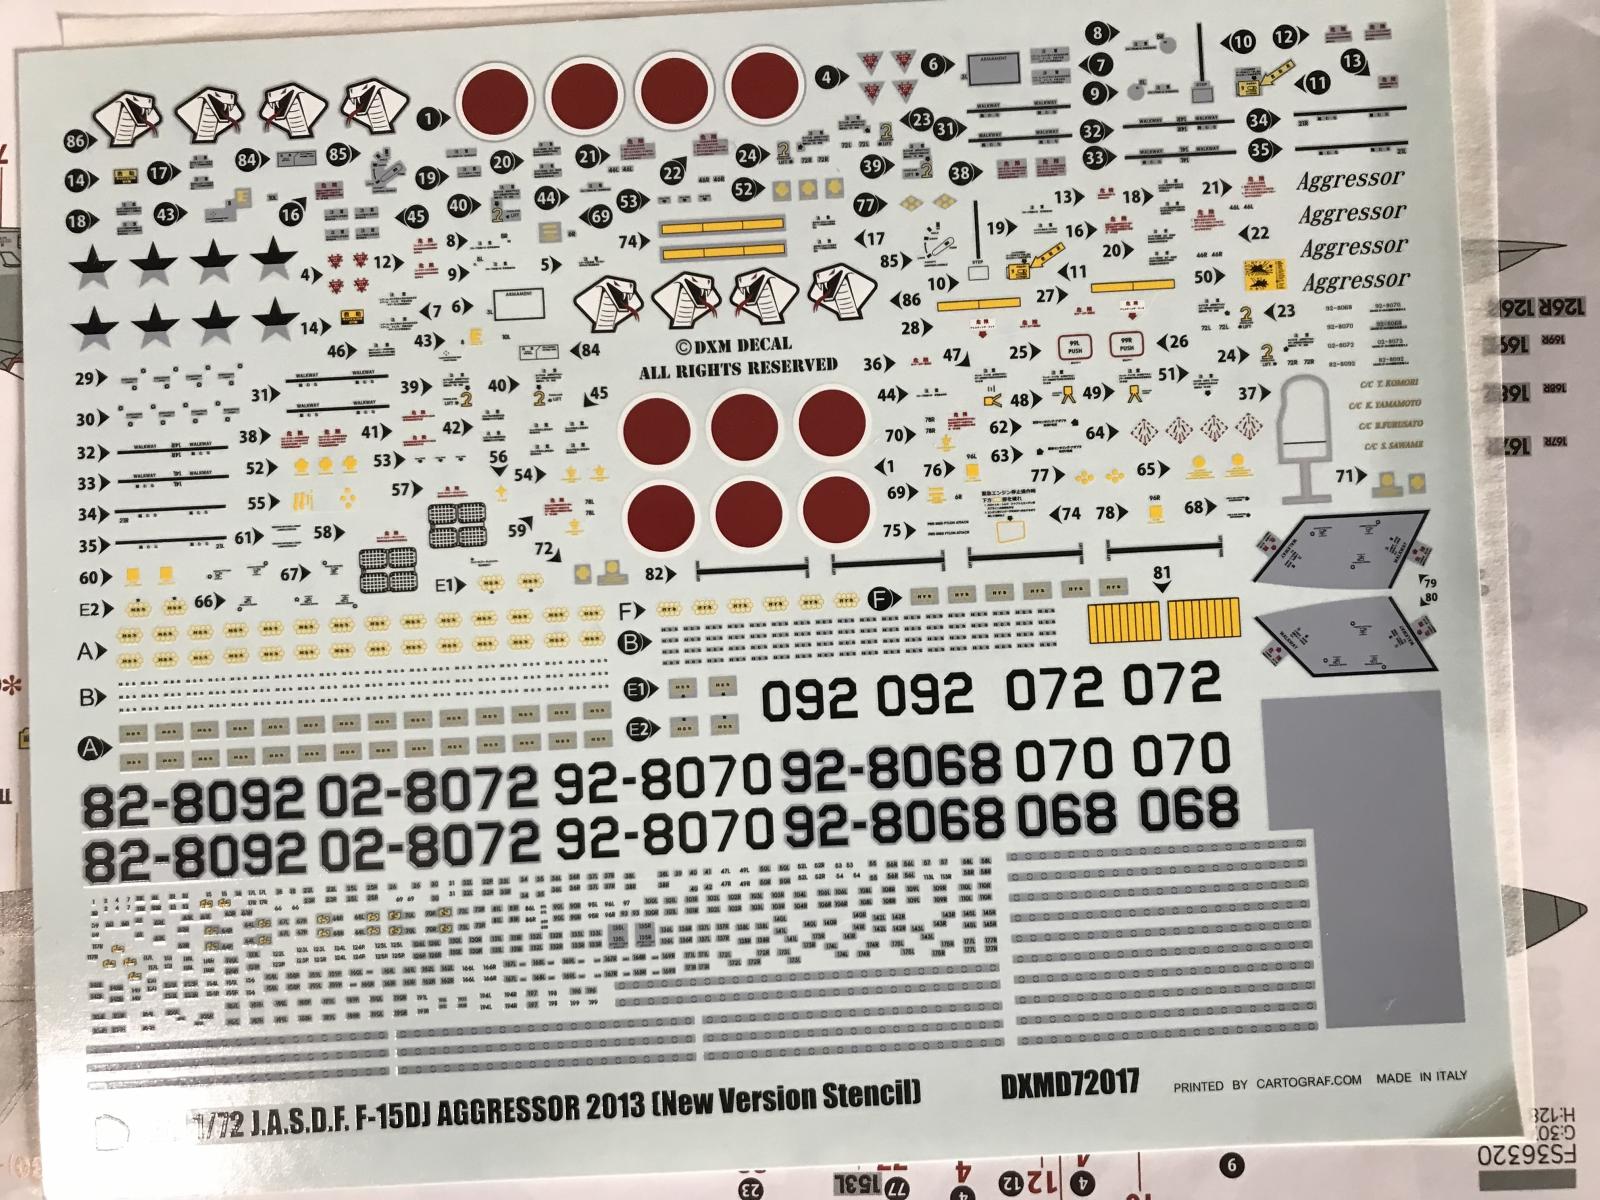
The decals were up next. Whew! Those Japanese love to number every panel, and basically print the operating instructions all over the skin of the airframe! Similar to the F-4EJ Kai I had built recently. Took me a couple of weeks working a few hours at a time to get it done.
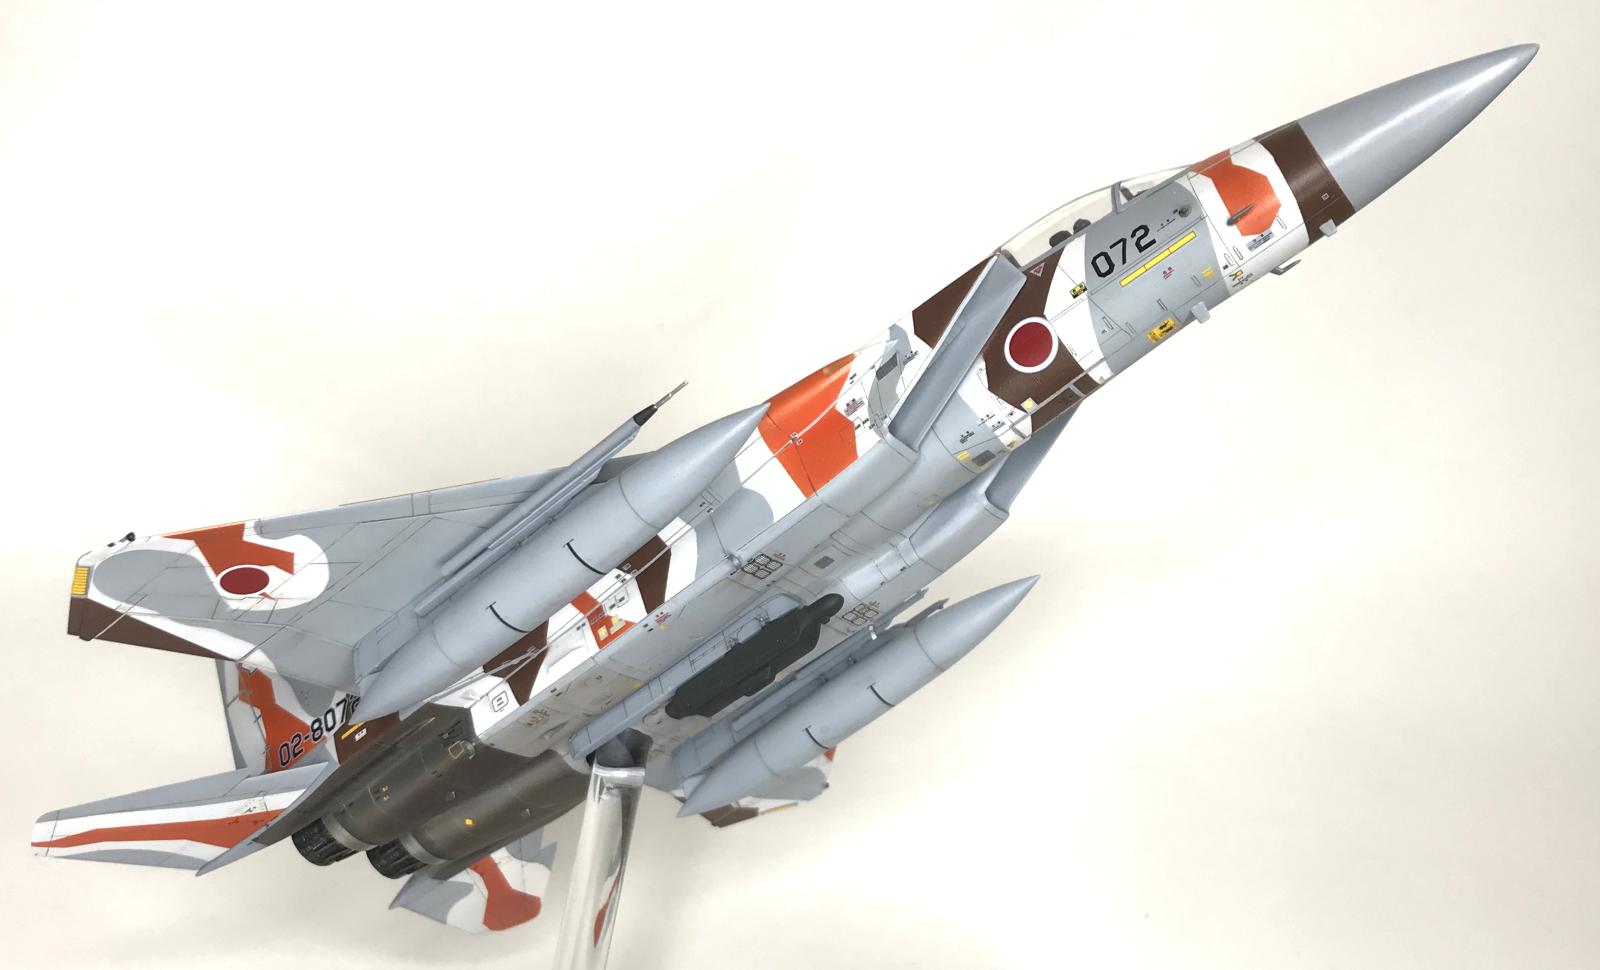
The ECM pod and air maneuvering probe were from a couple of Hasegawa weapons sets, and I matched what I saw in reference photos.
My only letdown of the project occurred after I removed the canopy masking. Even though I used static wipes on the canopy, there was still some small pieces of plastic and grit that got stuck up in the cockpit combing. Also - and this is a first - there was some sort of haze on the inside of the canopy. I don't know if some paint fumes drifted down through the mounting hole I drill in models to mount them, or what. I tried to pop the canopy off as I had glued it down with Gator Grip glue, but I applied as much pressure as I dared and couldn't pry it loose. I decided to live with it, even though to me it is an eyesore - probably my biggest disappointment for a modeling project in years, after having put so much effort into this.
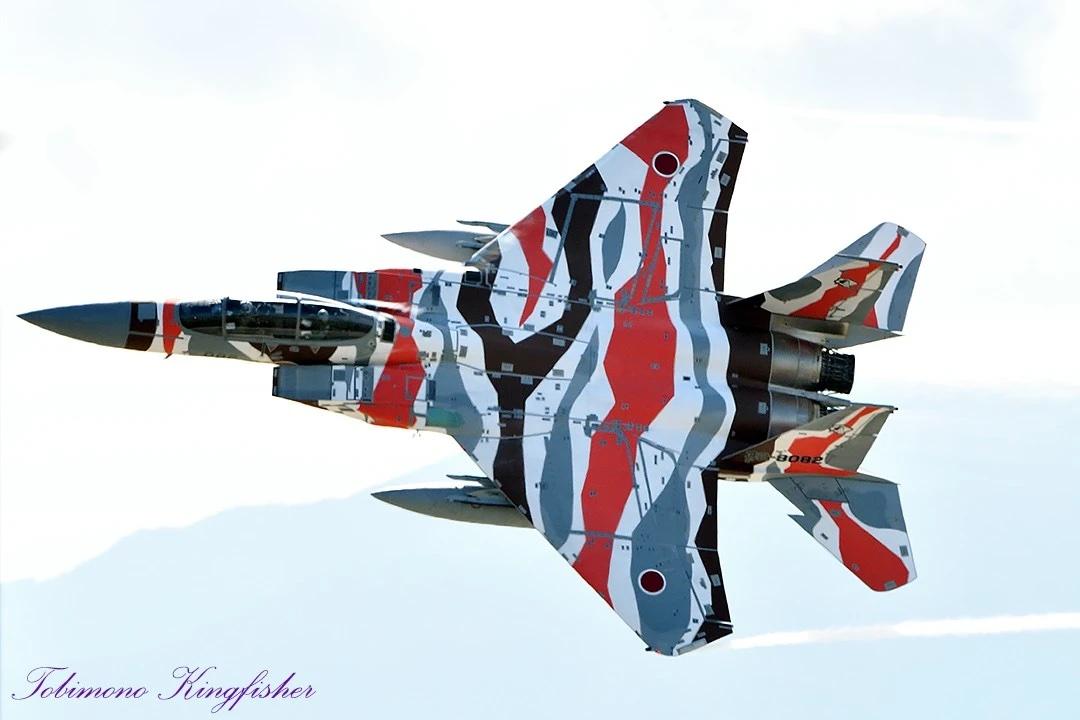
The last photo is of the real bird.


Turned out beautiful, Greg. All that work was well worth it.
Very attractive scheme Greg, It looks fantastic! Well done with the paint, and ALL of the decals. Certainly a labor of love.
What a great scheme Greg. Your work is of the highest level. thanks for sharing the process.
I can sympathize with you on how painful applying all those decals would be. The final result turned out way nicer than I could get. Very nice result even though you had some last minute booboos.
I can also sympathize with you on the last minute stuff going sideways.
...absolutely such nice work...super!
Great looking Eagle with a change in colours, Greg.
That's is amazing looking scheme, great work with this build.
Sorry to hear about the last minute mishaps.
Holy cow Greg, amazing work! Very nice results, it’s an eye catcher.
Spectacular!
Exvrllent result, Greg! Your skills are really amazing!
An excellent result, Greg @gkittinger
The scheme is awesome and you did great in applying it.
Very nice.
Wow Greg, @gkittinger Great work and one outstanding camo scheme!
I didn't notice the canopy problem till I looked close after reading your account; it's probably super-apparent to you since you built it. That's a common experience.I look at my models and see all the stuff I missed that nobody else notices.
Great job on kitbashing, painting and decal work. You must have gone nuts with all that stenciling in 1/72.
"Liked"!
Top notch build Greg! You must have been cross eyed after getting all those stencils down.
I had to put my eyeballs back in their sockets when I first saw this, Greg. What an achievement.
That is a very sharp Eagle, Greg...well done!
Wauw!
Superior build, paint , masking and decal job !
1 attached image. Click to enlarge.
Another Wow! Great work my friend!
Great scheme and those exhausts look awesome
You´ve done a great job on this!
The camo looks awesome, a real eye-catcher!
Wow Greg @gkittinger - what a beautiful build, sounds like you had a lot of battles but you definitely won - that looks fantastic. brilliant work.
This looks lovely. I have a big interest in the JASDF and other modern Japanese subjects, the Tactical Fighter Training Group offer a lot of distinctive marking schemes.
Excellent work!
@tankgrrl - I have a plethora of F-4 EJs and EJ Kais, along with some RF versions, along with the F-1, F-2 and others. I'm a fan of all Japanese aircraft, but especially love the schemes on their modern birds! I also like their aggressor schemes - the new digital scheme on the F-15DJ I may attempt someday soon! Love to see what you come up with...
I have F-15J/DJ kits in three scales, plus an F-2B in 1/48. I'm W-i-P on the 1/48 so called "MSIP II Configuration". I'm doing mine as the jet they tested with an IRST "ball".
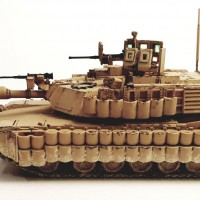
I'm ready-for-primer on a Tamiya 1/35 Type 10 JGSDF tank with DEF Models added details. The Type 10 is a really amazing kit, I've recommended it to beginner armor modelers.
@tankgrrl - love to see your wip on the F-15! If you're up for it, you could start a post in the Aircraft WIP thread in the Groups section, and we could all follow along...
I've just barely begun on it, maybe I will start a build thread.
Greg
I am gobsmacked. You did that in 1/72d scale? Wow. I really like it.
Got in the stash a Hasegawa 1/48 F-104J, an Eduard Eiko boxing of the Hase F-104J with some scrumptious schemes, and picked up at a show the 1/48 Hasegawa F-2B with Eduard cockpit PE and resin wheels. One of these days. It seems the blue scheme for the F-2B is US Navy colors - Dark Sea Blue, Intermediate Blue, and Dark Gull Gray but I see Ammo MiG makes a four bottle paint set for the F-2s.
@kahu, Thanks! The F-2 colors aren't quite the USN scheme. Gunze Mr. Hobby has a set for this scheme: JASDF Oceanic Camo Colors - C376, C375, and C374. I don't remember the # of the paint set, but I'm sure you can find it online. I've not see the Ammo set, but sounds like it's similar.
I stumbled across it on hlj.com with another set for the blues and grays of the JASDF F-4s. Like $7 a set but shipping charges are scary.
Thanks for the info on the GS set, never hurts to have options.
Actually not Ammo, but Vic Hobby has the set. Here's a screenshot.
1 attached image. Click to enlarge.
@kahu Never heard of that brand - water-based acrylics? Similar to Vallejo?
Never heard of them either but they have a large array of paints. This set is listed as water based and self leveling, either brush or airbrush. They also have two sets for the F-4EJ and the RF-4EJ.
I love this scheme! Amazing job Greg!