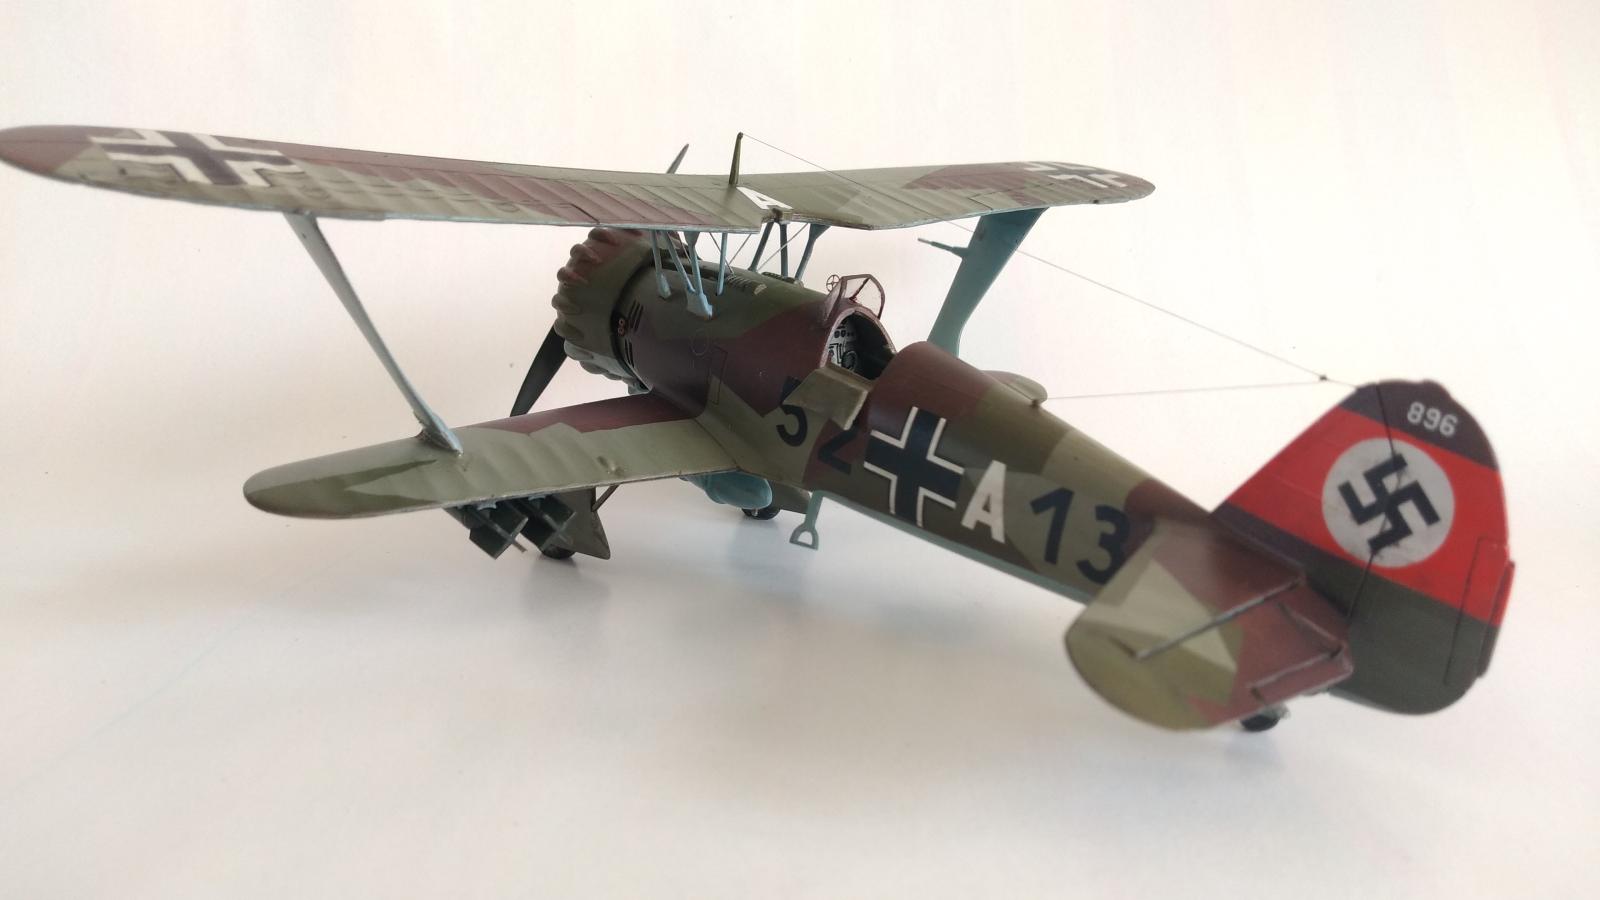
Luftwaffe GB: Combo build of ESCI/Revell 1/48 Henschel Hs-123A-1, kit number H2231
This build was part of the great combo build of the ESCI/Revell/Italeri 1/48 Henschel Hs123A1 done by Spiros, @fiveten, and myself.
It was built in the amazing Imperail German Air Service / Luftwaffe Group Build started by Louis Gardner @lgardner
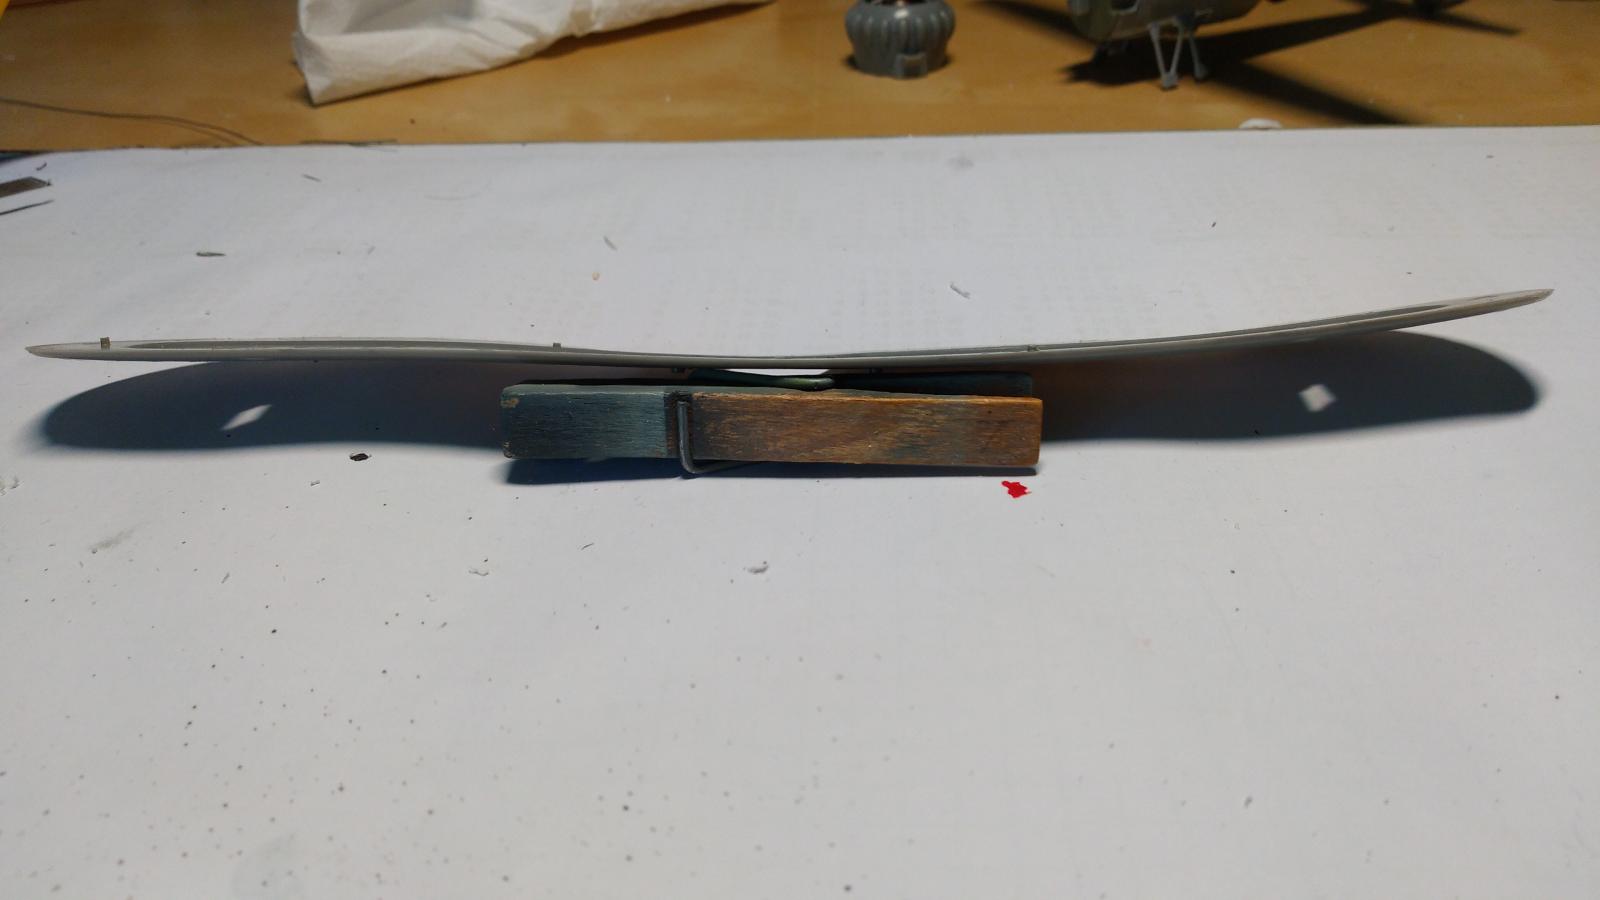
The kit I built was the Revell box H2231 and when opening, the smell of the old carboard indicated clearly that it was old. Decals looked already brittle and trying one made clear that they could not be used.
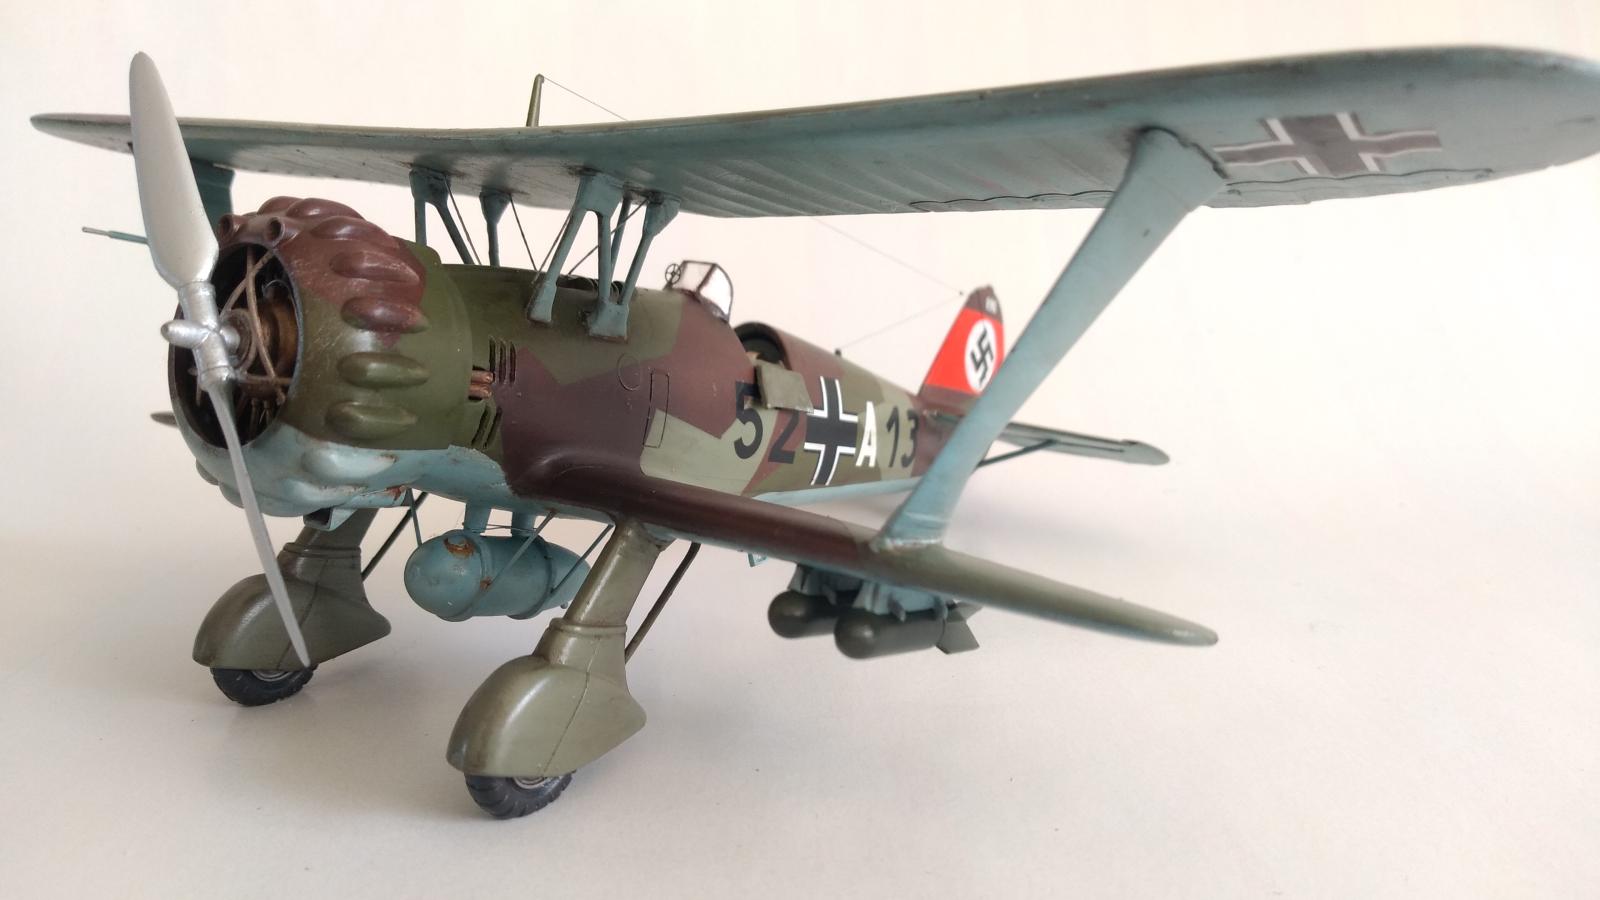
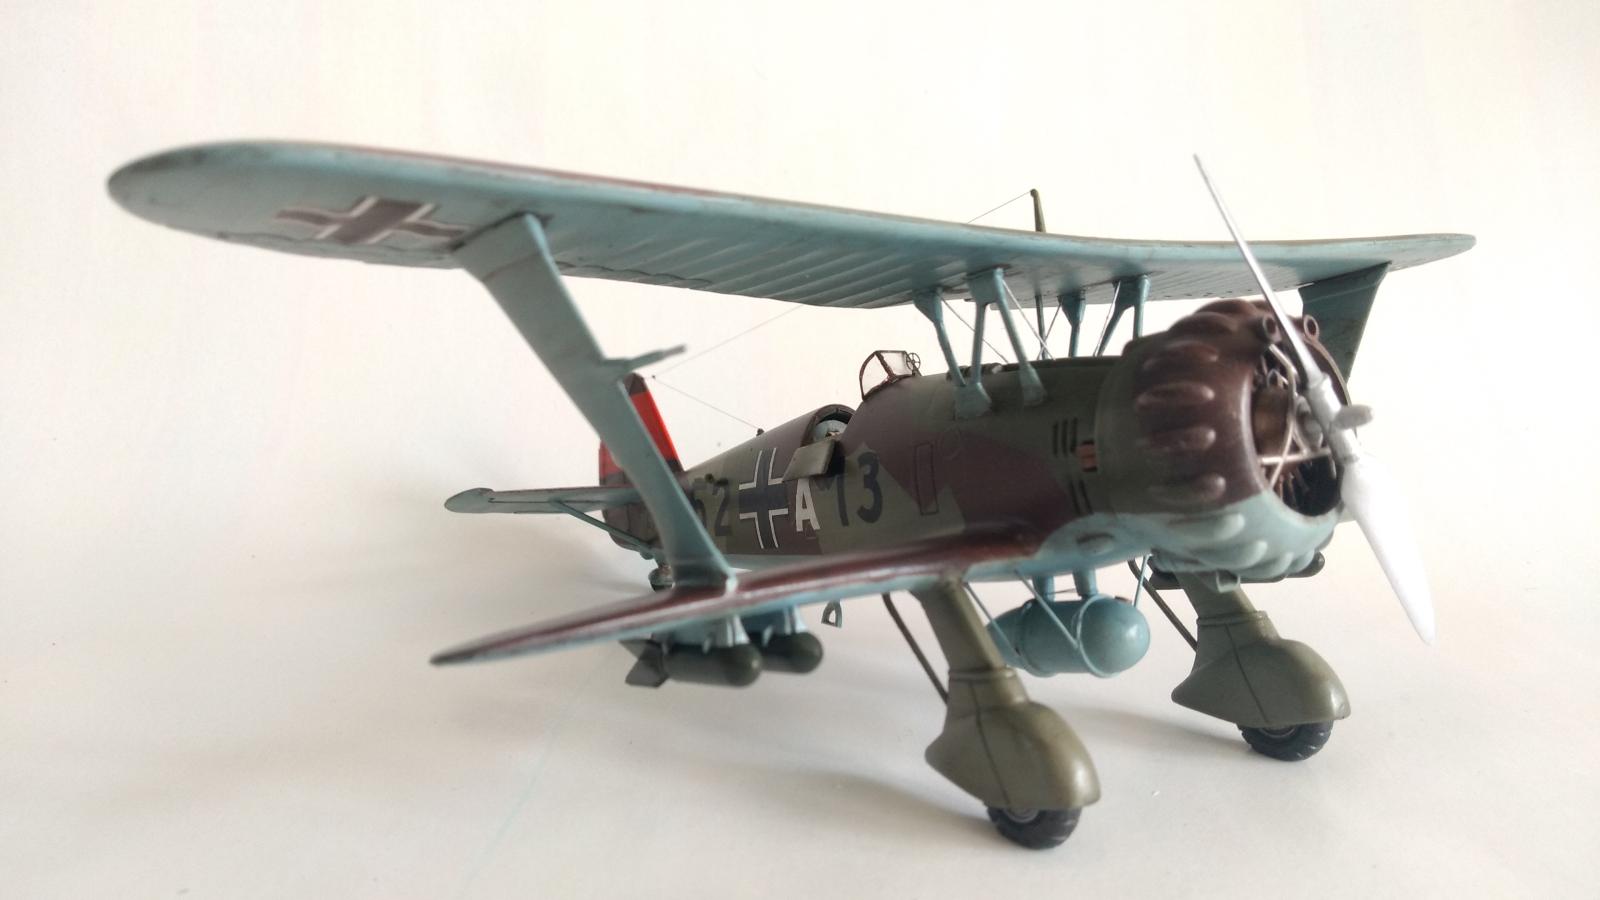
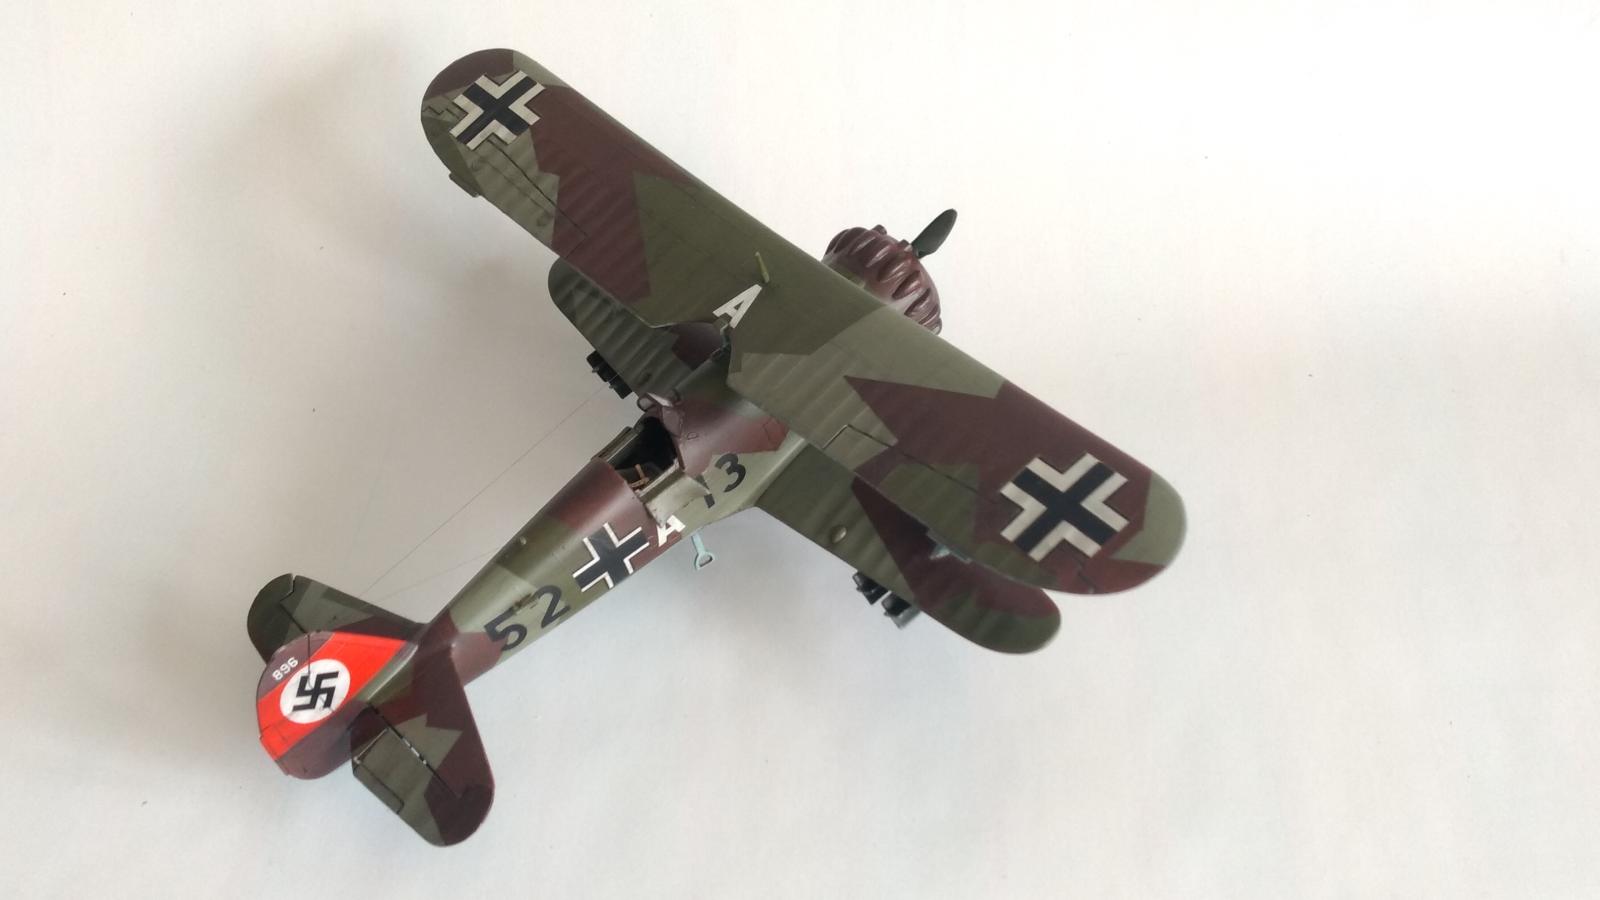
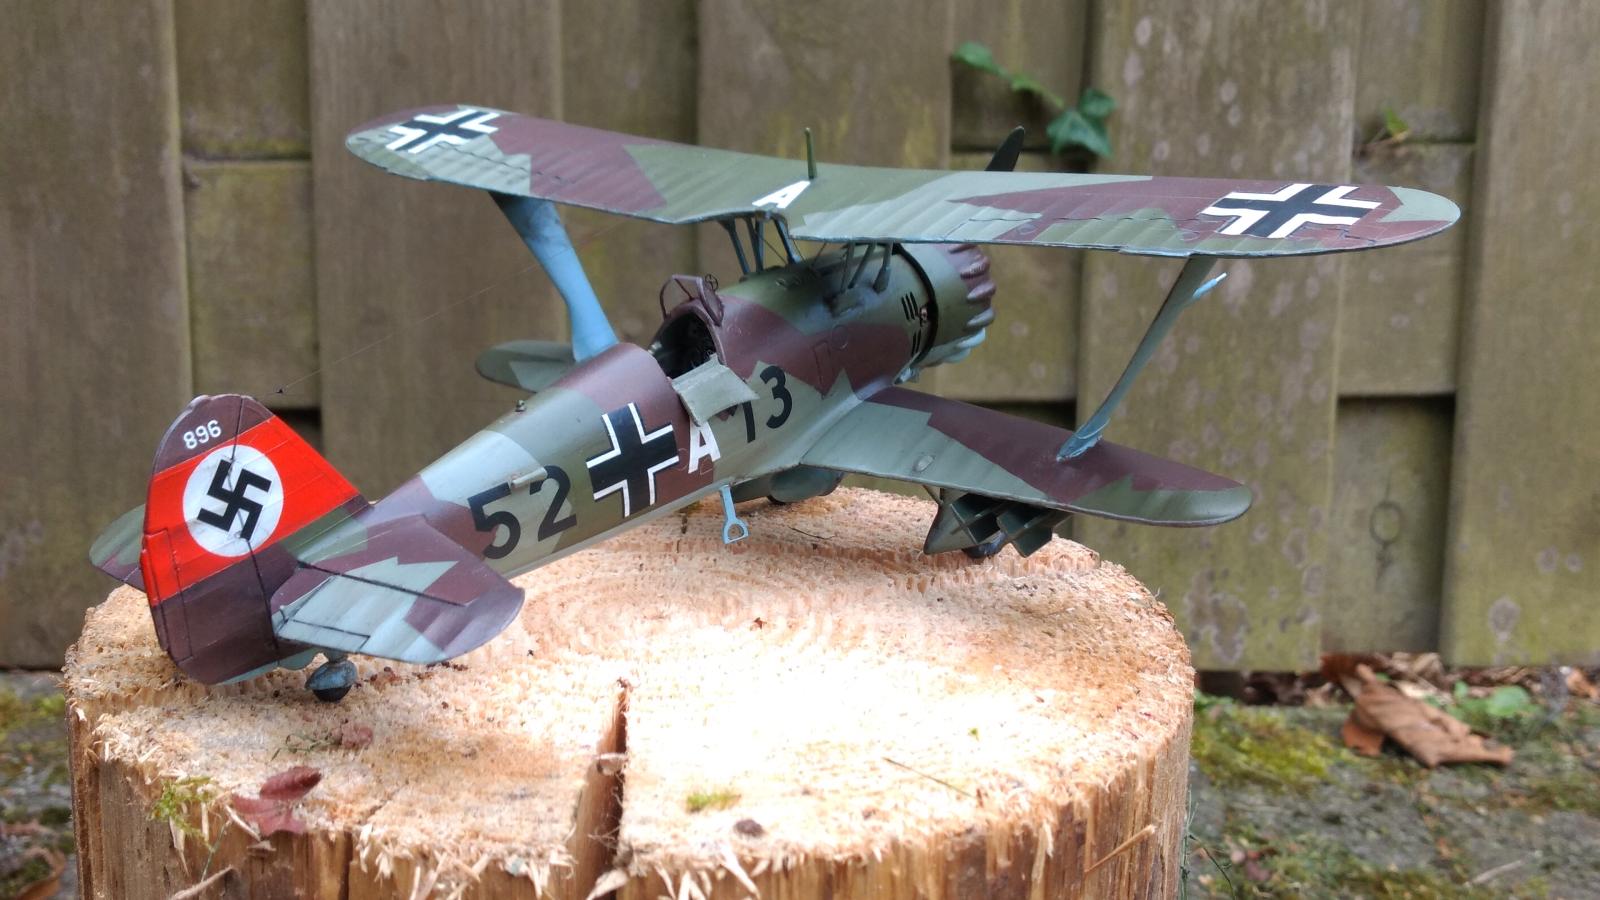
Thankfully Pedro Rocha @holzhamer was very kind to sent me a set of his decals so that I would still be able to build it with the three color splinter camouflage. Eventualy I built the aircraft in the scheme from 3./JG165 "Immelmann" in 1937.
In general a very nice kit but it does require some attention at certain points.
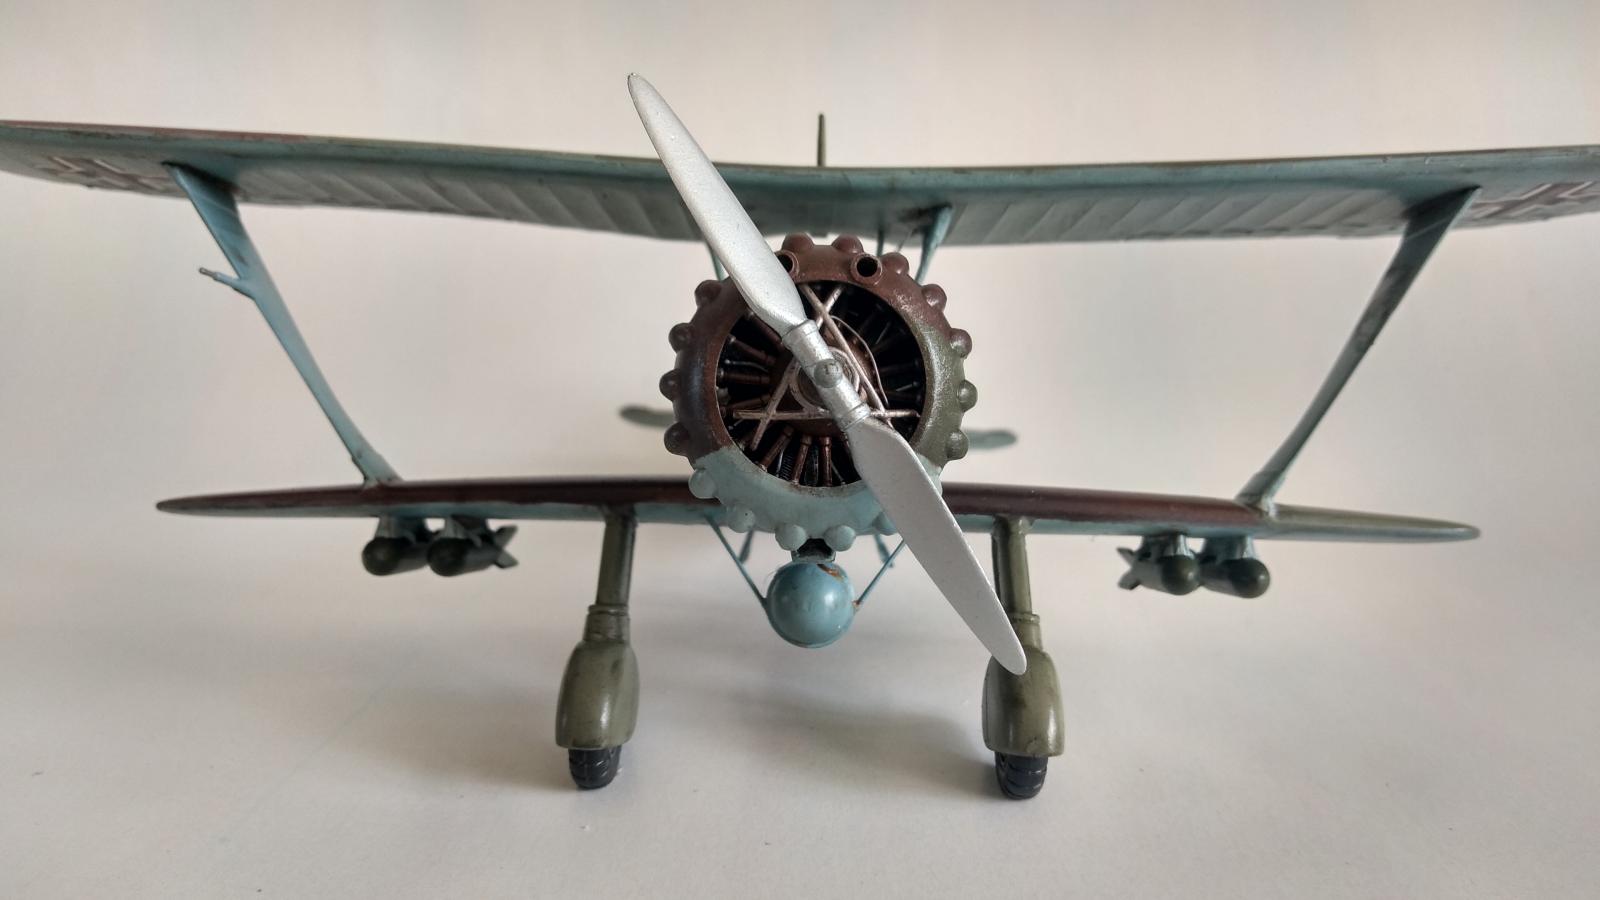
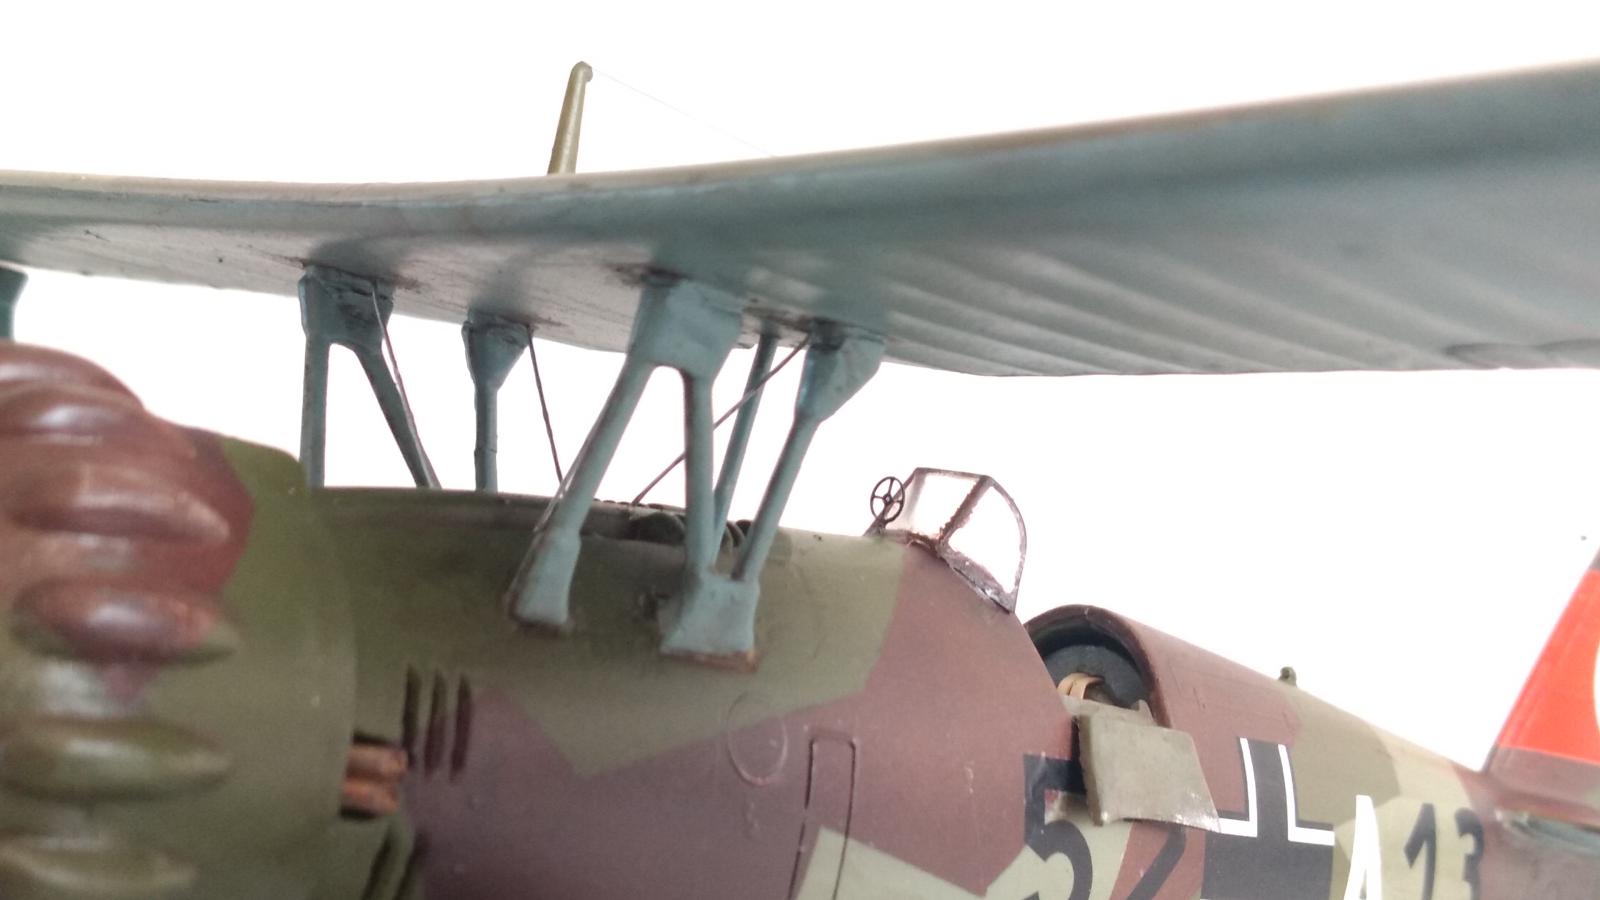
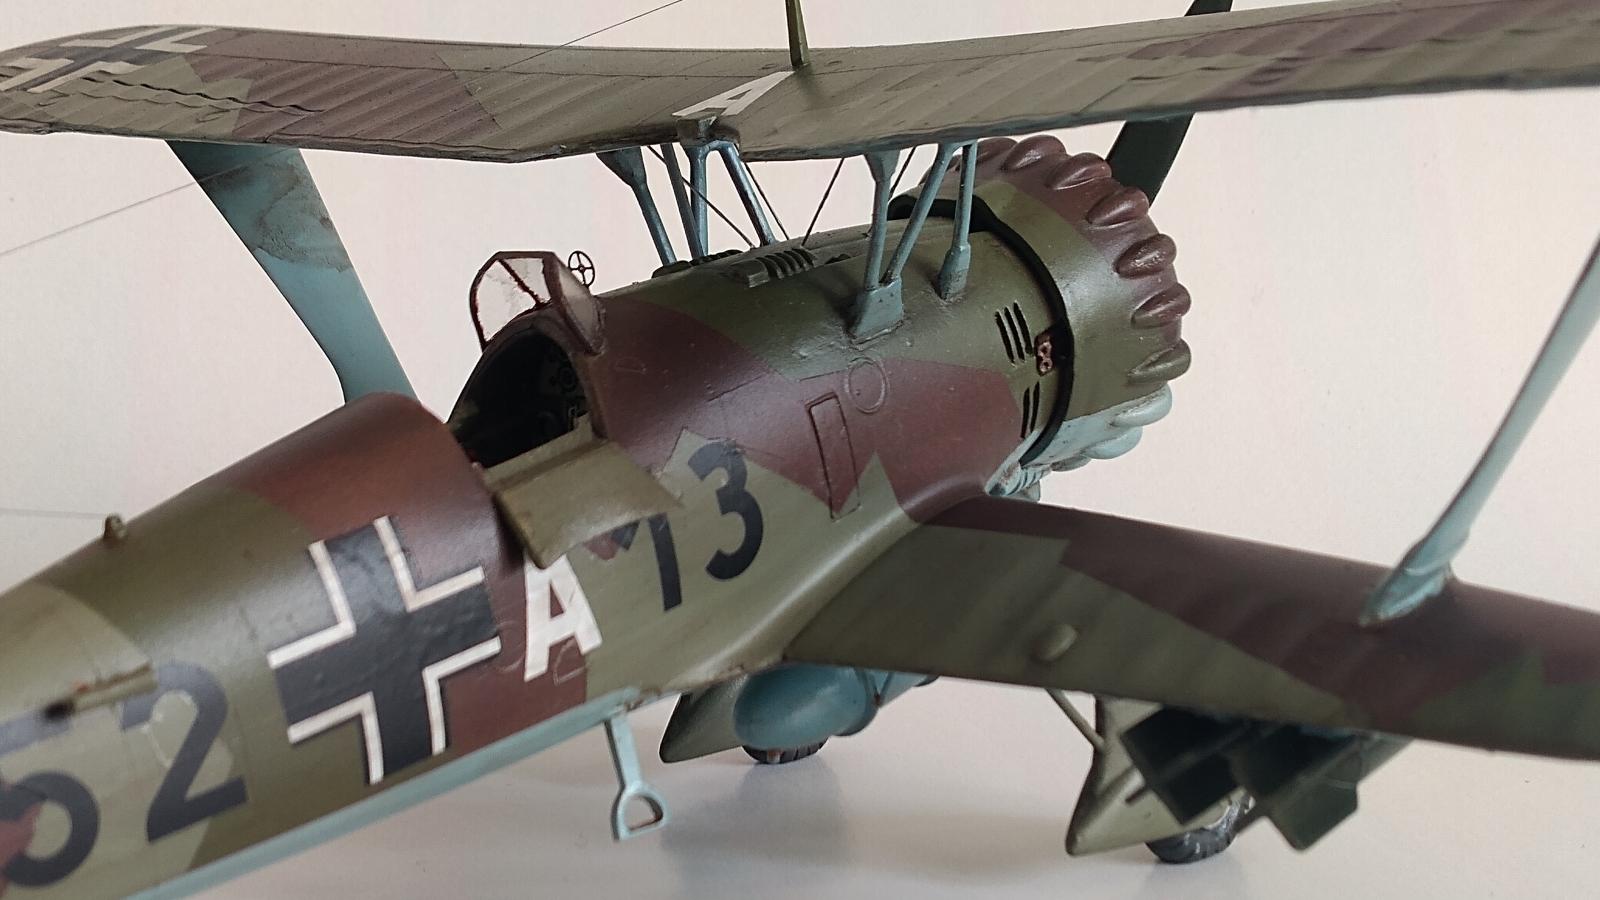
Putty is needed at some areas and in my case the upper wing had quite some warping.
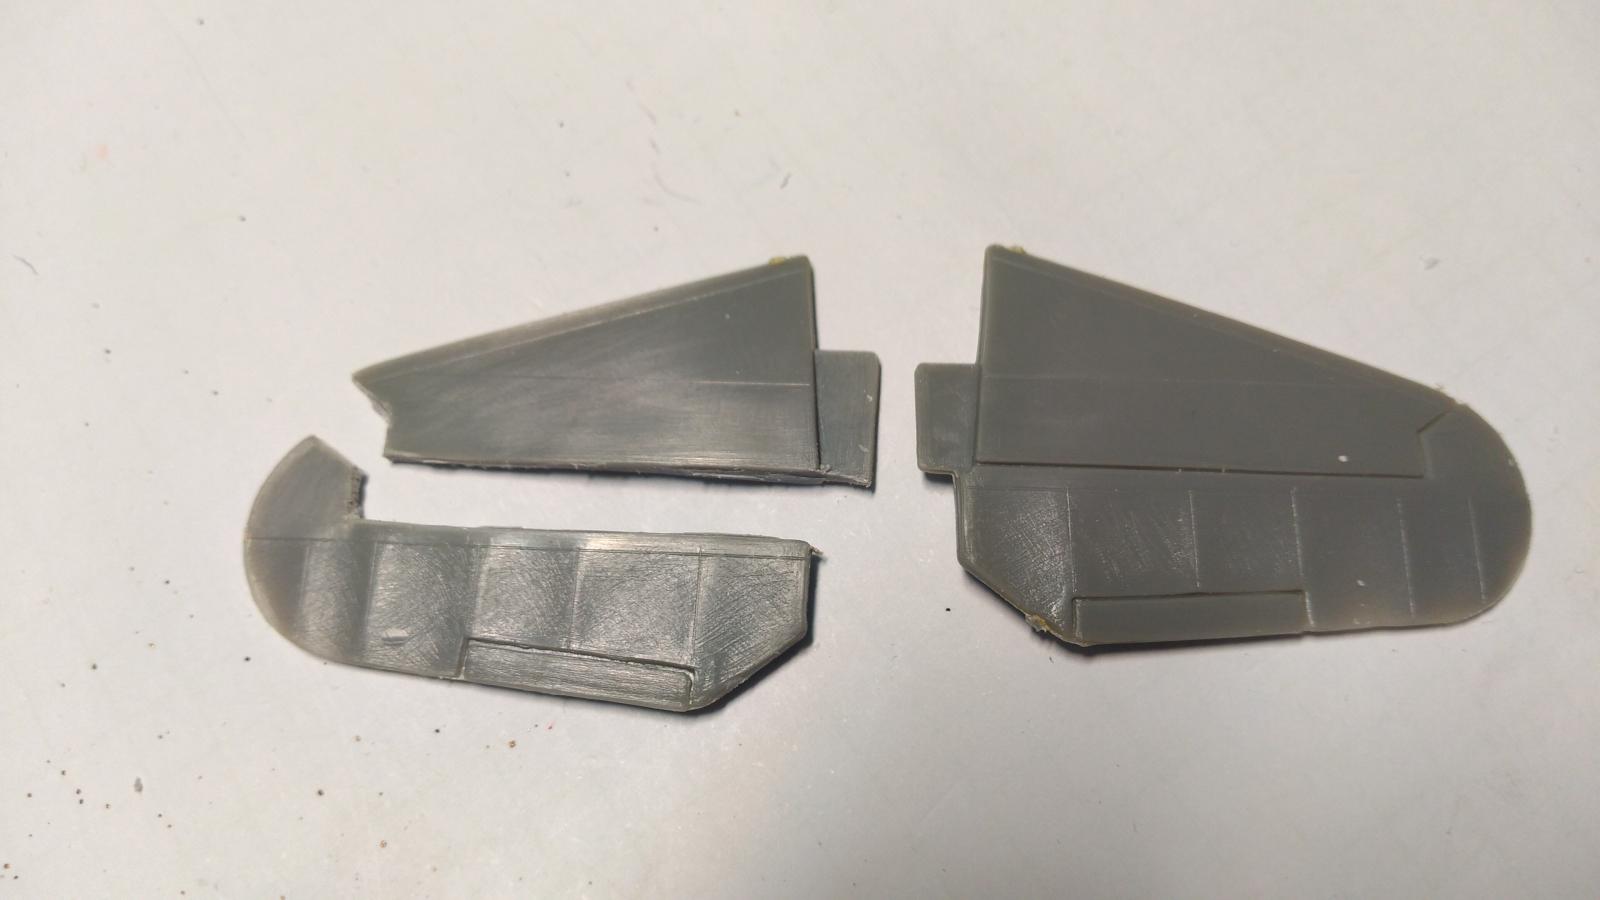
Ideas from Spiros @fiveten for cutting the elevators and lower them slightly and adding rods for the trim tabs, are well appreciated.
The idea from Louis @lgardner on how to mount the main wheels more easily in the wheel covers was very helpful as well.
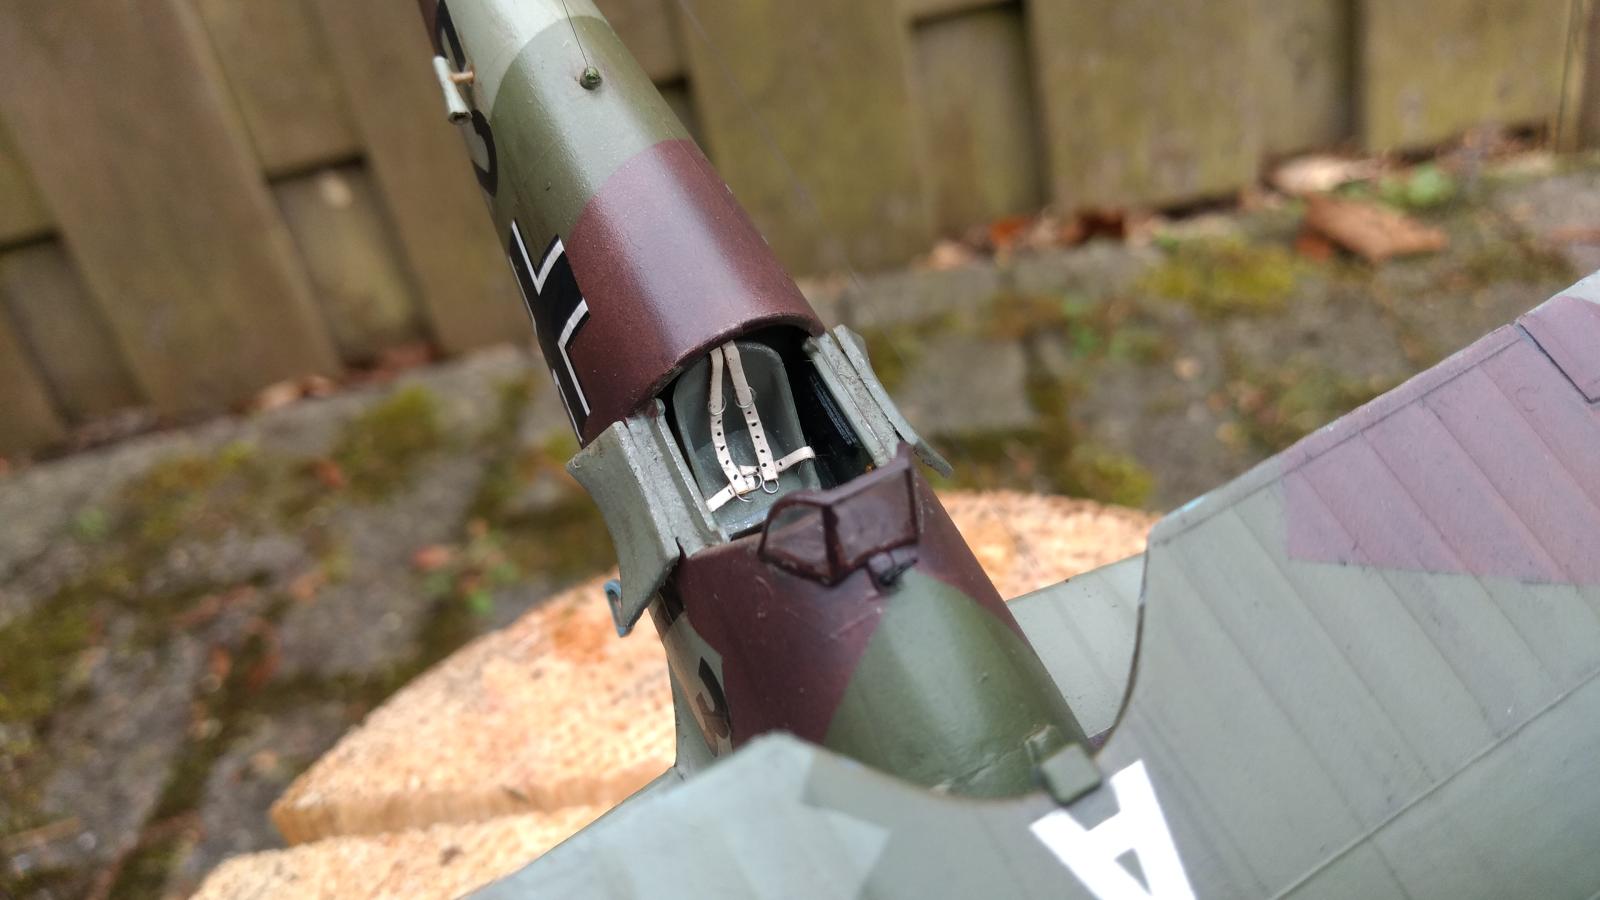
Using the GasPatch manual is very helpful since this contains lots of details which are not present on this kit.
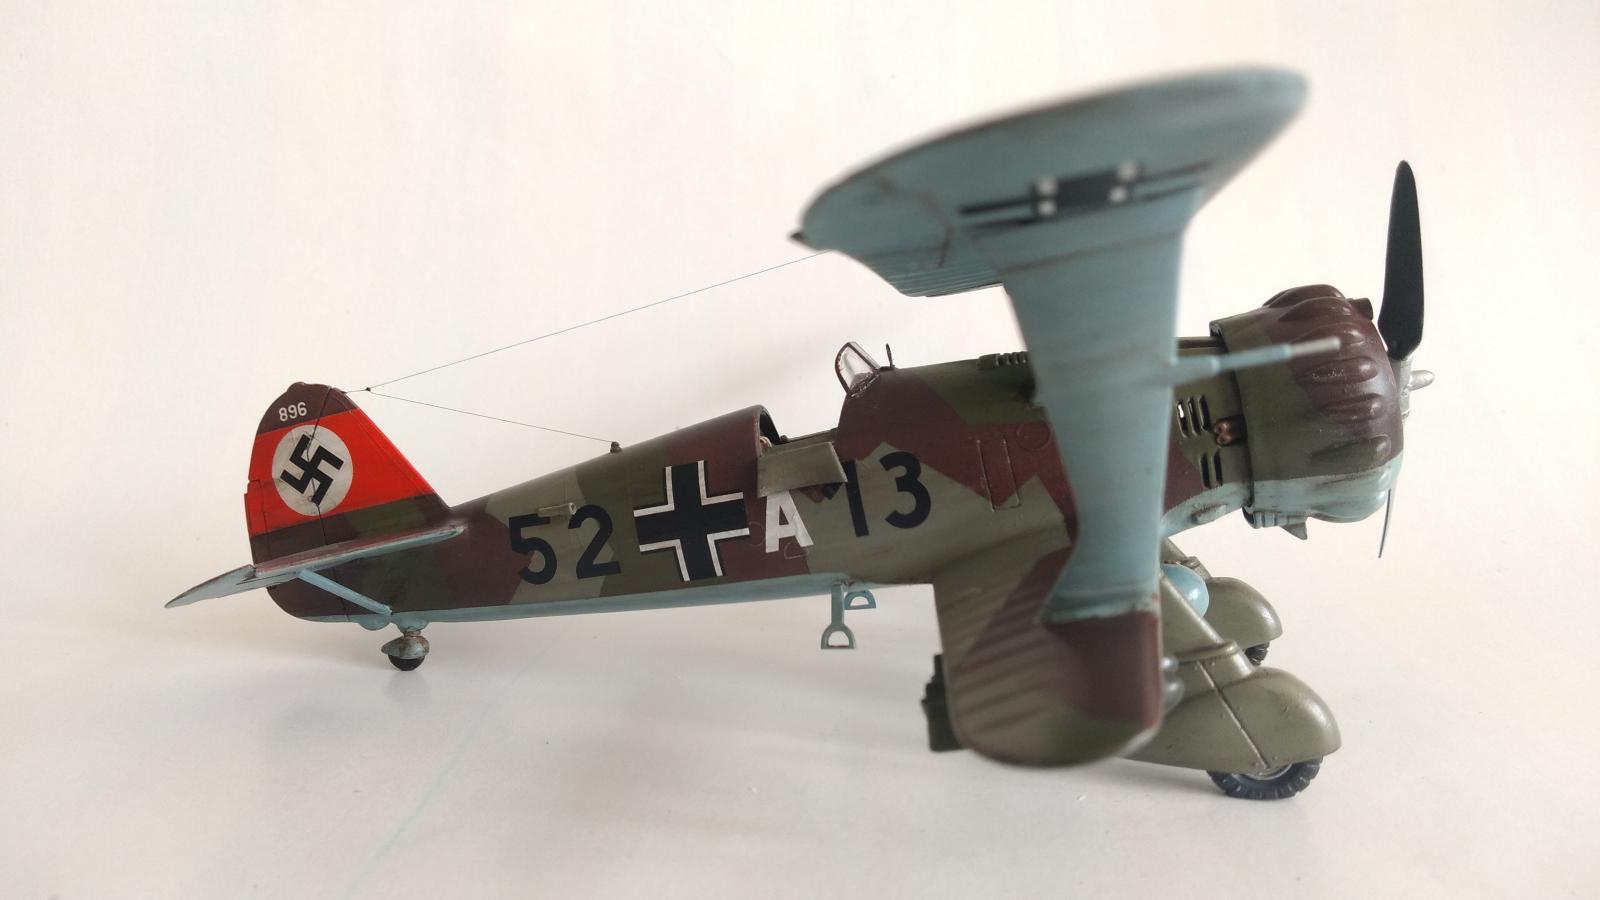
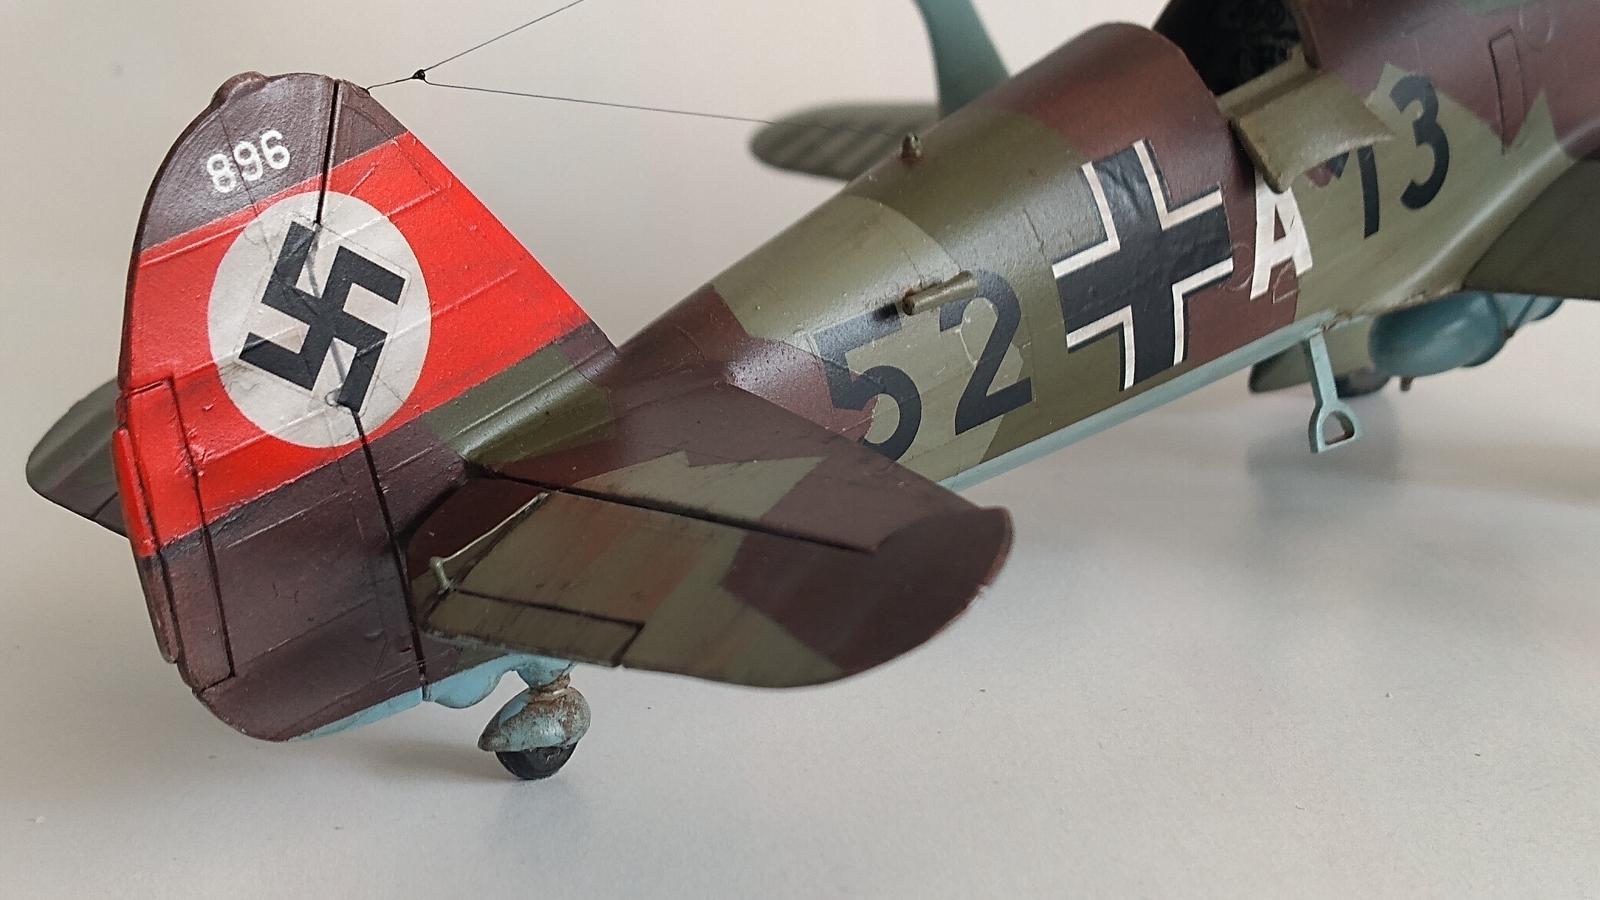
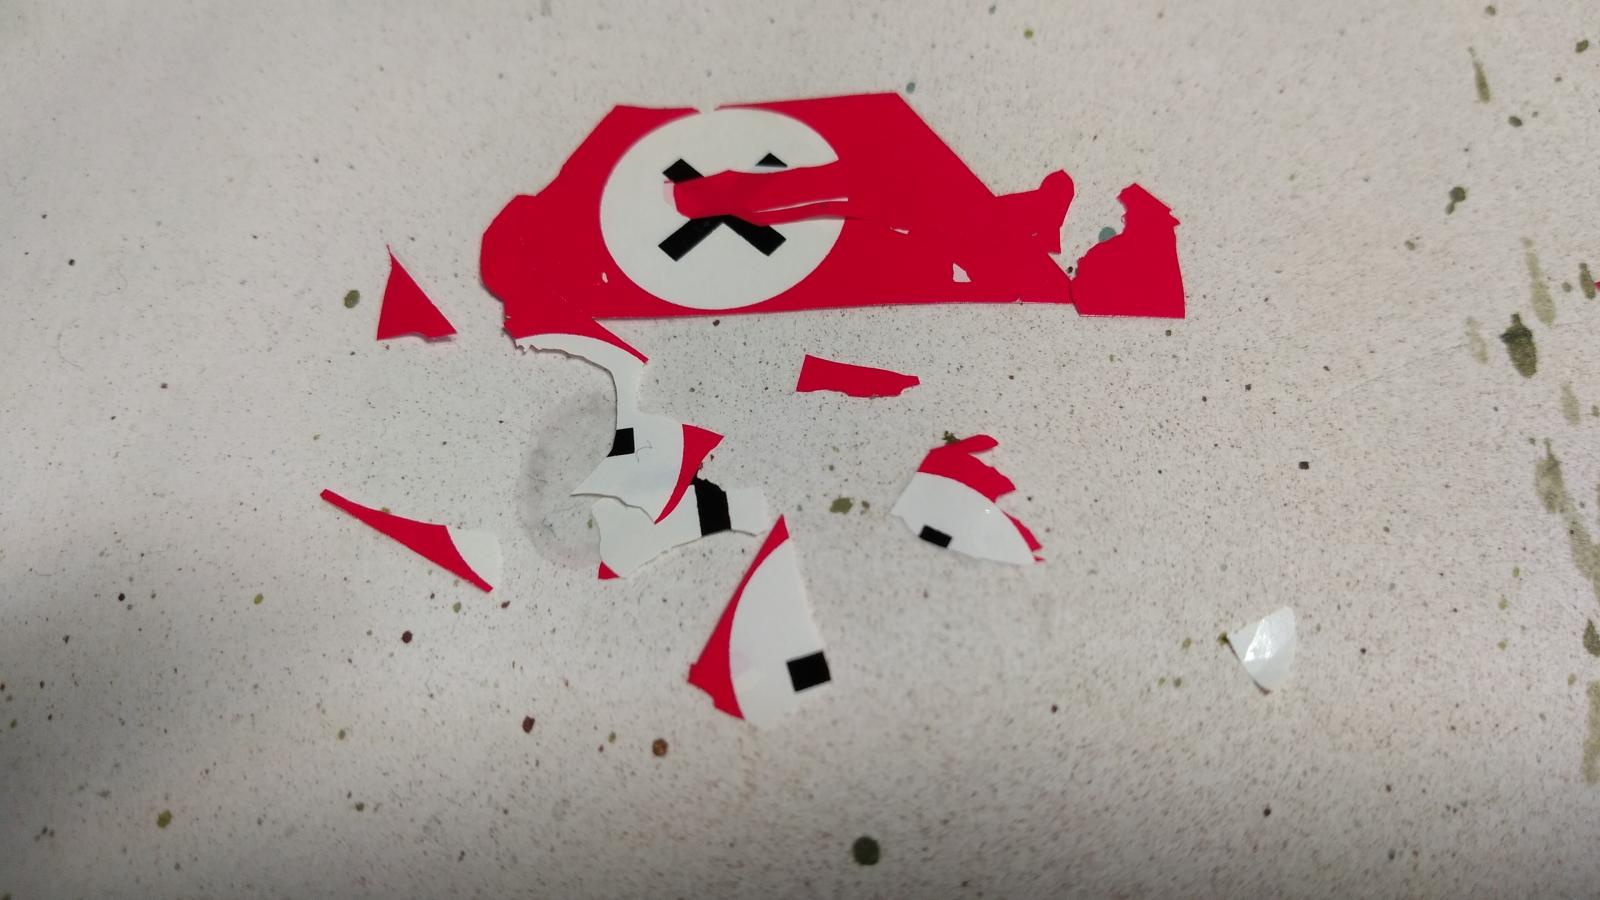
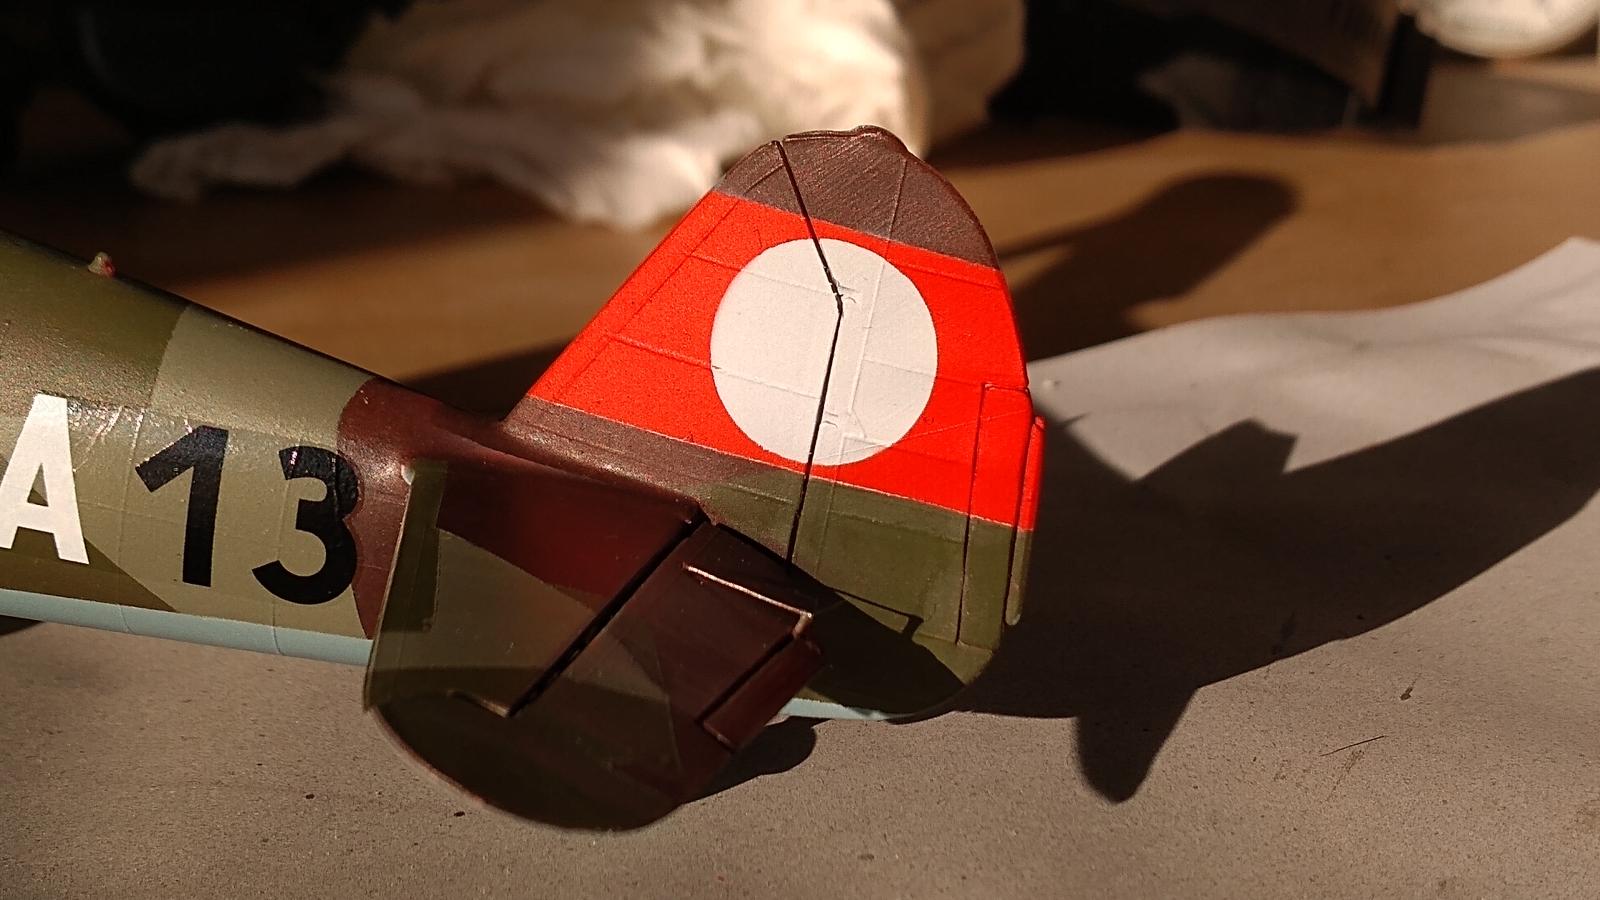
The decals for the tail section became a real struggle and in the end I decided to paint the red band and white circle by airbrush.
To my opinion it turned out not that bad, it does look more realistic than applying decals. The swastika still is a decal.
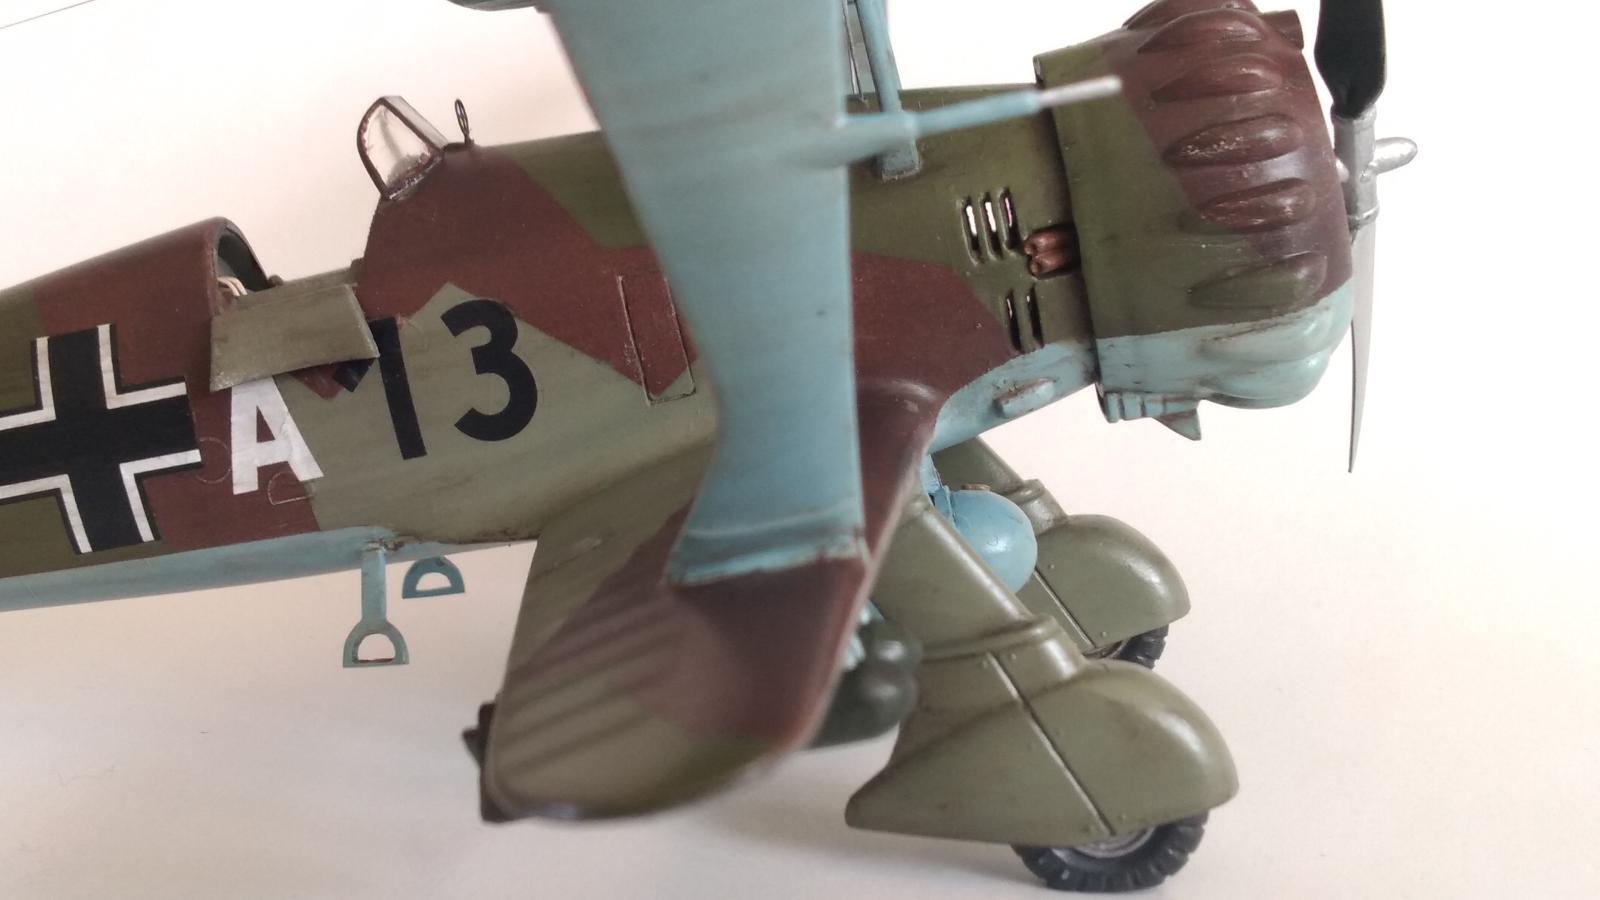
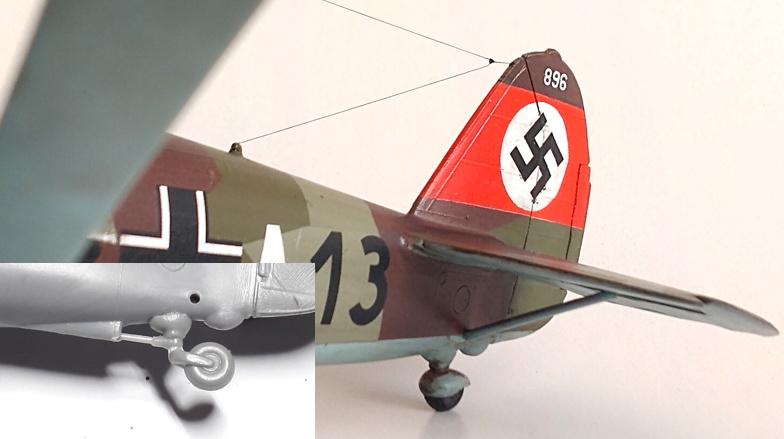
The original tail wheel from the mold had to be removed entirely and rebuild from scratch.
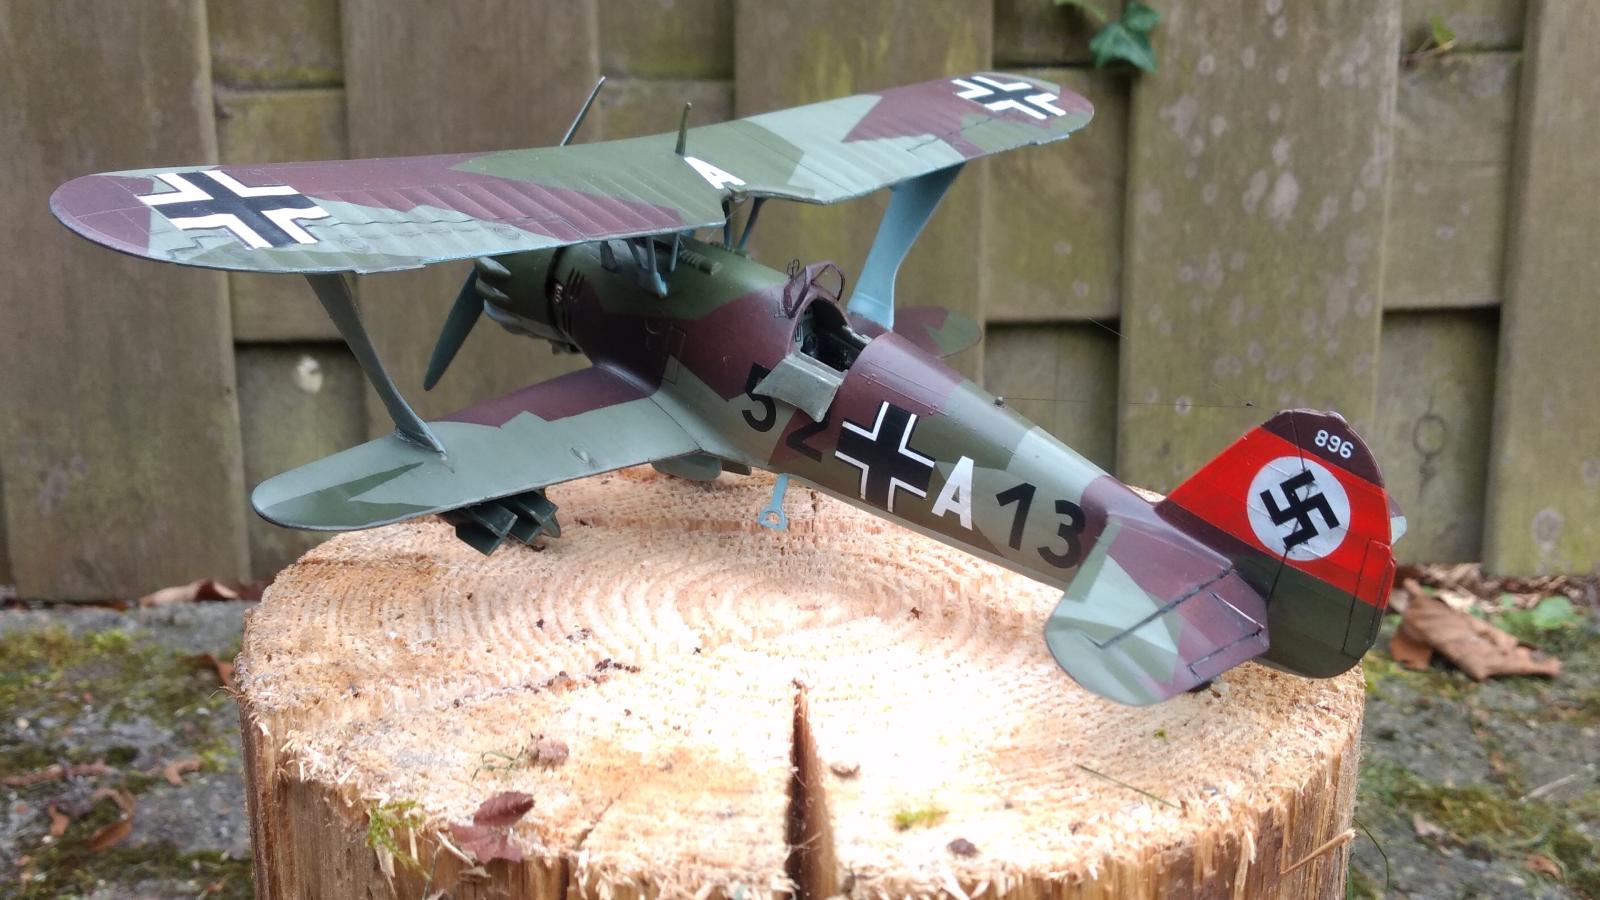
Improvement on the painting can still be done, you can see the demarcation lines where paint built up against the masking tape, Tom @tcinla has notified me about this on previous builds but I still need to improve more.
I did some more intense weathering, but on some areas I think it is a little bit to much.
Nevertheless, I'm pretty happy with the outcome of this kit.
I would like to thank all the people who followed the thread and commented on the progress.
Special thanks to Spiros @fiveten for having this great combo build and his motivating words and extra challenges he brought up.
Also special thanks to Pedro Rocha @holzhamer for helping me out with the decals, for some reason the decal issues followed me throughout the entire build.
The list below show the extras I did compared to OOB:
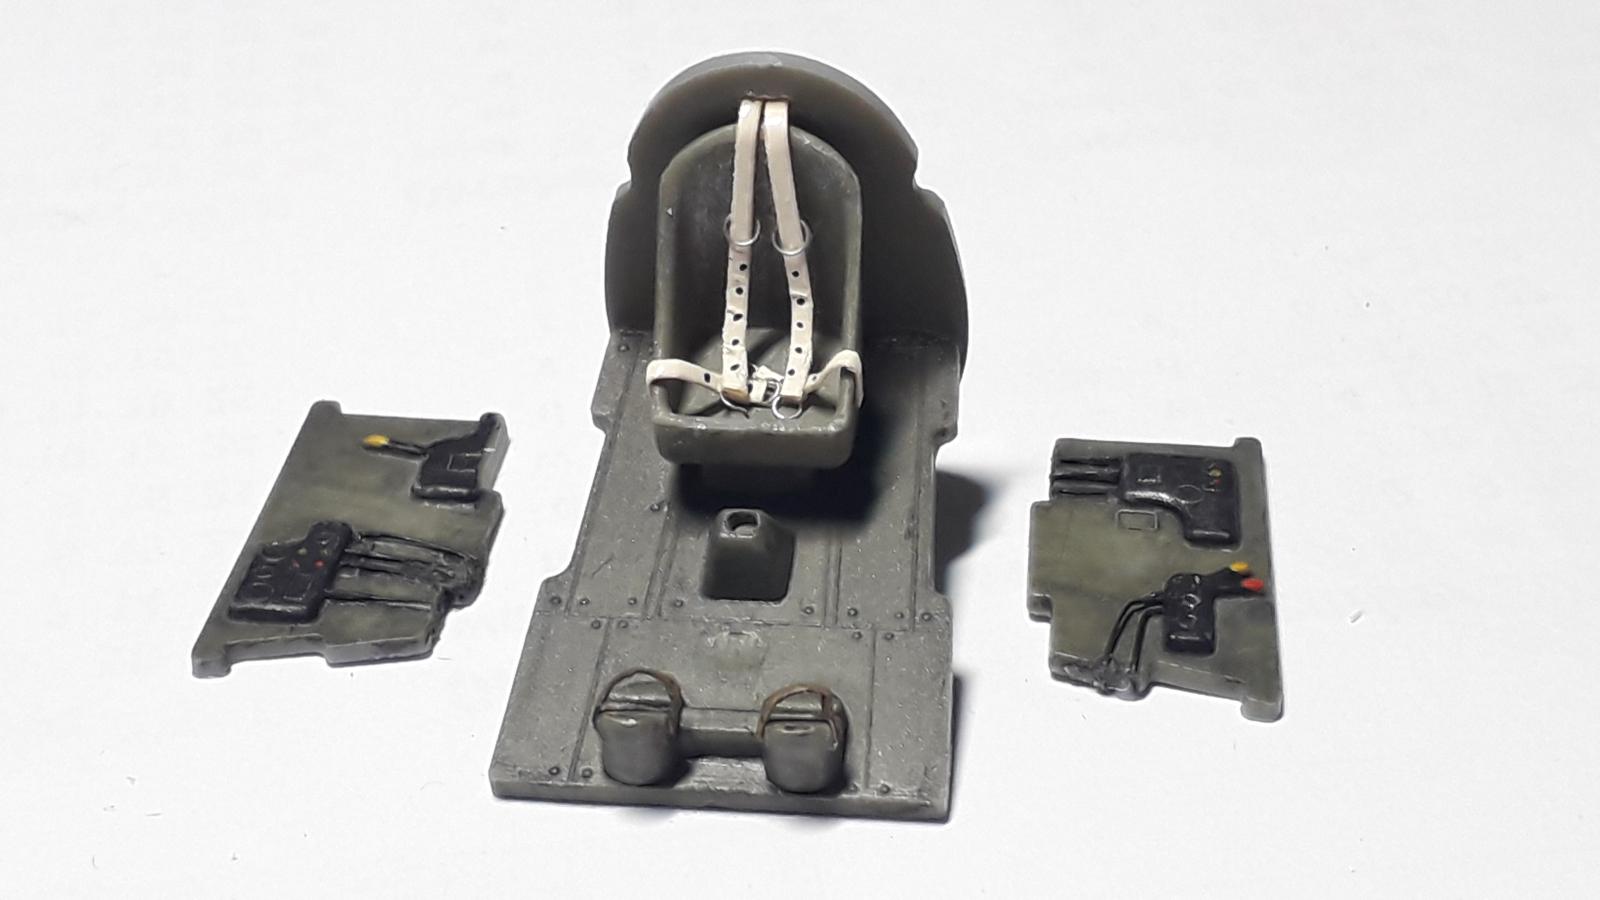
- Foot straps from masking tape
- Seatbelts from masking tape
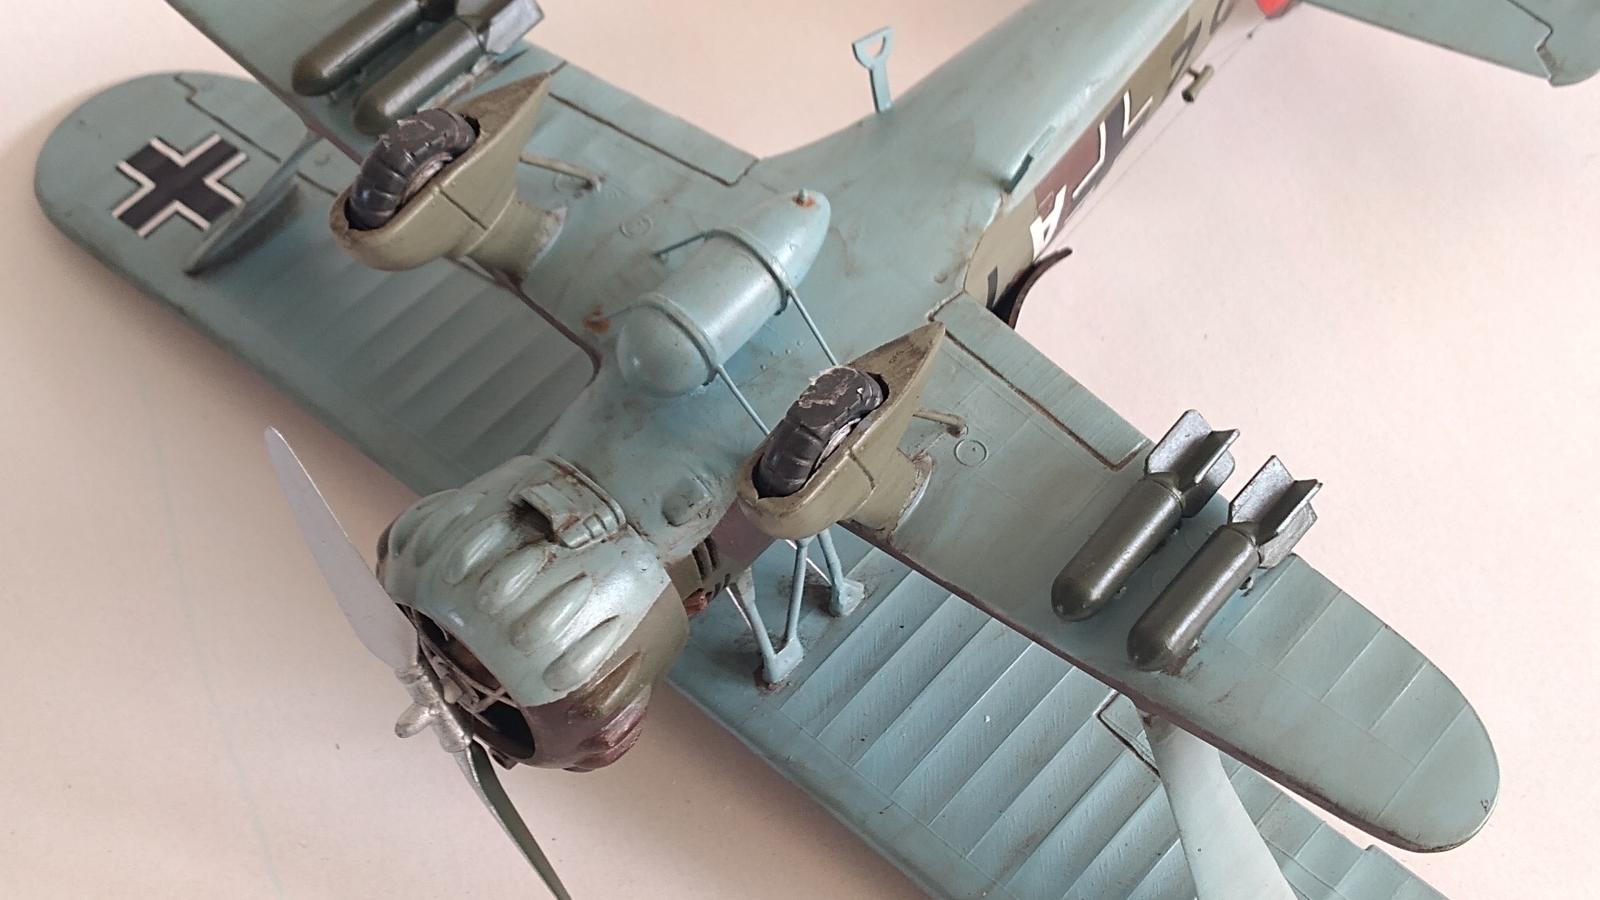
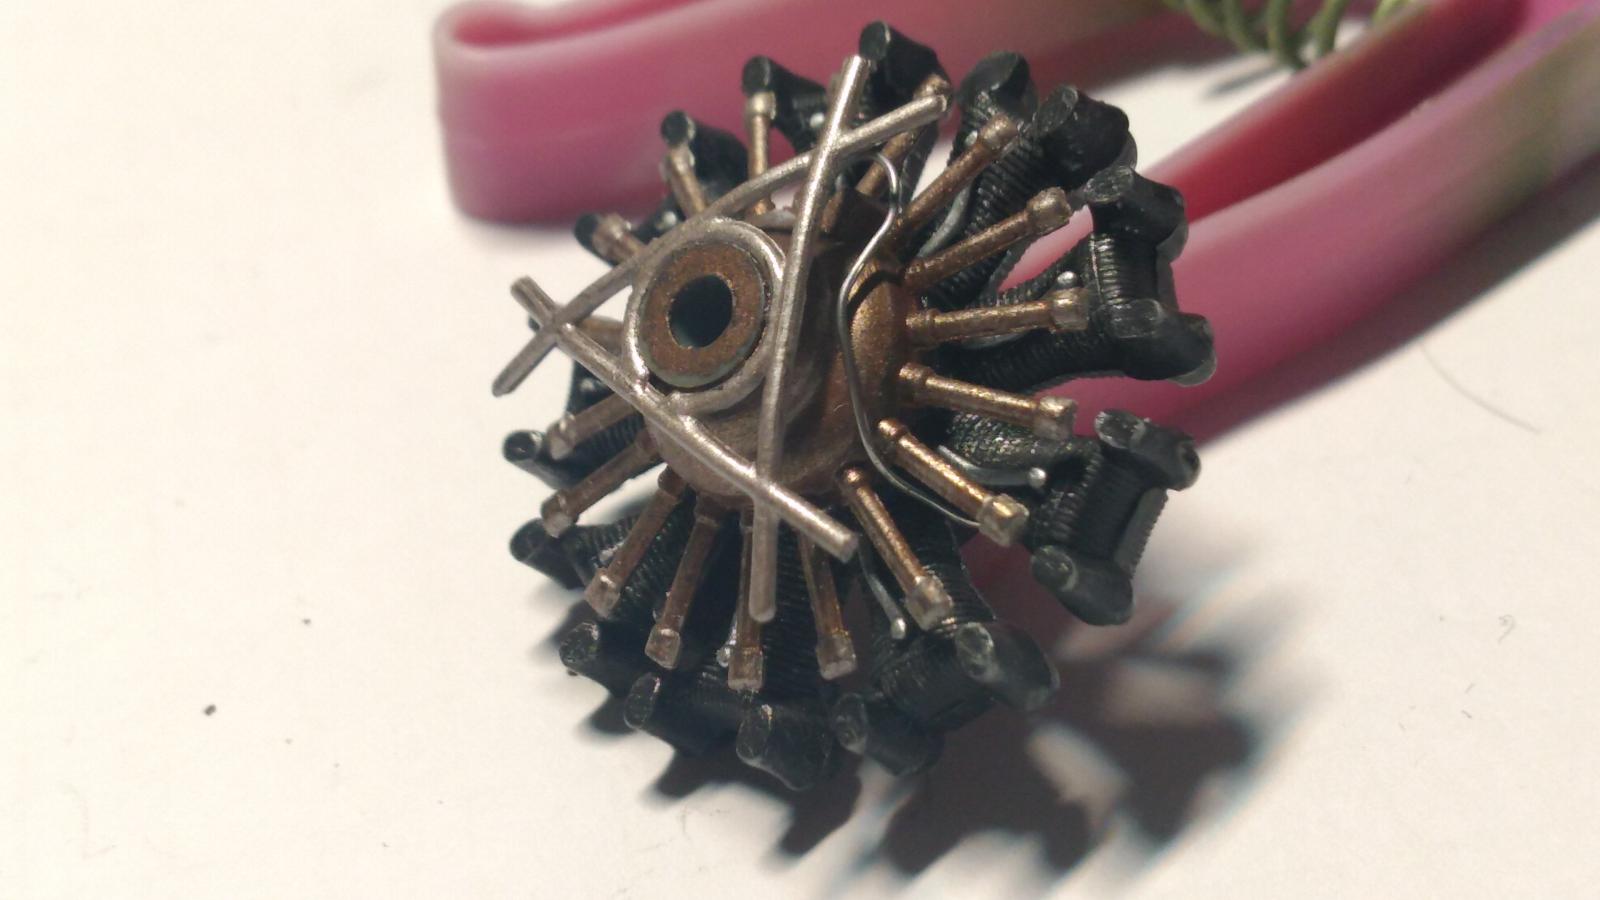
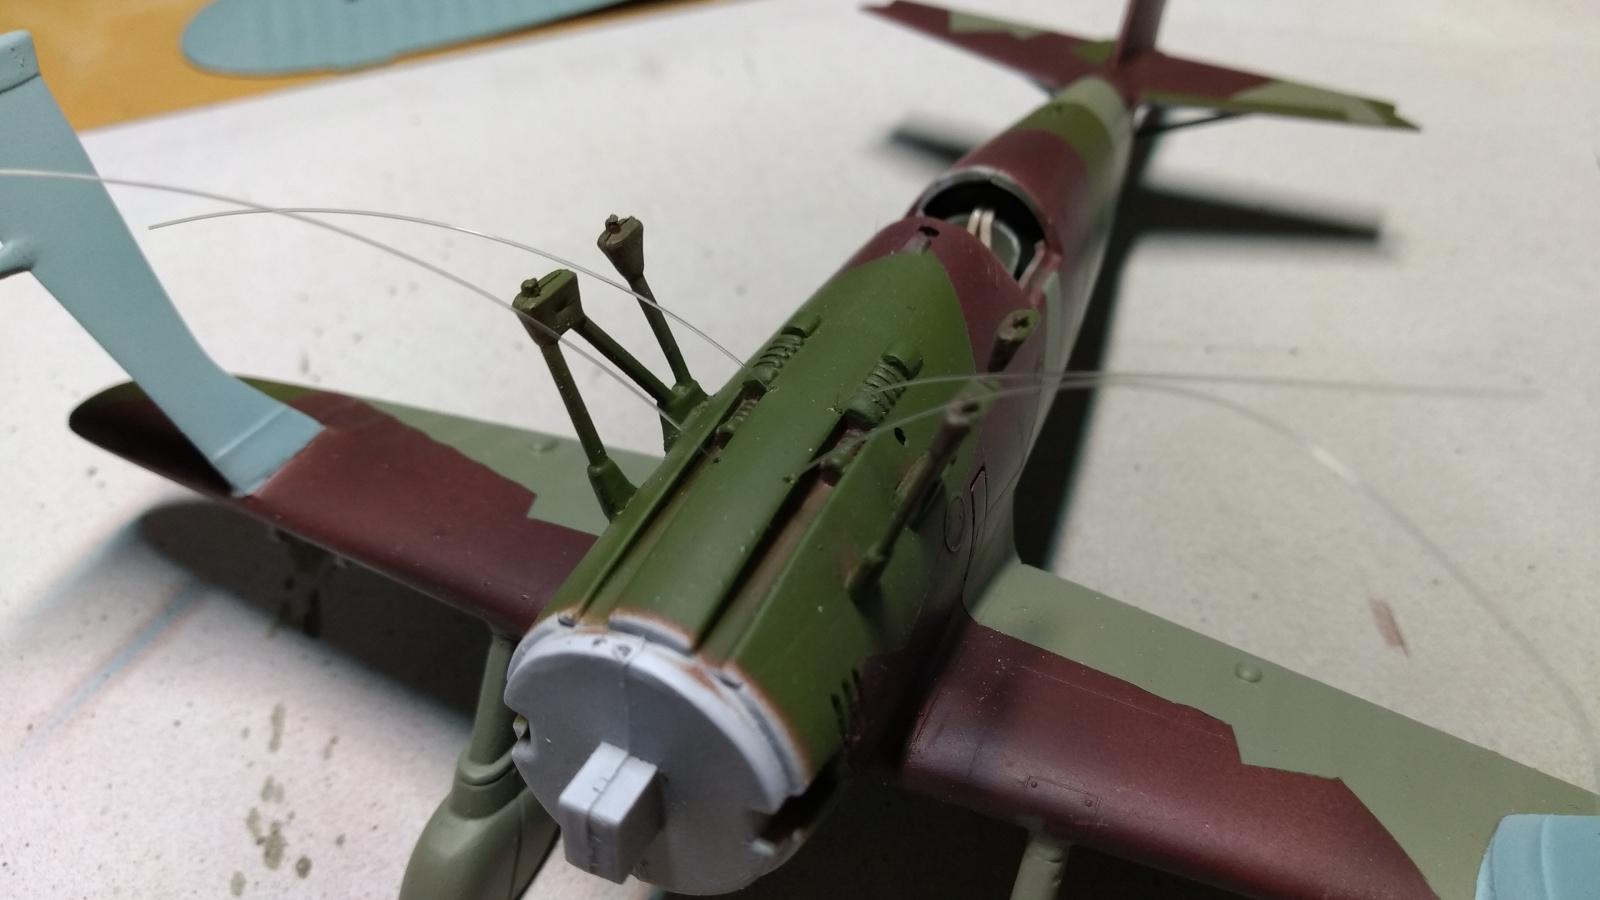
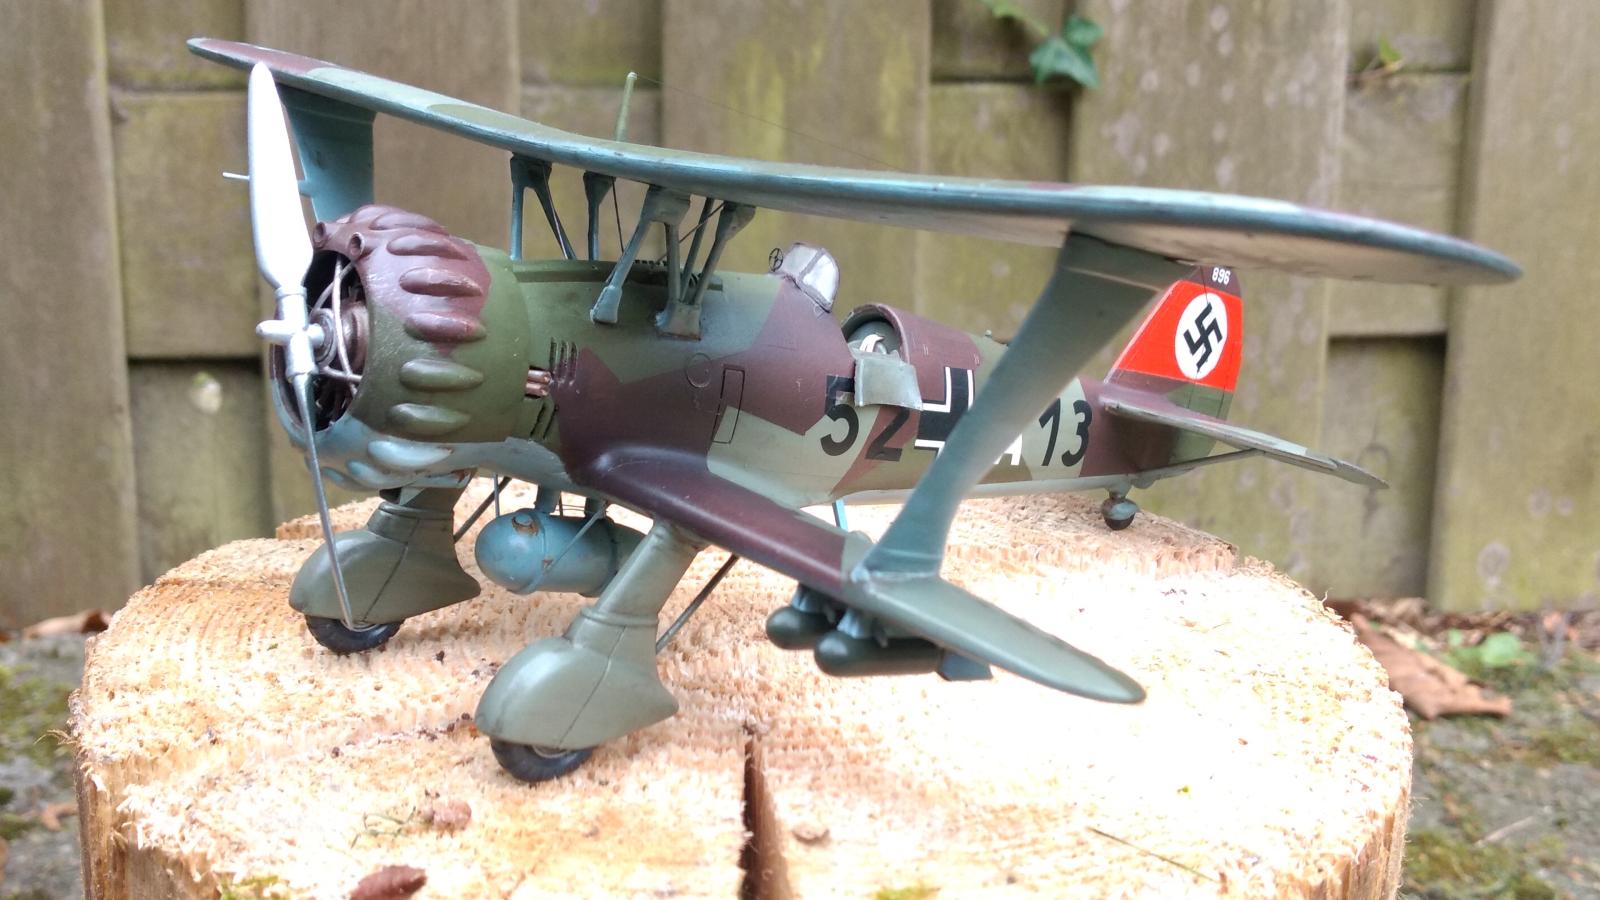
- Exhausts are drilled and shortened because they were too long compared to what can be seen on reference material
- Air vents just behind cowl openend for more realism
- Modification of the tail wheel to match the correct version
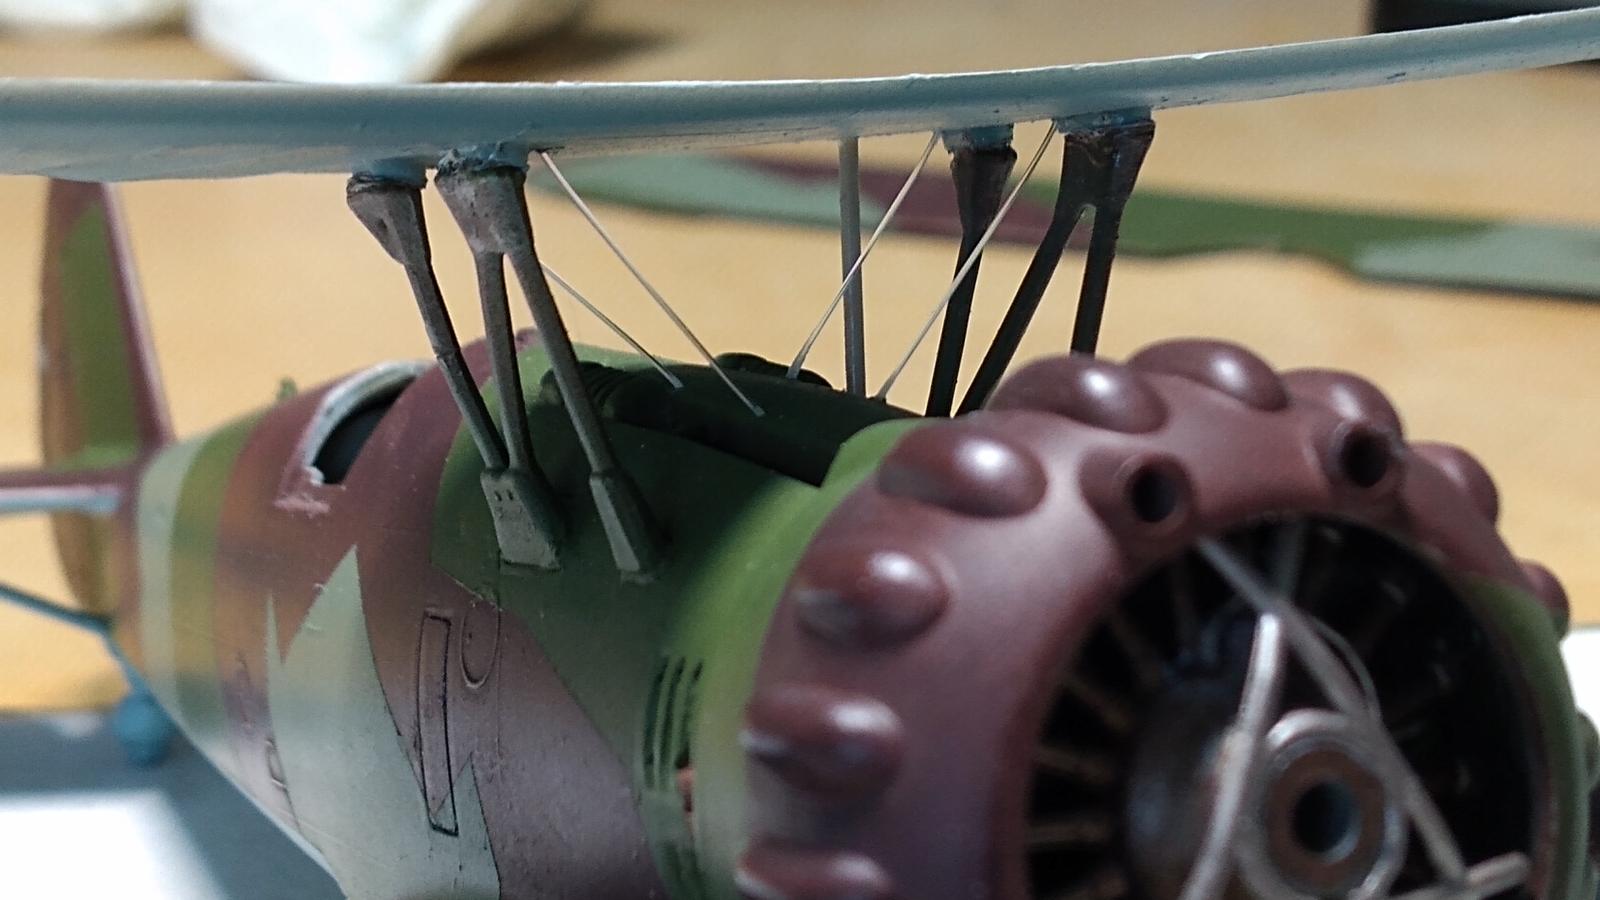
- Added a 'tube' on the engine which is also present on a lot reference pictures,
(not clear what the function of that tube is) - Cut the elevators to lower them slightly to give it a bit of dynamic view, thanks to Spiros @fiveten for the idea
- Rigging (just four wires) made from fishing rod
- Replaced the fuel struts by much smaller metal wire
- Fuel tank modified, less extreme fuel cap and valve
- Rods added for the trim tabs
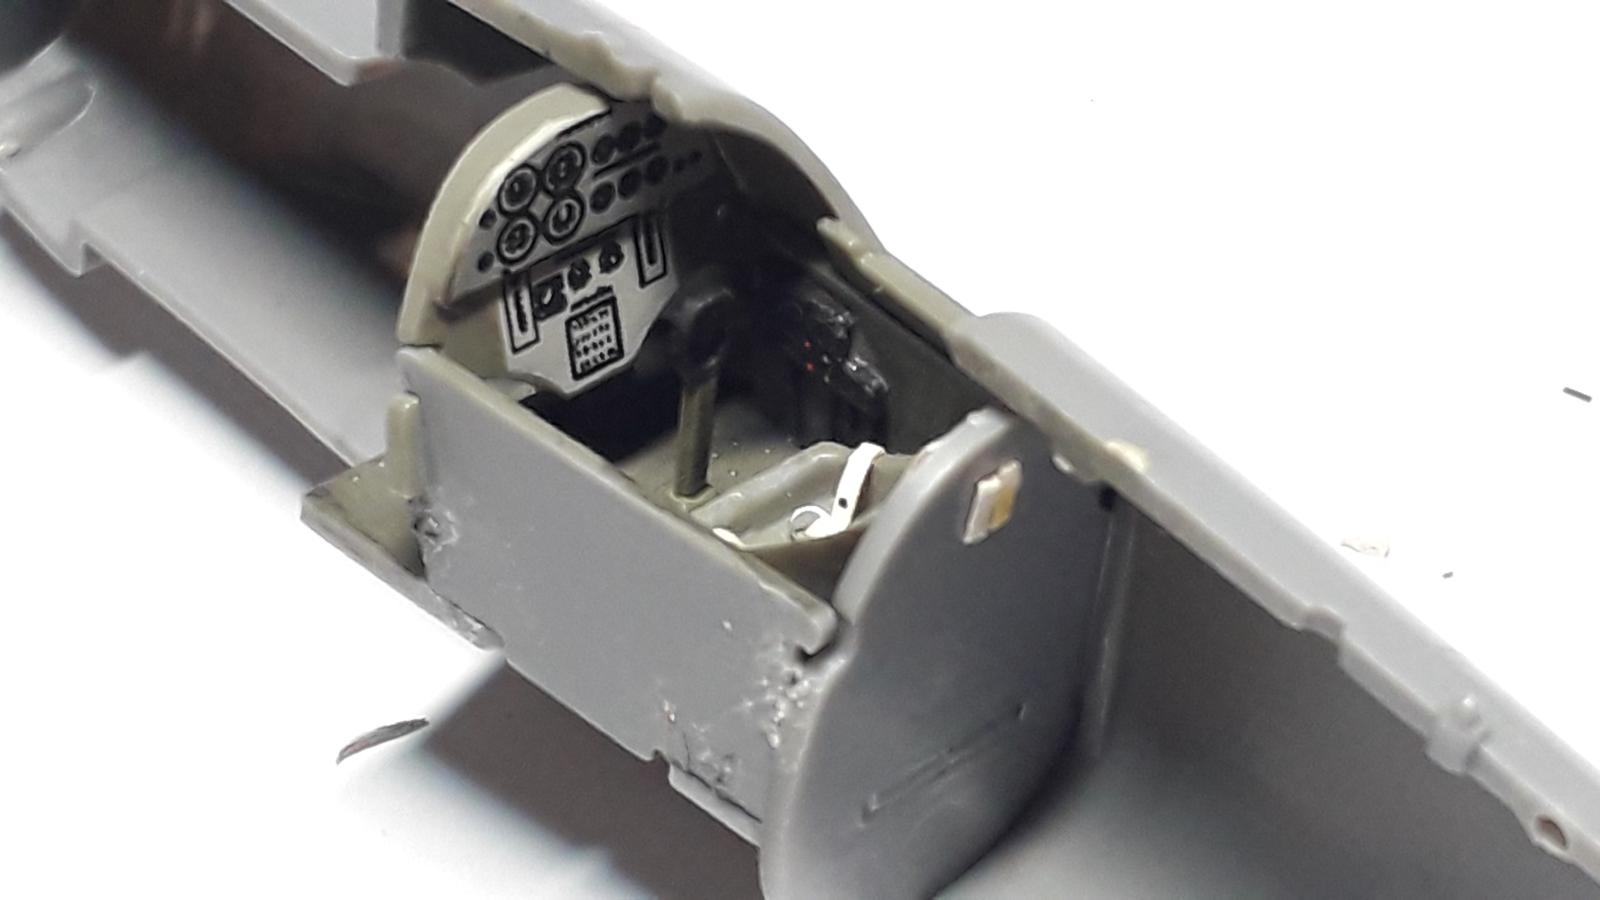
- Added gunsight, coming from a Fokker DXXI
- Decals used are from Pedro, @holzhamer, who was very helpful in sending me those since the orignal ones in the box were to brittle to be used
- Antenna wire from Ushi van der Rosten


-

- 1. Fokker DXXI gunsight
-
- 1. shortened exhausts
-
- 1. new rods
-
- 1. original tail wheel
- 2. scratch build tail wheel
-
- 1. masking tape straps
- 2. masking tape seatbelts
-
- 1. added tube
-
- 1. warped

-
- 1. rigging mounted to the fuselage
-
- 1. exhausts shortend and vents opened

-
- 1. leveller rods

-
- 1. rigging fixed
-
- 1. decal struggle
-
- 1. airbrushed

Very nicely done, John! That looks like a lot of work with outstanding results.
I have two bi-planes on my short list...this build is good inspiration.
@johnb
@gwskat, thanks Gary. Love to see your bi-planes being build.
That turned out great, John. It’s an interesting plane. Great paintwork, that splinter scheme isn’t easy to execute. It’s been s pleasure watching you guys build these Henschels.
@j-healy, thank you John. At first I thought the splinter camo was quite simple to appyl because of the straight lines, but it took more time and masking tape than expected.
What a wonderful result, John! You certainly took the most out of this old kit. The finished model looks nothing less than spectacular and your extra work makes it even more attractive! Your build thread was equally joyful to follow. Thank you so much for giving me the pleasure to combo build with you: an honor, indeed, hoping to repeat it the soonest!
@fiveten, thanks for your positive comments Spiros. The pleasure was all mine to have this build together. Your expertise definitely helped me to push harder and try new techniques, for example the surgery on the elevators and the addition of the leveller rods. Absolutely looking forward to another combo build as well.
Wow, looks great, John. I never would have given thought to building this particular plane, but your fine work makes me see it as a much more interesting subject. What you did to overcome problems with decals turned out to be a real benefit to the final result. Persistence pays off. Your color choices and masking of the camo look perfect. Masking tape details as opposed to stiffer etch for straps and belts are the way to go IMO. Great job there.
As always, lighting for your photography is top notch, revealing details and overall finish very well. Interesting pose on the handy tree stump!
@coling, thanks a lot for your comments. In the end I'm happy that I painted the tail section instead of using the large decal. Painting just looks more naturally. I did shoot some pictures outside to see the differences between in- and outdoor colors. The pose for the interior was indeed quite tricky.
@johnb
I too think that your resilience paid off John. The finished model is much more than just the basic plastic pit together and painted. I know by experience that any splinter tone scheme is a tape nightmare, even more so considering this is a biplane, so kudos to your fantastic effort and very appealing paint work here. Thumbs up!
@holzhamer, thanks a lot, Pedro. With the help of the decals sent by you, I was still able to build it like I had in mind. Thanks again for helping me out.
Looks amazing John. Thanks for sharing on how you put this kit together.
The enhancements make it look like the real aircraft.
@bernardbedeur, thank you Bernard.
Nice work. Looks like a tough build
@mercenarymodels, thanks a lot Joe. I would call it challenging at some stages, but absolutely doable and fun to do.
@johnb - your new photos really show the superbness of your build. Your thread was terrific.
@eb801, thanks Eric. Had to wait for a couple of days to have a bright day for taking the pictures.
I am shocked by the quality of your work! It turned out really well, and the set is still very old. I can see the decals changed their physical state. Oh meh! Besides, I'm glad that you used the swastika decal, because I am struck by the models that are really well made and have a square or a cross on the tail. I know that it may offend some people, but I think the plane is supposed to be the witness of the epoch. And what she was like - everyone can see.
@lis, thank you so much. The swastika is part of history (not the best part), but I do agree that it should be present on models just to represent how it was.
For the same reasons the Soviet trip and the symbol of imperial Japan should be banned...
Nice build, I really like those early pre-war Luftwaffe camo schemes. It really adds a lot to the build of the plane. Nice work on this kit, I am not really a fan of ESCI, so my hat off to you on doing such a great job!
@luftwaffe-birdman, Thank you Walt. I am also in favorite of those early schemes. The kit is not state of the art, especially not when compared to current kits but it still builds quite nicely.
@johnb, Wow John! ? Your additional work has sure elevated this kit to the "above and beyond" category! Great work and a superb result! ?
@garybrantley, thank you Gary. In a combo build you definitely try to do something extra. Some of the ideas from Spiros @fiveten where great and improved the looks of this build.
Really great job on this old beast. @johnb You did an excellent job on cleaning up the 2 piece engine cowling.
@dtravis, thanks a lot Dale. Those did indeed require some attention.
Things look like you were very busy John, with excellent results.
Nice to see this old kit built with great skill.
@georgeswork, thank you George. It took indeed more time than expected at first. But it was a pleasure to work on this kit.
It's very interesting that, without doing anything really "special" in your upgrade, you turned an "unspecial" kit into a very special model. A super result!
@tcinla, thanks a lot Tom.
You're a stouter man than I JB if it gave me all the trouble it seems to have given you I'd have probably launched it. You've managed to make a fine model out of this; your skills and patience are to be commended
@markh, thank you Mark. I have to admit that I had my moments of giving up as well, especially on the decalling.
Now that's what I like to see, and little TLC to bring an old kit to a higher level of realism! Well done! I have a couple of these in the stash, and really like that scheme - can you tell me the paint colors you used (PM me if you would)? Thanks!
@gkittinger, thanks a lot Greg. Looking forward to see one of yours being build. PM is on the way.