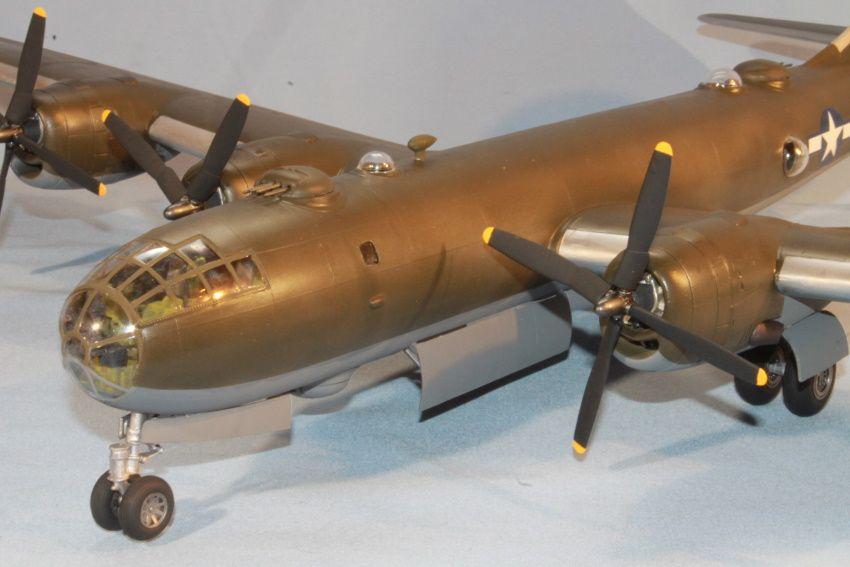
Monogram 1:48 Boeing B-29 Superfortress

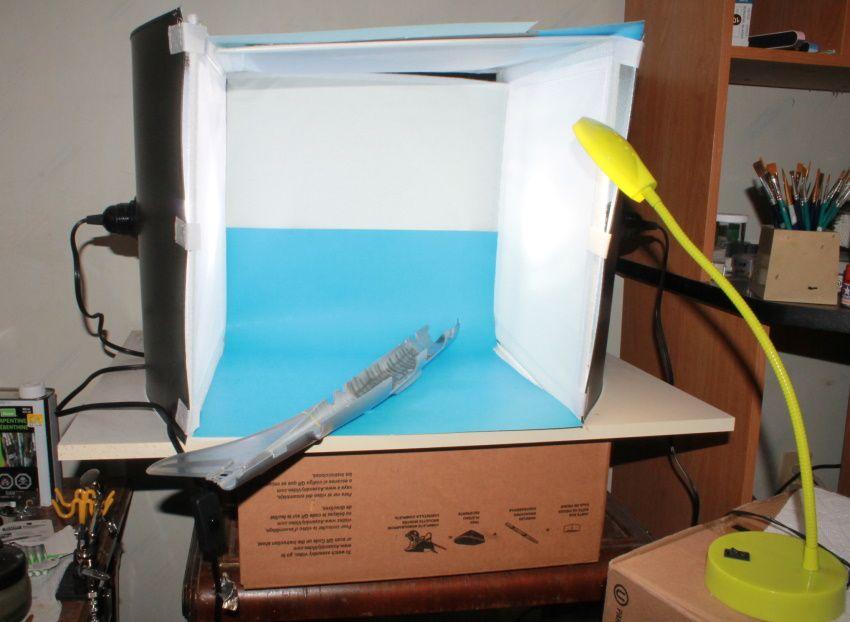
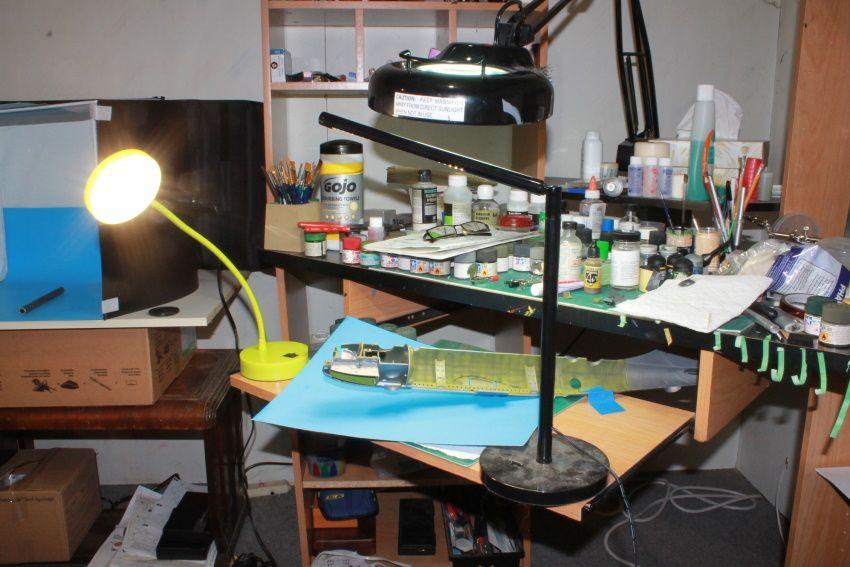
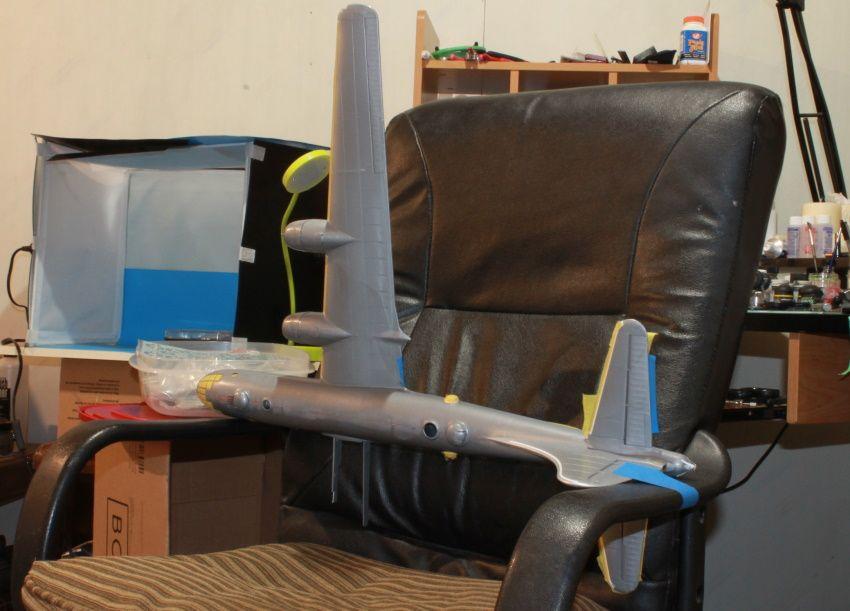
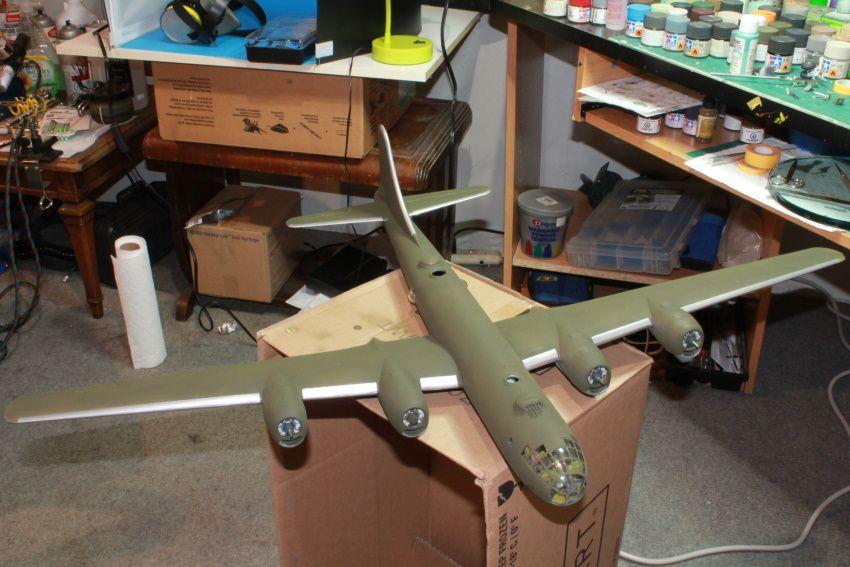
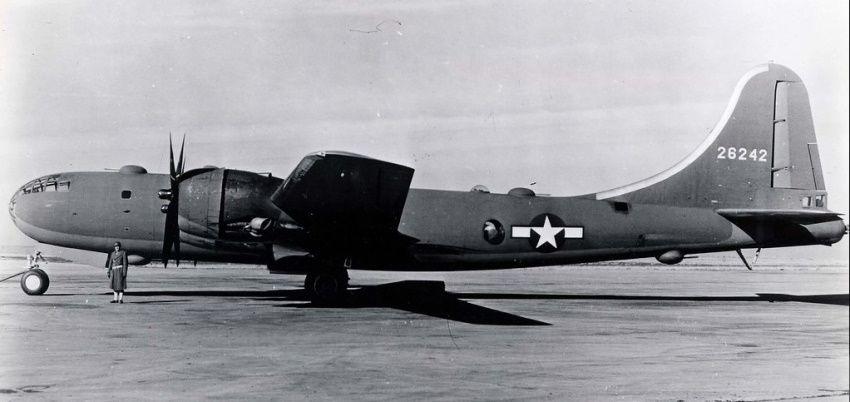
I had no intention of building this but trying to sell this online was not an option. The shipping costs alone are astronomical. So, given my penchant for oddball schemes, how to make one of 3790 NMF B-29's different. The first 40ish were camouflaged so throw some O.D./N.G on it. I found two photos of my subject but a third cropped up after I finished. More on this photo later. This B-29 was assigned to 794th BS/468th BG/58th BW of the 20th Air Force. It was declared "War Weary" in 1944, stripped of arms and converted to a bulk fuel tanker while the group was in China. As a fuel carrier it carried nose art, "Esso Express". I'll be doing it as before the conversion. I went through several builds as is my wont to see if there were any build issues. Most mentioned the canopy fit, the nacelle fit and the wheel well fit. I found that if I didn't glue the fuselage around the canopy and add spacers I got a decent fit. I ground out the insides of the nacelles and attached with CA, again decent but not perfect. The wheel wells didn't follow the contour of the inner wing so copious of CA was used but I was to find out later that this interfered with the wing spars. The fit of many of the interior parts weren't very good; no positive locating marks. In the end I left many out as you can't see them when everything is closed up. I sprayed the interior with a Tamiya mix for Interior Green and Nato Black. Closing up the huuuuuuge fuselage was the easiest part of the whole build but now presented a huuuuuge problem; how to wield this thing around without knocking everything off the desk or the neighbouring 3ft..The next hurdle was attaching the wings. Despite having spars they wouldn't line up. This was self-inflicted due to not getting the wheel wells in the correct position. I clipped off most of the spars and they slid on. The next problem is no positive gluing area for the wings. As huuuuuge as the wings are, its a butt join and you have about an ⅛" around the wing. Now I had to figure out how to let the glued wings set up. The right wing was the easiest, I balanced the model on office chair arms. The left wing attachment wouldn't allow this and after much pondering for a few days to ensure the glued left wing had set up, I jammed it between the cushions of a chair and left it for a few days. The penultimate problem...how to paint it. The model is quite heavy and very awkward to move around. If any paint reach the spray booth it was pure luck. For the OD/NG camo I used Tamiya and almost a full bottle of each. The final problem is the decals. Decals are from Fantasy Printshop. When the decals hit the model, they acted like scared limpets to a rock. It was only by flooding the area with water that I could get them to move but I managed to rip two stars and bars. They are very hardy decals and I managed to save them. Sorry for the long rant but I hope this dissuades any one from building it. And now the final photo I found. Its an over head photo and clearly shows that this aircraft only had two MGs in the upper front turret and no dome behind it. Had I found this earlier it would have been an easy fix. FYI...the wingspan is roughly 35¼" and was a pain in the keester to photograph


Sounds like an awful project thanks for the warning
Still, you've done it proud, it looks excellent especially considering the thing did not want to go together. You're to be commended for dedication, if it was me it'd probably have gone into the garbage bucket
Thanks Mark. It was close to becoming landfill many times. Just short of 5 months build time
Thank you for posting this, George. Looks great and will prove helpful in my kit bashing/altering of my ancient 1/72 MPC B-29. I intend to convert it into a turret less B model night bomber. If only I could find more info on the B series.
Thank you Carel. Good luck with your endeavour. I was unaware of the night bomber version. Korea?
Only positive waves, nice work!
Thanks Robert...woof woof
You did a great job on taming this beast George, it looks really nice.
Thank you very much Dale
A triumph of talent and skill and stubbornness over plastic. Looks great!
Much appreciated Tom
Amazing result, George!
Kudos to your skills and persistence!
Thank you my friend
Well done on the huge 'monster', George @blackadder57
You turned it into a great looking SuperFortress with lots of details.
It must have been a real nightmare to handle and build this huge aircraft.
Good you persisted because the outcome is really nice.
Thanks John. With the wings on there was no easy way to handle it. I don't know the weight of it but it was another factor
Nice job, George! Love the in process, "where the hell do I put this" shots.
Thank you Gary
Outstanding George, I've always wanted to see a B-29 kit completed in OD! Most of the first one's off the line were painted that way. Something that big would have compelled me use a rattle can for paint. Great persistence on your behalf and a job well done. Thanks for sharing.
Thanks Tom. I never thought of a spray bomb but with all the nooks and crannies around the engines I'm sure I would have made a mess of it
Looks great and I admire your perseverance and creativity in getting this done!- this is not an easy kit. A result to truly be proud of- keep up the good work!
Thank you. I must admit that there were a few times i would look at the model and then slowly put the sledge hammer down
Great completion George, that's a big model and looks fantastic.
I'd have to rent a room if I was to build something that big, I would have bought stocks in Tamiya Paint if I knew you had to paint this puppy.
Thanks other George. I was afraid of running out of paint as my closest paint source is 200km away
Looks great George . Your hard work paid off .
Large models give a special challenge in build and then ,where do I put this !
I recently put a few of my large kits up for sale for the very same reason.
Many thanks Bernard.
Humongously great, George!
Many thanks Eric
An interesting scheme for the SuperFort - well done!
Appreciated Greg
Yeah like the others all said great work on this ,I have a similar build here on iModeler , the only problem now is where to put the bloody thing ! mine lives in a home made cardboard box in the garage.
Thank you.
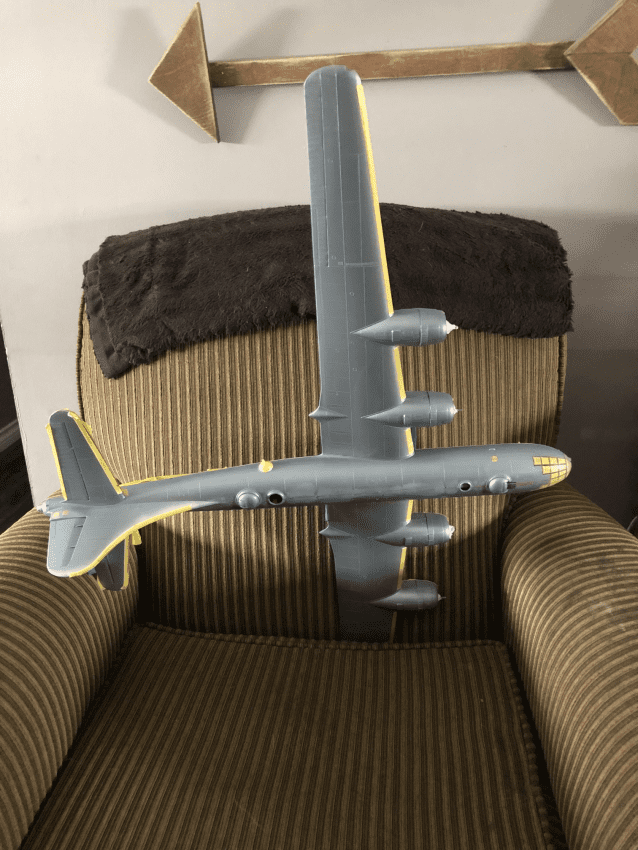
To all who have wondered where I am going to put this. It will be a dangler in my grandsons bedroom. As the bomb bay is open, I may add a string of bombs exiting it though it would be an oddity with the gear down.
@blackadder57, that's a great idea. I've got one to build one day, maybe. I had considered that the only good way to display it would be hanging, either from the wall or ceiling. I'm sure your grandson will love to see this hanging up. Great work.
Thank you Andrew
Looks great, George. I built one oob years ago for a guy who flew them. You are correct, it’s not an easy project.
Thanks John
I remember building mine several years ago. I needed a large modeling table and ended up using a dinner tray to hold it between building sessions. Nice job on a classic Monogram model.
Thank you
Looks great! I built a couple over the years and don't recall too many problems, but they were early releases and may have had less fit issues as the molds were new. I built a new release of the B-17 a couple of years back and was amazed at how poorly things fit since the last one I built over 30 years ago. At any rate, glad your pressed on it looks wonderful! I have a 1st issue in the stash I plan on building soon, I'll see how that goes!
Thanks Rob. Looking forward to seeing yours
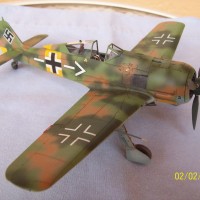
I am on my third one since childhood with one more first run in the stash. I may have to build yet another so I can have an OD one as well. I like the way the aluminum sets off the green after the deicer boots are removed!
As for big, I really don't think it's all that large... 😀
1 attached image. Click to enlarge.
Awesome
Well done job on a big beast. Mine stays in the box for a while.
Thank you Dan. Wise choice.
Lovely job George, what a project. youre right, early birds had no astrodome and 2 gun forward turrets. they also had their pitot tubes placed differently, being half way up the fuselsge circumference. they are best fabricated from thin card,as the kit parts are fine for a 1/24 scale model.
Thank you Mervyn