Handley Page Heyford
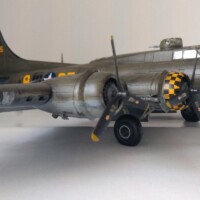
This is a fairly easy article in that there aren't many models of the prototype out there. The Heyford suffers from the same issue as all British (and for that matter American) interwar heavy bombers. There isn't much interest and only limited run manufacturers will take a punt. What is surprising is that we actually got an injection molded kit of the Heyford in 1/72 thanks to Matchbox. What isn't surprising is that it needs almost as much work as a limited run kit, i.e. the Contrail vacform to bring it up to an acceptable standard. It is heavily simplified and rumour has it, it was the kit that sank Matchbox. When Revell (owning the Matchbox molds) reissued the kit 'due to popular demand' it didn't sell either and it is still easy to find original Matchbox molds on ebay. No one has attempted a 1/48 version to the best of my knowledge.
Versions
The Heyford came in 4 versions the Mk. 1, 1A, 2 and 3 and the Matchbox kit allows you to build all of them though with caveats. It's actually a bit of a mixture with Mk. 1 engine mounts and a Mk. 2 fuselage. For an accurate Mk. 2 or Mk. 3 the engine mounts need to be raised a scale 18 inches but you could probably get away with leaving that change undone. As a bonus the Matchbox kit includes spats for K3489, the first production aircraft. This can be modelled by switching the numerals in the decals for K3498 (a standard Mk. 1). Matchbox also give you the option of dual control - a lot of Heyfords didn't fly with dual controls though.
Improving the Heyford
Matchbox simplified alarmingly. Firstly they omitted the prominent fabric ribbing on the rear fabric portion of the fuselage. This can be replicated by using very thin plasticard cut to shape and scoring lines along it with a ball point pen.
-

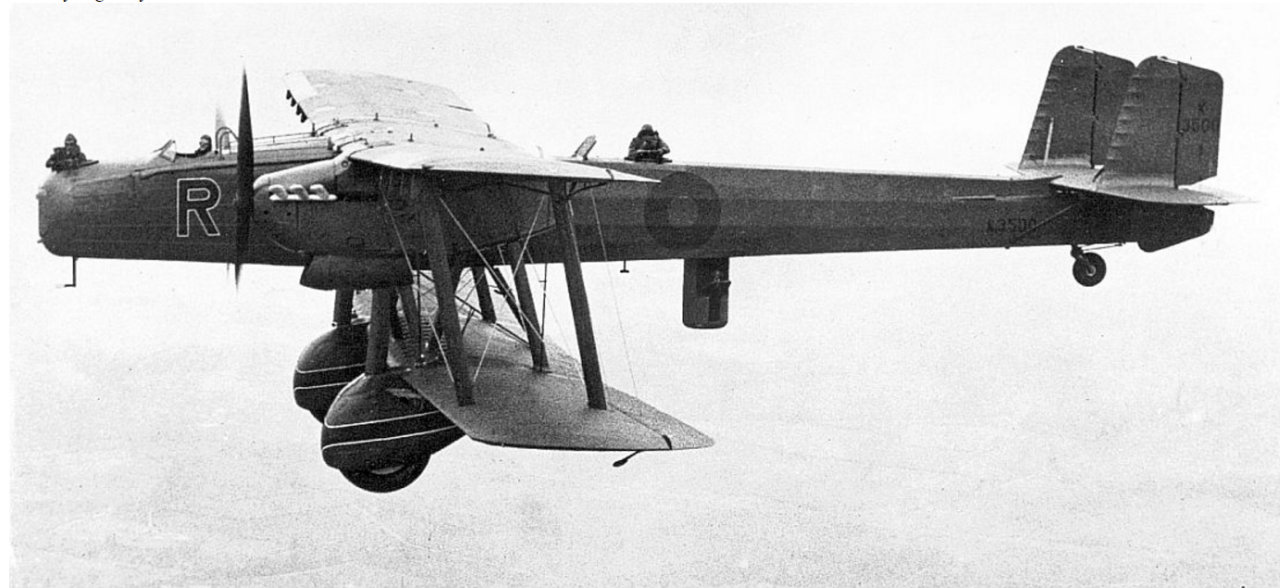
- 1. Mk. 1 in flight with the early two bladed propellers (Mk.1s were later fitted with 4 bladed propellers). Also visible, rudder balance weights, rear fuselage ribbing and aileron balance weights. The aircraft letter is red lined with white.
-
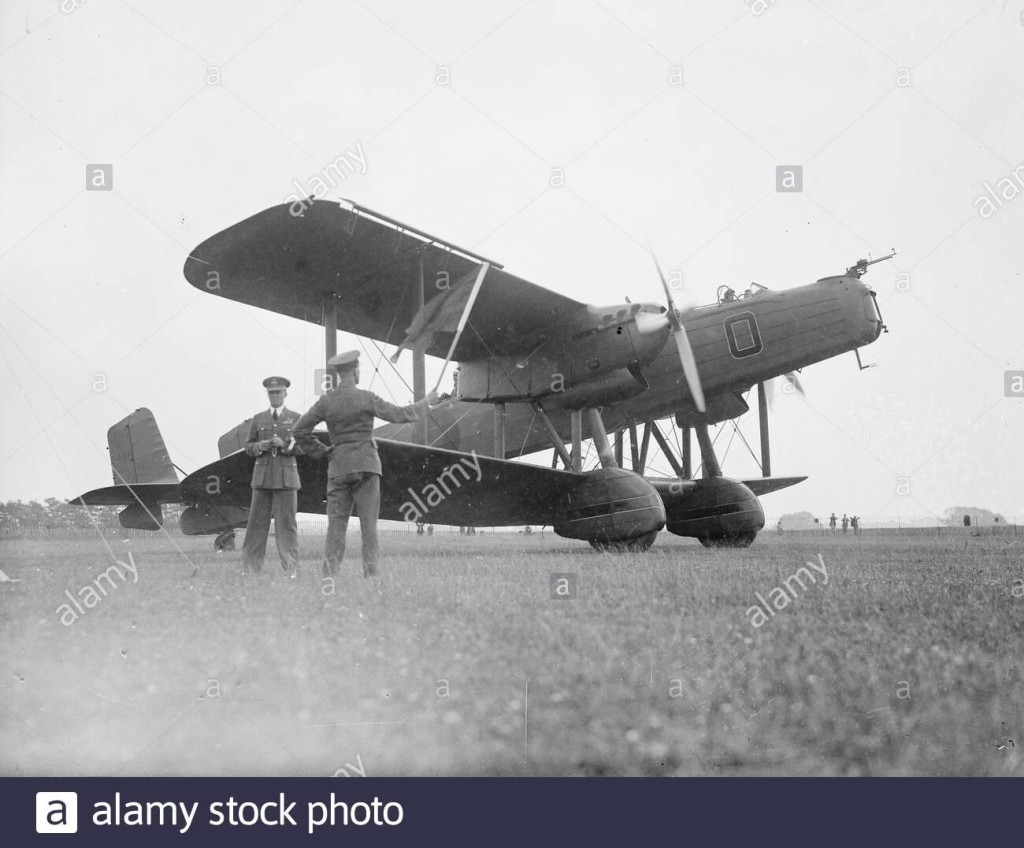
- 1. Mk.1 showing the early position of the Vickers Potts oil cooler under the wing behind the exhausts. Also visible, the cut out behind the exhausts and the opening in the nacelle behind the propeller.
-

- 1. Mk.1A of No. 10 Squadron showing the later position of the Vickers Potts oil coolers under the exhausts. These were on the same side of the nacelle.

Detailing
This is a matter of taste but the cockpit needs more as does the front gunner's station. The rear gunner's station also needs work. External details to be added include fuel vent pipes, pitot tubes, aileron balance weights, navigation/position lights, rudder balances, gun rings and Holt flare brackets. Replacement Lewis guns can be easily obtained - FineMolds, Gaspatch or Master do superb replacements but finding the right gun ring is a bit more difficult. The Heyford didn't use a Scarf ring but a Hawker gun ring. These used to be obtainable from Aeroclub but no longer. The aileron balances can either be scratch built or Quickboost Wellington balances can be used. The light bomb carriers can come from the Steelworks or Eduard sets with the larger carriers (if one chooses to fit them as frequently they weren't carried) from the Steelworks set. Holt flare brackets are more problematic but can be scratch built. Vickers Potts oil coolers can be Steelworks or one of the other brands.
Colour schemes
Overall NIVO for almost all aircraft with one or two aircraft camouflaged late in life. Matchbox cover one of these Mk. 3s on their decal sheet. Some Heyfords were apparently also painted yellow. The Heyford carried roundels in six positions with serials in black and aircraft ID letters in flight colours. Some aircraft had the flight letters in 4 positions others just on the nose. Squadron badges were also carried by No.7 and No. 10 Squadrons.
-
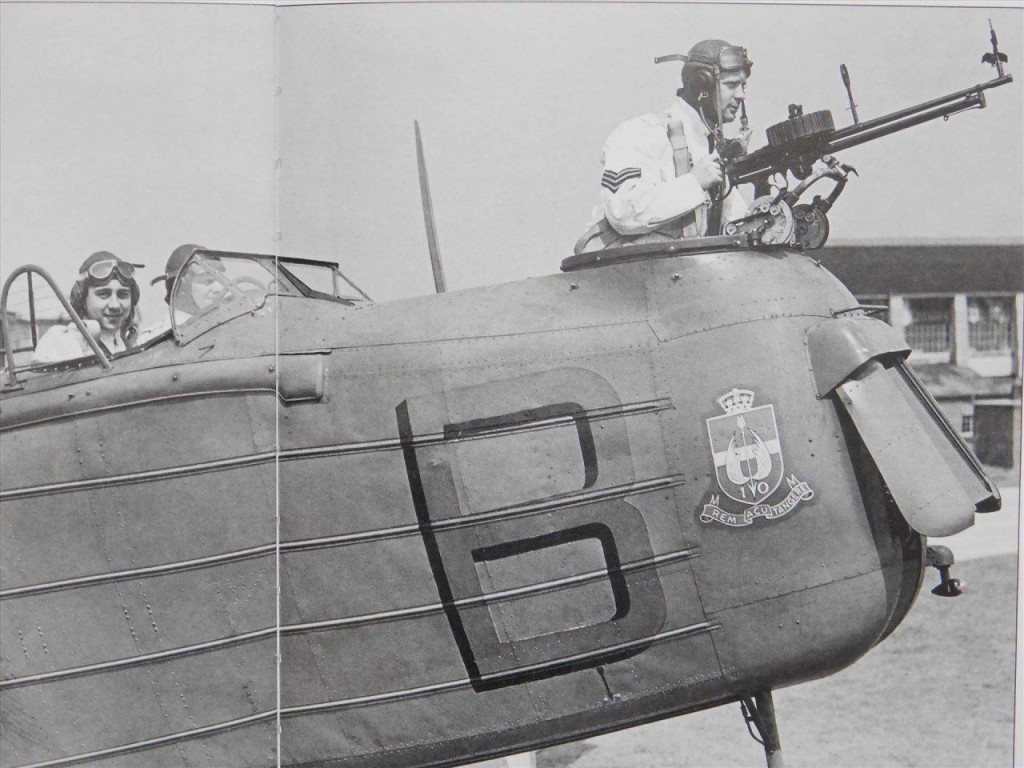
- 1. The nose of a Heyford showing the front position light and the Lewis gun on the Hawker mount. The No. 10 Squadron badge is blue over red and the aircraft letter red countershaded black.
References
The main reference is the old Profile Publications No. 182 dedicated to the Heyford. One can also buy the AP (the RAF guide to the aircraft) to download and this is invaluable though most of the photos are Mk. 3s. Photos are also readily available to download.
The Matchbox Heyford is a fun build but also a lot of work to turn into anything reasonable. When built though it really does shine out as a centrepiece in a collection.


Another very informative and well written article, Christopher!
Thanks for sharing all this very useful info.
You are right that there isn't much modeling interest in inter war heavy bombers and it is a pity, as the finished models are (or would be) very imposing.
Many thanks Spiros. I agree but size is probably the issue. Tooling up something that big especially in injection molding would have to generate a lot of sales. If it's resin it would also be extremely expensive and of limited interest. One can always hope though.
Thanks for this informative article on the Heyford, Christopher @christopher
It would be very interesting to build one of these, I'm definitely start a search to find one.
Thanks very much I learned a lot from it, Christopher
Nice write up Christopher
I have 2 in my stash. The first one was so pristine, box and all that I could not bring myself to building that one.
Ill be looking to sell it together with the profile publications no. 182
All in all I find this a very interesting and Worthwhile to build airplane Model and I look forward to assembling it, taking your guidelines into account as much as possible.
Thanks for sharing this, Christopher. I have a Matchbox Heyford that I’m likely to build in the near future.
Hi John, Cooper, Benard and John Healy
Thanks for the kind comments - as I've already built the model I'll happily answer any questions that you might have.