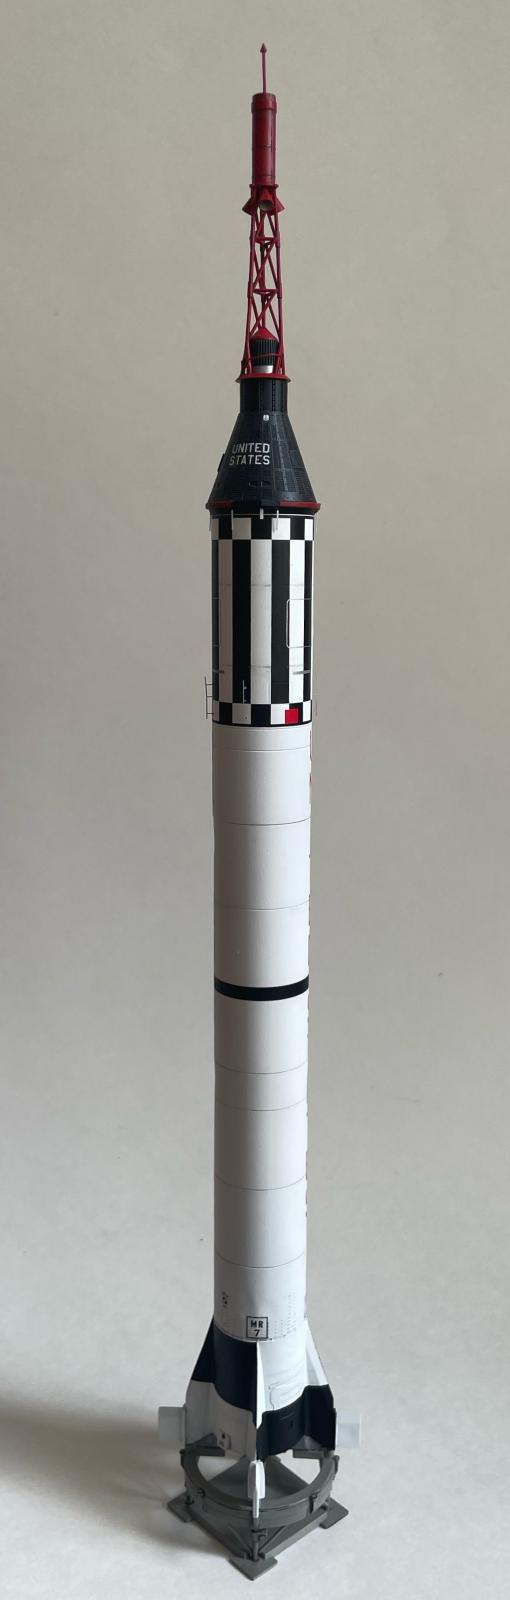
Horizon Models 1/72 Mercury-Redstone
“I'm a hell of a lot cooler than you guys. Why don't you fix your little problem and light this candle?”
So remarked Alan Shepard, first American in space, as he sat inside his tiny Mercury capsule on May 5th, 1961, atop a Redstone launch vehicle for 4 hours as launch control dealt with a seemingly endless stream of problems. Shepard's nerves and patience were holding out, but just barely. His bladder had succumbed to the pressure hours earlier, as he urinated inside his flight suit when von Braun denied his request for a pee break. Eventually, they did light the candle, lobbing Shepard higher in the sky than any other American to date. His sub-orbital flight lasted 15 minutes and 28 seconds from lift-off to splash-down; 45 million Americans watched with bated breath to see if Shepard would survive the extreme g-forces of manned space flight. Though the Soviets had beaten America to space some three weeks earlier (with Yuri Gagarin's longer, orbital flight), NASA's Project Mercury marked the start of America's space franchise, culminating 8 years later with Apollo 11's lunar touchdown.
The first two Mercury launches (Shepard and Grissom, MR-3 and MR-4) made use of the Redstone launch vehicle, which was a modified ballistic missile originally developed in the 1950's by the US Army. It was an 83-foot tall, single stage rocket with a liquid fuel engine. The modifications included essentially swapping the warhead out for a spacecraft that would carry a human, and reducing vibrations. This kind of ingenious repurposing of available technology defined the early space race, making it one of the most exhilarating, gritty, and courageous periods in human history.

Horizon Models is a small Australian company that appears to exclusively produce Mercury missions and military missiles that use the Redstone or Atlas molds (i.e. the launch vehicles associated with…Mercury missions). The 1/72-scale Mercury-Redstone kit is made of gray styrene and metal photo-etched parts, capable of constructing any of 4 different configurations/missions. This variety is a win for the kit.
The Shepard “Freedom 7 “configuration (MR-3), which I selected, uses 46 styrene and 20 photo-etched parts.
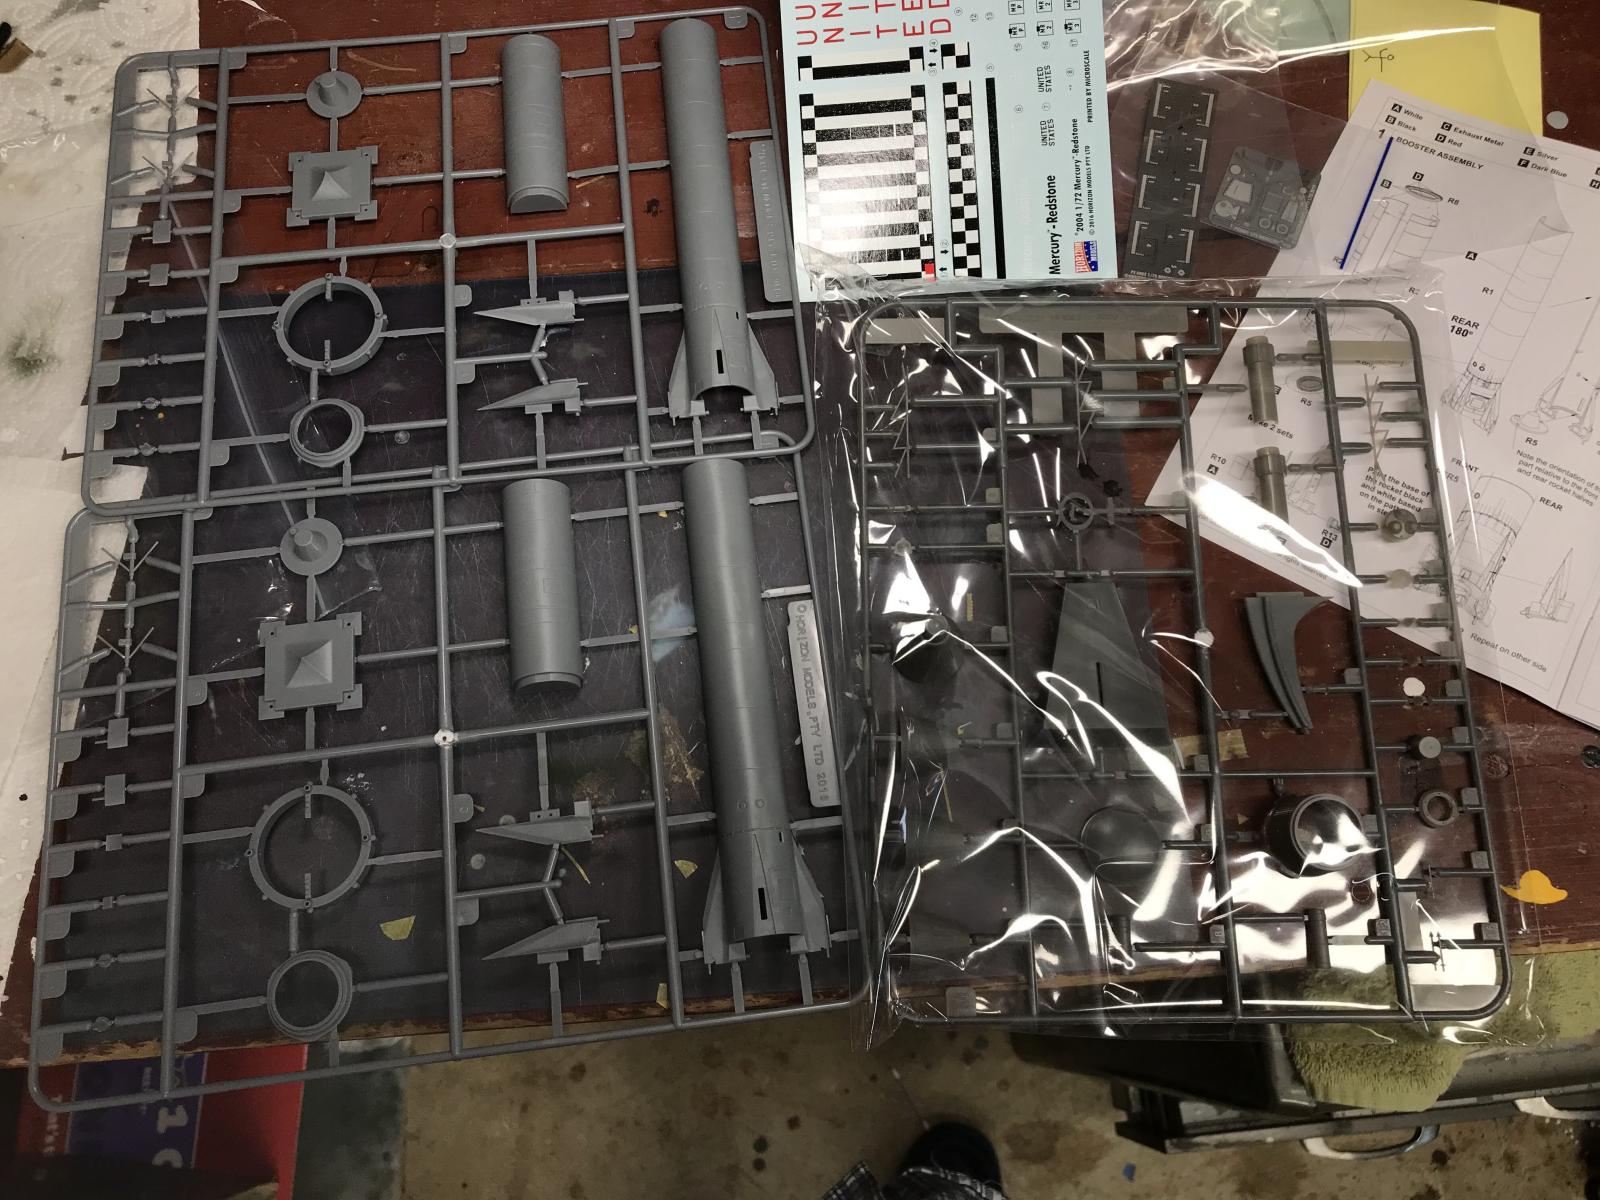
There is good engraved detail: panel lines, rivets, the “shingles” on the capsule. You'll notice in the photo above that the two sprues with the rocket body pieces are identical molds; the trouble is that the Redstone rocket is not bi-lateral symmetric (there are fuel intakes and other details that don't exist on both “halves” of the rocket.) The instructions direct you to “fill in” these details, which is a bit of a pain. The capsule is molded for the MR-4 configuration, which has a window not present in the MR-3 configuration: to build the MR-3, this window must be covered over by one of the photo-etched parts designed to look like regular capsule shingles. That works fairly well, but it's not an ideal solution because the photo-etched part protrudes slightly relative to the other shingle panels. I get the desire for efficiency in reduced molds, but these work-arounds aren't always easy or optimal.
Those nits aside, the model was a joy to build. Overall, my process was as follows:
1) Prime (Stynelrez at 25 psi)
2) Base coats (Tamiya acrylics thinned ~50% with Tamiya X-20A at 20 psi, Alclad metallizers at 15 psi)
3) Gloss Coat (Alclad Aqua Gloss at 20 psi)
4) Panel line pin wash and weathering (Tamiya Panel Line Accent)
5) Decals
6) Gloss Coat (as above)
7) Panel line pin wash and weathering over decals (as above)
8) Dull Coat (Alclad Klear Kote Matte at 20 psi)
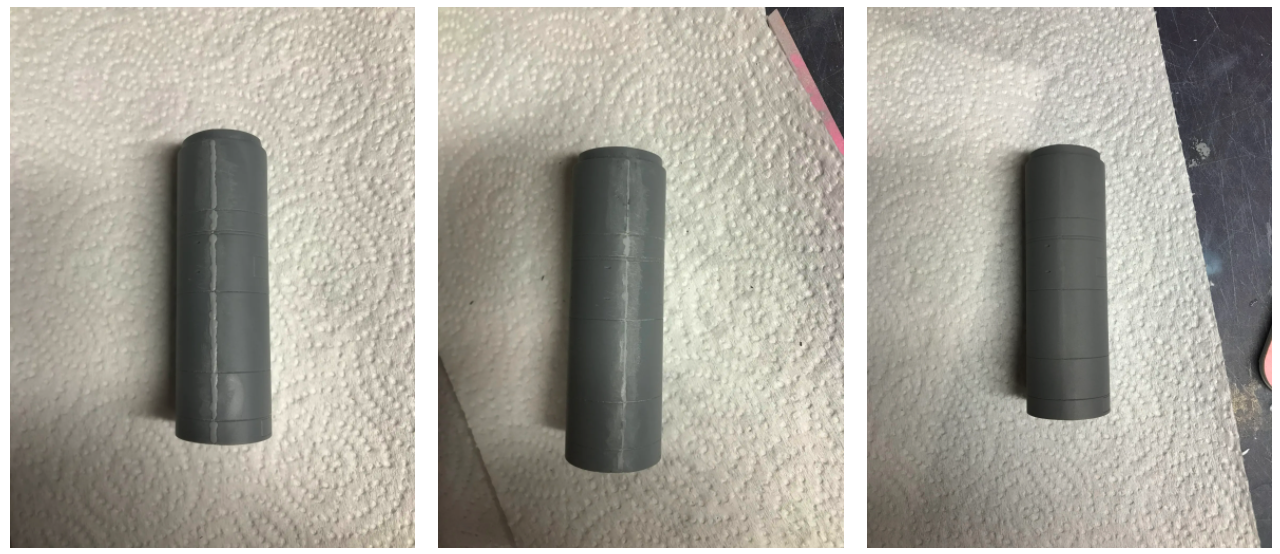
The big job with rockets is getting rid of the seams. I used the “scrape” method (squeezing cement out of the joint and scraping it off and sanding when dry) and some Mr. Surfacer 500 for touch ups. For the top section of the rocket, I tried using only Mr. Surfacer as a test; below I show the process: just applied, sanded, primed.
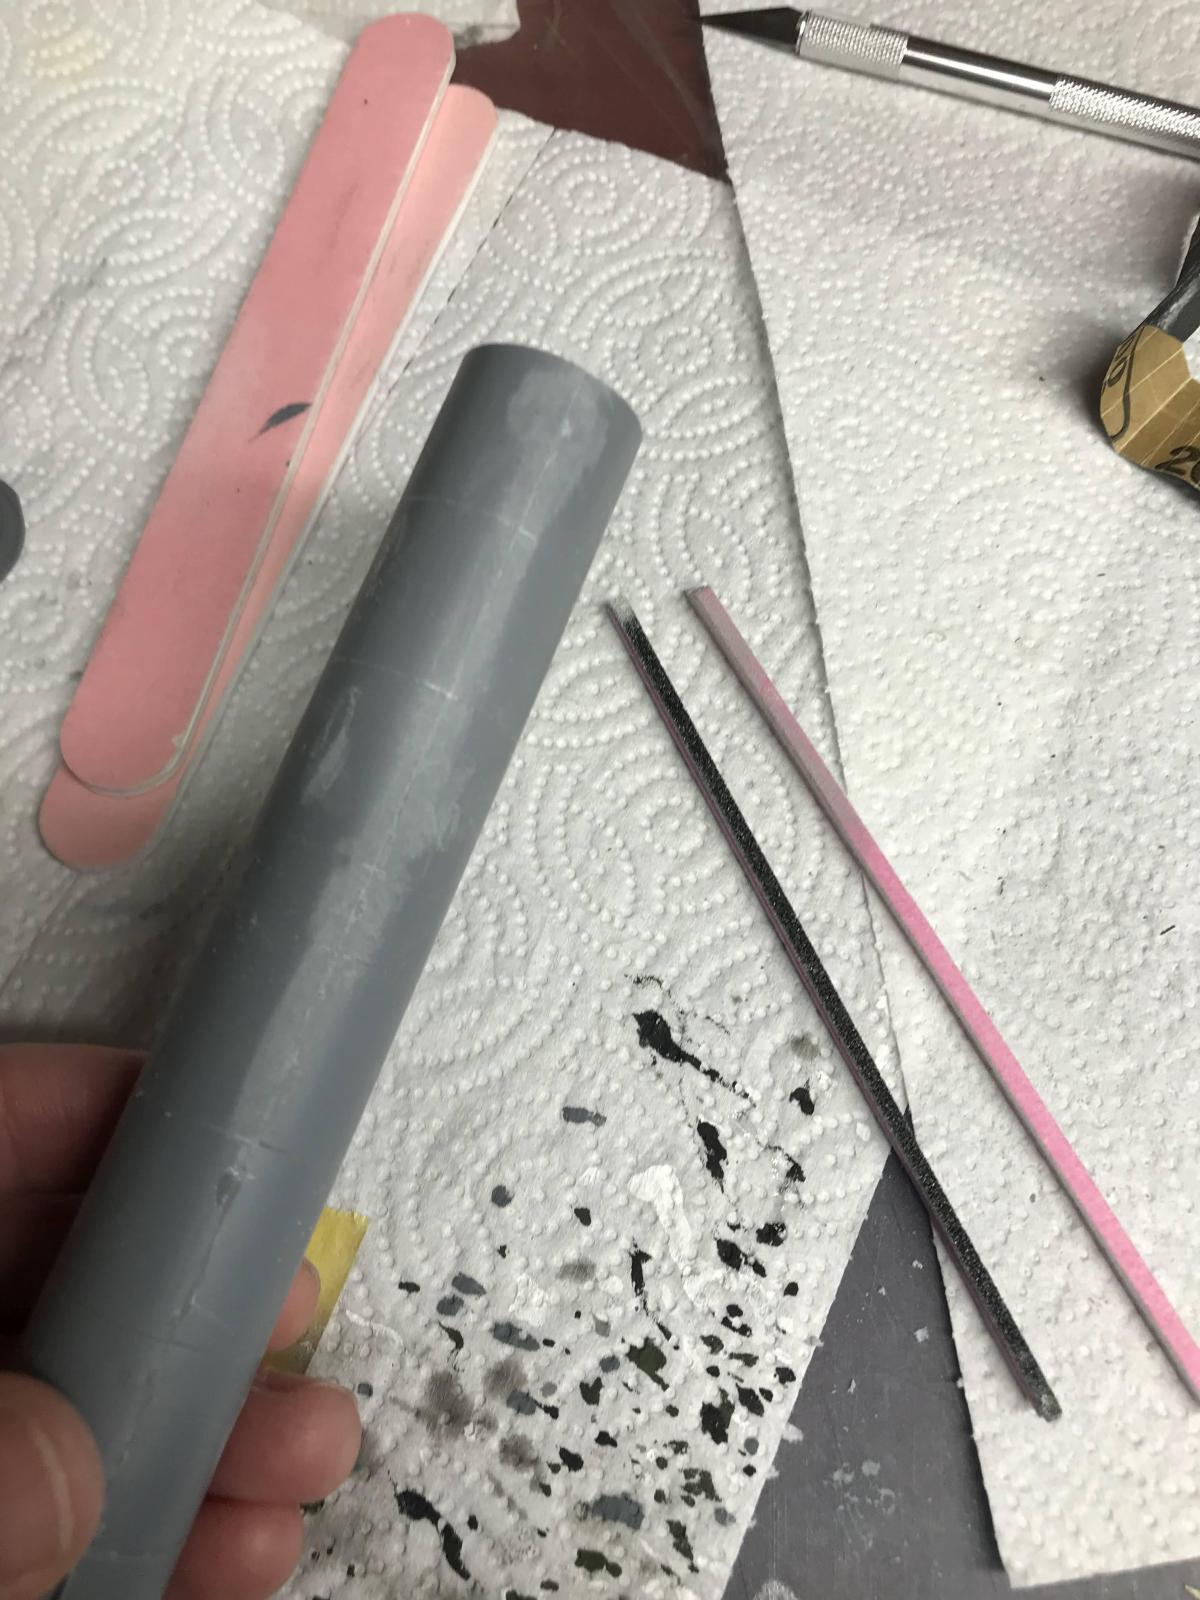
Using the scrape method on the main section, I found sanding twigs to be a good way to apply directed, even pressure along the seam:
This took some effort, and I ended up sanding so vigorously that I slightly flattened the body at the seam (giving the cylinder a slightly oblate cross section). I suspect this would not have happened so readily with regular old sandpaper which can be applied along the curve with less pressure. In the end, the effect wasn't too noticeable but it's a lesson-learned. After this, I re-scribed the “panel lines” that run around the circumference (which were inevitably destroyed in this process) using a straight pin chucked into a pin vice.
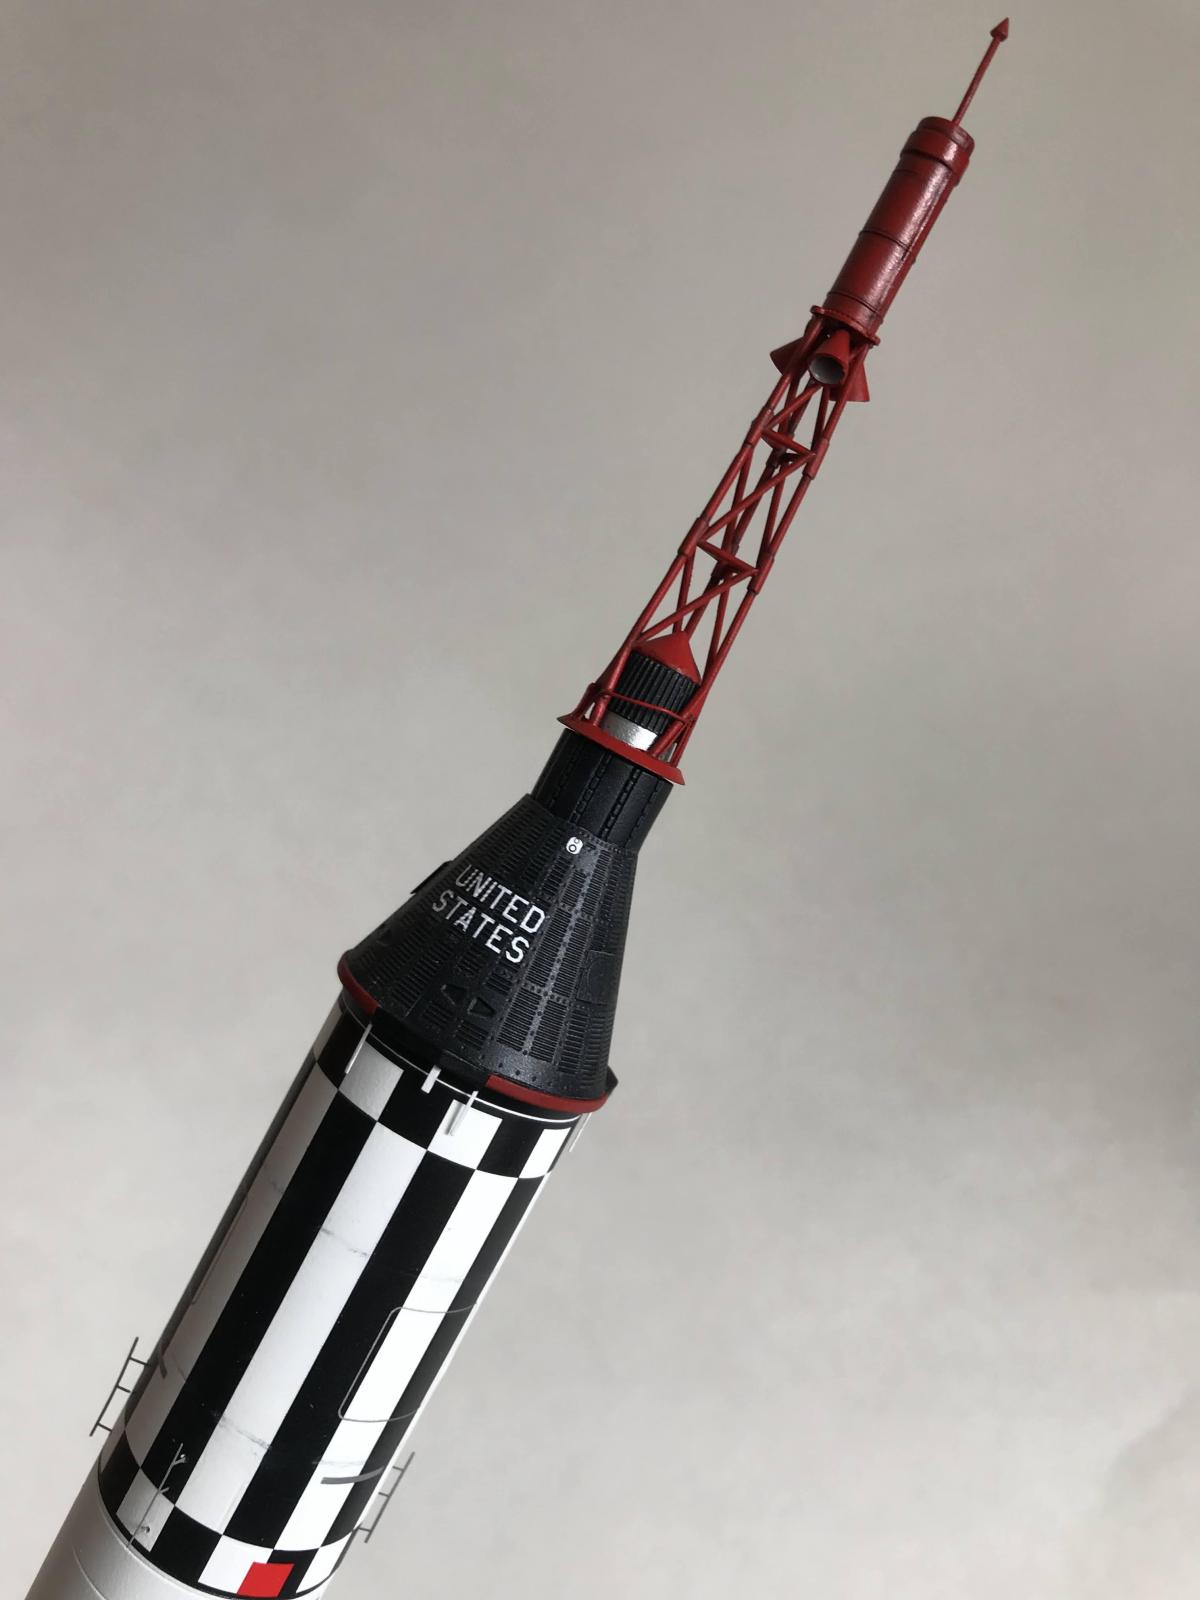
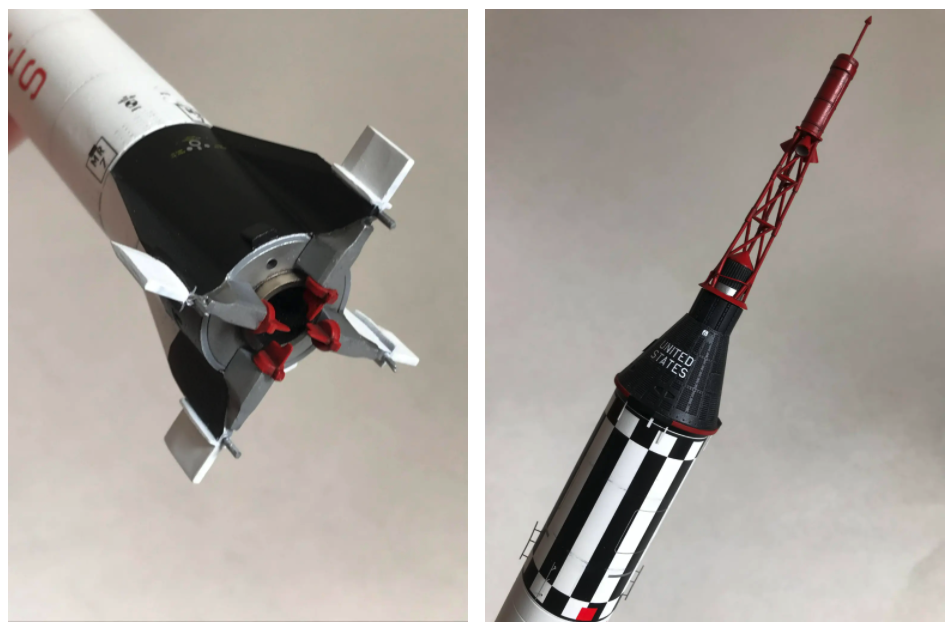
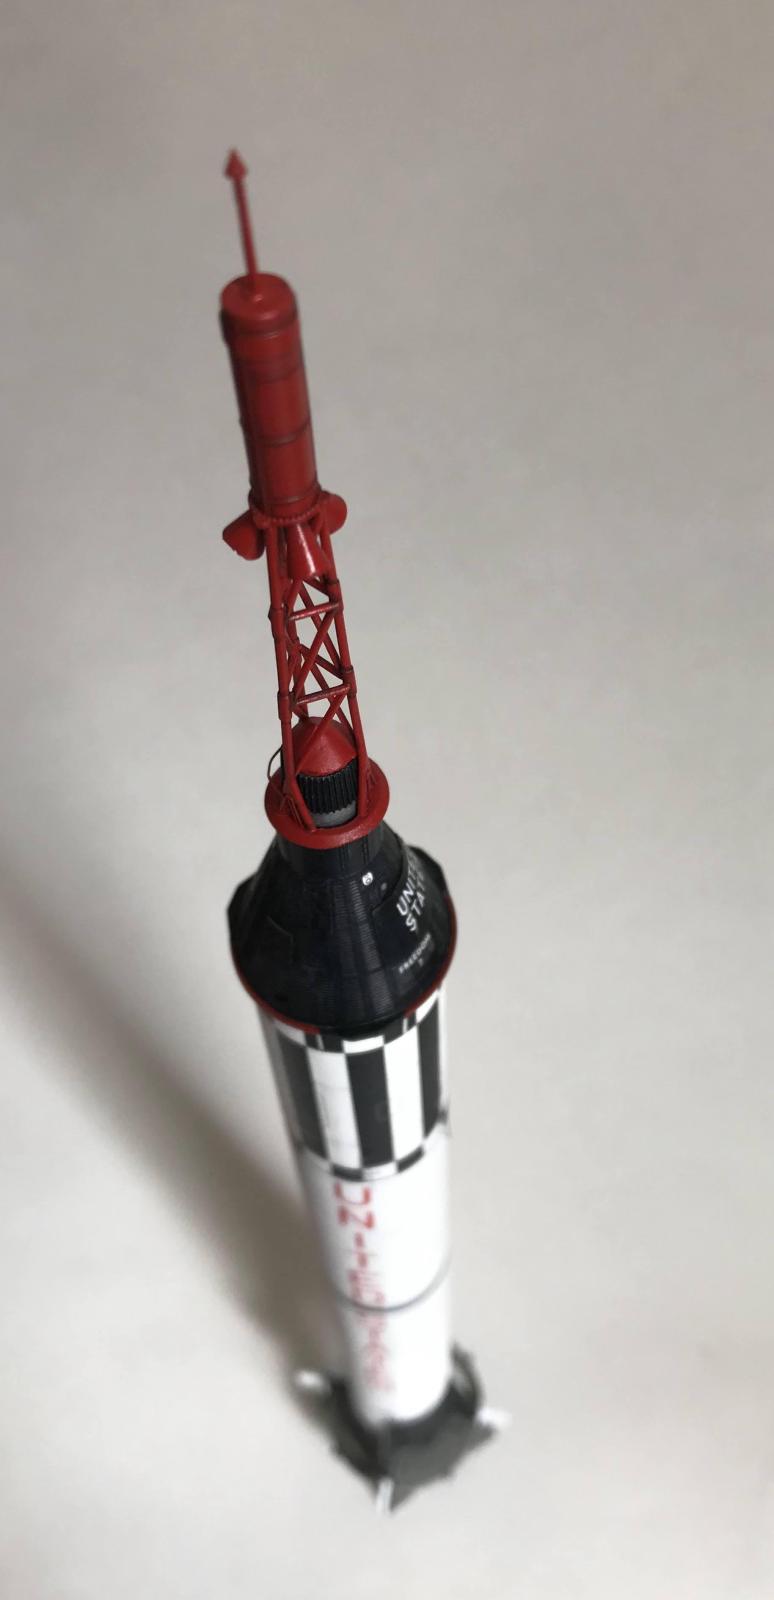
The only other challenge with the assembly proper was constructing the escape rocket and tower: it's a trellis that comes in three parts that must be interleaved:
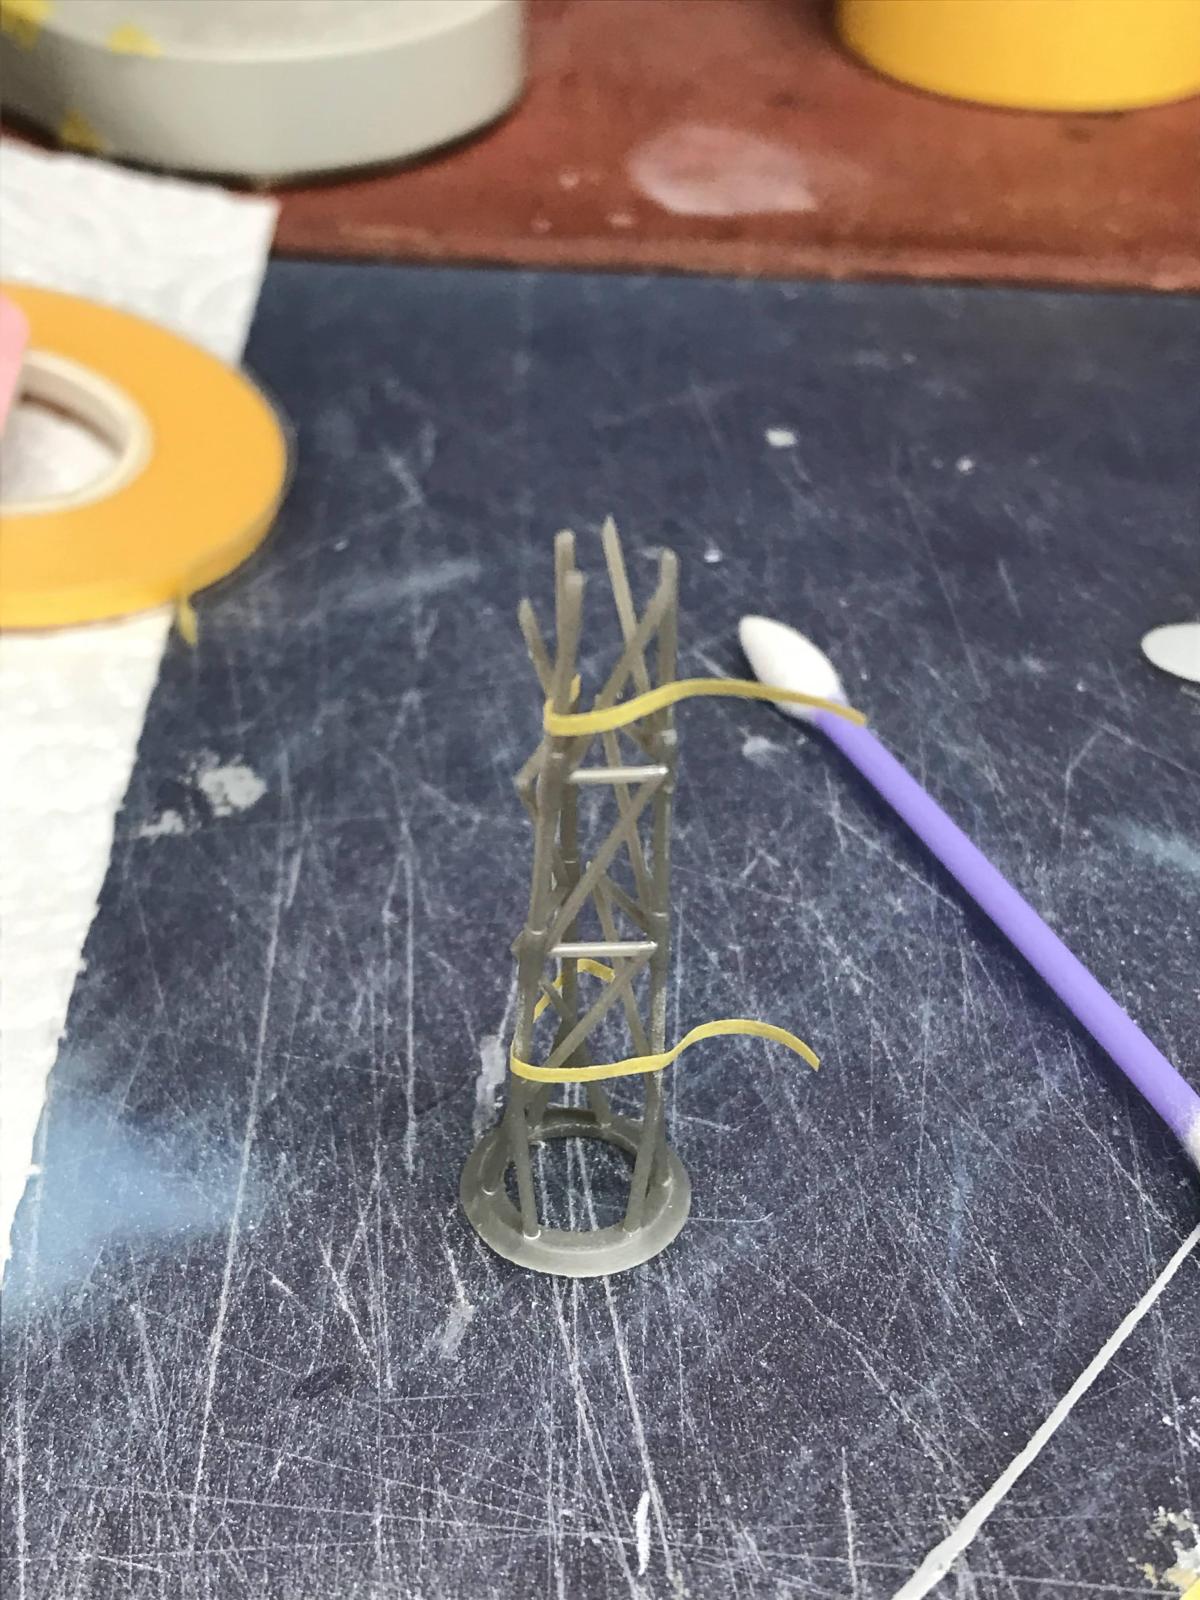
Even after delicately glueing them together, the tower didn't stand straight since the lengths of the three trellis pieces weren't exactly the same. I had to slice the two that were longest off the base with my Xacto knife and sand them down while keeping the rest of the structure glued together and not bending too badly. It was difficult but I was able to get the tower to stand passably upright.
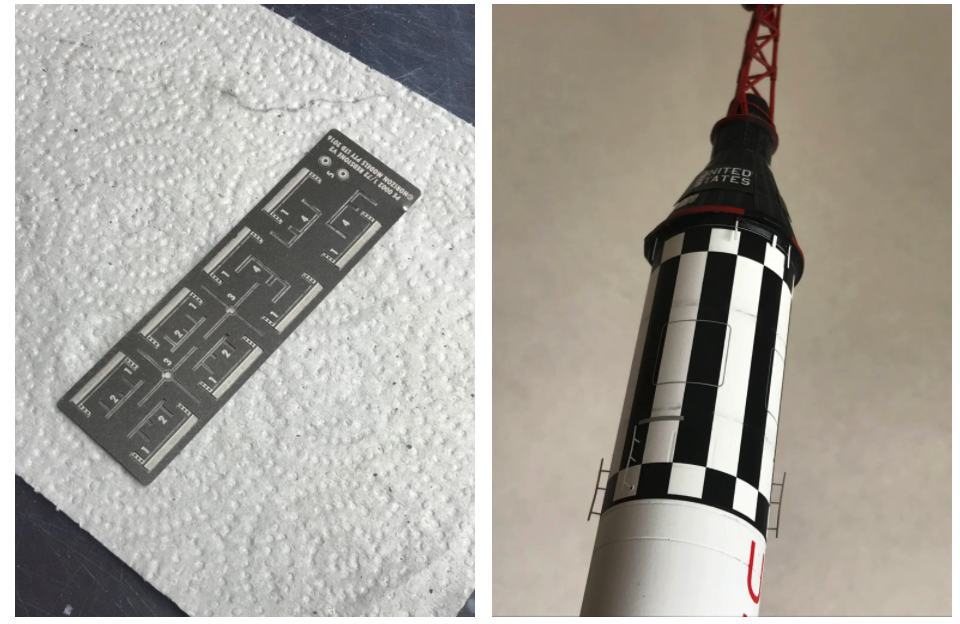
There were a couple new challenges/techniques presented by this model. First, the use of photo-etched parts which I've not encountered before. These metal parts can be made considerably more detailed than molded plastic, but most of the ones in this kit probably could have been done with styrene without any noticeable loss in detail. For example, the four antennas (parts 2 below left) that mount to the upper portion of the rocket are photo-etched:
They probably don't need to be. I found the best way to prepare these parts is to remove them from the template with a No. 17 (chisel) blade (together with careful wiggling) and then to file smooth with a diamond file:
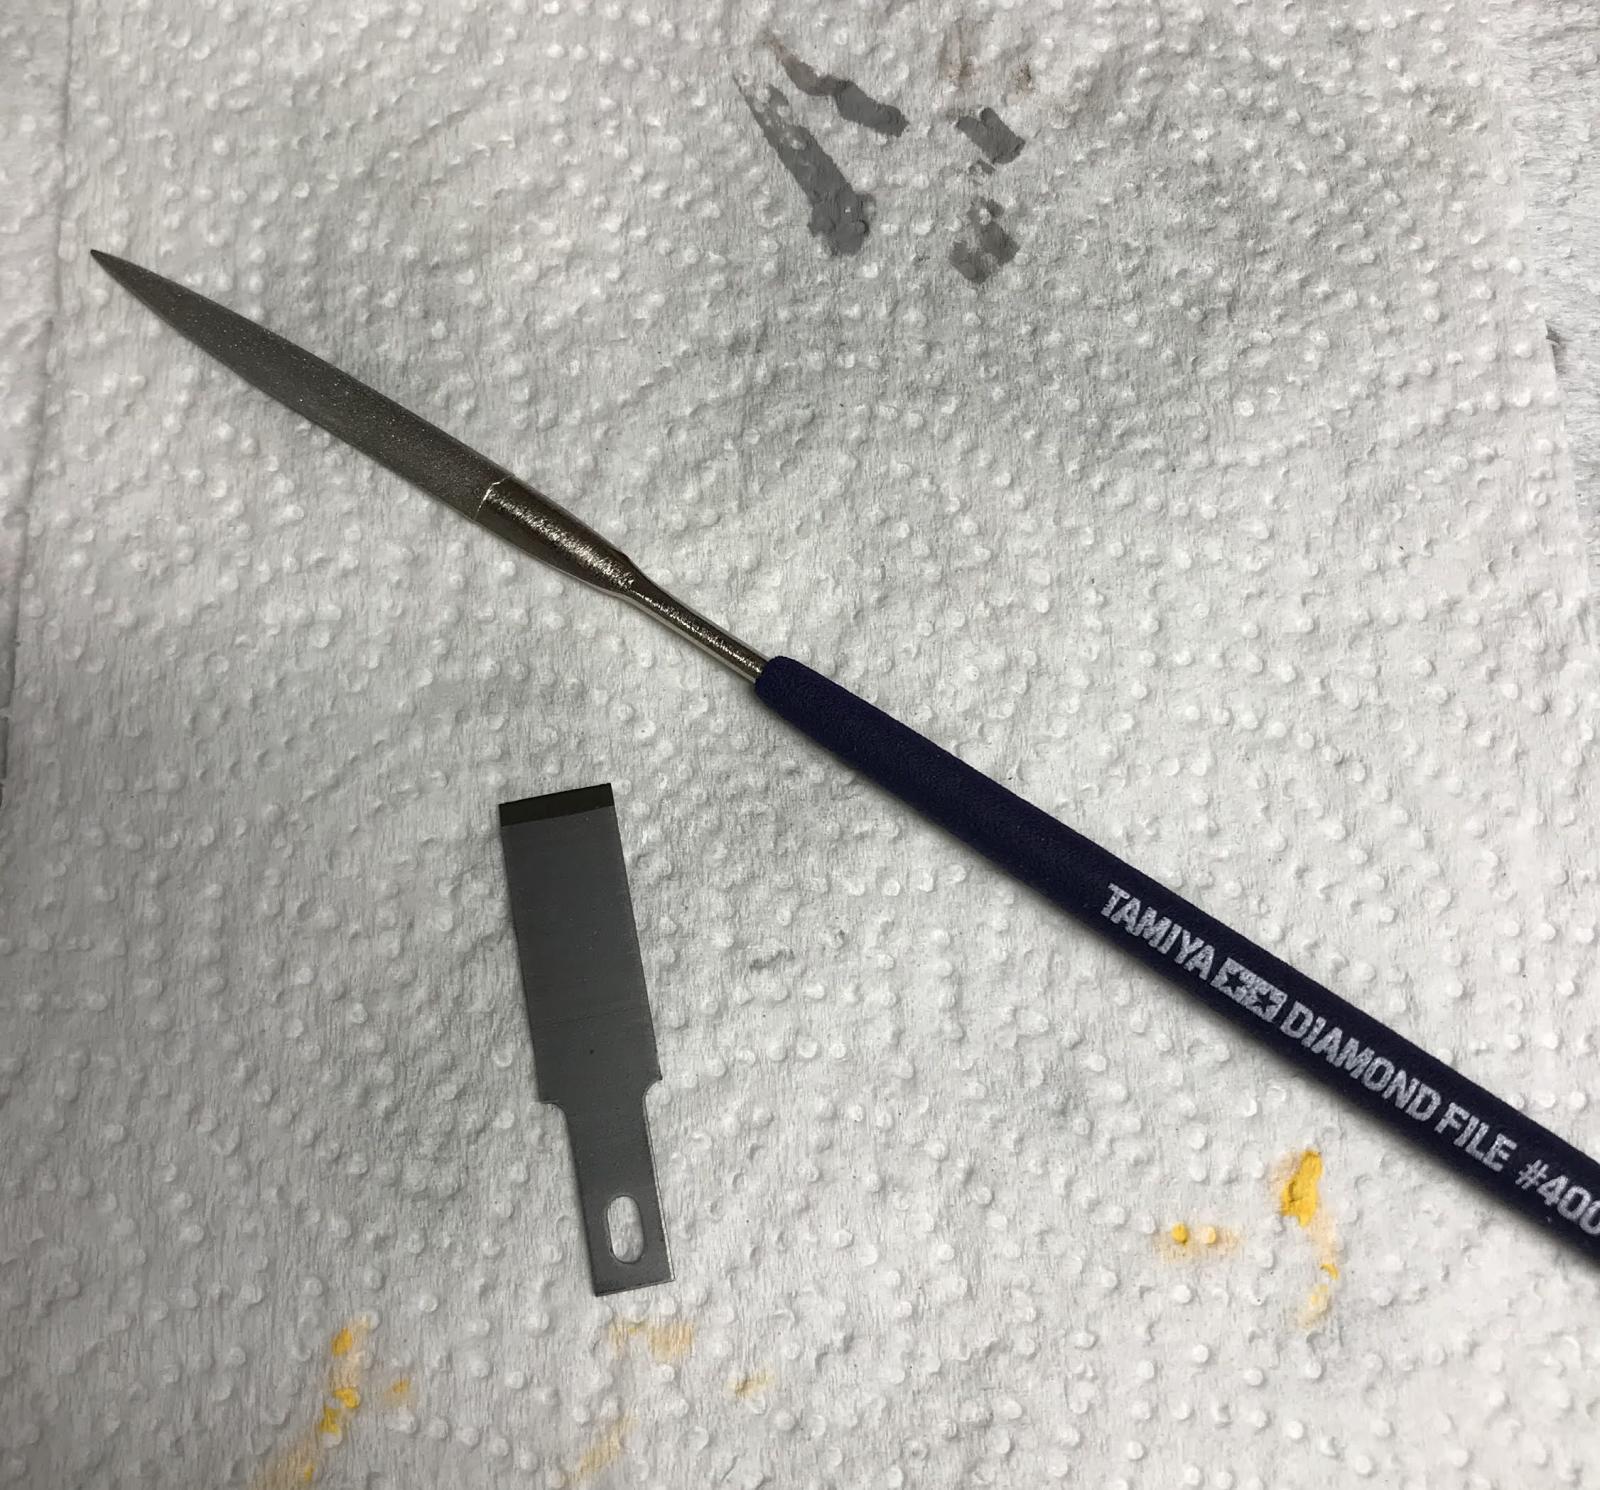
Photo-etched parts attach with cyanoacrylate (CA, or Krazy glue), which, honestly, was a bit touch and go for me and I still am not sure why. Sometimes pieces would attach immediately and firmly, other times they'd fall off, possibly because I used too much glue (a tiny little bit of CA goes a long way.) If necessary, excess glue can be sanded off like plastic cement without trouble.
The instructions also requested that I “drill” the 0.3 mm holes for these antennas. These holes could easily have been created with the mold, but I'm catching on that this kit is delighting in making me work for it. So, I picked up a cute little mini drill set and got to work:
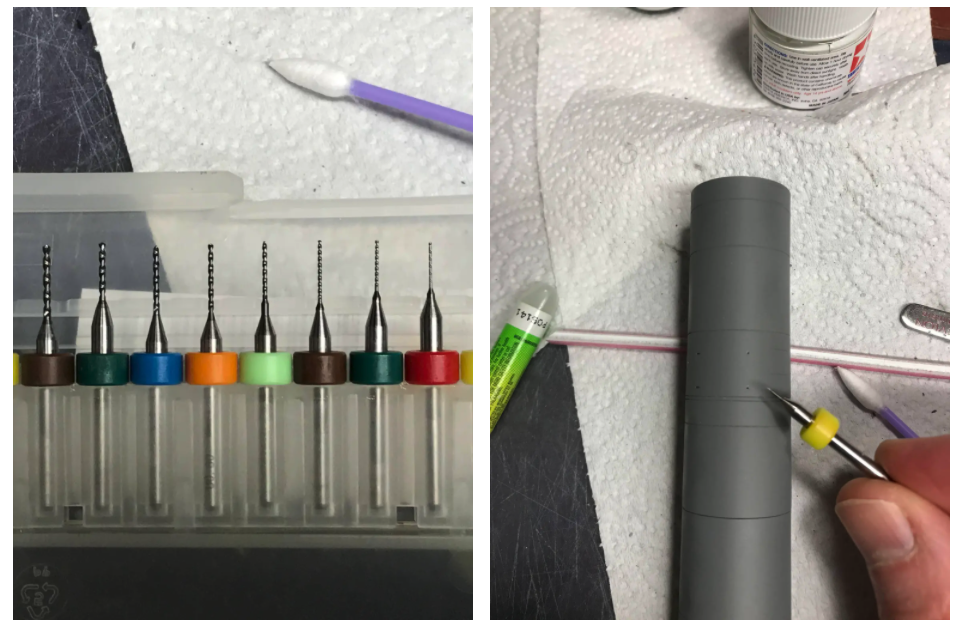
Turns out these drills are super useful to have around in general, working much better than push pins or other random puncturing implements found around the house.
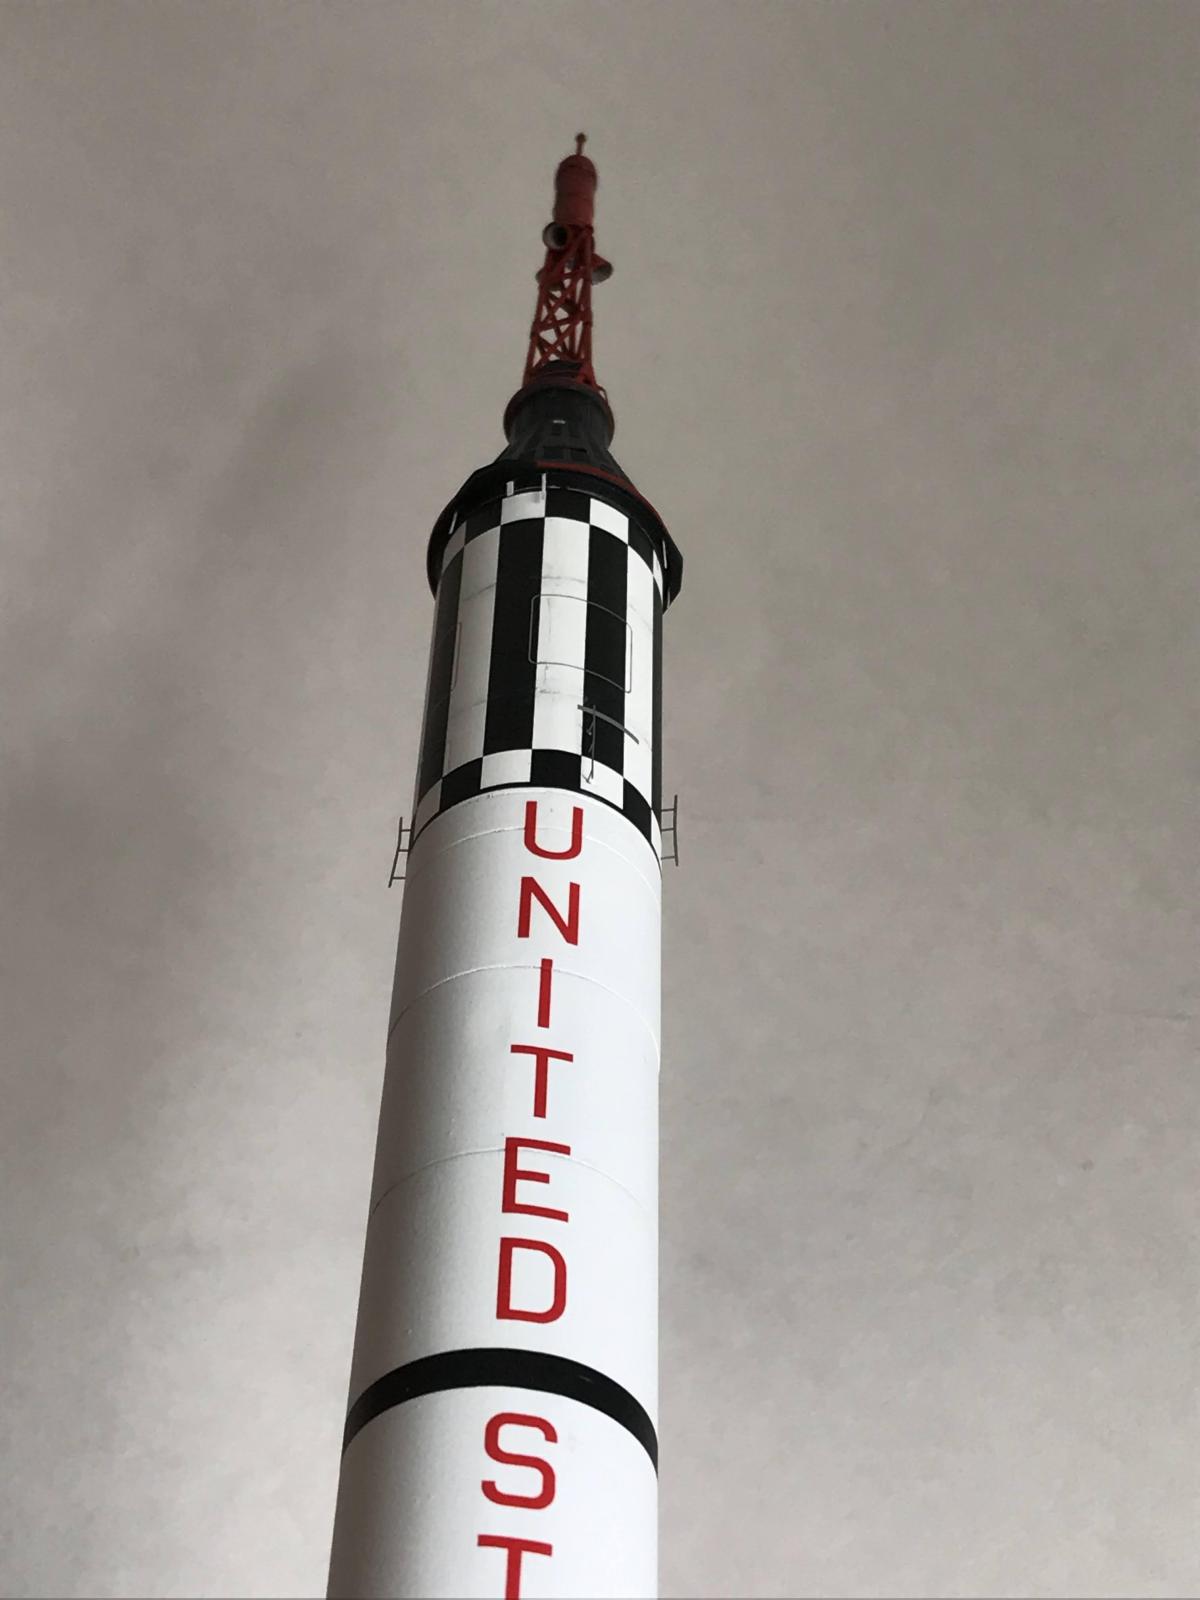
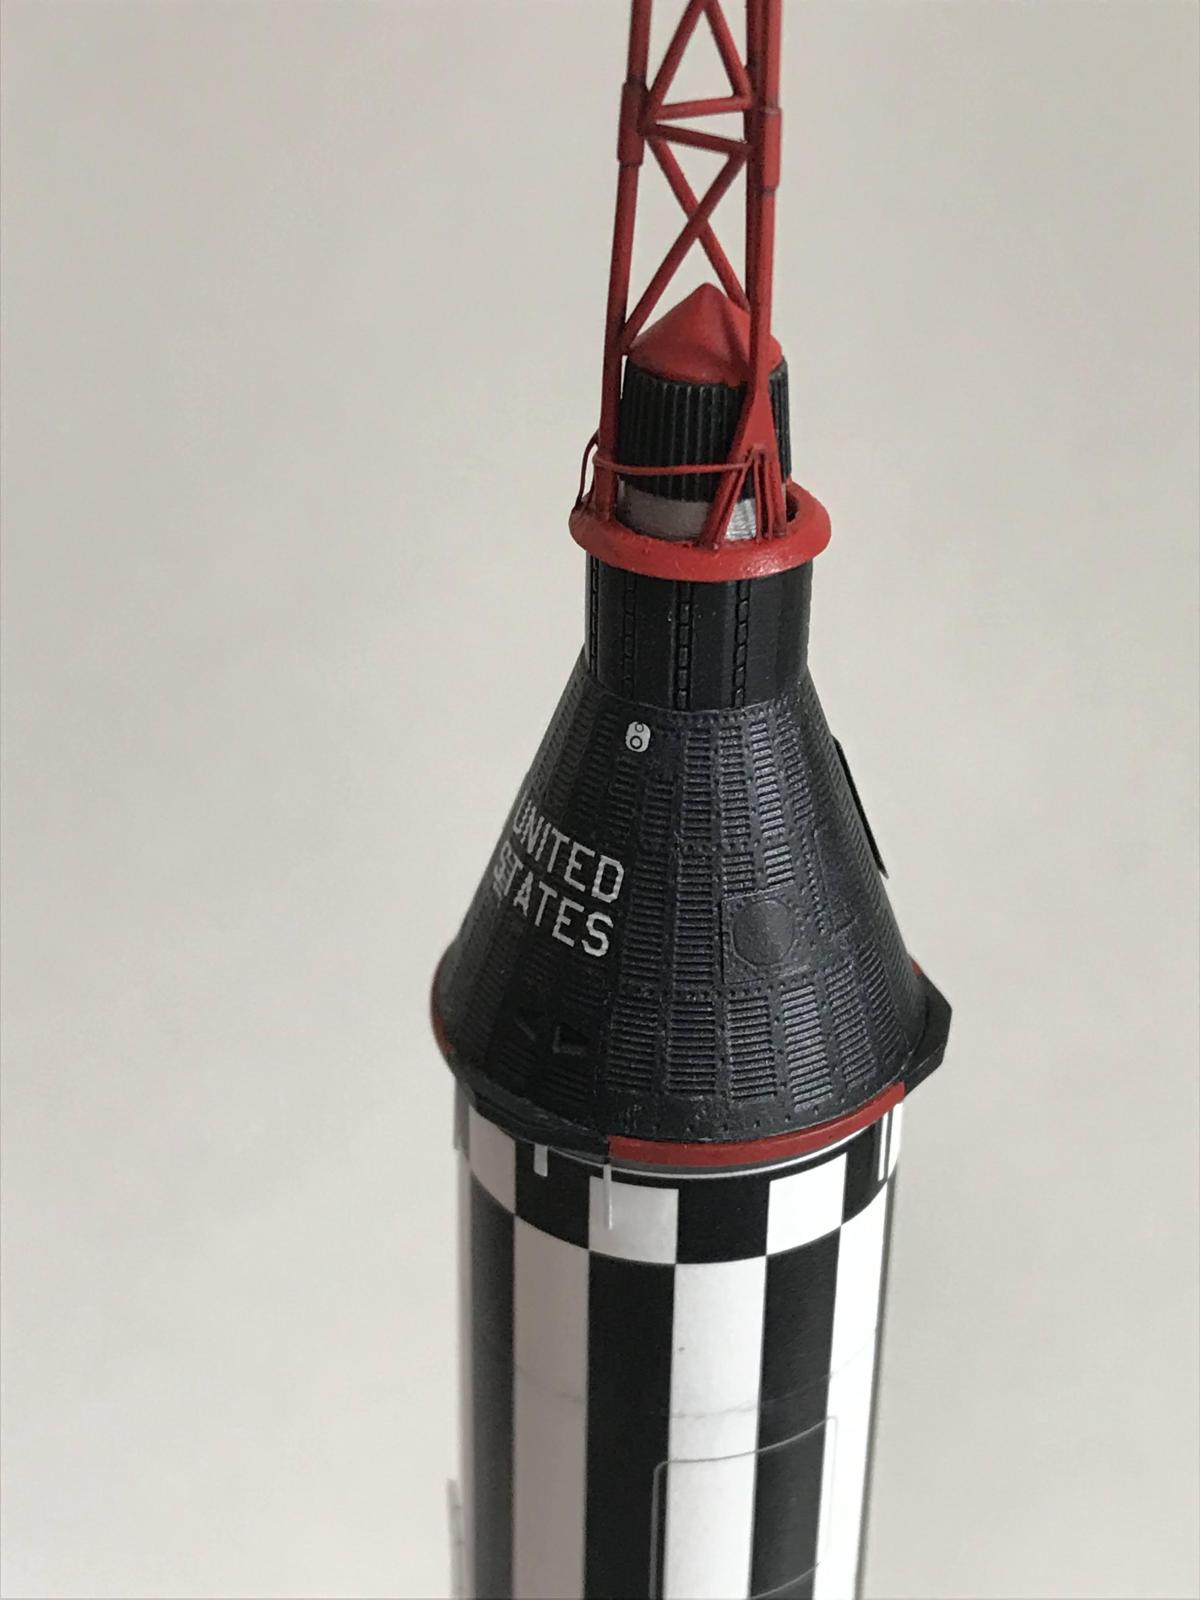
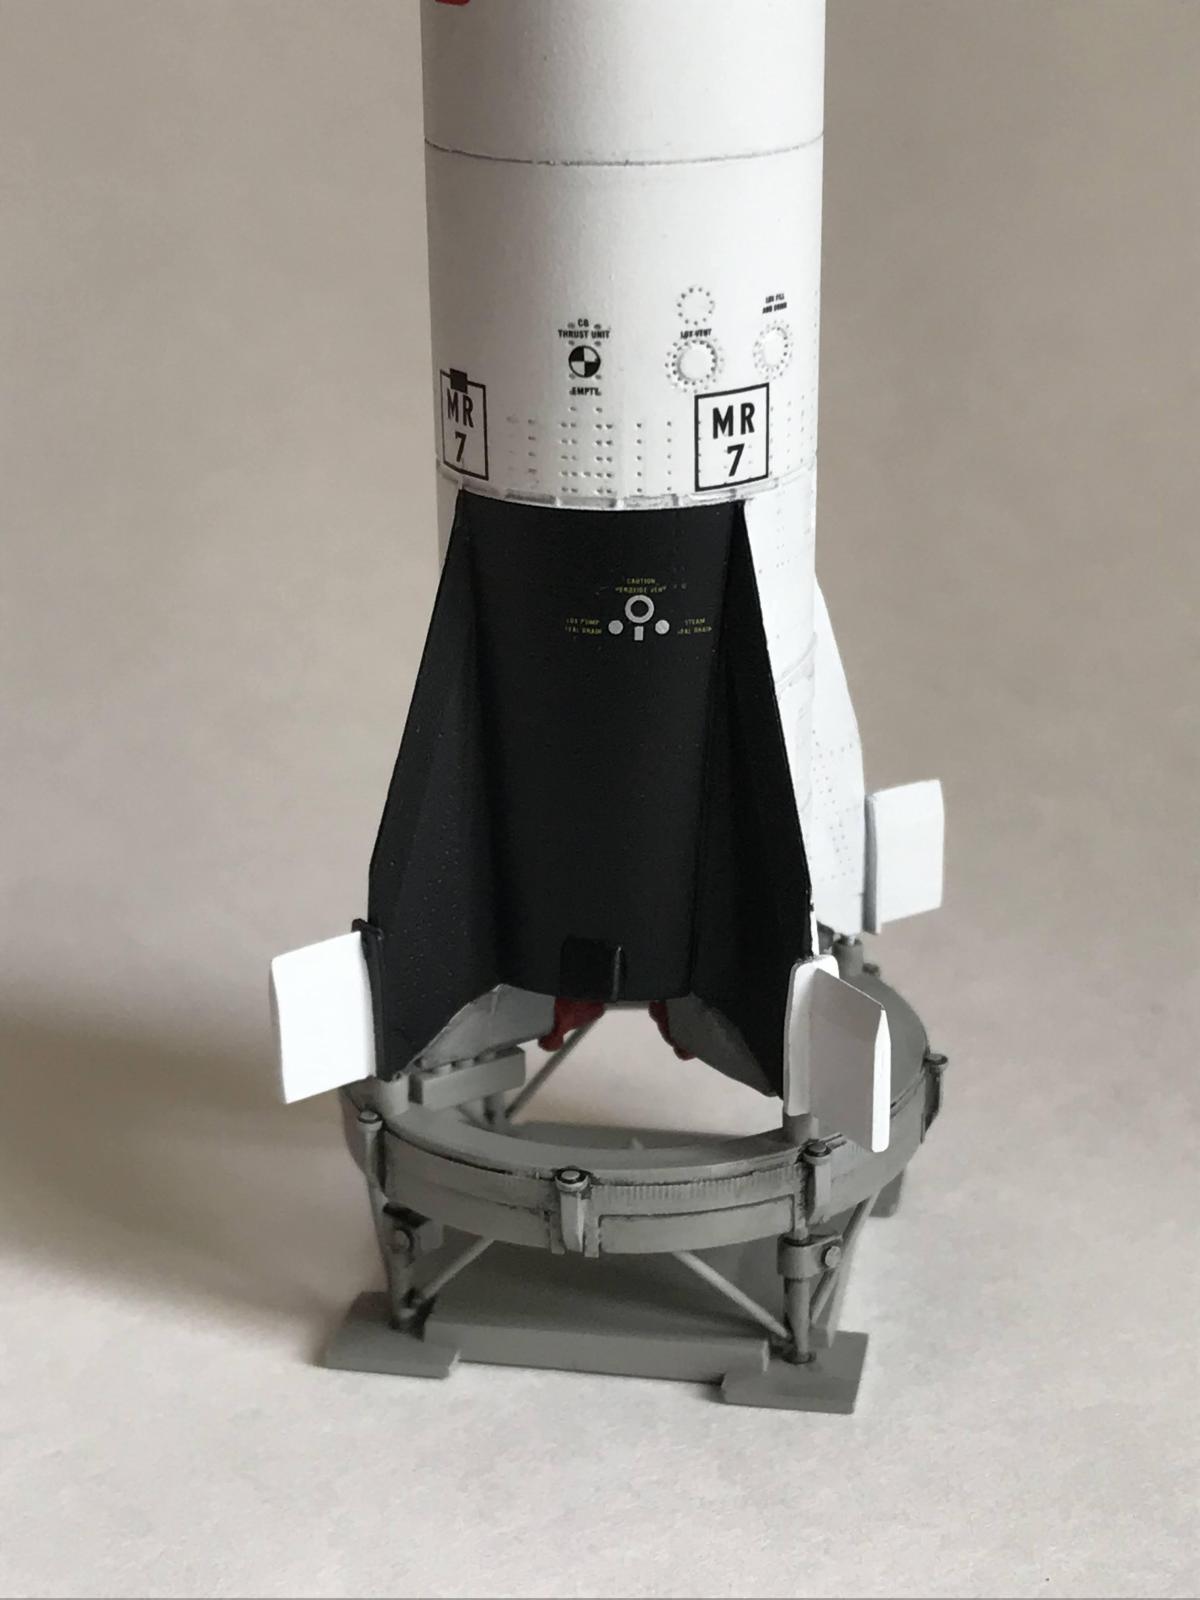
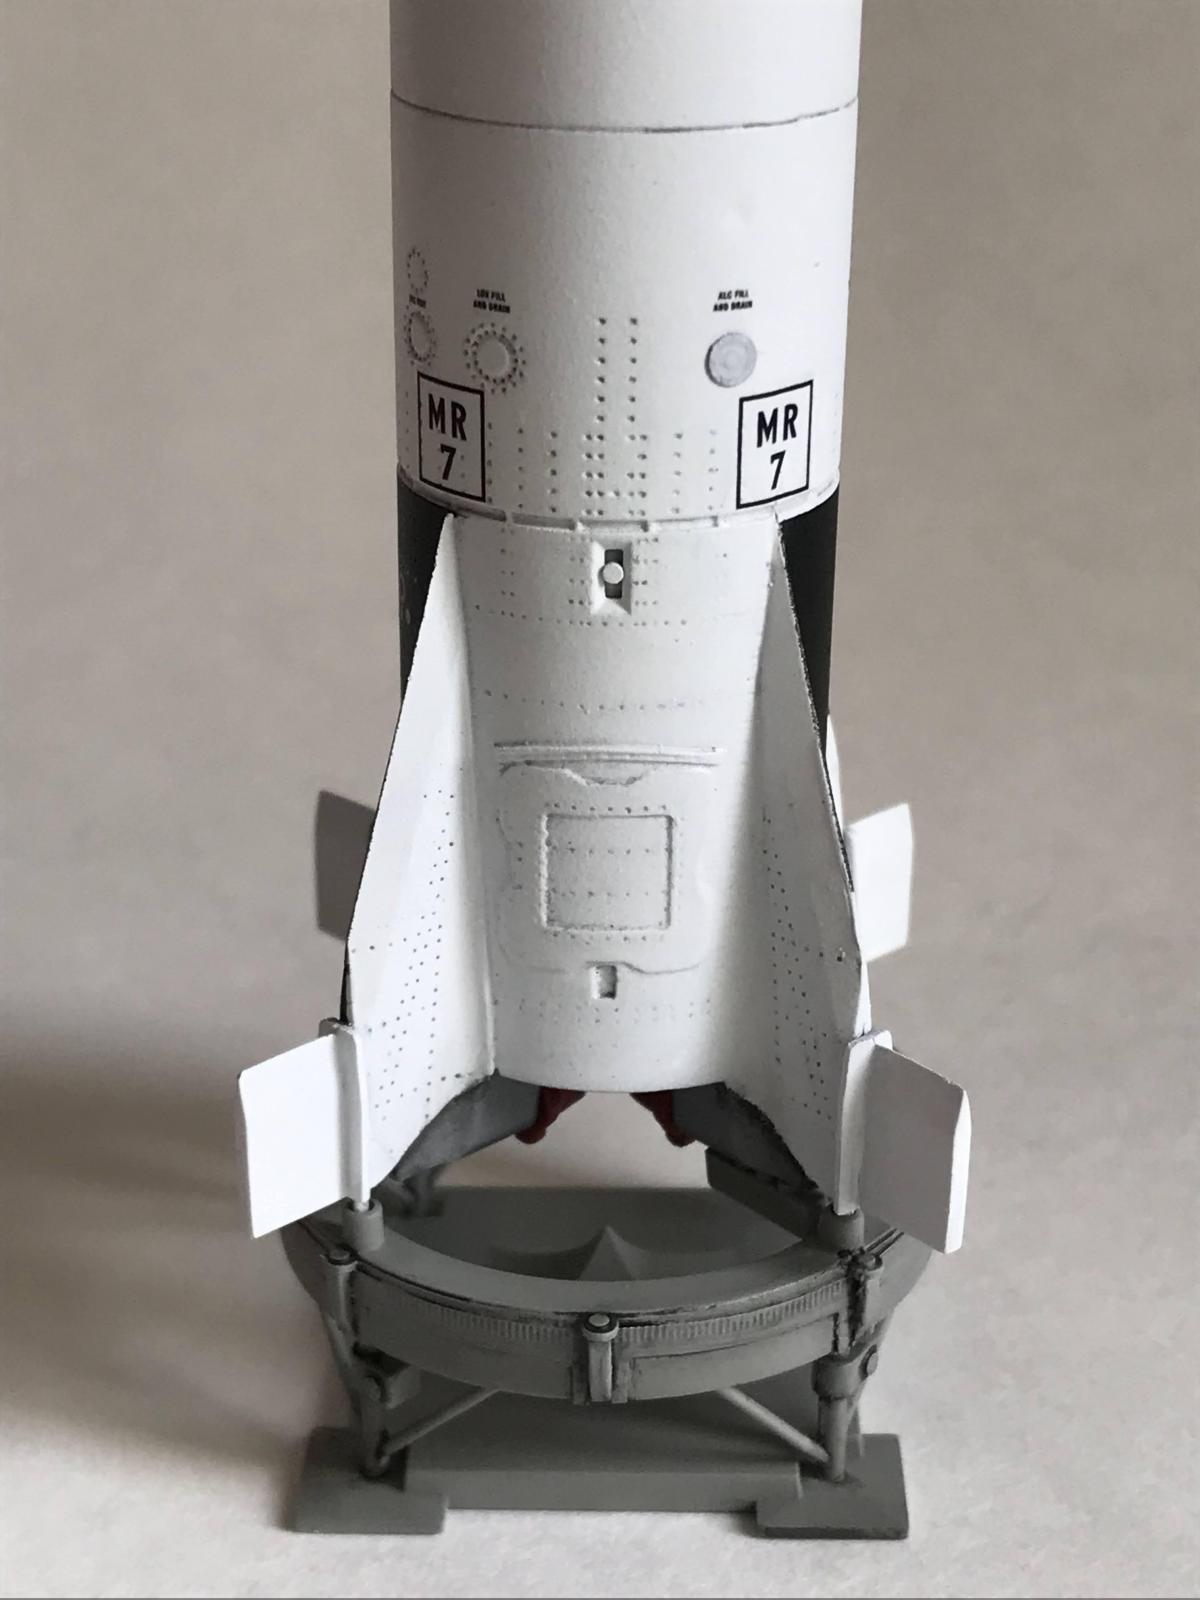
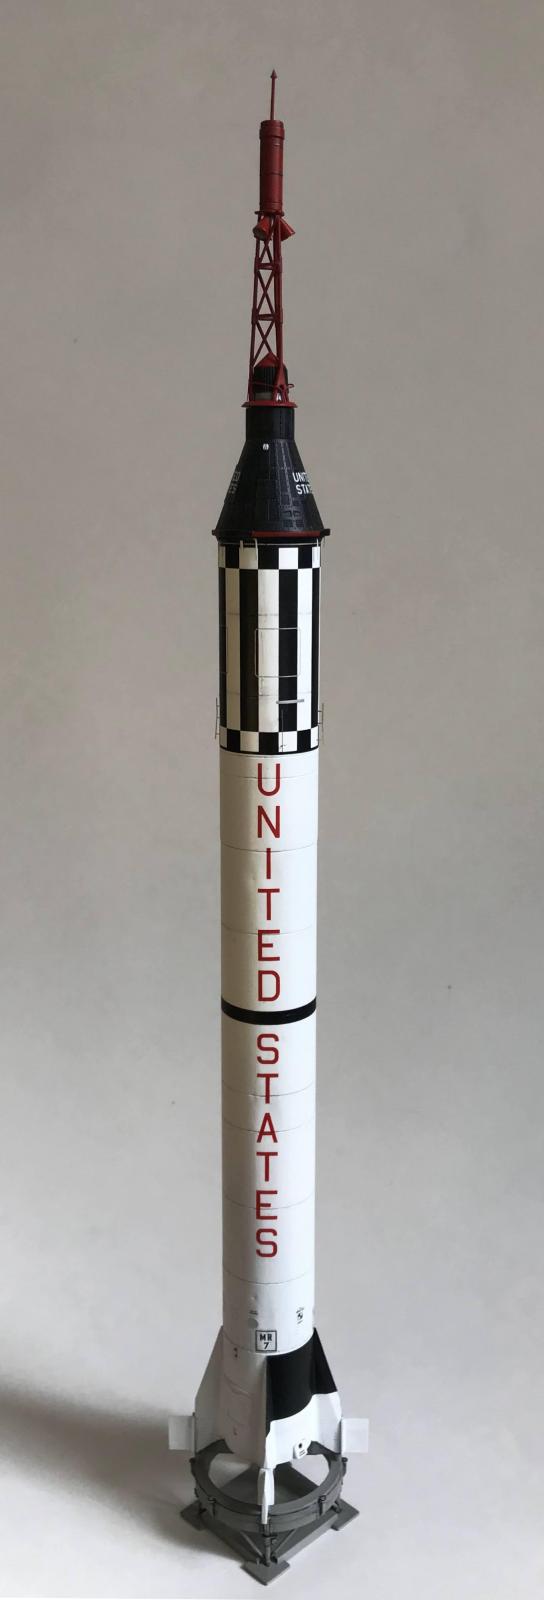
Painting was straight-forward: white rocket, with the black-and-white roll pattern at the booster. (The roll pattern at the top of the rocket is a decal). After painting, the question of weathering/detailing: how much should one do? After some thought, I decided that minimal weathering would be best, partly because the rocket is single-use and isn't getting dinged and gritted up in its years of service. Another concern is that this is ultimately a small model (just under 14″ tall from launch base to tip) and I was afraid that the contrast and shadow effects provided by washes might look overdone and artificial. I ended up applying Tamiya black panel line accent to only the jet vanes and escape rocket and tower.
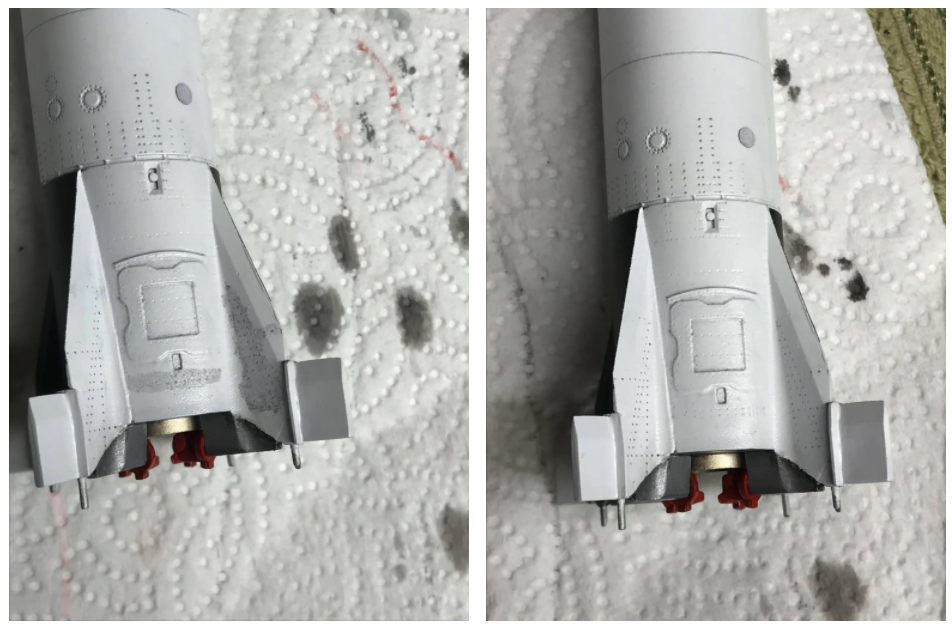
I used Timaya gray panel line accent (fearing black would be too stark) on the panel lines running around the rocket's circumference and for filling in the rivets and fuel intakes:

As you can see above (left), I started out surgically applying the wash with a fine-tipped brush, but this got ridiculous. I then tried a more liberally-applied wash which I had to very carefully wipe clean after drying to avoid removing the wash from the shallow rivet holes:
Finally, I dry-brushed a tiny bit of Tamiya Sky Gray over of the capsule to give a little bit of contrast.

Some day I hope to finish my Dragon 1/72 Saturn V (It's five feet tall!), and this would look really cool next to it.
Oh wow, I didn't know they made the Saturn V in 1/72! Revell's got 1/96 and 1/144, the latter of which I built last year and it's still twice as tall as the 1/72 Mercury-Redstone!
It needs a bit of extra detailing to be more accurate, but the LM and CSM is pretty good right out of the box. They also make the Skylab launch vehicle.
Amazing model and fantastic article, Brian!
Fantastic result, Brian @bapowellphys
Great to read supporting article as well.
Well done.
Looks great, nice to see this built!
Nice work. As one of the 45 million who watched "with bated breath," this brings back memories.
Super result.