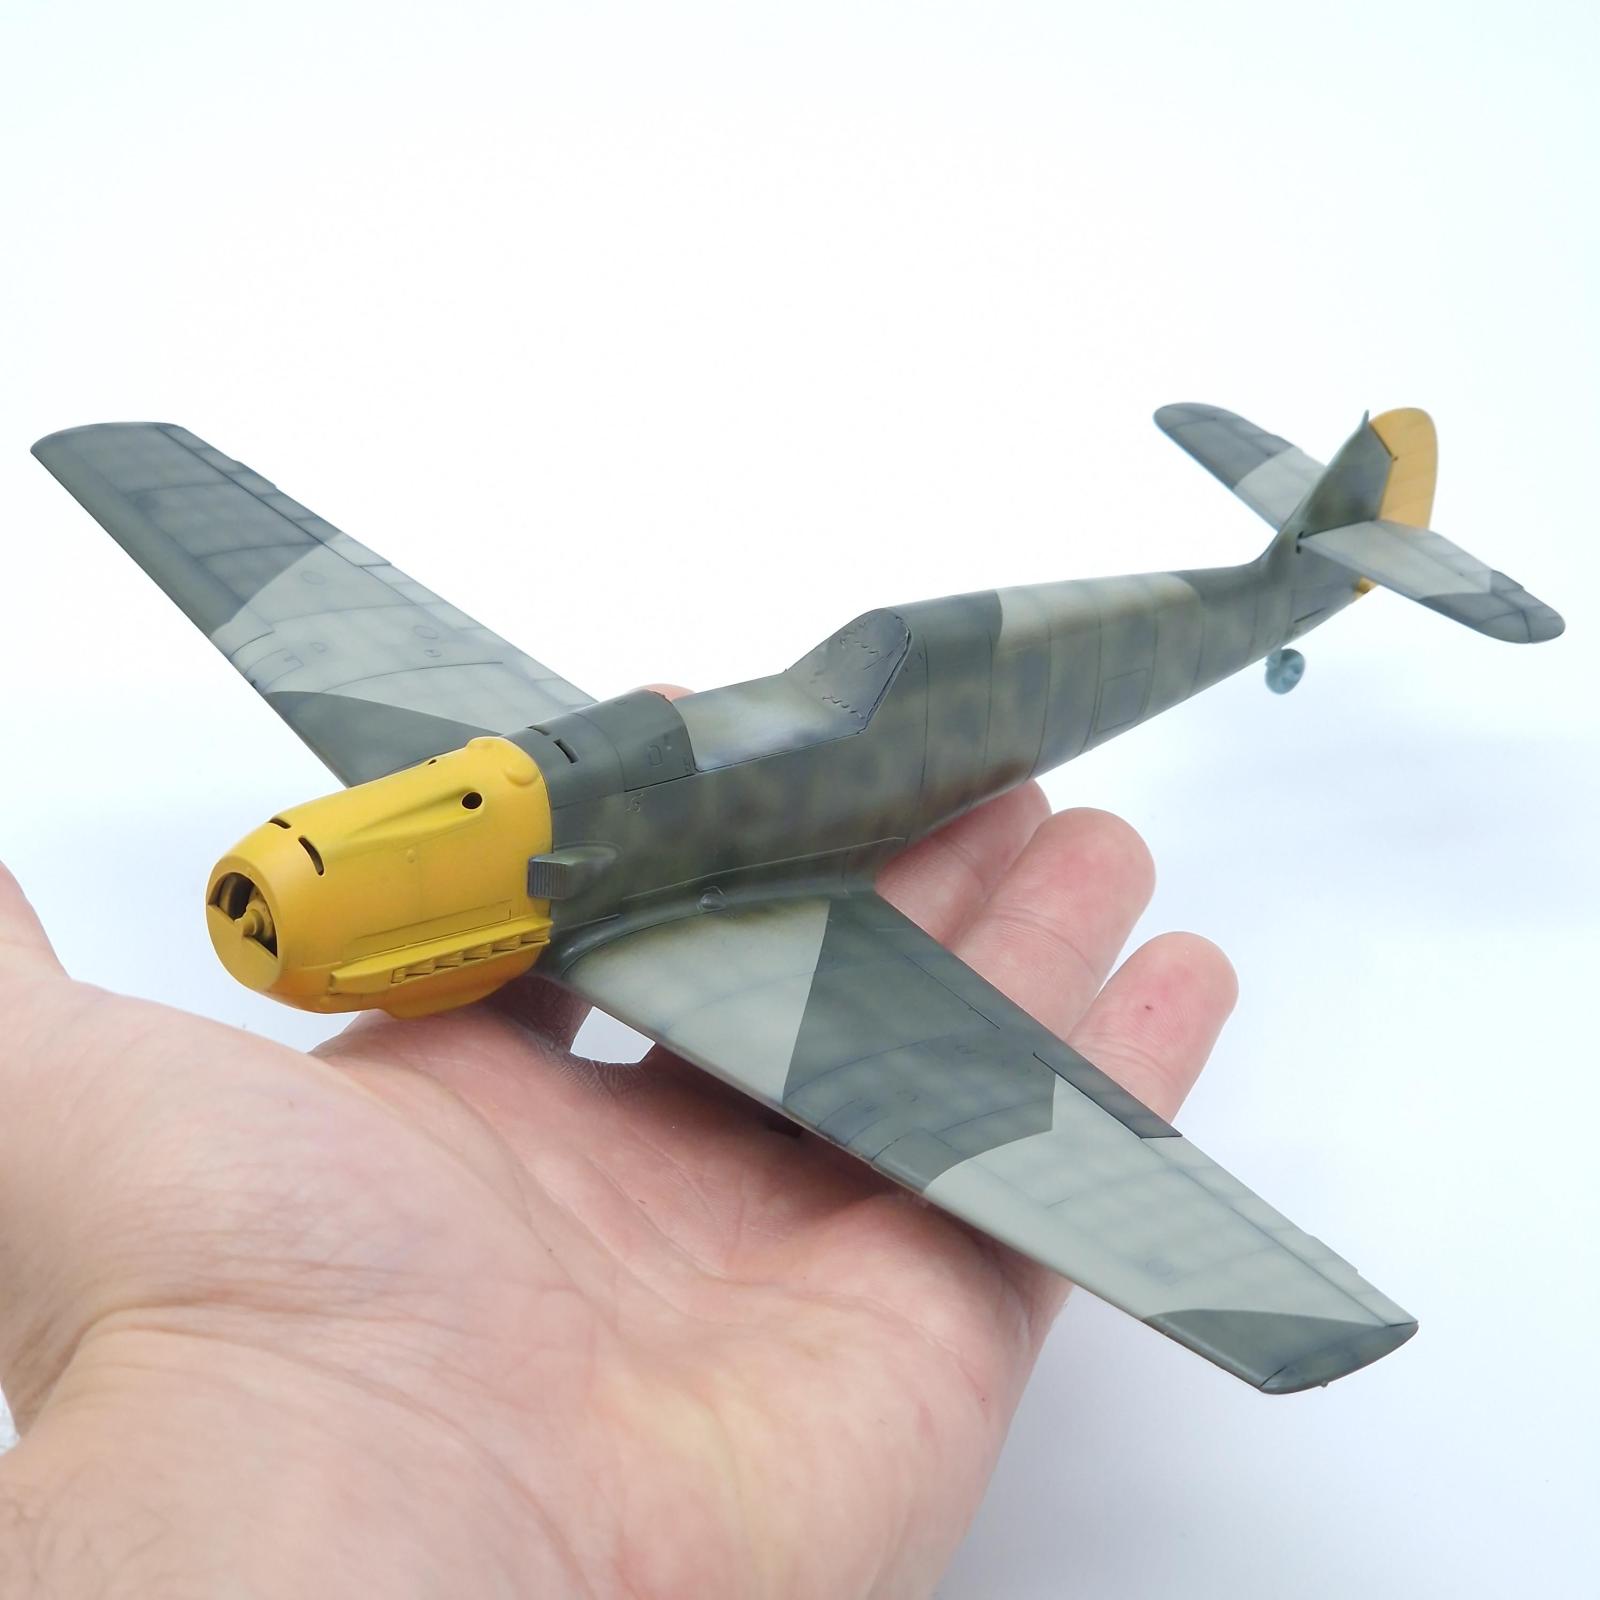
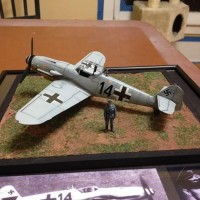
Eduard Bf 109E-4, 1/48. 'Emil Over Britain'.
This article is part of a series:
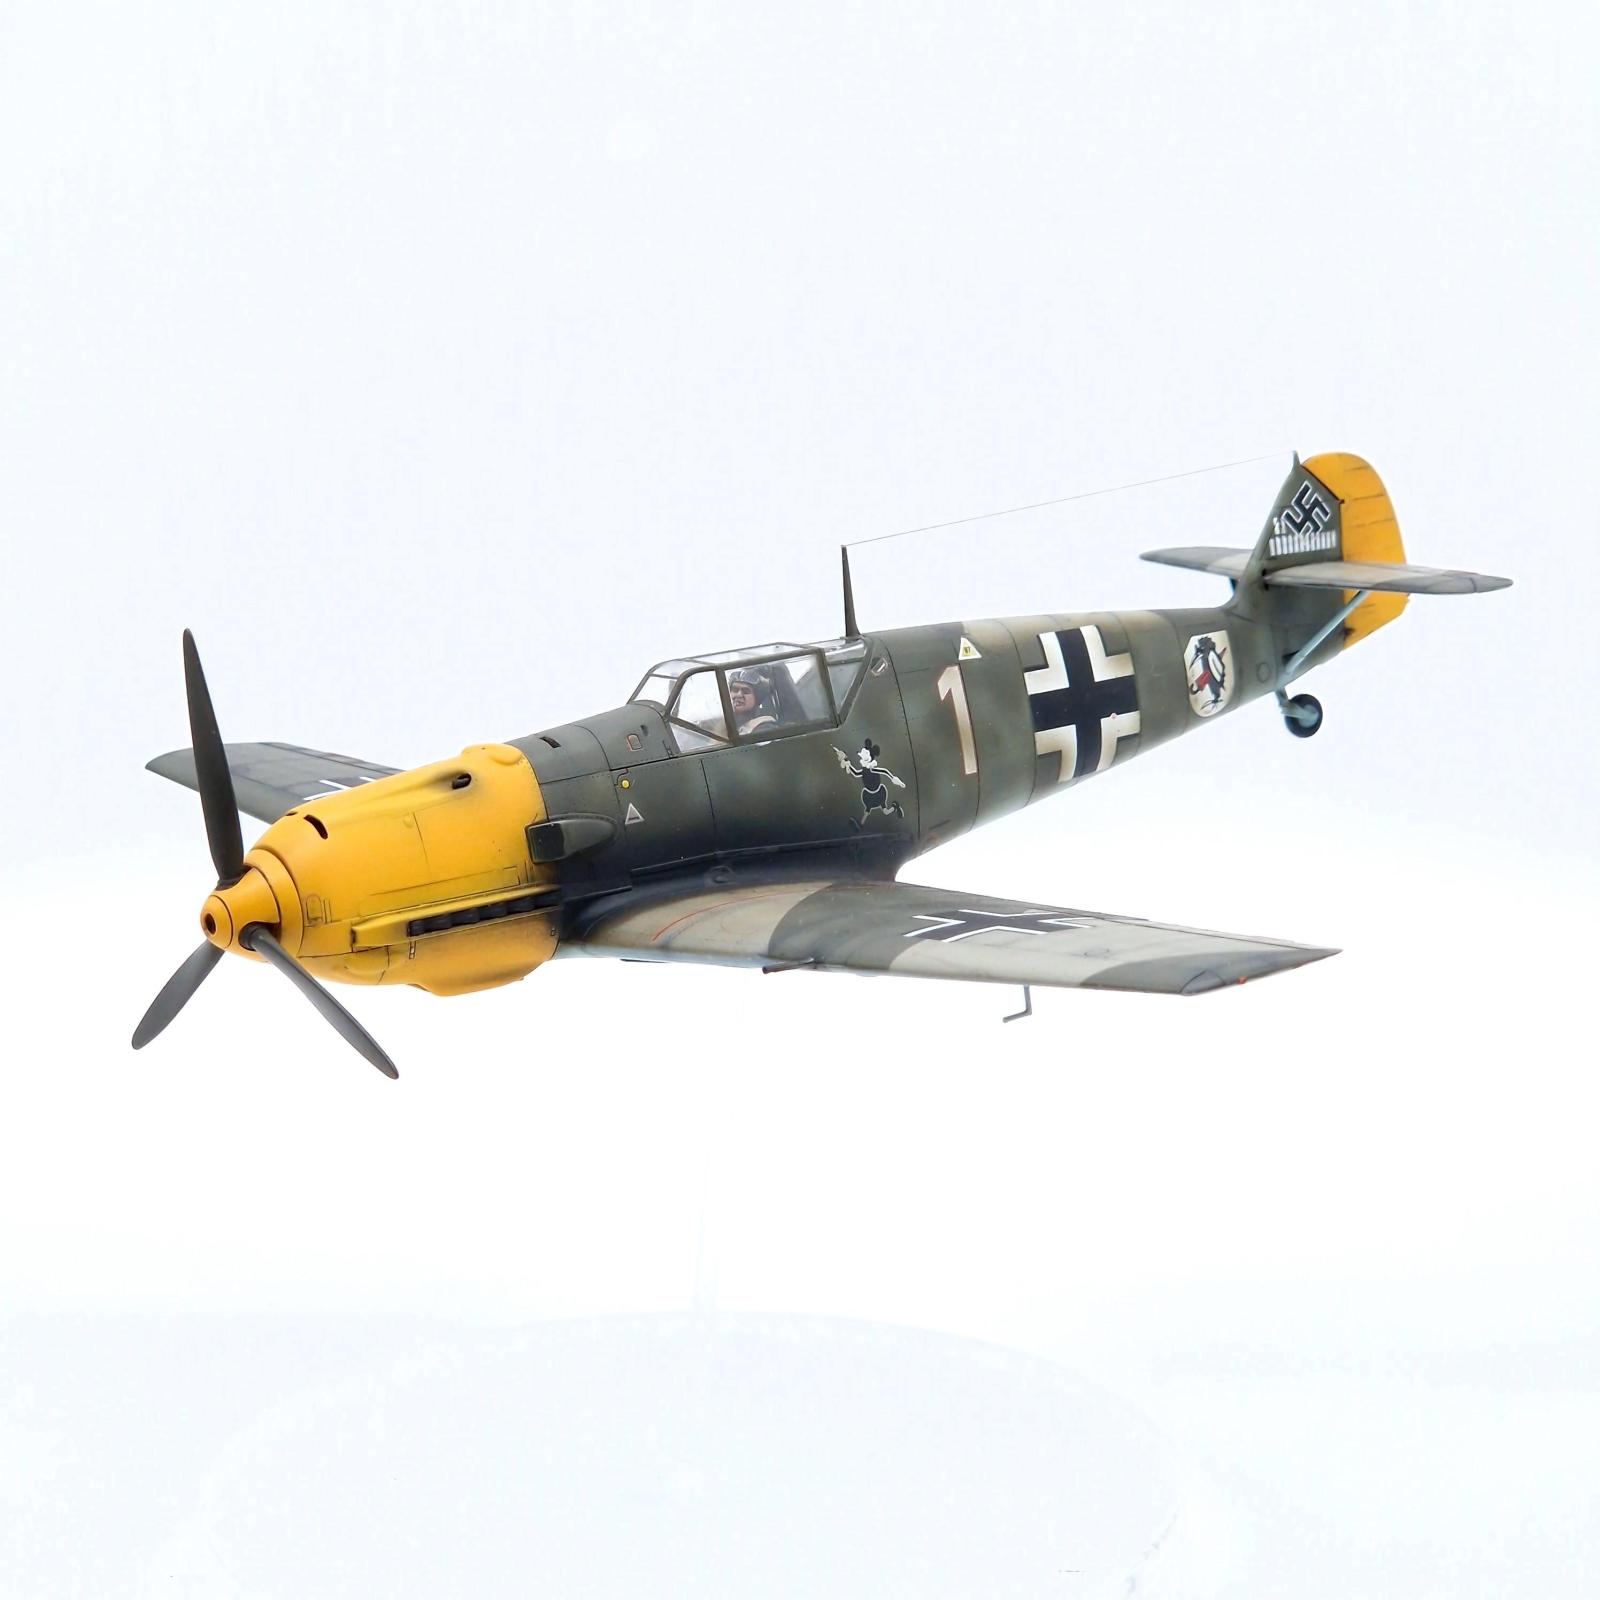
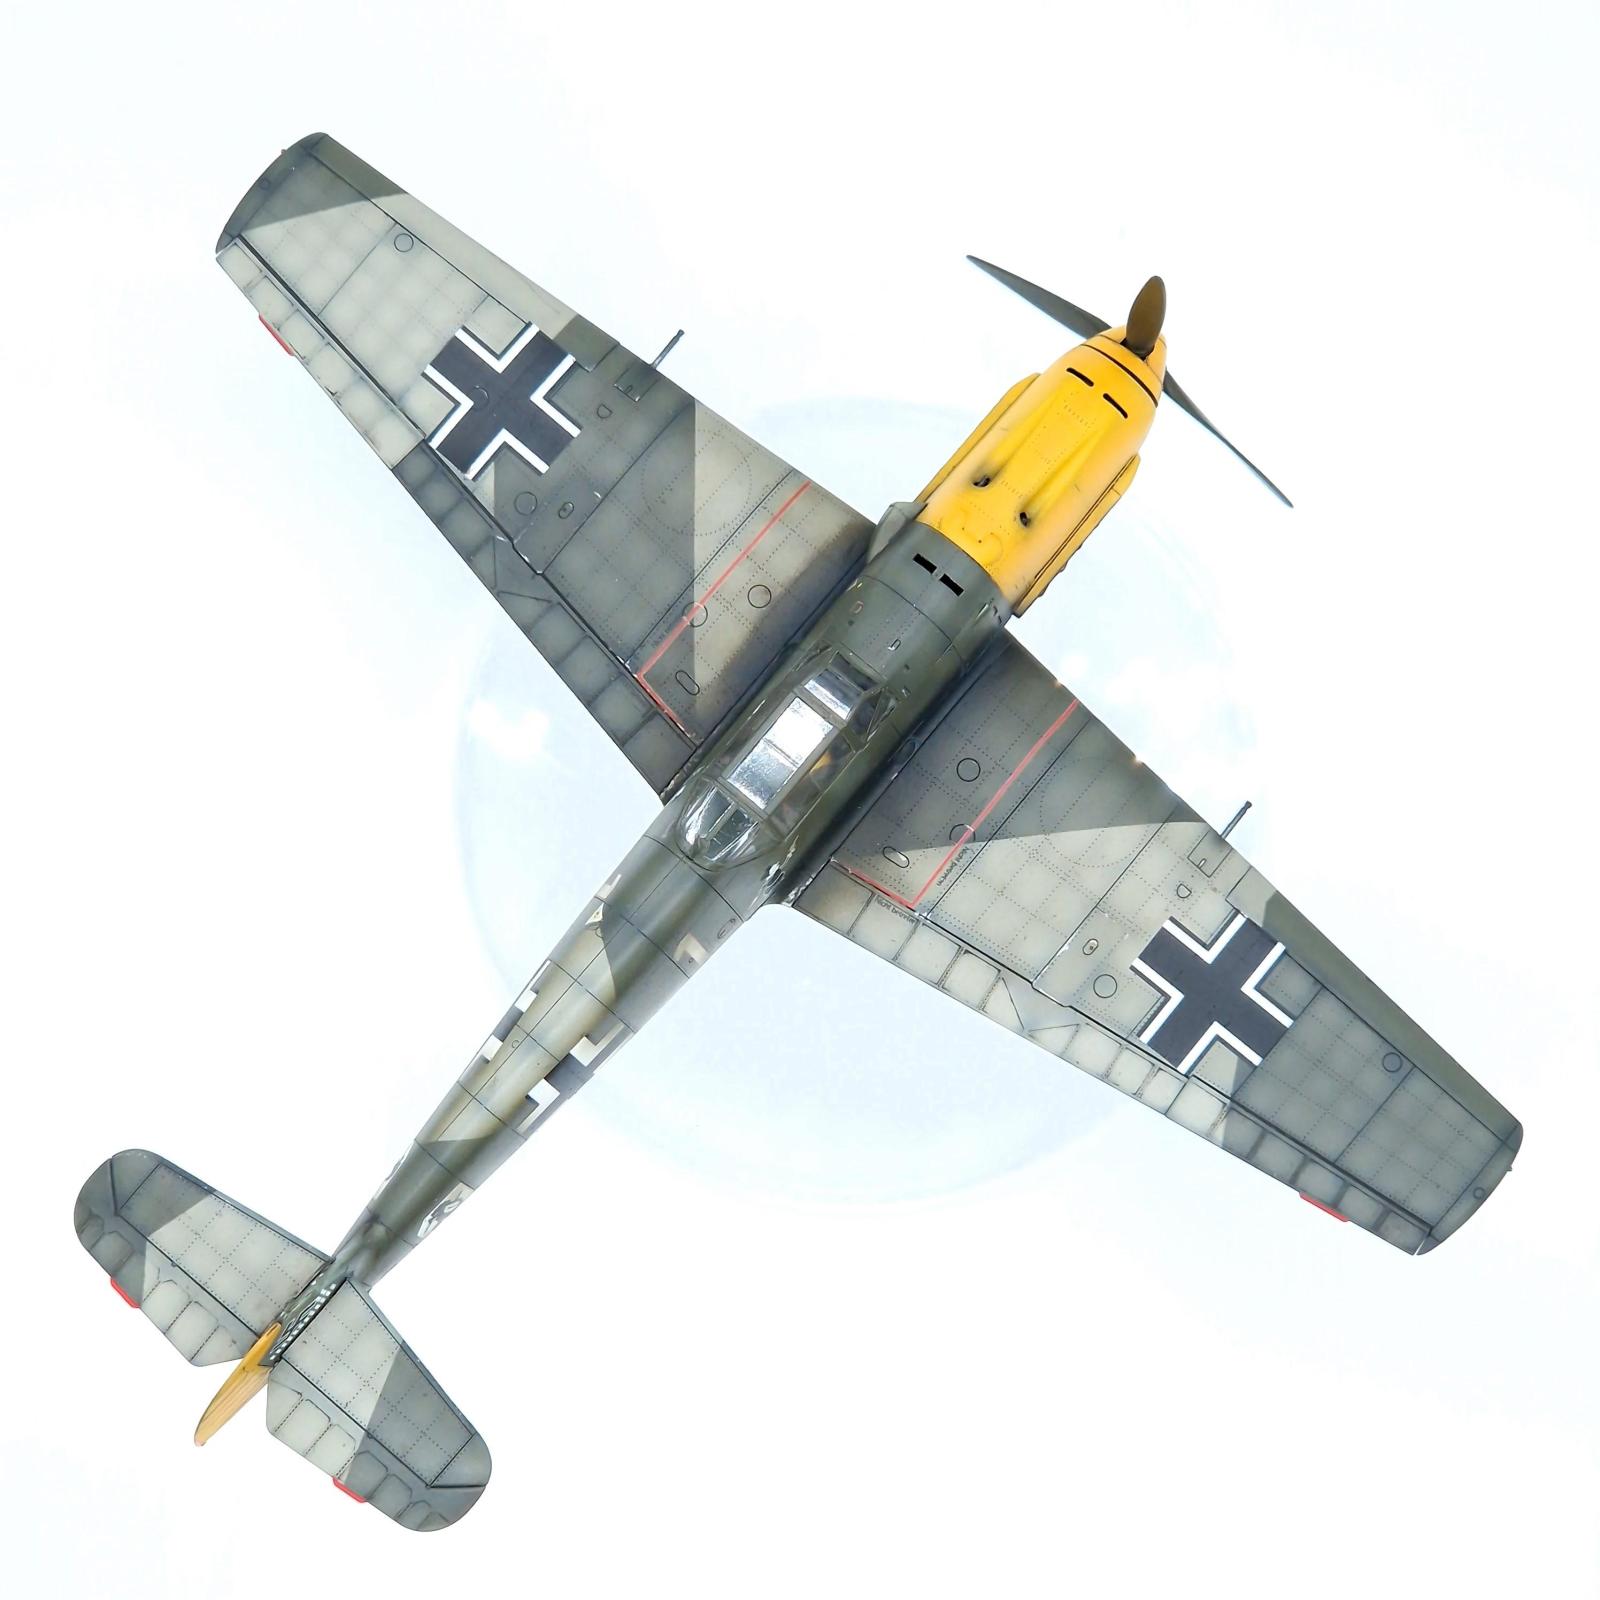
With two Bf 109 kits, I knew one would have to have the classic yellow nose. I also wanted to try the dreaded mottling that made Luftwaffe aircraft so off-putting. Two birds, one stone I thought.
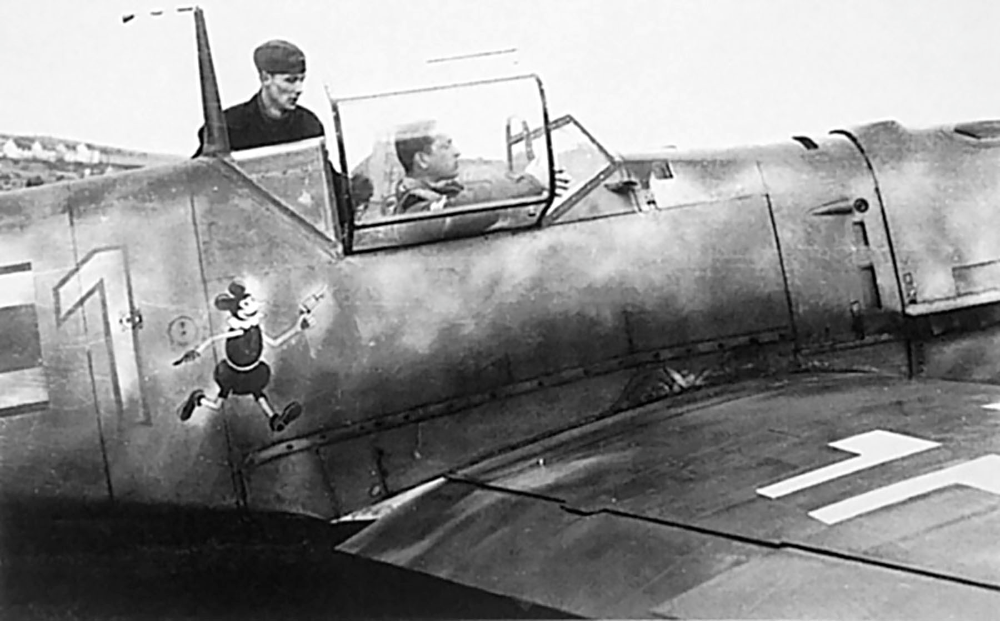
This Bf 109E-4 is supposed WNr. 3709, flown by Oblt. Josef Fözö whom shot down 27 aircraft including his time in Spain. The 'Adlerangriff' kit comes with two schemes of this aircraft, one from July and one in September which has the yellow nose and rudder. Being that this is one of only two options for a cannon armed 109 with a yellow nose and mottling, I chose this one as it was an E-4 and the other was an E-4/B with the bomb rack.

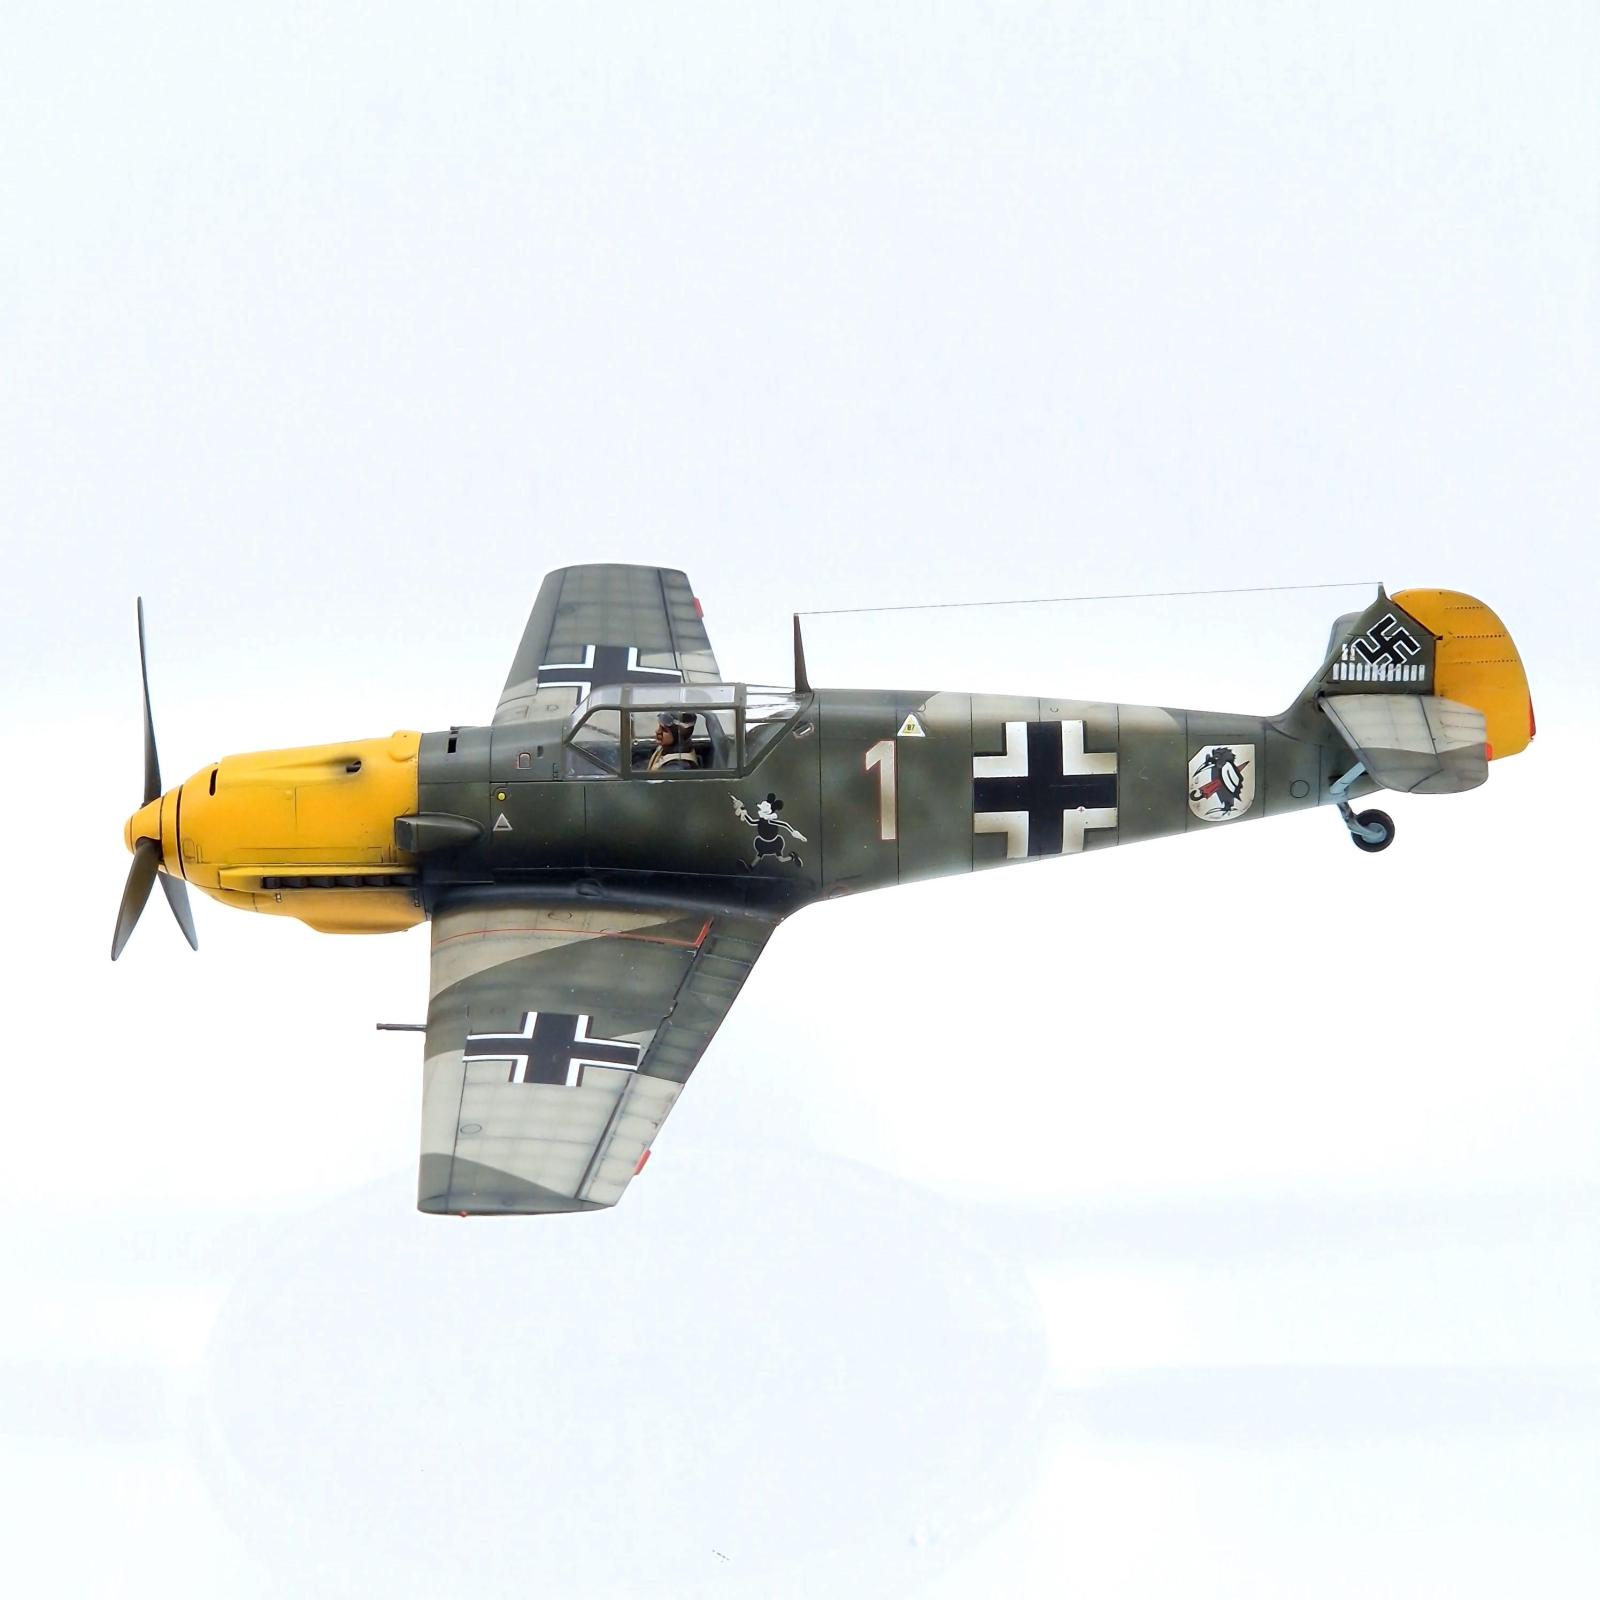
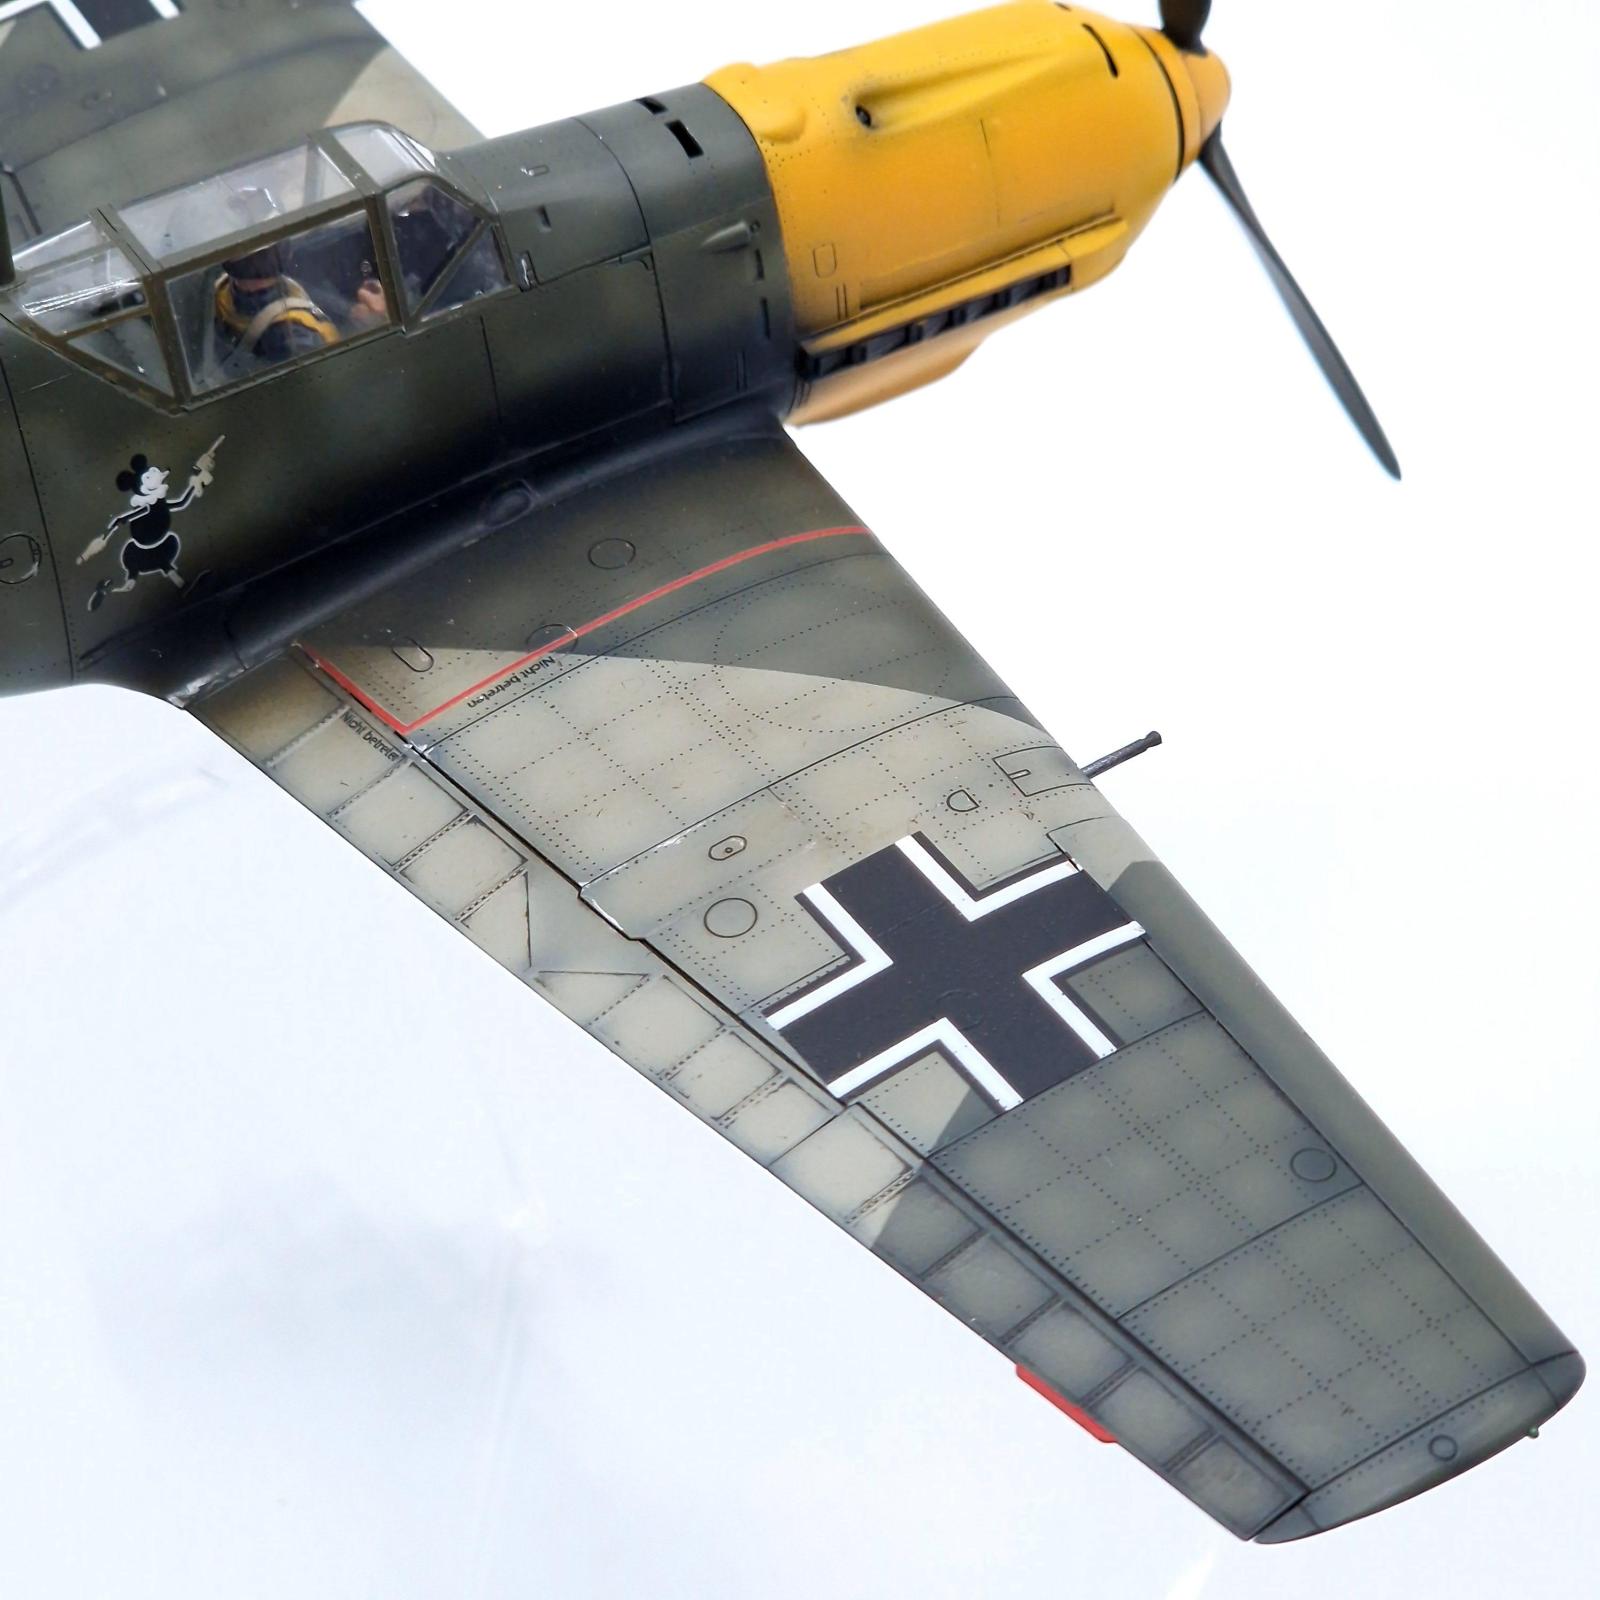
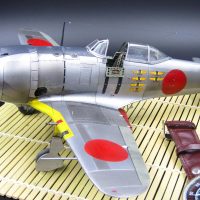
One trick I found a while ago regarding yellow was to paint the areas pink as this makes the yellow come across more vibrant, it seems to work! By doing this I was also able to shade these parts so panel lines and the such were darker pink, and the panels lighter, creating some nice variation and then all I needed to do is add the yellow over the top which would in turn now be shaded. This has a major advantage as trying to do shading with yellow often ends up turning the paint into a green colour.
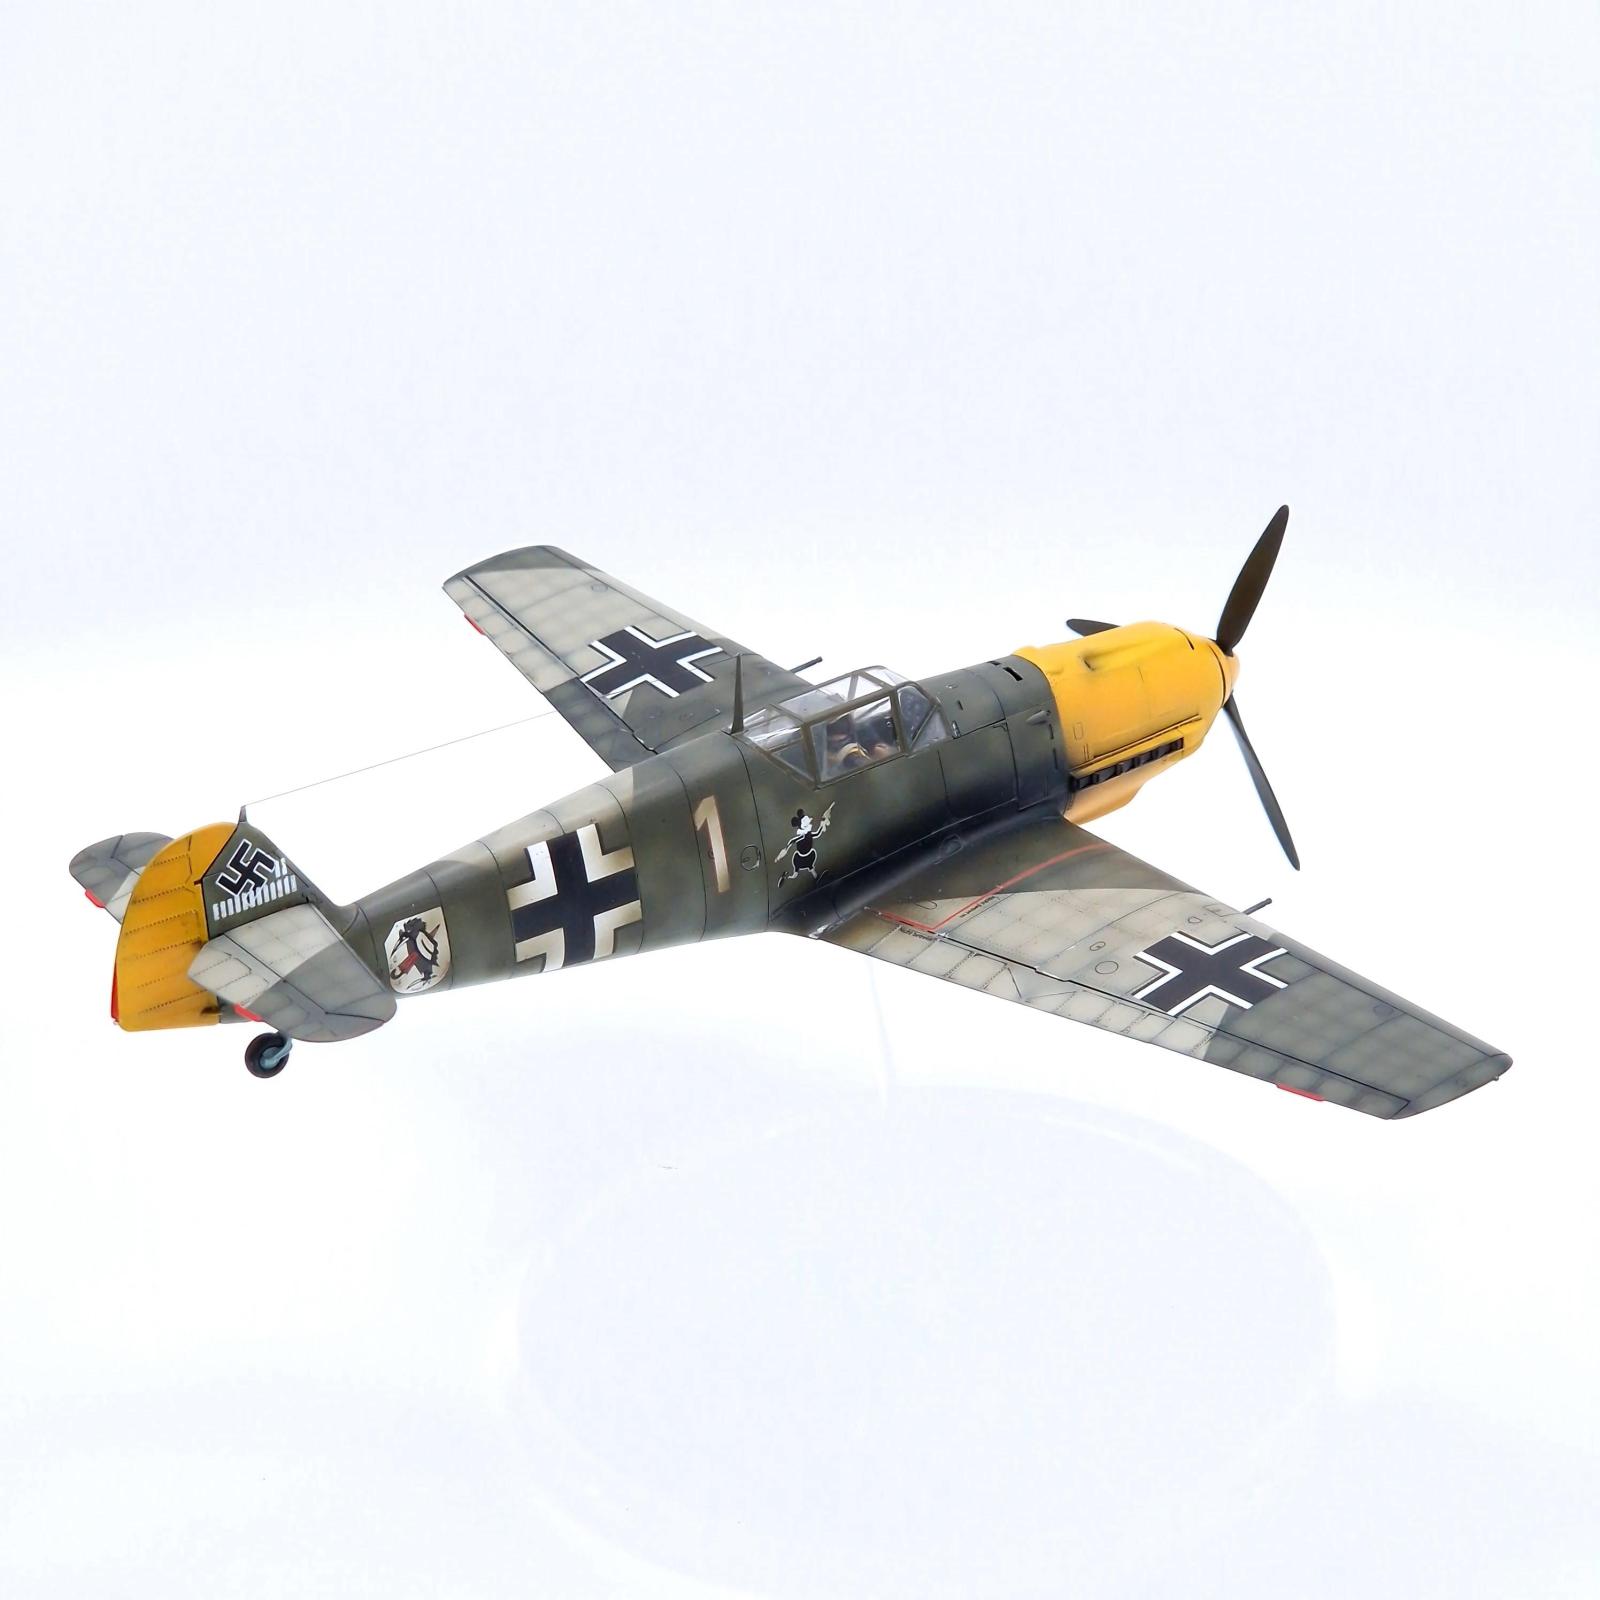
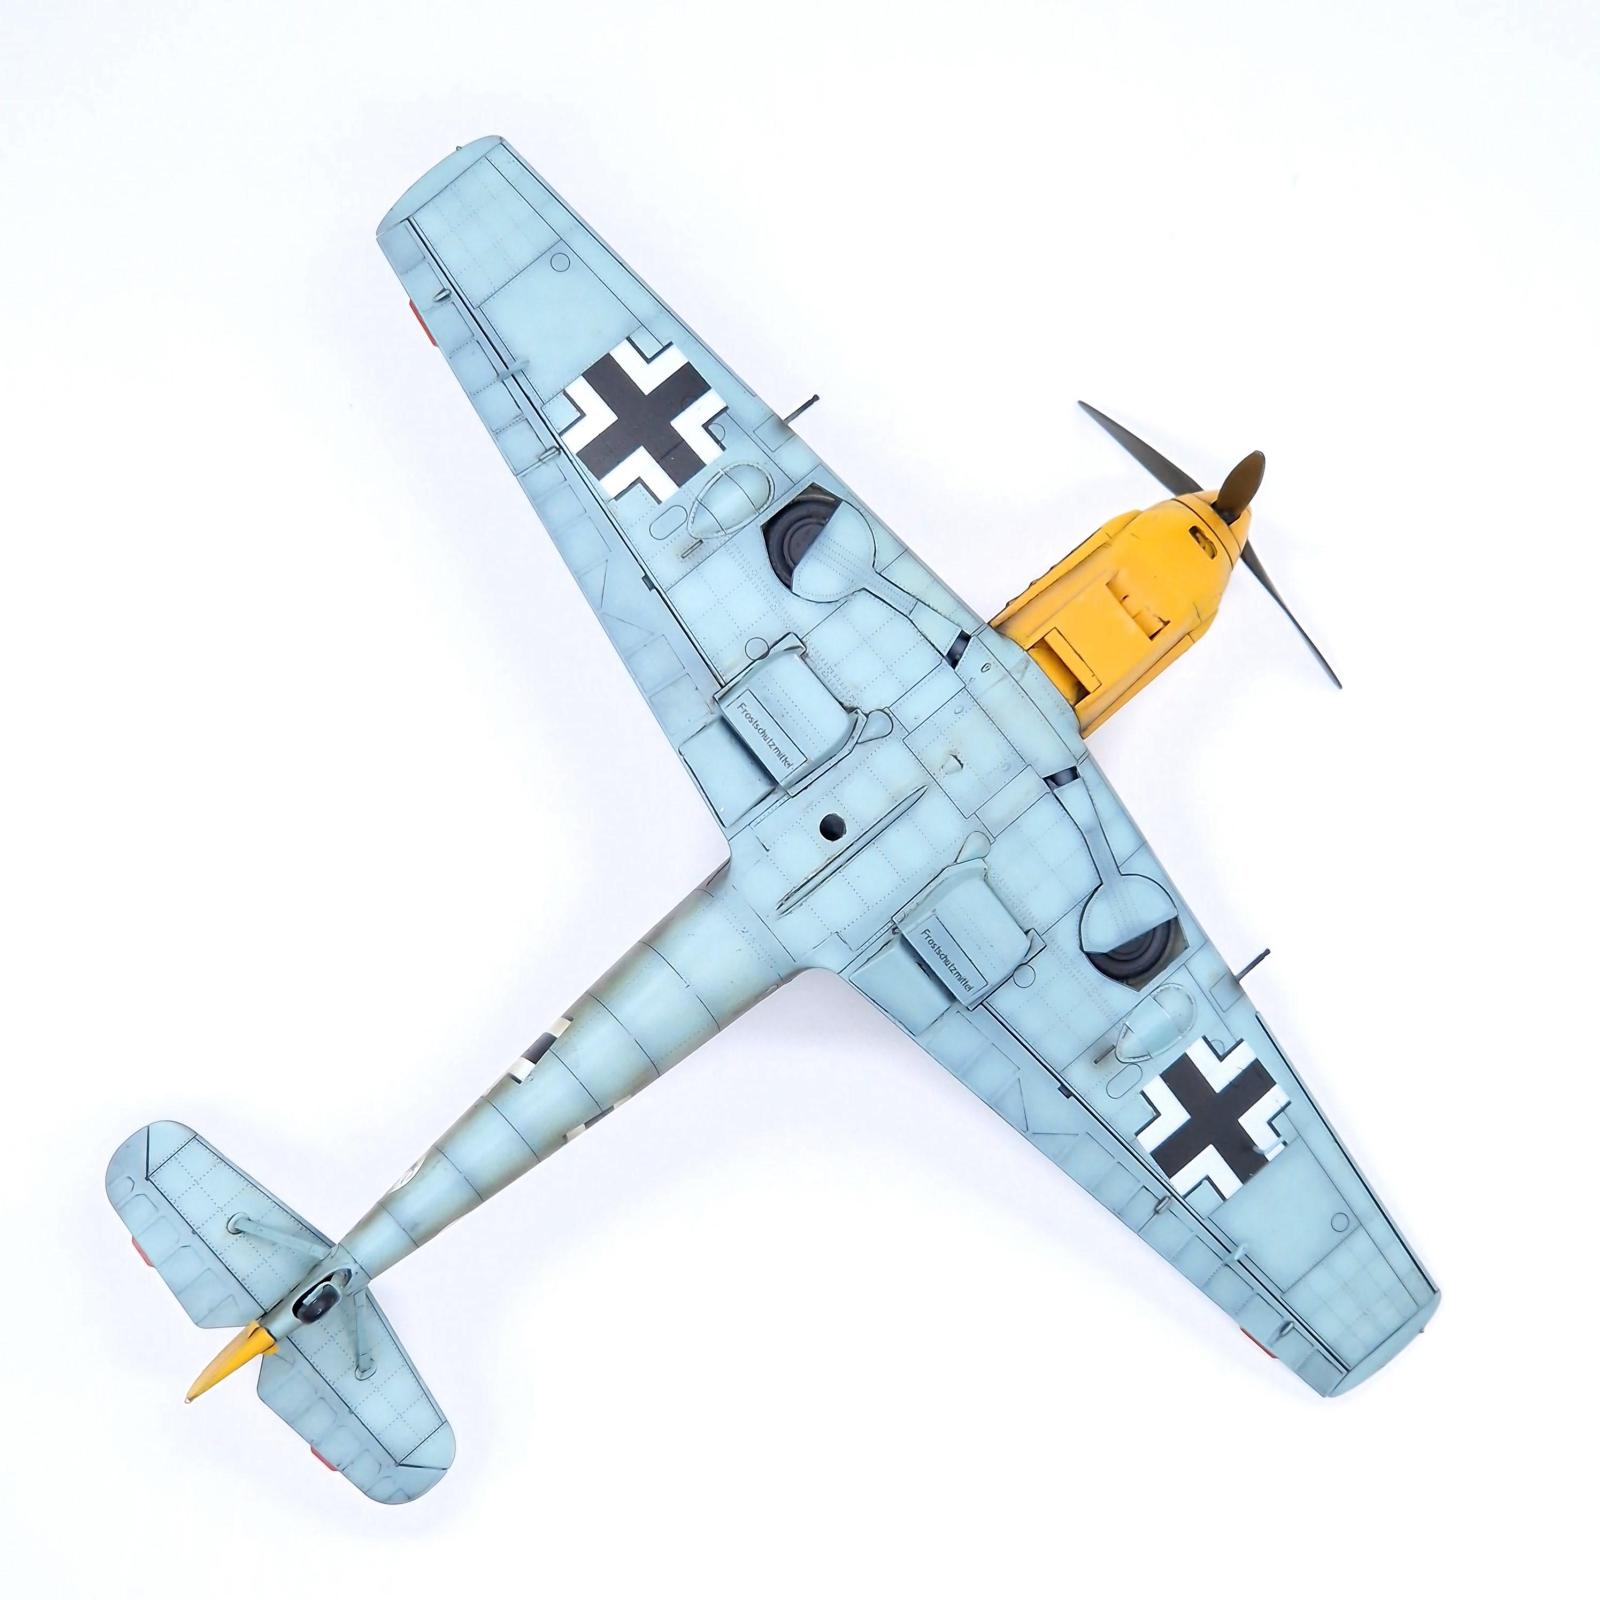
For mottling I first painted the aircraft in a standard scheme before masking off the yellow parts. I did not bother masking off any of the standard scheme in order to show over-spray from the field painted scheme. The instructions showed it to be very heavy compared to the other 109s in the set, I tried my best to replicate this but I went too far.
Luckily, as I discovered, since mottling is by nature a pretty random camouflage technique there was no issue in going back and adding some light blue to break up the particularly overdone areas. This resulted in a fairly decent fix.
After the decals were on I decided to go back and do some spraying, a photo of Fözö's plane shows the cross definitely had some overspray on it. That being said one confusing thing is whether that aircraft is the same as this as the photo listed a different WNr. Either Eduard is wrong, the photo caption is wrong, or he had two planes with an identical scheme.

I wouldn't mind doing another attempt at mottling preferably on a scheme with less mottling and seeing how it comes out, perhaps this gives me an excuse to get a later war 109. We shall see.
-

- 1. Prior to mottling

-
- 1. First draft of the mottling, before it was toned back down a tad.
A wonderful result, Harvey!
Thank you!
Speechless, Harvey @scalerambush
This is truly high quality modelling and photography together.
Are you using photo editing software to do some corrections on your pictures.
Thank you! No correction with editing here, though I do play around with the camera settings themselves to try and get it as close as possible in colour to the real thing.
I may have removed the stand in some of the photos on one of them (I think it was the E-1 mostly), but this was just a simple built in eraser tool on my phone like the one they always advertise on phones at the moment.
Very nicely done in both builds. I really like your paint work, and like the tip about painting Pink as a base coat for yellow. I want to give that a try on my next build. I usually use white or light gray. I worked for a gentleman who has all his planes painted in primarily yellow. To get consistant coloring we would prepaint in white. Yellow just doesn't cover very well and more layers only seems to make it darker not more yellow. I love the surface detail of the Eduard kits, and you did a great job to bring it out. Two excellent builds!
Thank you! I think I saw it a while ago, and then was reminded it as someone was painting up a pre-war US navy aircraft with the yellow wings. Apparently it also works the opposite way, yellow before red to make it more vibrant, but I've not tested that.
Nice work, Harvey!
For your future attempts at mottling, allow me to pass on what I have learned: Thin the paint to 50-50, then tighten down the brush till you tap it and a "dot" appears on the surface. Then "mottle" the surface with the dots, as light or heavy as you wish. Wiggle the brush as you do this to make different shapes in the dots. You'll pick it up easy and be on your way for further Luftwaffe schemes. I post a couple photos here to demonstrate what I describe.
4 attached images. Click to enlarge.
Thank you for the advice, they are the sort of schemes I'd like to try in the future. That being said it seems the mottling on this one in the photo is more intense than those mottle schemes.
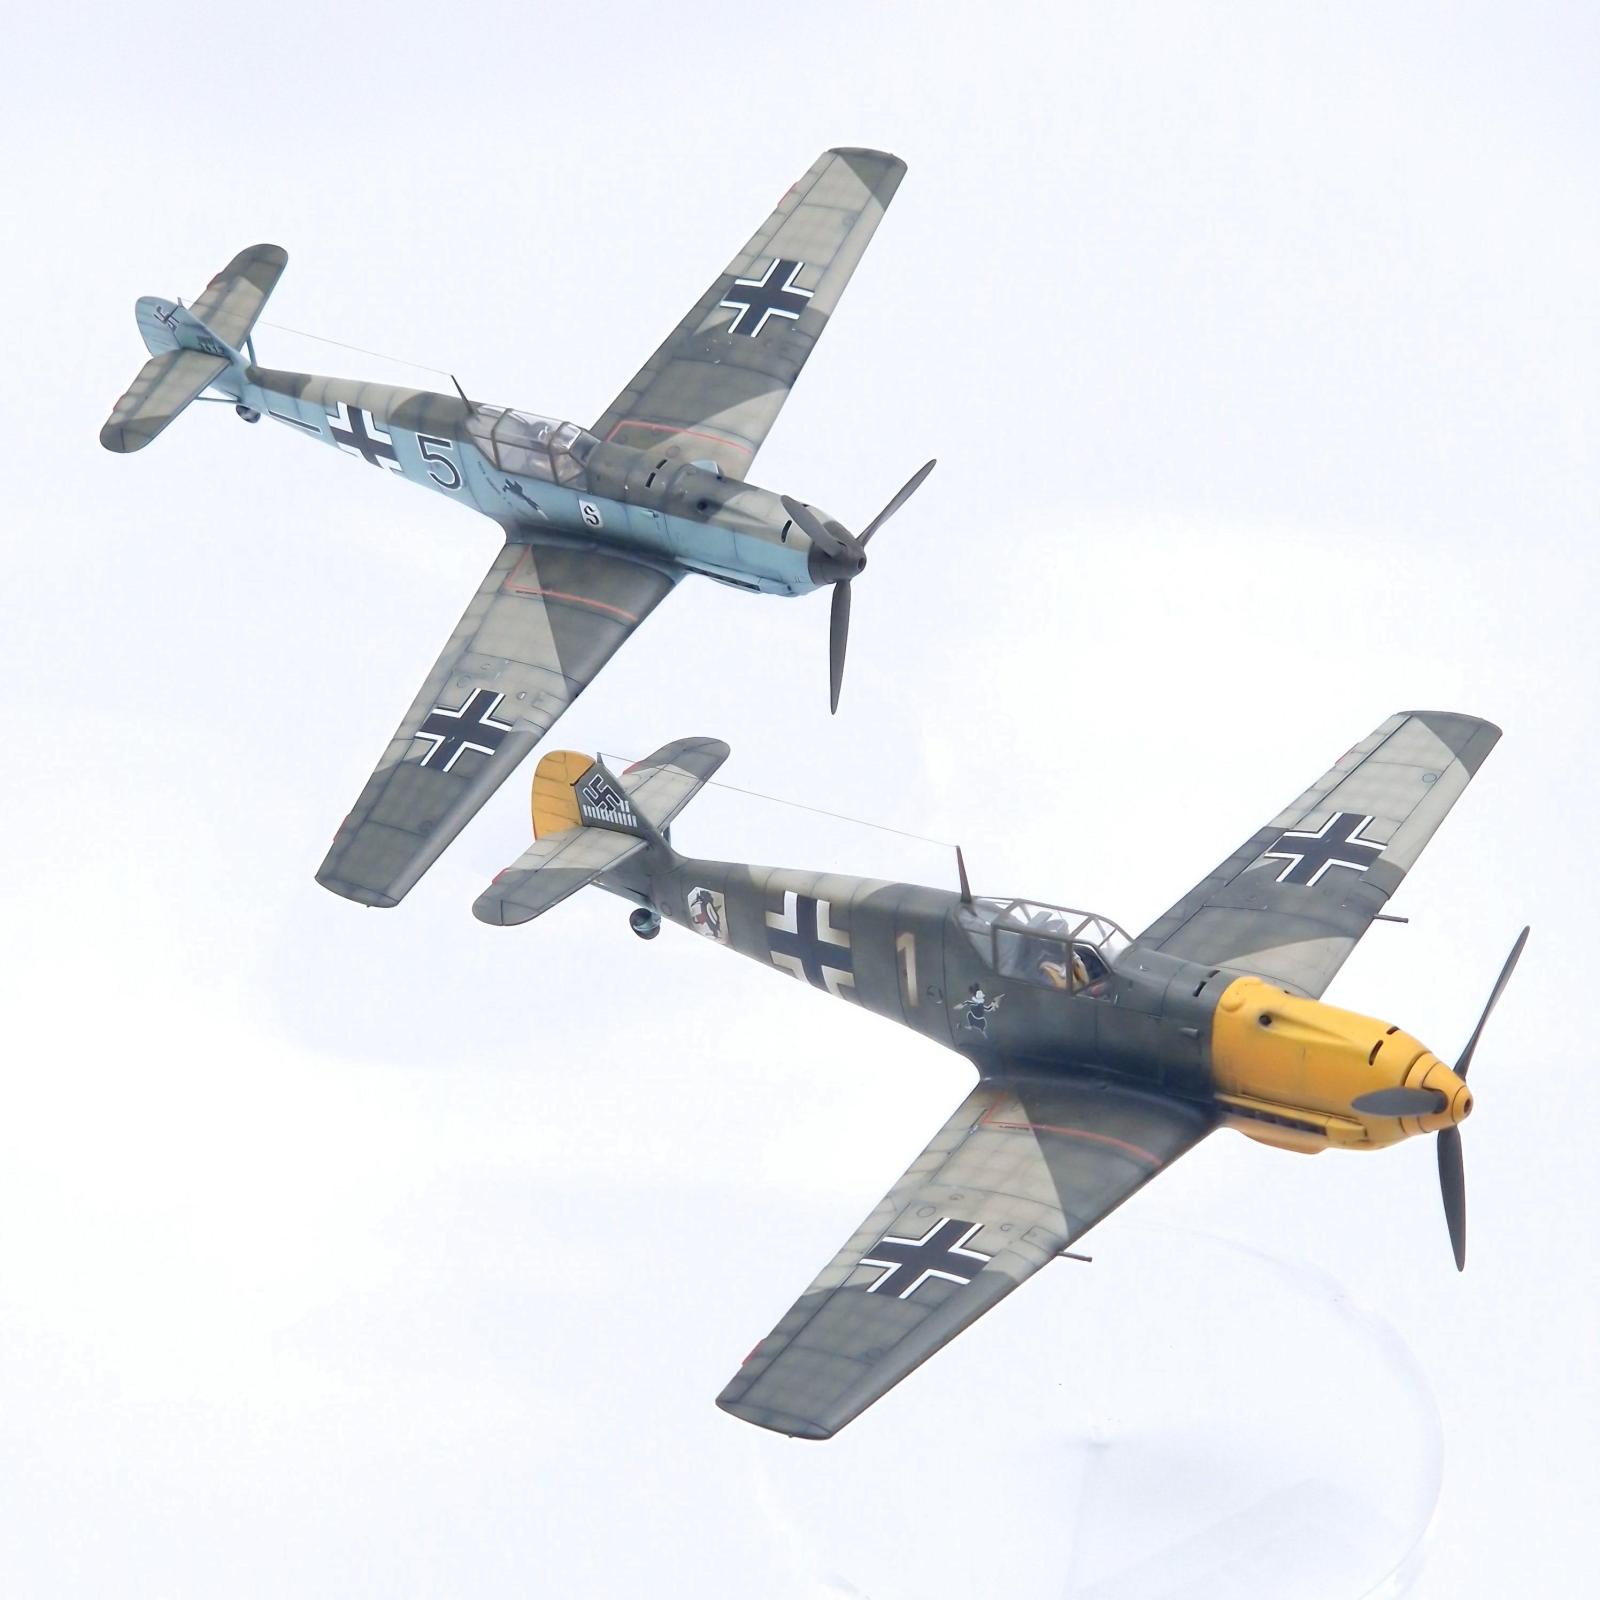
Very smart looking model. Makes me think of the box art of the classic Airfix Bf 109E in 1/24. You are on a good start of showing the progression of the camouflage patterns and colours changing as Luftwaffe got more opposition from the Allied forces.
Thank you, and that's exactly what I thought. Whilst it is a bit of an extreme from factory fresh to extremely mottled, it does reflect what a lot of pilots were thinking at the time about the scheme being too bright.
Great one, what prevents me from building a Bf 109 is exactly this mottling, I can't imagine to be doing this with my airbrush (badger 100) I also have a Harder/Steenbeck but still I don't dare. @tcinla when you mention "brush" do you mean a paintbrush or an airbrush? Thanks for sharing this one!
Michel, give it a serious try! I do not have any experience of the Badger airbrush but have used H&S airbrushes for many years and also held heaps of courses and demonstrations. Ordinary office printing paper is cheap as well as any paints you have in your modelling studio. Air is free! Just play around with some simple exercises and you will soon find yourself getting the hang. You may struggle a bit with the air pressure/paint mixture/distance to surface/work speed at first but you will certainly not go backwards in your knowledge. Send me an email and we will sort this in no time.
To be honest it wasn't too bad! It helped when I realised I could just fix it with the original colour. The next Luftwaffe plane I do will probably be a more 'medium' mottling as this one is quite deliberately heavy.
@michel-verscheure - airbrush. Trust me, it's easier than you think. It's not supposed to be neat. 🙂
Excellent, Harvey @scalerambush. Extra nice touch with the pilots in both planes.
Thank you! Sadly, those pilots seem to becoming harder and harder to find. I might have to jump on the 3D printing bandwagon at some point just for pilots.
Nice model, staging and photography!
Beautiful paint work and excellent result - well done!
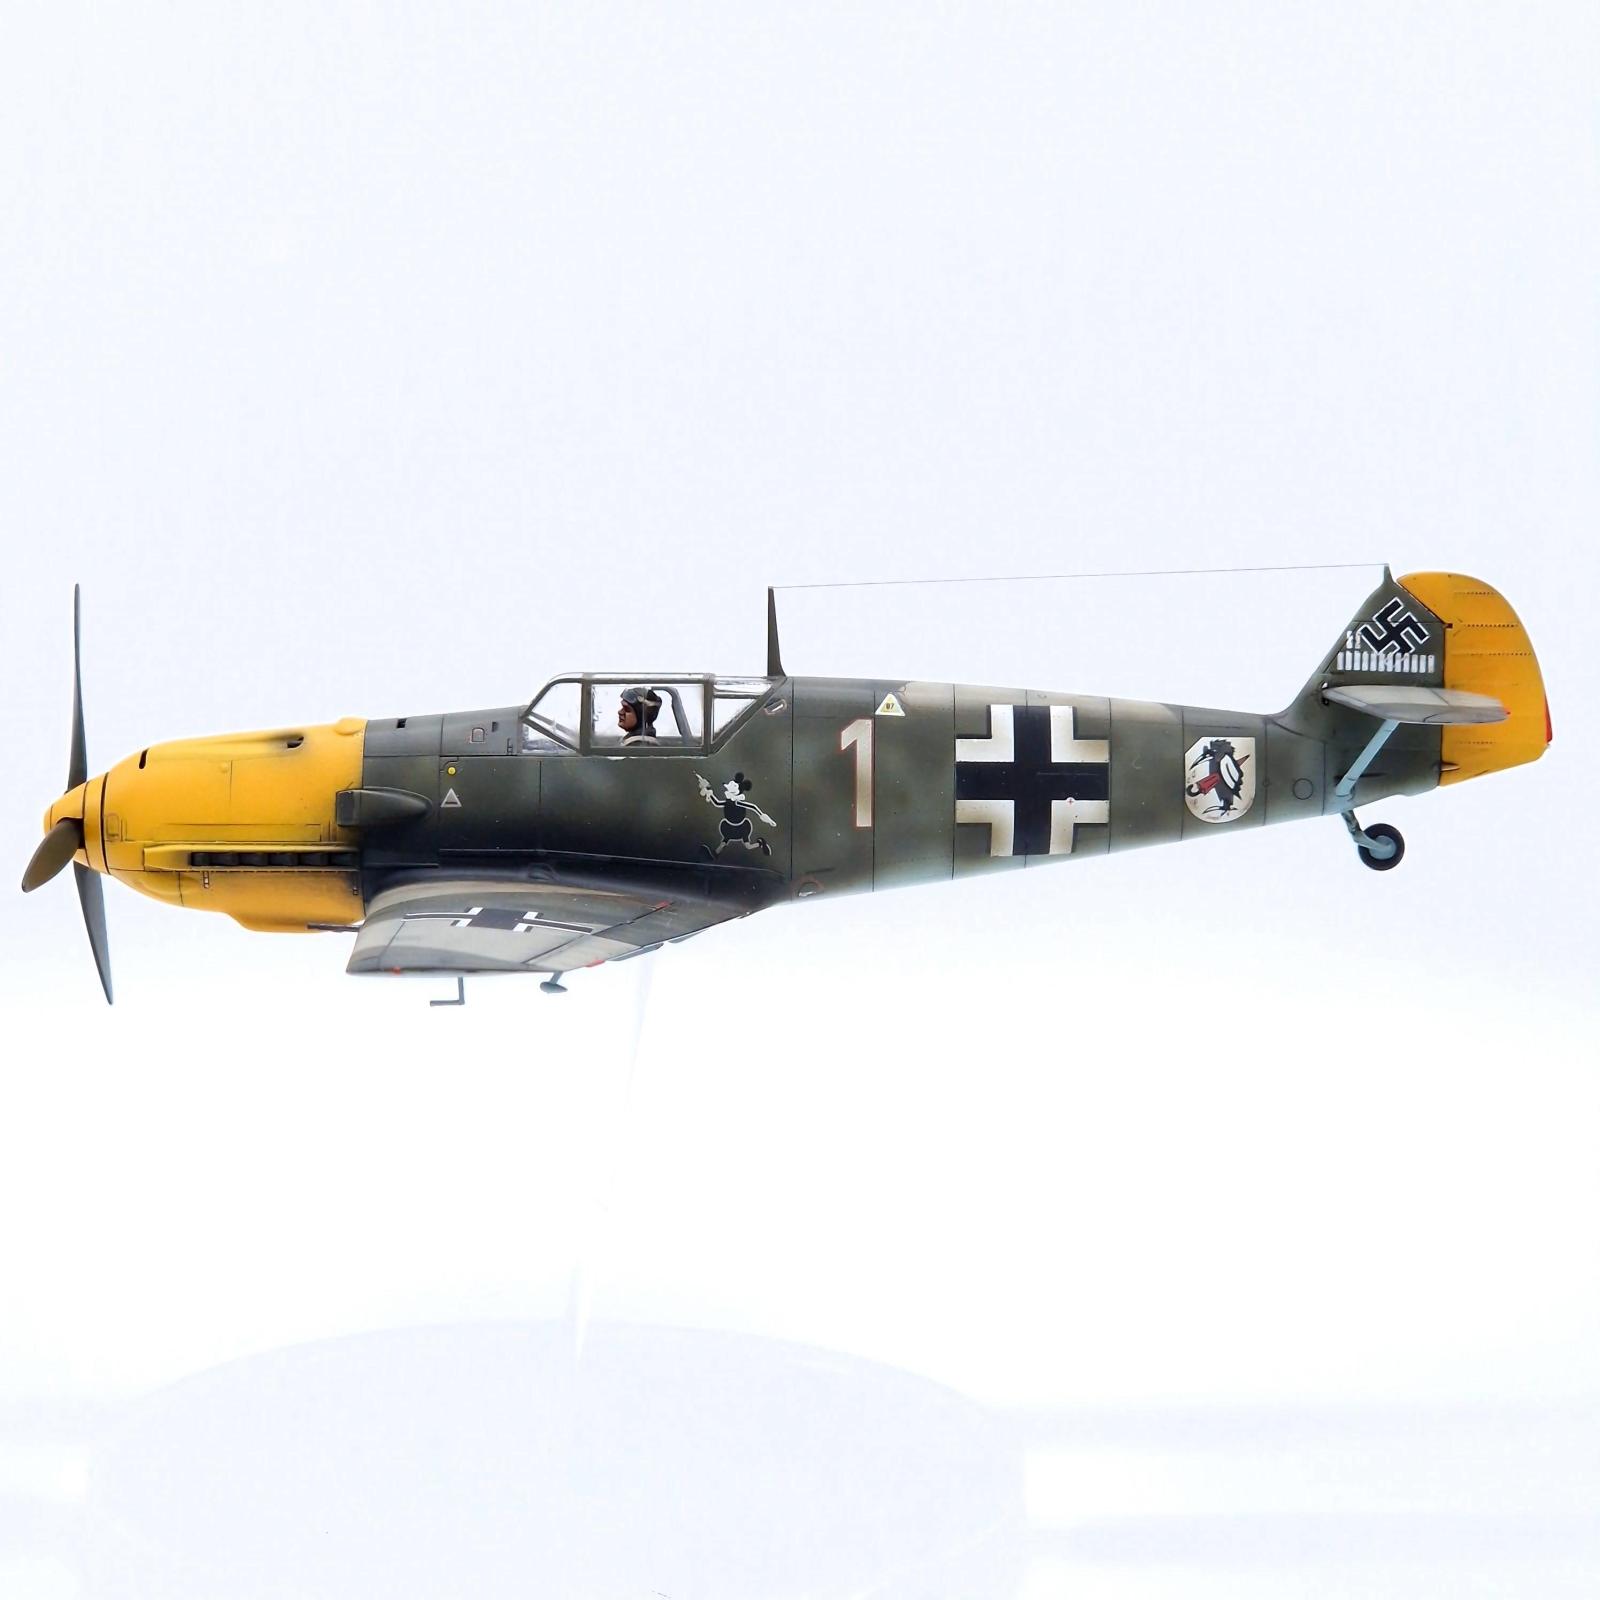
Panel details are mesmerizing. Beautiful work, Harvey
Thank you very much, all credit goes to eduard though. Realistic or not, those rivets really help you line up were to put the shading.