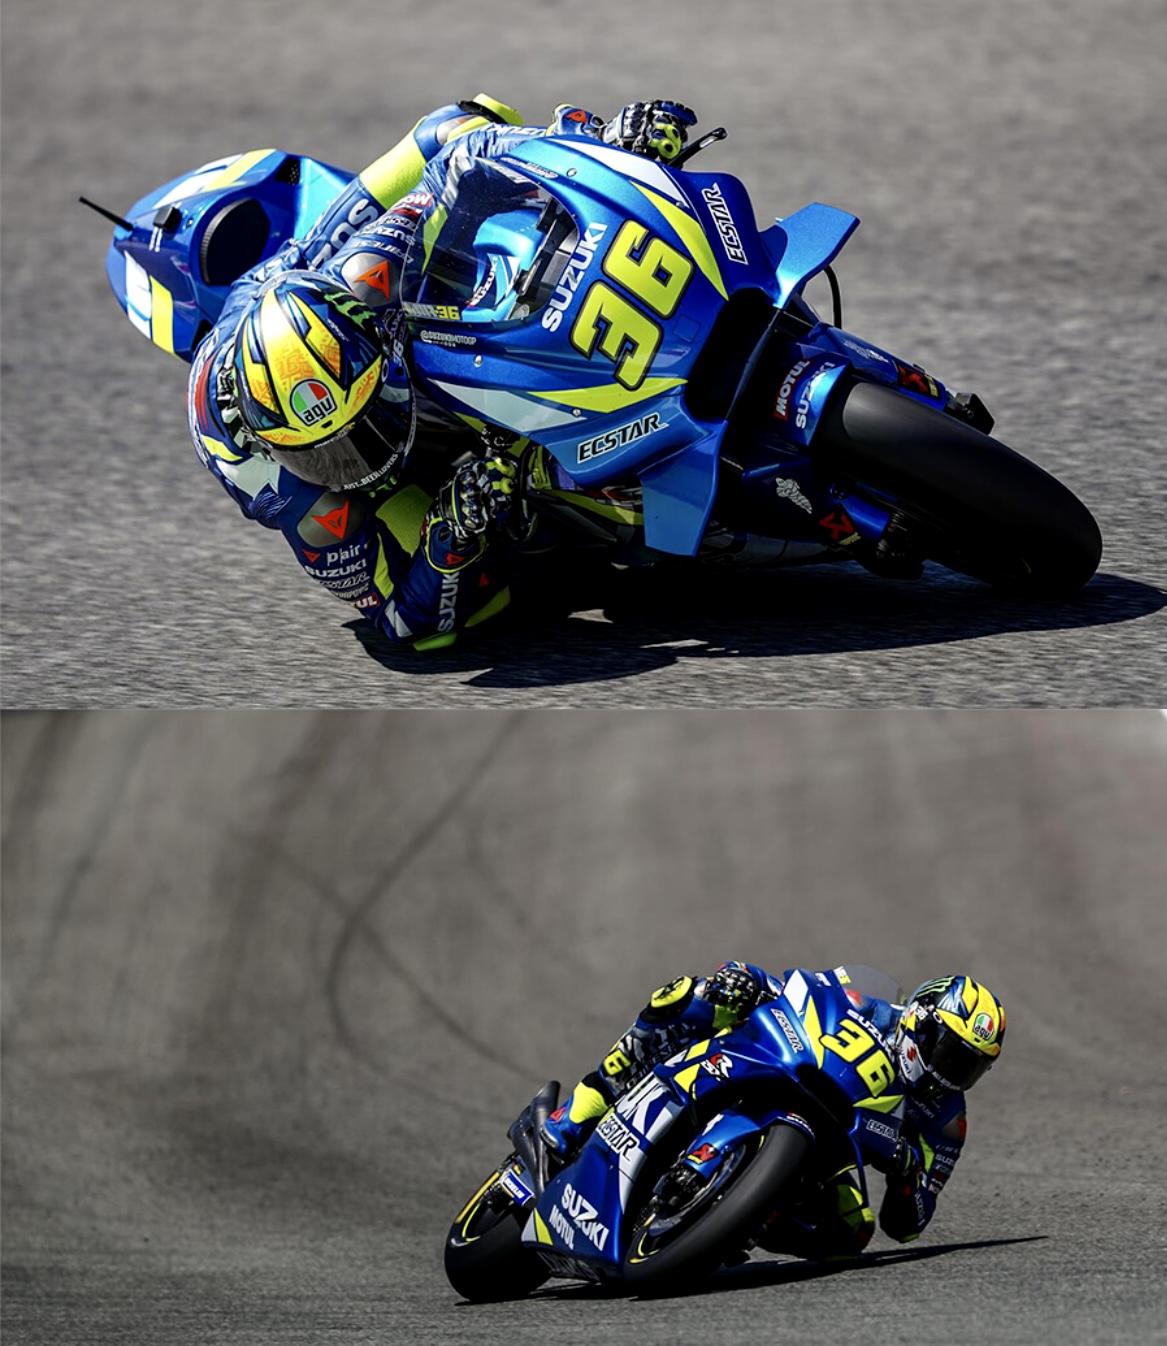
Joan’s Suzuki
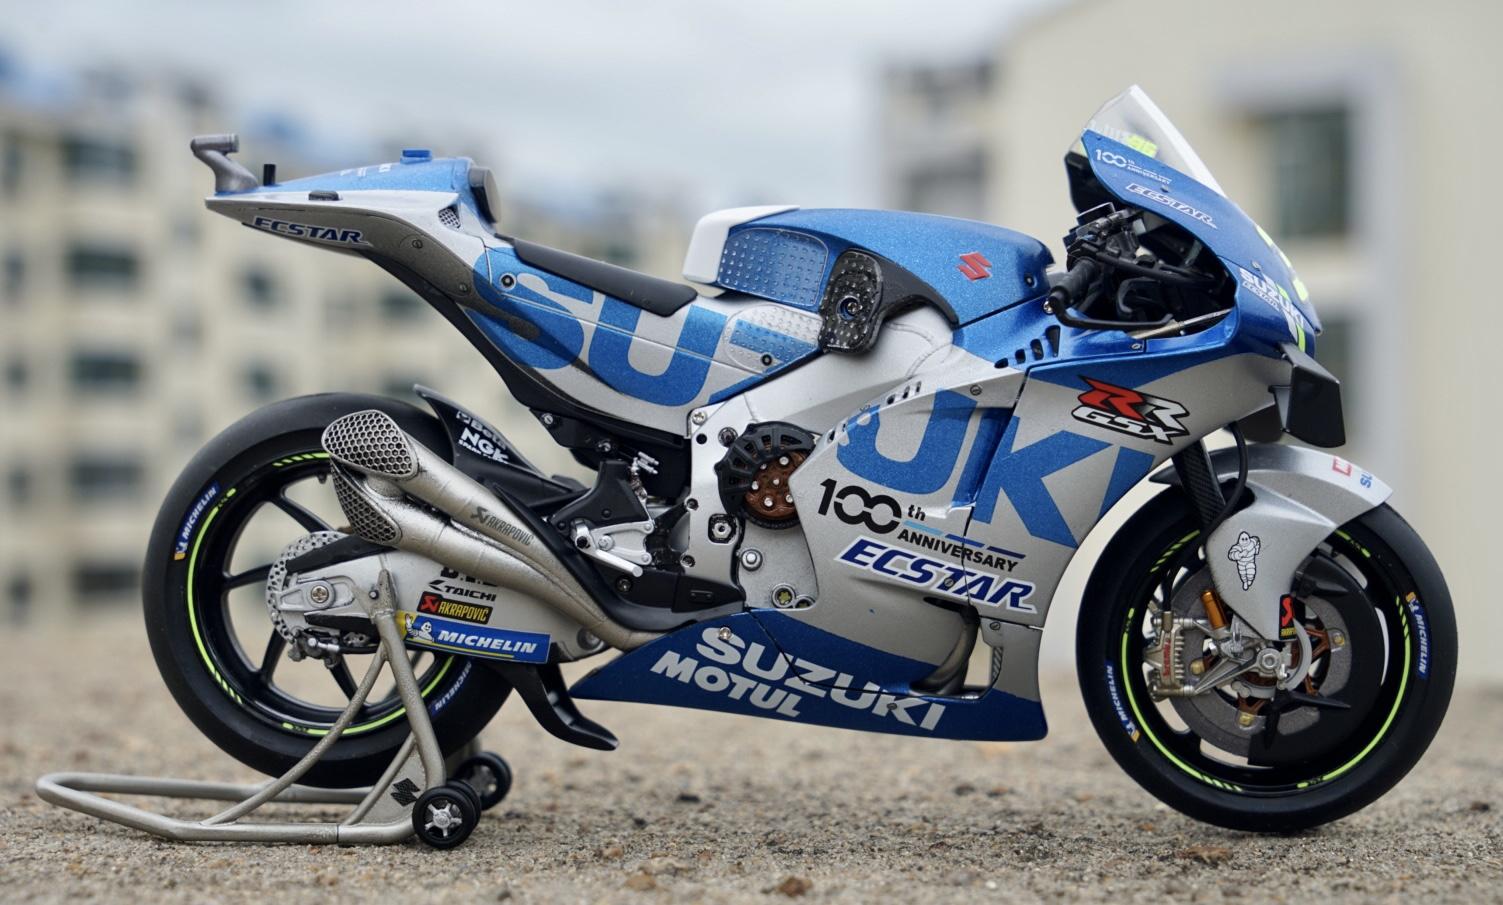
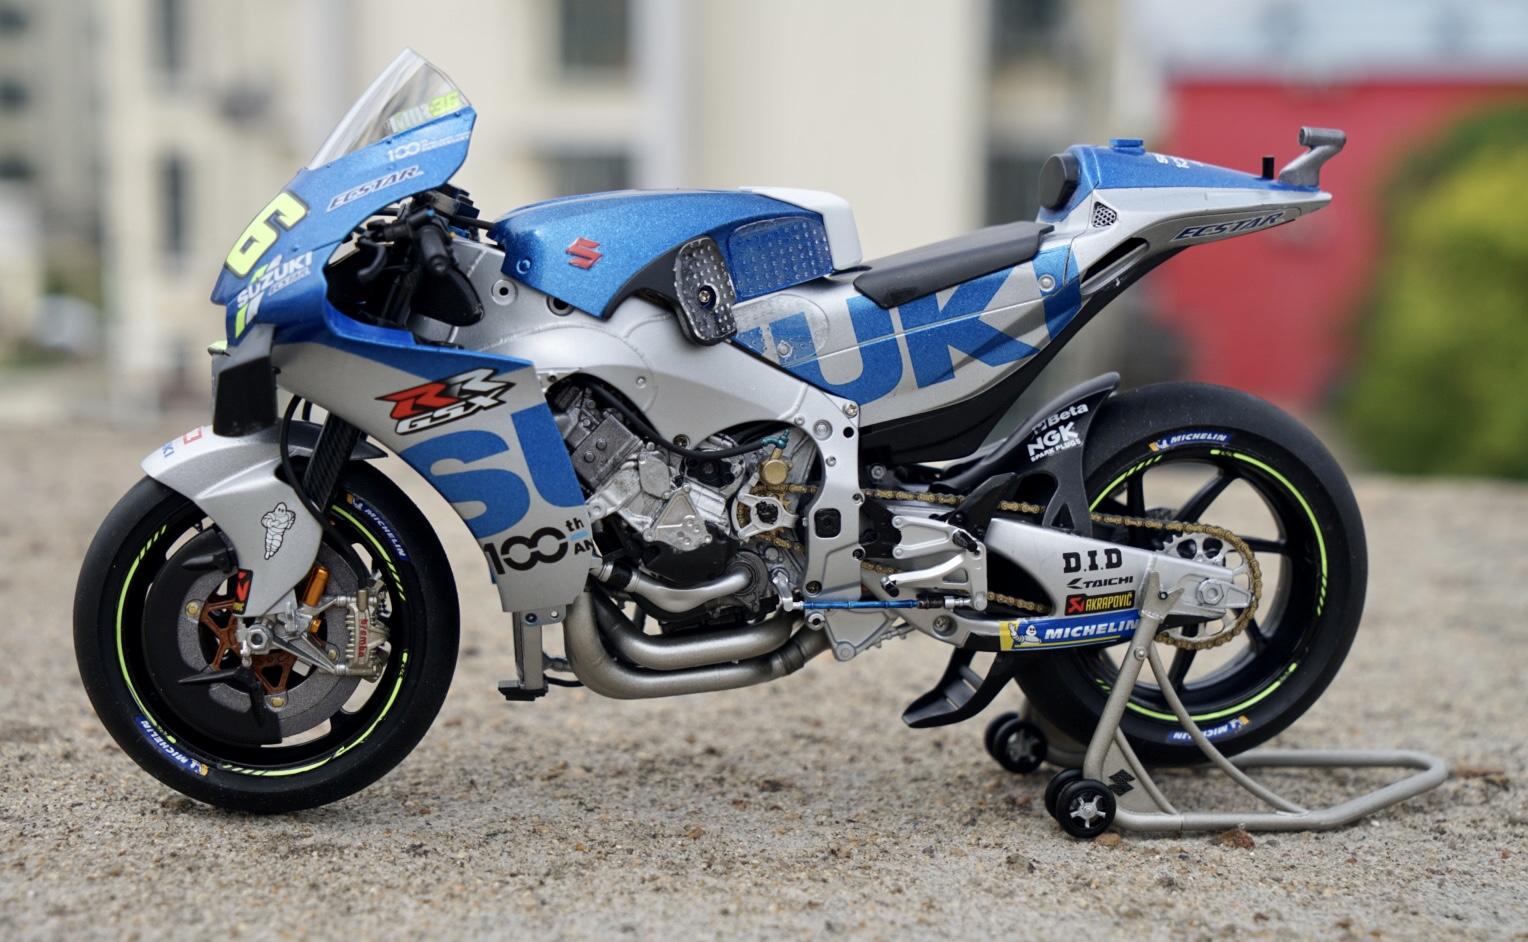
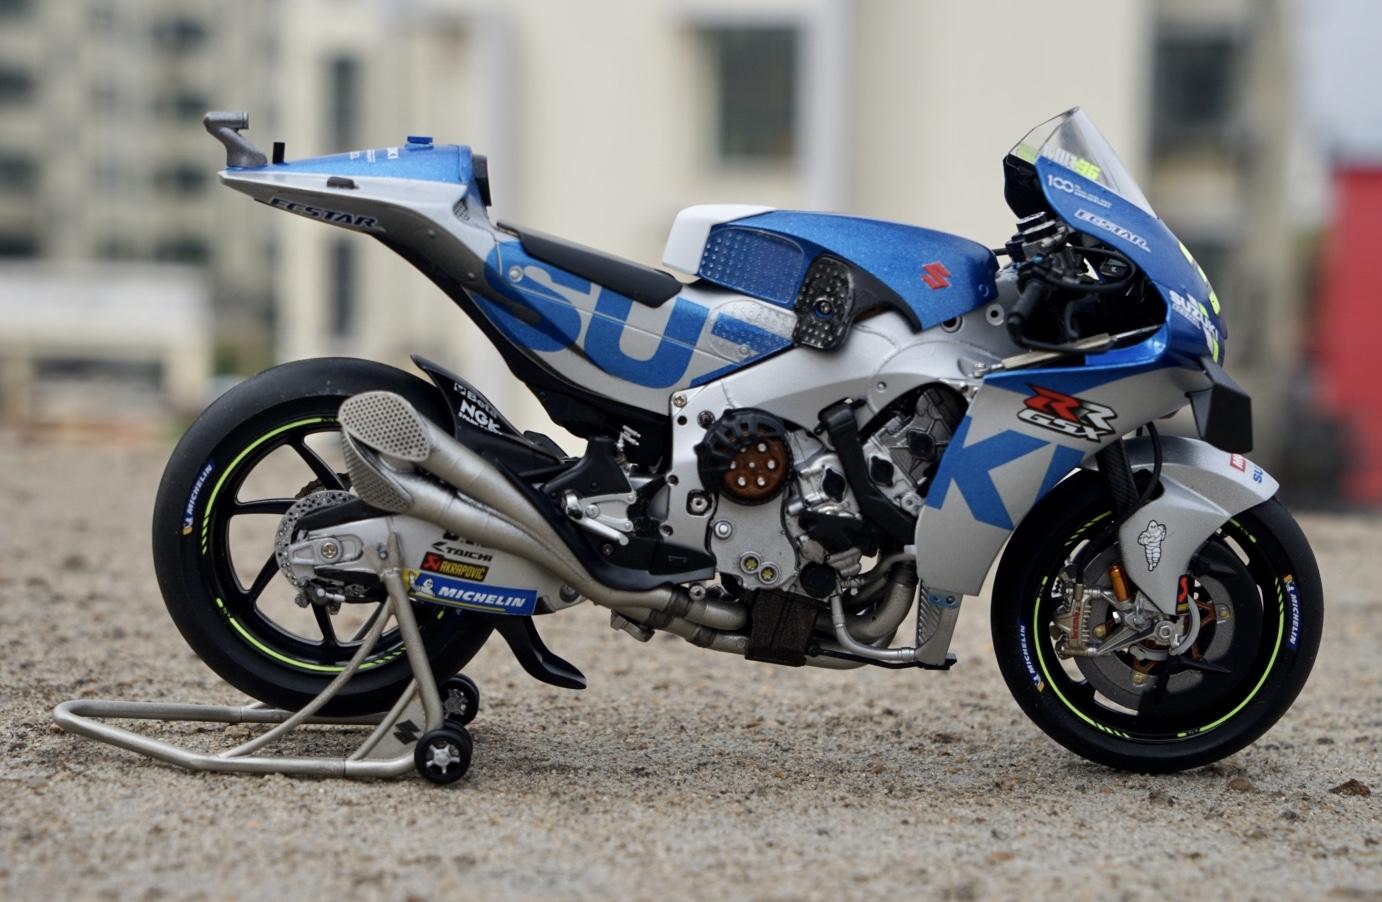
After a gap of a couple of years Tamiya released another Moto GP 1/12 scale model, this time the Team Suzuki Ecstar GSX-RR ‘20.
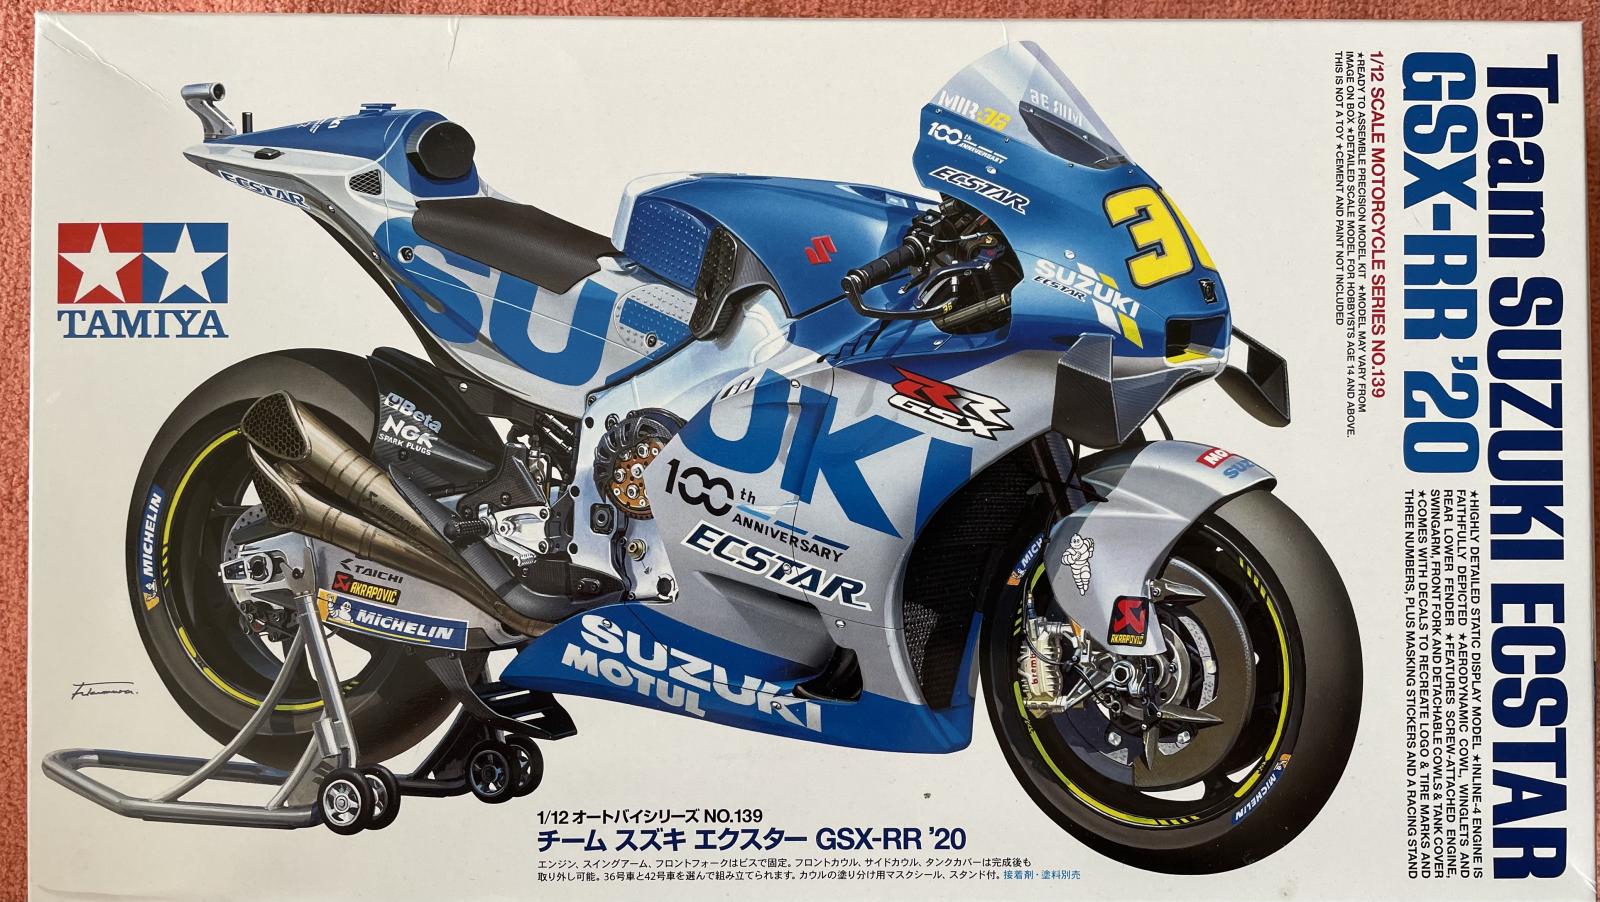
About the bike: to quote Tamiya's info - in 2015 Suzuki made a welcome return to Moto GP racing after an absence of three years. The GSX-RR is a compact masterpiece of handling and cornering on account of its innovative frame. The 1,000cc water-cooled four-stroke DOHC inline-four engine outputs over 240PS. The exhaust is an Akrapovic 4-into-2-into-1-into-2 with dual megaphone tailpipes features welded honeycomb end plates (more about those later). Aerodynamic featured, including winglets, help to reduce the tendency to wheelie.
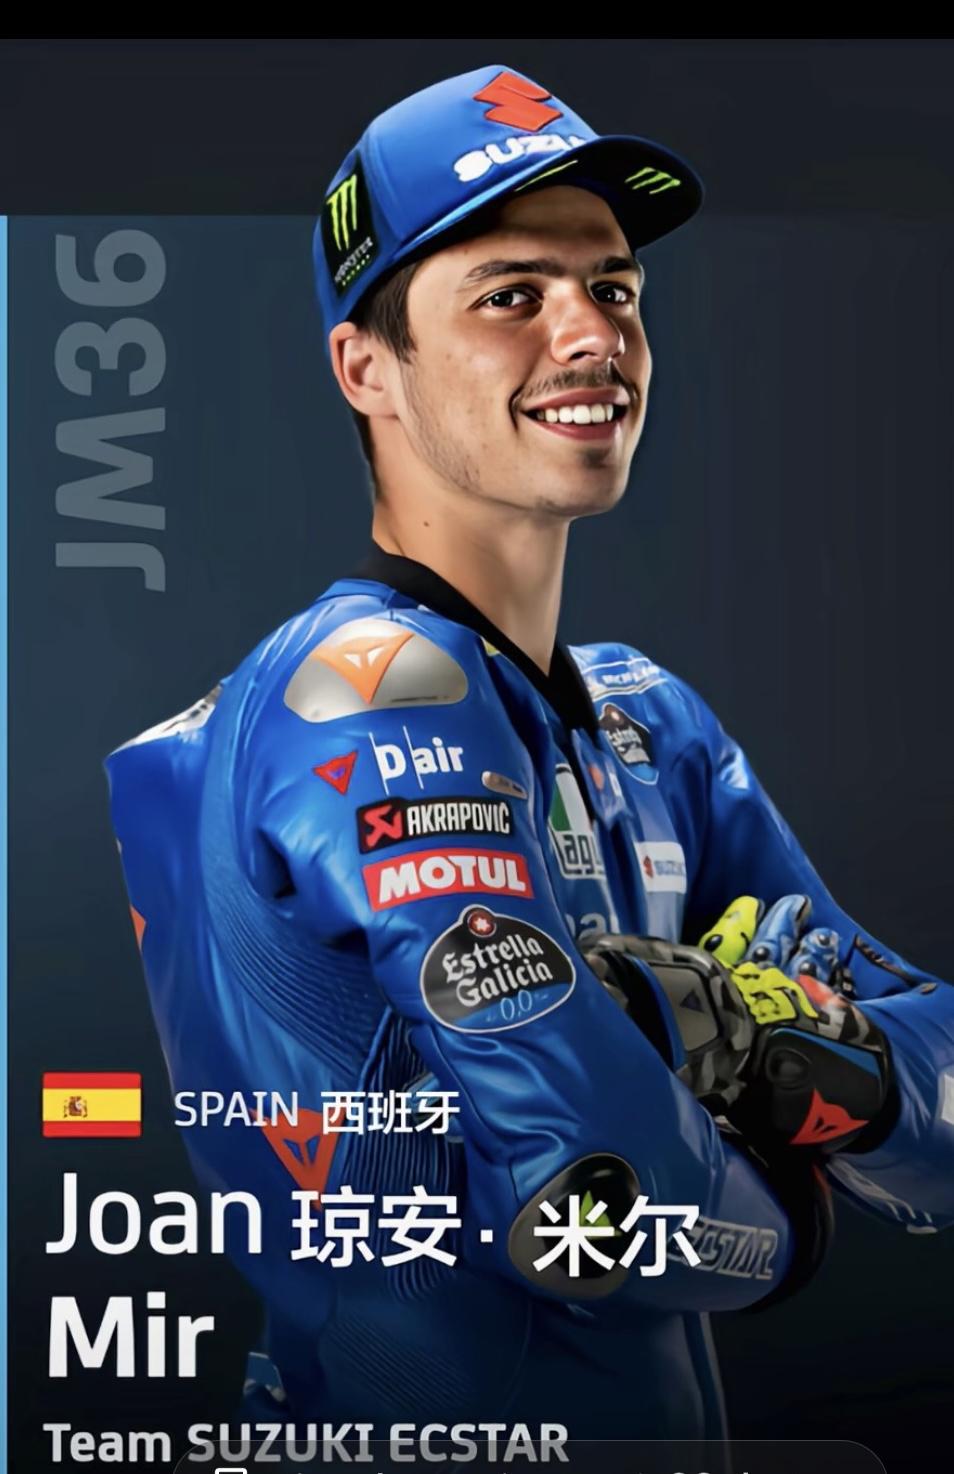
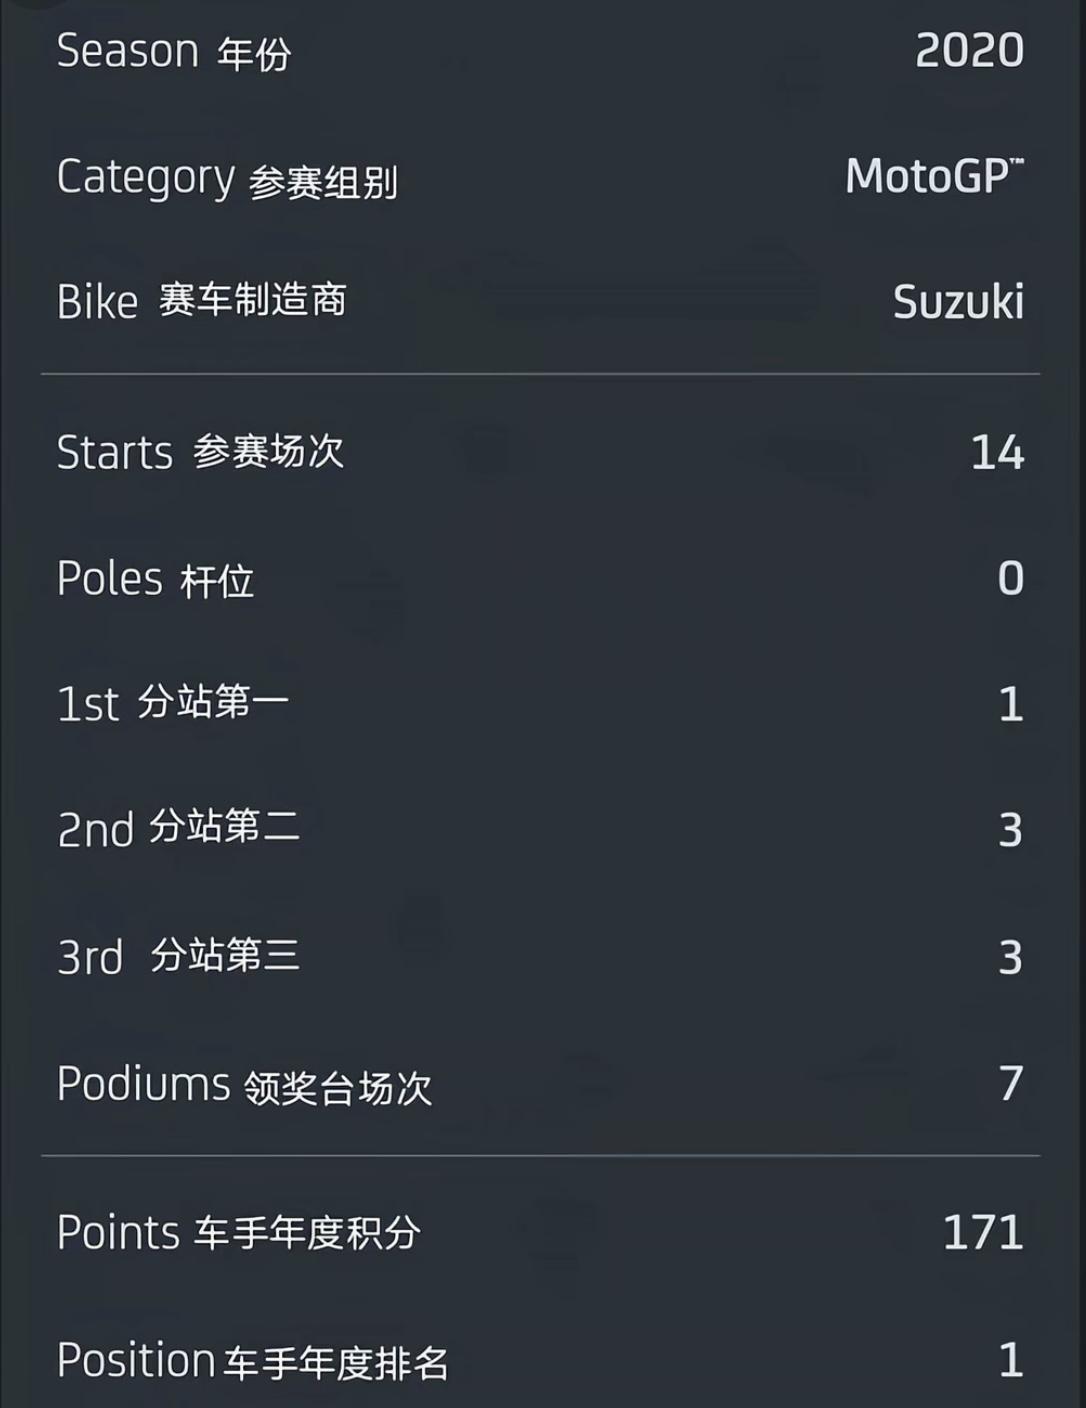
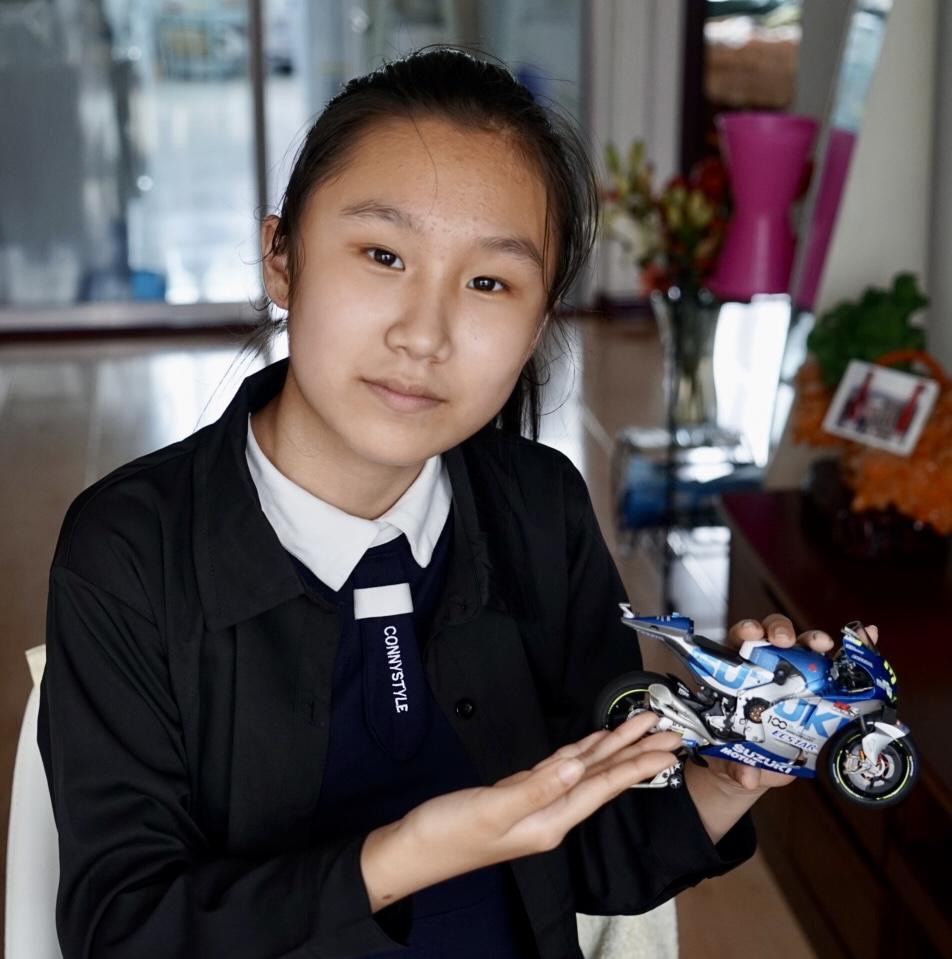
About Joan Mir:
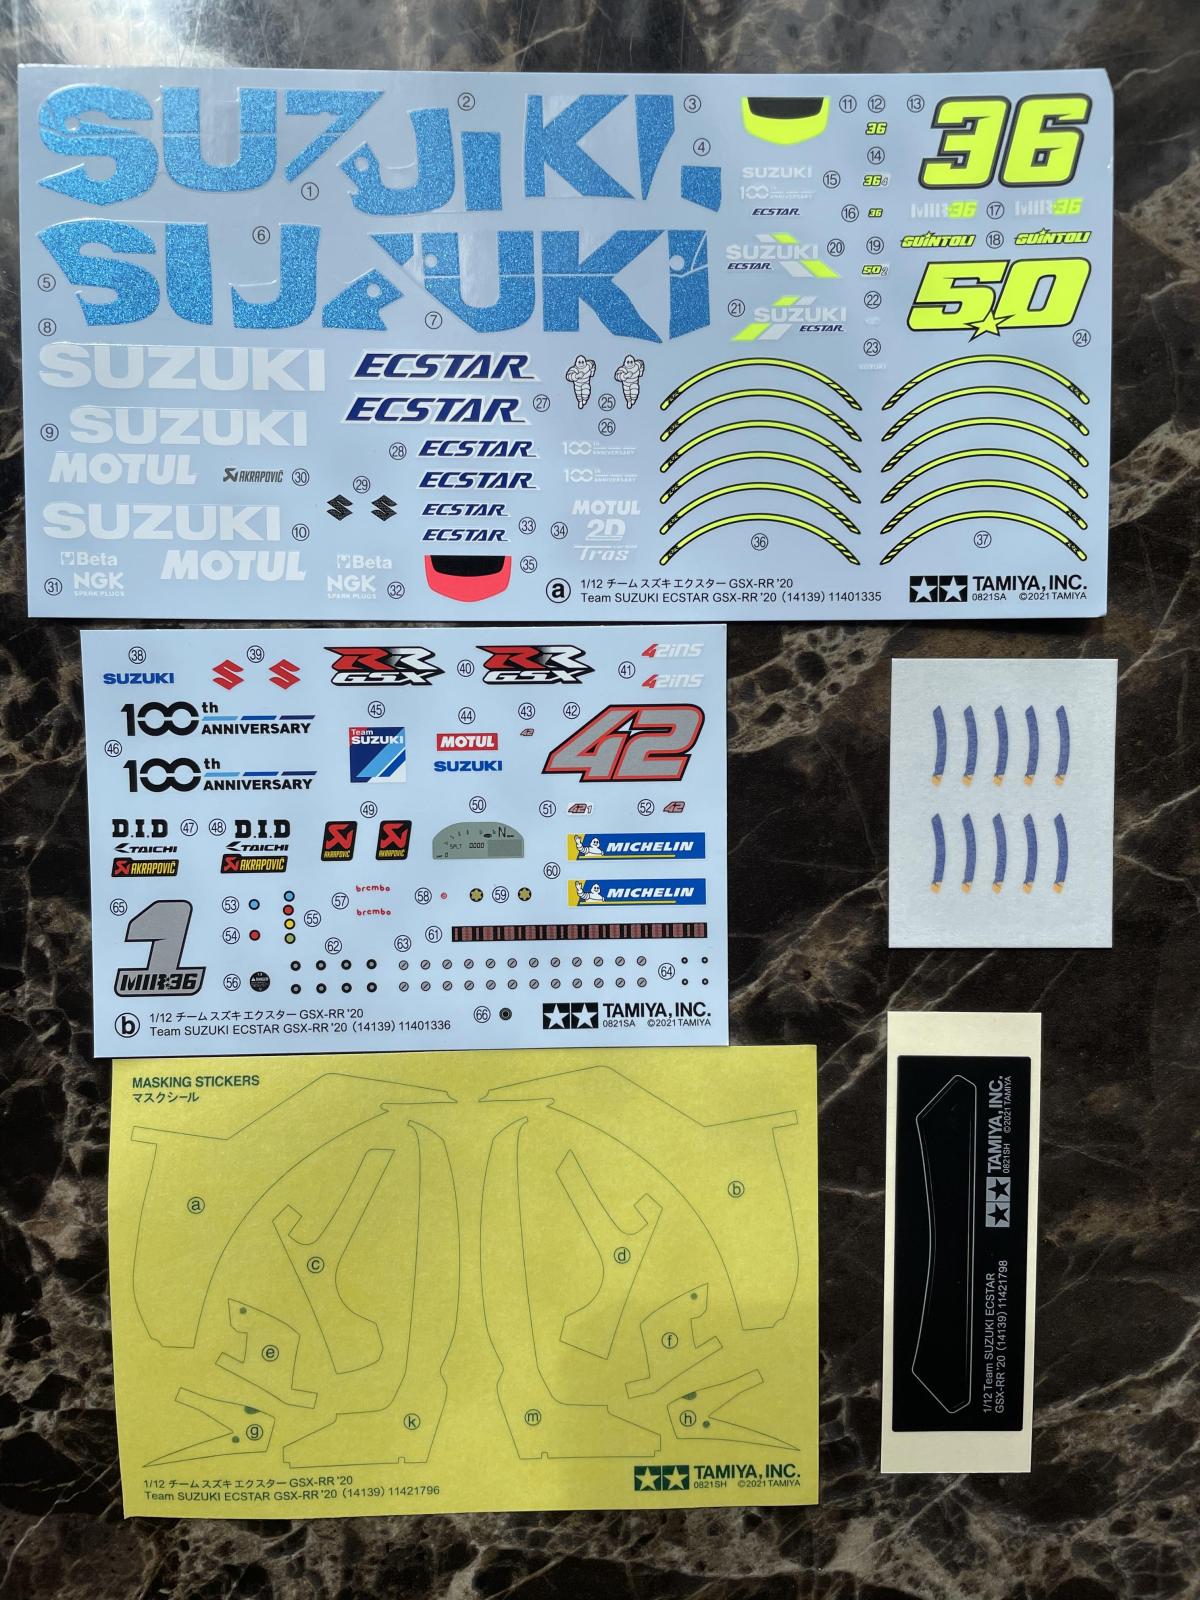
About the kit: this is currently the latest release in Tamiya's 1/12 series of motorcycle kits, and is well up to their usual standards. I would recommend following the instructions closely, especially when optional parts are used to decide whose machine you have chosen to model, Tamiya provide markings for three riders and leg grips differ as well. The transfers are quite complex and must be put on in the correct order
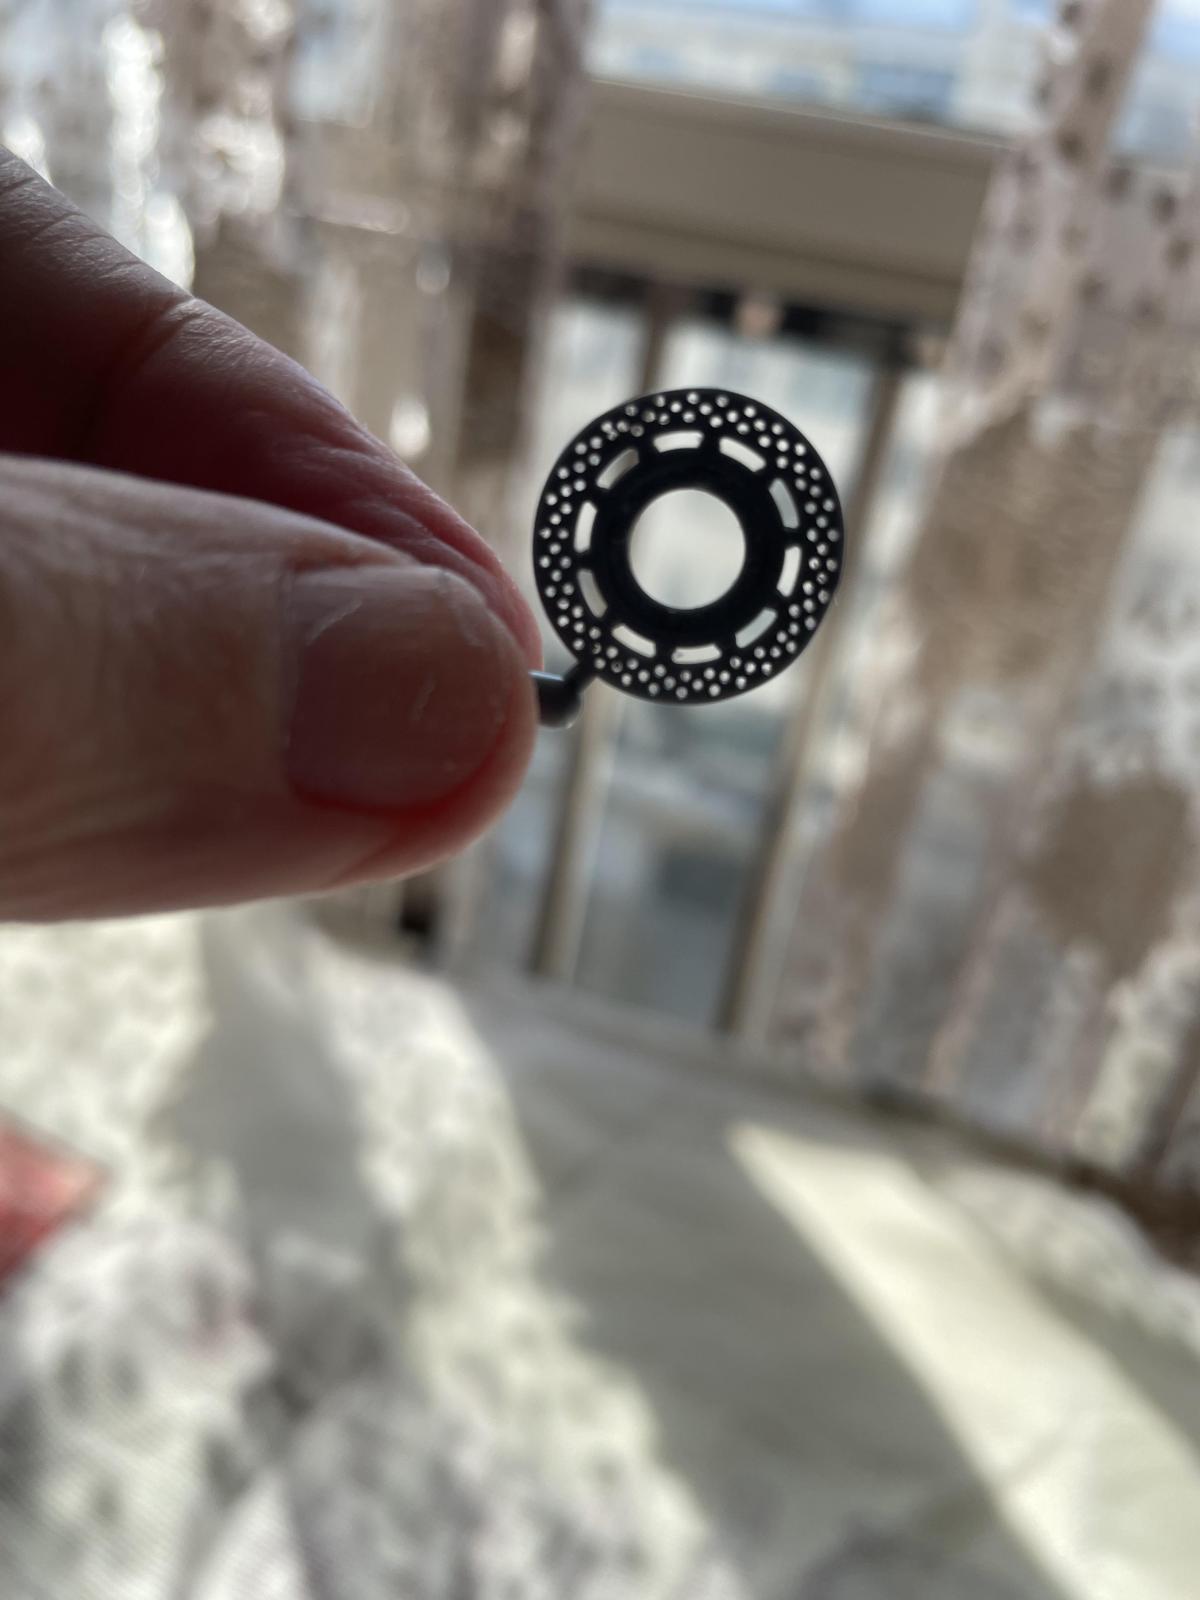
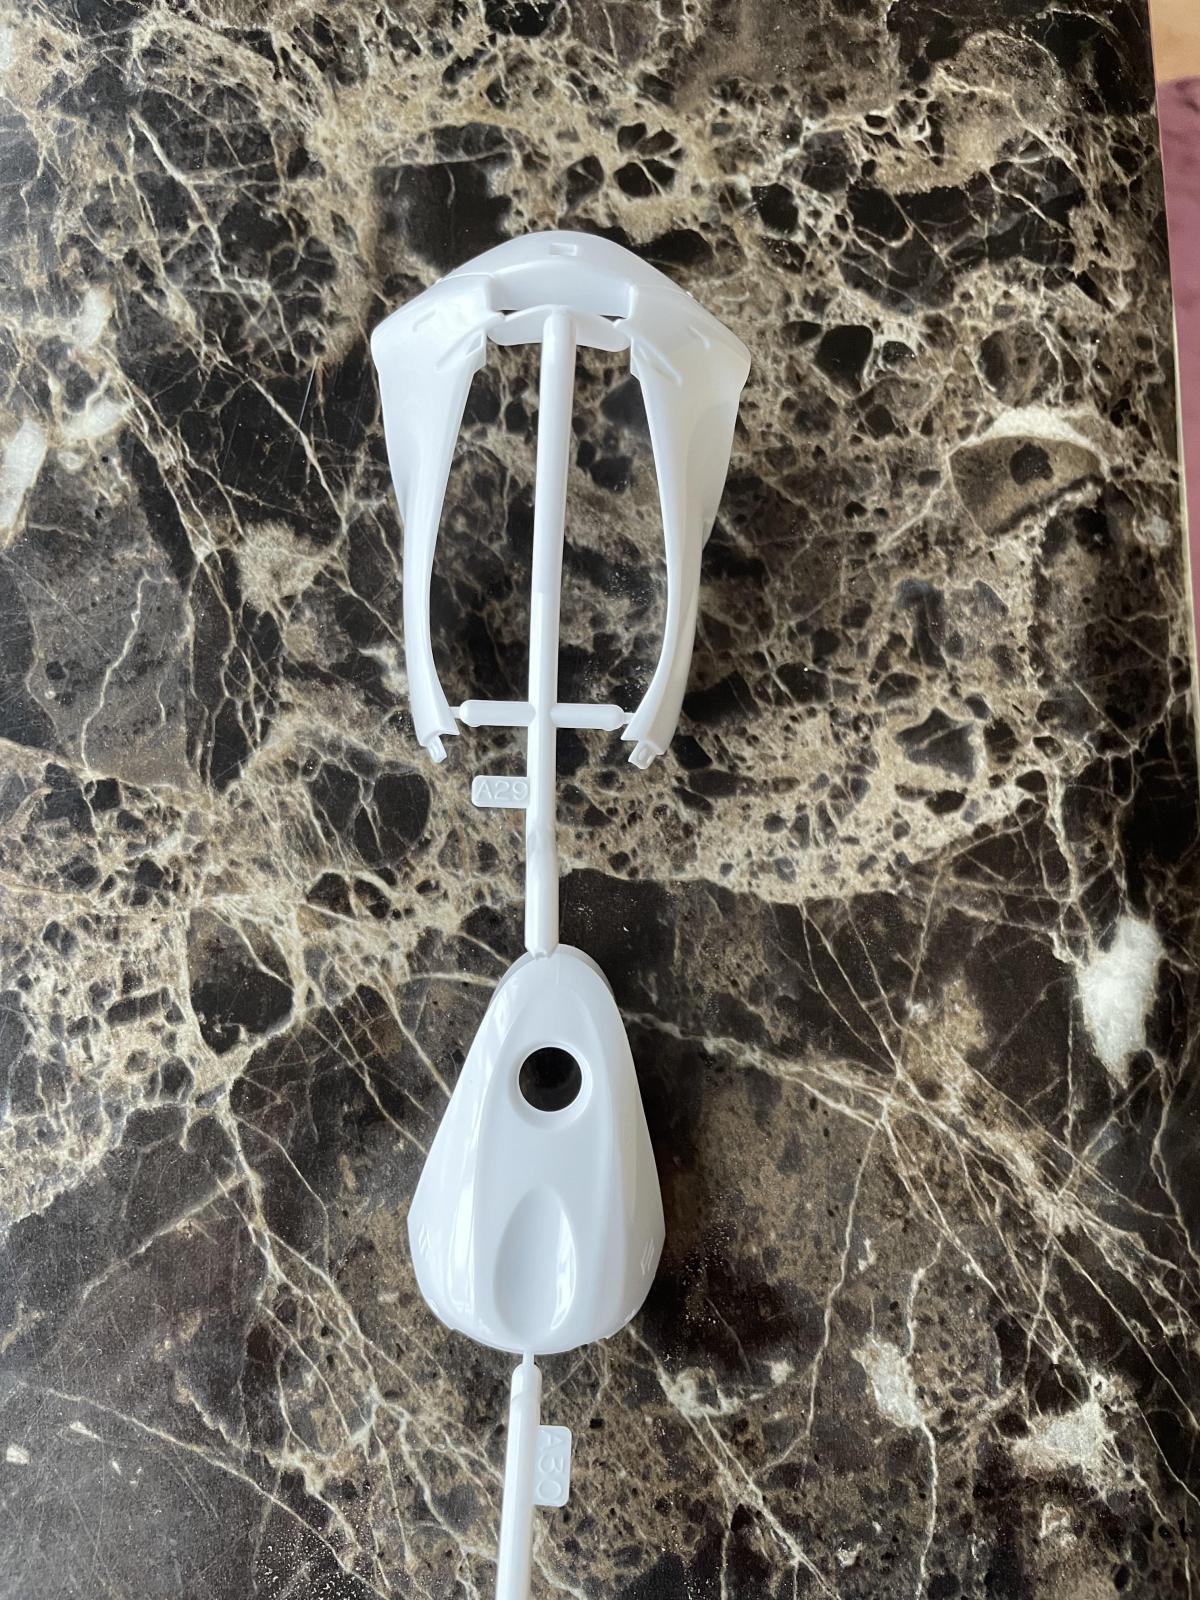
I spent some time drilling out the cooling holes in the brake disc
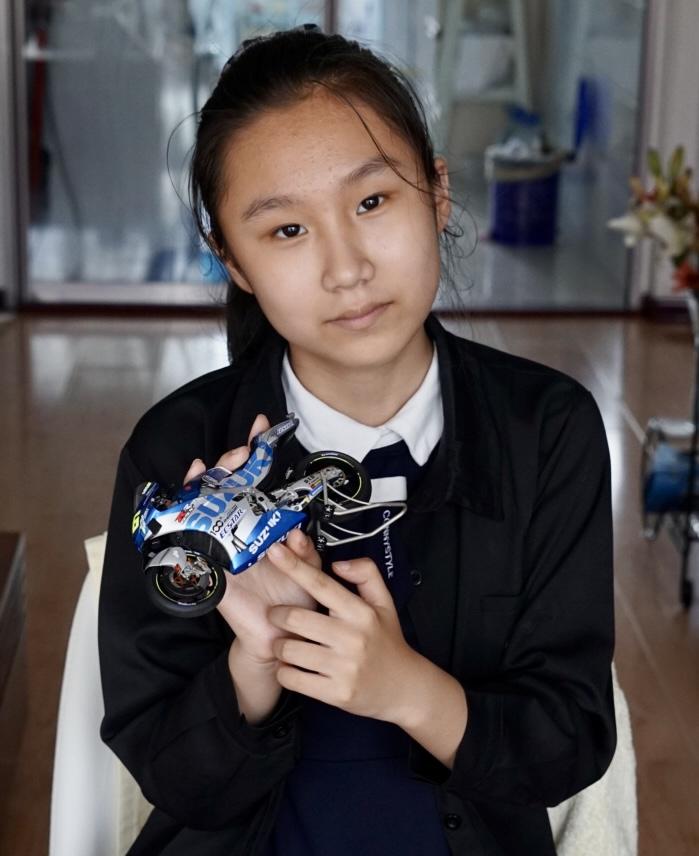
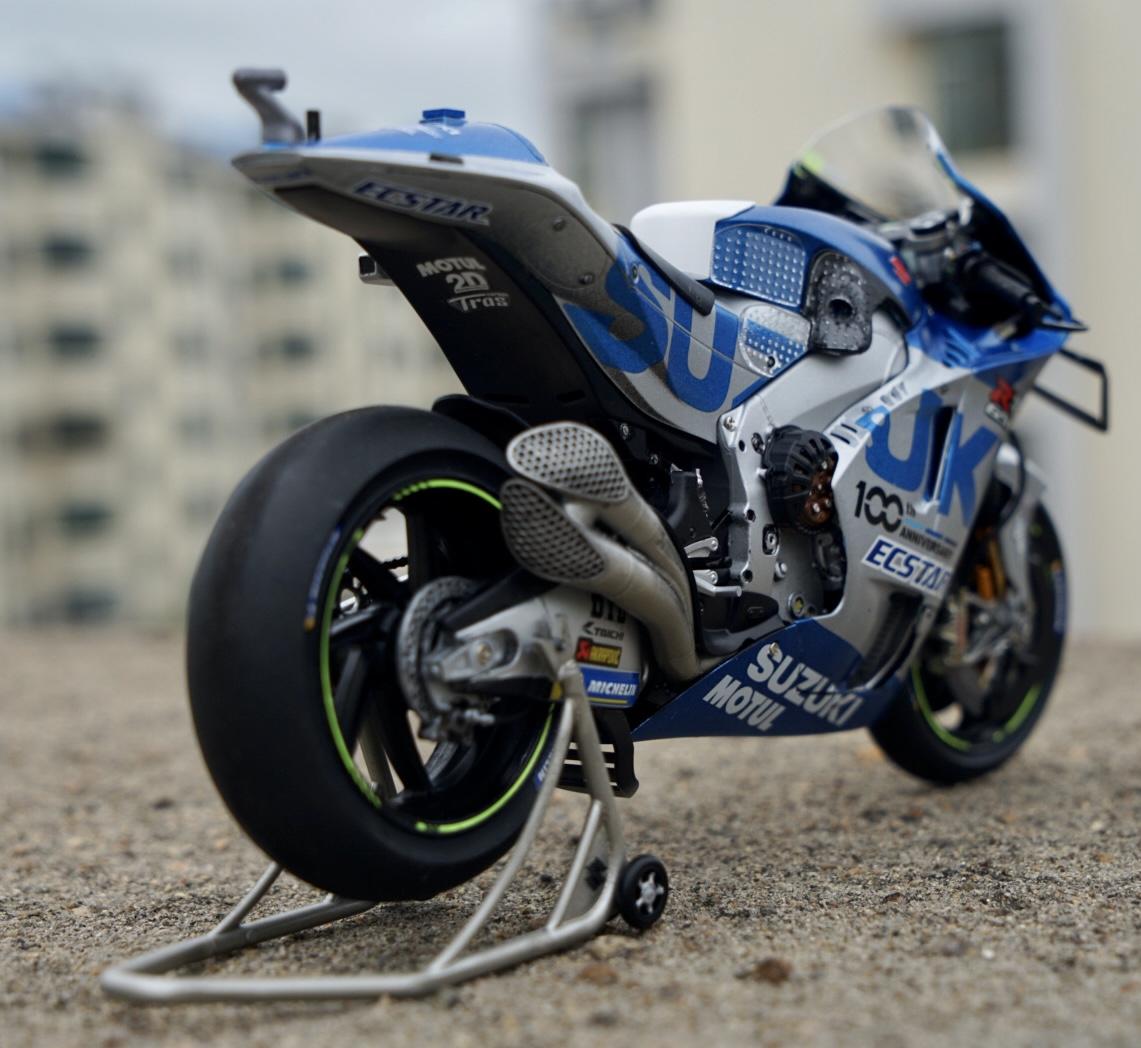
My QA assistant spotted at least two problems, the first being a mashed up transfer on the LH lower cowl
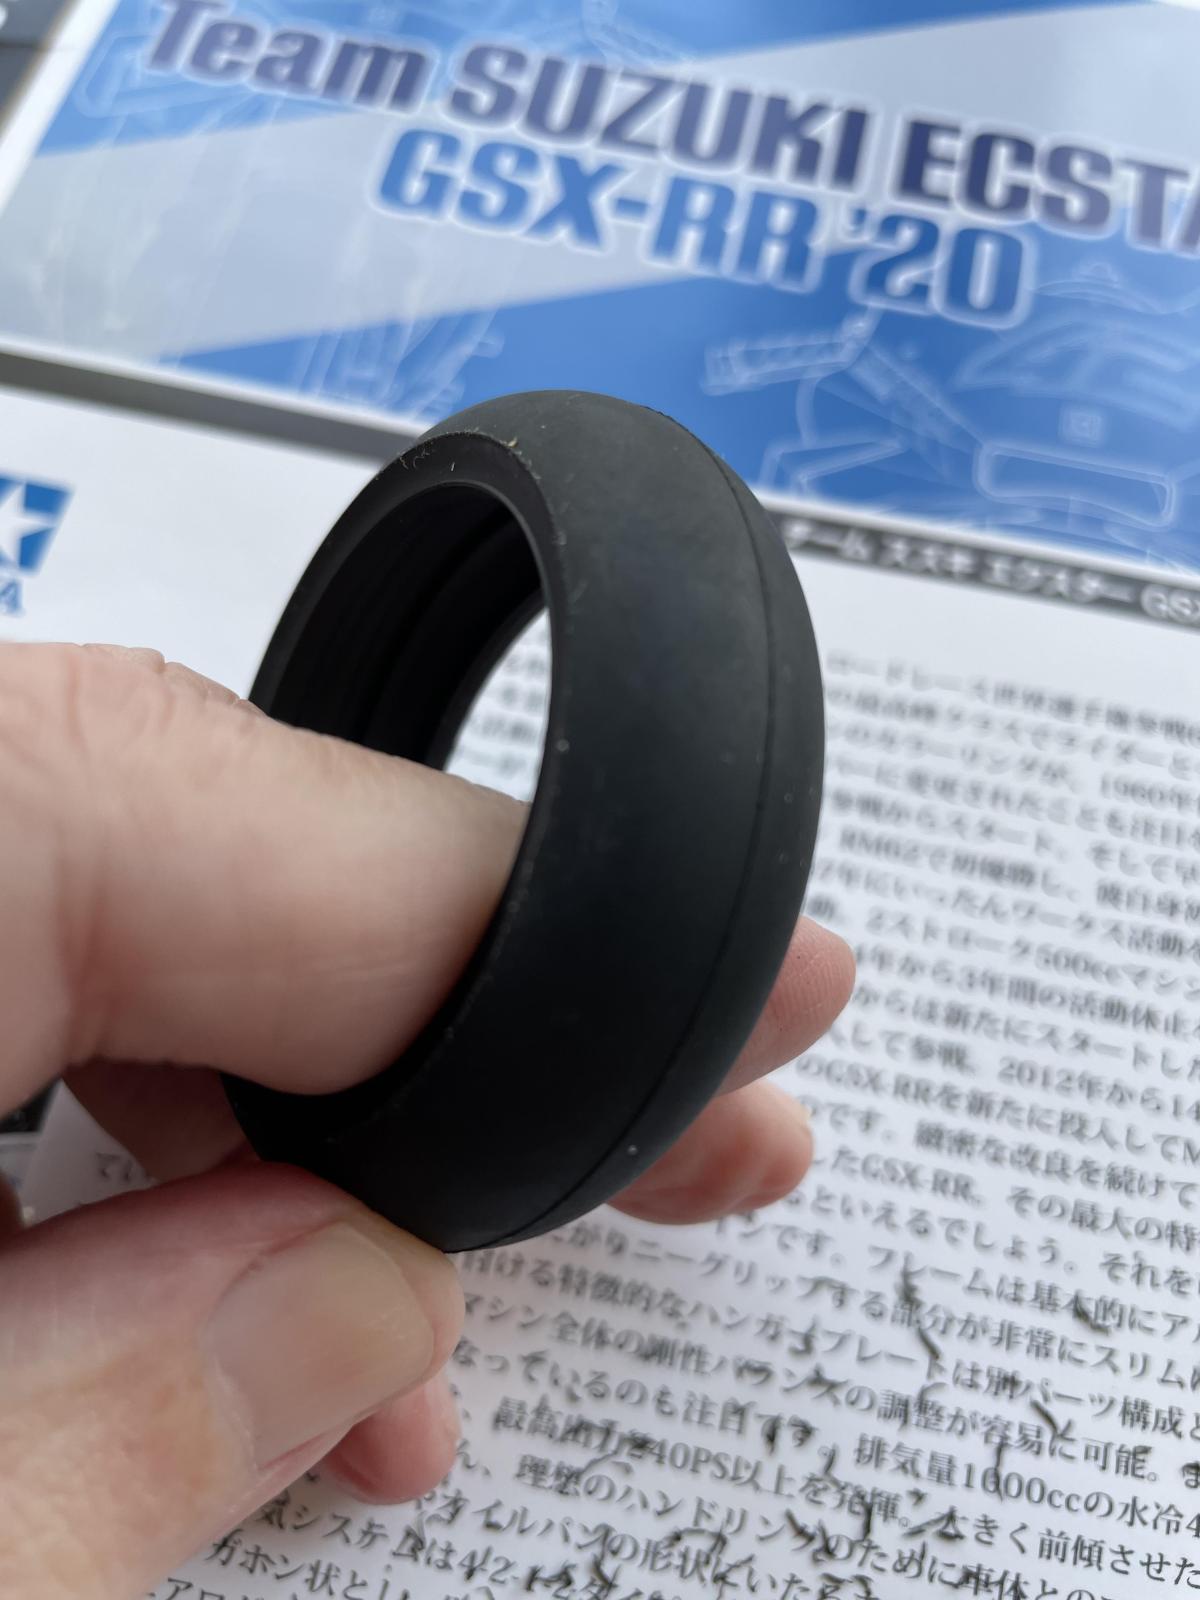
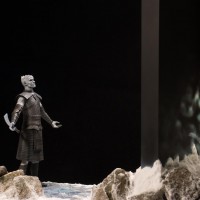
Here are some pictures showing a little of the build sequence
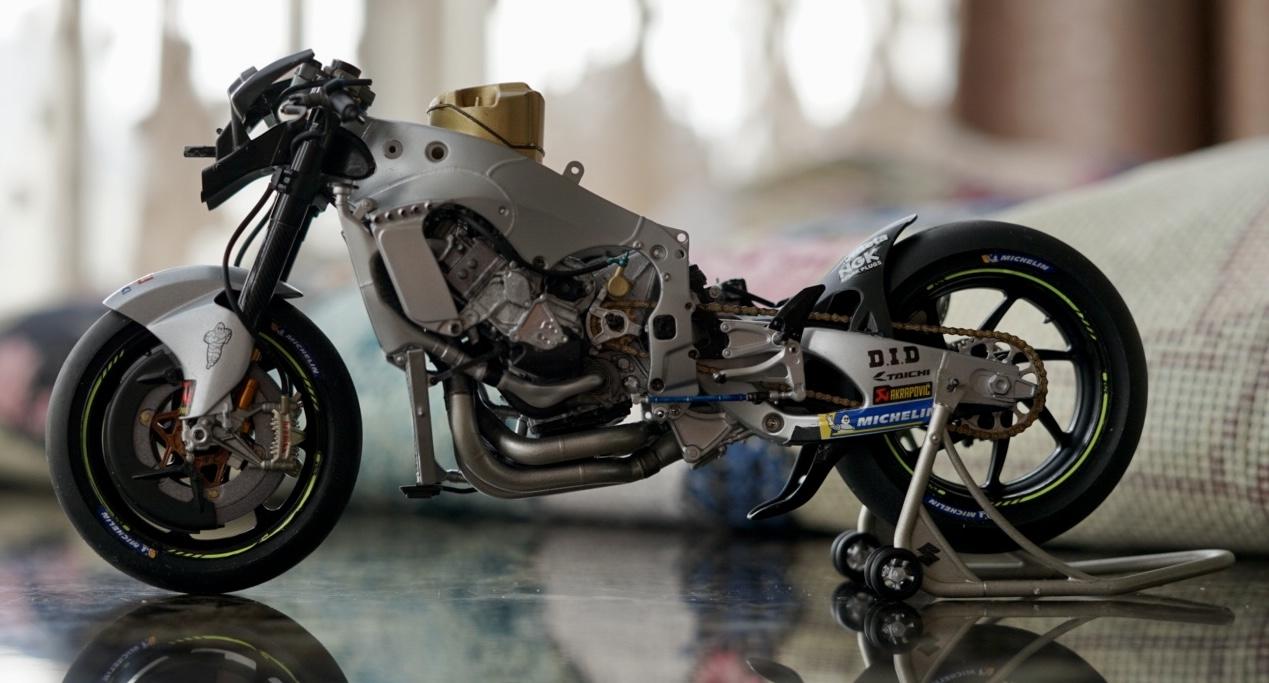
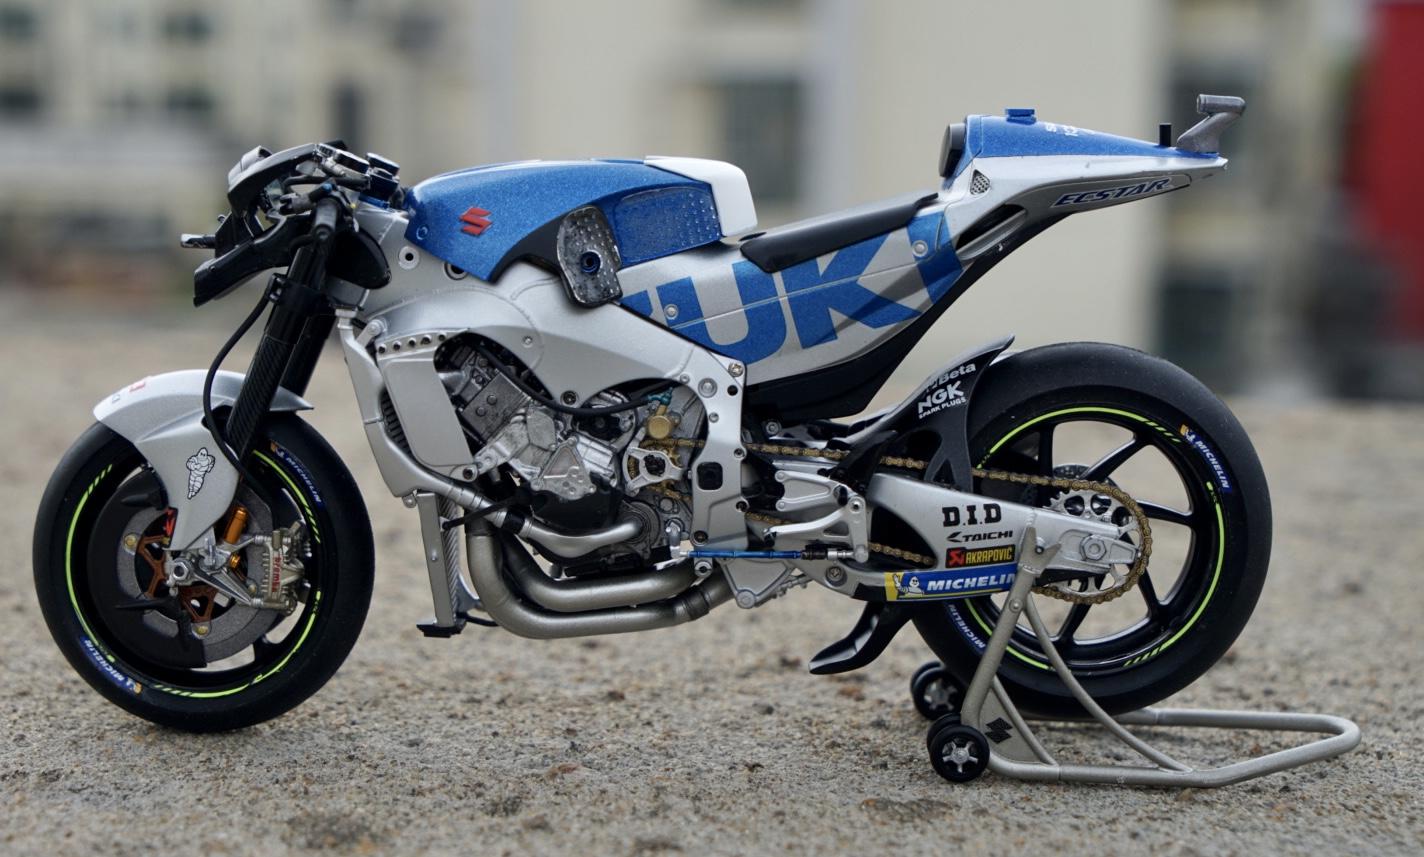
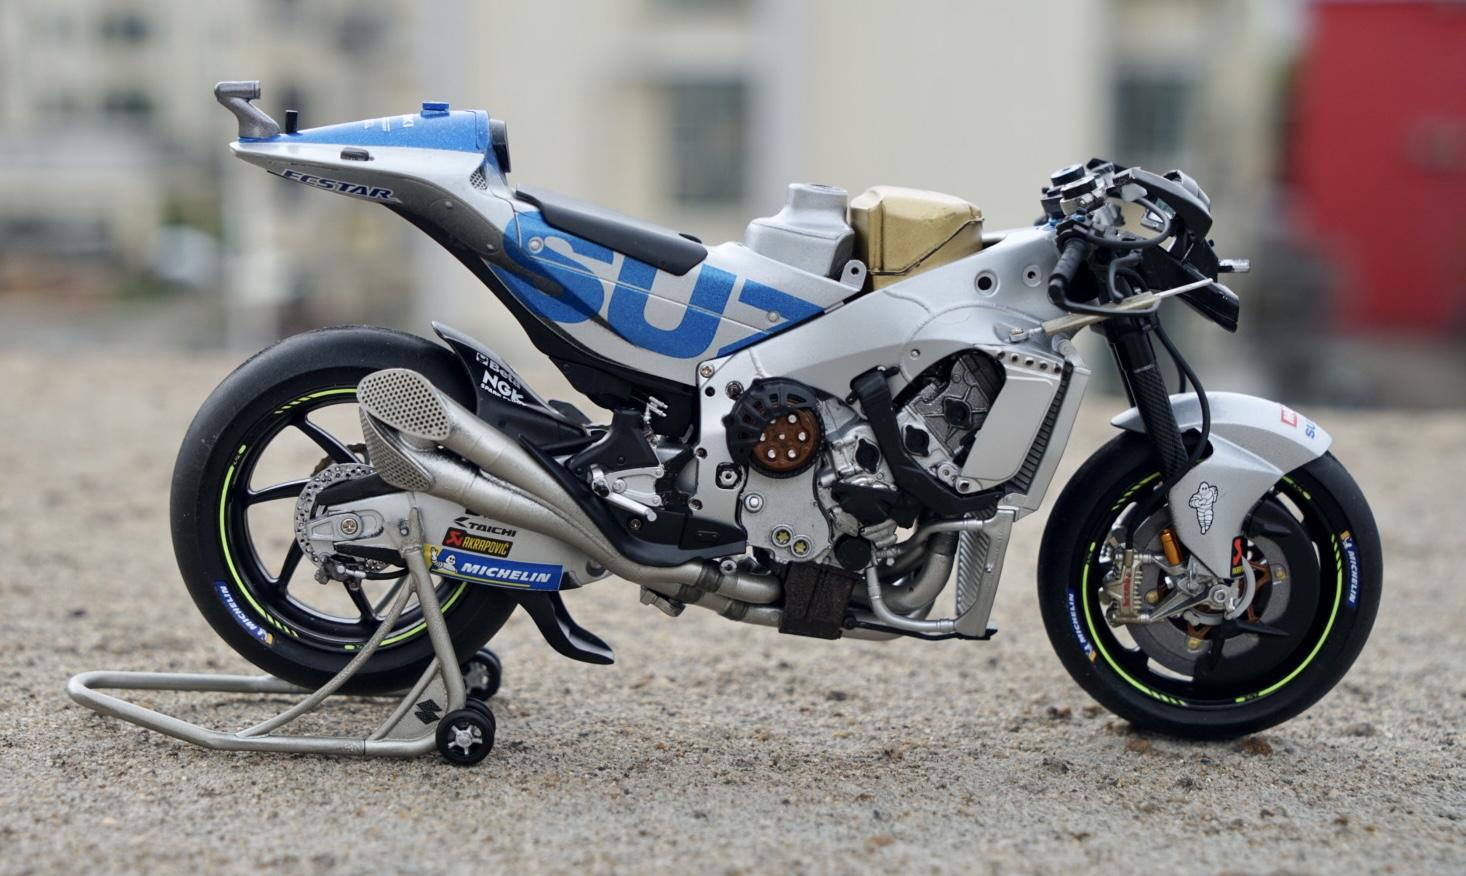
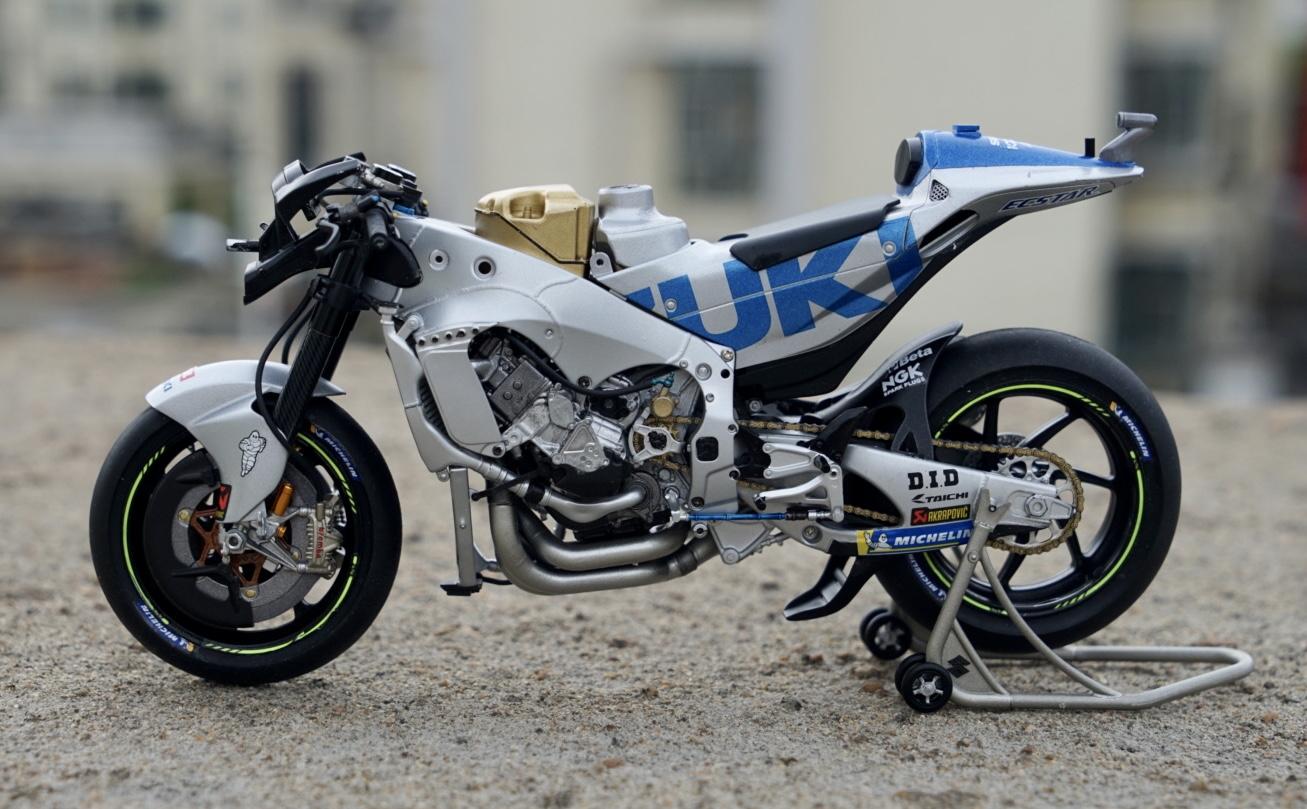
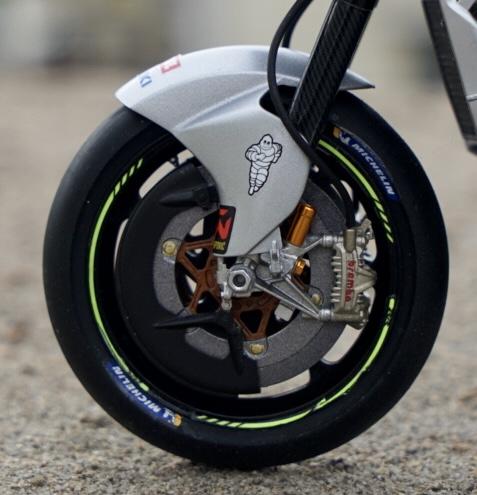

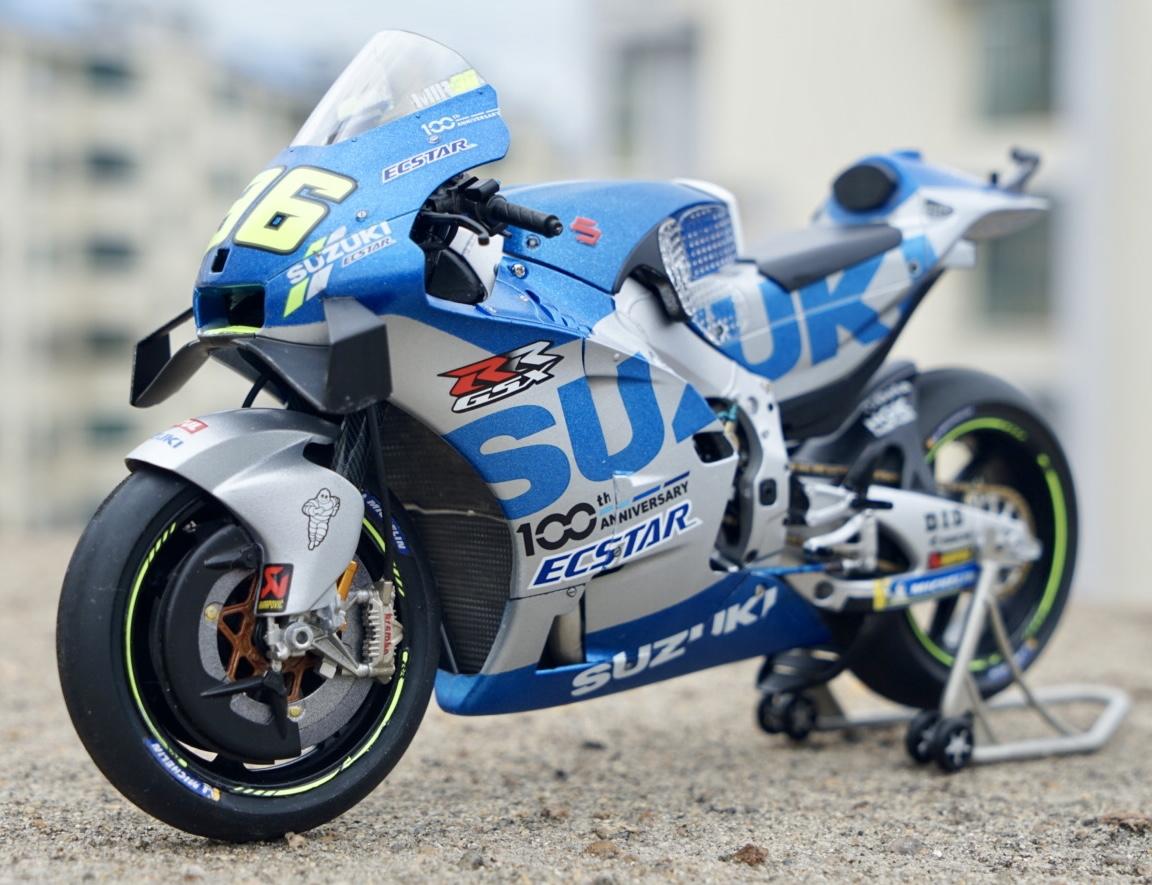
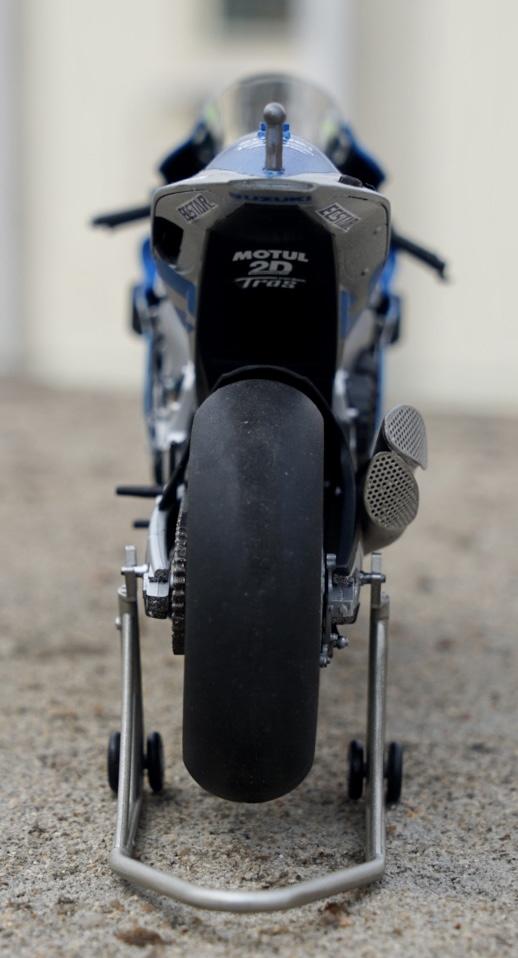
And a few of the completed model

Thanks to iModeler for an excellent site, and thanks for looking, happy modelling.
Thanks for looking and happy modelling.


This is a wonderful model, George! For sure the Tamiya kit is great, but it takes your skill to come up with such wonderful result!
Congratulations!
Thanks my good friend Spiros @fiveten
Wow, George, you surely are blessed to have an assistant who pays such intense attention to details. Cool.
Thanks, Bob, @bails, I pay her in chocolate.
Very good work and a great result.
Thanks for looking, Tom @tcinla.
Great job on what looks like a complicated model.
Thanks, Bill @billkoppos, it certainly pays to follow the instructions.
Very nice result, George @chinesegeorge
From the pictures it looks like to be a real bike.
Well done.
Thanks, John @johnb, I enjoy the photography as much as building the models.
Top work George! ?
Thanks very much, Gary @garybrantley.
Bravo!
Cheers, Richard @rbungay, these 1/12 bike kits are great, lots of detail but they don’t take up much space.
That turned out incredible, George. The detail work on the brakes/wheels looks 1:1 scale.
Thanks very much, John @j-healy, I think that’s one of the advantages of 1/12 scale.
Hi mate, It’s been a while!
Lovely bike!
I’ve got the kit myself and the carbon fibre decals ready to go.. but I’m just not finding the time for modelling at the minute, working away and all that.
Cracking job on it though! I still remember ten years ago when I joined this site and you won model of the month with your Desmosedici.
I’ve got that kit half assembled at home now as well!
Hope you are good anyway mate.
Hi Richard @richardmcstay48gmail-com, good to hear from you and thanks for looking. Glad to hear you’re keeping busy in these troubled times. The Suzuki went together easily although I’d recommend applying the transfers after you’ve attached the cowlings as some of the markings stretch across more than one panel. I still have my prize-winning model in pride of place in the display cabinet. I found some other after market transfers for the Suzuki, and I see on Scalemates are doing a Superleggera, there’s no end to it.
2 attached images. Click to enlarge.
Hi mate, indeed times are worrying..
I went for a different strategy in the end, I’m working on a yacht. It’s more of a lifestyle than a job. I still have my modelling set up at home but I’m never there!
I have a shelf full of semi built, unpainted kits!
I’ve finished the pre-painted Meng H2R but didn’t get a chance to take photos before I left for work again. I can’t paint at work so got that one just to stay occupied at sea!
Same advice with that.. the side fairings were really hard to attach. I think if I’d airbrushed it myself I would have ruined the finish trying to attach them.
That’s the first I’ve seen of the V4 kit mind! I need that in the stash, although I think it won’t get built now till I retire!