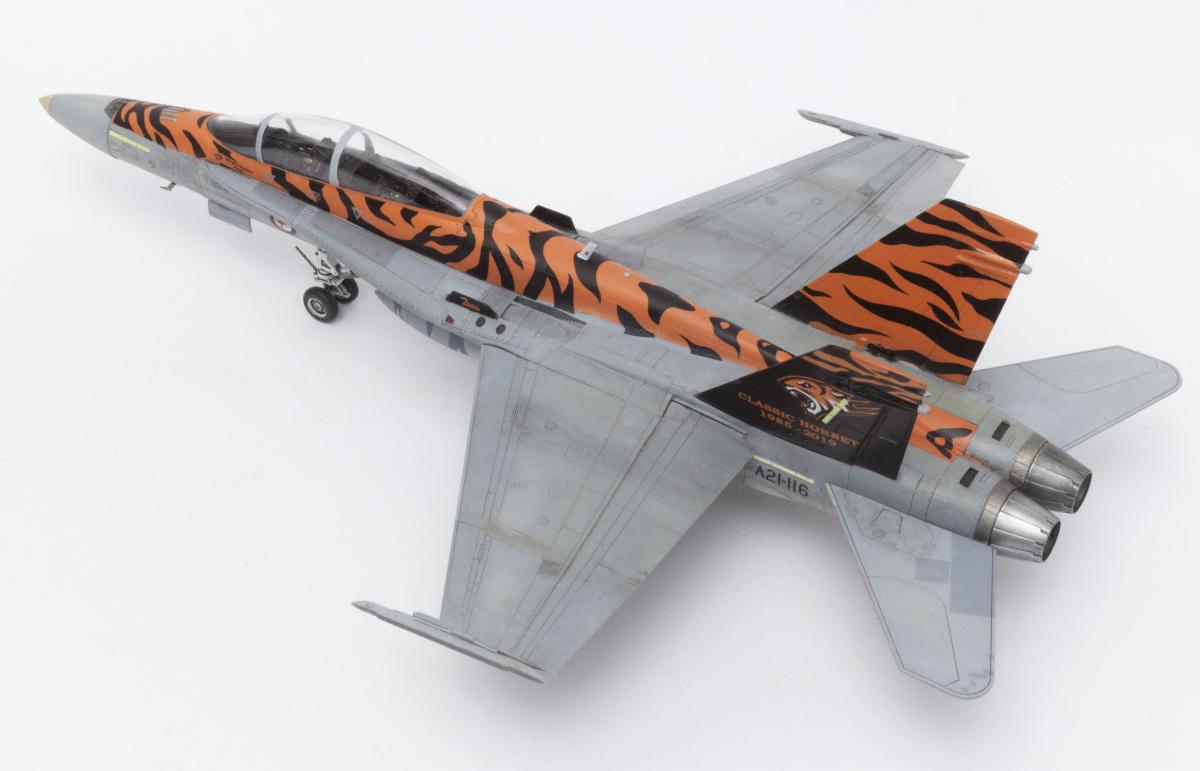
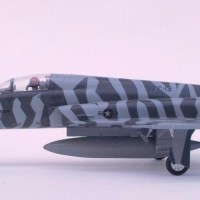
Academy 1/72 F/A-18B Hornet, 2OCU RAAF – Tiger Scheme

Hi all.
It's been a slow year at Casa de Crosby but a second build has crawled it's way over the line.
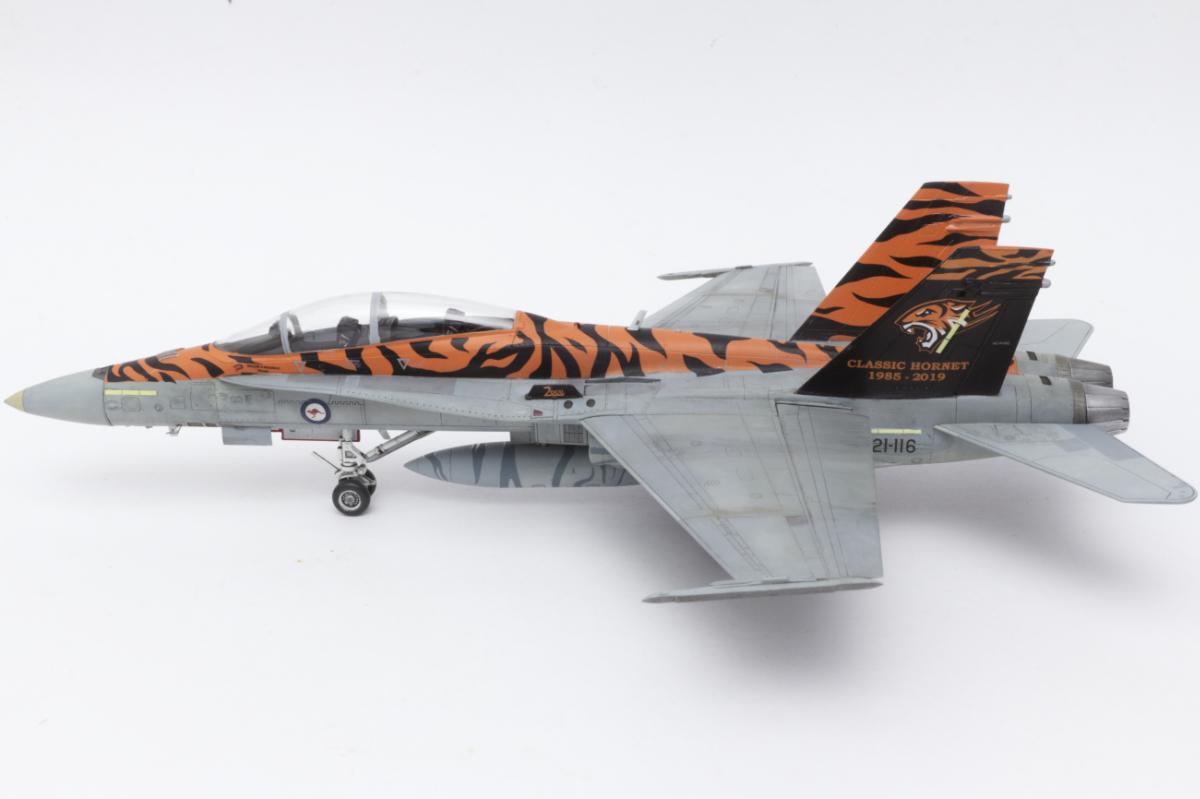
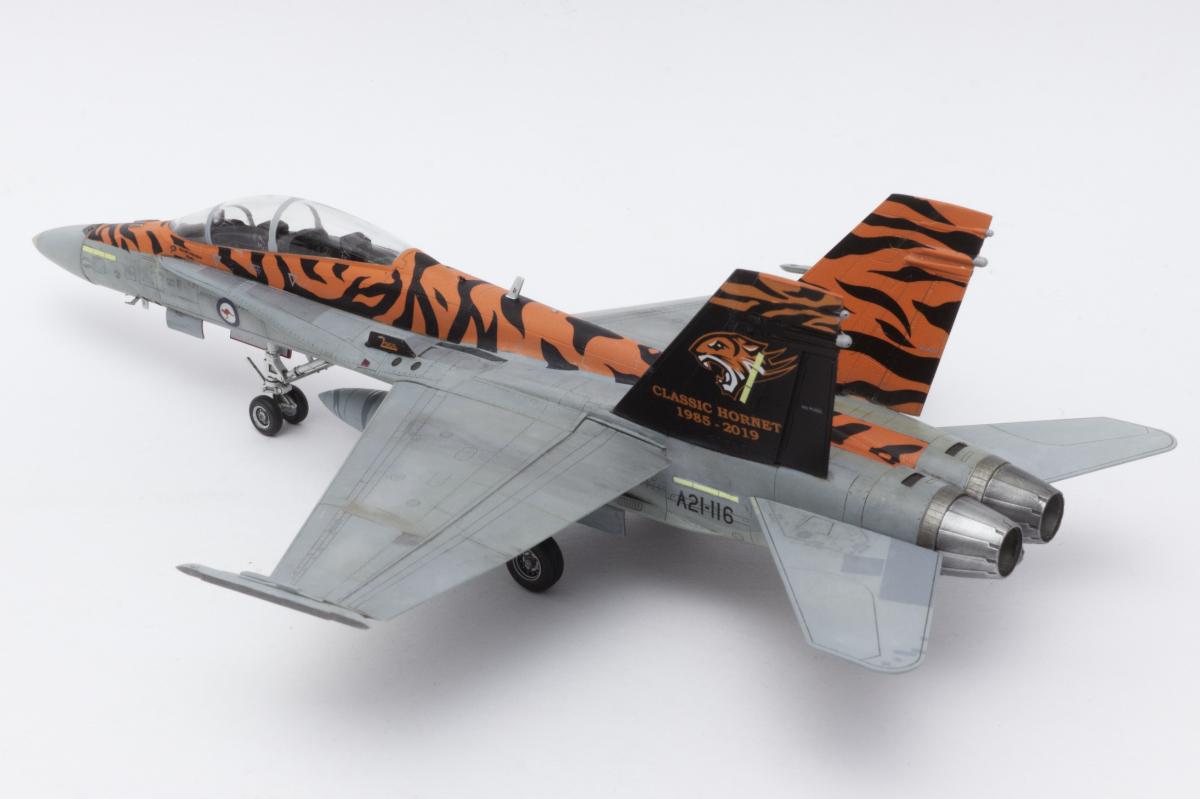
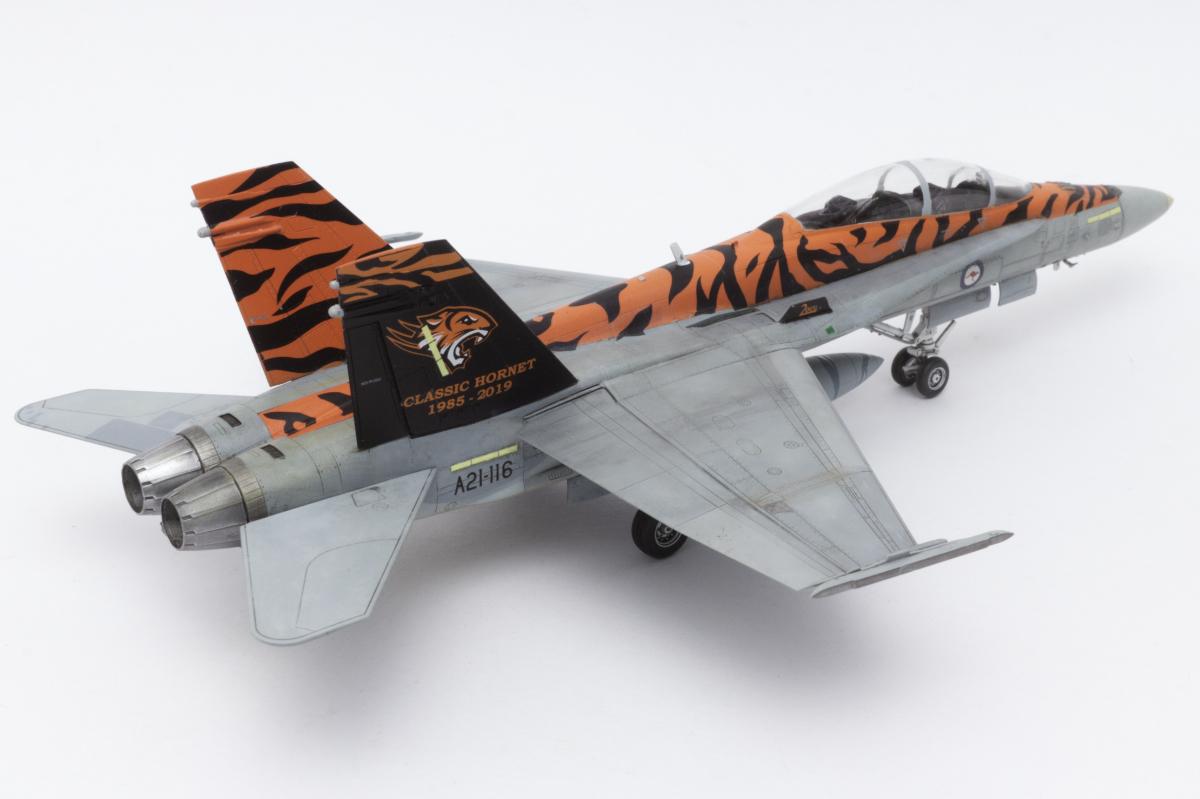
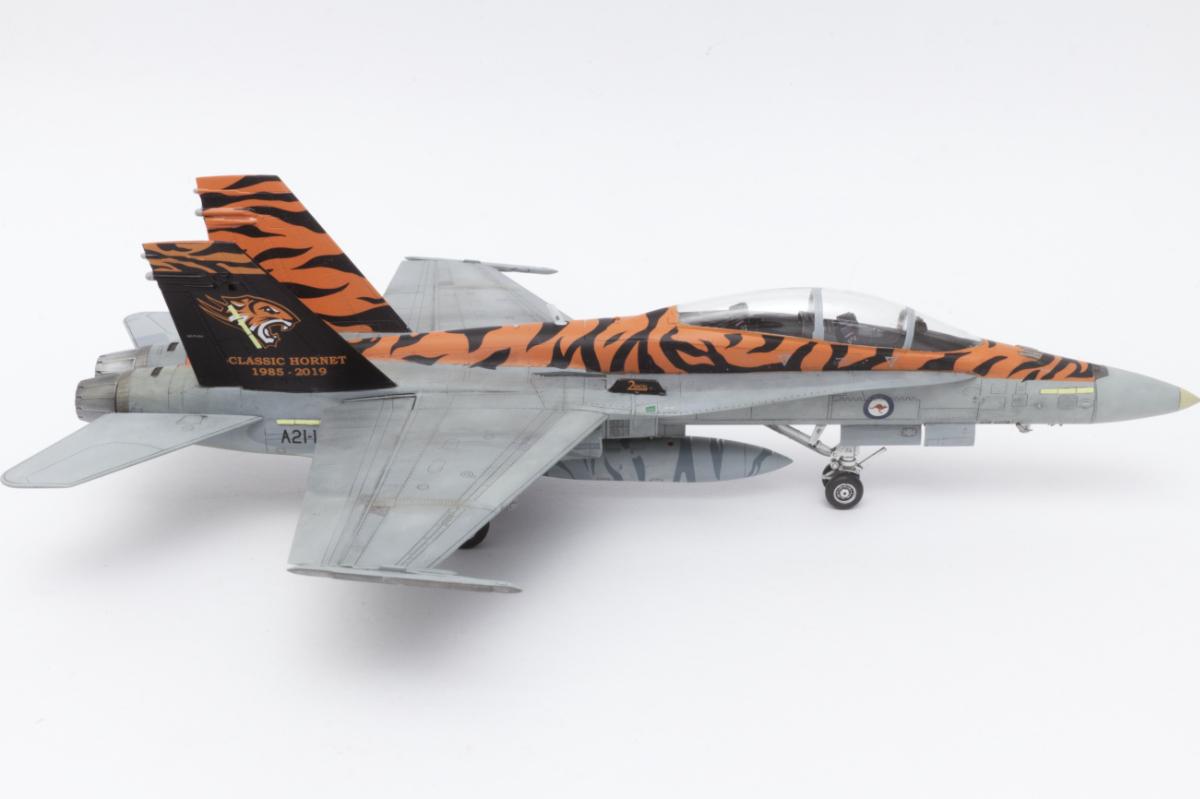
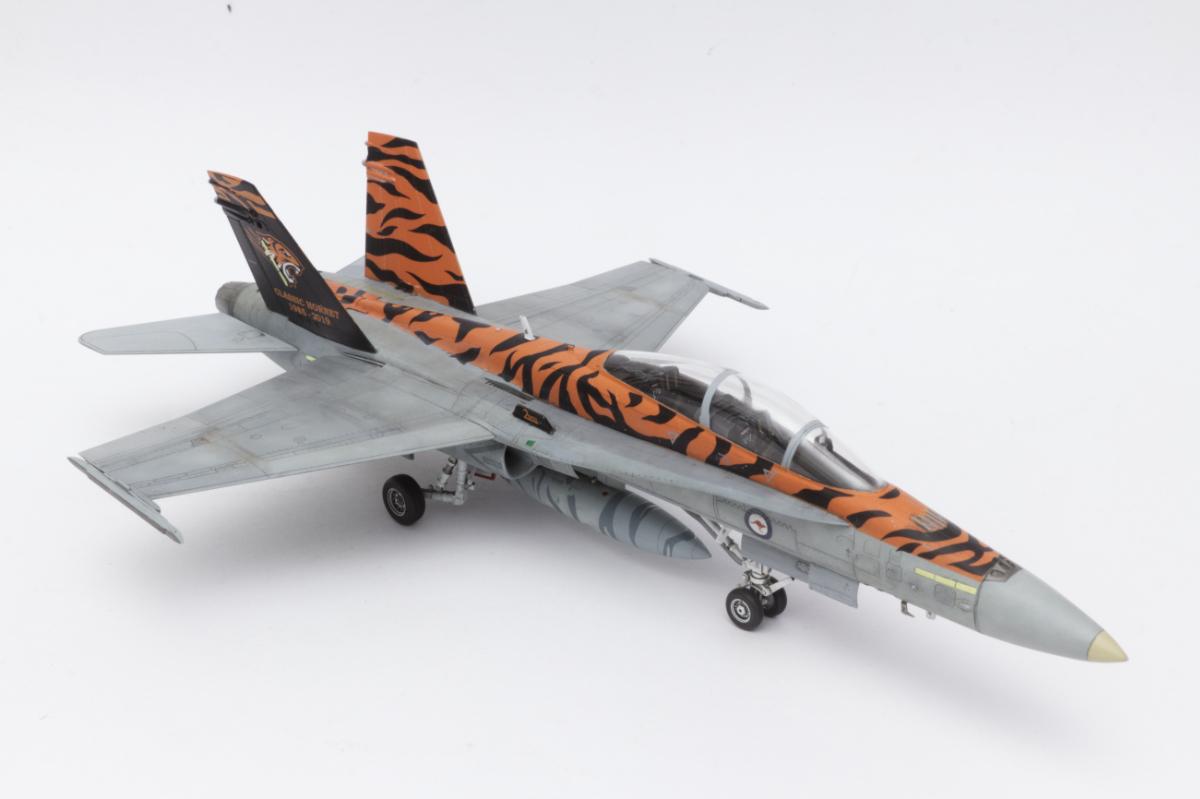
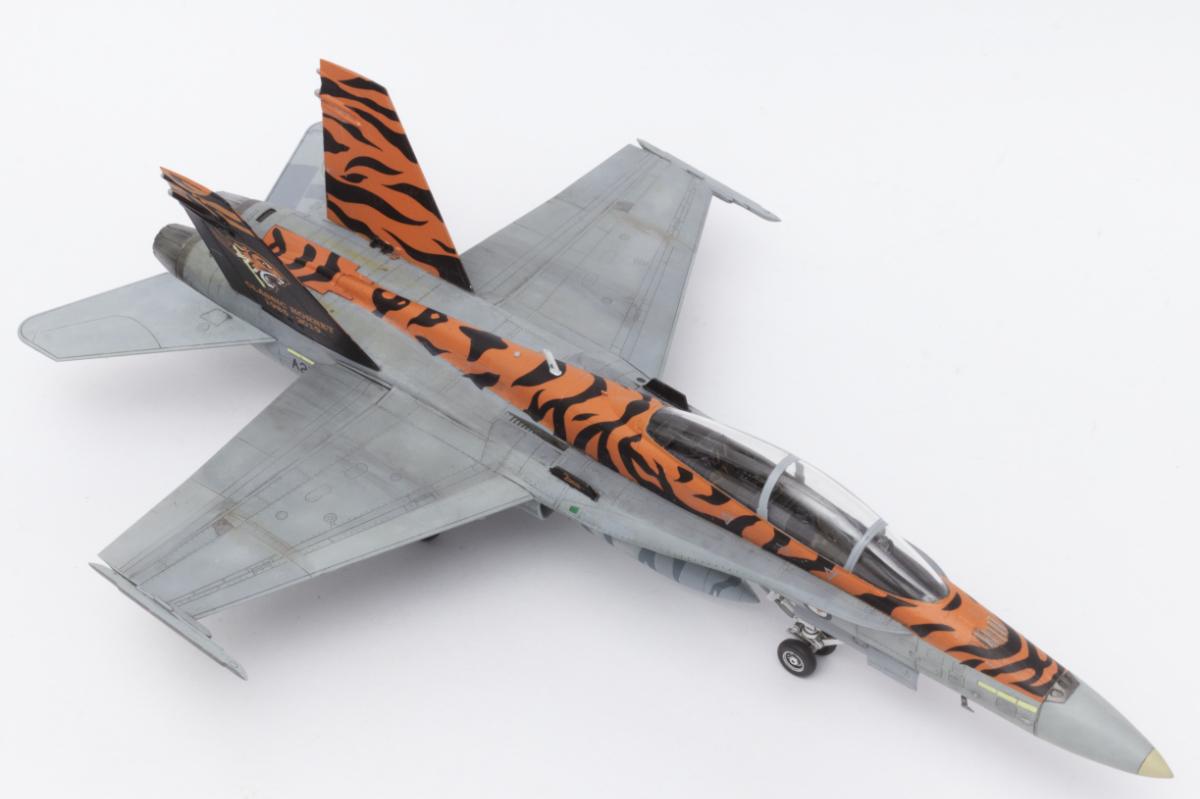
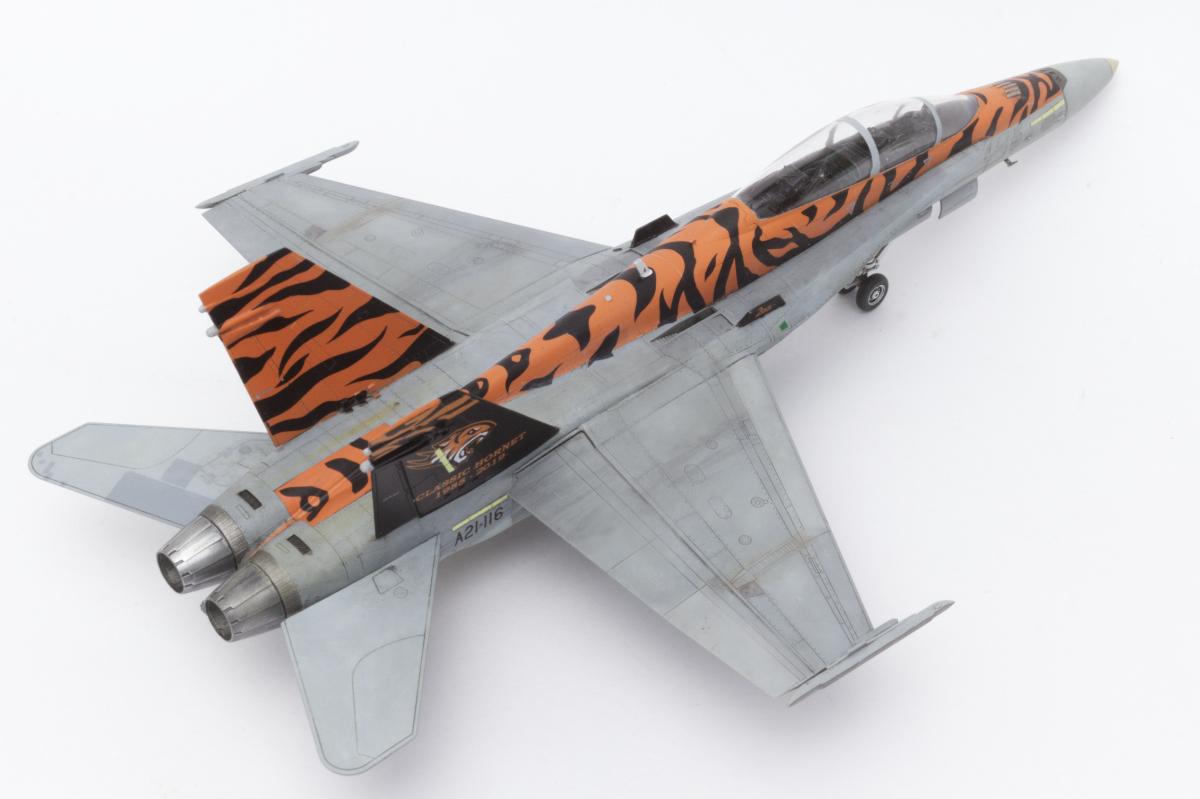
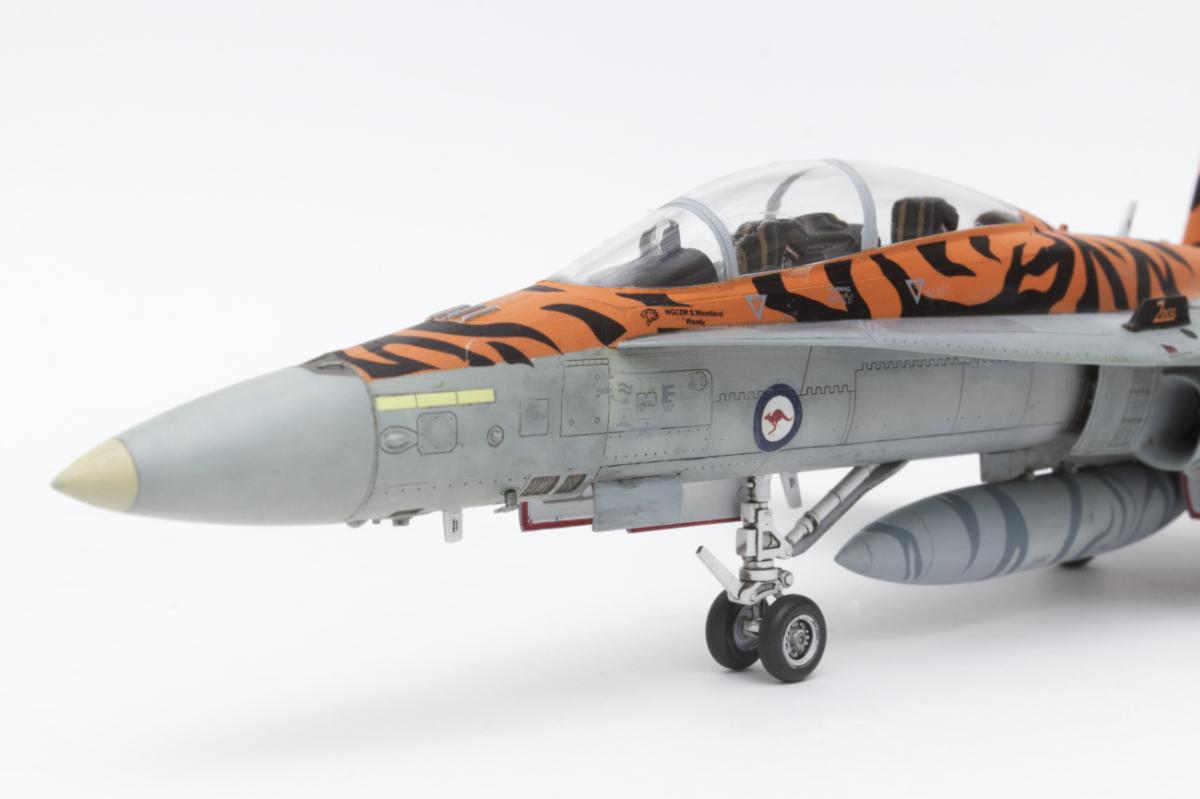
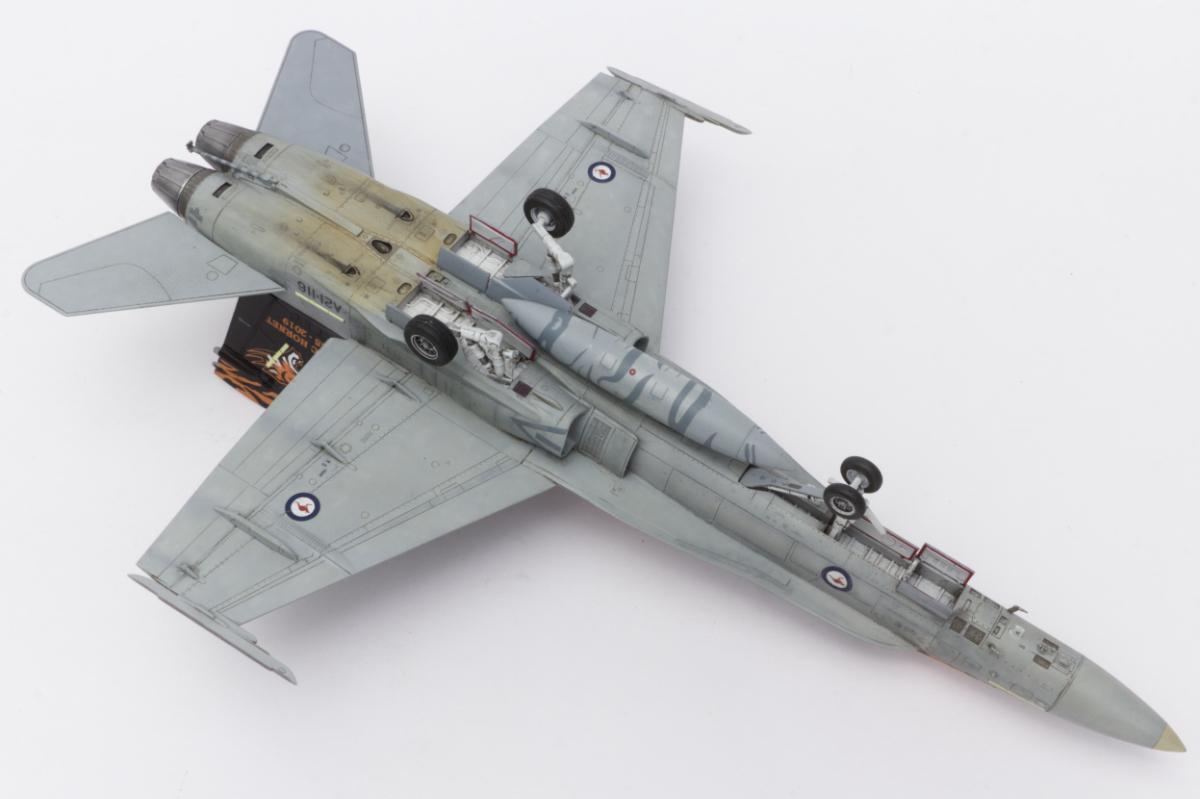
The kit is the quite nice 1/72 Academy F/A-18D converted to an Aussie B. In order to get to the B version that we flew, a few lumps and bumps need to be removed from the plastic as well as a few omissions in the way of the ECM blister behind the canopy and the cheeks of the nose. Aussie machines also had the catapult launch bar replaced with a square piece of steel bar similar in weight to the original launch bar. They did operate without the launch bar for some time however shimmy problems of the nose gear required the installation of the bar to negate this problem.
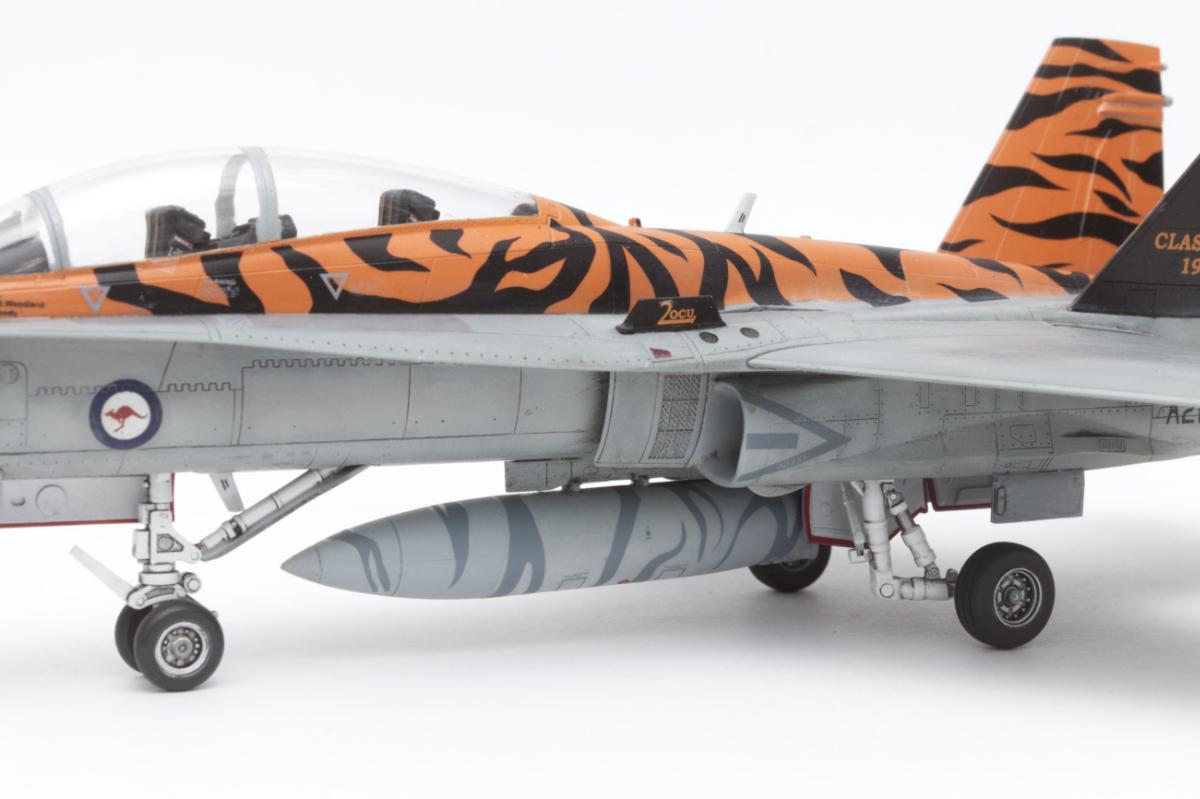
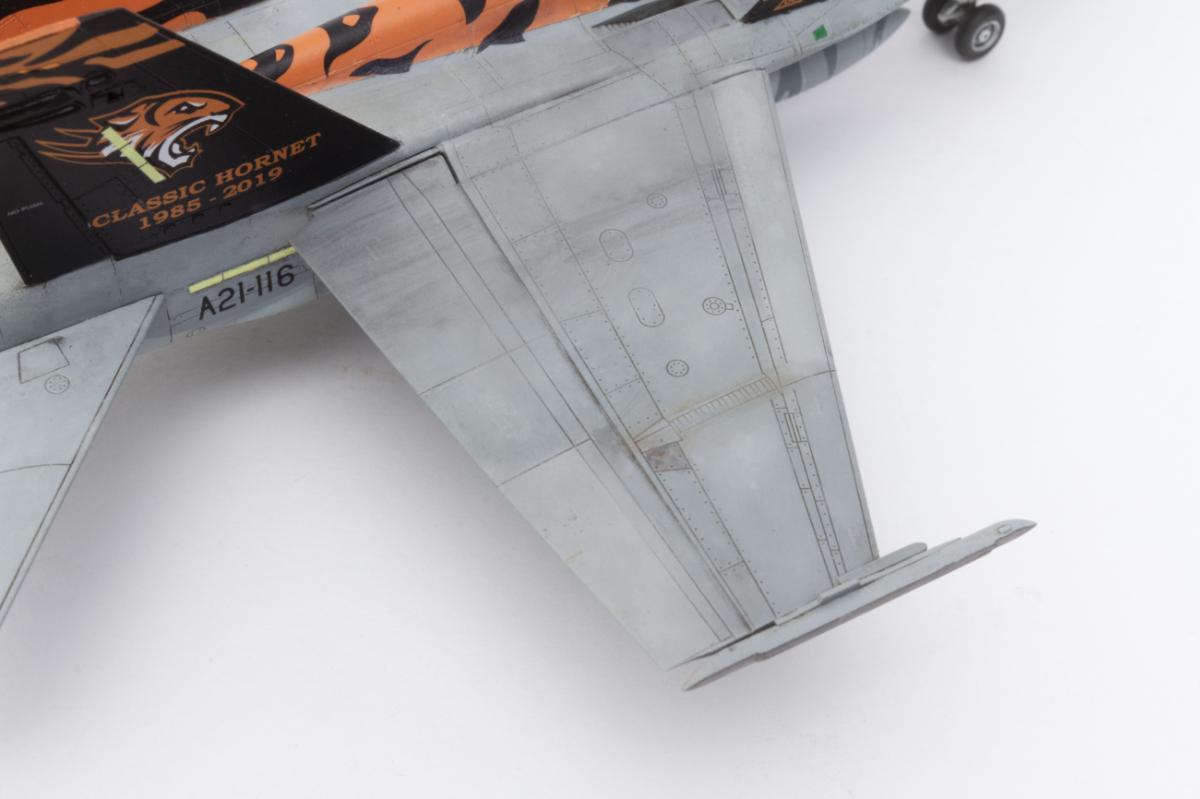
Another item that needs to be addressed for RAAF machines is the tail stiffener on the left side of each of the fins. The Kinetic kit comes with the stiffeners as etch items so I scanned then traced them in Affinity Studio, scaled them down to 1/72 and then cut them in vinyl. A bit of Mr Surfacer of the top and they blend in well. The reinforcing cleats at base on the inside of the fins are also needed however as this kit was a D version they weren't supplied. If you've the A/A+ boxing you'll be in luck as they are included. I made mine from some plastic card cut to appropriate size and shape.
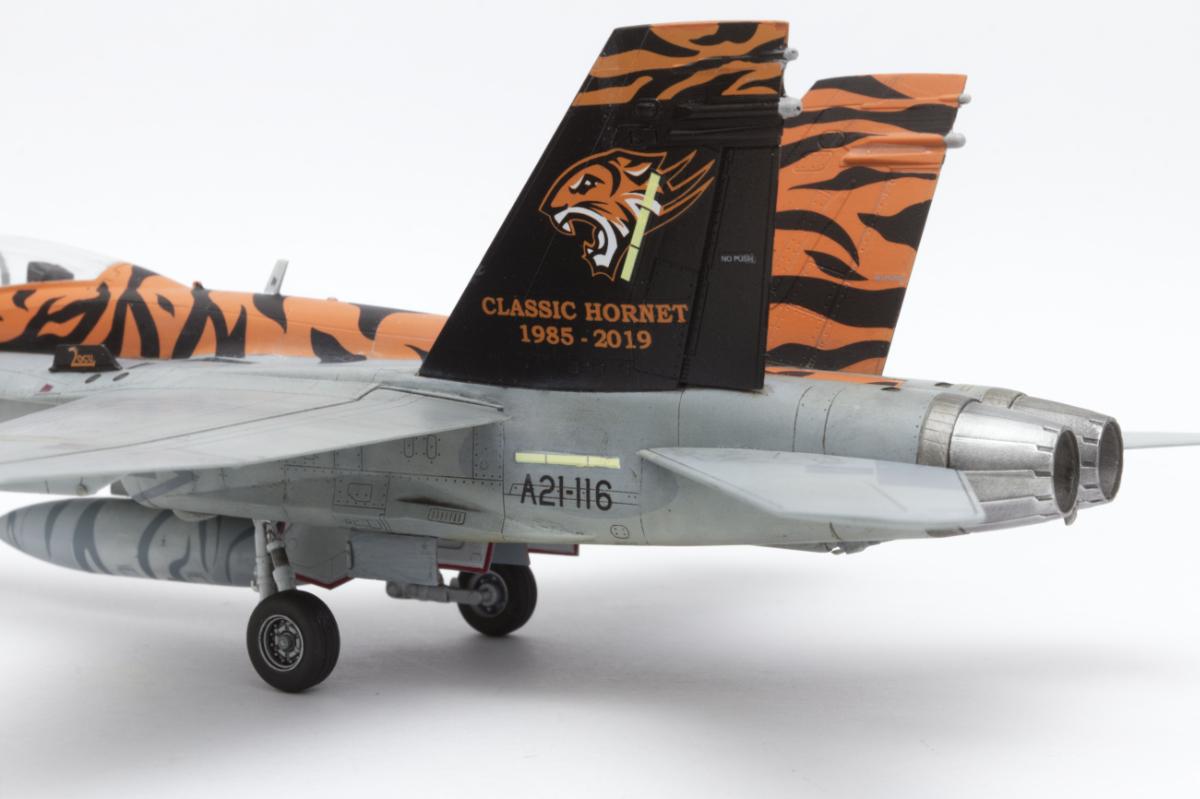
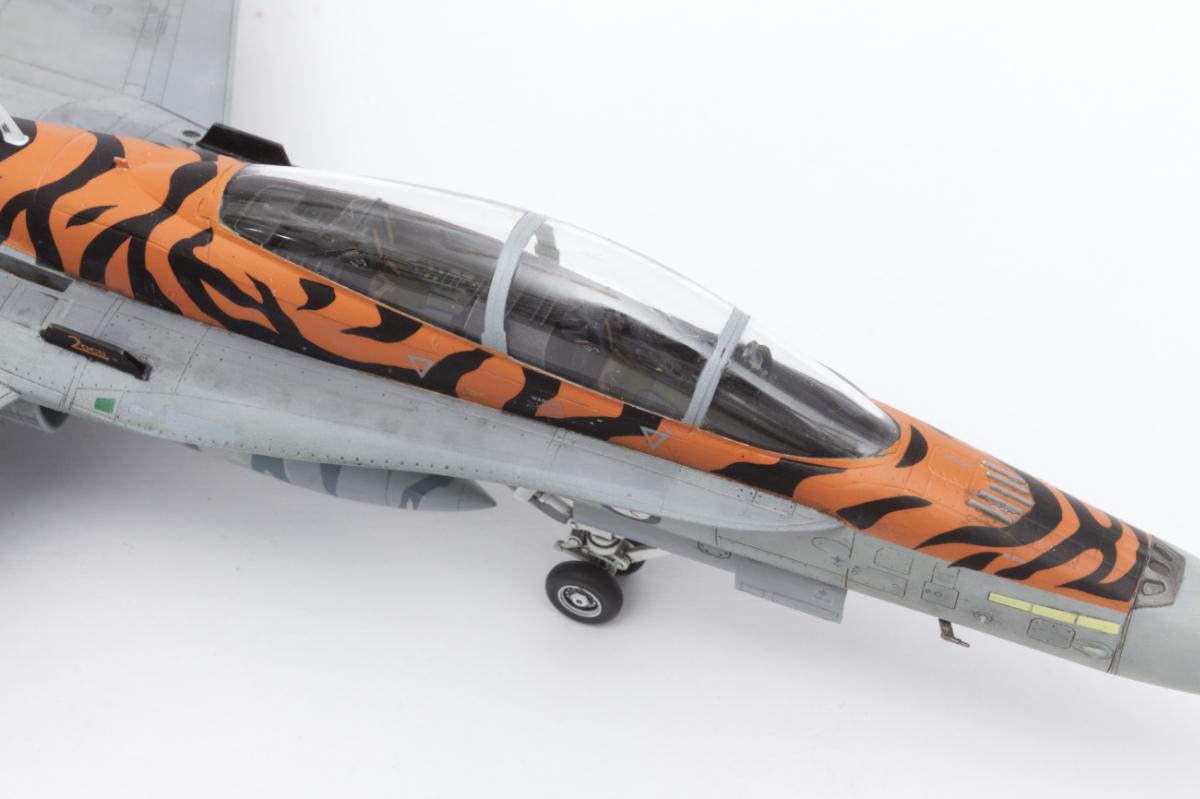
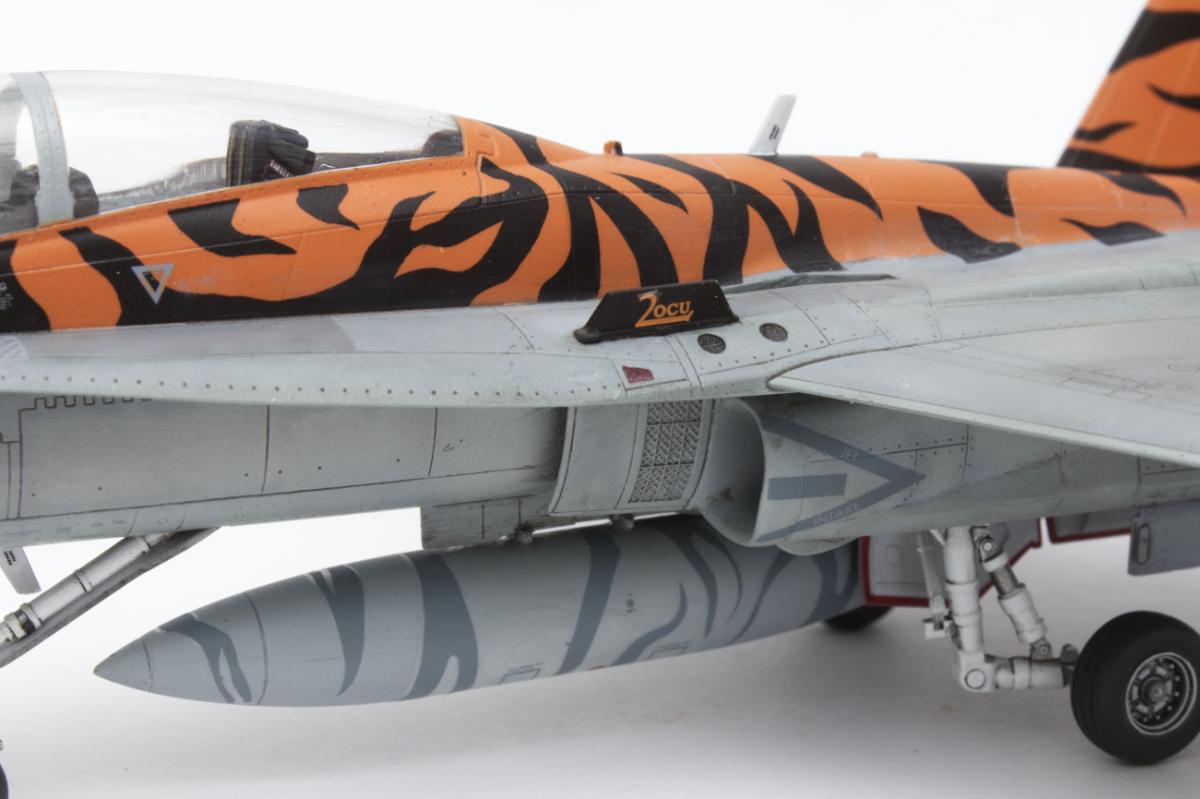
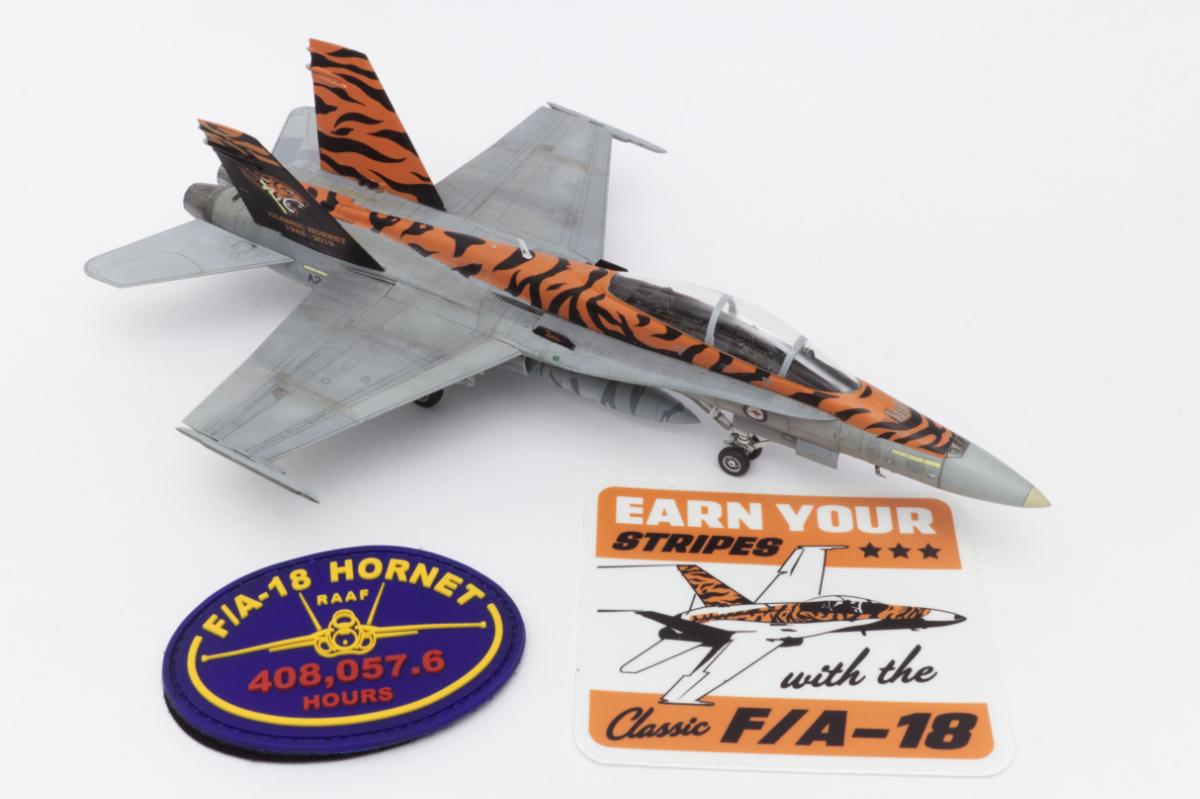
The decals are from Ronin Graphics here in Australia. They are very thin and the colour density is excellent but they are quite fragile if not handled correctly. I managed to fold a section of the tiger decals on itself so had to order a second set...doh. Anyone want a 95% complete set of this scheme in 72nd?
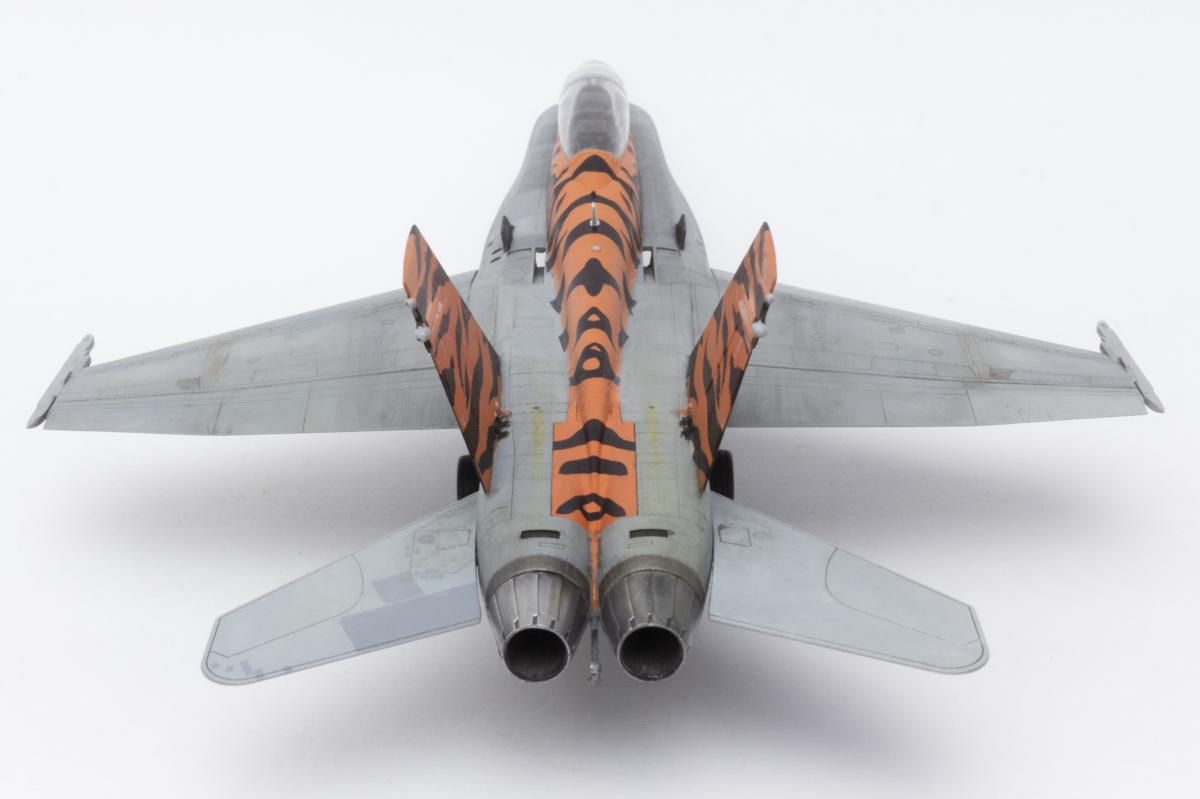
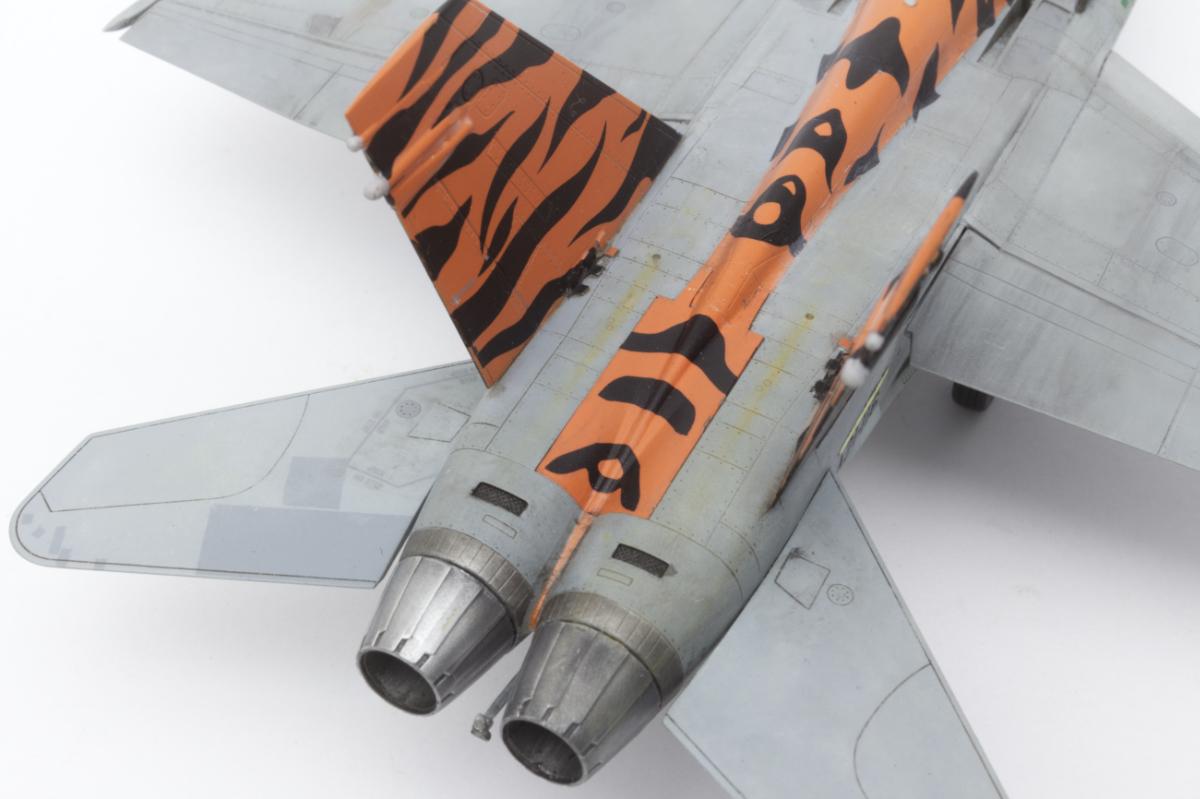
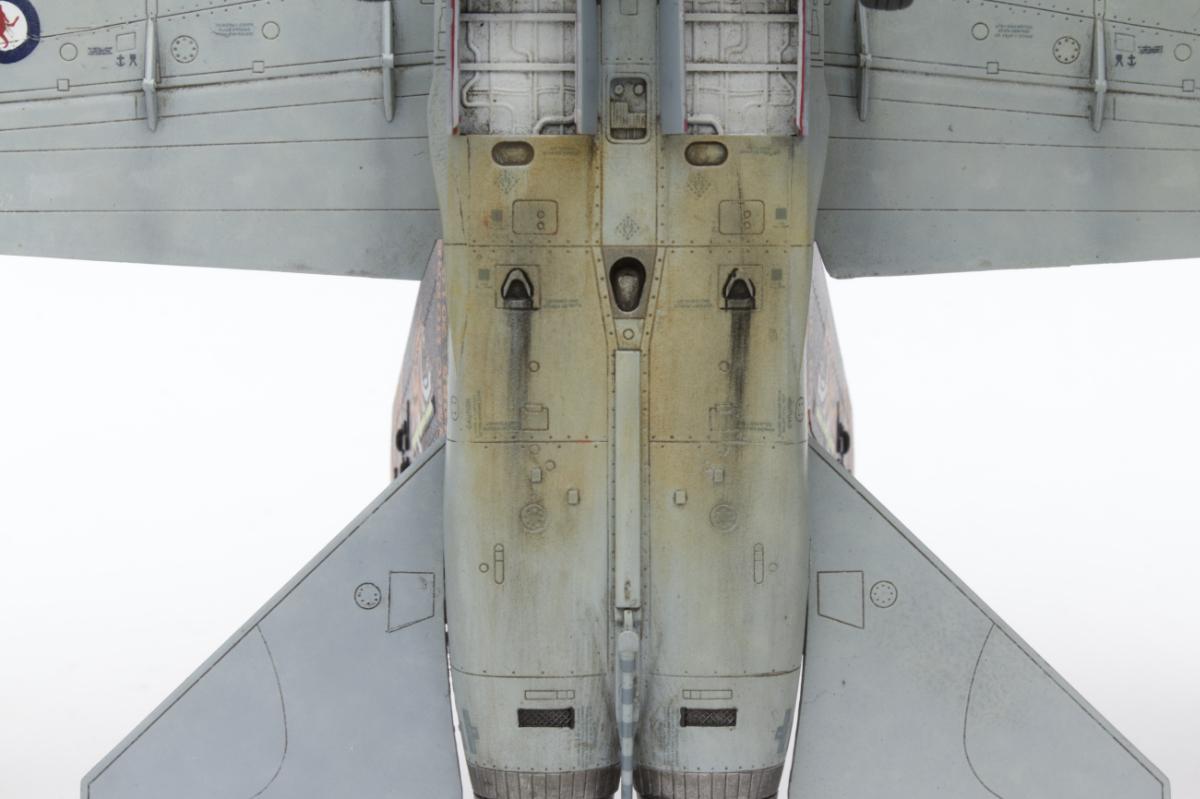
A colour chip of the orange is also provided with the decals so some paint alchemy, 30 minutes and lots of test spraying and I think I nailed the colour. There are many photos of this jet showing how worn out the grey scheme was at the end of its service life. A good example are the stabs. The left and right side are inter-changeable and this can be seen in the photos with the lighter colour of the underside appearing on the top side indicating they had been swapped out. I could spend hours on the weathering of the airframe but I'm happy with where I've got it to. Perhaps if it was 48th I'd spend a lot more time on it.
Enough words, onto the pics.
Hope you like!
Mick


I love tiger schemes, Mick, and this one looks great.
One word: "cool."
The tiger scheme is very cool, @mickdrover, and any paint matching you did must have been perfect, because you can't tell where any painting might have been done. Weathering is also well done. Cheers.
Thanks George. I've ended up with a jar of the colour with all of the mixing and matching I've had to do. I should have posted a photo of the paint chip next to it.
Stunning Hornet, Michael, fooling the scale for sure!
Congratulations!
Thanks Spiros. 72nd scale can be a fooling scale indeed. I've had similar comment son other models.
Very nice! Love the subtle weathering, and you really got those decals down nicely - hard to do with such complicated sets. Well done.
I think Tony the Tiger would say that Academy kit looks GREAT, and then your build looks FANTASTIC ! - and it's 1/72nd scale with some great mods. Nice post!
1 attached image. Click to enlarge.
Thanks George. I never had Frosted Flakes as a kid but I recognise that mascot! It'd be a cool addition to display next to the model for sure.
Great looking Hornet- fine weathering and finish!
Incredible 1/72 scale work. It’s a thing of beauty.
Very nice work Michael. I Love the 2 engined jets. Model or real. Hard to tell the difference some times.
Hi Mick that is a cracker! Hope all going well fore you! All the best DD
G'day DD! Yep, all well up here. Hope all is well down south for you guys too.
Well done Michael, I hope my Fujimi kit looks as good in this scheme when I finish it.
Thanks Allan. I built the single seat Fujimi kit quite some years ago and remember that it was a nice build. What scheme will yours be in?
RDS-177, what did you do your single seat as ? here's a couple of pics of my single seat Fujimi models so far.
2 attached images. Click to enlarge.
A beautiful Hornet, Michael @mickdrover
Those Tiger schemes are always amazing and your Hornet clearly shows that.
Well done.
Great Hornet, Michael! Weathering and dirtiness are really well-done, just a fantastic model to look at. What did you use on your afterburners, the metallic 2-tone on the turkey feathers & the band in front looks really sharp!
G'day Joe. The exhaust are done in a three step process.
You could seal it and then add a dark wash. I may do this as I think it needs to be dialled back.