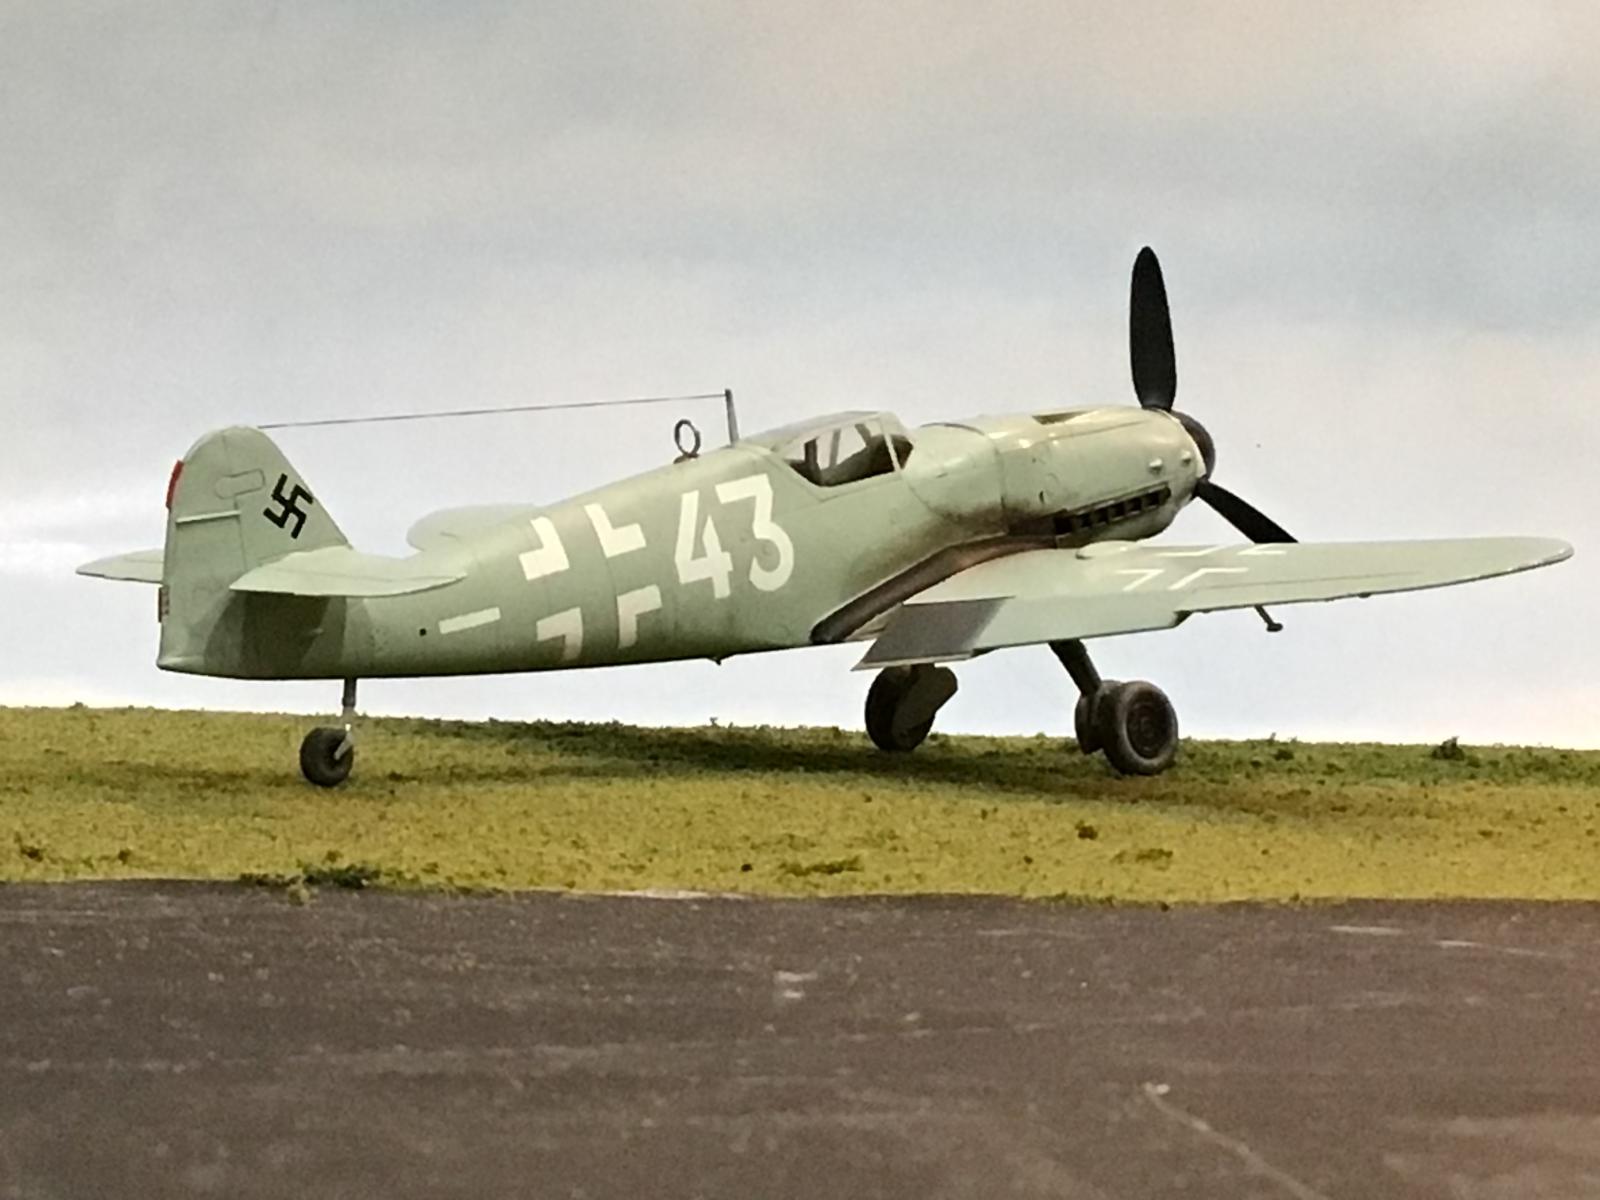
1/48 Hasegawa Bf-109G10, Werke Number 130 369 of 5 / NJG 11, Fassberg, May 1945 a gift from Tom Bebout
This model was sent to me as a wonderful gift from Tom Bebout.
One day he contacted me and asked if I had a Hasegawa Bf-109G-10 in 1/48 scale. My answer was "No, I don't." The very next thing Tom said was, "Well now you do !, I'll send you this one." (or something very similar to this). About a week after our conversation, a package was delivered at my door.

Thanks again Tom ! You're the best.
Tom Bebout @tom-bebout
I let the Hasegawa 109 "Gustav" sit around for a short while, as I had a lot of other builds underway, and no room to build it, plus a lot was happening on the home front too, with various family health issues. I hate it when life gets in the way of our hobby. Sometimes it does though. When it does, you deal with the punches and roll on.
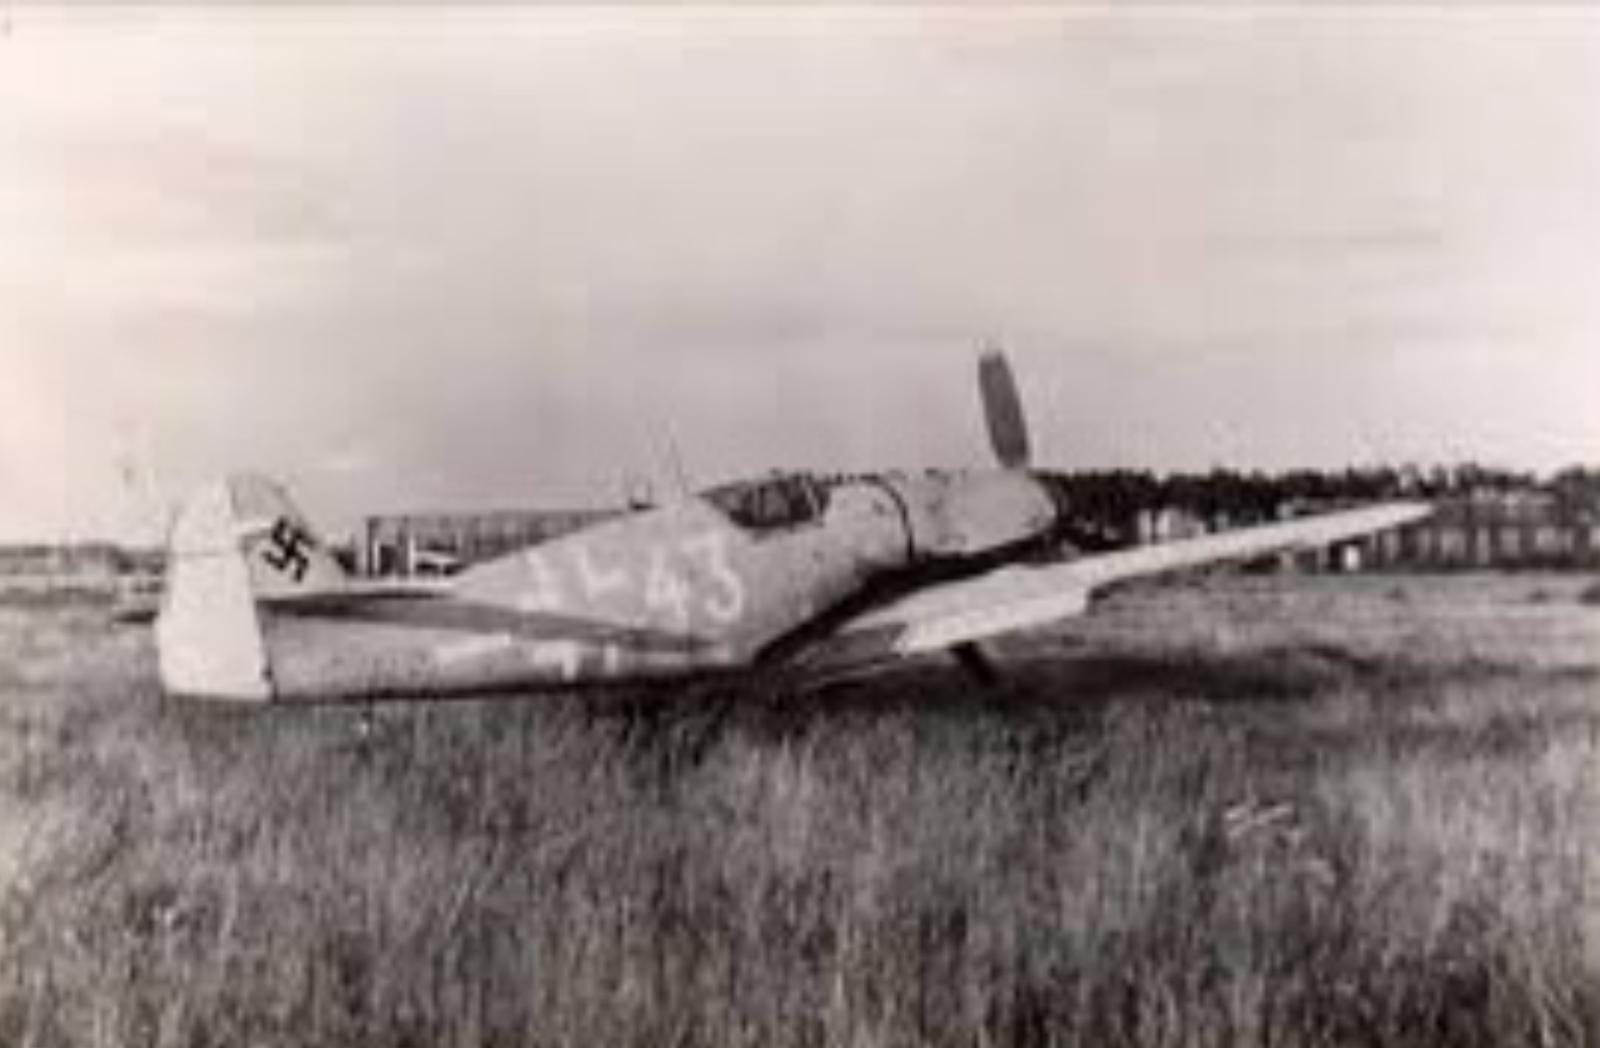
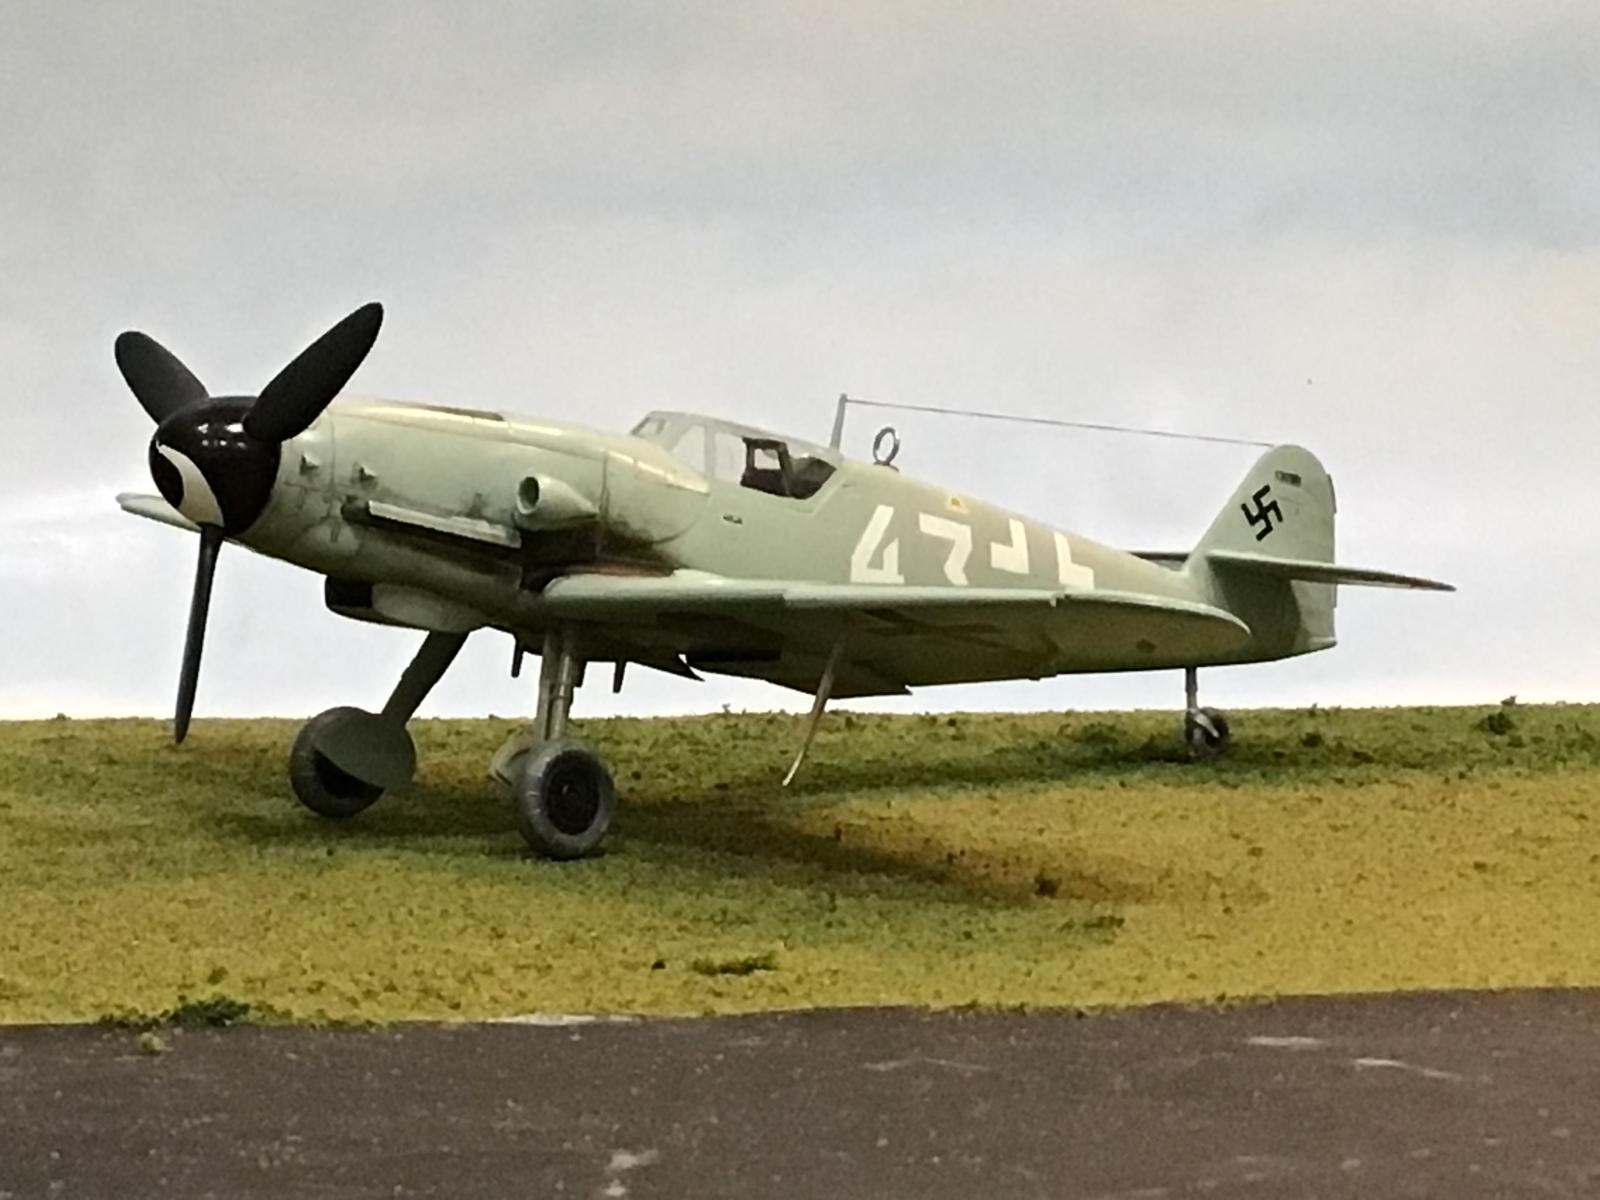
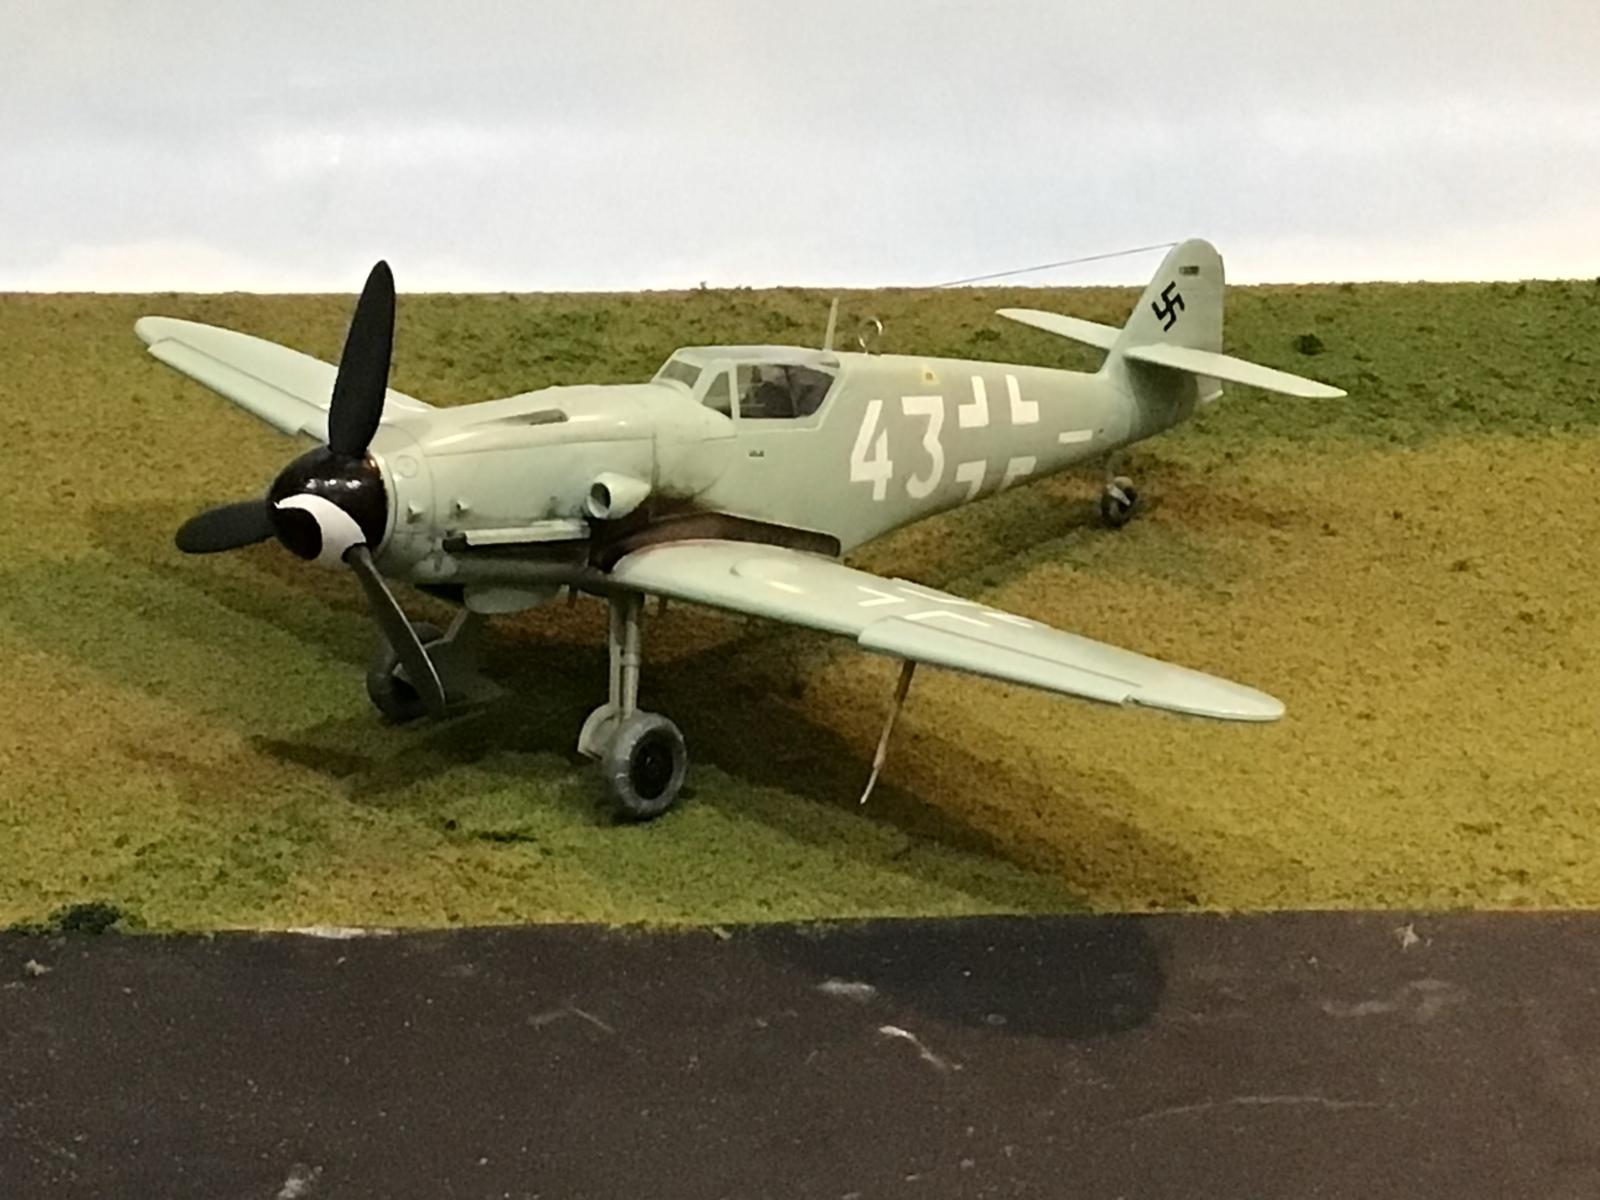
I have always wanted to build a 109 in the Late War overall RLM 76 field applied finish. One such example was captured intact in the last days of the War. It was assigned to 5 / NJG 11 and it was used for night time interceptions and on occasion ground attack missions.
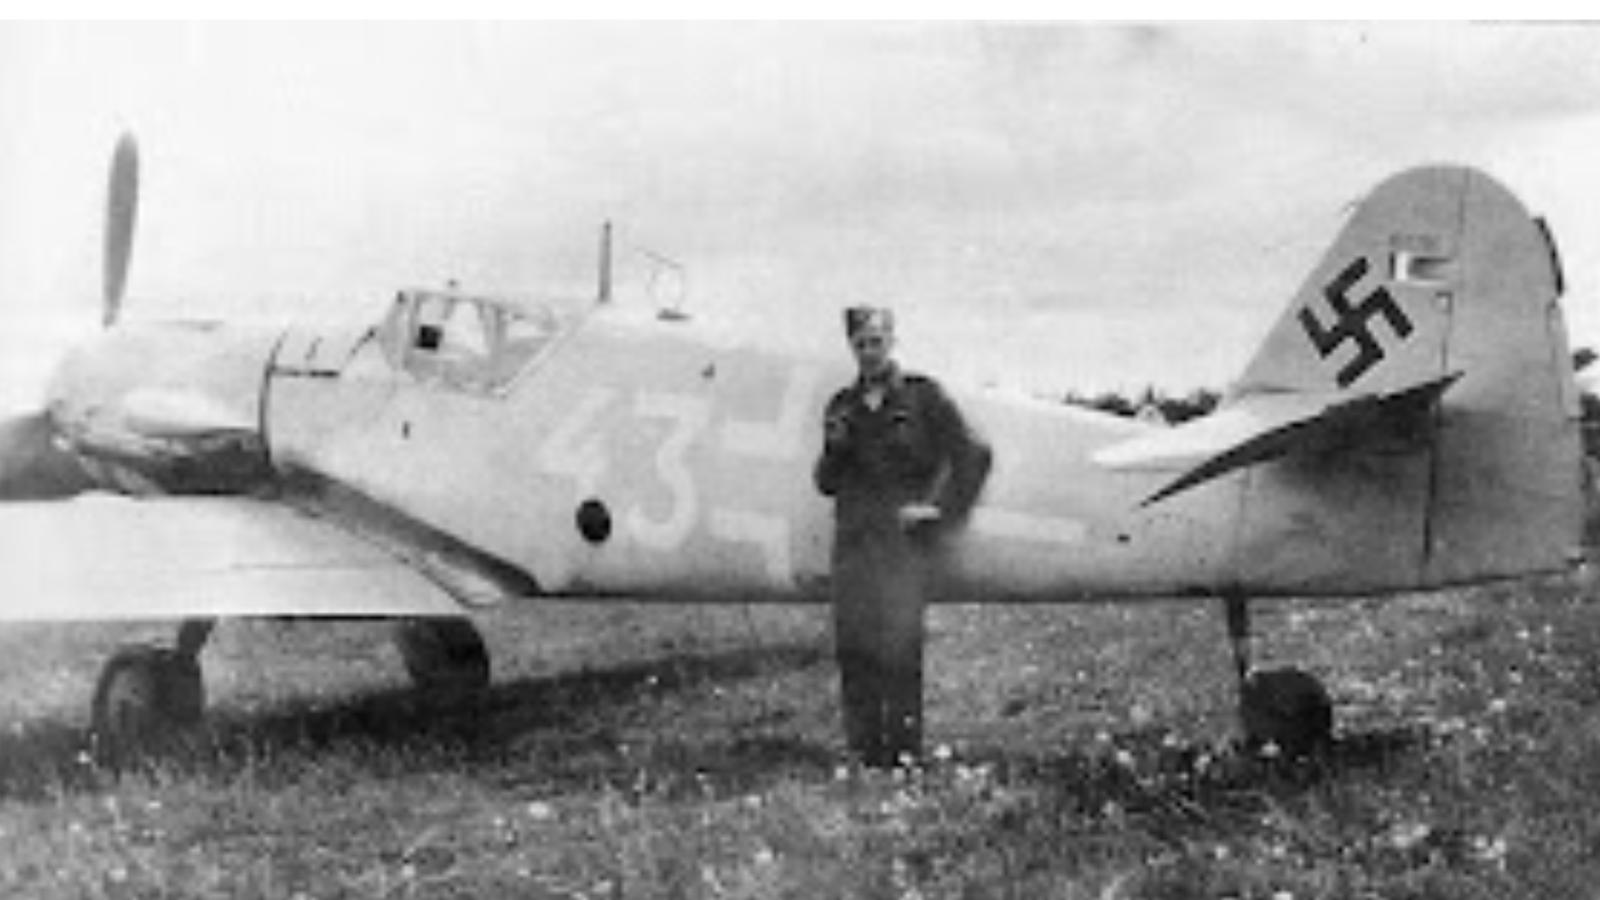
There were several black and white pictures on line, so I was able to see what both sides of this Messerschmitt looked like. I'm not an expert on the 109, so I enlisted some help with this one to make sure it was as accurate as I could possibly make it.
Here are the original photos I found online. I have included a link to the website where they were. Full credit goes there as these were not mine.
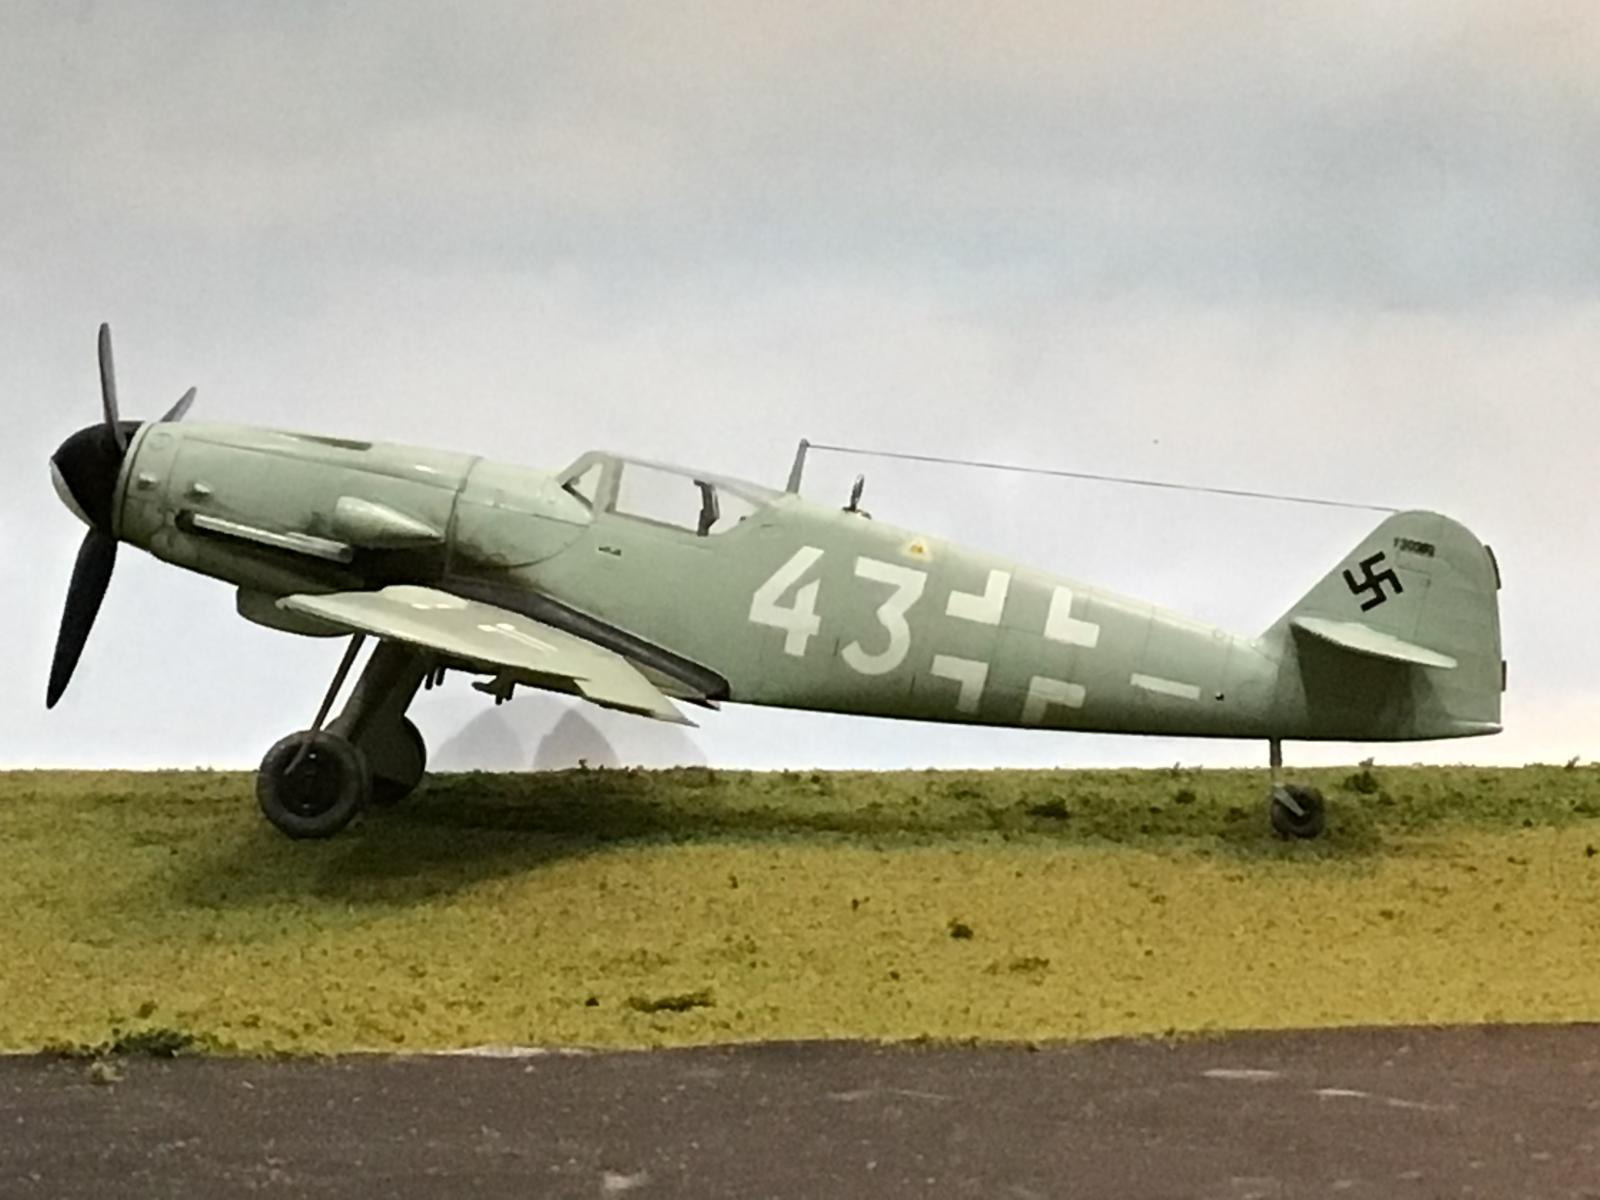
In the next series of pictures, I have taken the original pictures, and posed my model in a similar manner.

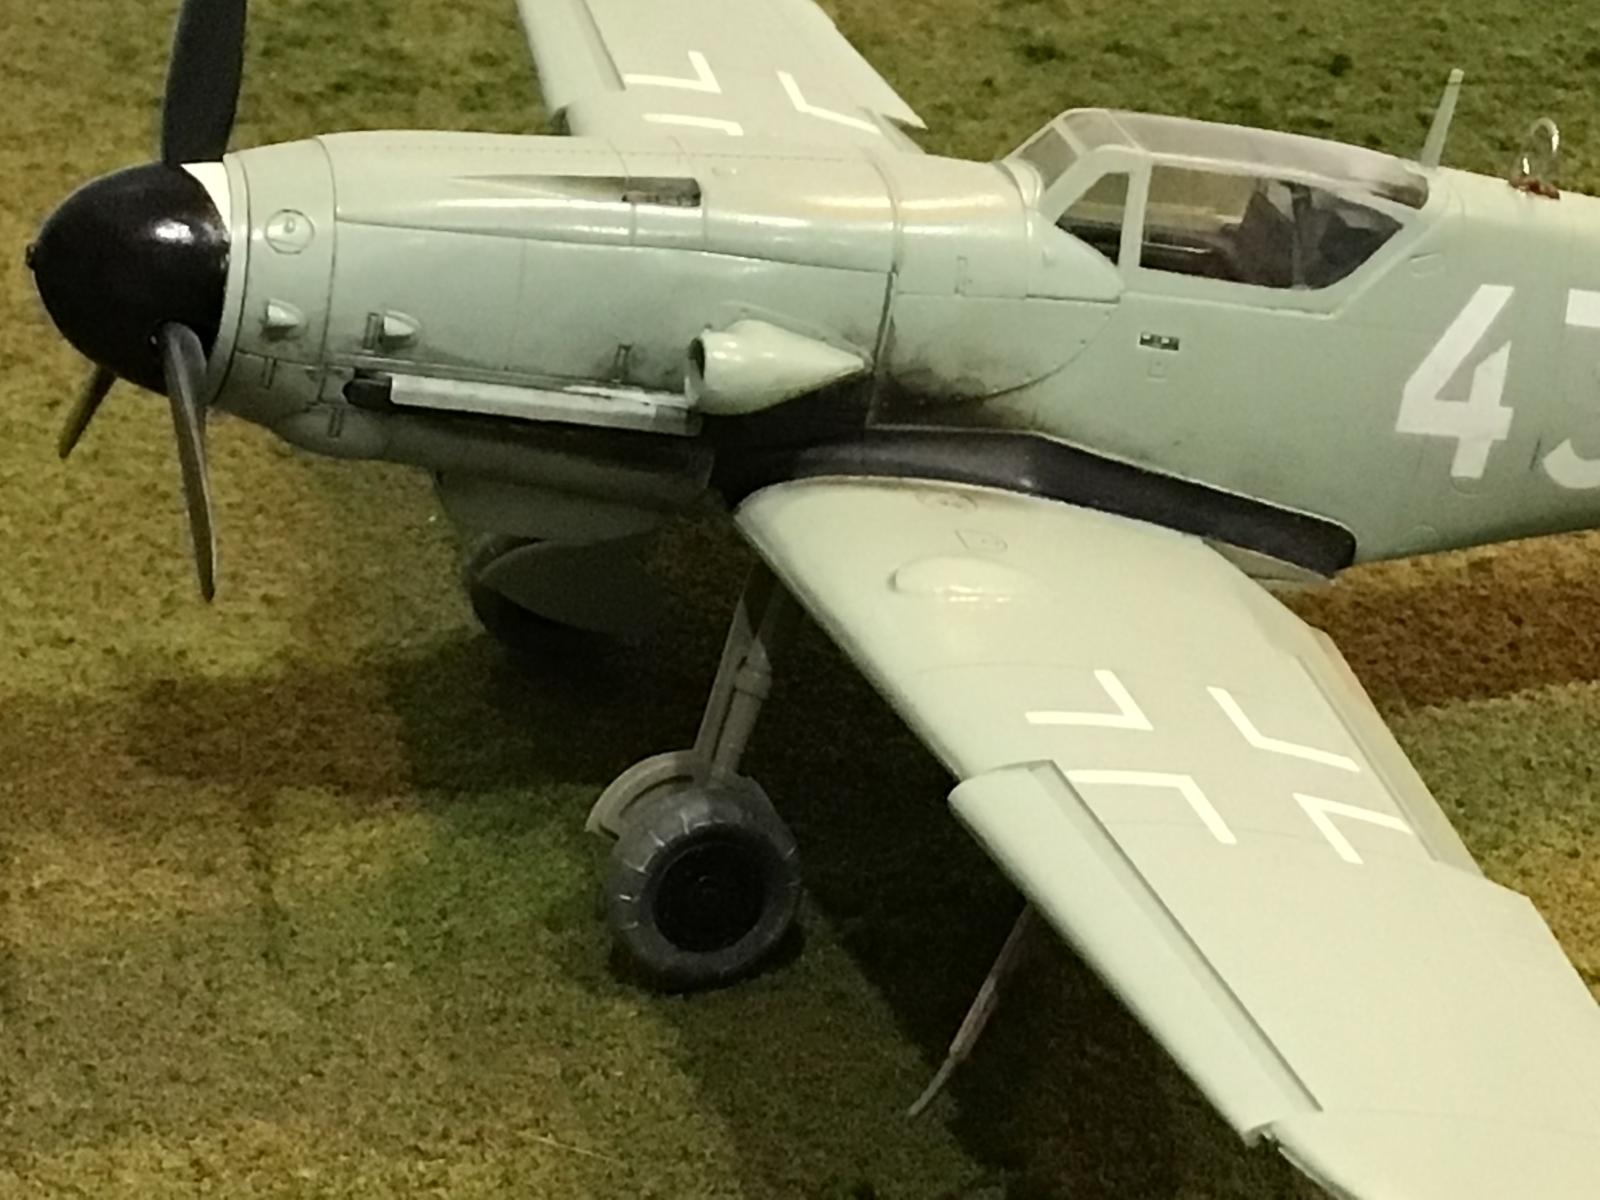
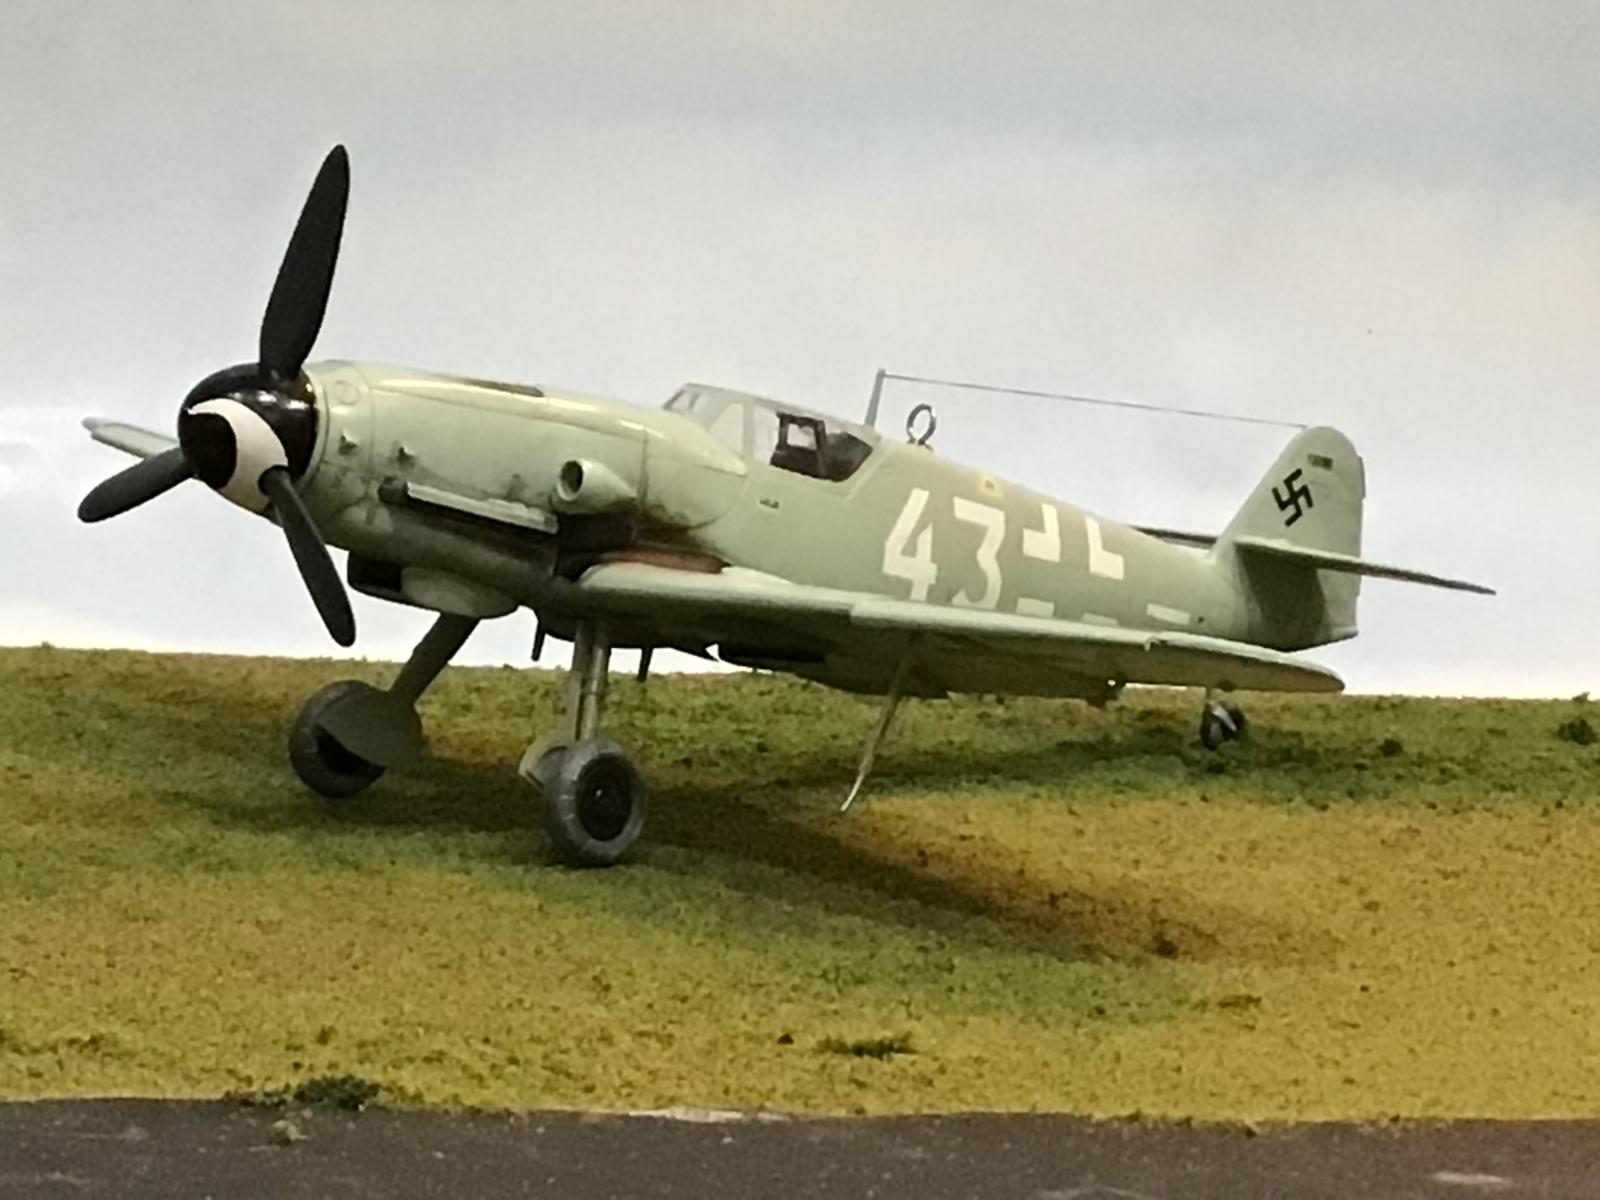
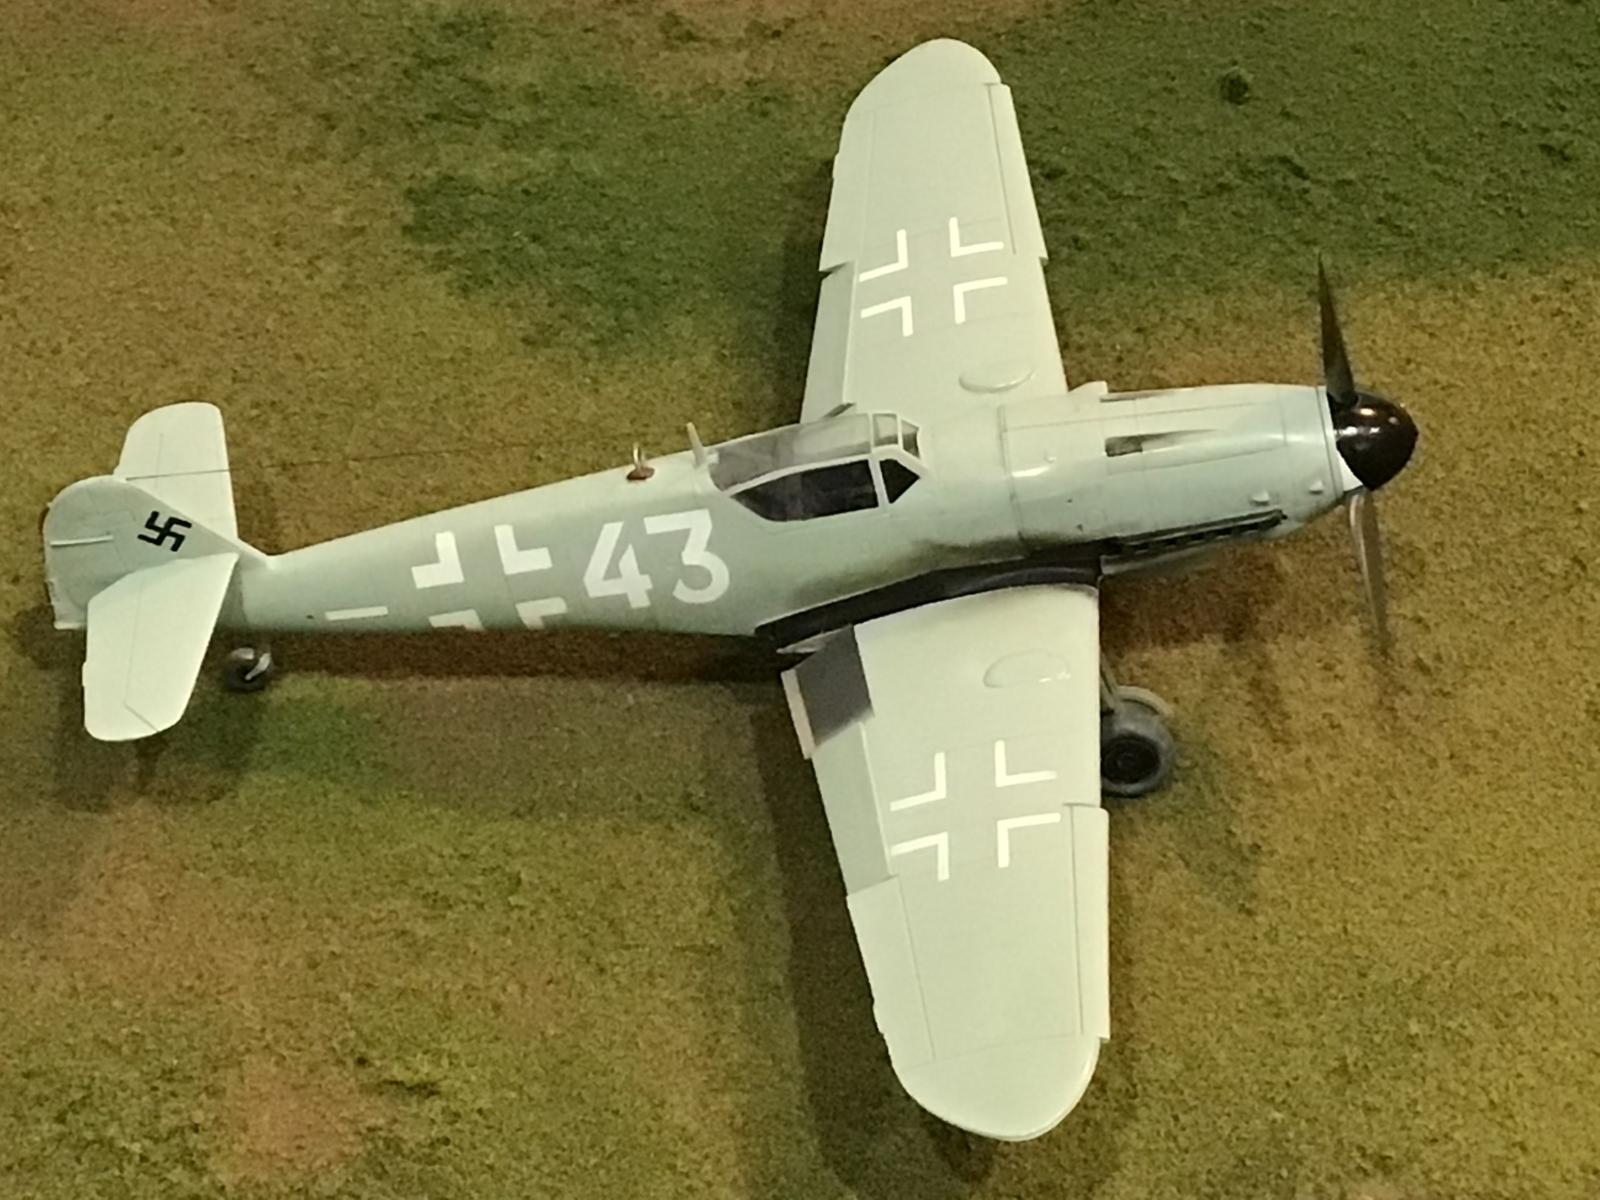
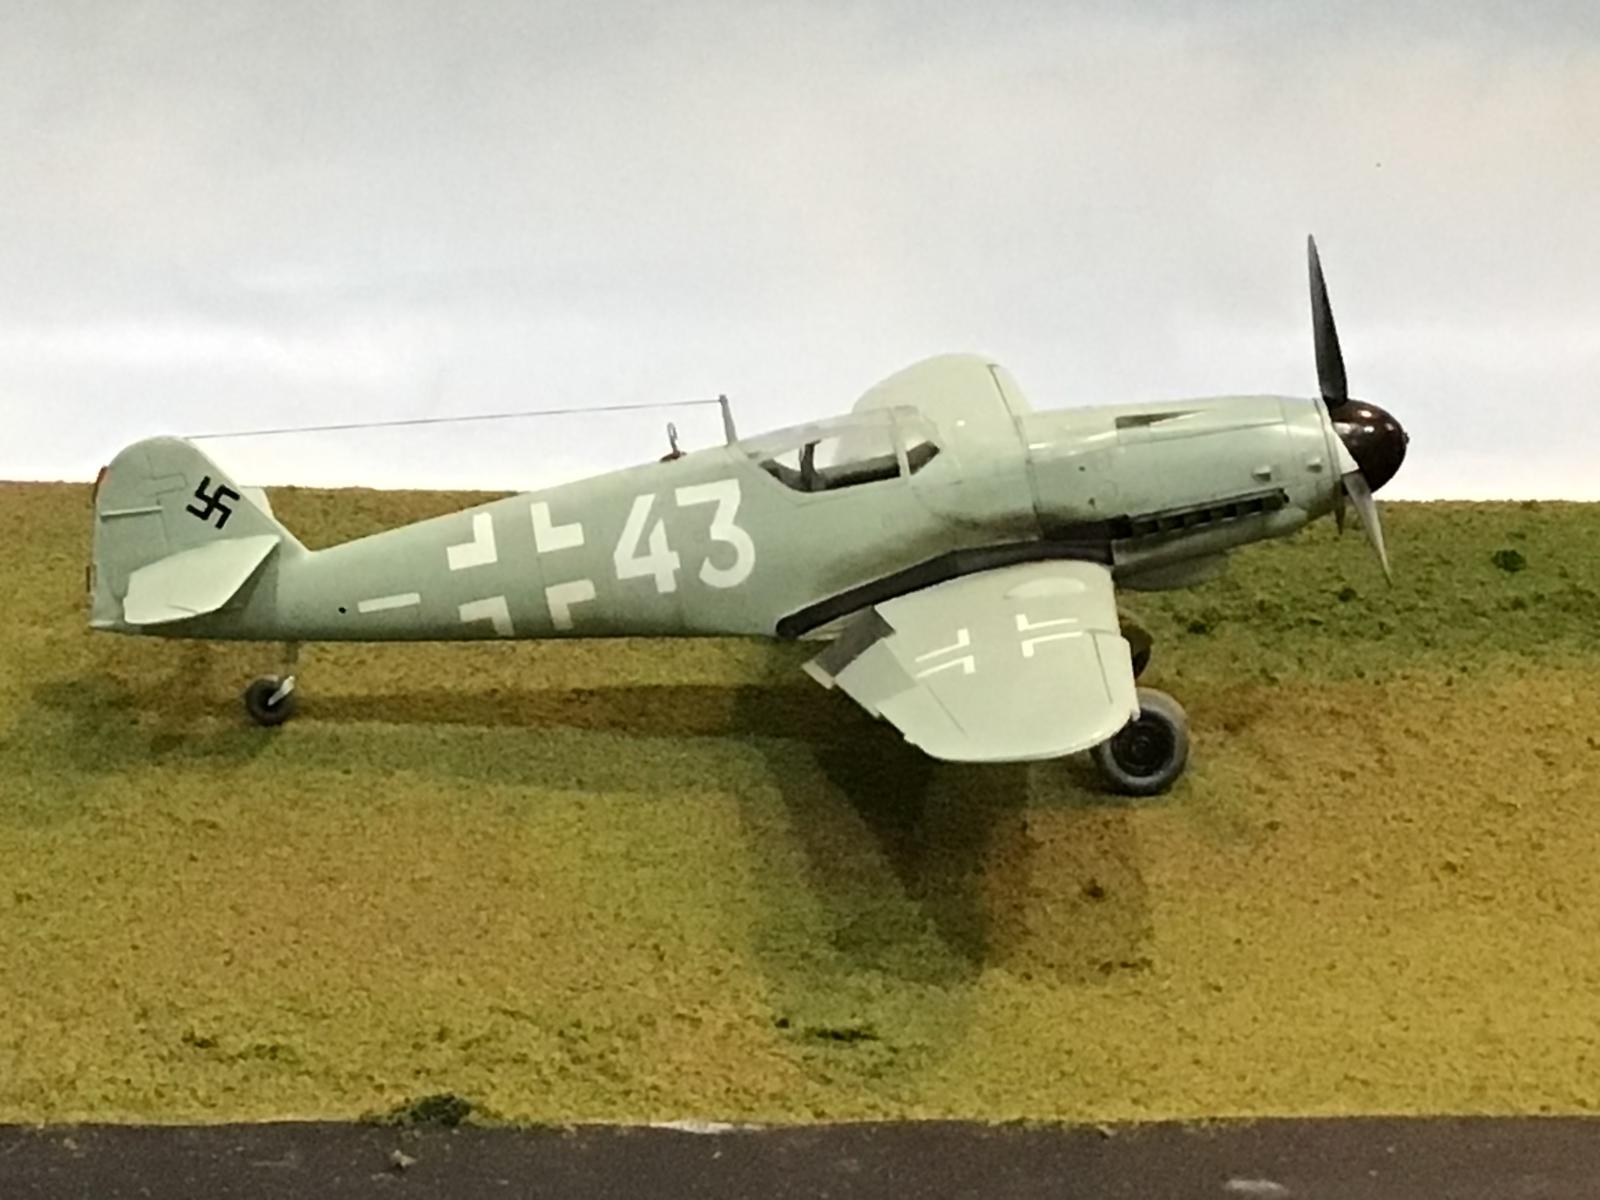
Here is a side shot.
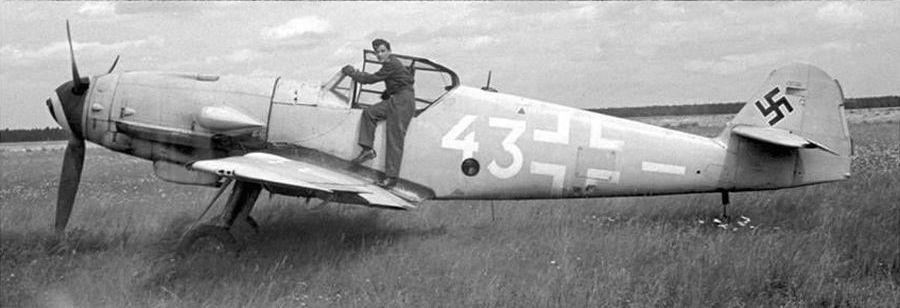
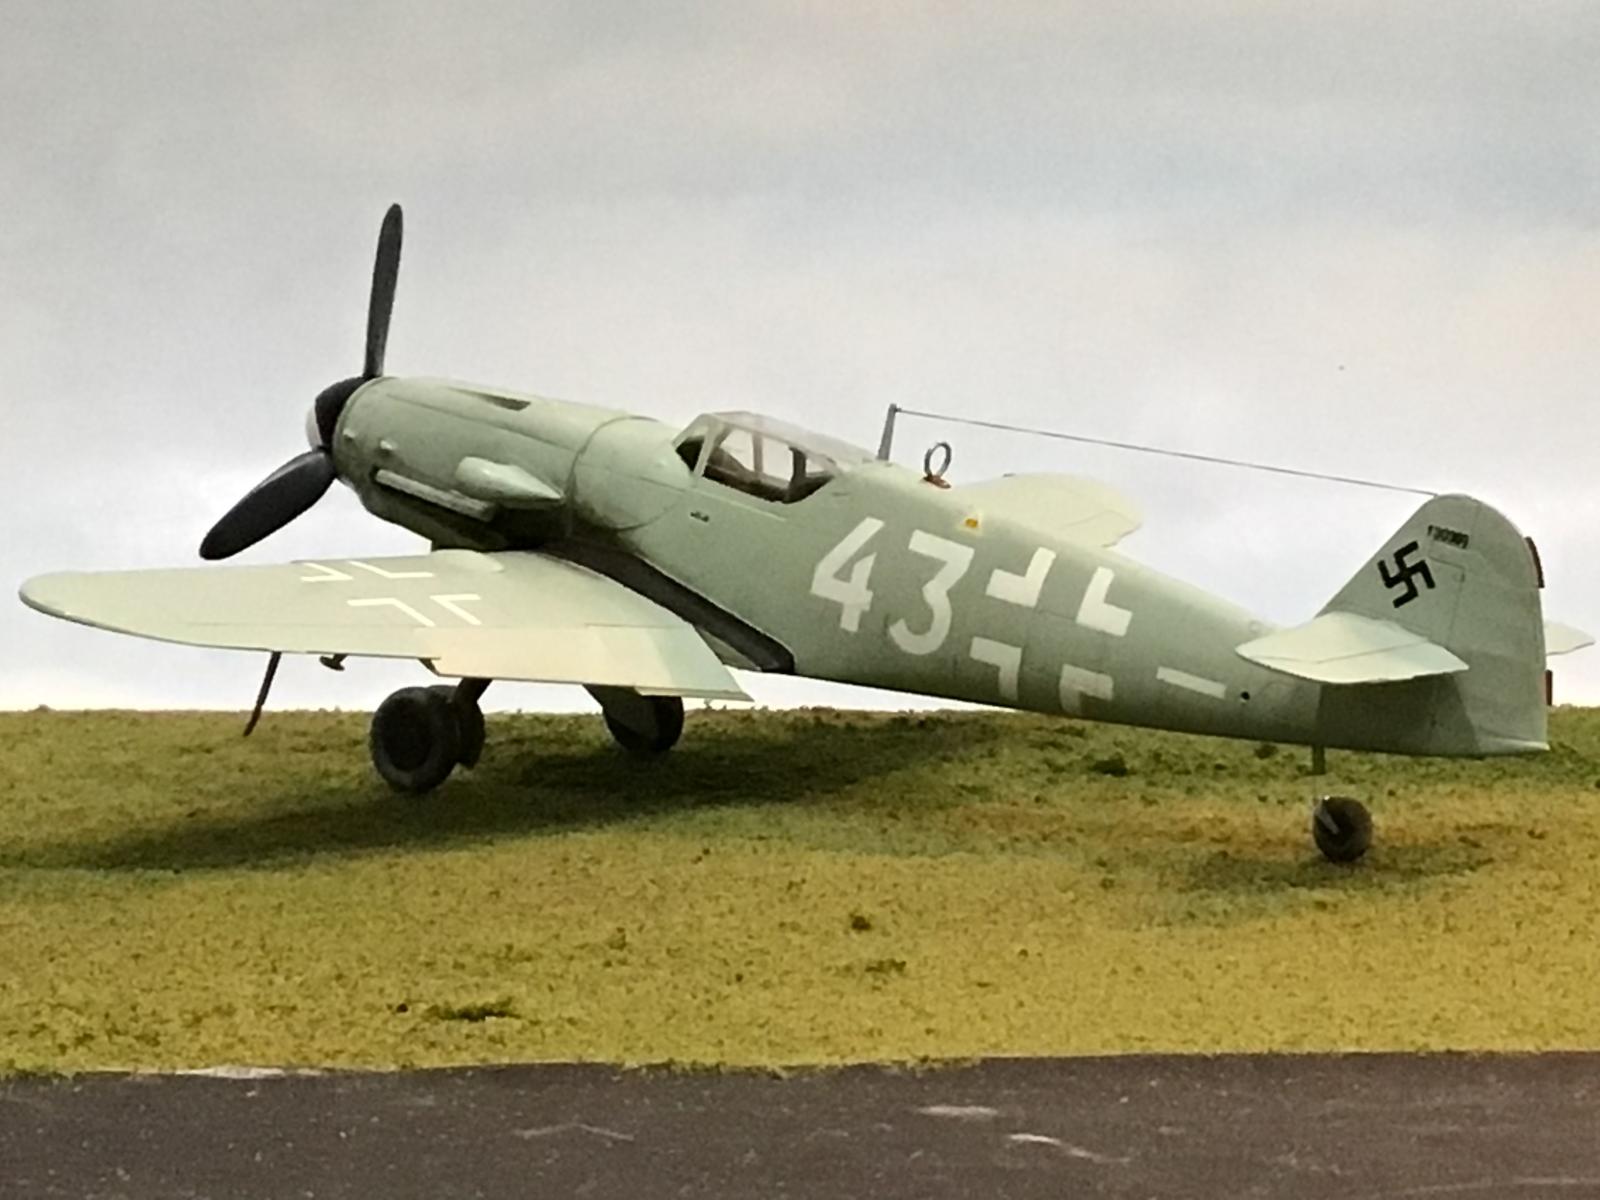
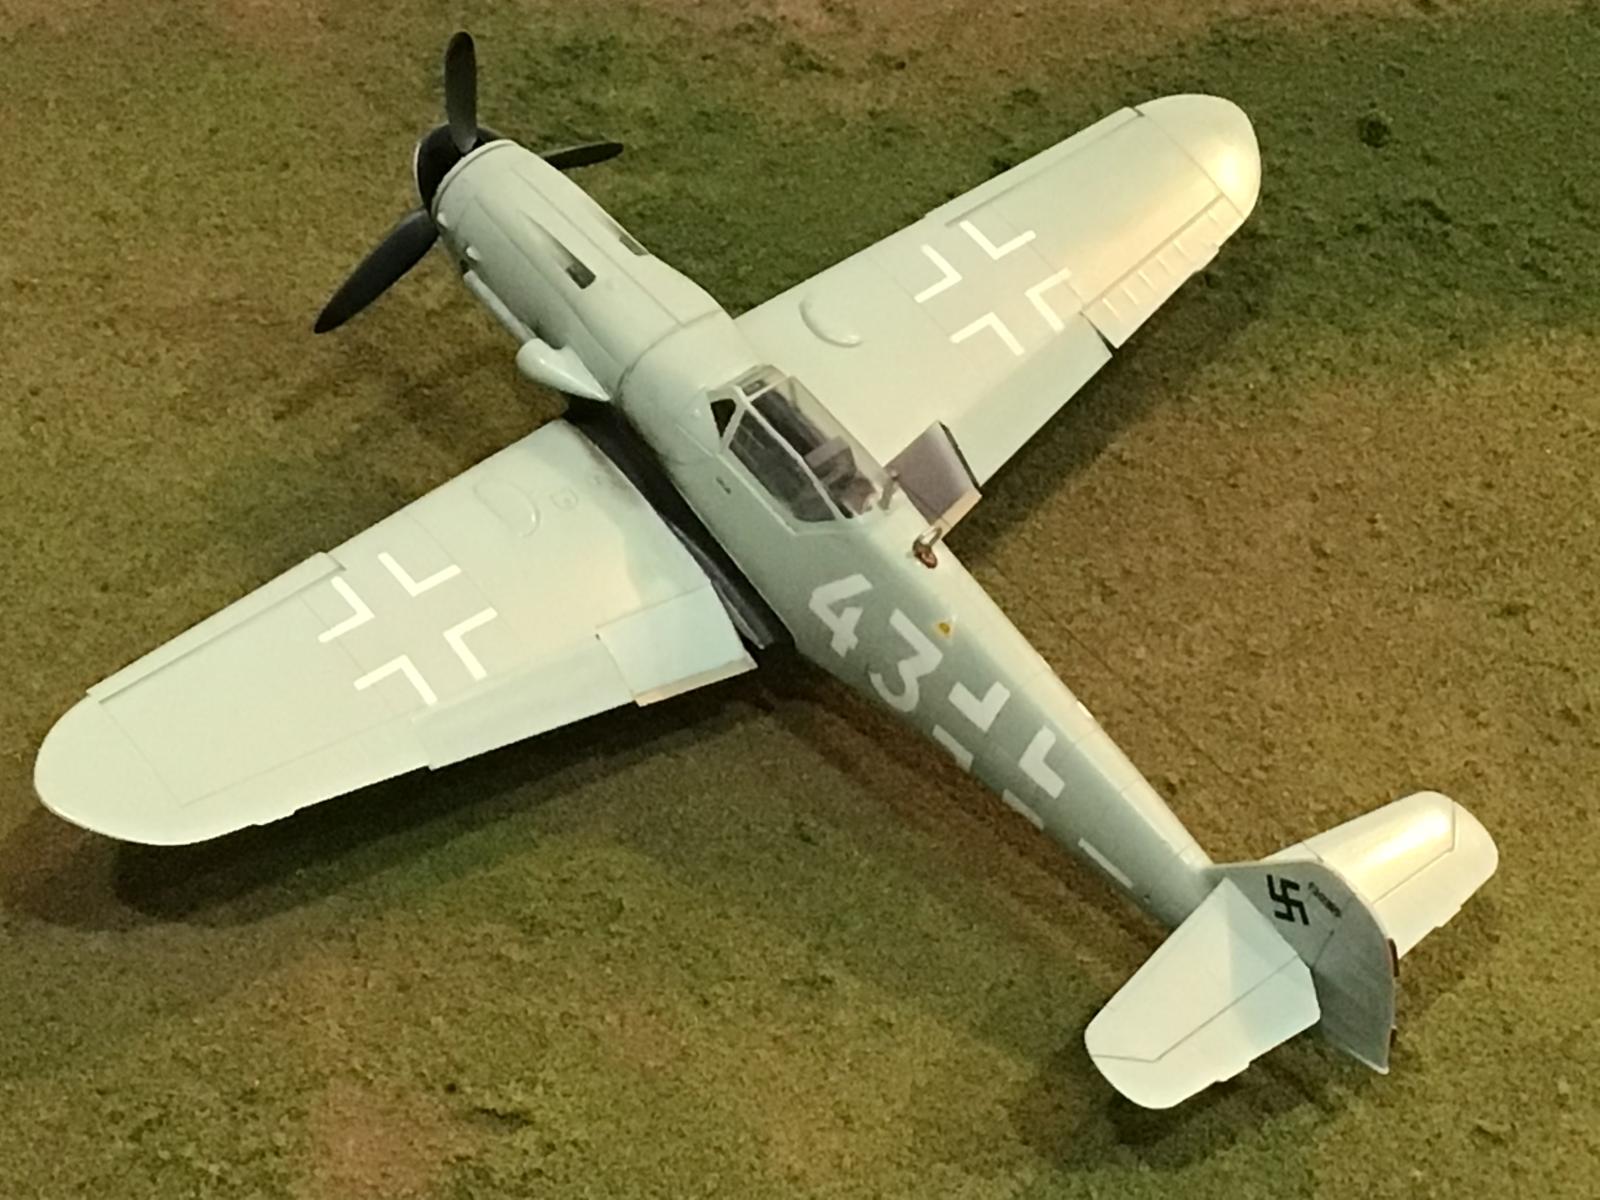
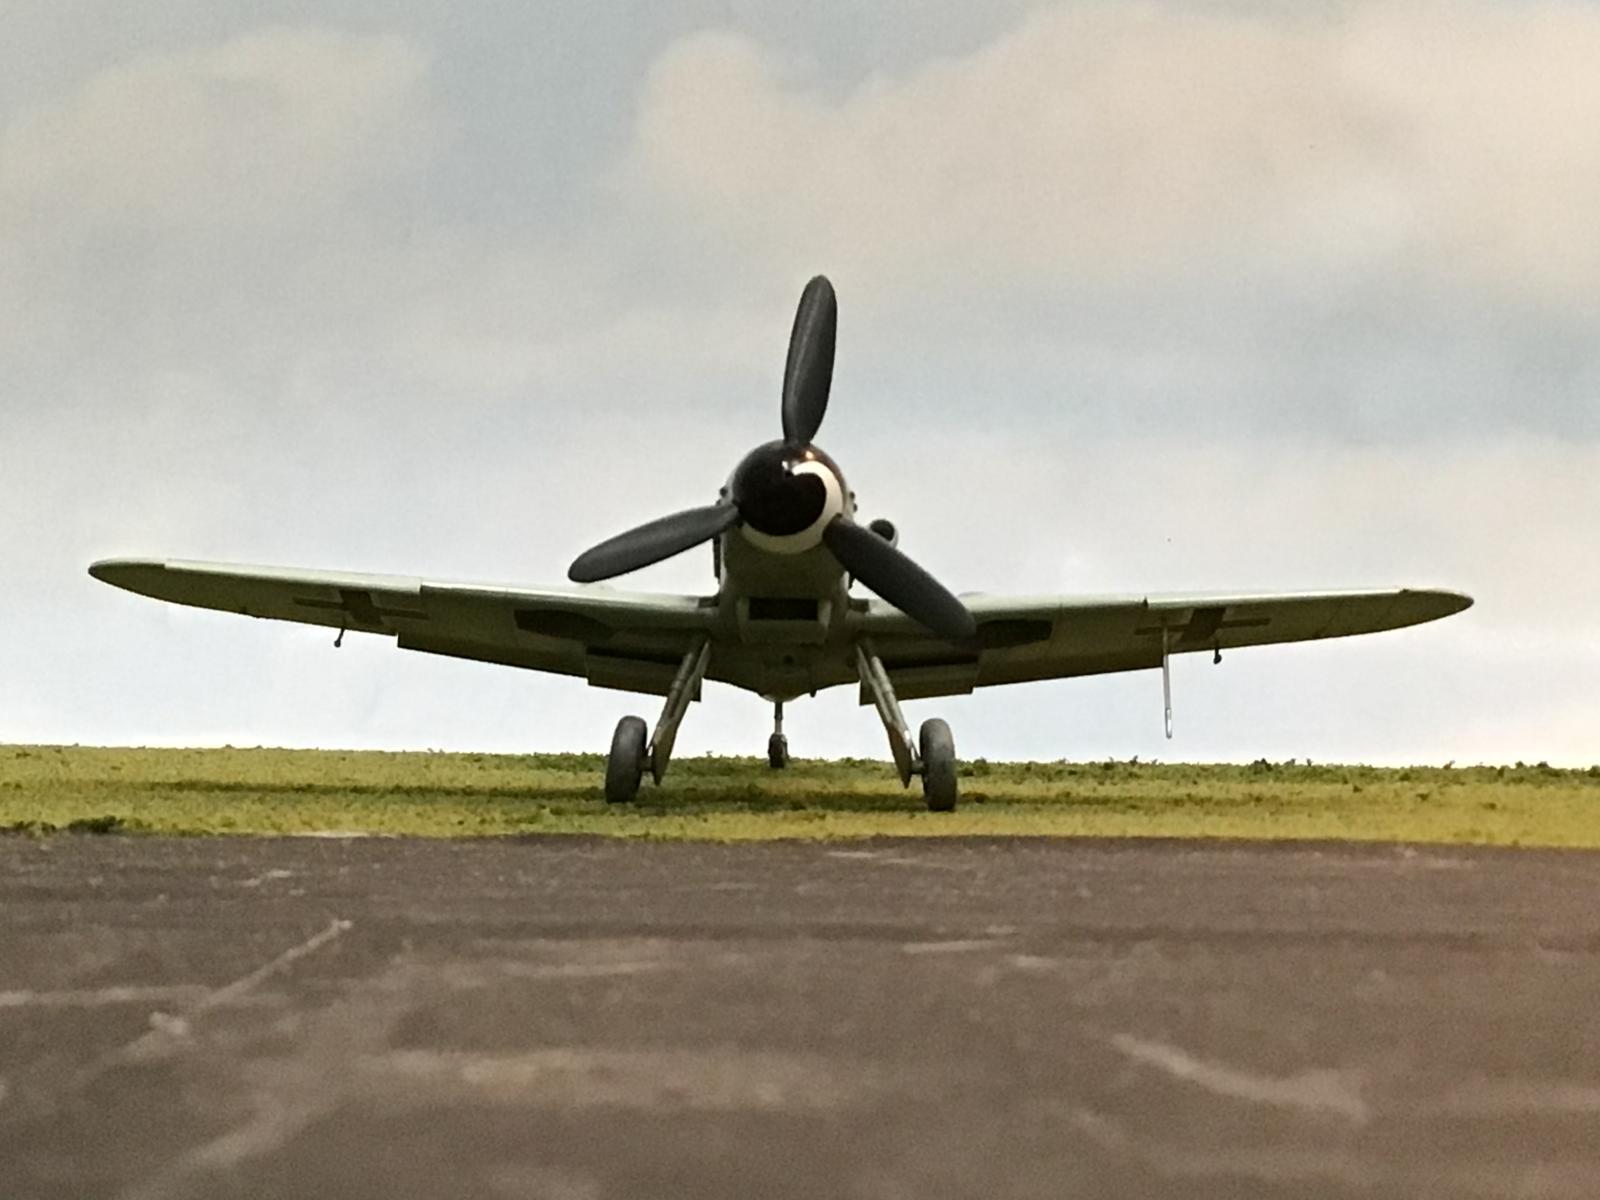
The same thing, but this time from the front Port side / LH quarter.
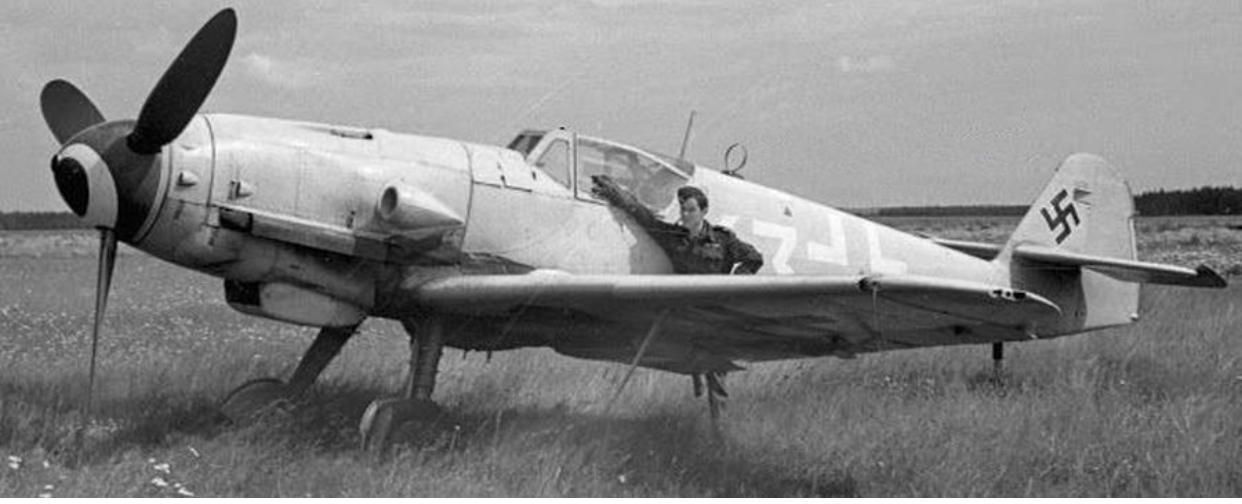
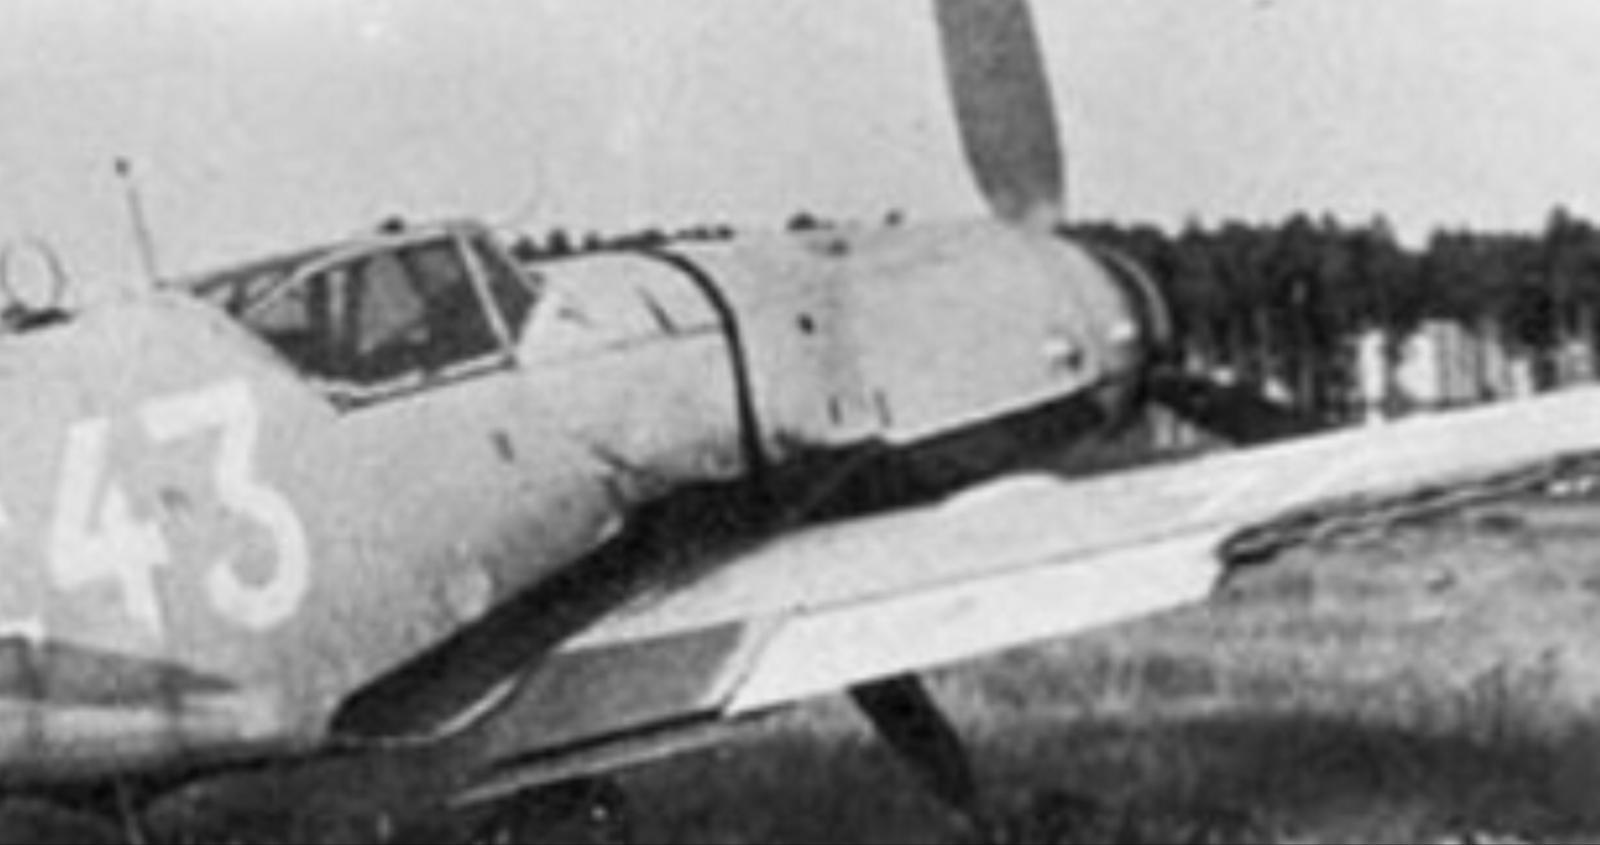
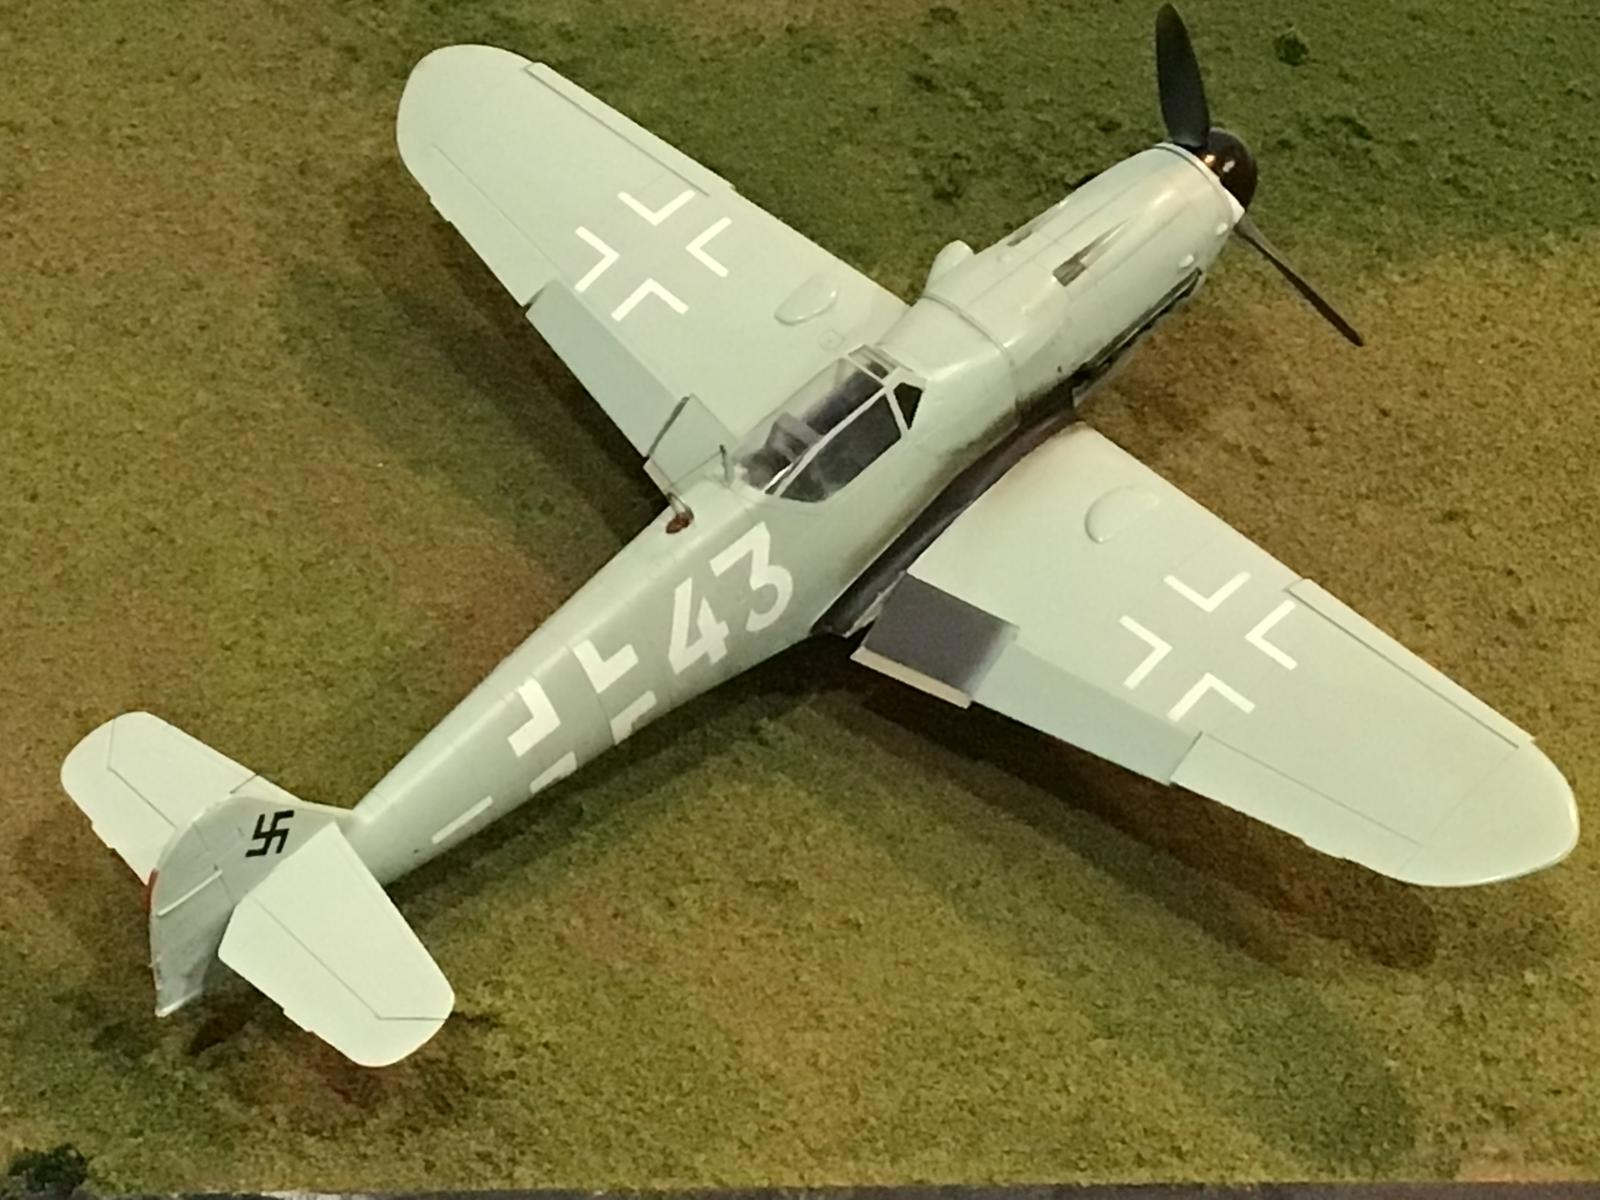
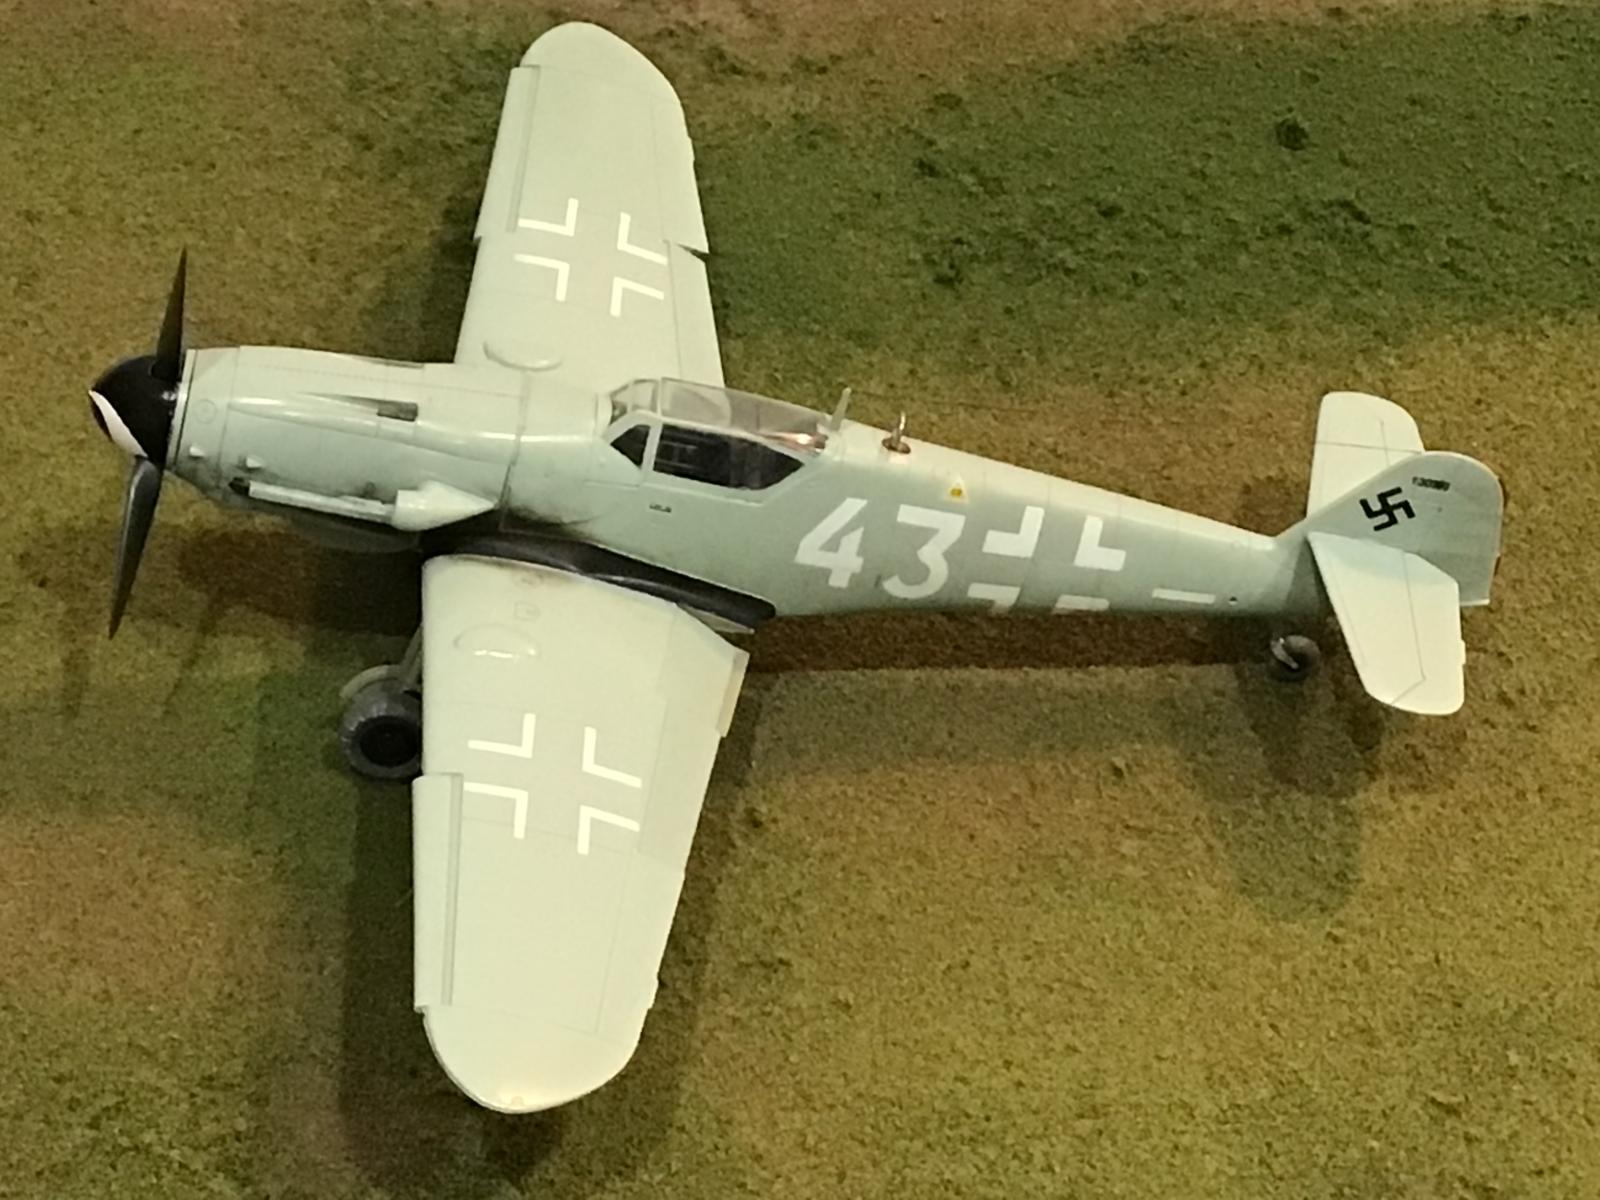
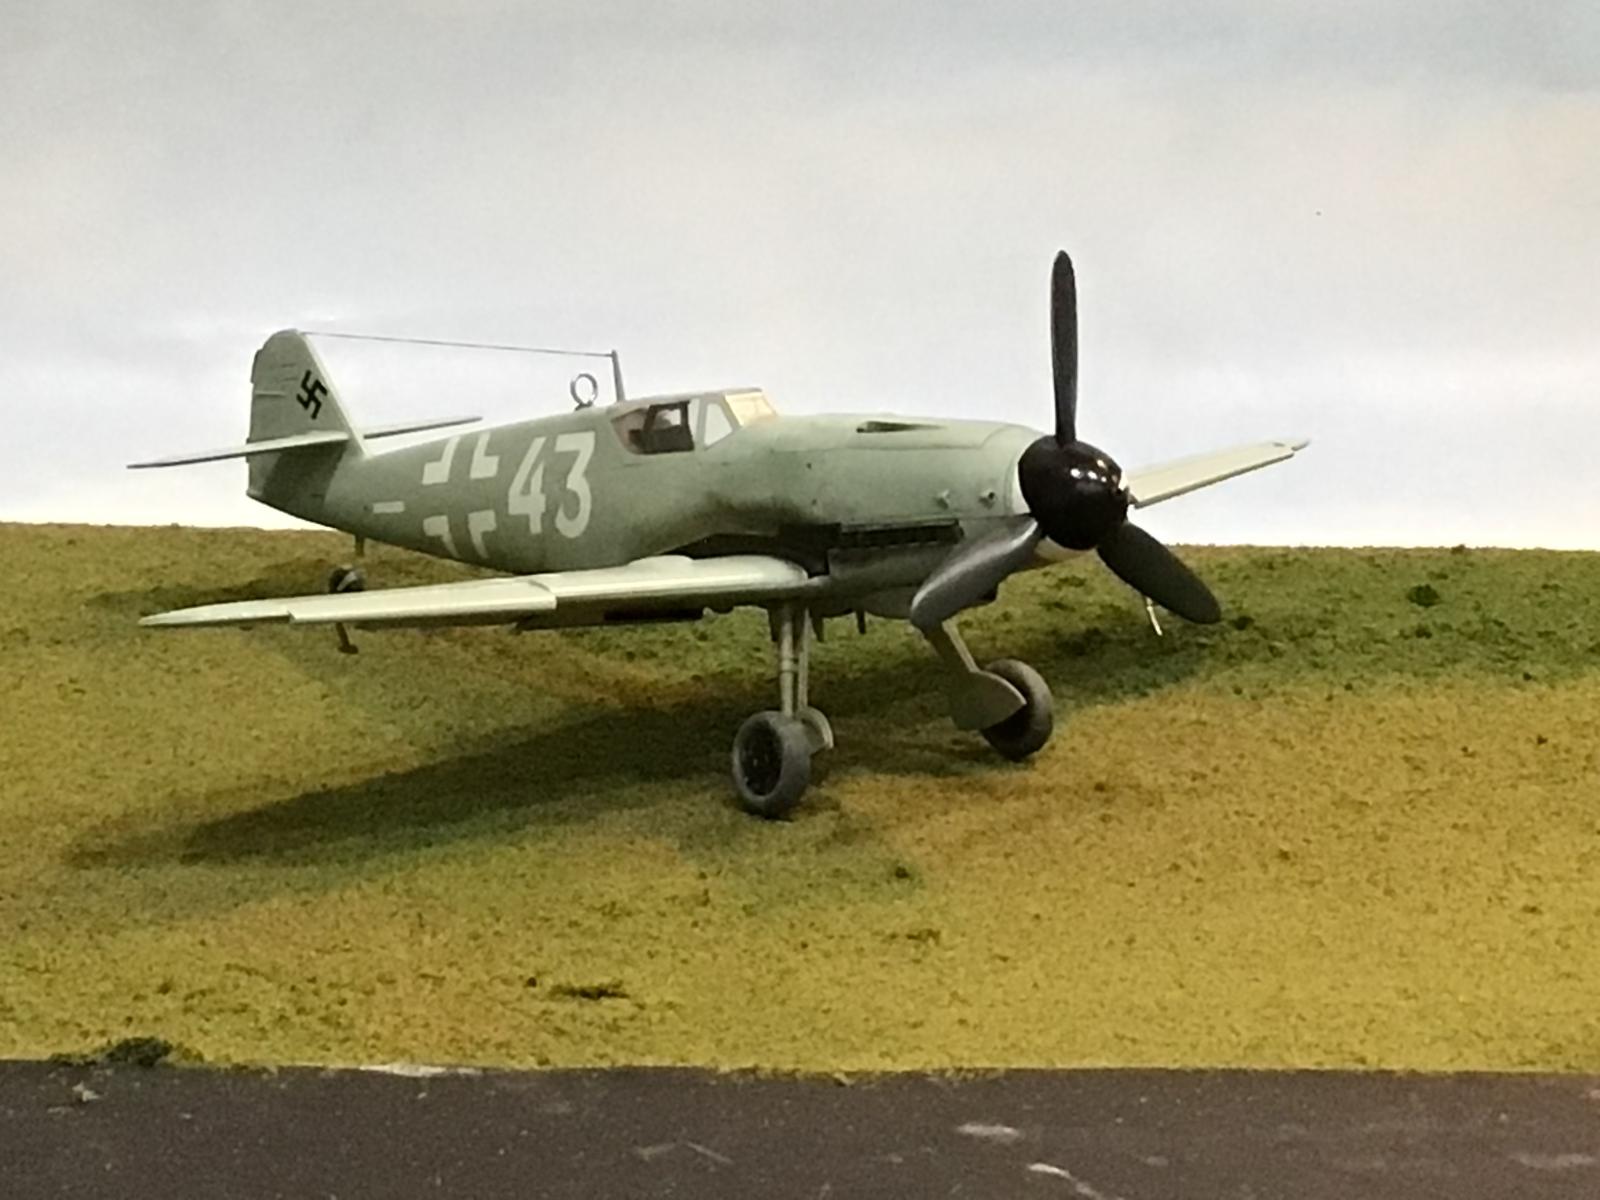
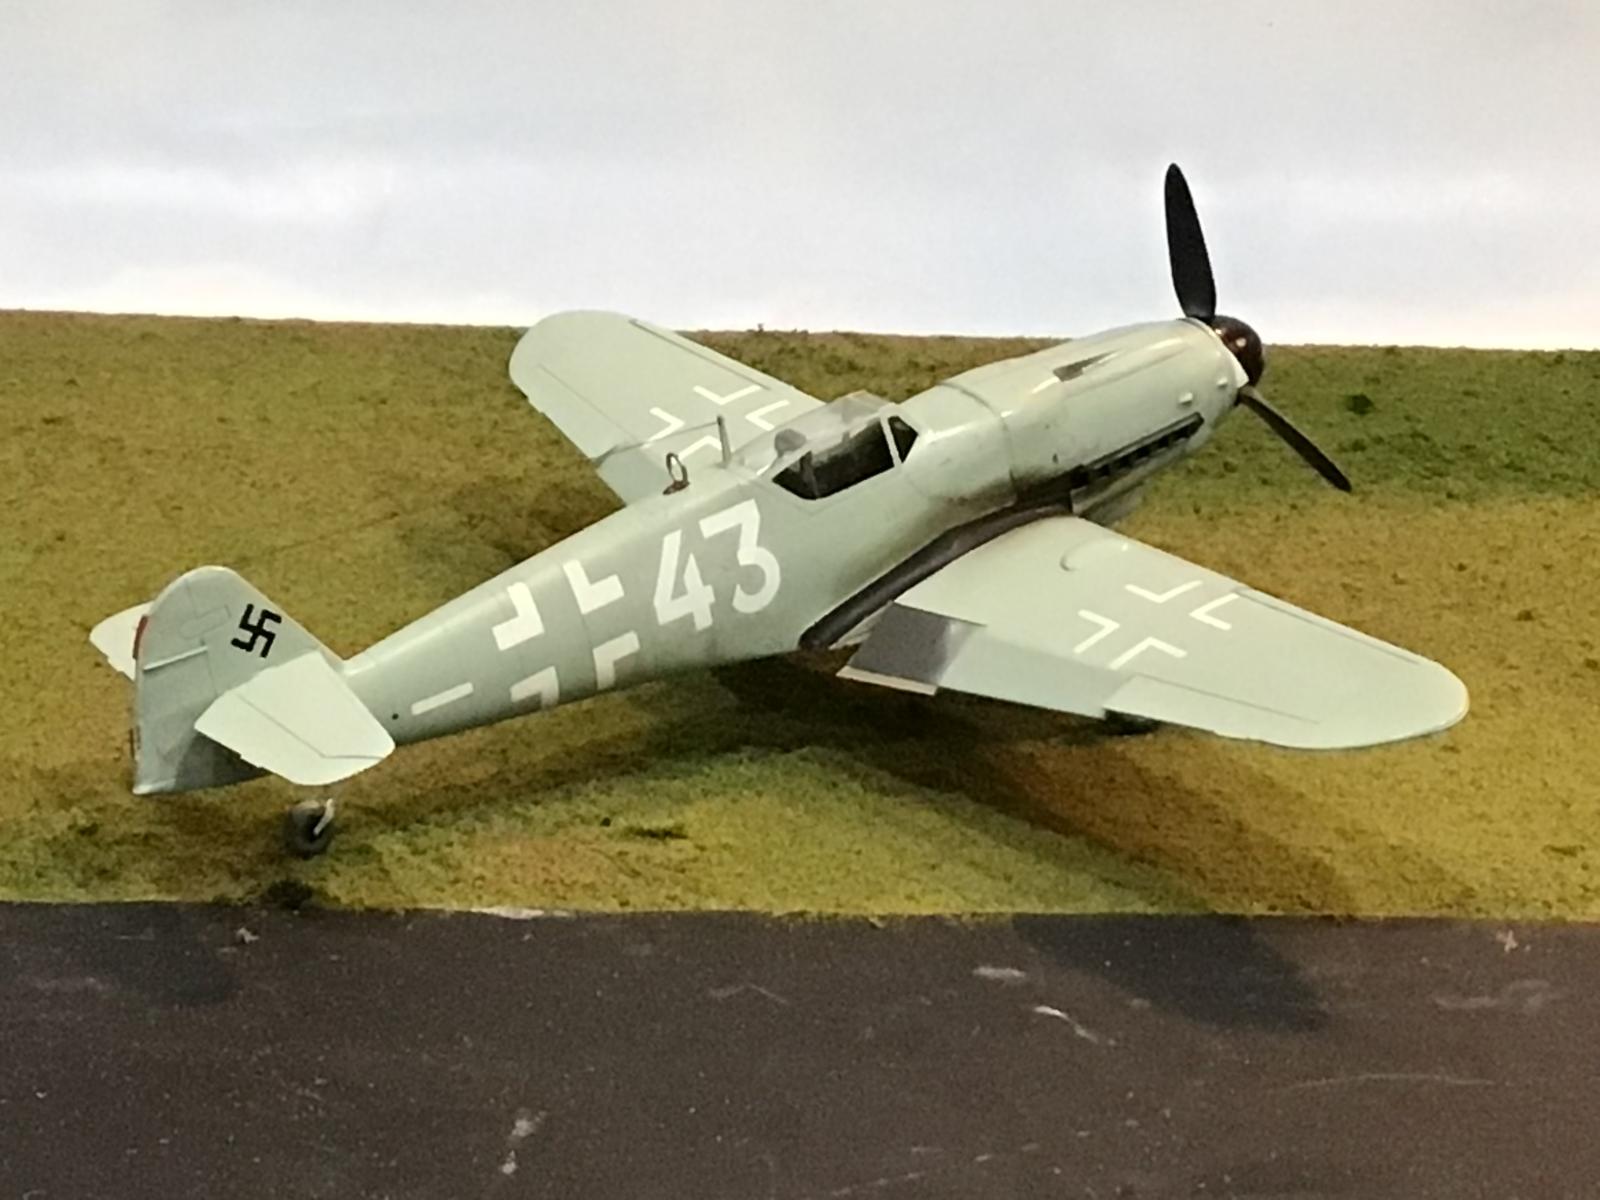
This next set of pictures shows the same "Weiss 43" from the LH / Port side rear quarter.
I didn't pose the elevators during the build, as they are in different positions in these pictures.
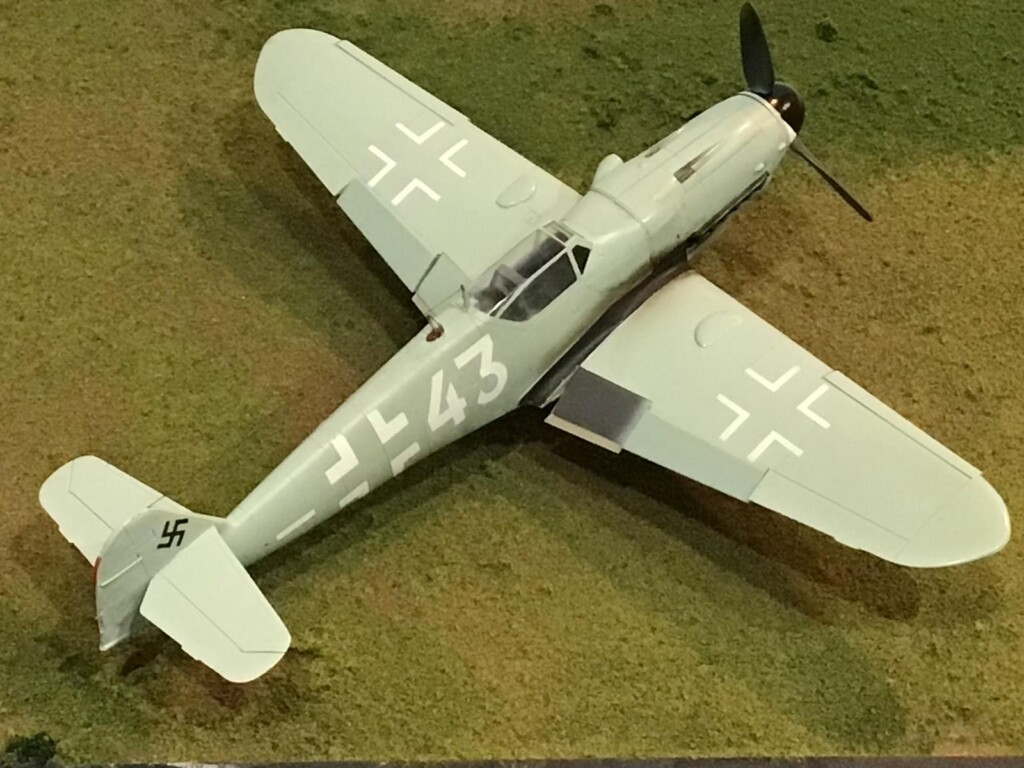
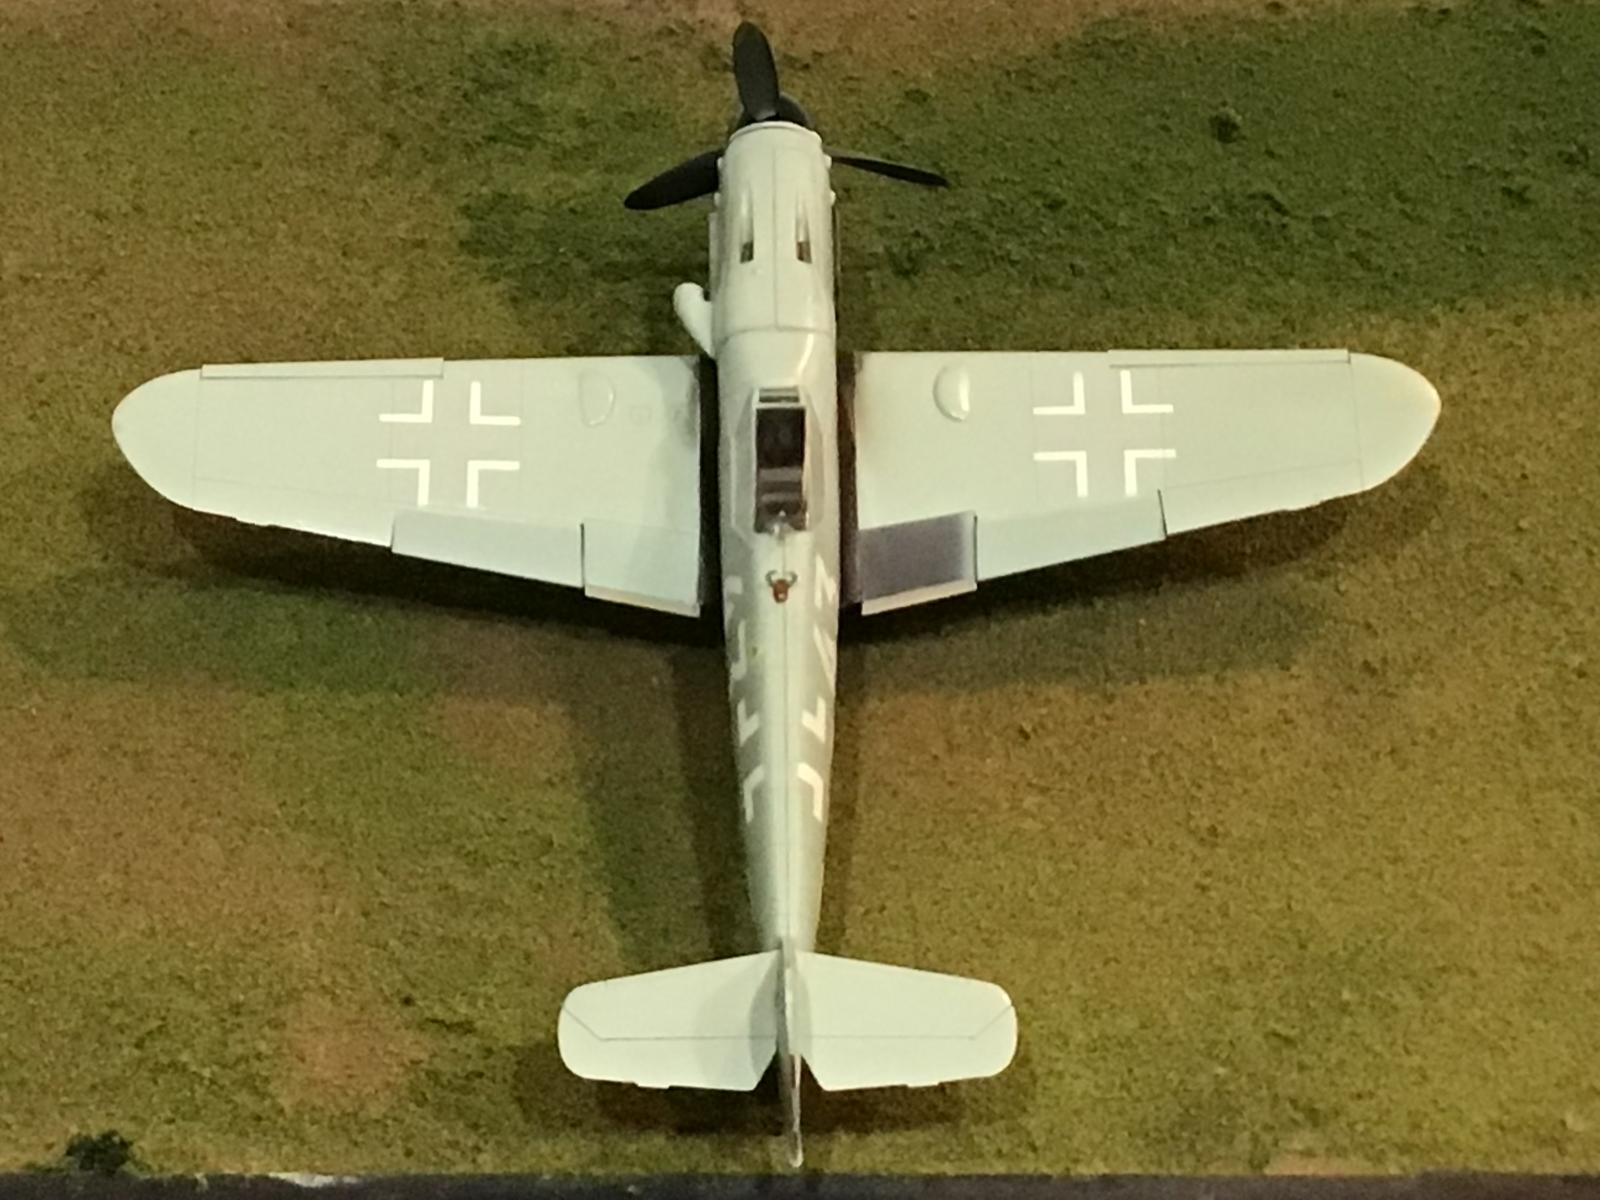
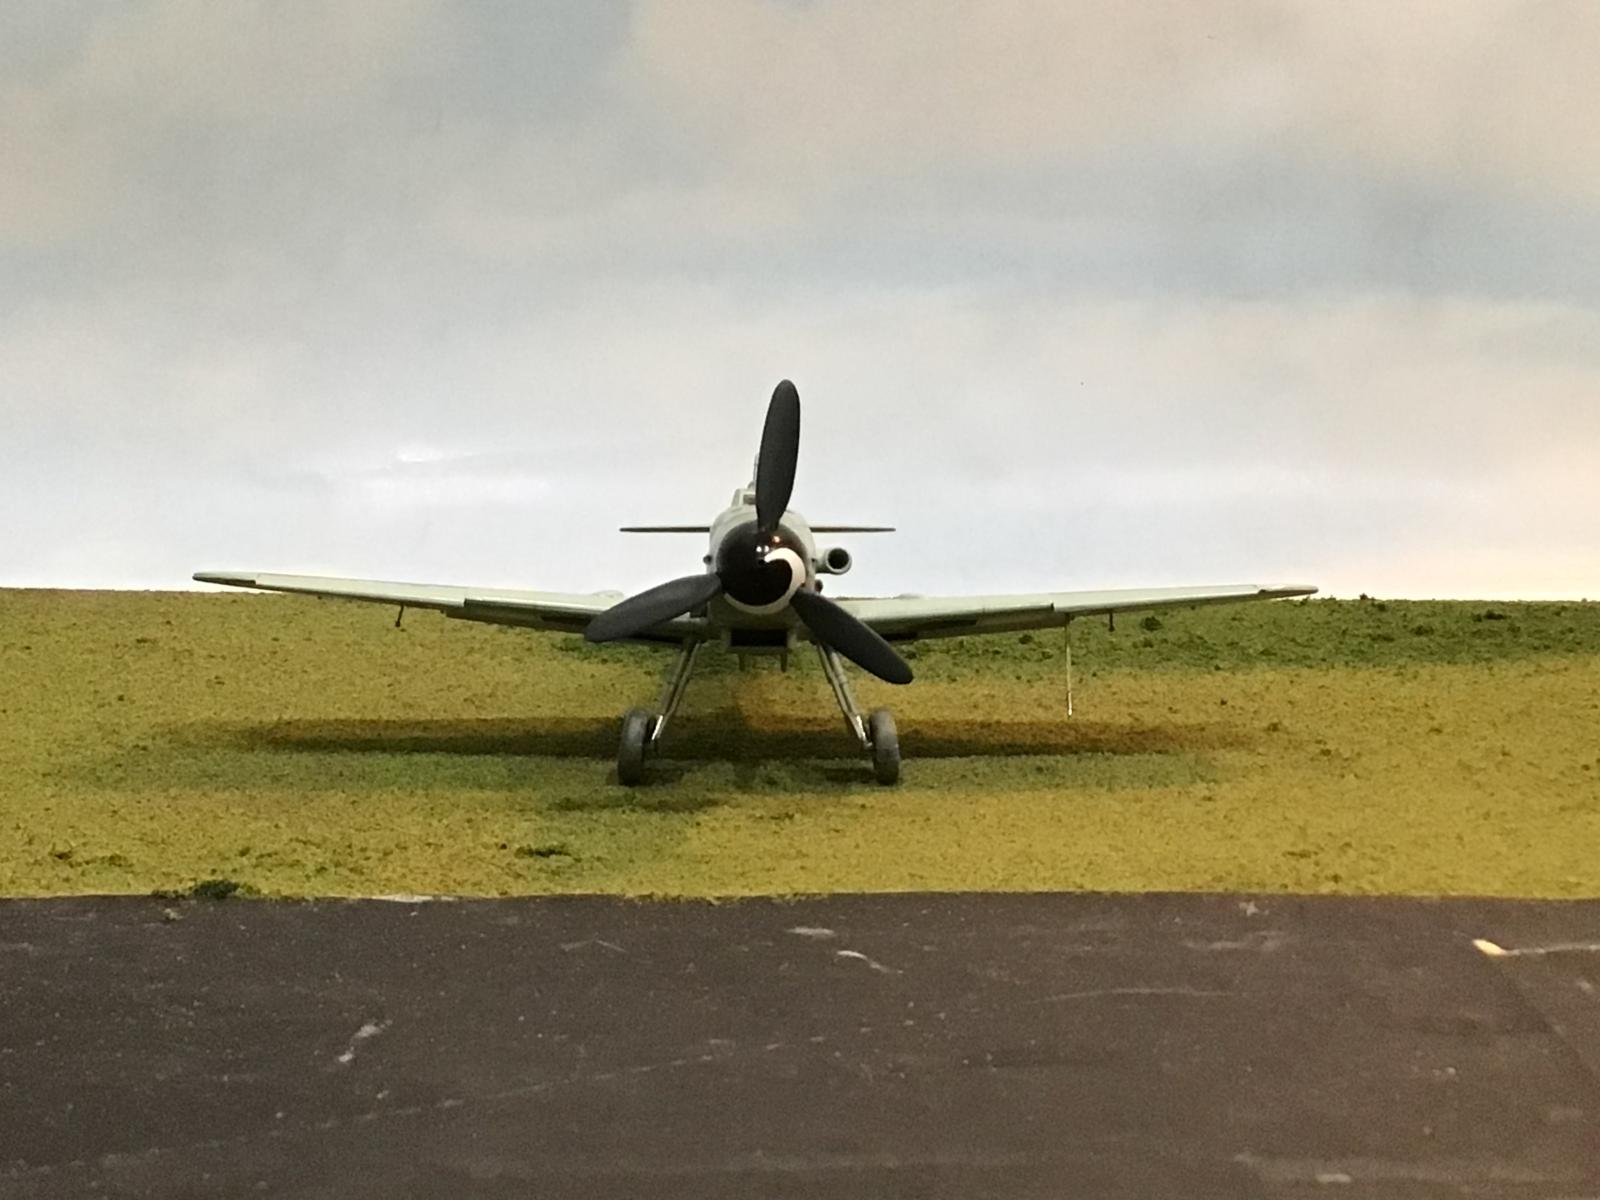
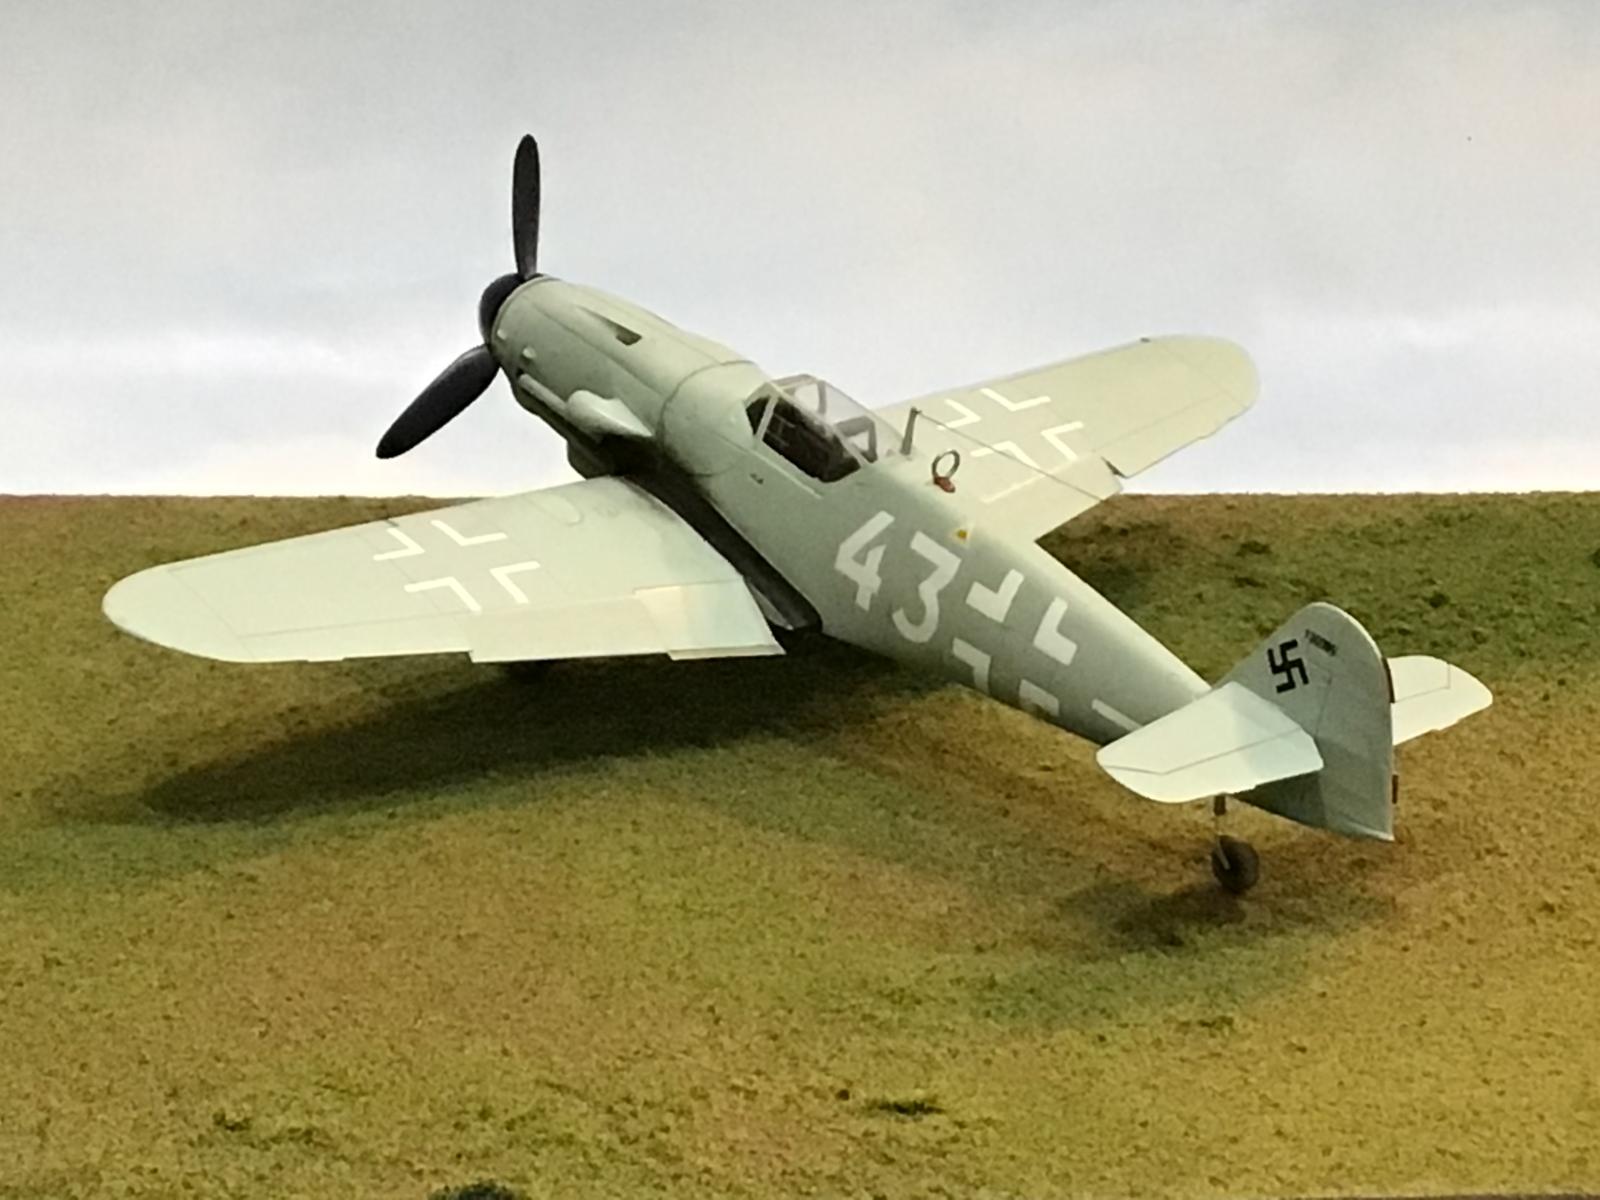
Here we have the Starboard RH side, as viewed from the rear.
I got it as close as I could here...
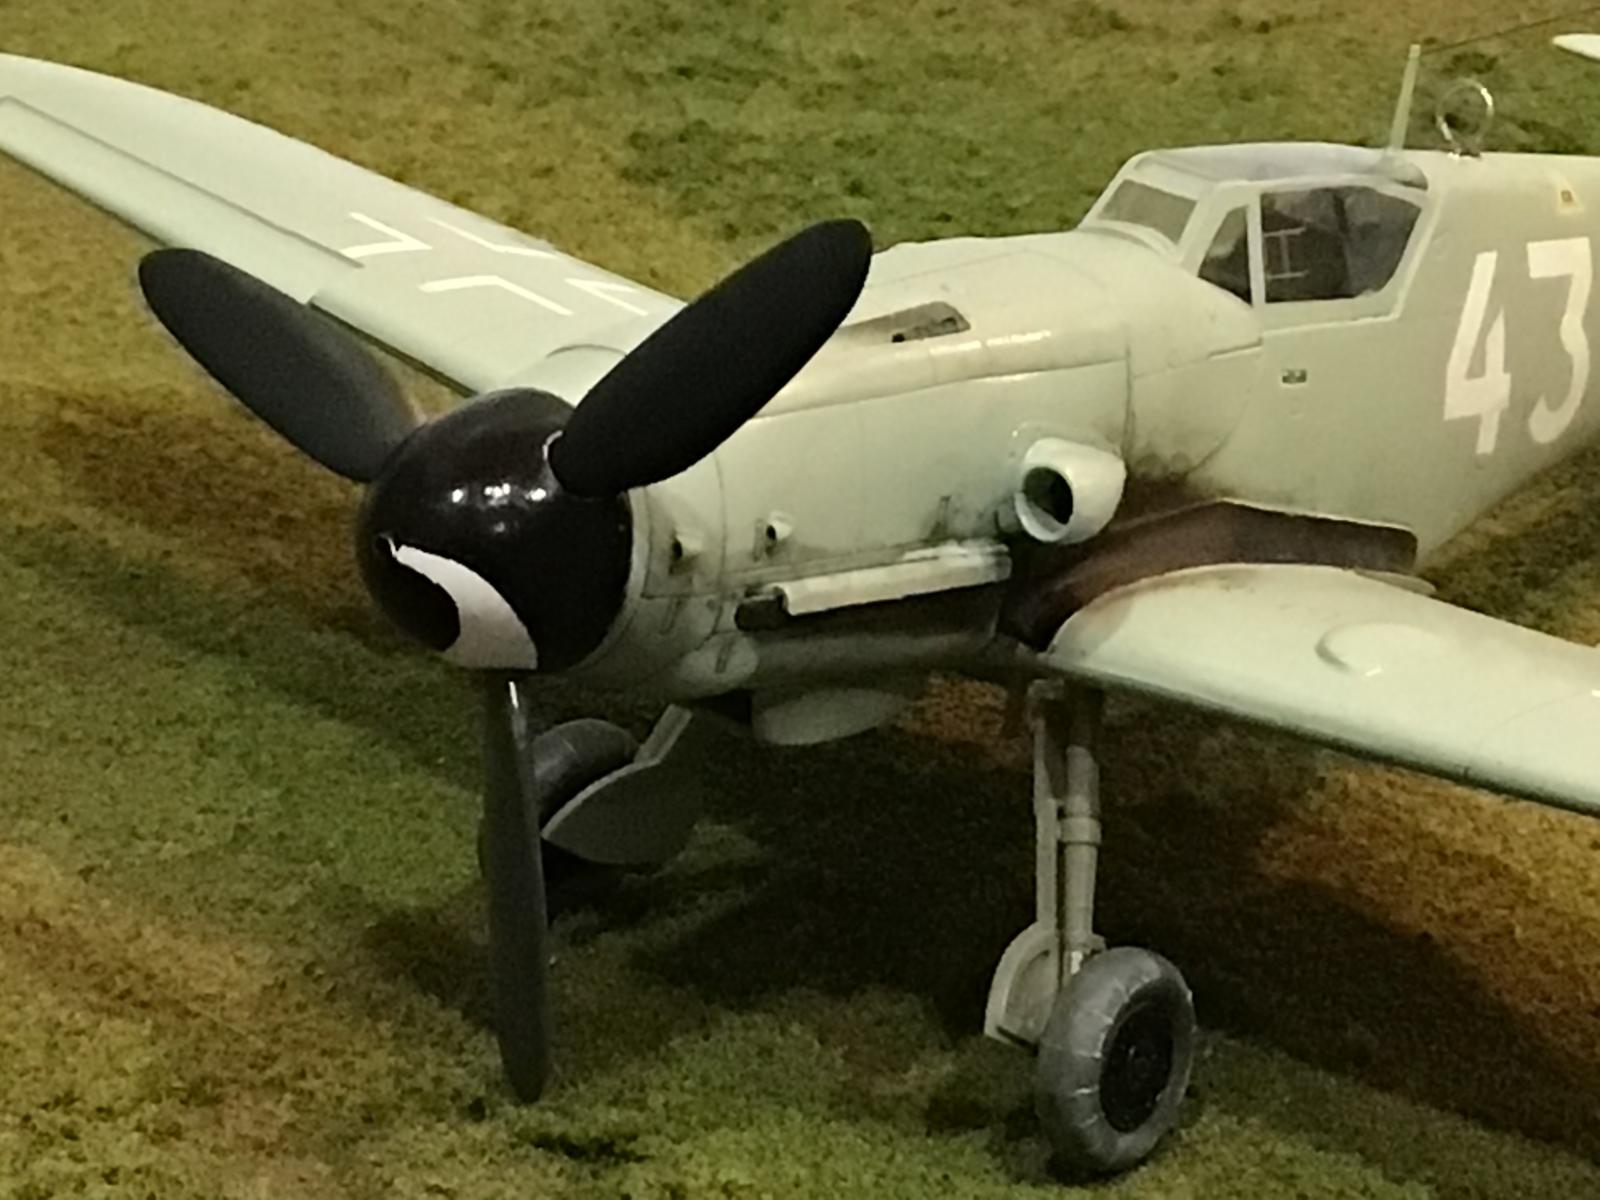
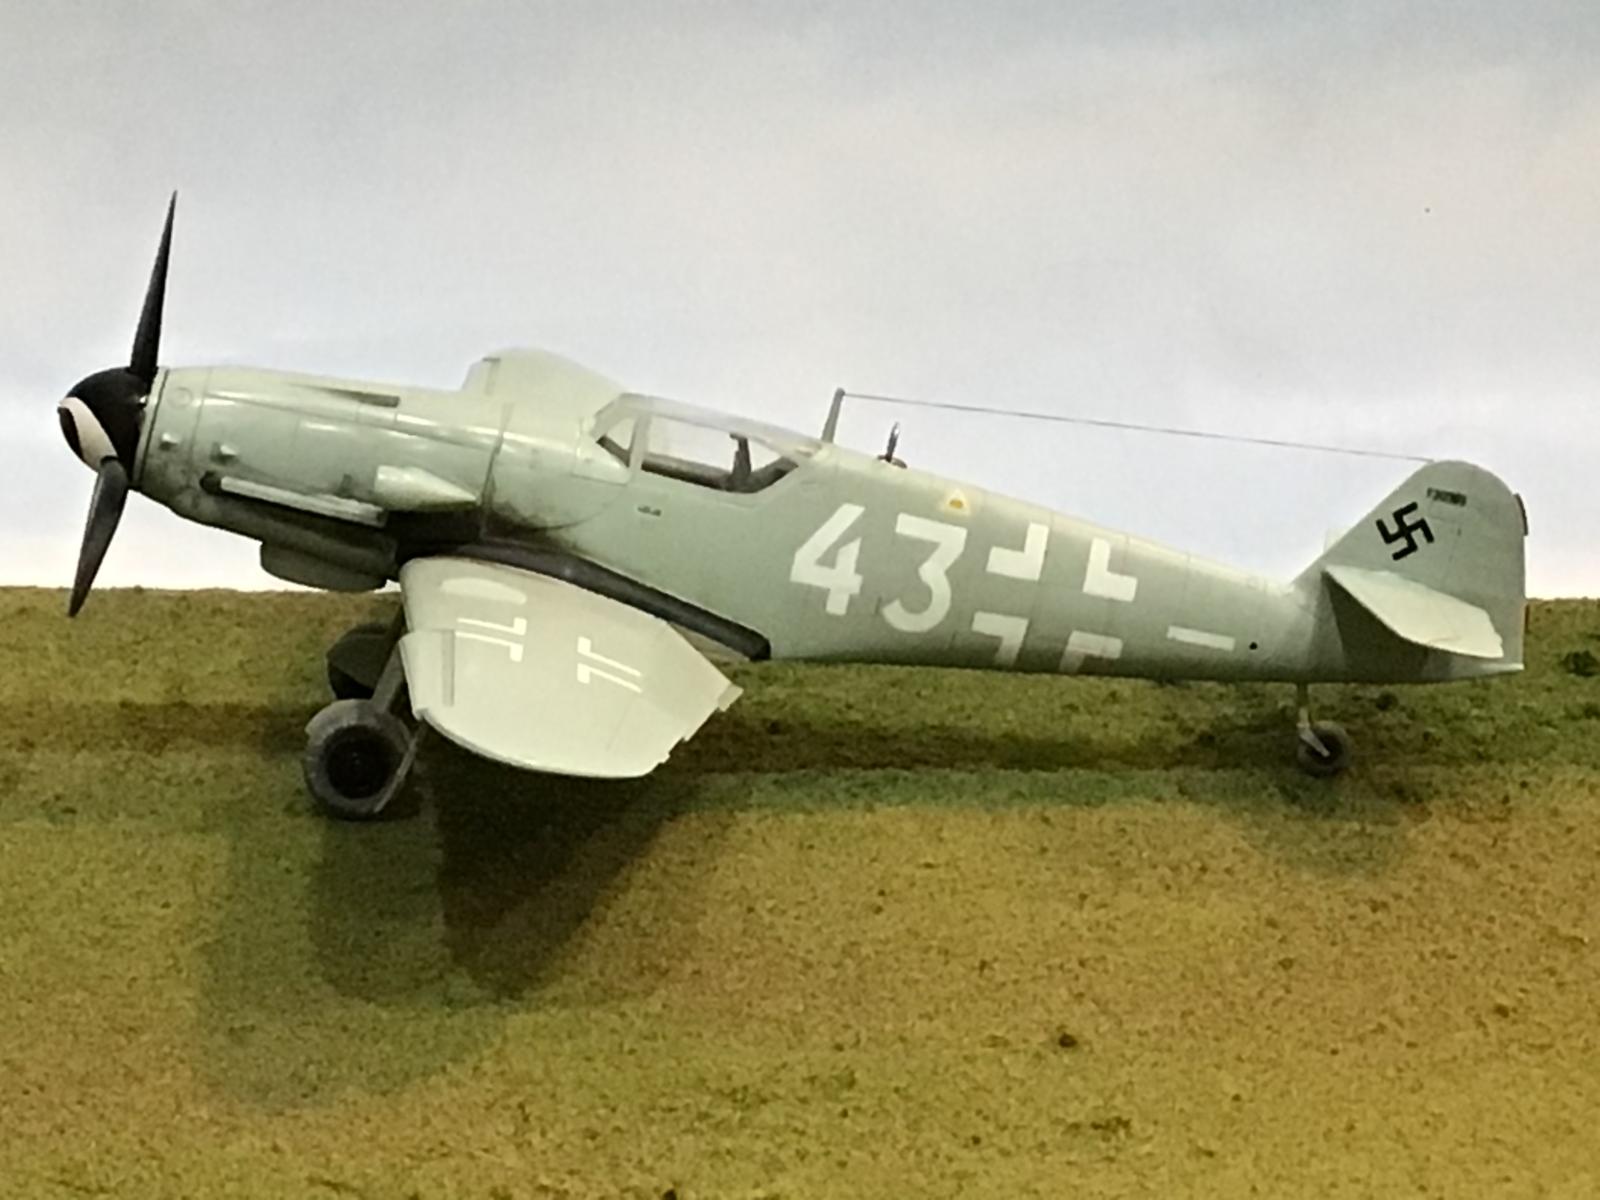
The propeller blades had some RLM 76 over spray paint on the back sides. Close examination of the original photos also revealed the spinner backing plate was left in place when this aircraft was painted in the field.
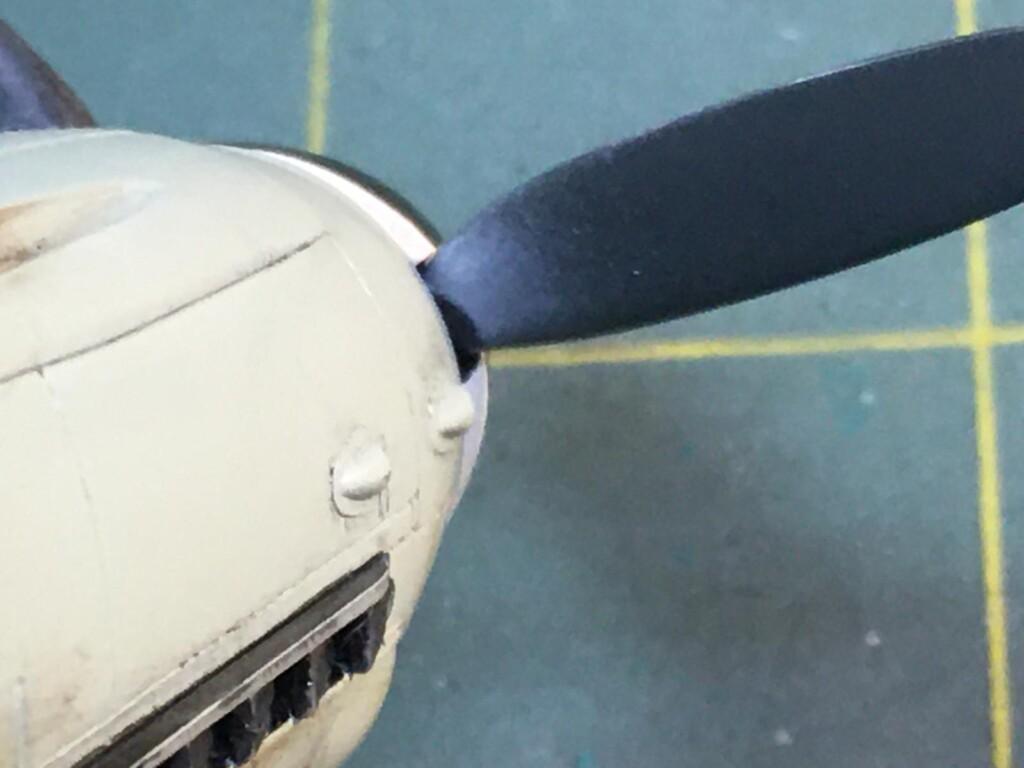
I tried to replicate this feature too. There is also some paint erosion on the tips of each blade, on the back side only. It was also done, but it's not easily visible in the pictures I took of the model.
My hat's off to Pedro, and Erik for their expert knowledge of all things that were related to the 109. Thanks guys !
This one would not be nearly as authentic without your help.
Erik, @airbum
Pedro, @holzhamer
The pictures I mentioned above were located here on a website that is dedicated to mainly Luftwaffe subjects. If you follow this link, you can see the pictures I am talking about. Plus if you browse around some, I'm sure you will find some other very cool stuff too.
https://falkeeins.blogspot.com/2013/05/messerschmitt-bf-109-g-10-of-5njg-11.html?m=1
This model was built as part of our Luftwaffe group build. I have a build journal showing the steps that went into building this one. If you are interested, you can follow this link here. There's a lot of good information covered on this particular machine in the journal.
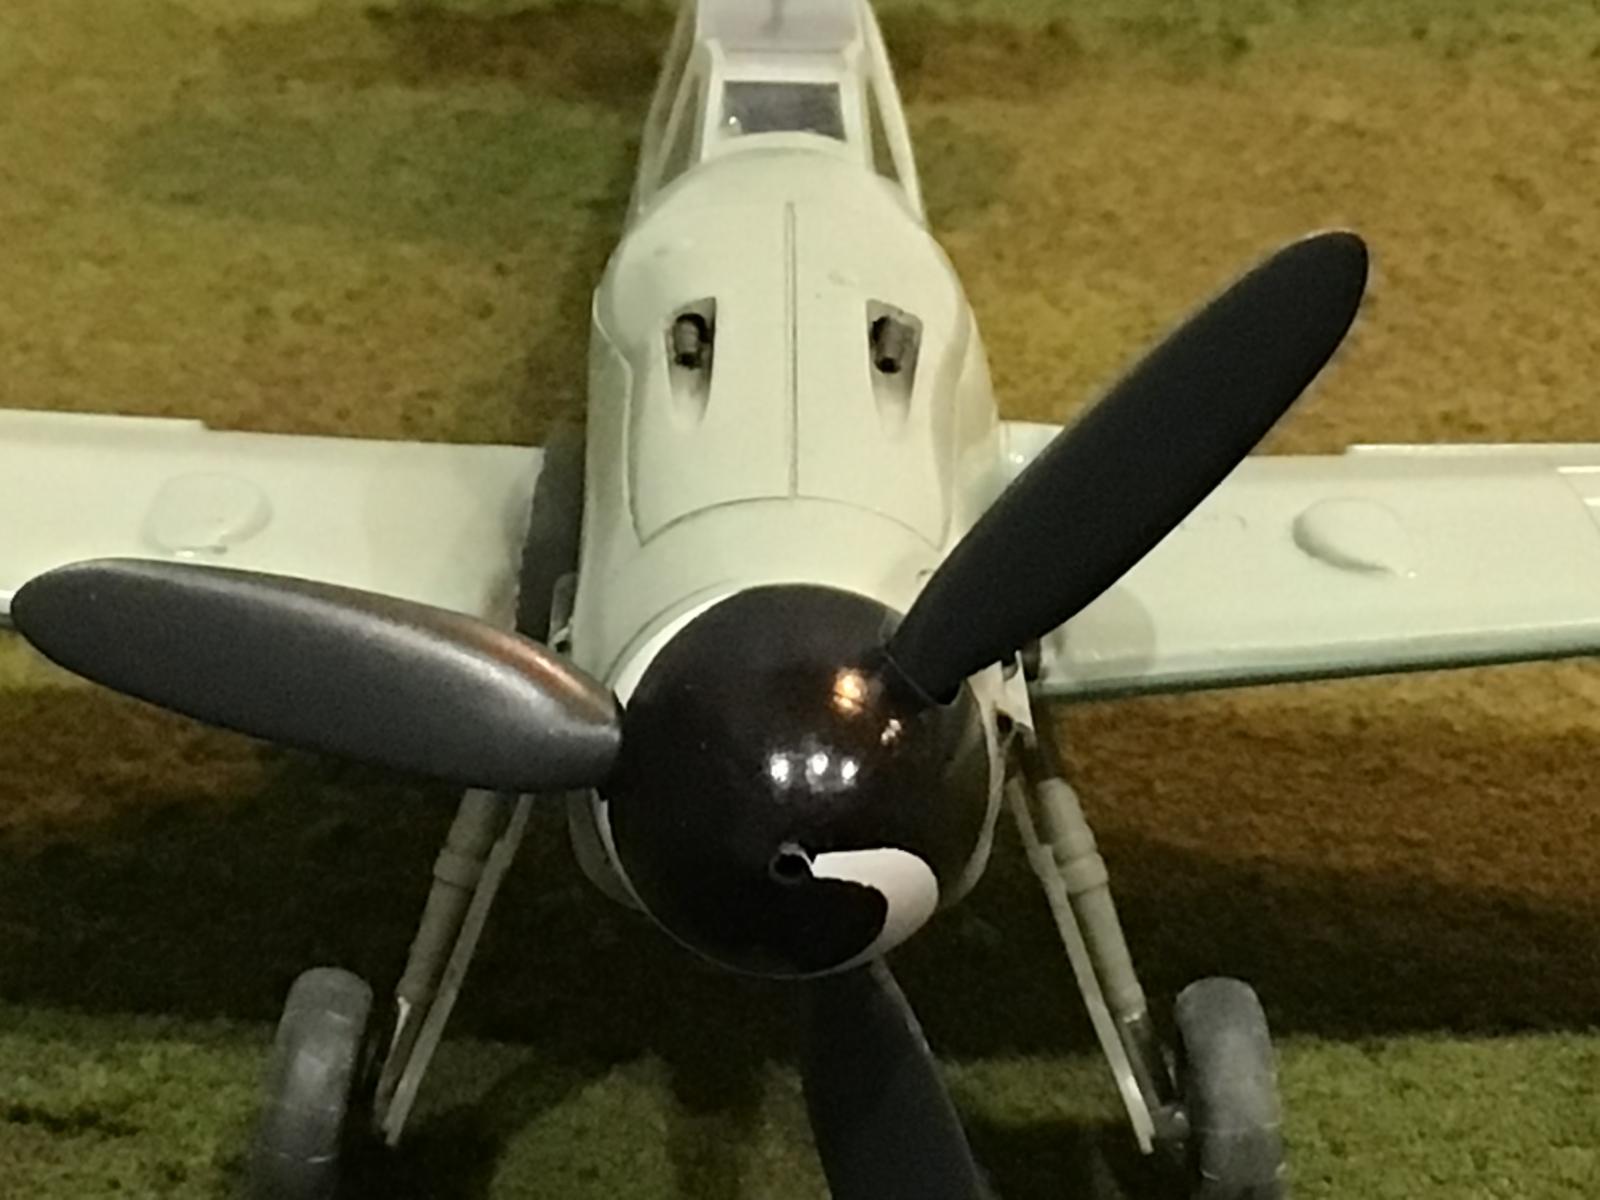
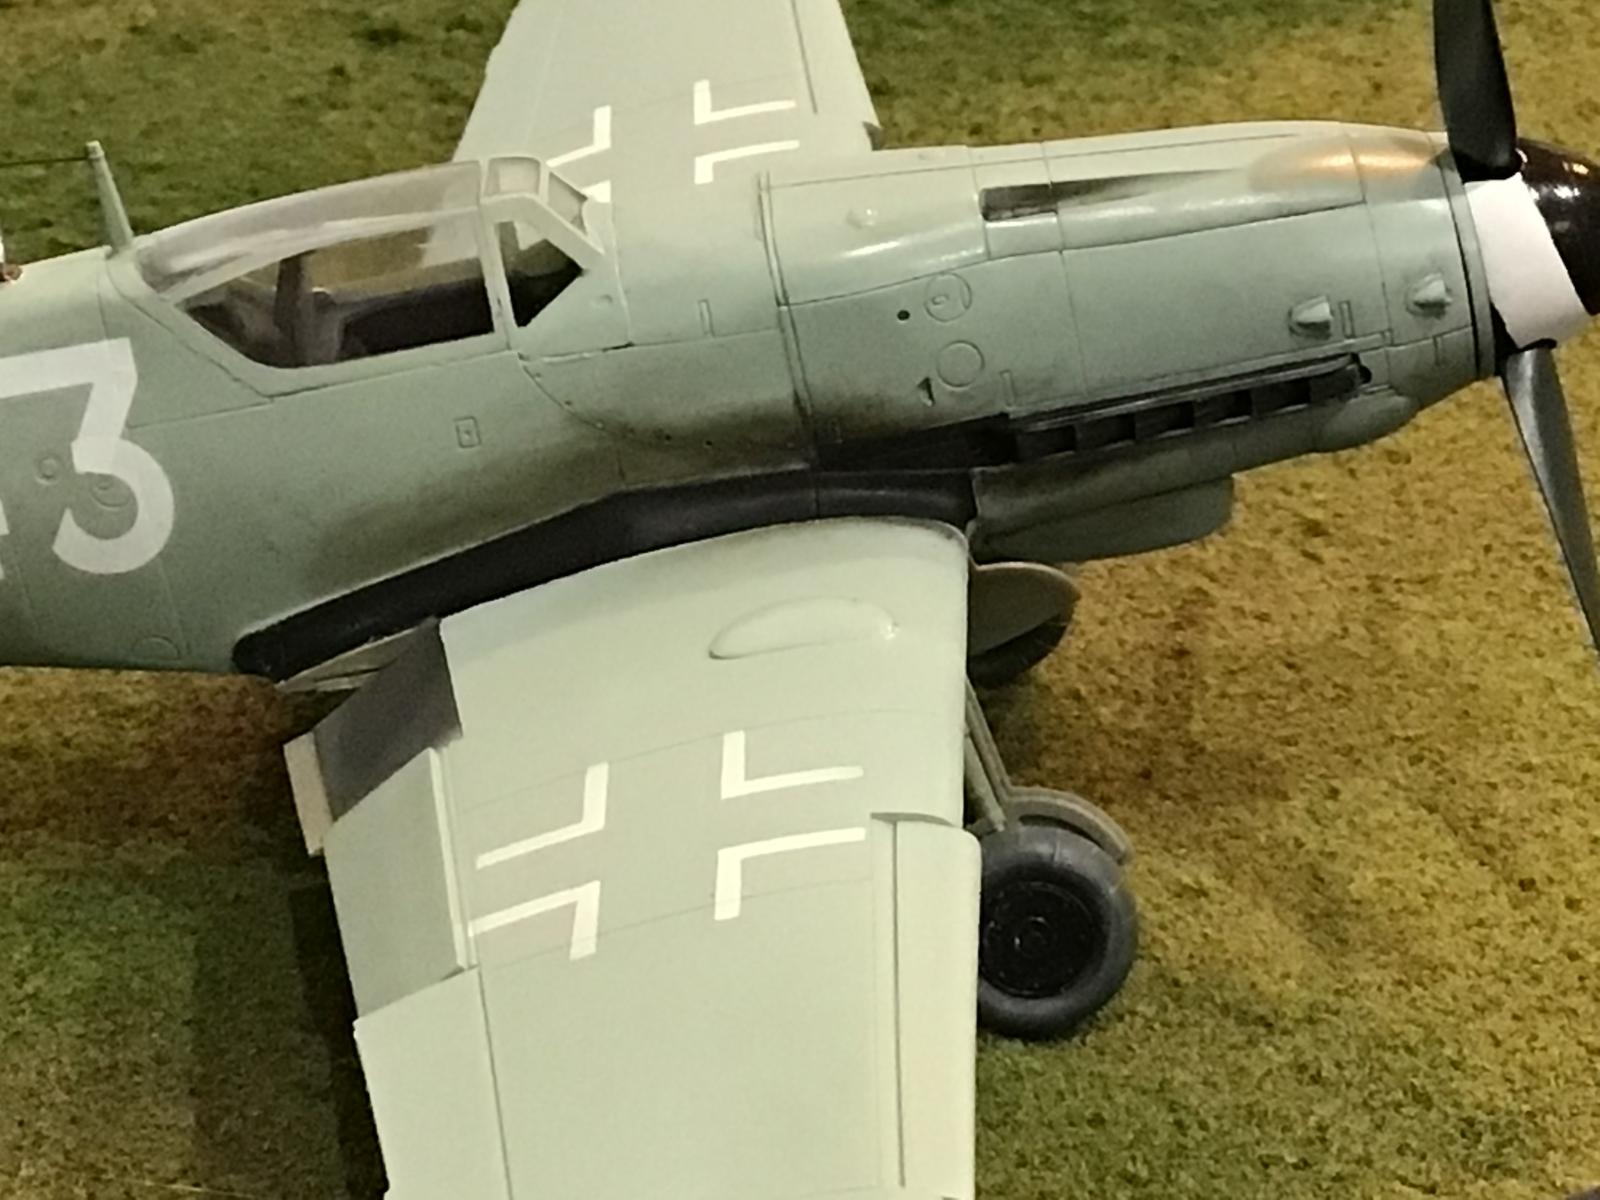
The cannon and heavy MG barrels were drilled out, as were the two scoops on each side of the nose. This is not a sight that I would want to see if I were flying in an Allied plane in 1945... Just saying !
-
- 1. Replacement inboard upper radiator flap
In one of the original pictures, it was very evident that one of the inboard flaps was a lot darker that the surrounding areas. I'm guessing this was a replacement from another aircraft, and likely done to keep this machine in the air, as long as they had fuel to fly it.
I painted this feature on my model using RLM 75, as if it was "borrowed" from another Gustav.
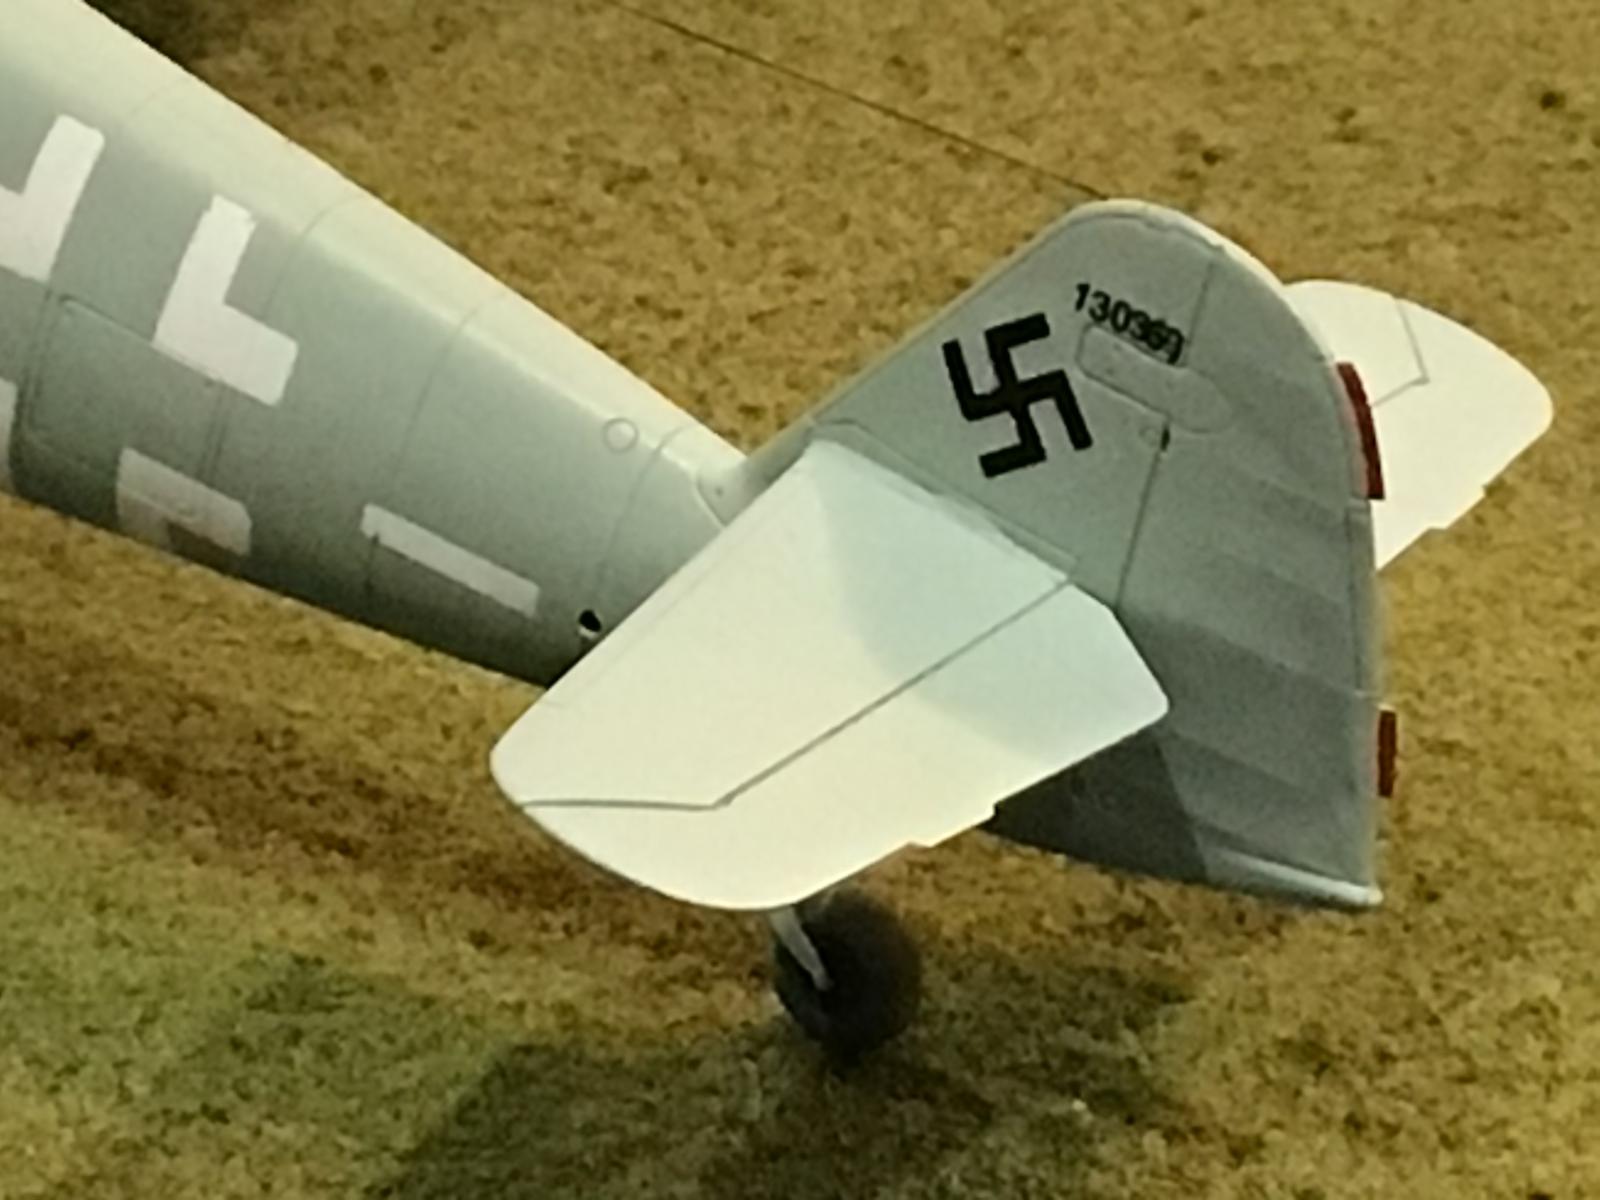
The Werke Number on the tail is supposed to read as as "130369"
Here I used the little decal numbers that are used to show you which decal on the sheet matches with the same decal as illustrated on the instructions. These home made / improvised Werke Numbers actually came from a Revell / Pro Modeler Focke Wulf Ta-154 Mosquito kit in 1/48 scale. I was able to use them as they are close to the originals in size.
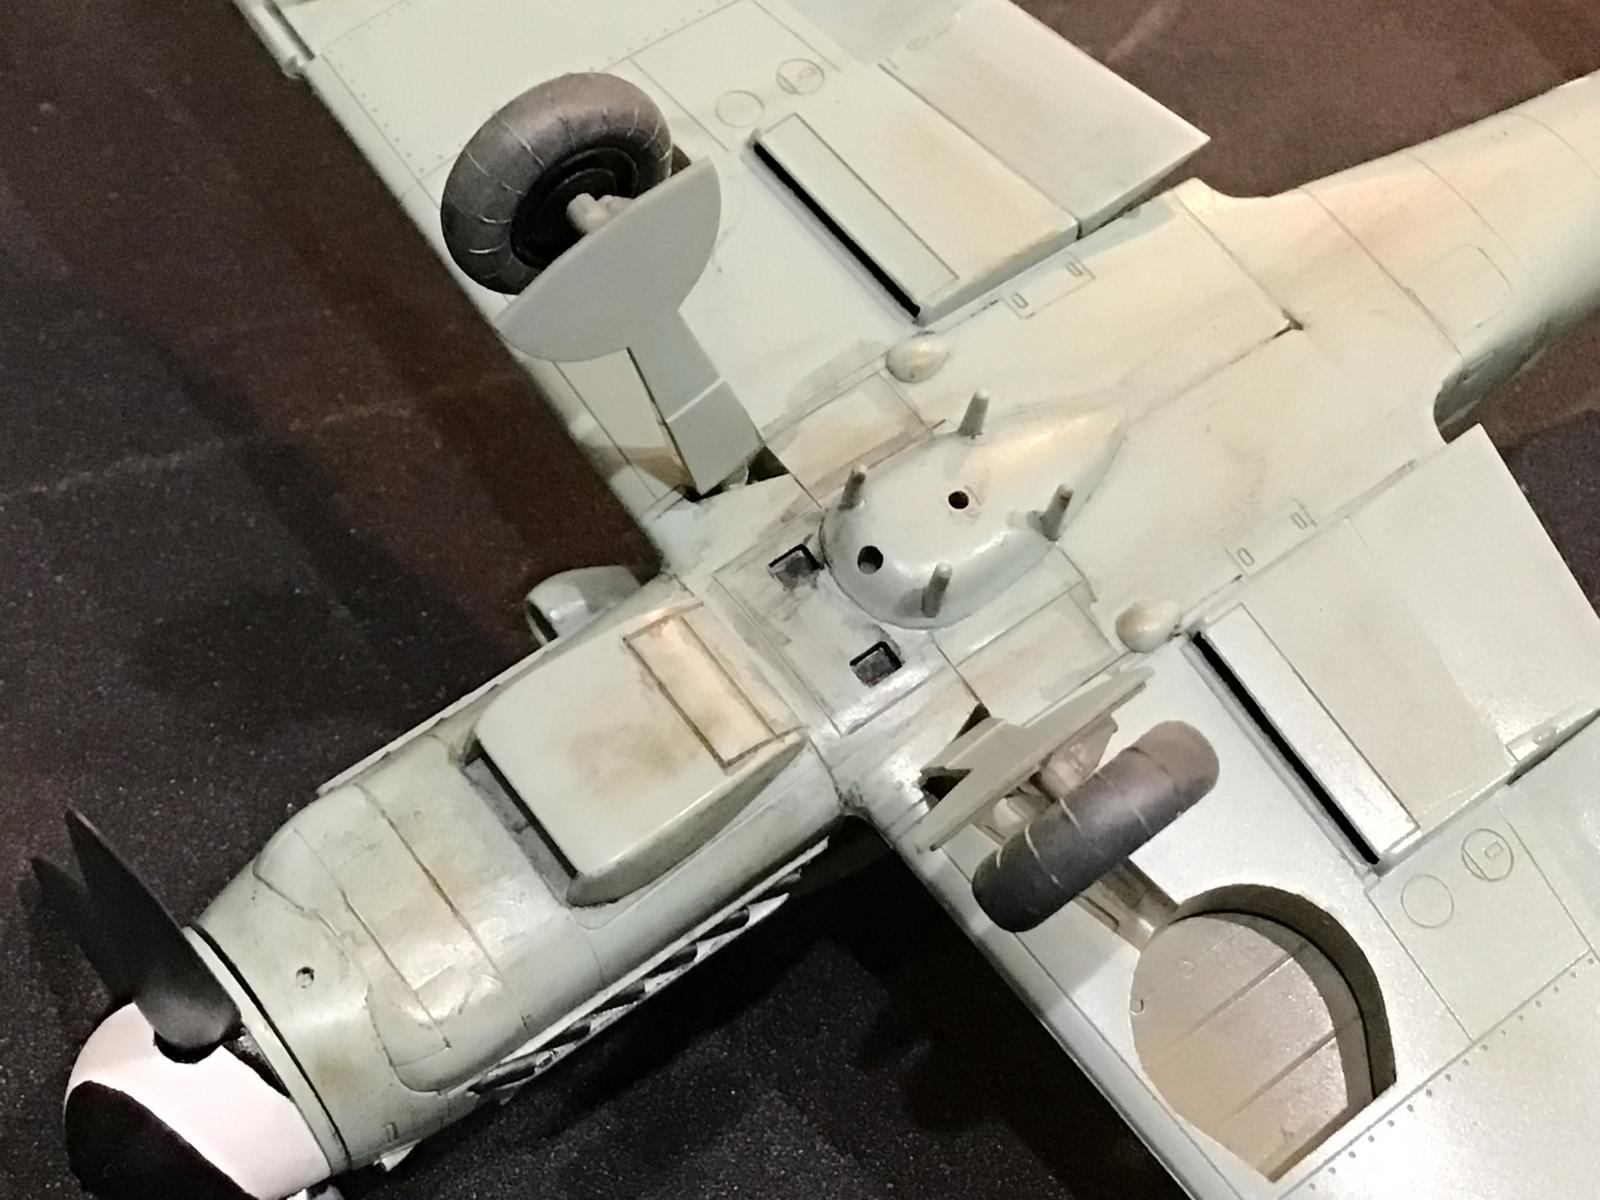
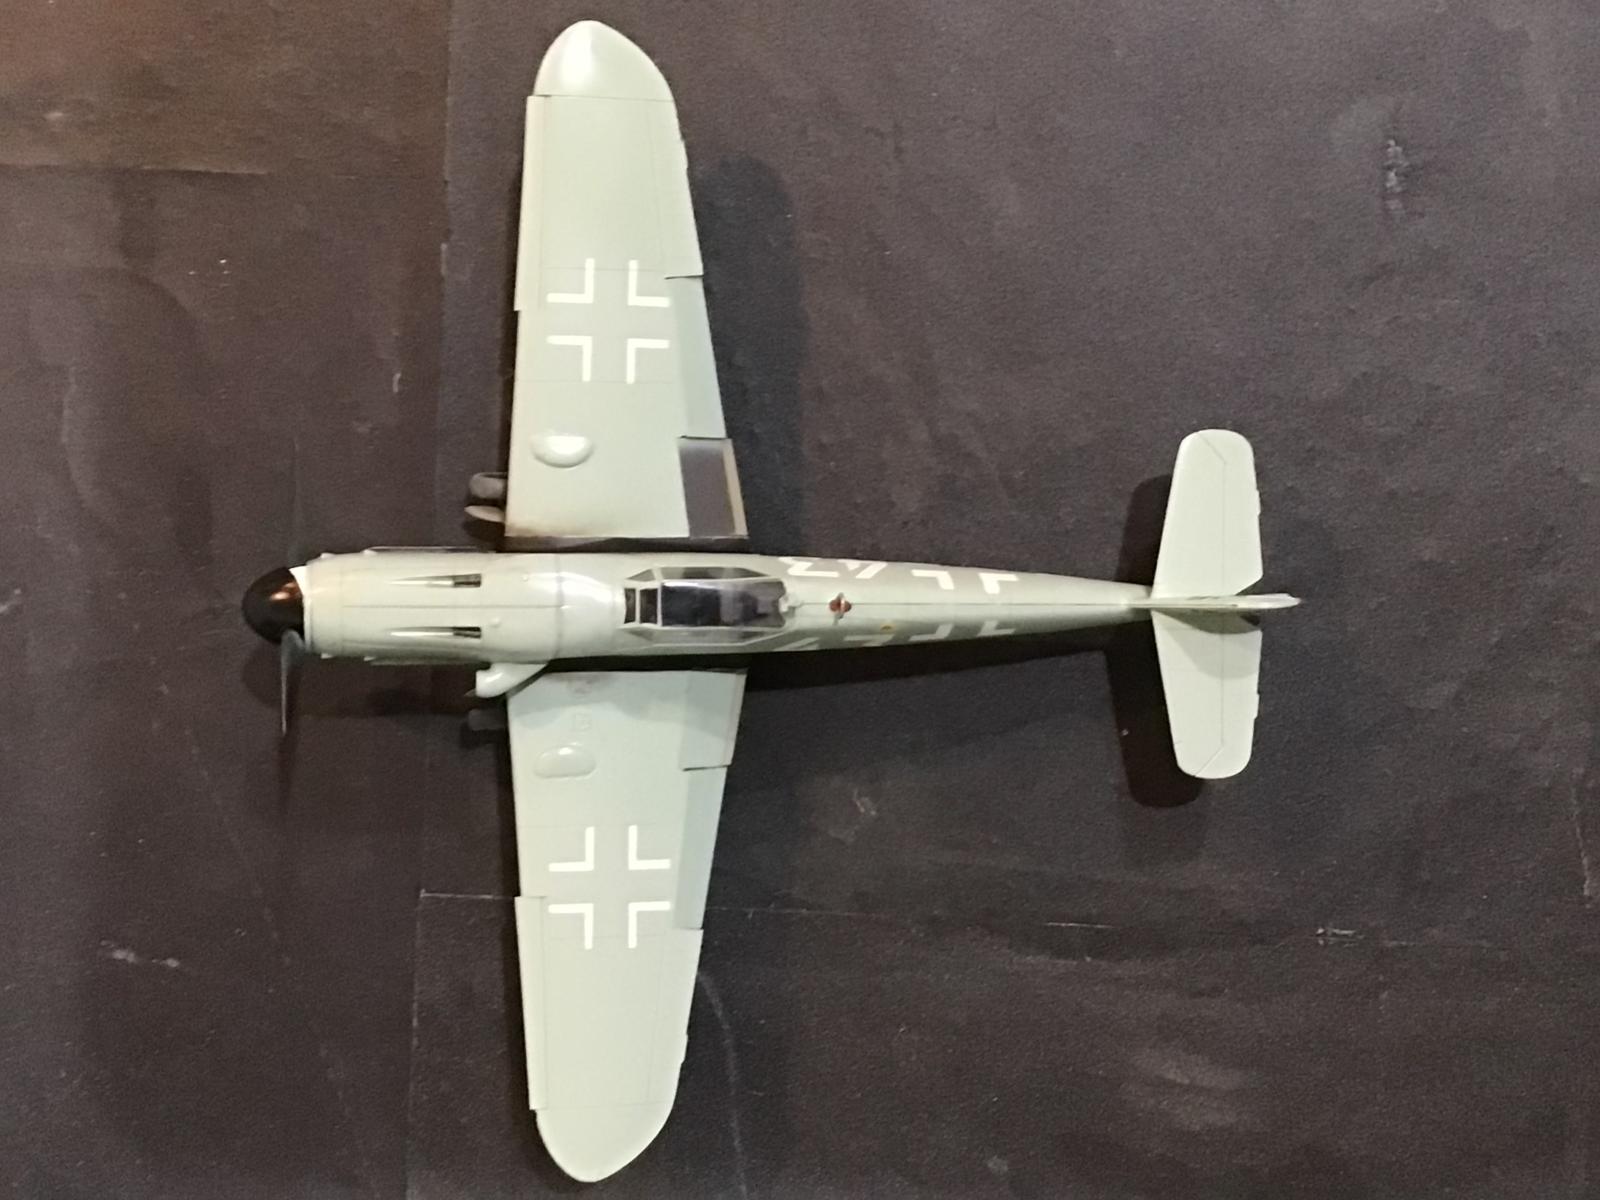
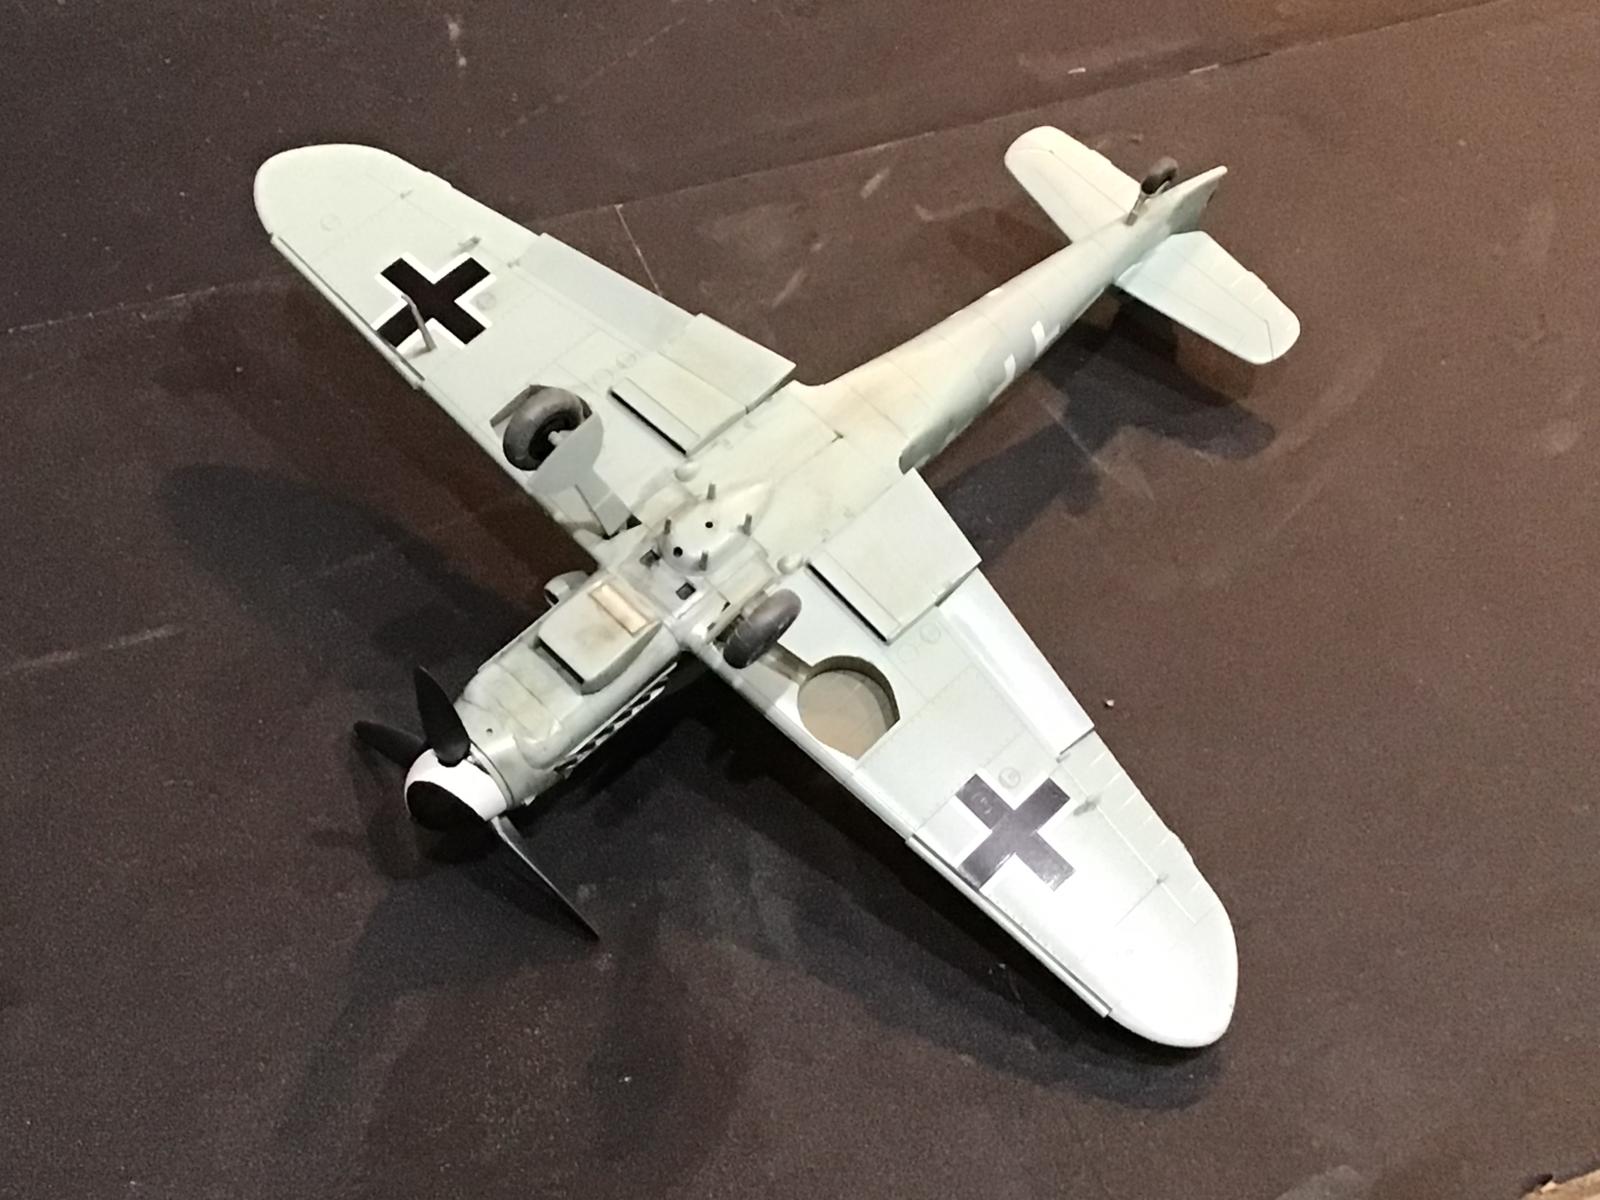
The underside of this Gustav was dirtied up some, using a home made mixture of Windsor and Newton oils, suspended in turpentine. Besides using this mixture for getting the leaking oil appearance, it was used as a panel line wash.
The exhaust staining was done with a cotton bud Q-tip and a Tamiya weathering deck. This allowed me to modify it as needed to get it to look as close to the original exhaust staining as I could.
-
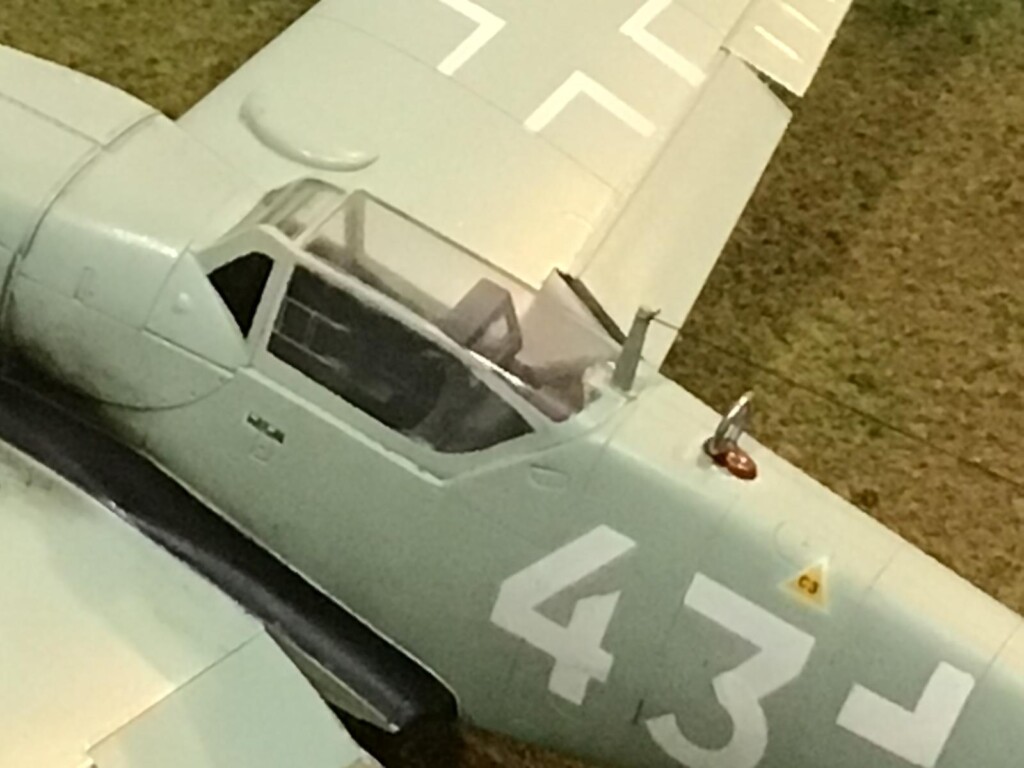
- 1. Scribed on sliding window
This particular Gustav had a feature that I have never seen before on an Erla Haube canopy hood. It had a small square shaped sliding window, and it looks as if it could have been made from clear plexi glass. I didn't want to tempt fate too far, so I chickened out and simply used a small machinists metal ruler and a razor, to scribe on the lines and give it the appearance the small window was shut closed.
-
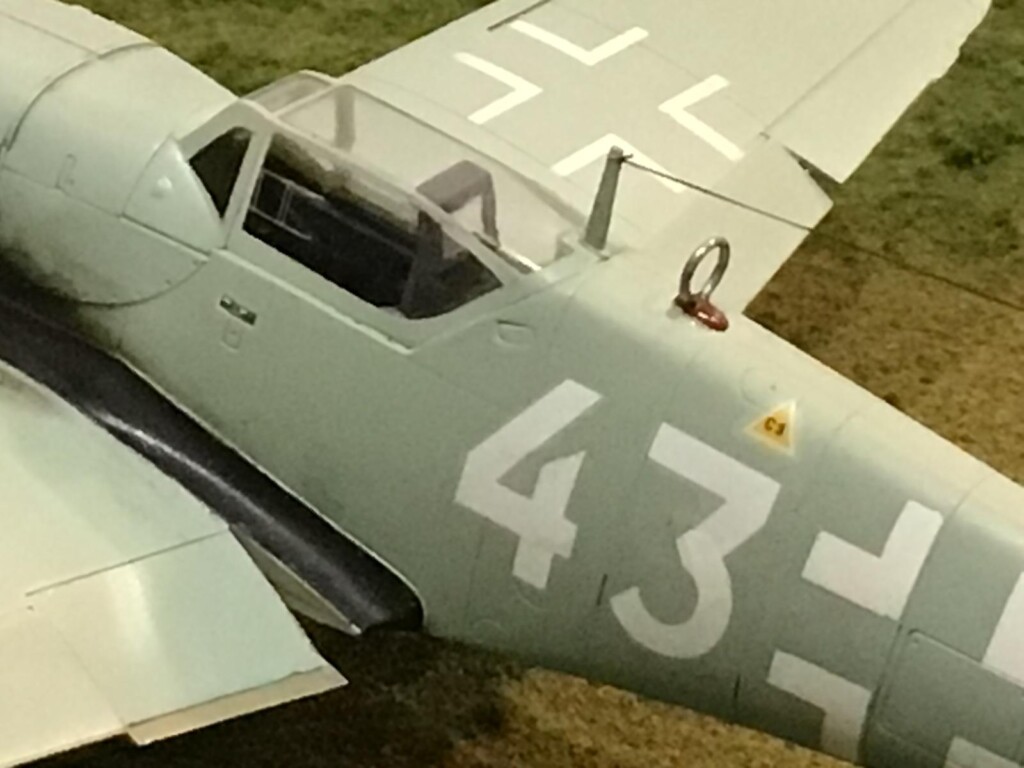
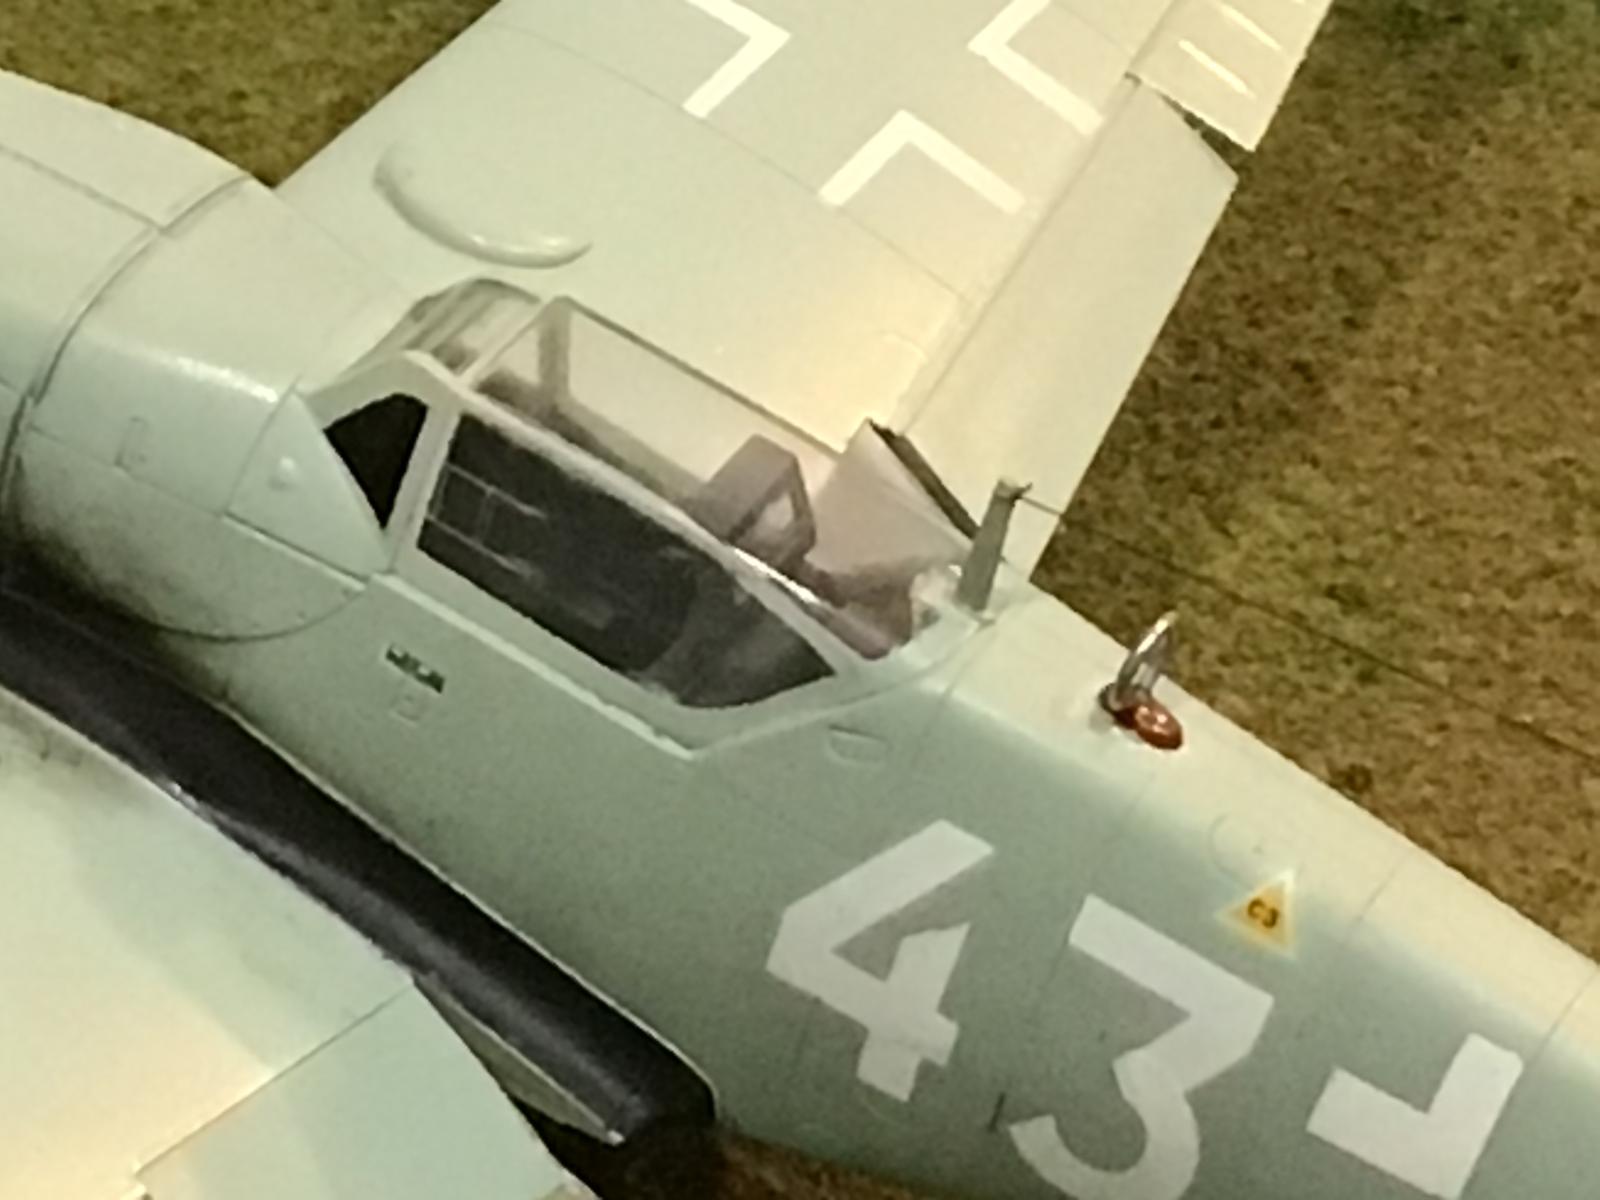
- 1. painted the base a bakelite color
- 2. C3 fuel triangle
- 3. DF loop is silver

The radio DF loop was also a darker color as it can bee seen in some of these pictures too. The base was painted to resemble a synthetic "Bakelite" color, as if it was a brand new unit installed here. On most wartime pictures it looks to me as if the circular loop base was painted in the same colors as the surrounding camouflage.
However, the circular loop was actually a bare metal silver or aluminum color. I tried to mimic these colors on this model.
Another neat thing I learned is the Morane mast located under the Port side wing was not painted, but instead it was varnished using a clear varnish. This left the natural wood grains visible on the actual mast.
This plane also had a yellow C3 fuel octane triangle marking on it too. I used a decal here for this.
The main German crosses were spray painted on and are not decals. However, I ended up using decals on the crosses under the wings after some discussion in the build thread.
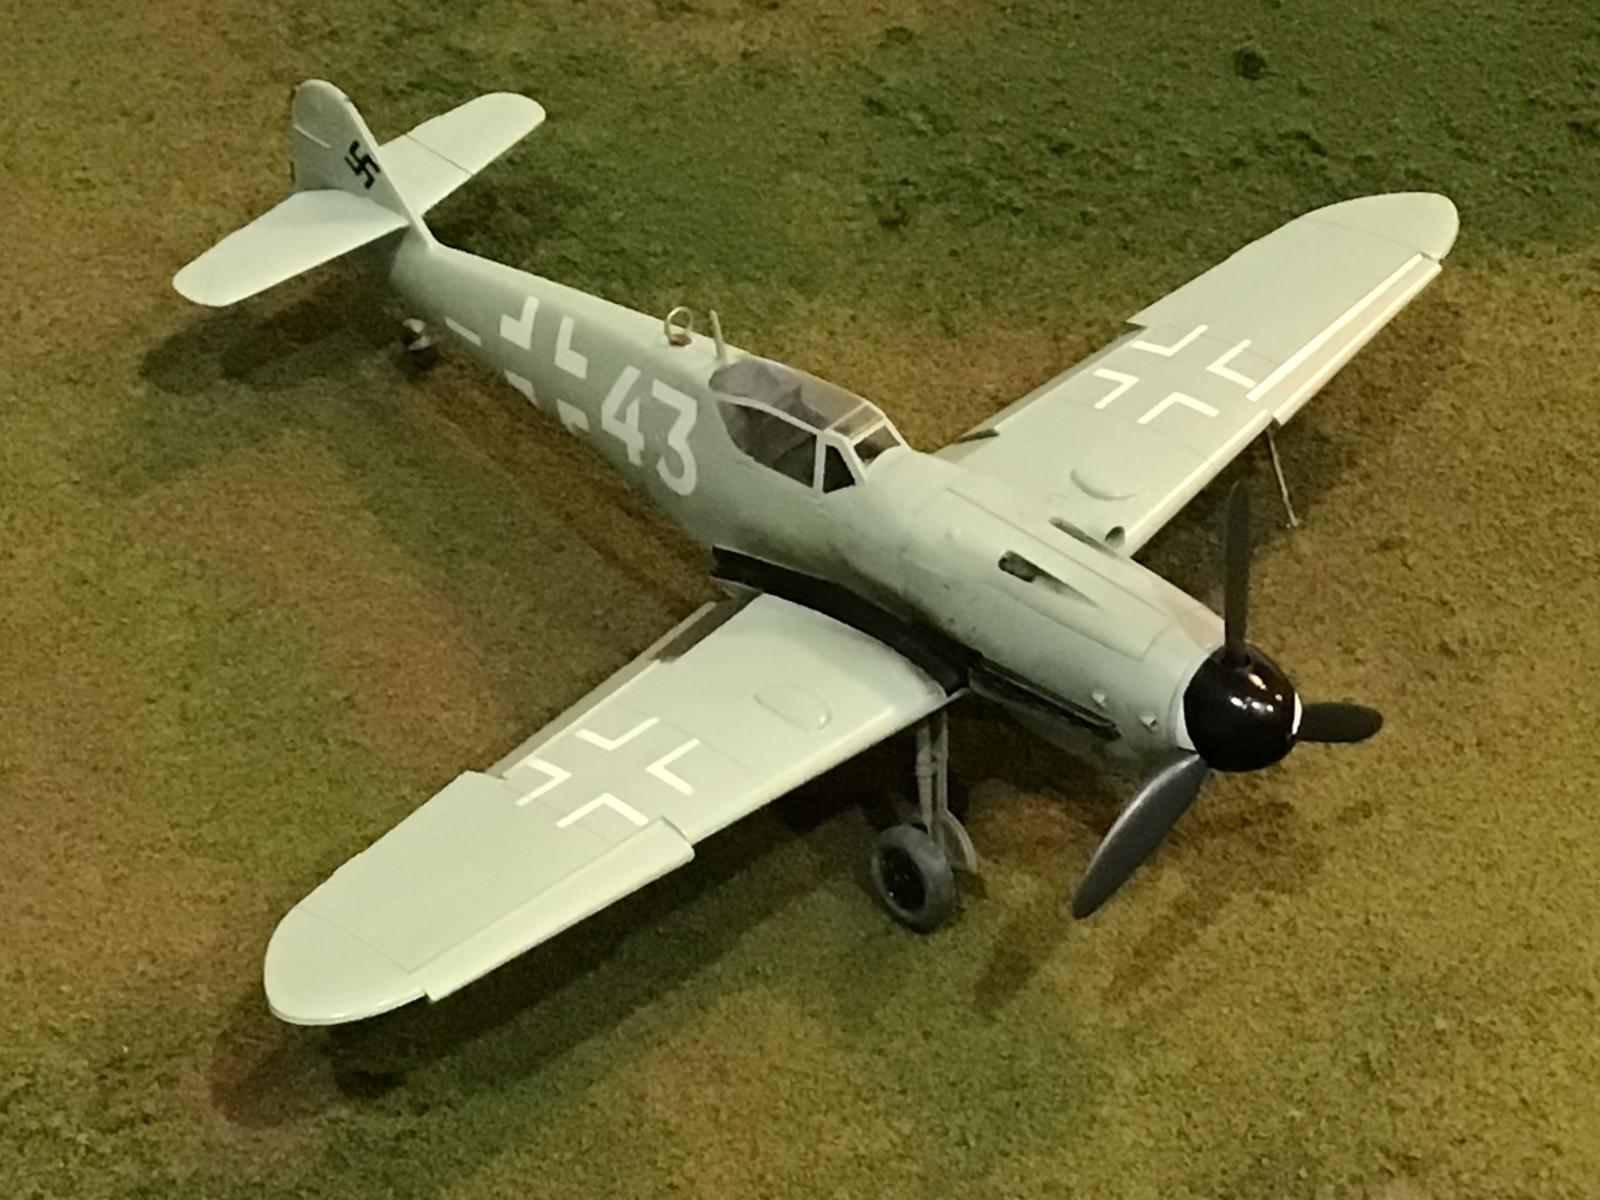
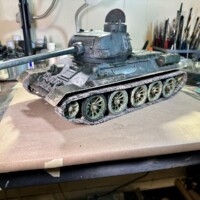
Here are some more pictures I took of the model. I am using a base that I constructed to take pictures of my models on. Someday I want to also construct a hangar to accompany this base.
This was a very fun build, and what's more is that I learned a lot about these late War 109's in the process. I have also gained a new found interest with the late War overall RLM 76 "low-vis" camouflage that was used on some of these 109's, and possibly some FW-190's too. I will likely build two more similar 109's in the future, with one being "White One" from JG-1 with a red RVD fuselage band, (and yellow lower nose), and another one as "Black 14" from JG-3 which was very similar to this model I present to you here.
Once again Tom, I sincerely thank you for sending this to me. You're the best.
As always comments are encouraged. Thanks for stopping by.


Well done, Louis, up to your usual high standards, and what a great gift from Tom, just what iModeler is all about.
George, @chinesegeorge
Thank you for the kind words. Yes sir, I agree with you 100 % that Imodeler is the BEST place hands down. Take care my friend.
Nice work, Louis! Old time lo-vis!
John, @j-healy
Thanks for the compliments. That's exactly what I thought when I first saw these pictures. Lo-vis we have today is definitely not something new.
The Germans where ahead of their time when it comes to lo-vis. Today's fast jets all are in various shades of gray.
Sometimes life gives you curve balls and its a blessing Louis to see that you have the time to do a little rope a dope and roll with the punches and come up swinging with this kit. I always get a kick out reading and seeing the further adventures of Louis in modeling. Keep up the good work and doing Louis.
Had to smash the like button.
Stephen, @stephen-w-towle
Yes sir, the Germans were ahead of their time with a lot of things. I immediately thought of our current /modern Low Vis markings we use on our jets today on the first time I saw these pictures. This is nothing new for sure... and the Germans even used a pixel style camouflage (in the shape of lozenges that were printed onto the fabric. over and over in a repeating pattern) way back over 100 years ago in the War to end all Wars. Rockets, jets, flying wings, even space weapons were all designed by them. Thank God we were on the winning side, or things could be a lot different in today's world.
Your rope a dope statement made me smile... Float like a butterfly, sting like a bee... That's me !
I have plans to finish up the Revell 1/32 Mustangs next, so please keep checking back on them.
As always, take care my friend, and thanks for the kind words (and for smashing the like button too).
What an adventure Louis,congrats!
Well done, Louis. Nice to see a non-"traditional" 109 paint scheme.
Some really excellent work on display here and a great result, @lgardner.
The kit may nowadays be "surpassed," but in the hands of a talented modeler, the result will still be outstanding.
A great project, well-executed. All good.
Louis, @lgardner, that really turned out nice. Definitely something a little different too, you don't usually see a fairly monotone 109 at any contests. Great attention to details in this build. Congrats on a great build.
A wonderful build, Louis, meticulously researched and excellently accomplished: up to your usual superlative stabdards.
The finished Gustav looks stunning.
What a wonderful gift from our friend @tom-bebout.
Congratulations my friend
What more to say, Louis @lgardner
This is a stunning Gustav, beautifully painted and nicely detailed.
I do like the way you presented it in the same positions as from the original pictures.
You have a real gem added to your shelf, well done.
Most excellent work Louis !
Great job, very accurate!
Beautiful looking aircraft Louis. I have "White 44" decals somewhere in the stash
Amazing work, Louis! Life photo//model photos are spot on.@lgardner
@lgardner
This is a great presentation my friend! Not easy doing a one colour subject and make it interesting for the beholder. Well done! Liked 😉
Another great build, Louis (@lgardner). It was a pleasure watching this come together in Groups. The paint scheme is a pleasant change from the green and gray mottle we usually see. Glad to see you missed the worst of the hurricane. Cheers.
Well that little gift was certainly sent to the right person. Nicely done and of course your research into this particular air frame was exhaustive and very informative. Two thumbs up.
What a great Gustav, Louis @lgardner. Your research and text with all those photos certainly paid off as you really dialed in this Luftwaffe project. The sliding vent on the port side of the canopy turned out just right. Good to see you back in action.
So great to see another signature Louis Gardner post again! A great looking 109, and I think that is a livery I didn't have teed up for my 109 project, so I may have to add a similar looking one in 1/72!
G'day Louis (@lgardner),
This is another great build of a classic scheme. I remember seeing those photos in (I think) the Squadron Signal book when I was young and I've wanted to build it ever since.
I do have the Haseqawa Bf109G-10 'NJG11' kit that features 'White 43' as well as its sister ship 'White 44' and a II/JG 52 'White 11'. I also recently bought the Rising Decal "Under New Management" decals that has 'White 44' with British roundels over-painting the German markings.
I just need to find the time to build it.
Liked!
A great colour scheme Louis! @lgardner
Another super build as always!
Best wishes