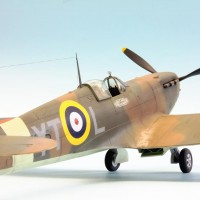
Eduard 1/48 Martlet III
The Airplane:
In October 1940, Greece was attacked by the Italian Army. Though the Greeks repulsed the first Italian attack, the situation was difficult because Hitler was ready to reinforce his ally. A Greek Purchasing Commission came to the United States in November, where they were able to secure the agreement of the U.S. Navy to release the first 30 F4F-3A Wildcats. These aircraft differed from the standard F4F-3 in that they were powered by an R-1830-90 Twin Wasp with a single-stage, two-speed supercharger, as opposed to the two-stage supercharger in the original model aircraft. The thirty F4F-3As were crated and shipped to Greece in April, 1941.
By the time the aircraft arrived at Gibraltar in early May, 1941, Greece had fallen to Hitler's attack, and the airplanes were homeless. The aircraft were taken on charge by the Fleet Air Arm as Martlet IIIs, and sent on to Egypt.
In Egypt, the Martlet IIIs equipped FAA 805 Squadron, beginning in June 1941, replacing Sea Gladiators. With two other Sea Hurricane squadrons in the wing, 805 Squadron and the Martlets became part of the FAA Desert Fighter Wing which flew under RAF control from Dekheila along the Egyptian-Libyan border. On September 28, 1941, Sub-Lieutenant W.M. Walsh recorded the Martlet's second aerial victory of the war when he shot down an Italian G.50 in the opening of Operation Crusader, the British advance into Libya.
On December 28, 1941, Sub-Lieutenant A.R. Griffin - who had been unable to take off with his original patrol flight - was alone over a convoy when four S.M.79 Sparviero torpedo bombers were spotted. Griffin forced two of the bombers to jettison their loads when he intercepted them, and shot a third S.M.79 into the water. Diving to attack the fourth Italian bomber, he was shot down just as the S.M.79 dropped its torpedo, which failed to get a hit. Observers saw the Martlet explode on impact with the water.
The Martlet IIIs were in action in North Africa until August 1942, shooting down a Ju-88 in February and two more S.M.79s in July.
In late August, 805 and its Martlets were transferred to Abyssinia for coastal patrols, and eventually wound up in northern Kenya in 1943, where they were able to maintain a high in-commission rate despite conditions so primitive that the pilots frequently found lions in the back yard of their mess. The aircraft were removed from operations in 1944.
The Kit:
This new kit from Eduard turns the Hobby Boss F4F-3 kit into a door stop on any grounds other than price.
Eduard's F4F-3 kit provides parts to make a model of any of the three production sub-types, which are distinguished by engine cowlings and a supercharger, all of which alternative parts are in the box.
Unlike the Hobby Boss and Tamiya F4Fs, the Eduard kit has full detail in the engine and wheel well, as well as complete dimensional accuracy - it turns out the Tamiya F4F suffers a problem in comparison to the real thing similar to that of the Trumpeter/Hobby Boss F6F series regarding shape outline, most prominently with the upper profile being too low, resulting in a “squat” canopy.
Decals are provided for six F4F-3s: a VF-41 “Yellow Wings” plane, an all-grey VMF-111 F4F-3A from the 1941 War Games, the VMF-211 Wildcat flown by Henry Elrod on his December 11 mission where he shot down two G3Ms, the publicity Wildcat “Butch” O'Hare sat in at the Grumman factory during his visit in April 1942, Lt. McCuskey's F4F-3 in which he shot down the first plane by a Wildcat (mistakenly identified as being from VF-5 rather than VF-6 and at Midway rather than Kwajalein), and the F4F-3 flown by VMF-221's John Carey at Midway.
Fortunately, Yellow Wings Decals did early F4F-3s of VF-41 and VF-72, the Wake Island Wildcats, and Wildcats over Guadalcanal, and Fundekals has released an excellent sheet for F4F-3s and F4F-4s.
Construction:
Some modelers have expressed confusion over Eduard's instructions which mention “early” and “late” variants. These terms have nothing to do with other variants of Wildcat. They have to do with the three different versions of F4F-3 that were produced and primarily involve the engine and cowling; also there are different windscreens.
The “early” F4F-3 involves the “A” markings option for the VF-41 airplane. The instructions show which cowling parts to use with reference on the panel to “A”; this also uses the windscreen for the telescopic sight.
The “B” and “E” options in the markings diagrams are F4F-3A Wildcats; again, look at the instructions for what parts to use where. Since I was making a Martlet III, which was an F4F-3A, I followed all the prompts for the specific differences, the most prominent of which are not using the supercharger part inside the wheel well and using the other front part on the engine, which does not have the mags; they are on the back of the engine (where you cannot see them) in this sub-type
The “C”, “D” and “F” options are “late” F4F-3s; again, consult the instructions for the parts that are relevant.
The only “fiddly” part of the construction of this kit is in getting all the interior of the wheel well positioned correctly. Take your time and all is well. Once you have the wheel well and the cockpit installed, the fit of the two fuselage halves is tight.
For this kit, I used the Eduard Brassin cockpit, which had been provided for review. I like Eduard Brassin cockpits, but the truth is they are frequently “overkill” because all that great detail is hard to see in the cockpit once the fuselage is closed up. The same problem exists here. There is an additional problem, which is that the 3D printed parts are not as strong as the plastic parts; thus, when it came time to press the fuselage halves together strong enough to get a good joint that didn't need filler, some of the 3D cockpit parts bent under the load. The good news is that since it is hard to see detail in the cockpit, you can't see the bends and I'm not going to point them out. It is also easy to mess up these parts in original assembly, so if you decide to use this option, handle with extreme care throughout the construction process.
I used the SPACE 3D instrument panel “decals” and I really highly recommend them unhesitantingly. They look much better than the 2D classic photoetch instrument panel I used on the first of these kits.
I squeezed the fuselage together and glued an inch at a time, wrapping the fuselage in rubber bands (which is where the cockpit interior parts deformed). After it set up overnight, there was no need for any filler and the fuselage centerline seam disappeared under a light scraping. Since the outside of the model is far more visible than the interior, I consider it the important work.
Past that, the rest is very easy: assemble and attach the wings - which I did with two rubber bands stratched wingtip to wingtip to press the wings tight to the fuselage. A spar is provided on which to mount the wings that assures proper dihedral. The horzontal stabilizer goes on easily. All the control surfaces fit tight, but you can droop the elevators if you wish (which I did).
Fit overall is excellent and no filler of any kind was needed anywhere with careful assembly.
Modelers should note that all F4F-3s, being Grumman-built, had Bronze Green cockpits, with the area below the cockpit and the wheel well and firewall interior and cowling interior being “Grumman Grey” a light grey almost an “off white.” All F4F-3s used lap belts only; the Navy didn't equip airplanes with shoulder harnesses until after Coral Sea, just before Midway. However, the Greek F4F-3As did have shoulder harness, which is provided in the Profipack photoetch details and I used them; no one knows if the FAA substituted a Sutton harness.
Painting and Decals:
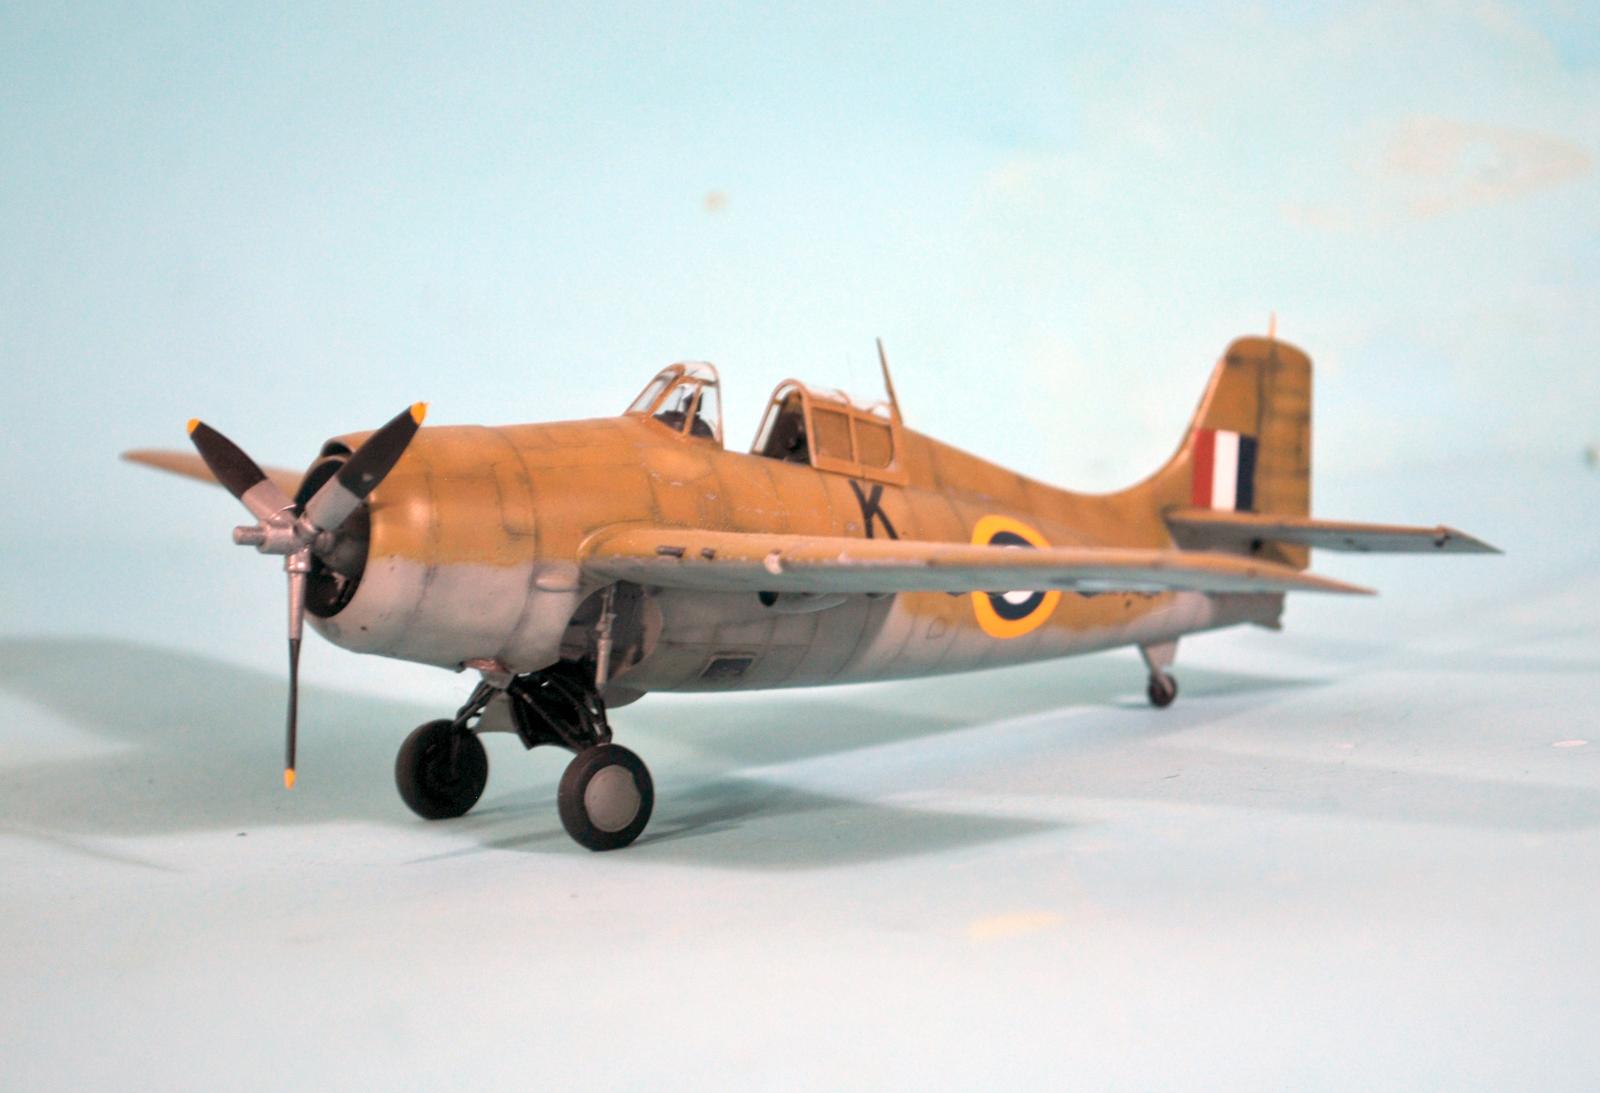
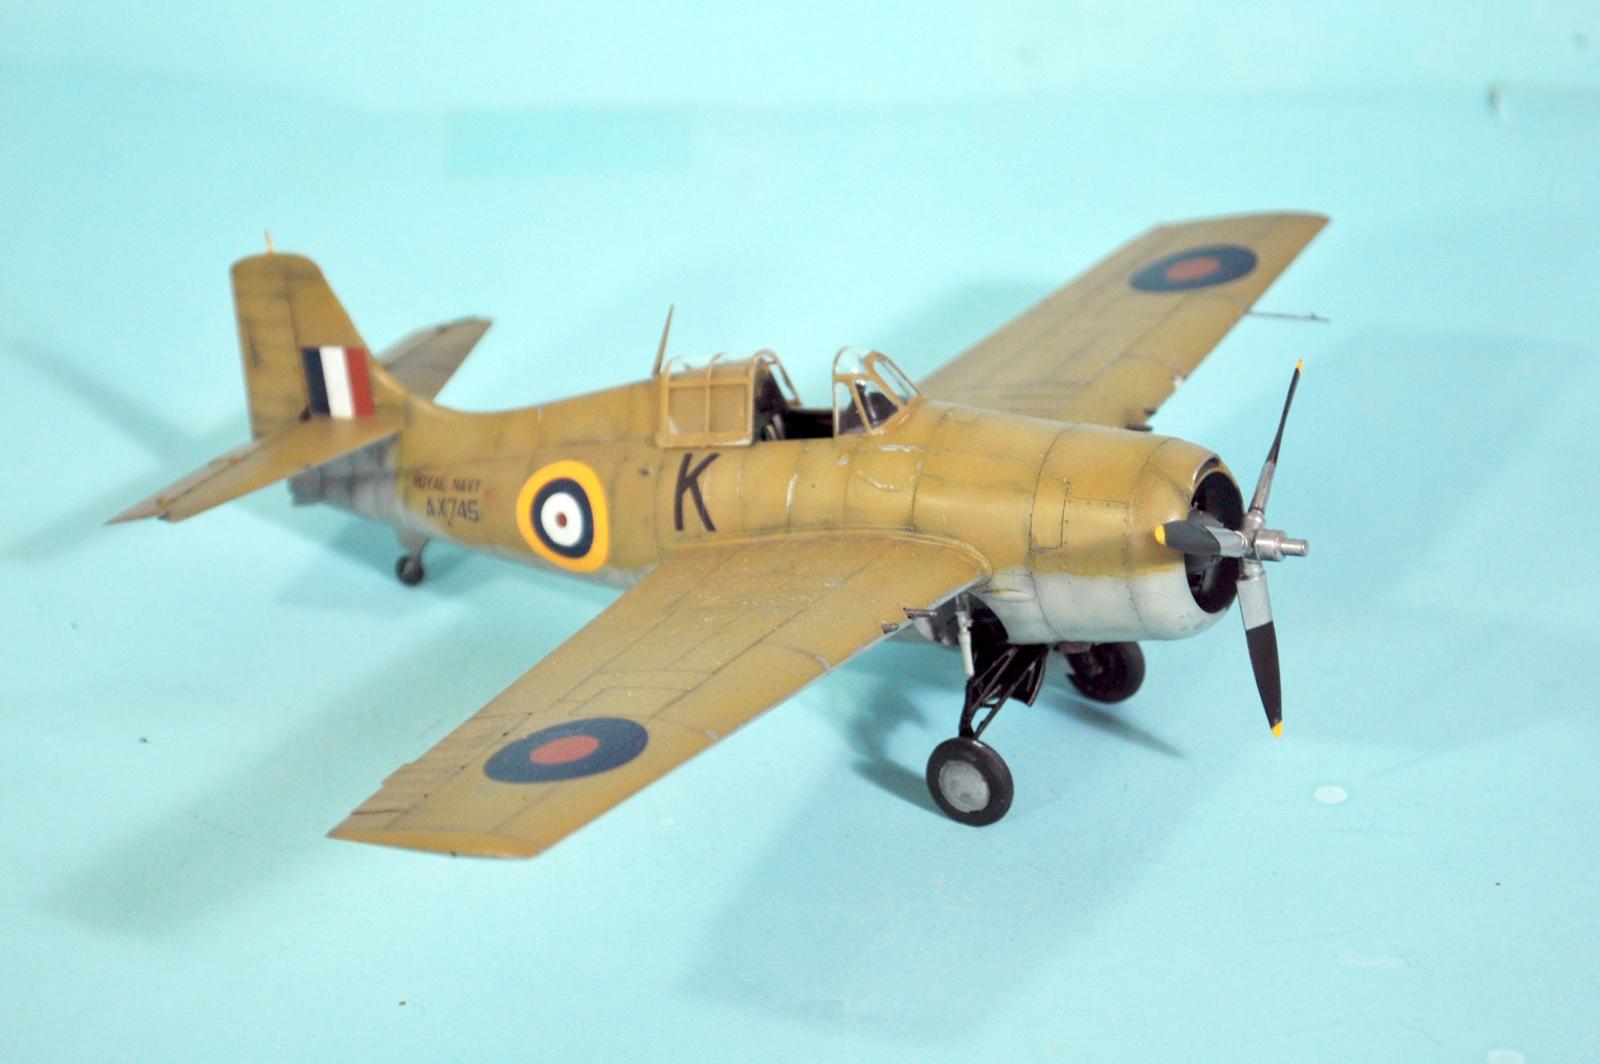
The Greek F4F-3As were delivered in the light grey the Navy had ordered for aircraft, in which all other F4F-3As were delivered. Once in North Africa, they were given desert camo.
It is difficult to really determine with certainty for individual aircraft, but some of them were done quickly with only an upper coat of Middle Stone applied, while others received the full desert camouflage of Dark Earth and Middle Stone. Photos of Martlet IIIs “O” Oscar and “X” X-ray clearly show the former is in a single shade while the latter has both colors applied. There is no likelihood they took the time to paint the lower surfaces Azure Blue, as some “hex-spurtz” have declared.
If you have or can obtain (it's almost made of unobtainium now) the Aeromaster sheet that has FAA Martlets with the Martlet III, that option is “X” X-ray and despite the “Errormaster” paint instructions, it should be done Dark Earth, Mid-Stone and Light Grey.
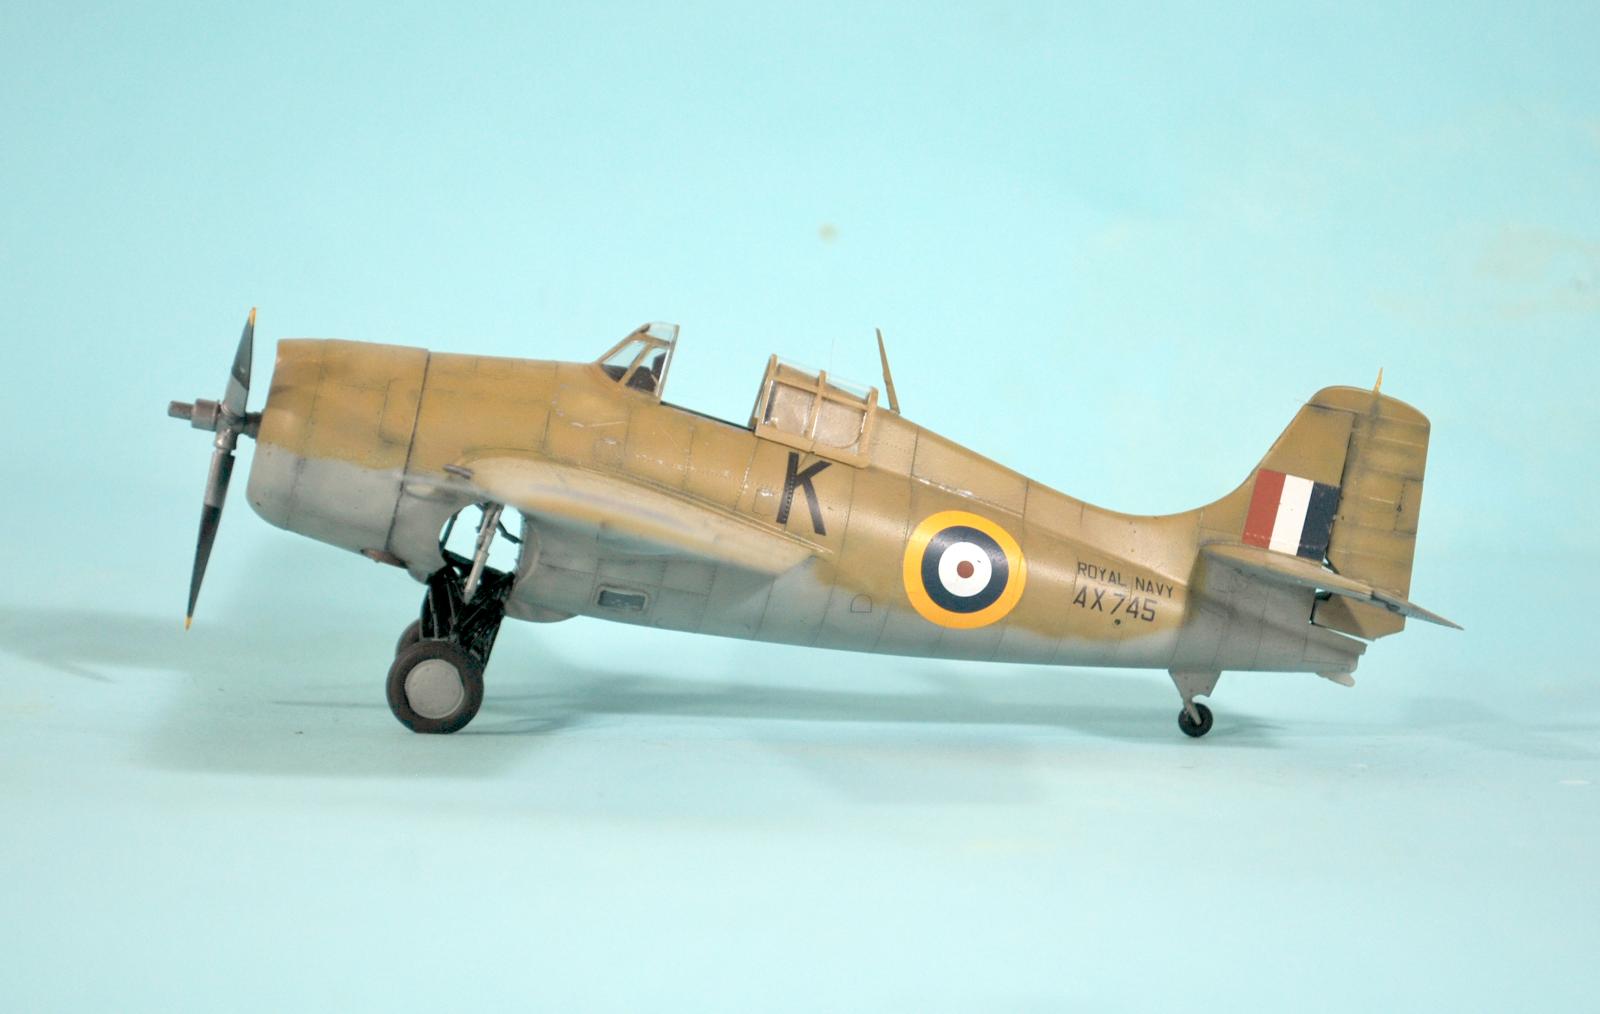
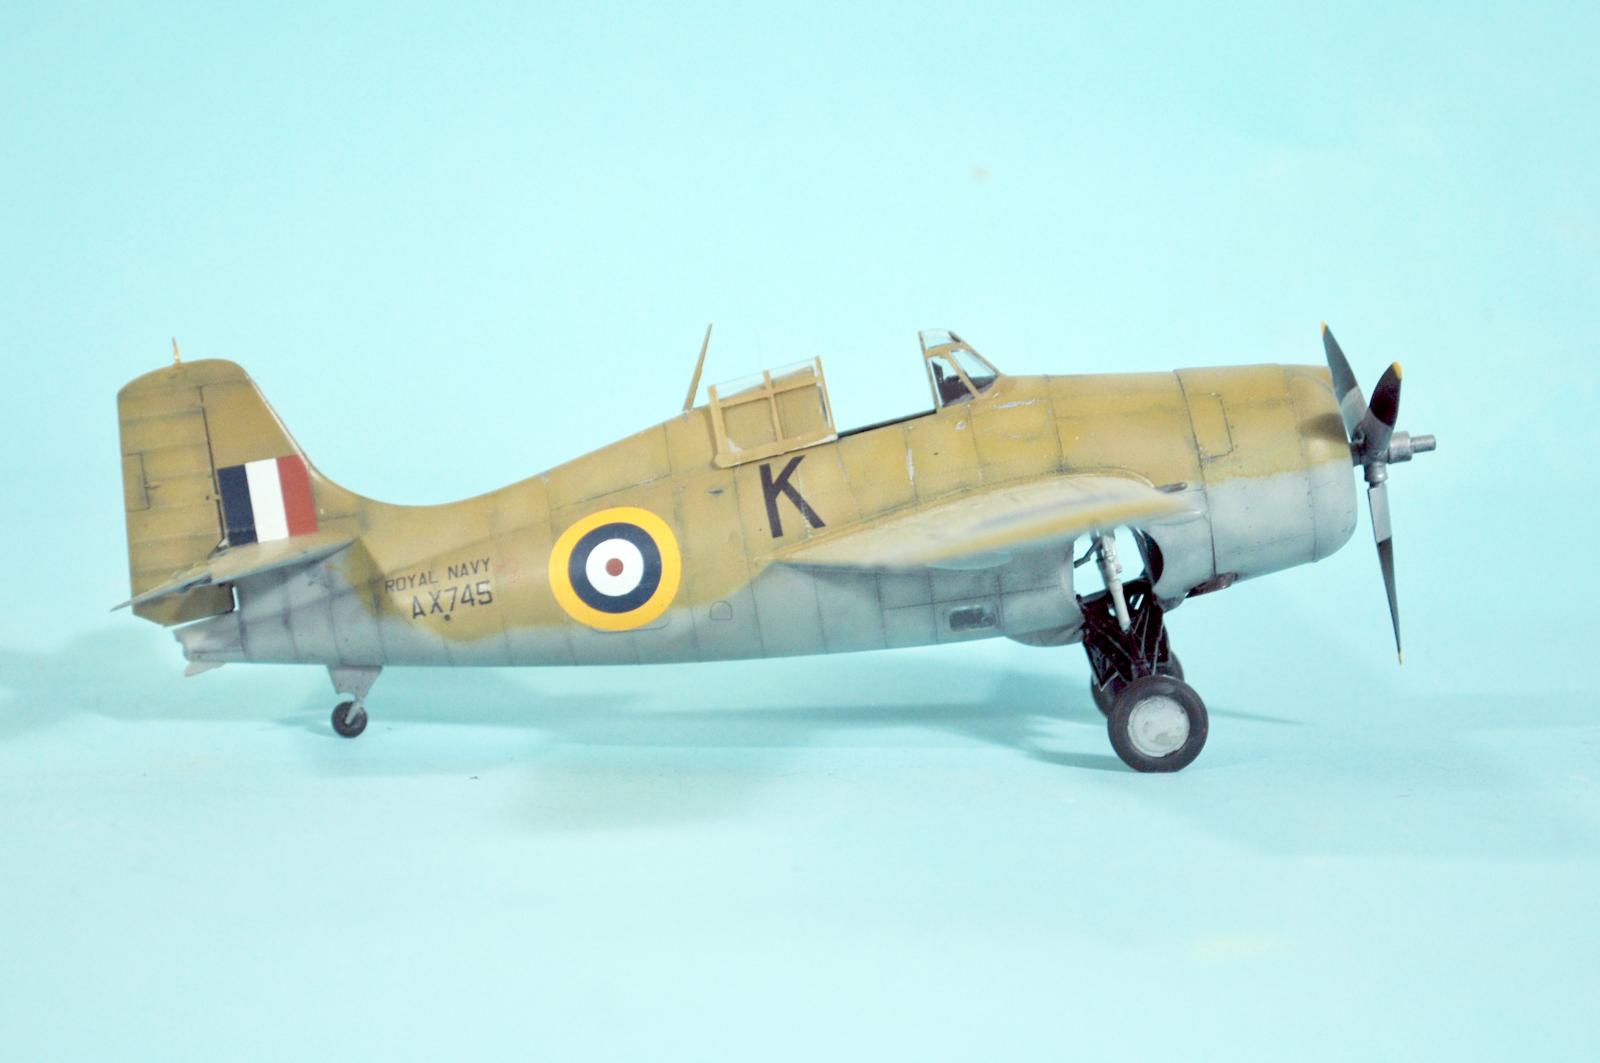
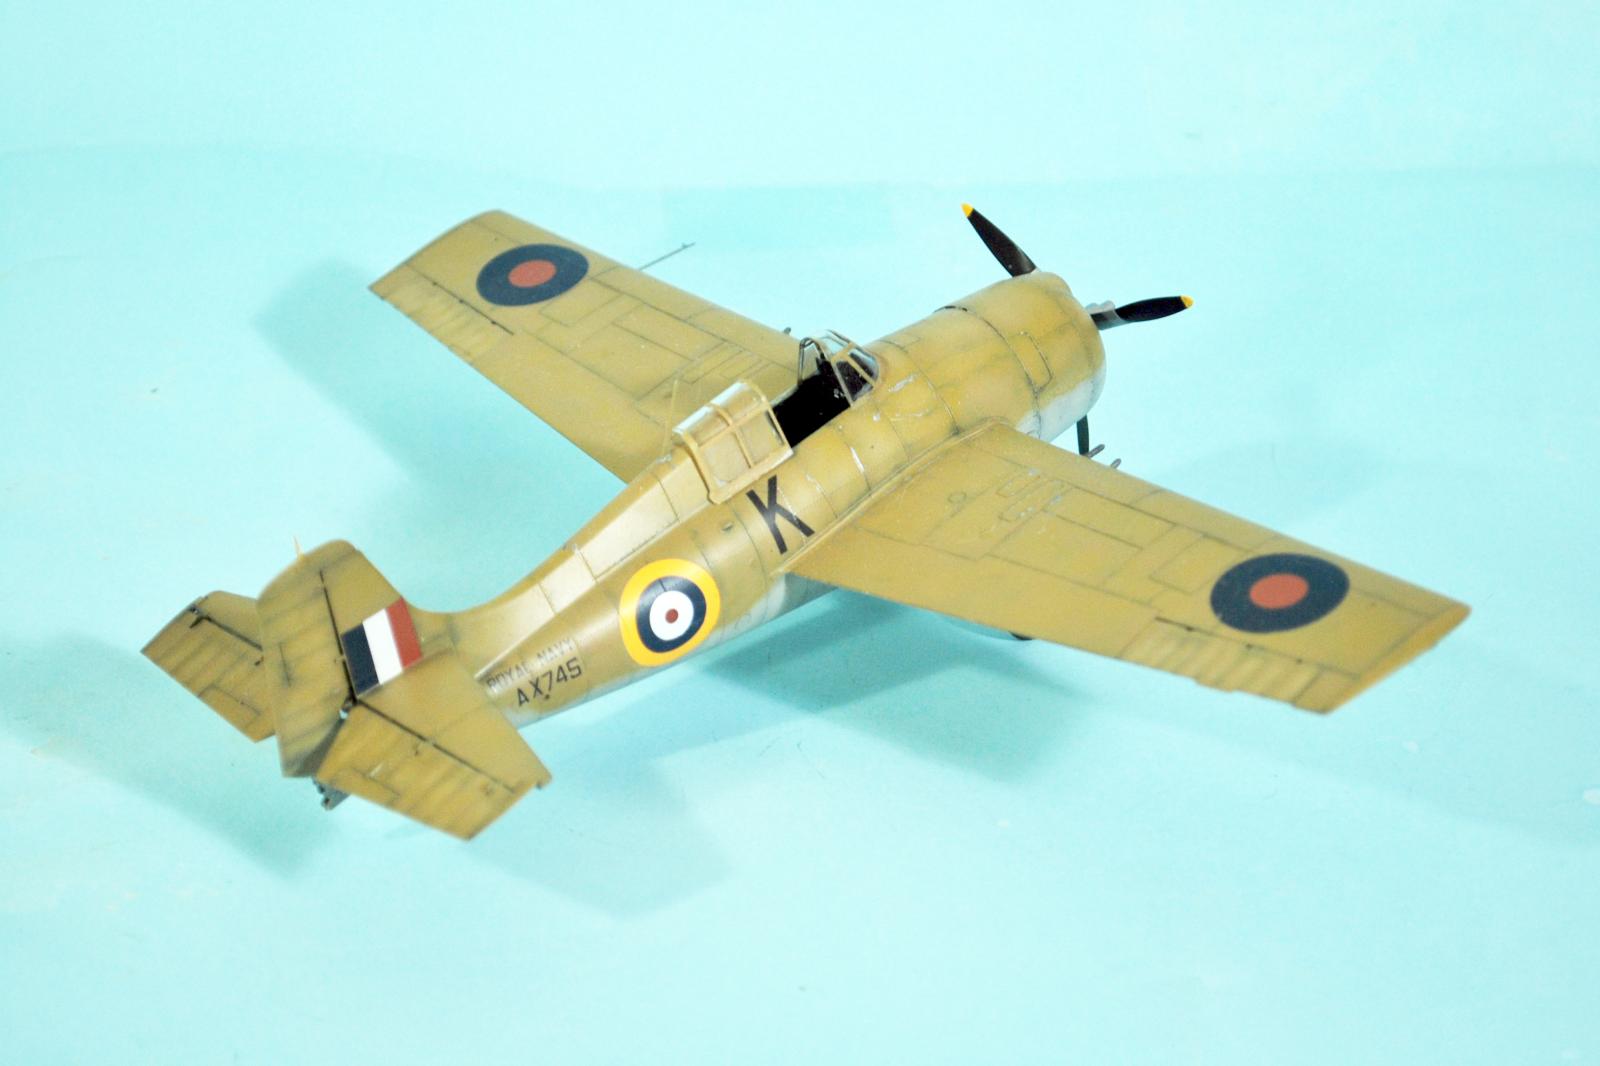
I didn't have the sheet, so cobbled together markings out of the decal dungeon. I found a distant Martlet III in the background of a photo that appeared to be “K”, and couldn't tell more about it, so I painted it the solo color with my Tamiya mixtures for “Middle Stone” and “Light Grey” and gave it a serial in the correct range. If anyone can prove it otherwise, please let me know.
Since the upper color was applied over an existing paint, it would have weathered and faded quickly in the desert. I decided to “set the time” of this as representing the airplane early - July or August - after it was painted. So there is some sun fading on the upper surfaces and “wear” from feet on the wings, but that's it.
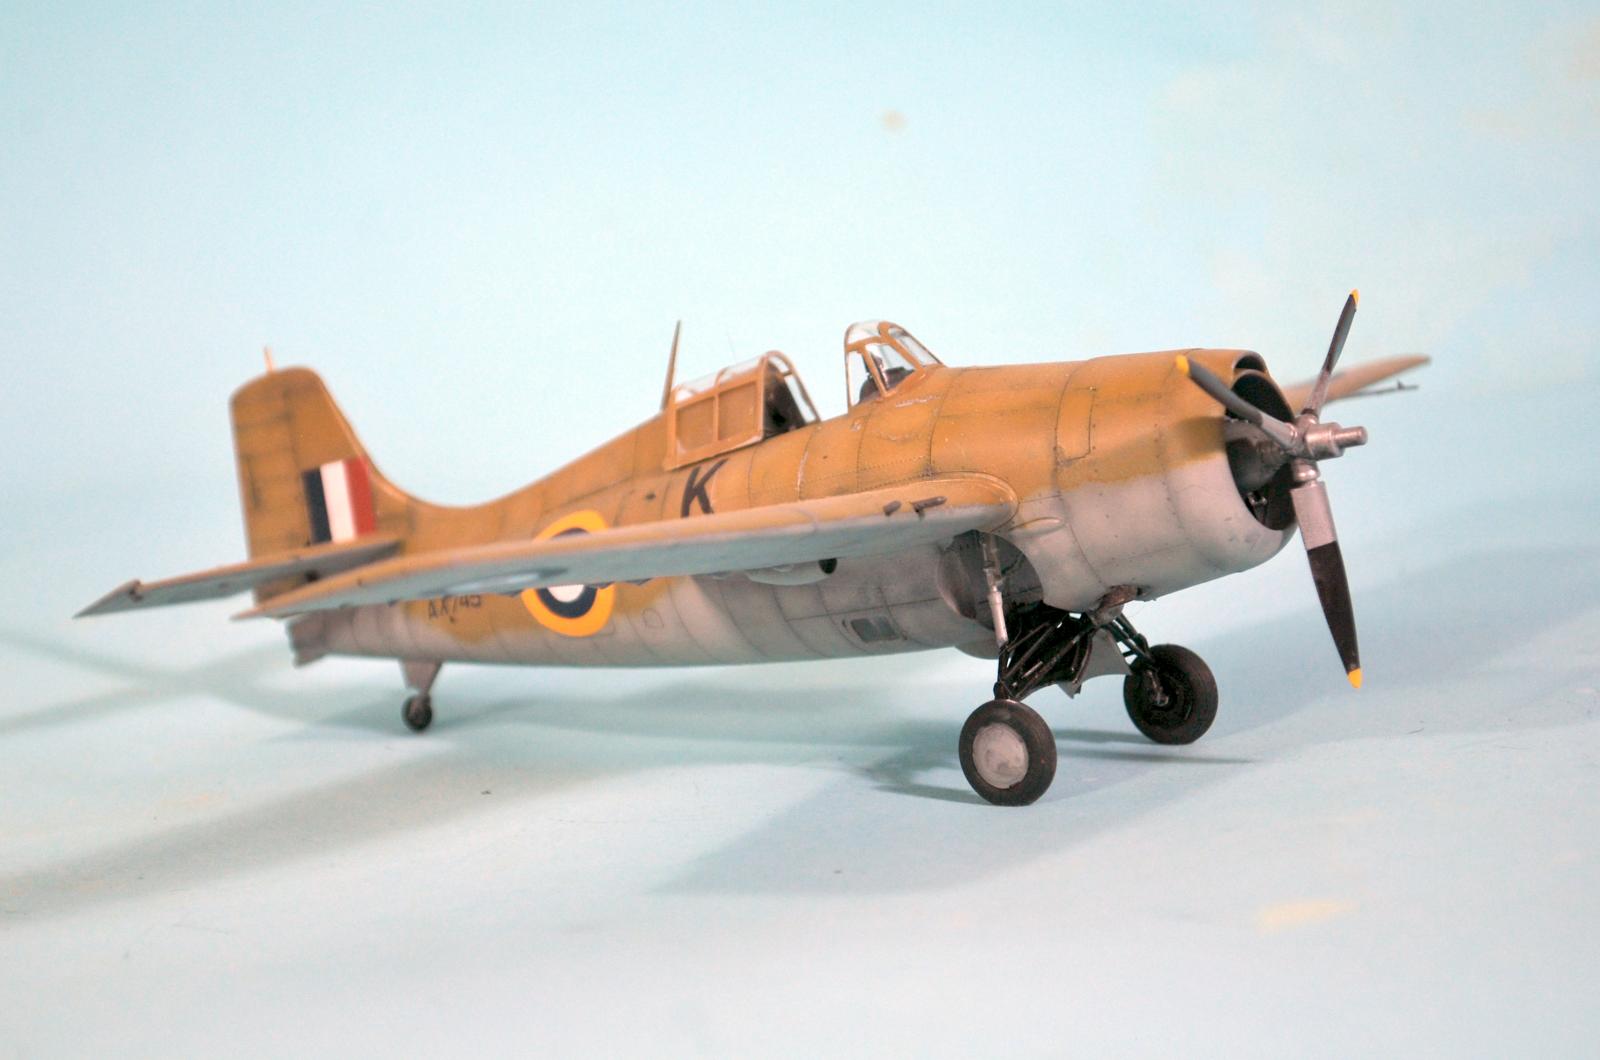
Final Finish and Assembly:
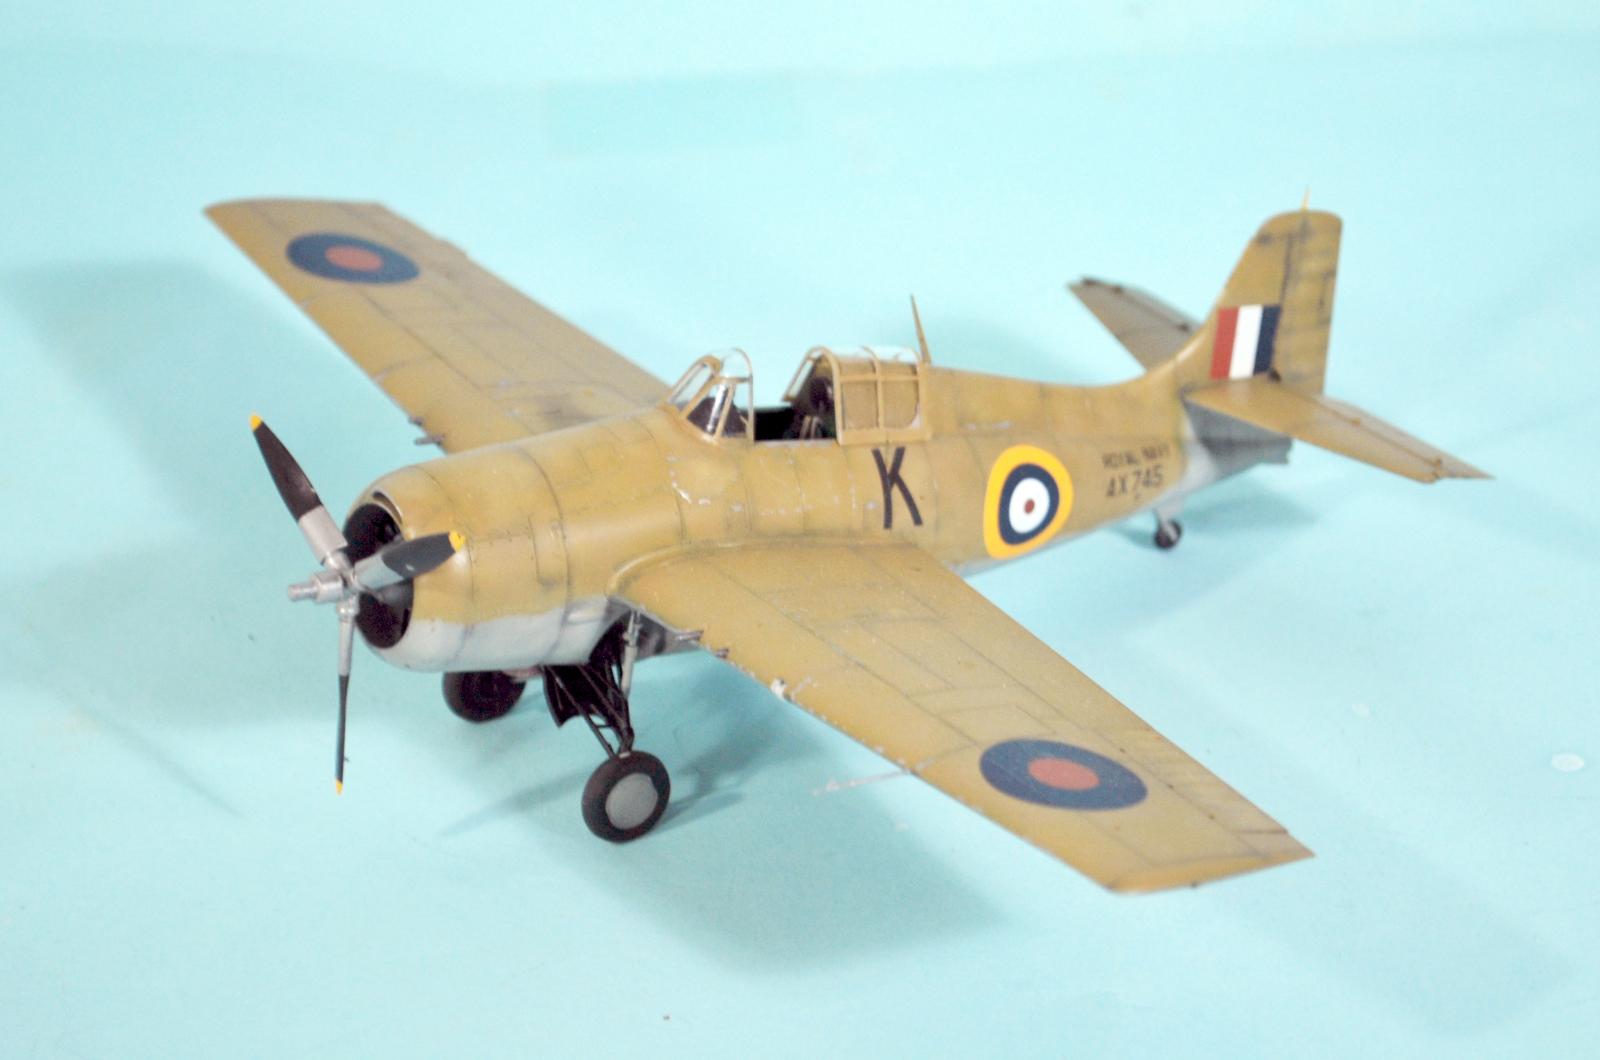
I had the Brassin exhausts, which really looked good, so I used them. I assembled the landing gear and mounted it in the open well. I attached the prop, then unmasked the canopy and mounted it open, and declared the project complete.
Overall:
From what has been said by Eduard, I don't see any immediate plans to release their new Wildcats as Martlets (but never say never). However, the Martlet III is a “paint and decal” conversion. A Martlet II from the coming F4F-4 is a minimal conversion. The FM-2 that they have announced for next year would be a ”paint and decals” conversion to do a Wildcat VI, while an FM-1/Wildcat V would be an easy combination of F4F-4 fuselage and FM-2 wings.
The Eduard Wildcats are a really excellent series. I highly recommend what's available in the line and look forward with anticipation for the others.


Looks great, Tom. Nice paint job.
My favourite livery tbh. I still vividly remember the first time I saw a (then) brand new Tamiya F4F using those same Errormaster decals you mention in the text. I guess azure blue was lower colour.
This is a fabulous model Tom! Well done
Sharpe looking Martlet! Looks good in this scheme.
Excellent result, Tom!
Well done, Tom! I think Xtradecals offers some Martlet options in 1/48 on their “Yanks with Roundels” sheets.
That is awesome! I’m going to get me one and do the same! (Imitation is the highest form of flattery.)
Imitate away! 🙂
Obviously the Eduard kit is the way to go for one of this family of aircraft.
Sharp work Tom, up to your usual high standard!
You have really fallen for this new Edward Wildcat in a big way, TC@tcinla. Making a Martlet out of the kit exceeds all expectations. Bueno.
Excellent looking Martlet, Tom @tcinla
Thanks for sharing the historical background of these desert scheme Martlets.
Nice Build Tom, @tminla, that is not a scheme you see often for a Wildcat...ok Martlet. I think you did a great job with the paint work on this one, it really looks good. Seems that Eduard kit is another one I need to add to my stash.
Looks great, Tom (@tcinla). I love models that feature a paint scheme that isn't very common for the airplane. This is one of my favorites. Great choice of schemes.
Nice build, it looks great in this scheme, great job. Also great read as usual.
Great looking model, and as usual, an interesting history lesson too! Well done @tcinla!
Great work, Tom- Need to get hold of at least one Eduard Wildcat, but I am thinking to get at least an Eduard Wildcat canopy, and see if I can improve that area on my Tamiya Wildcats in the stash, which I will never be able to sell (and replace with Eduard kits) anyway!
I am thinking to see what the fuselage (at canopy) difference would be, make a resin plug, and maybe vac a few canopies as well...
Dan from Bermuda.
Like Scott - I'm using this post as a cheat-sheet for a similar build in 1/72! I LOVE the Cat in that scheme - first I have seen it that I remember. Great-looking build as usual.
The Wildcat was one of my first models - the new led 1:72 Academy release.
Now we have a few really great offerings in 1:72 and 1:48 scales, maybe I should give a try to a modern kit of the same subject.
Looks great Tom, and as usual, very interesting historical background!
Another beautiful job, Tom. I love the subtle tonal variations. While I'm not a big fan of WWII Navy aircraft because of their "unimaginative" paint schemes, I may have get one of these Wildcats just for the enjoyment on the build. It really sounds like a nice kit.