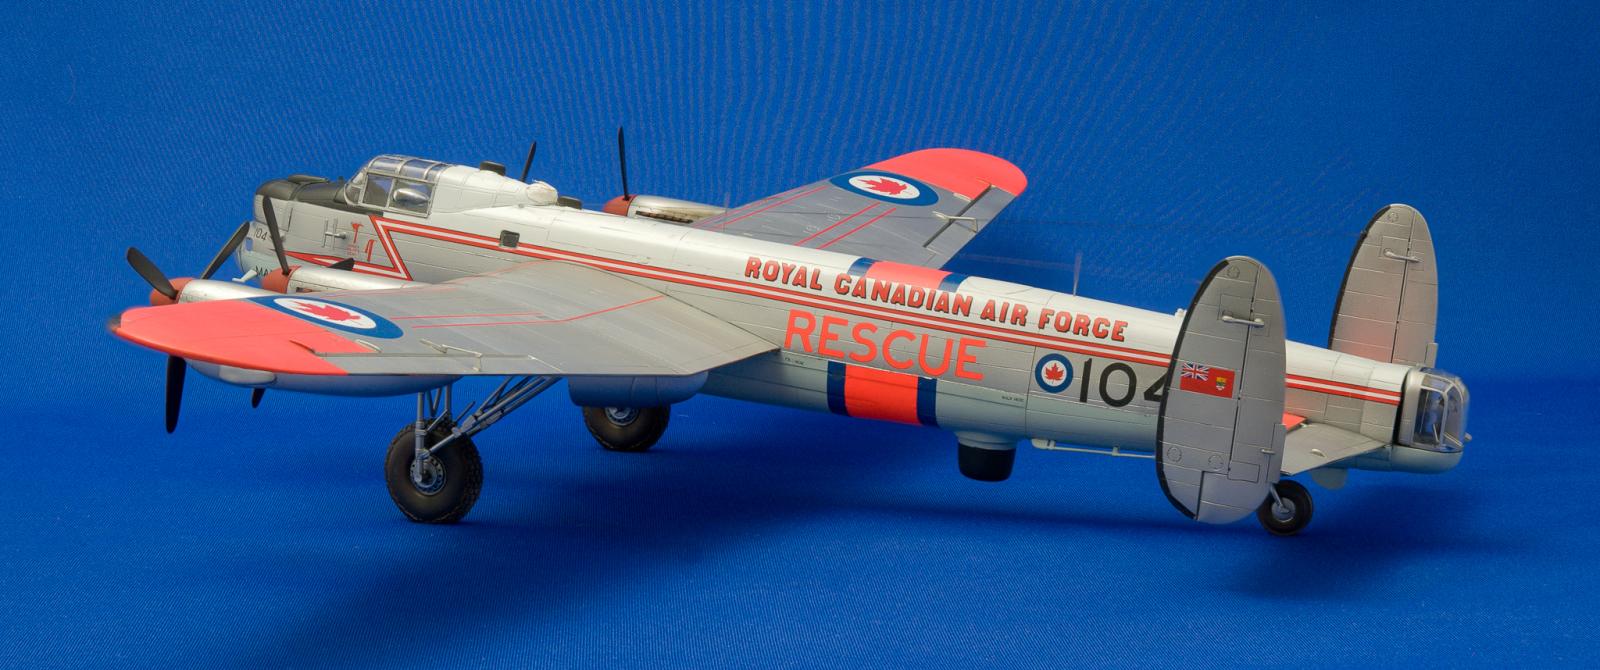
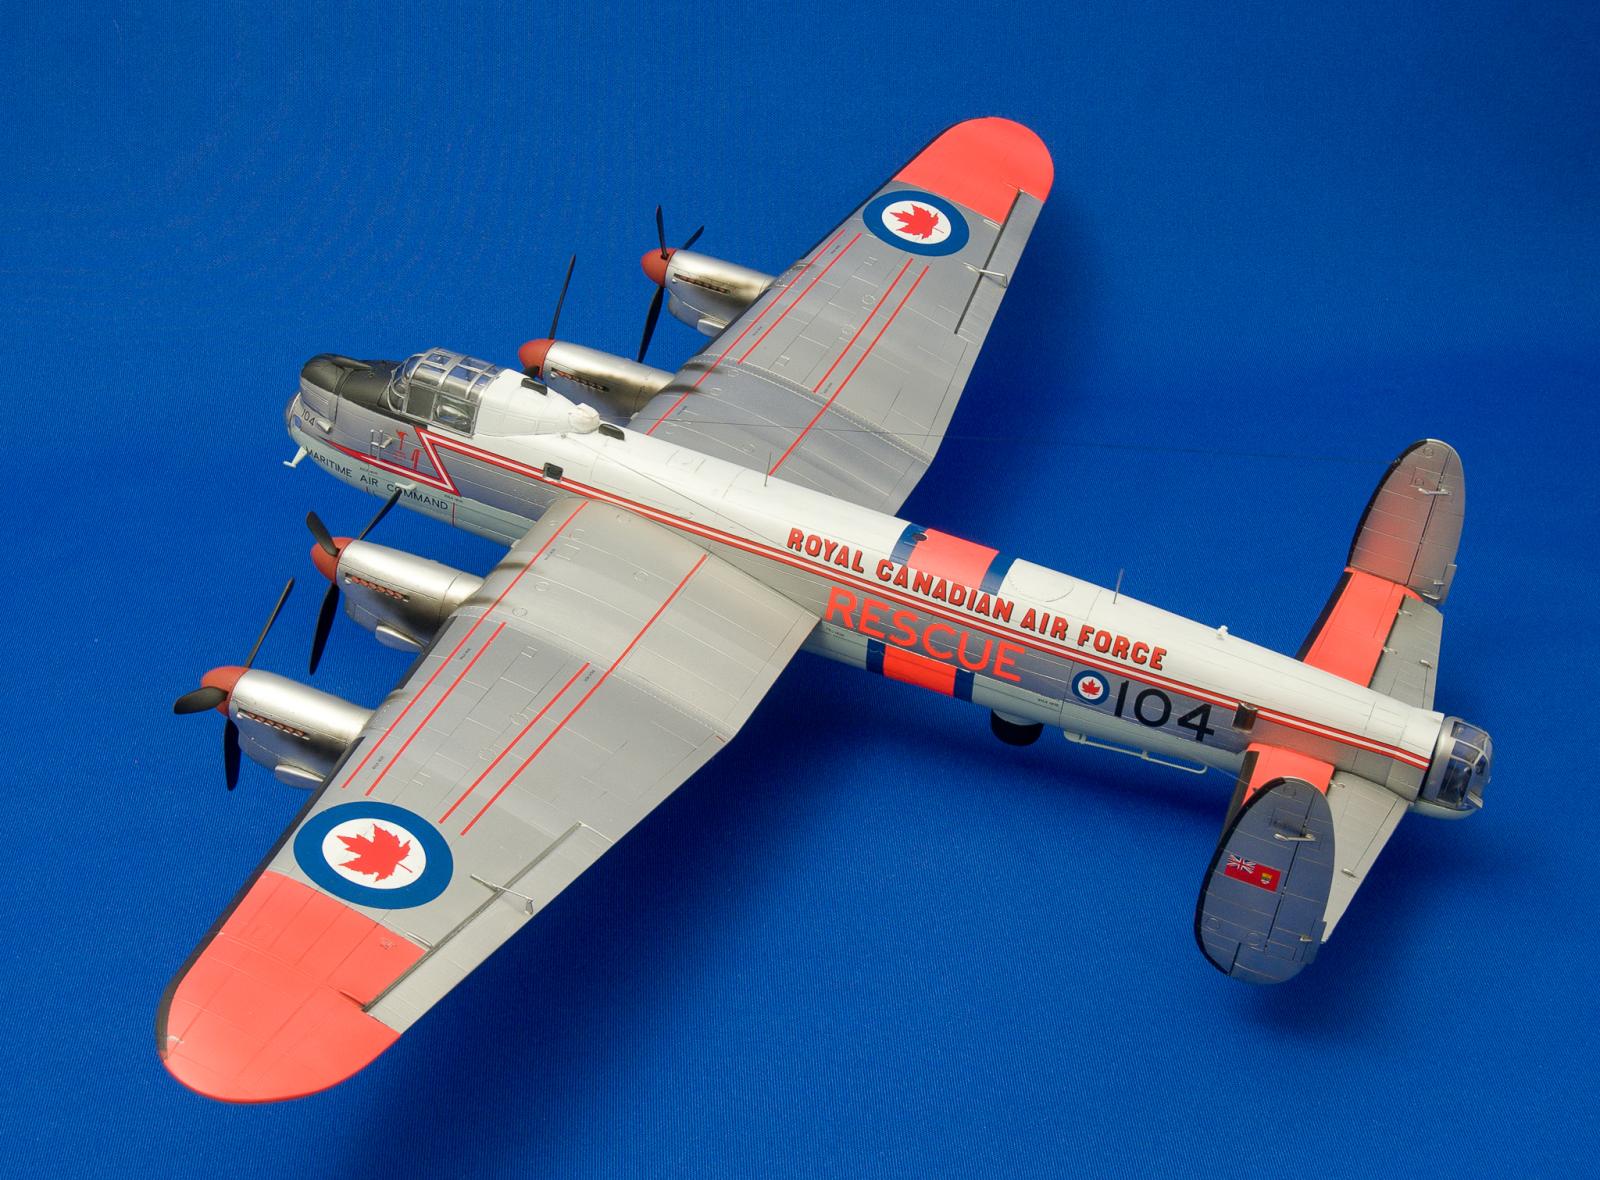
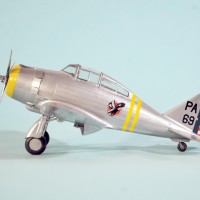
1/72 Canadian SAR Lancaster, 1962
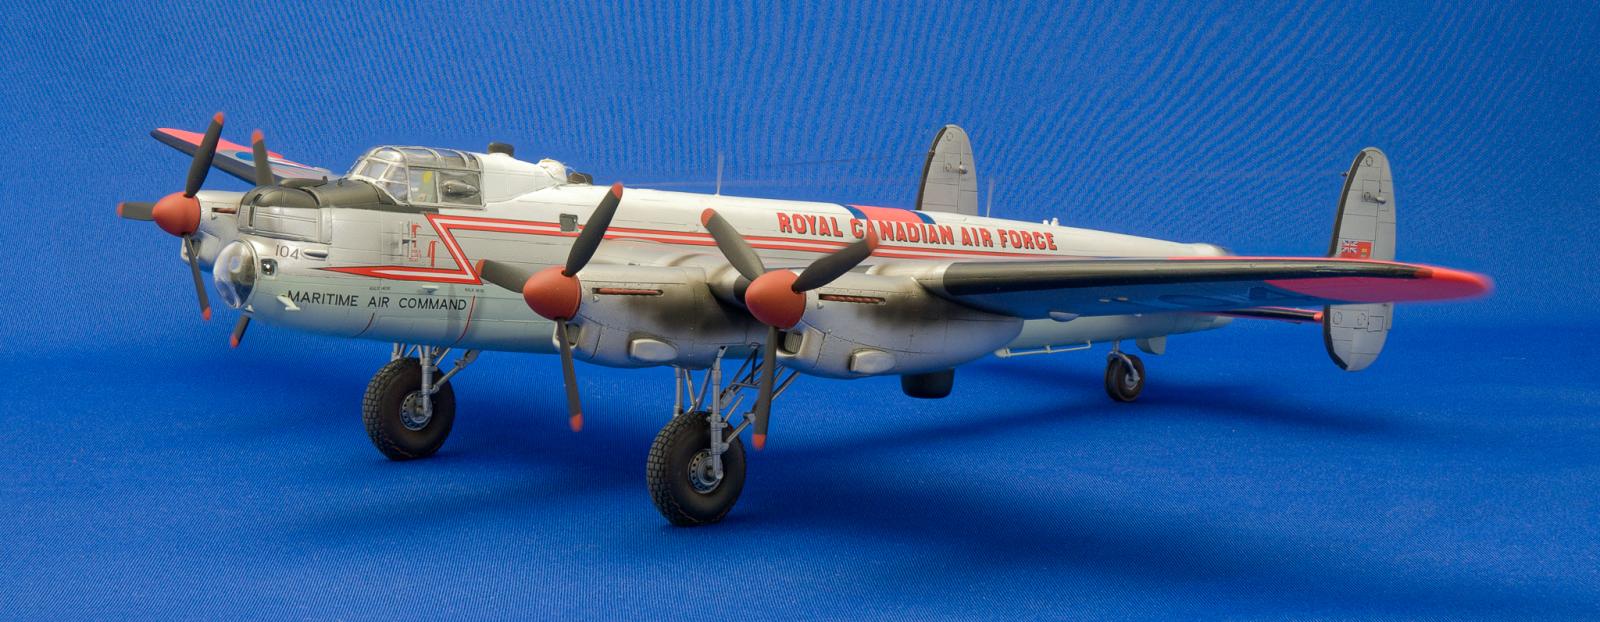
1/72 Canadian SAR Lancaster, 1962
See all my models at: https://www.flickr.com/photos/98961263@N00/albums/72157603606379755
Photograpy: Nikon D300; Focus Stacking using Helicon Focus; Editing using LightRoom
Kit: Hasegawa 1/72 Lancaster
Decals: Leading Edge 1962 Canadian SAR Lancaster (set includes a few resin bits for the Canadian SAR Lancaster
Accessories: Belcher Bits resin treaded wheels (BL4); Eduard window masks
Paint: Tamiya White Lacquer (top); AK Interactive Real Colors RC221 (bottom FS16473); Alclad Aluminum and White Aluminum; 2:1 Mix of Zero Marlboro Orange (ZP-1006)and Ferrari Flourescent Red (ZP-1007)
Completing this subject was quite an adventure fraught with danger, disappointment, a rescue from the abyss and finally, satisfaction.
The build was fairly straightforward. Having just finished the HK 1/48 Lancaster, I found the Hasegawa was a lower quality kit. This isn't a surprise given that the Hasegawa is pushing 20 years old while the HK Lancaster is brand new. Of course, the Has kit is 1/72 so too many comparisons would be unfair but I noted the following about the Has kit:
- the surface detail is somewhat soft. It has recessed panel lines but they are not as sharp as I would have liked.
- the canopy on the Has kit fits better
- the other glass pieces are equal in quality to the HK kit with one exception - the side windows are individual on the Has kit and one piece on the HK. The one piece version is soooooo much better.
- the Has kit does not have a dropped flaps option
- the Has kit landing gear are easier to assemble
After basic construction, things got complicated, mainly due to the paint work. First, the paint scheme comprises several colors, including two shades of metal, which required a great deal of masking and therefore a lot of room for error. My basic principle when painting is to attach as many parts as possible prior to applying the colors. This way I reduce the chance of fouling the paint during final assembly. In this case, I did leave off a lot of exterior details until after painting because with such large areas needing masking, many of these details would surely have broken when removing the tape.
The order in which to paint was not straightforward given my reluctance to mask over metal shades. I was using Alclads which do take masking well but I didn't want to take too many chances so I painted the metal last. This turned out to be a mistake because the demarcation lines between the Alclad and other colors showed a thin line of the black base coat under the Alclad. My advice would be to paint the metal shades first if using Alclad.
Unfortunately when I was painting the white over the canopy, I noticed some of the Eduard masks lifting. I stopped painting and peeled them back only to find that the white had fouled some clear parts. The last time this happened to me I ended up ditching that kit but this time I decided to use a Q-tip with some Tamiya polishing compound to scrub off the paint. It worked really well and I was able to re-mask and paint successfully. I will be wary of Eduard masks from now on though since this is the second time this has happened to me.
One unique challenge to this kit was the day-glow wingtips and stabilizers. Years ago I bought some Gunze paint which I thought would match the decals since the lid seemed to be nearly identical. Upon opening the bottle it was obvious that it would not work though since it turned out to be very orange whereas the decals are more of a reddish orange. I could not find anything to match until I went into my F1 paint stash and found that Zero Paint's McLaren Marlboro Orange was in the ballpark. I ended up mixing it 2:1 with some Ferrari Flourescent Red to get a nice match. The thing about Zero Paints is that they are as hot as fire. One cannot put them on wet or they will melt everything under them including plastic, primer and other coats of paint. Since I had to undercoat the day-glow bits with white, I ended up misting on 6 or 7 super light coats of the Zero paint to get coverage.
Prior to applying the Alclads, I undercoated with Tamiya gloss black lacquer. Unfortunately some spilled onto the masking for the day-glow port wing. I wiped it off quickly and hoped for the best but some did migrate under the tape which required some creative paint chipping to hide. I think it would have been impossible to over coat with the day-glow to hide the blemishes due to its thin nature and the number of coats it would have taken.
Once I removed all the masking, it looked pretty good, in my opinion. I let it gas out overnight then I woke the next morning eager to put “For all Mankind” on the TV and set out on a marathon decalling session. The first couple of decals cracked but I was able to nurture them into place anyway. After that, the decals began to shatter upon hitting the water. I ruined some key decals so I was stuck. I did a web search and even contacted Leading Edge to see if I could buy another set (they are out of production) but I struck-out. Admitting defeat, I decided to put away the kit and hope that I would come across some decals someday to finish the project. Well, my luck shifted the next day when I got a response on HyperScale to my ad to buy any set I could find. Corbin C. from Anchorage came to my rescue with a replacement set - thanks Corbin! All went well and the decals went on without any problem.
When all is said and done, the stress of this kit was worth it. I think this is the coolest Canadian post war scheme and I'm happy to have it in my collection. It looks great beside my Canadian Neptune and Aurora. I'm hoping to build an Argus once Belcher bits releases their conversion set for the old Brittania kit.
Thanks for looking,
Richard

Well done Lanc.
Well done, I think this is one of the more interesting Lancaster schemes.
I think a couple parts that are supposed to reside near the landing gear may have scampered off.
Yup, I forgot the gear doors. They are in place now but you'll have to take my word for it because i'm too lazy to re-take the pictures.
Thanks for the compliment 🙂
Really nice, Richard (@rbungay). I have wanted to build this version for a long time, but complicated paint has always put me off. A big pat on the back for working through the painting problems. One of the things I really like about acrylic paint is that if I really mess things up that I can remove it with either alcohol or Windex. Well done.
An adventurous travel and a superb final result, Richard!
Nicely done Richard, a different look in that scheme.
Very nice result, Richard @rbungay
A very unique scheme which you applied perfectly.
Well done.
Well done, Richard, for persevering and getting a great result. Is it just me, but doesn’t it look like its cousin the Shackleton in this colour scheme?
Wow Richard ! , this is one of the best looking Lancs I've seen, she looks amazing in this colour scheme, like she's put her party dress on after a hard week at work ...
Well done, Richard! With the striking scheme/markings and your beautiful paint job it is very eye catching.
Really nice. Makes me think of this story. This lanc was very similar.
http://www.timefadesaway.co.uk/strathallan/kb976/kb_976_5.html
Strathallan is about 2.5 hours from me and I remember seeing Sir William Robert's collection back in the day. Sadly the collection is dispersed.
Definitely a striking Lanc! Well done.