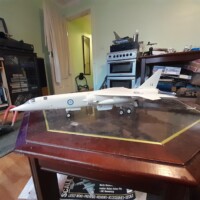
PA-48 Enforcer
Hi All,
To me, the PA-48 Enforcer is probably one of THE coolest looking airplanes ever produced and when I saw one at the USAF Museum, I knew one day I needed to build a model of it. So, when Halberd Models, from the Ukraine, had a limited run, 1/48, resin conversion kit available I jumped on the purchase before they were gone. When delivered the bench was cleared and it became my number one build.
BRIEF HISTORY:
In 1968 the US Air Force was looking for a low-cost aircraft to be used, mainly in Southeast Asia, for close air ground attack/support. David Lindsay, owner of Cavalier Aircraft, submitted the Turbo Mustang III to be evaluated. The Turbo Mustang III was a modified version of the P-51 Mustang using a Rolls-Royce Dart 510 turboprop. Ultimately the US Airforce, and other countries, would not purchase the aircraft.
David Lindsay did not give up. To continue with this concept, and to utilize a larger mass-producing company's capability, Lindsay closed Cavalier Aircraft and sold the Turbo Mustang to Piper Aircraft, as well as remaining close to the project as an advisor with Piper.
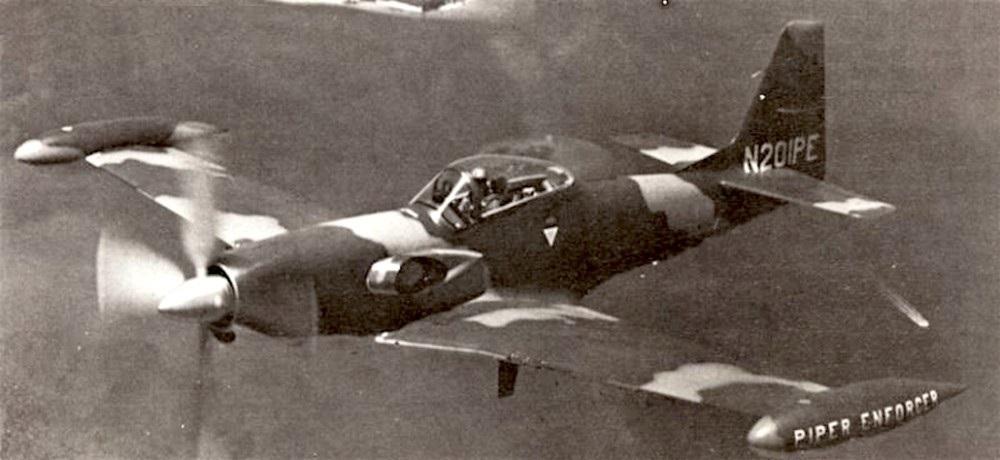
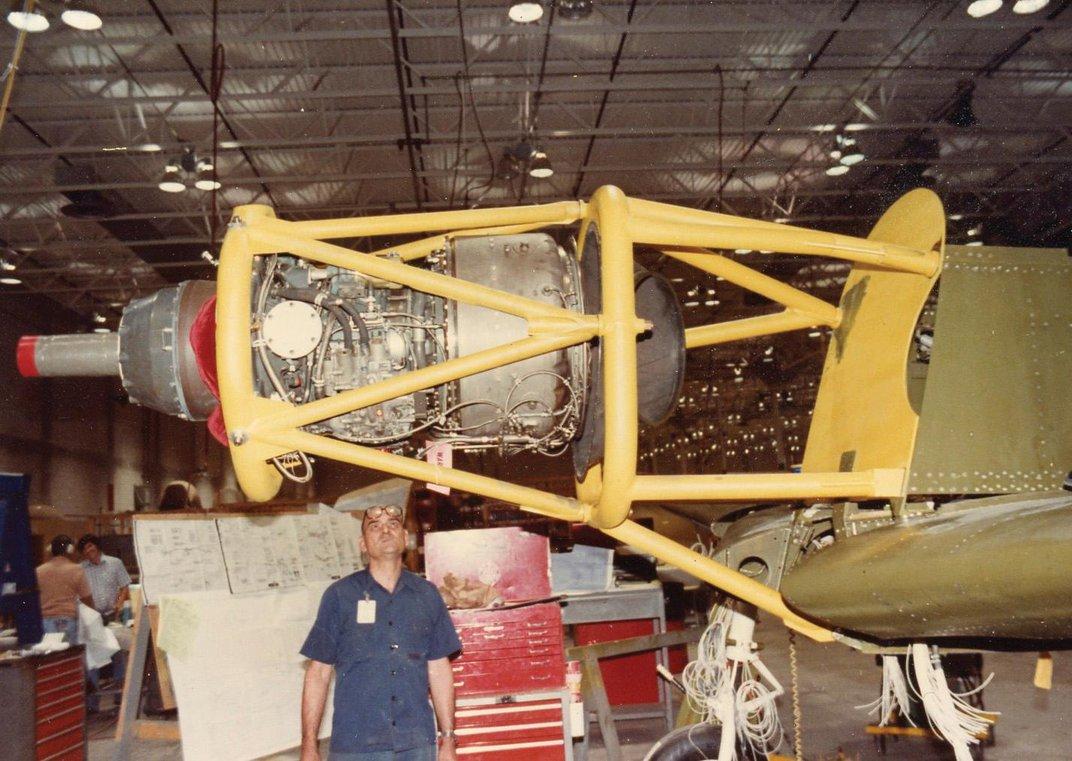
In 1971 Piper began work on a new version, renamed the Enforcer. Using two highly modified P-51D Mustang airframes, now mated with Lycoming YT55-L-9A turboprop engines, Piper built aircraft N201PE, a single seat version, and N202PE, a dual control aircraft. Due to elevator trim problems N202PE was lost in a crash off the coast of Florida before evaluations began.
Despite performing well during the 1971-1972 Pave COIN evaluations Piper also failed to secure a contract with the US Airforce with the Enforcer.
Continuing to pursue Congress for another USAF evaluation, in 1979, Piper was allocated funds to build two new prototypes, now designated, by Piper, as the PA-48 Enforcer.
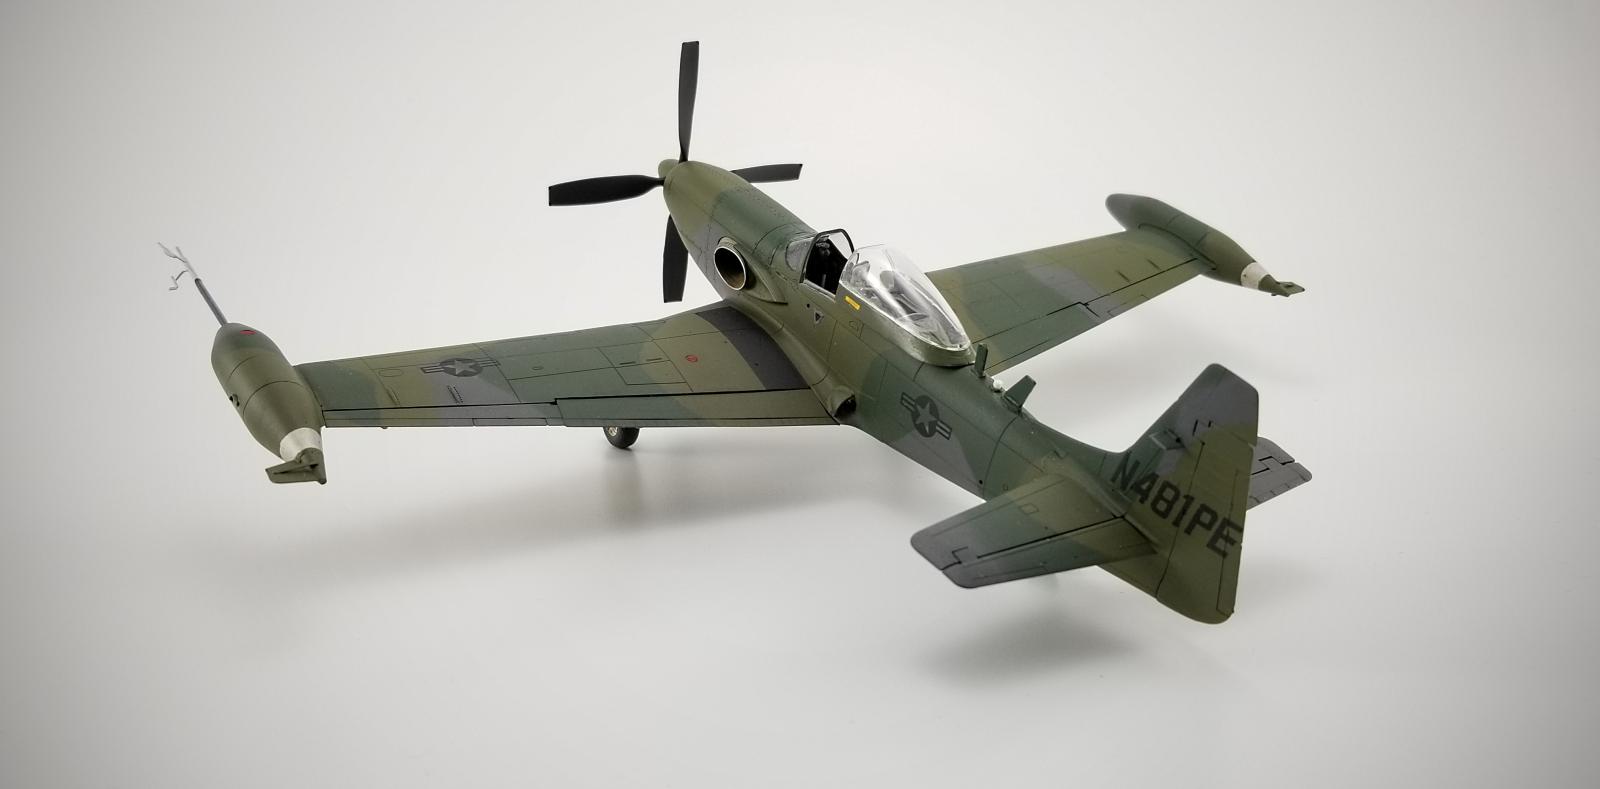
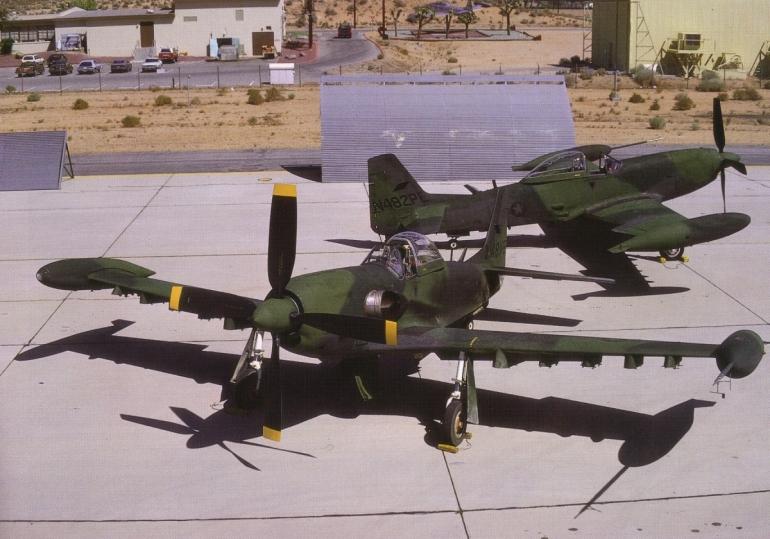
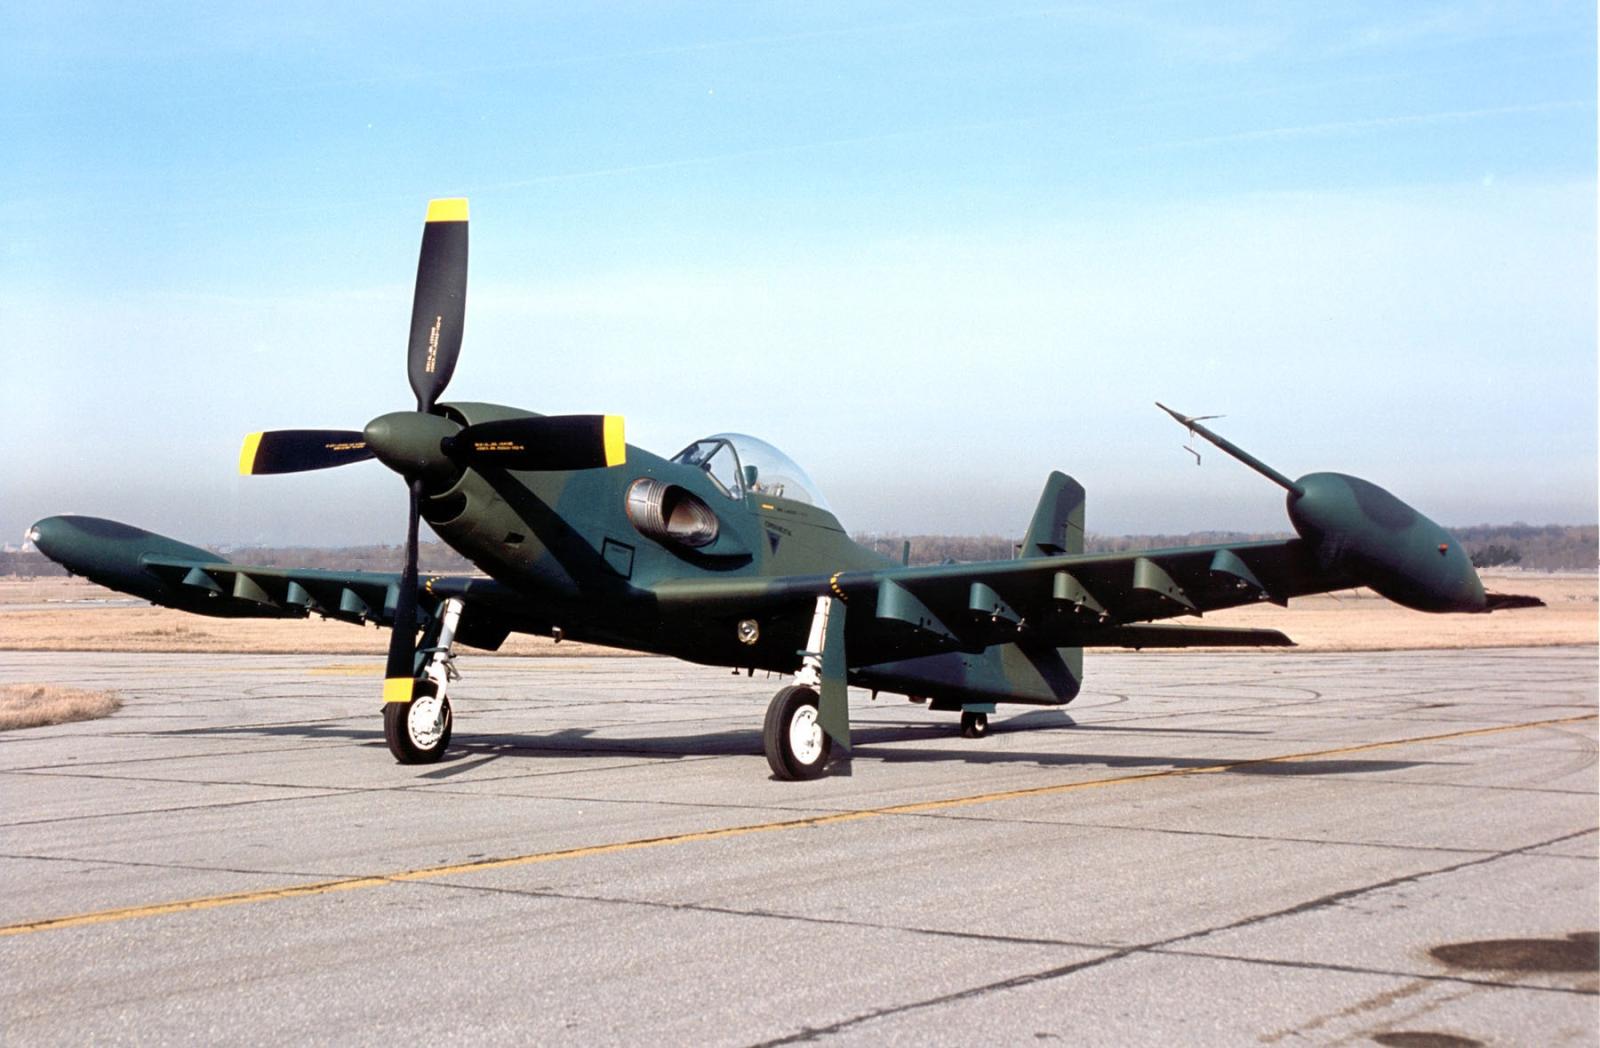
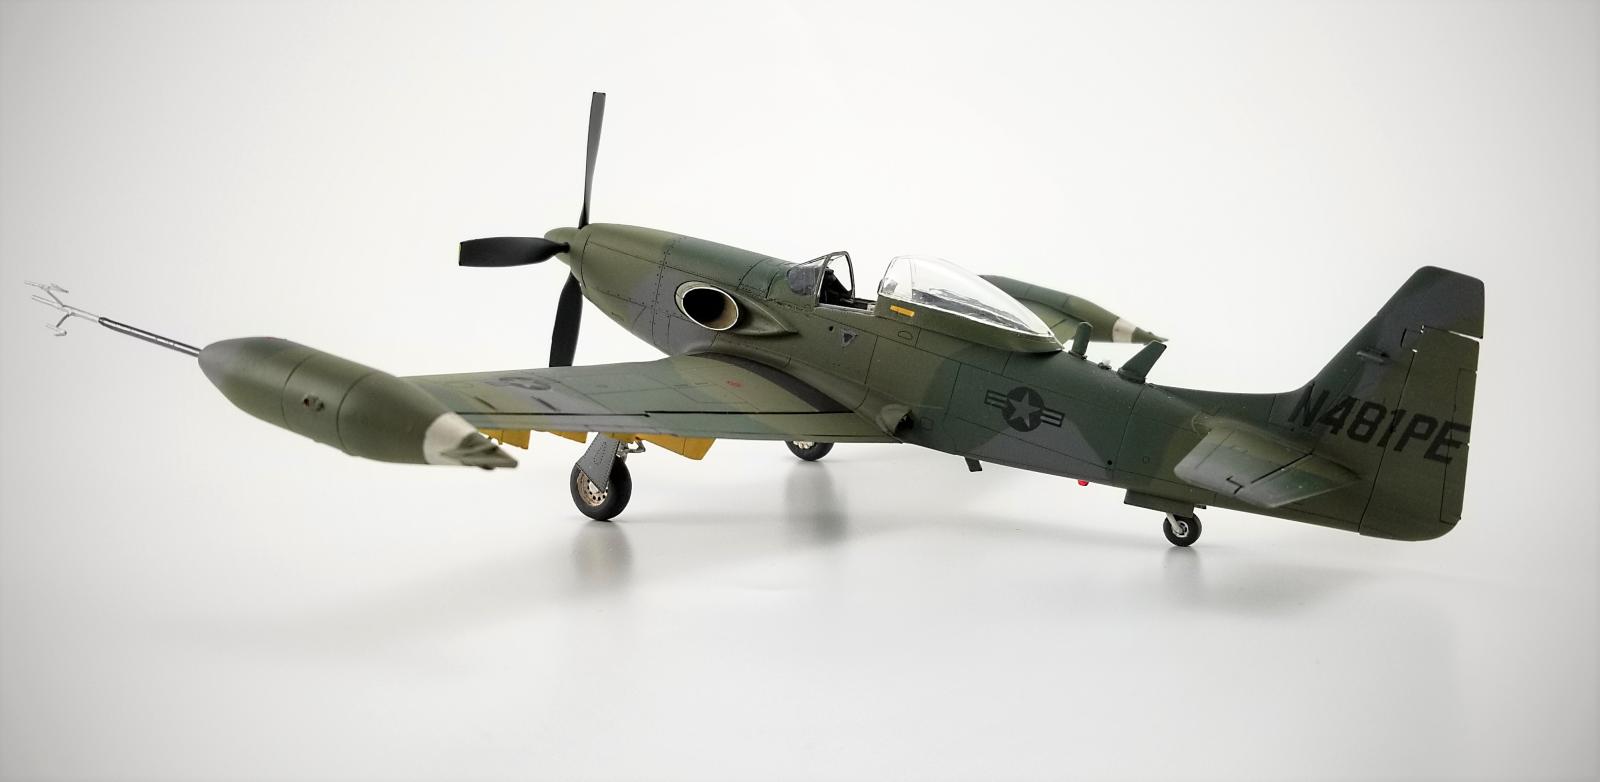
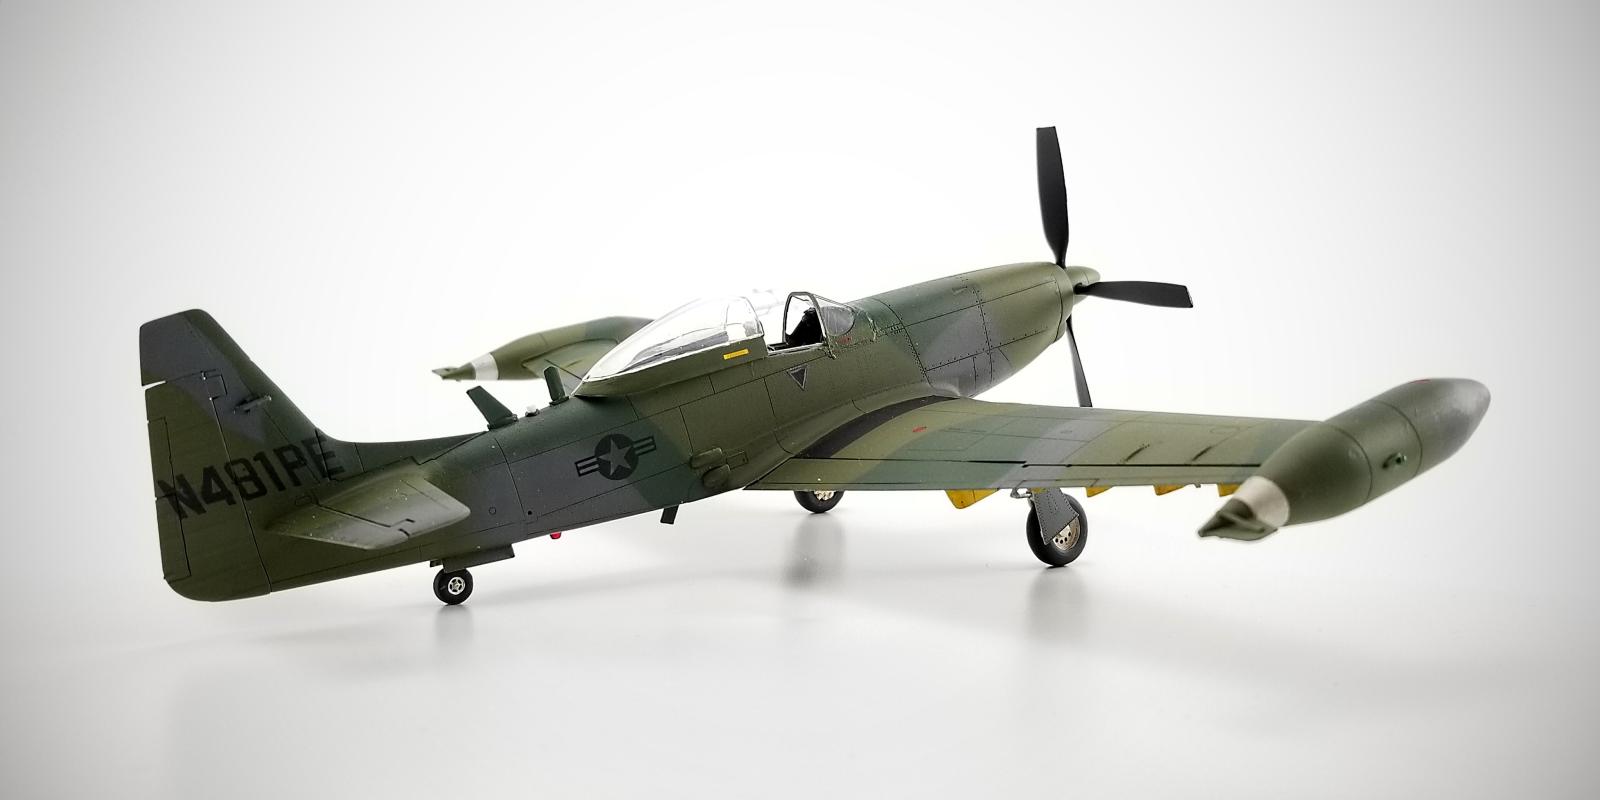
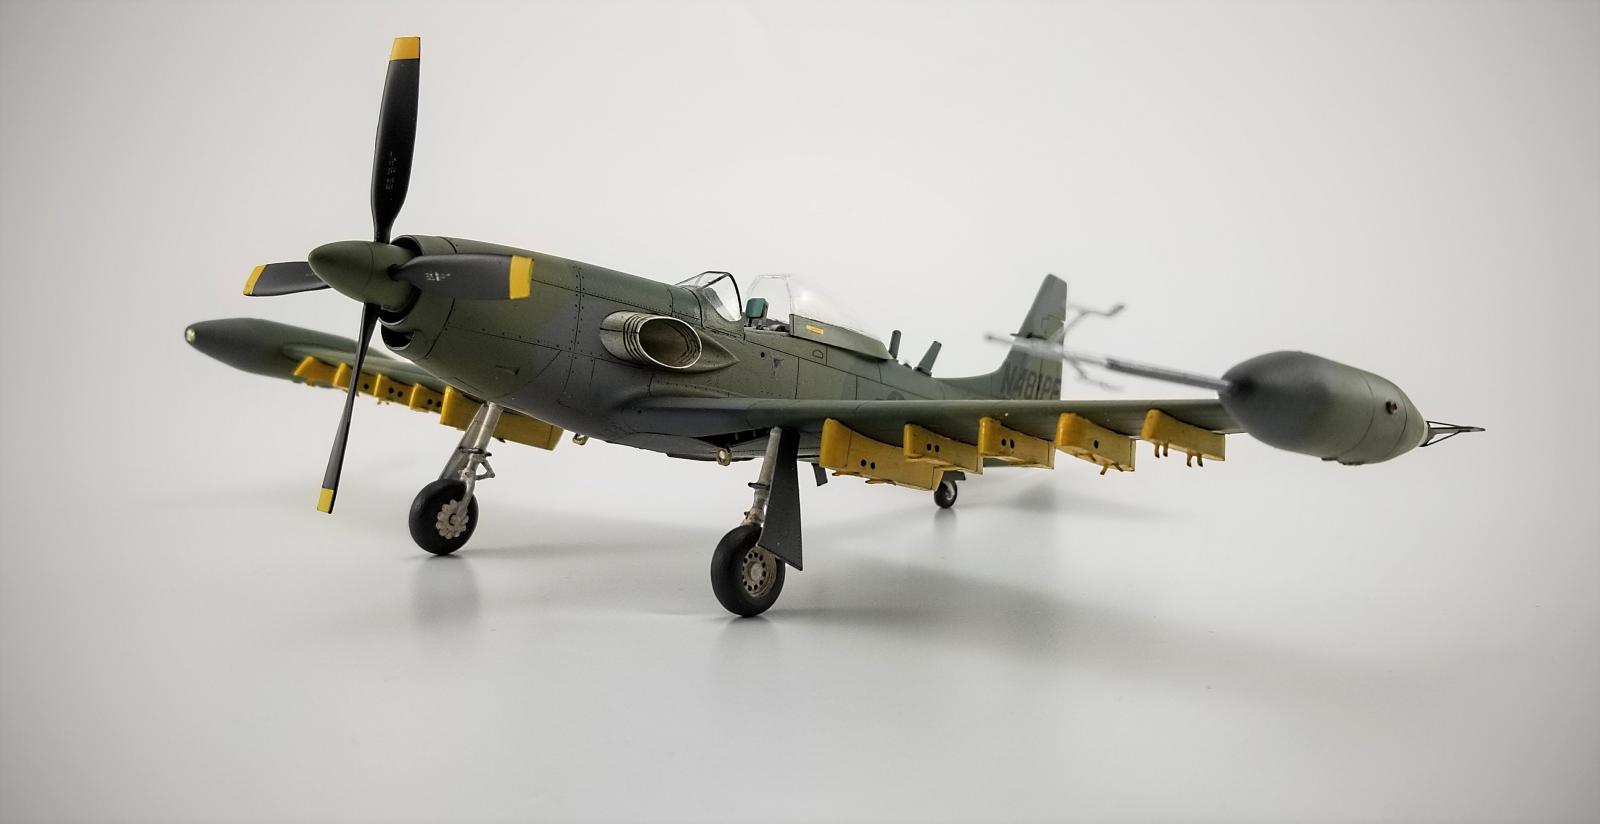
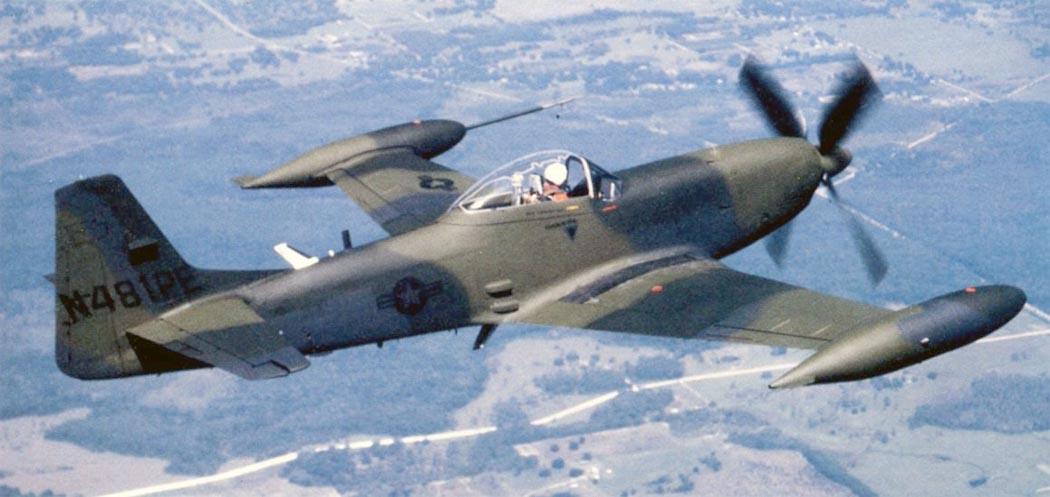
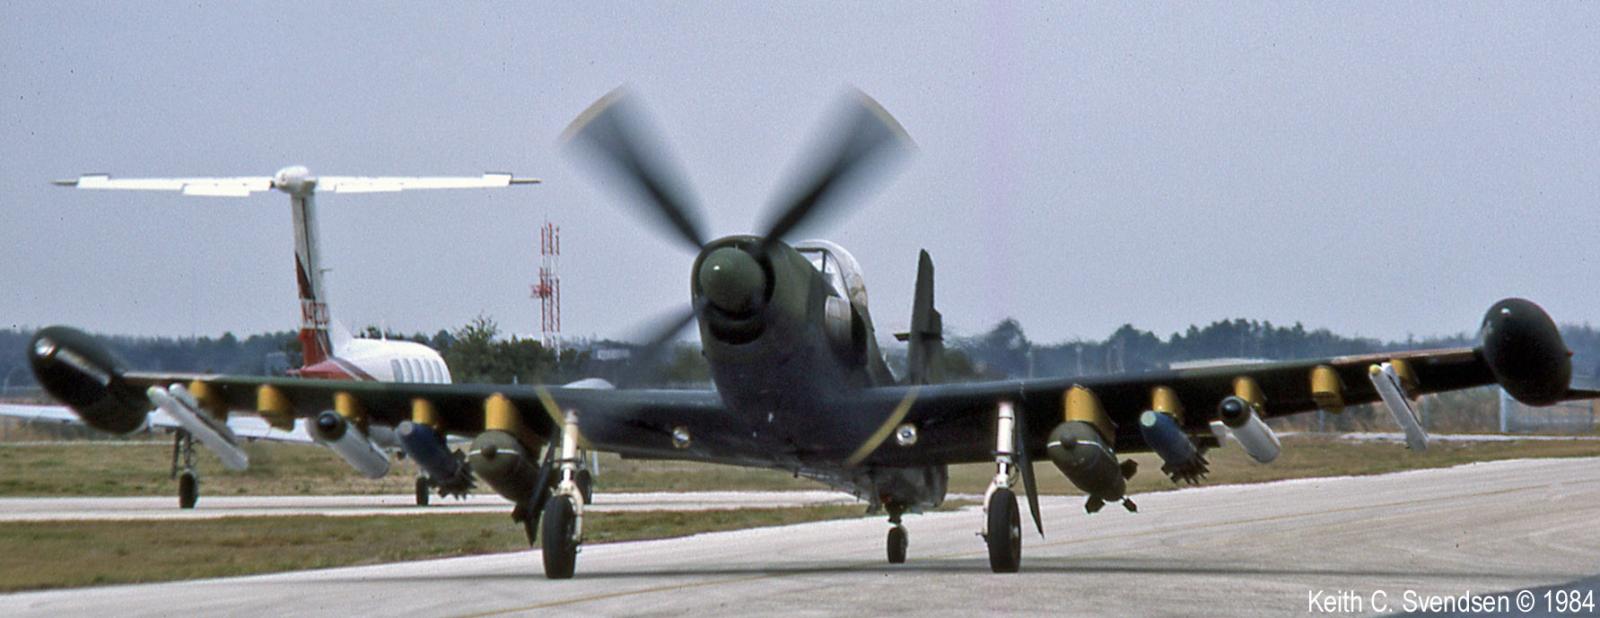
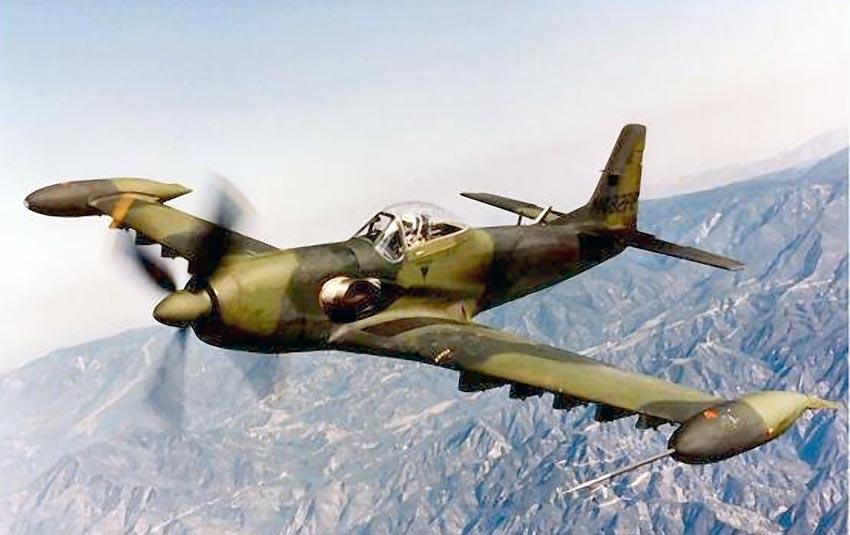
PA-48 Enforcers, N481PE and N482PE, were produced as completely new aircraft but still powered with Lycoming YT55-L-9A engines. Despite retaining less than 10% of the P-51 structure the PA-48 still bore a strong resemblance to its Mustang cousin.
These new Enforcers performed well during the 1983-1984 evaluations but the US Airforce, again, did not make a purchase. Although the PA-48 was a much more cost-effective alternative, by this time, the USAF already had the venerable A-10 Warthog in its inventory. This was the last attempt to sell the idea and the end for the Enforcers.
Today, N481PE and N482PE are the only survivors of the four prototypes produced. N481PE, fully restored, was at the USAF Museum, Dayton, Ohio but now resides at the Pima Air and Space Museum, Tucson, Arizona and N482PE, also restored, is located at the Air Force Flight Test Museum, Edwards Air Force base.
KITS
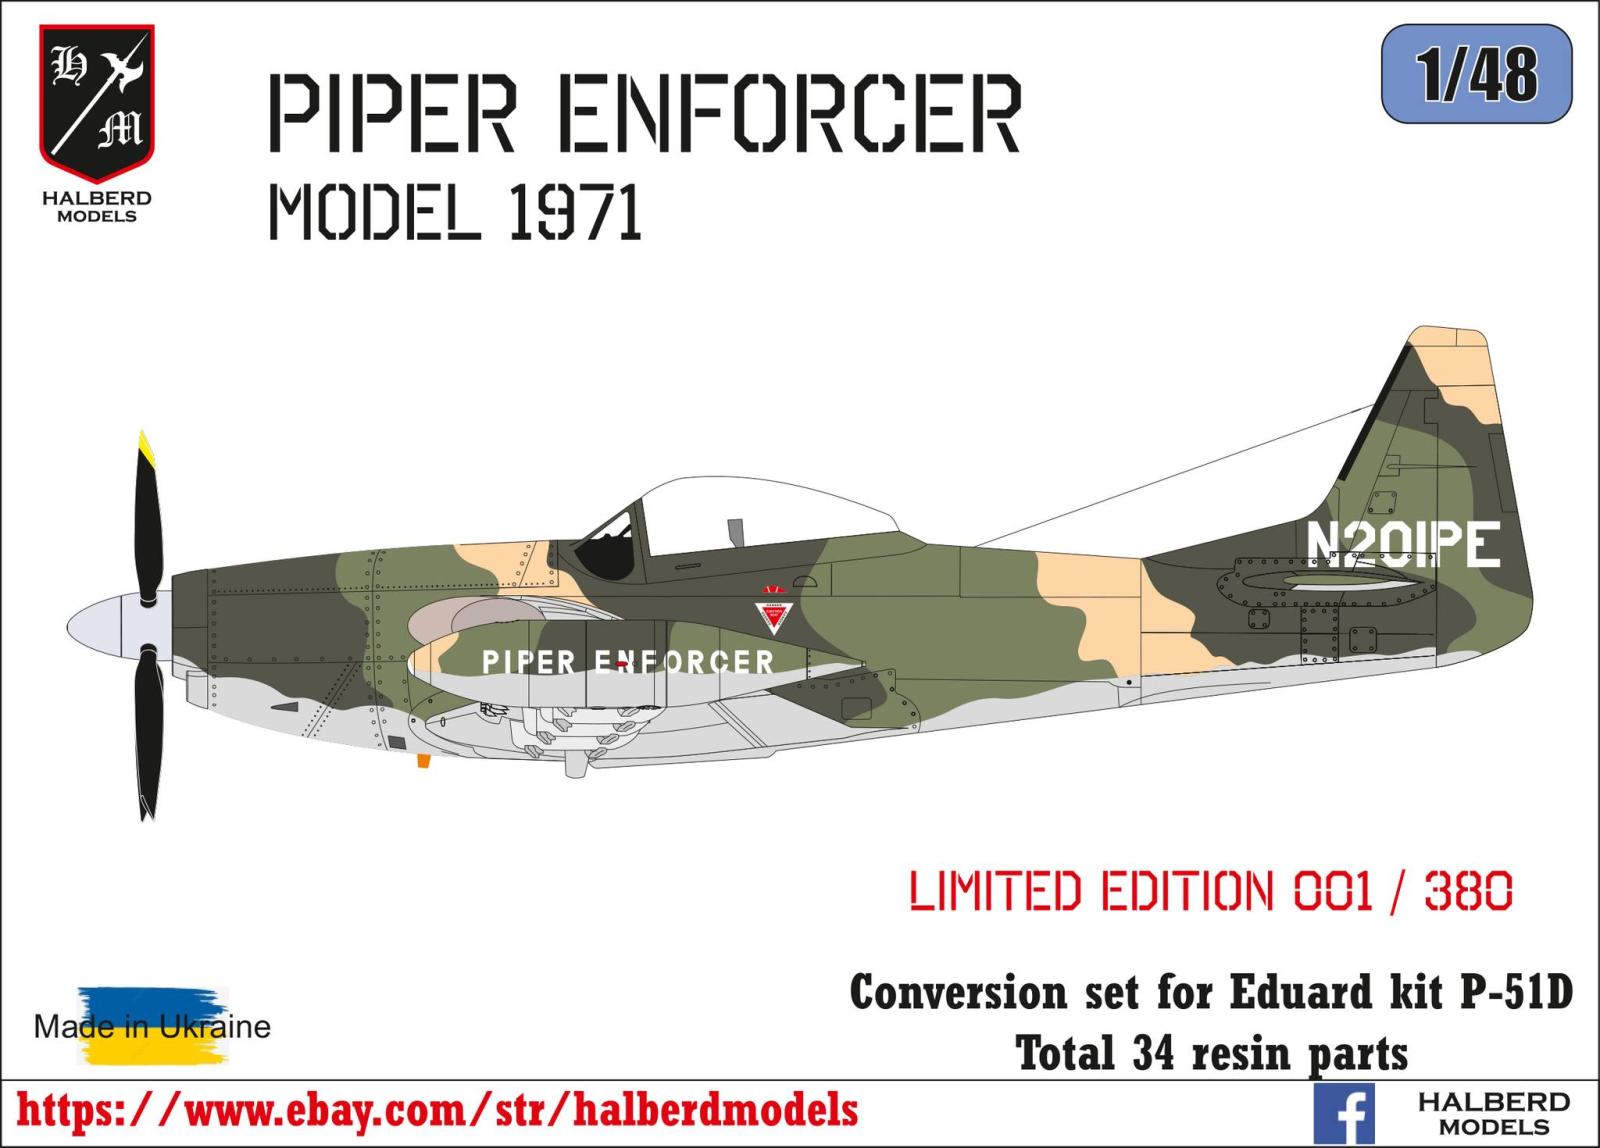
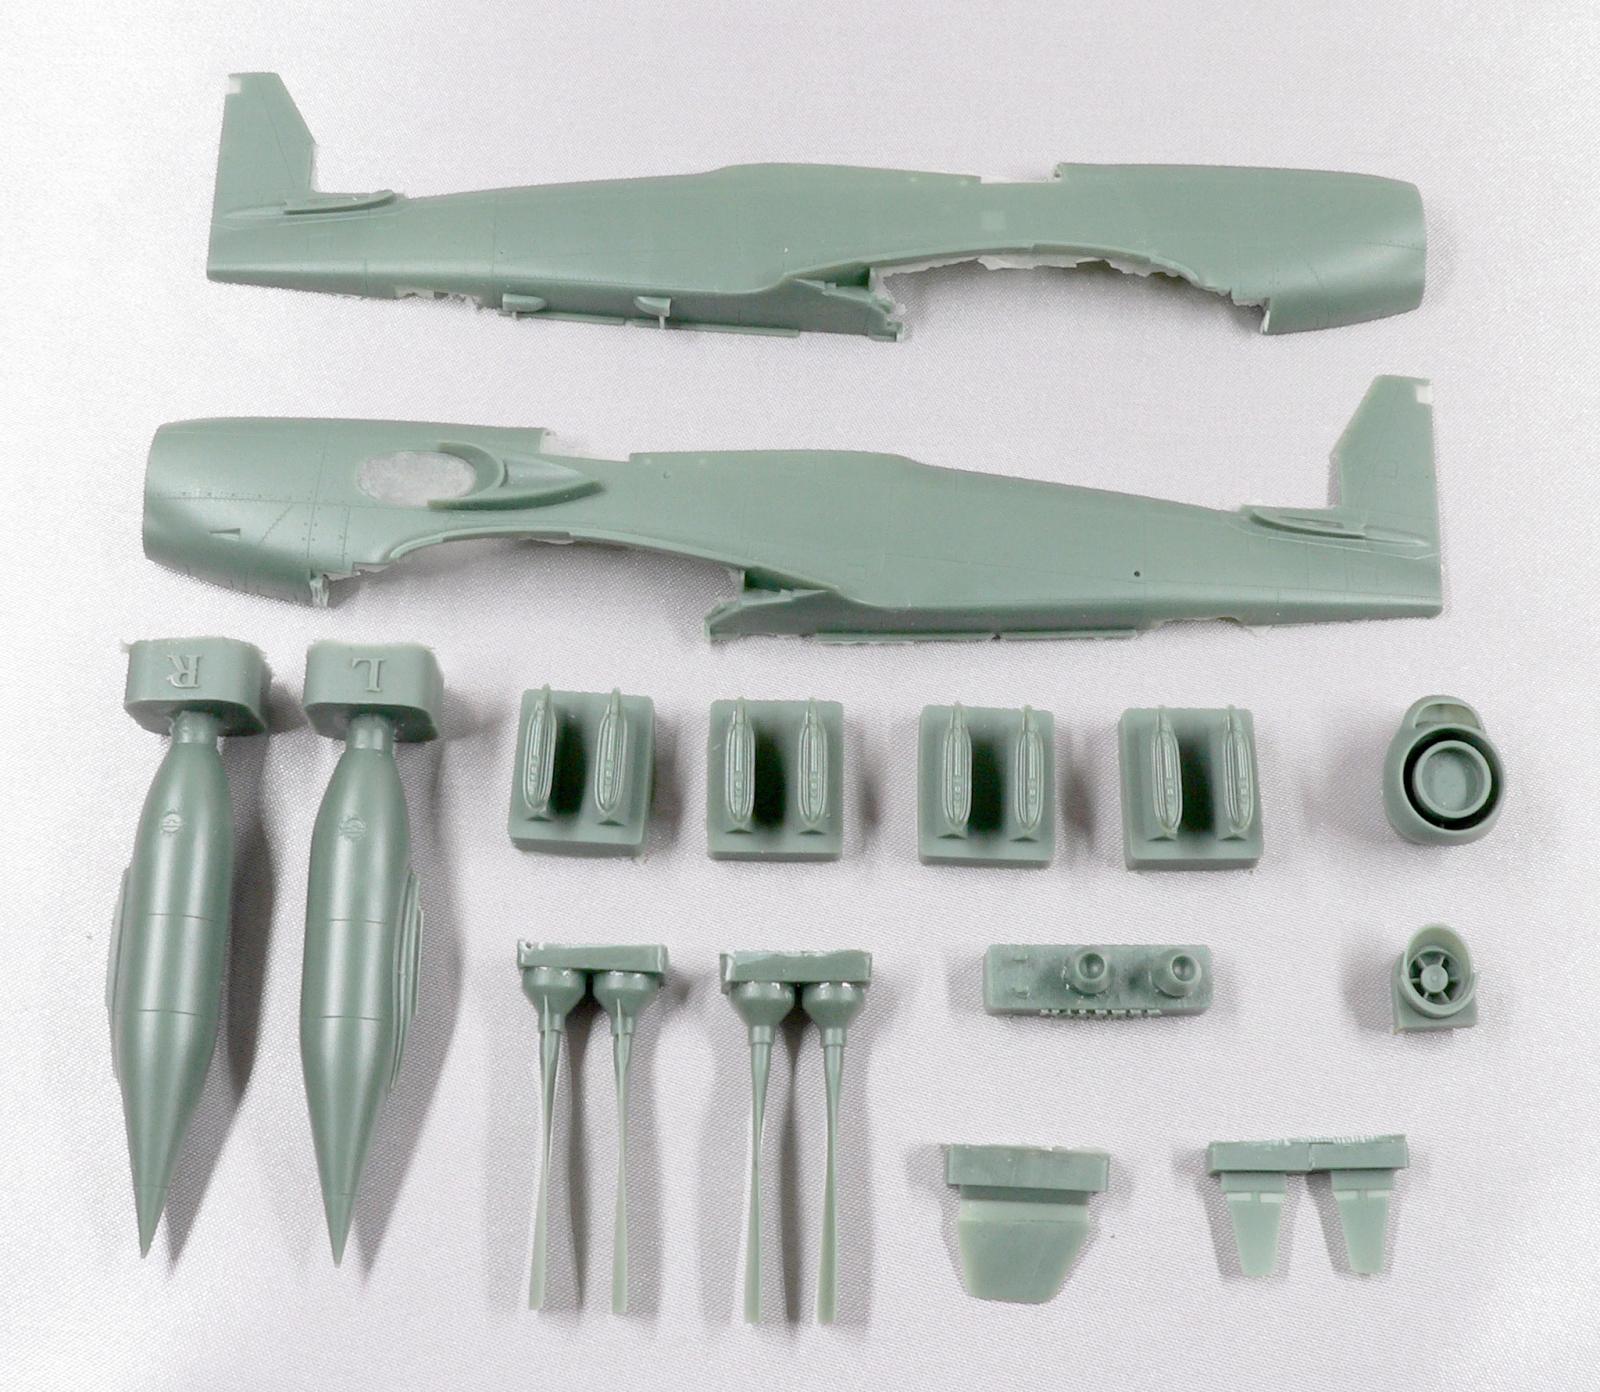
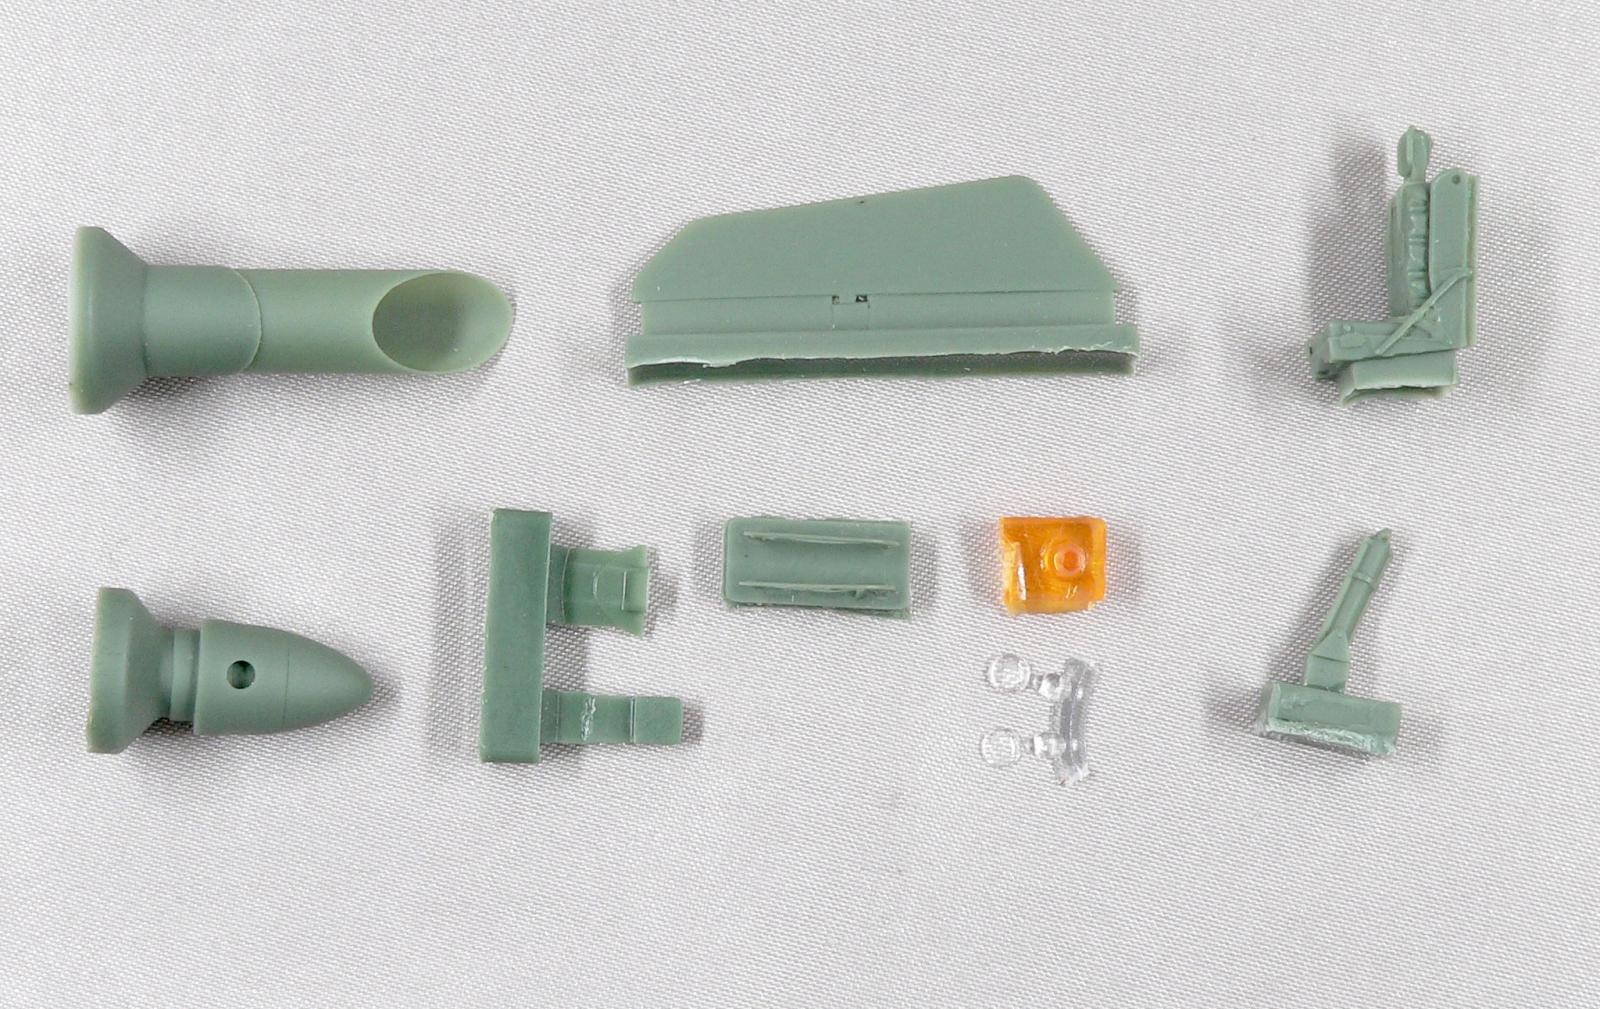
1/48 HALBERD MODELS LIMITED EDITION RESIN PIPER ENFORCER
1/48 EDUARD F-6D/K No.82103
THE BUILD:
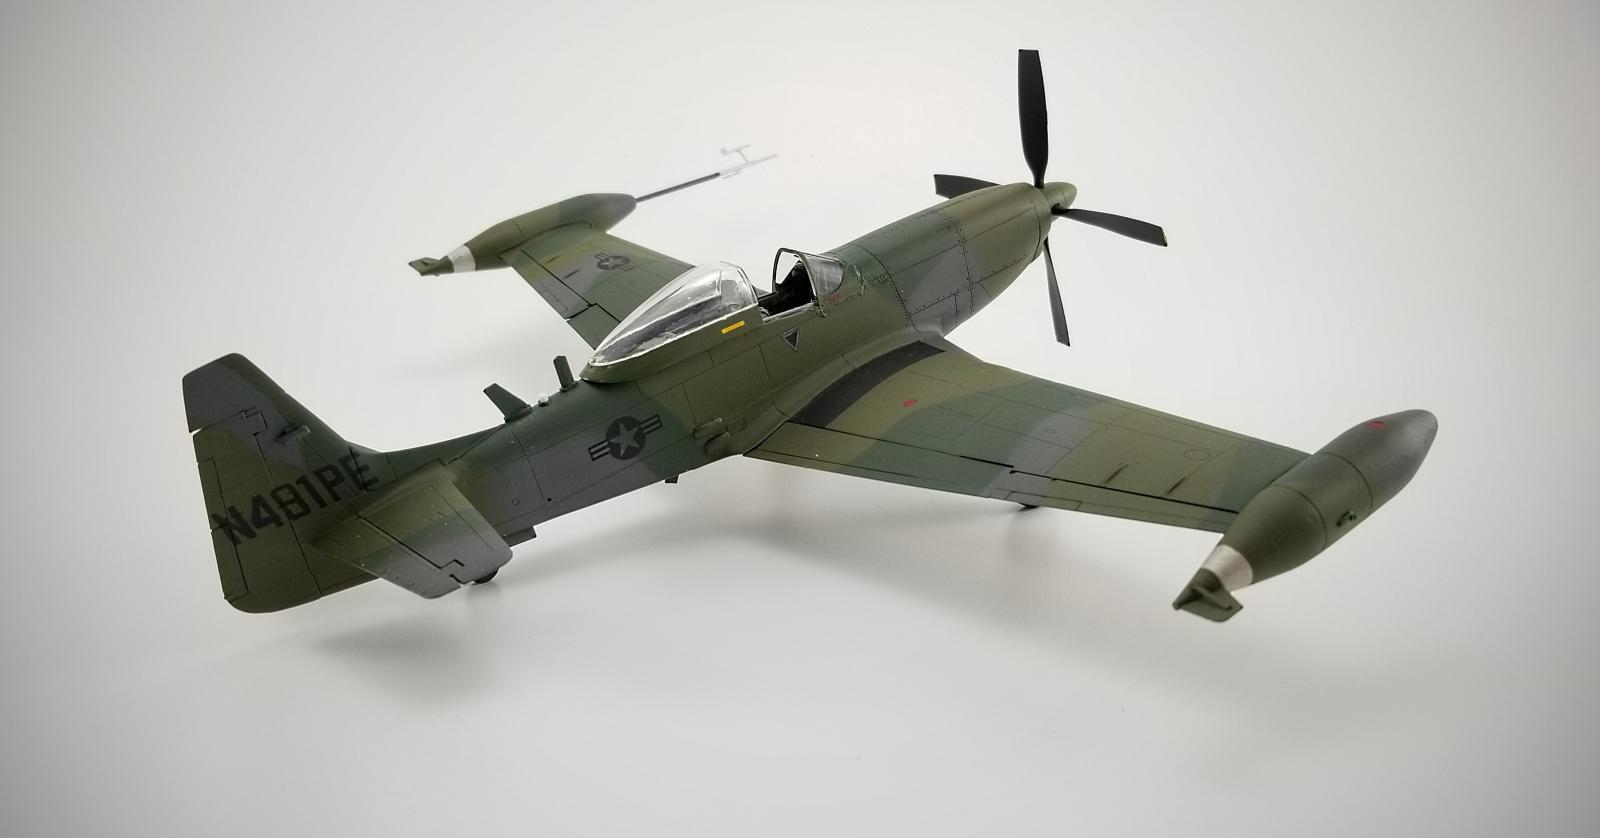
The Halberd Enforcer kit is designed to be used with the 1/48 Eduard P-51D or K and will build the early, single seat, N201PE.
I wanted to build one of the latter two versions, so I needed to make the following conversions:
MODS:
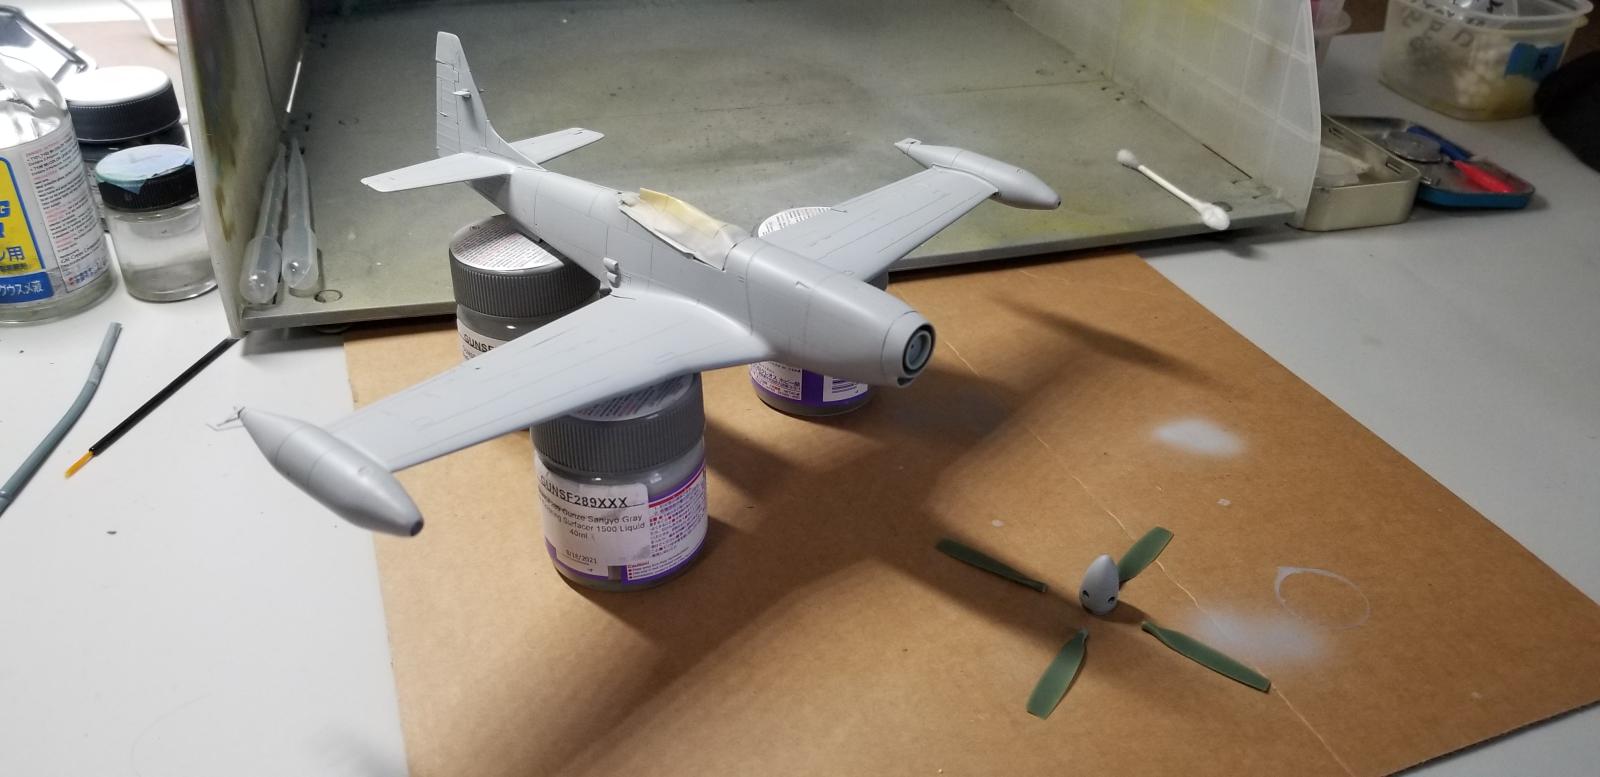
Wings:
Gun ports and ejector holes were filled in.
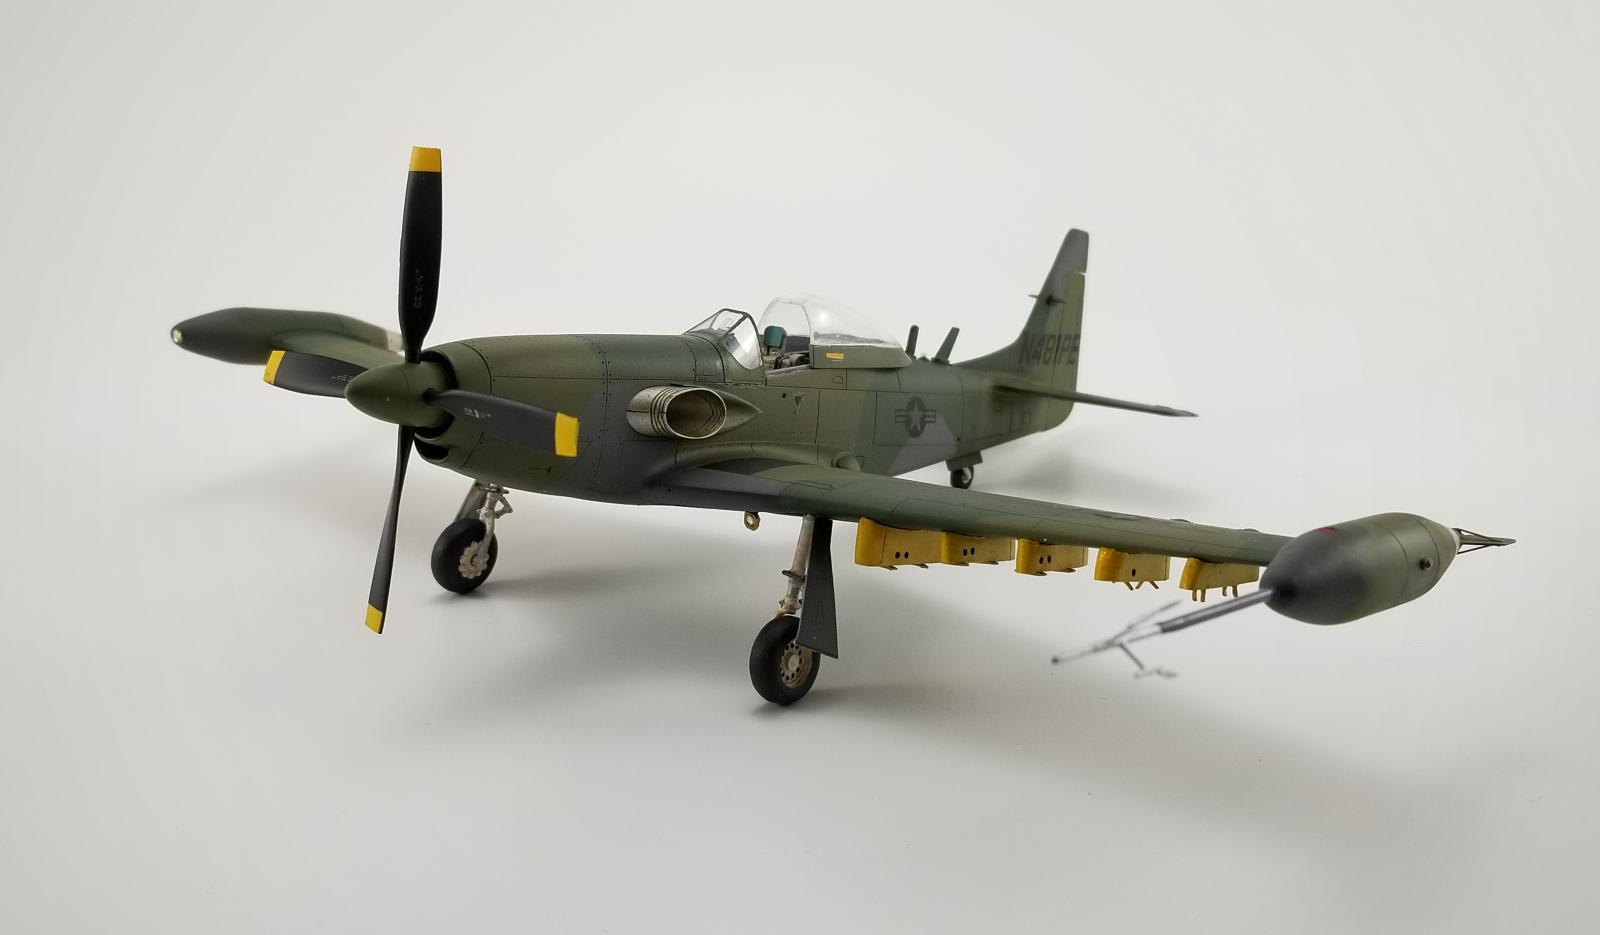
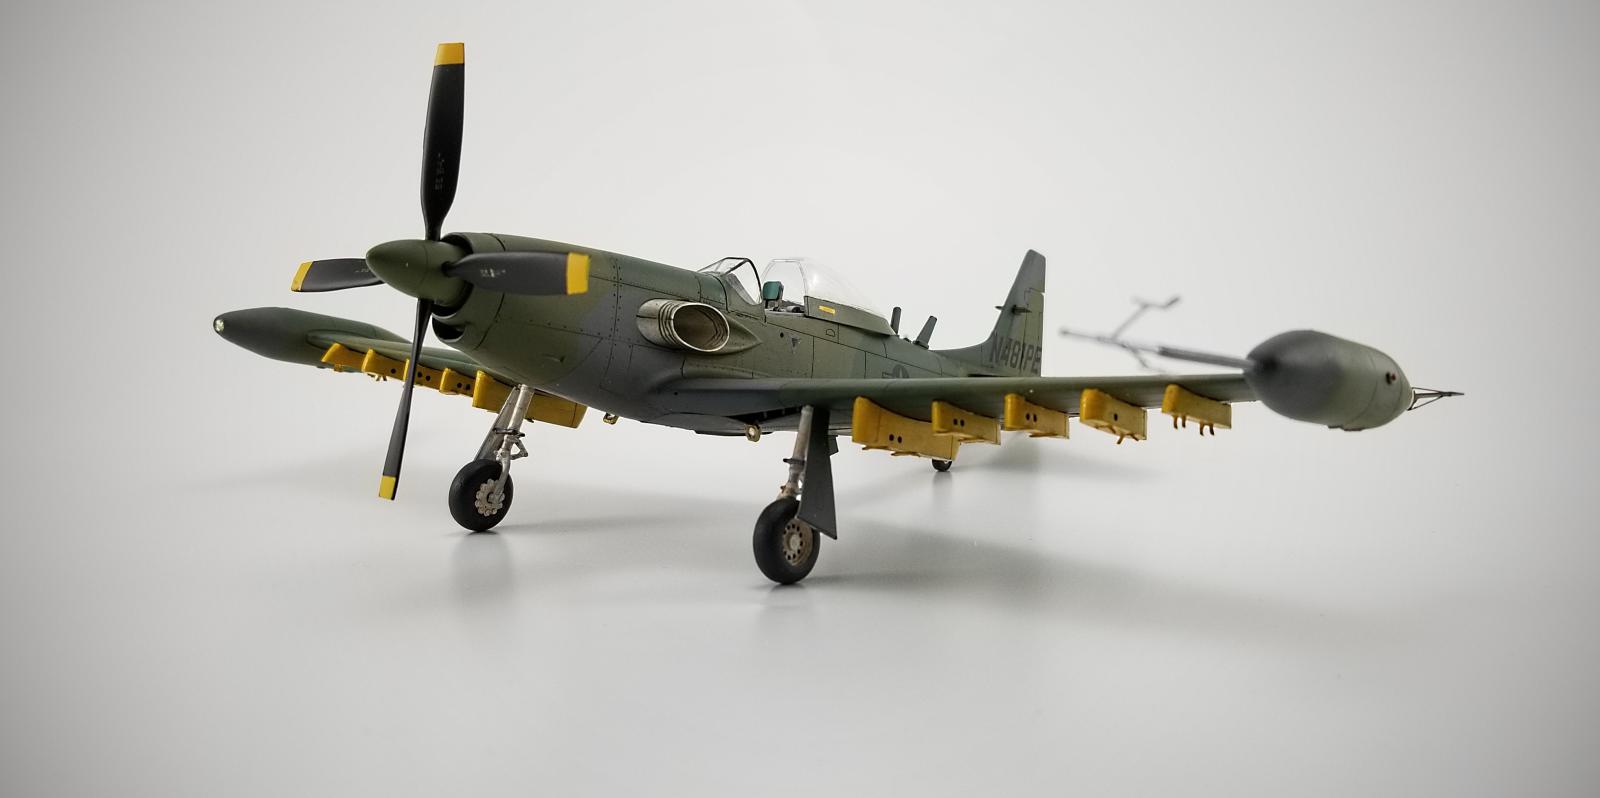
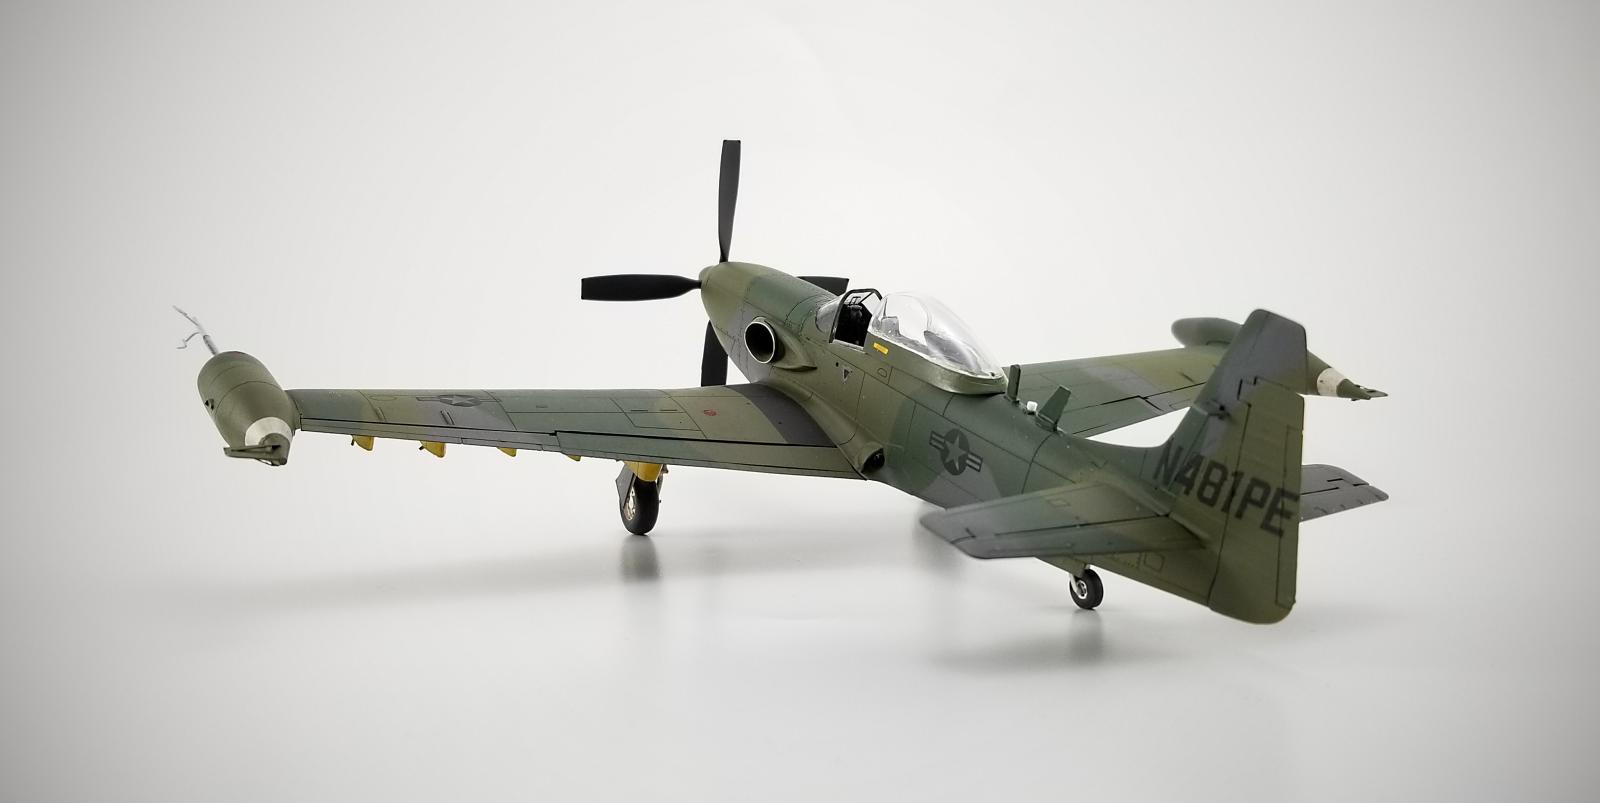
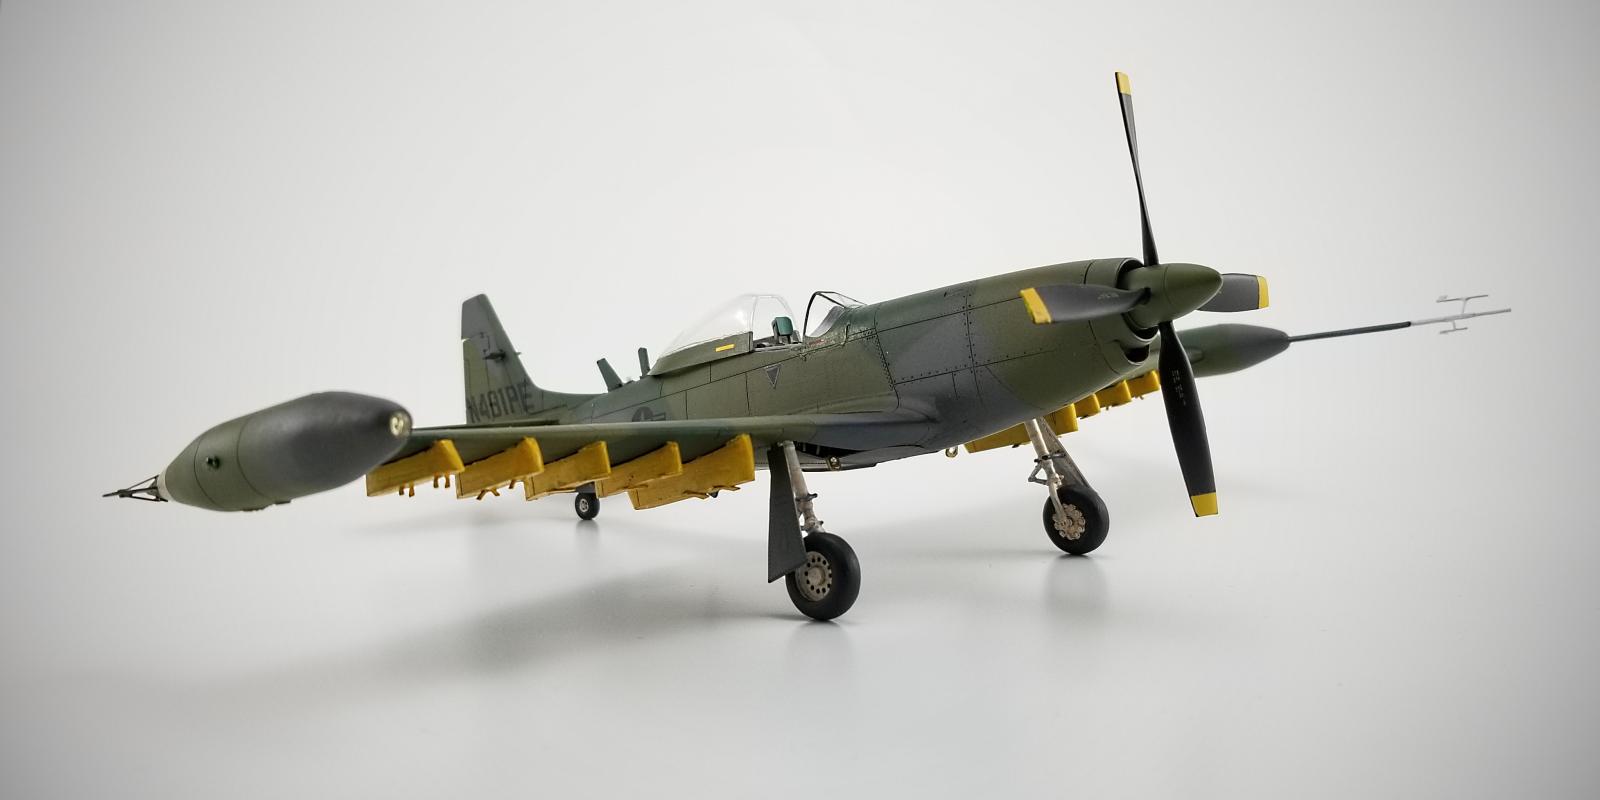
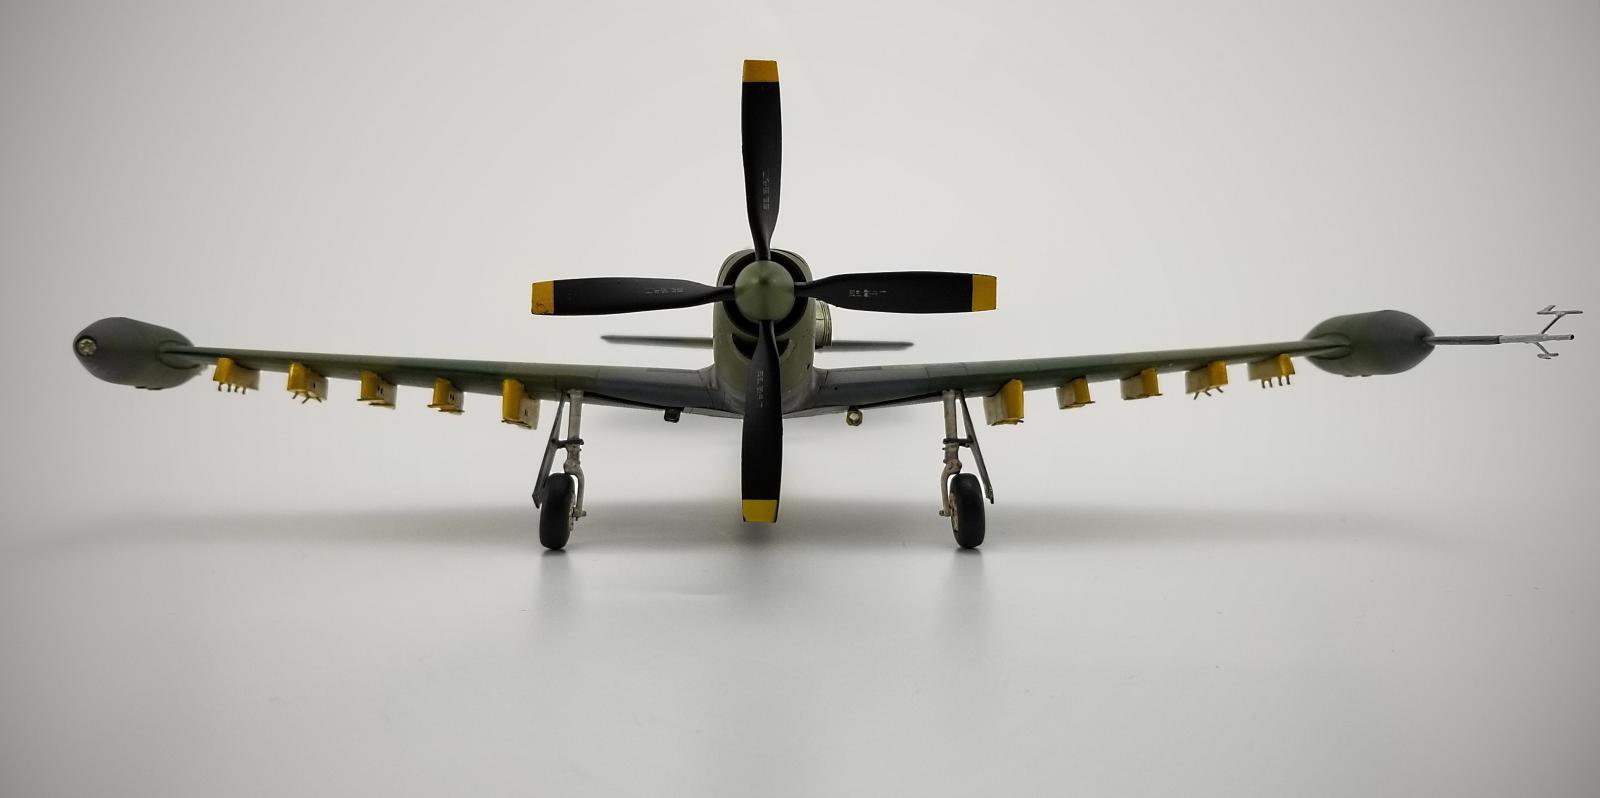
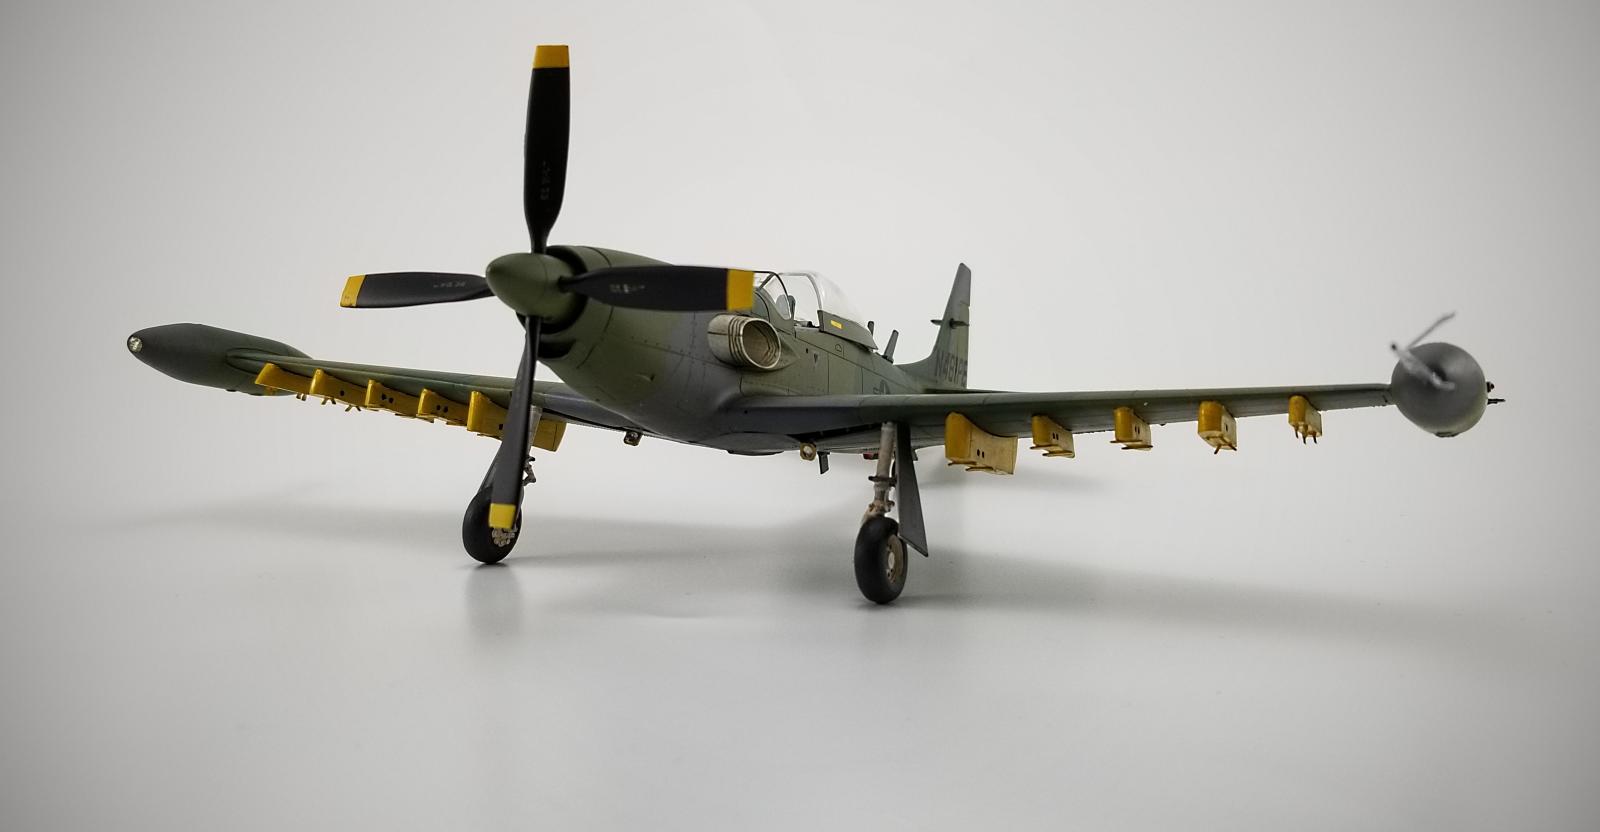
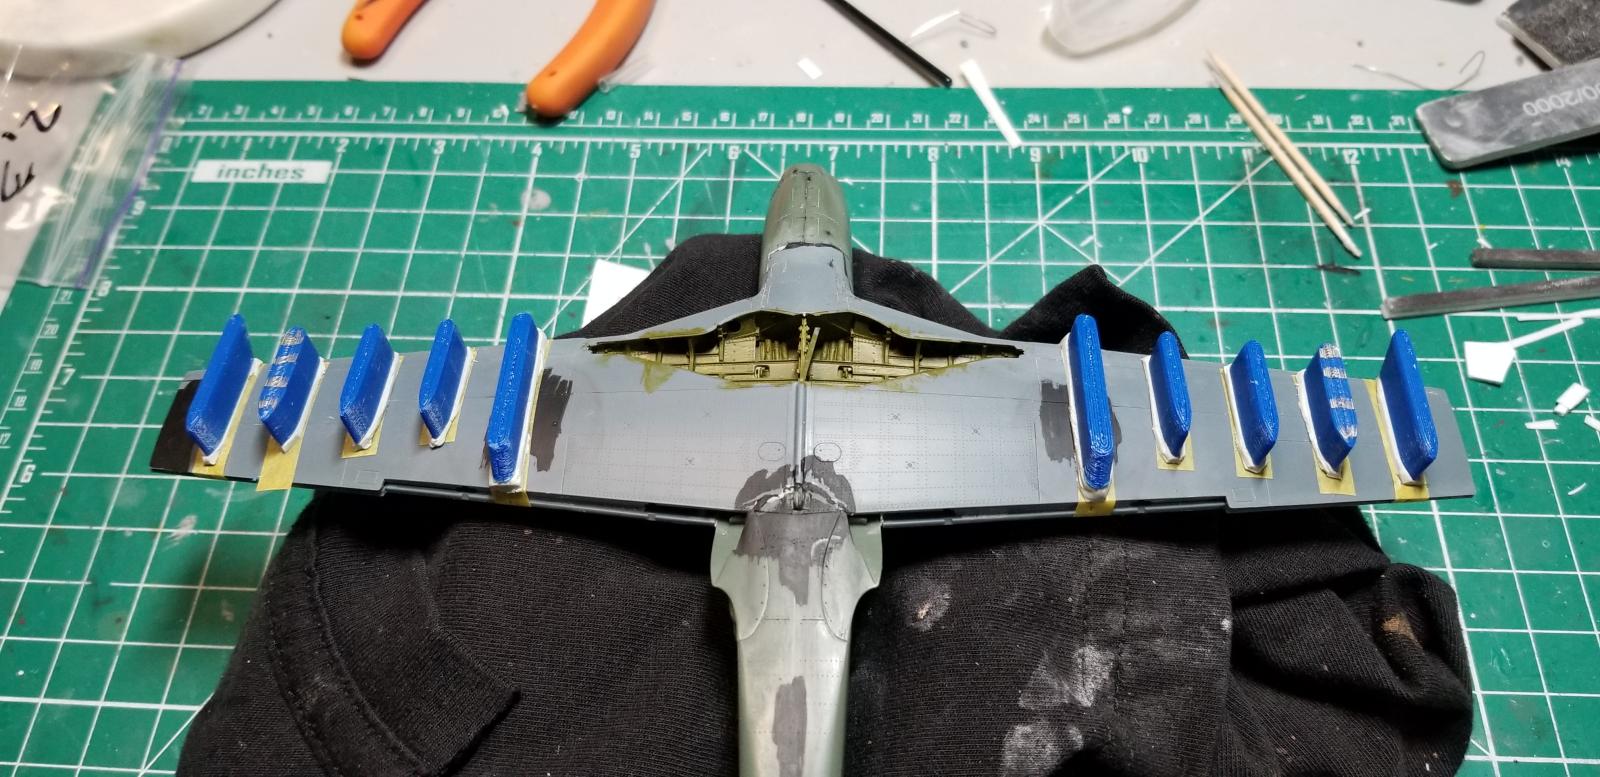
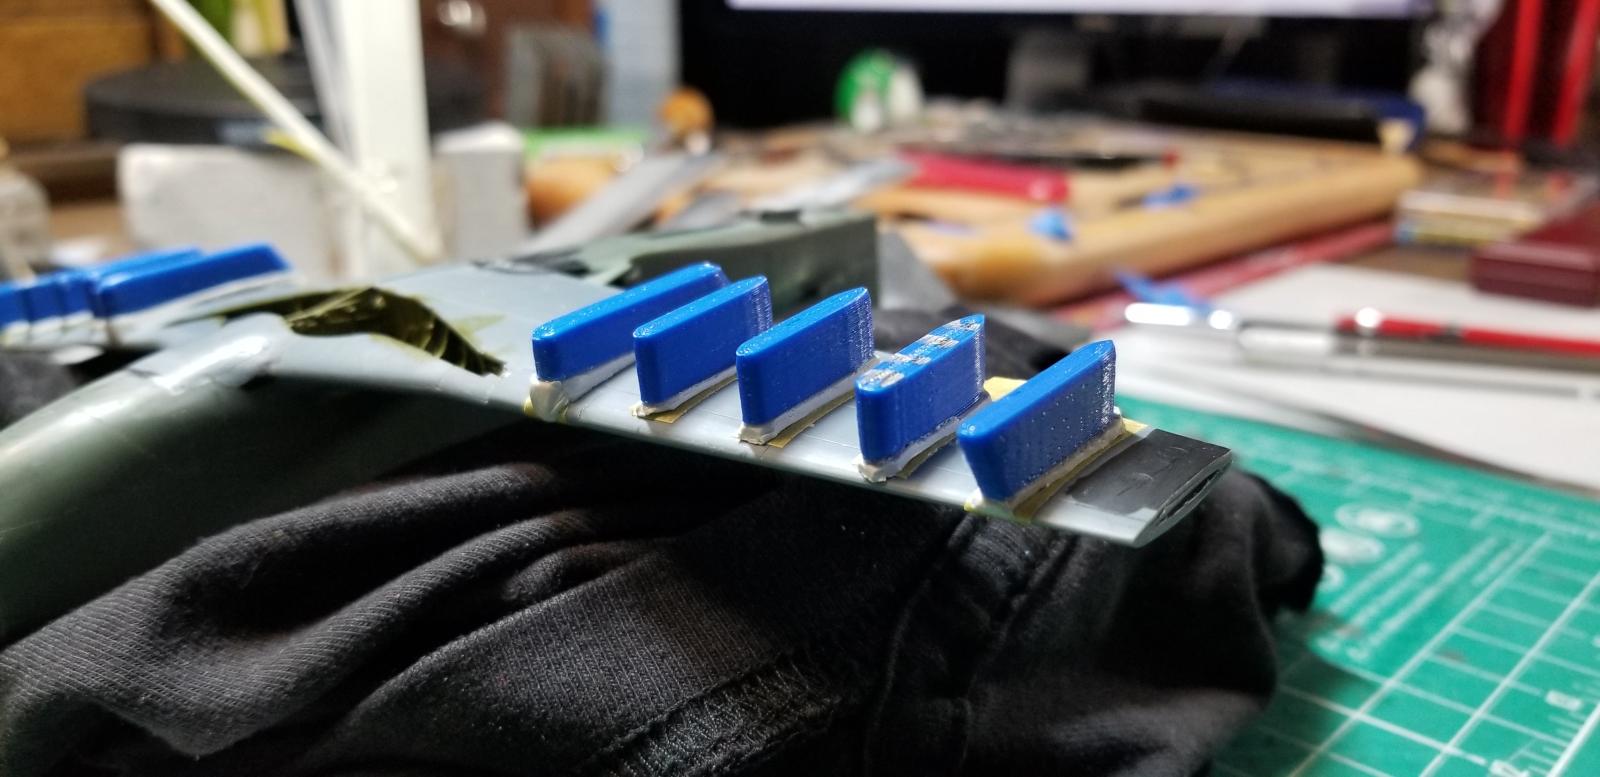
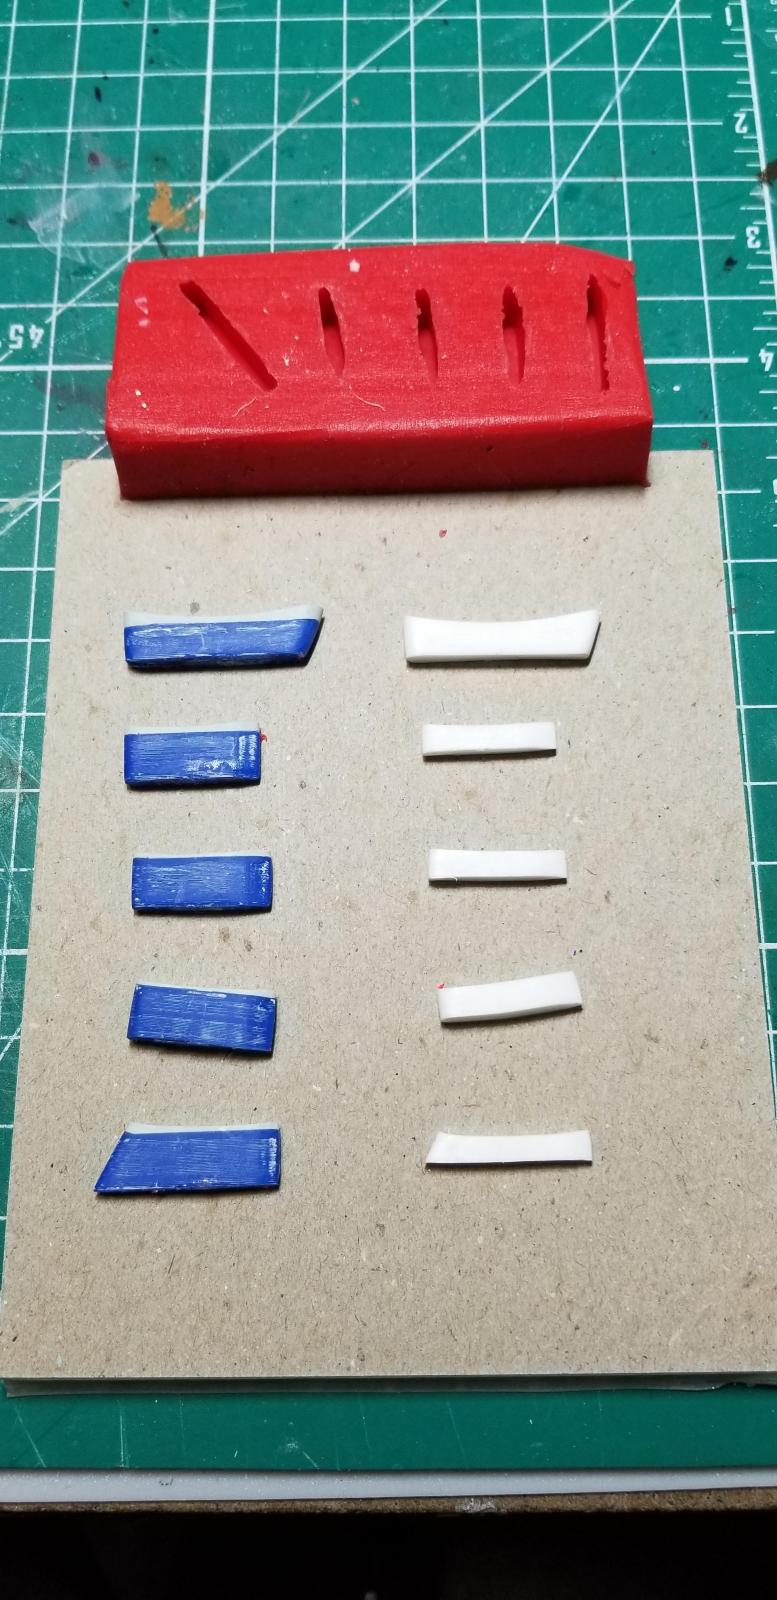
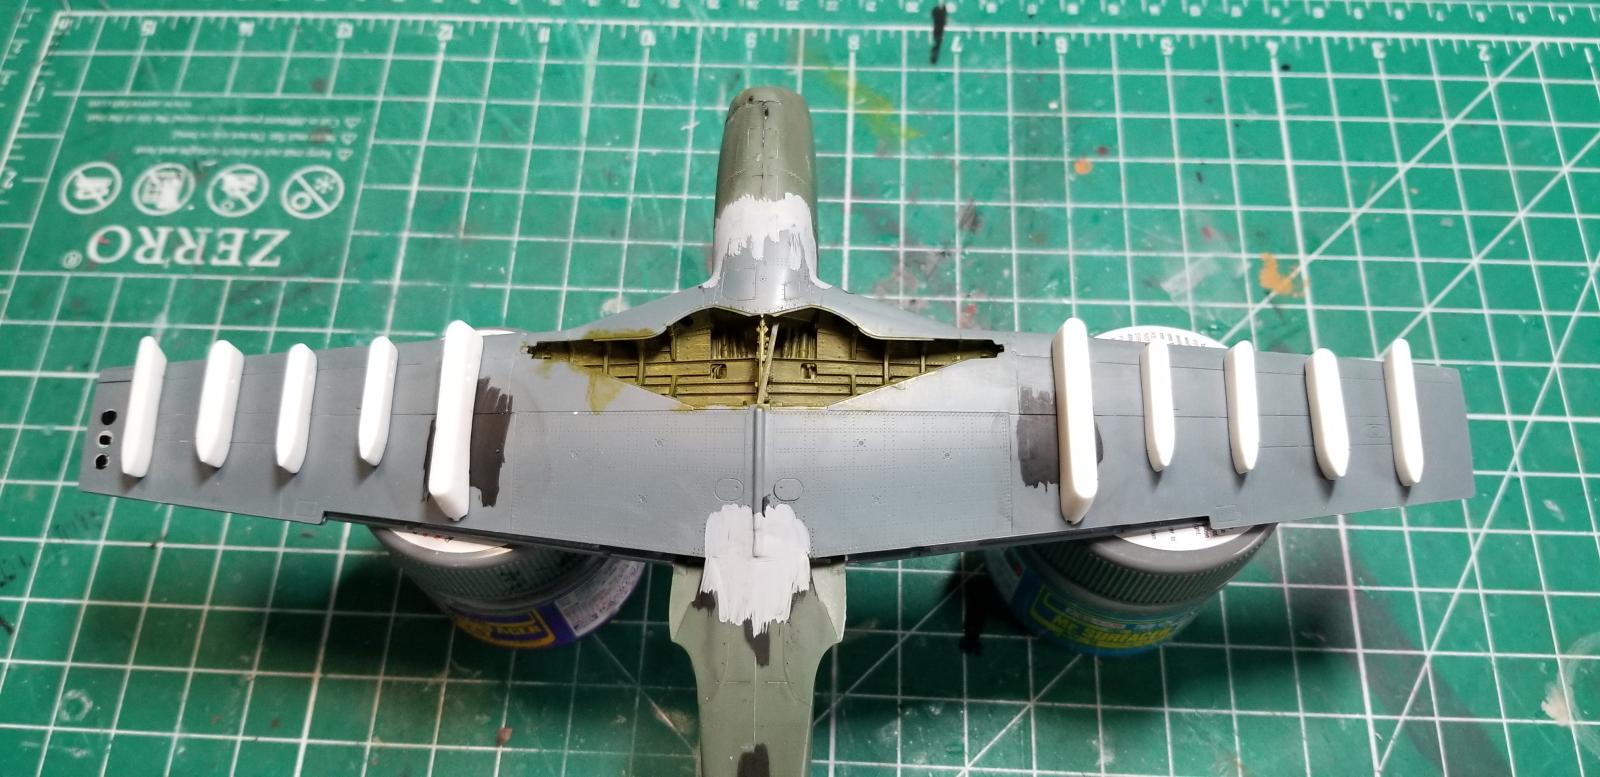
New Underwings Pylons:
Using CAD I modeled each pylon, and a co-worker 3D printed them for me. (Thanks, Phil !)
These 3D pieces and Aves Apoxie putty, (used to replicate the wing shape), were used to create mold patterns for casting resin parts. The resin parts were trimmed to size and styrene pieces added for shackle details.
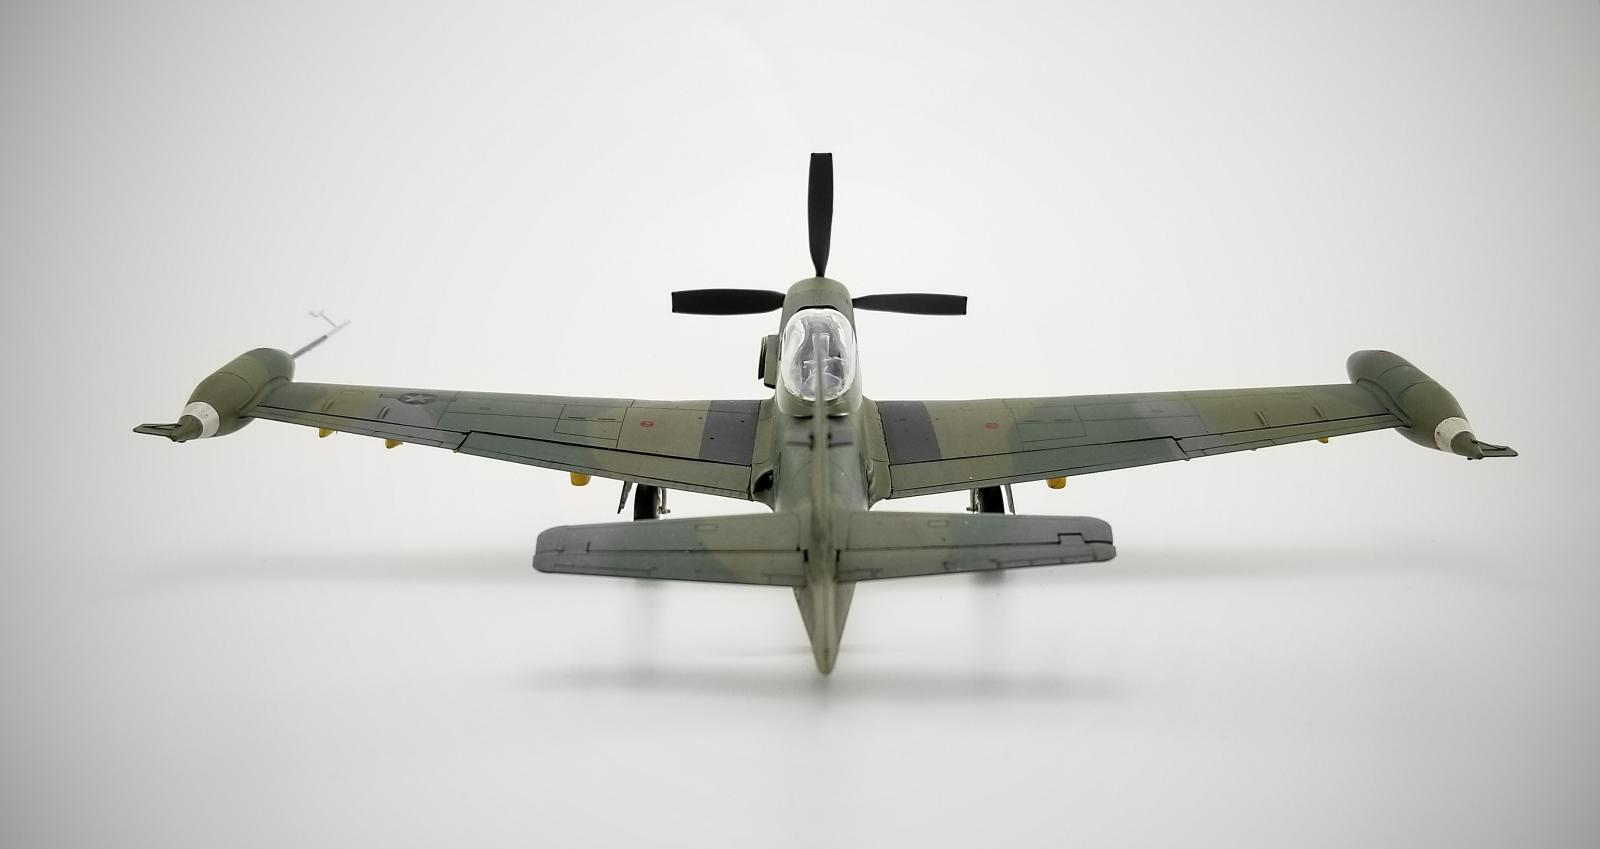
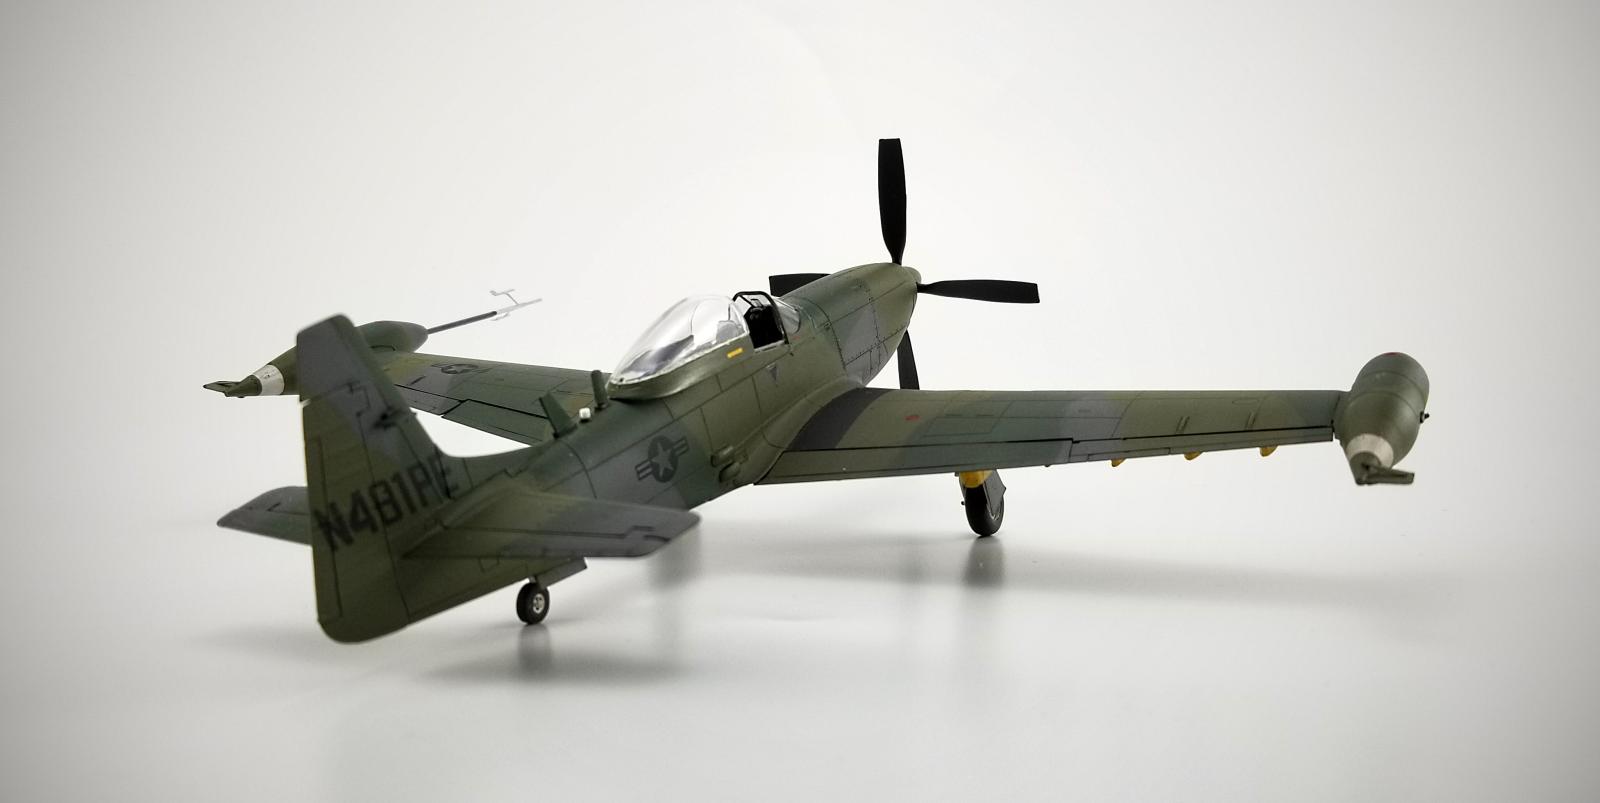
Wingtip Tanks:
Fins were added using styrene for the fins and brass photo-etch supports.
Port and starboard nav lights were added with small clear sprue and green-stuff putty to shape the housings. The clear poritons were painted with Tamiya clear red and green.
Starboard tip light was created with aluminum foil and filled with clear UV epoxy.
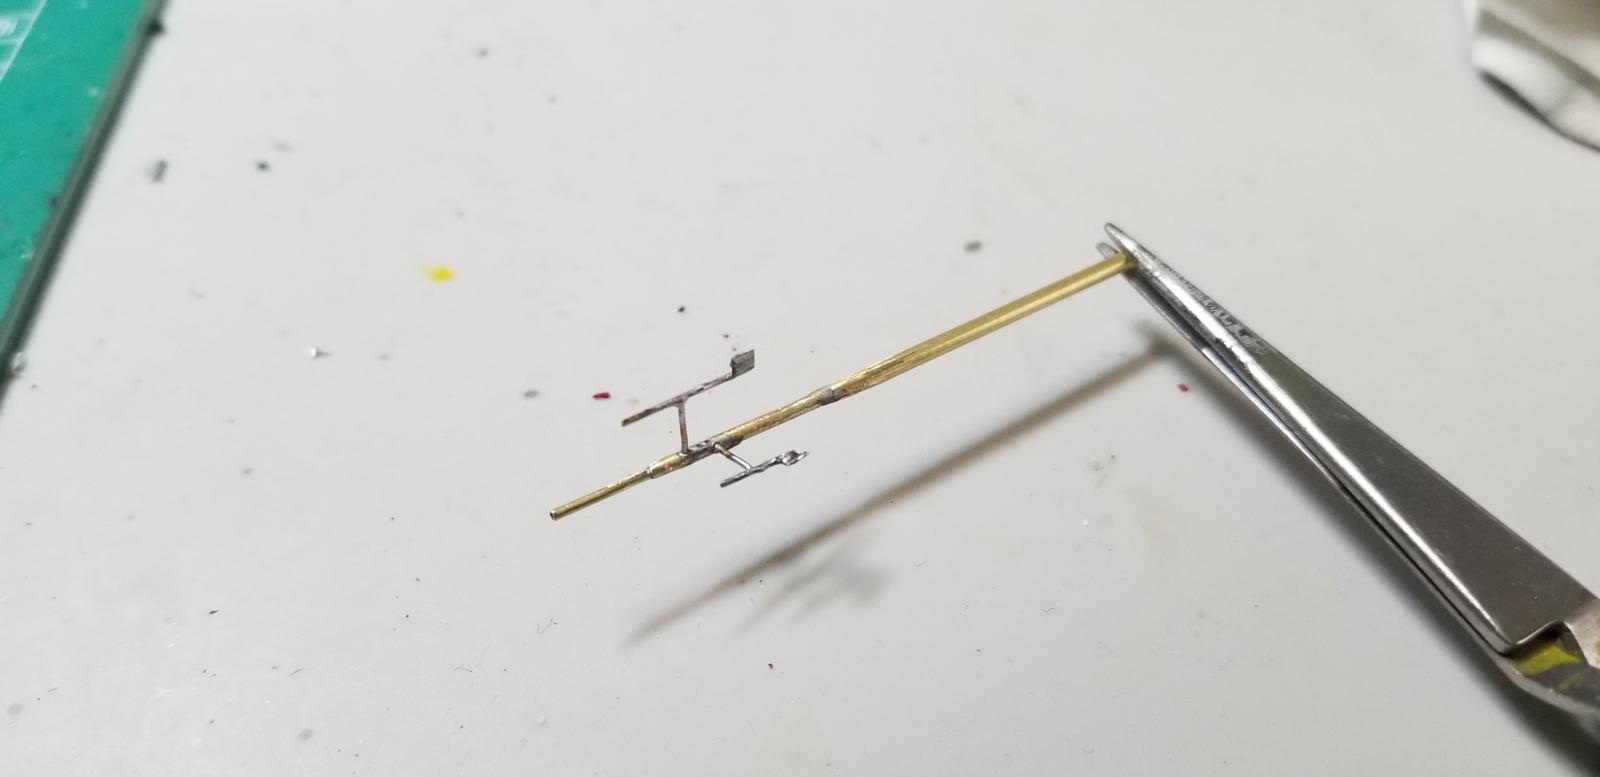
Port tank probe/pitot is soldered brass tubing, brass wire and photo-etch.
Fuselage:
Two scoops located on the fuselage bottom were sawed off and repositioned to the fuselage starboard side.
A Cowl Heat Vent was added to the port side wing root using photo-etch for the louver fins and a piece from the spare parts box, that resembled the cover shape, thinned and trimmed to size.
Three vertical fuselage Antennas were shaped with styrene and pinned in place.
Top nav light added using white styrene rod with green-stuff putty added for the base.
Vertical Fin:
The Port and Starboard small horizontal fins were cut from styrene and added to the tail surface.
The second rudder trim tab was scribed in.
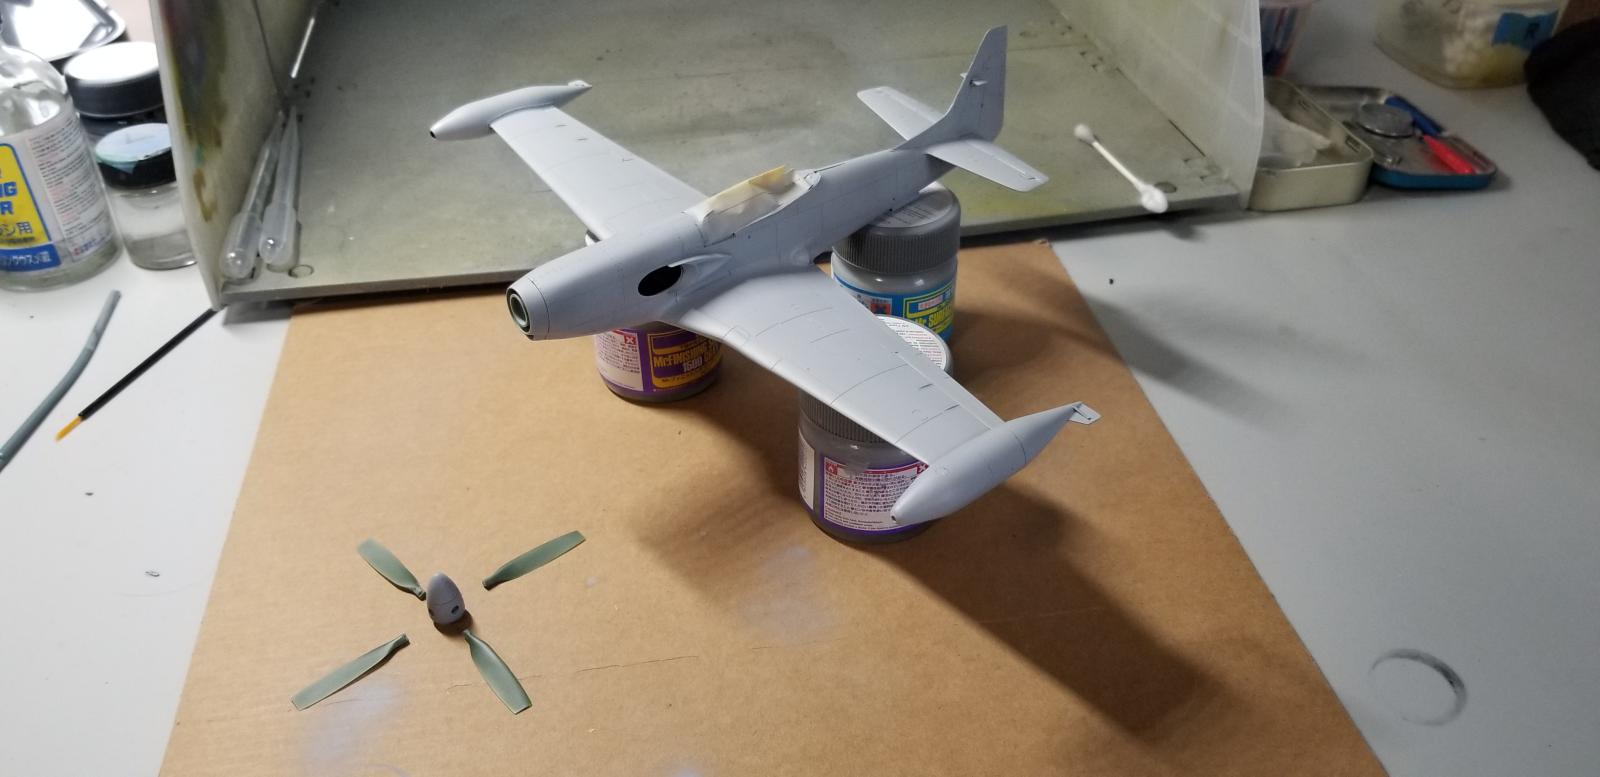
Main Gear Wheels:
Wheels were used from the spares box. Holes were drilled and a hub added on the outboard side. Inboard side brakes were created from discs punched from styrene and glued together around the perimeter of a central styrene disc.
Main Wheel Doors:
Pictures of the Enforcer show the main, inner, gear doors closed. The Eduard parts, intended to be displayed open, did not fit in the closed position. Using the kit parts as templates new ones were cut from styrene, scribed, riveted, and installed.
Two gear well lights were made from styrene and clear UV epoxy.
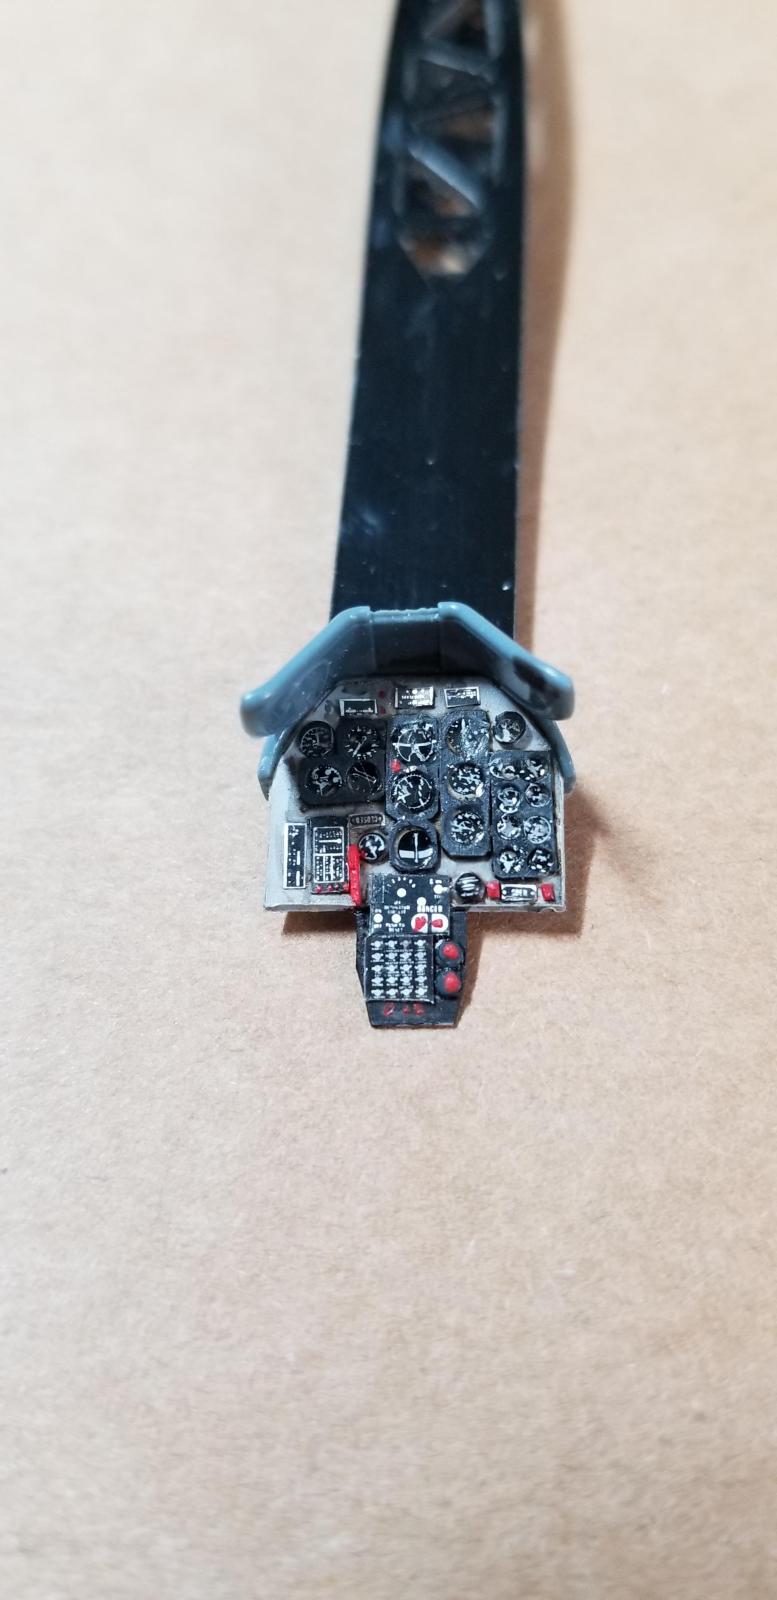
Cockpit:
The main panel was cut from styrene, using the kit piece as a template, and a lower portion was added using styrene. Individual instrument bezels were punched and cut from styrene, added instrument decals and sealed with clear UV cured epoxy. Various placards were used from bits and pieces from the spare decals stash. Not exact to real thing but close enough for 1/48.
Both side consoles were also spruced up with added bits and decals. A guitar string used for the oxygen tube.
From the few photos I could find, behind the ejector seat was empty, no radio deck like the P-51, so I added some floor wiring with thin solder and styrene strips to the fuselage sides for added visual detail.
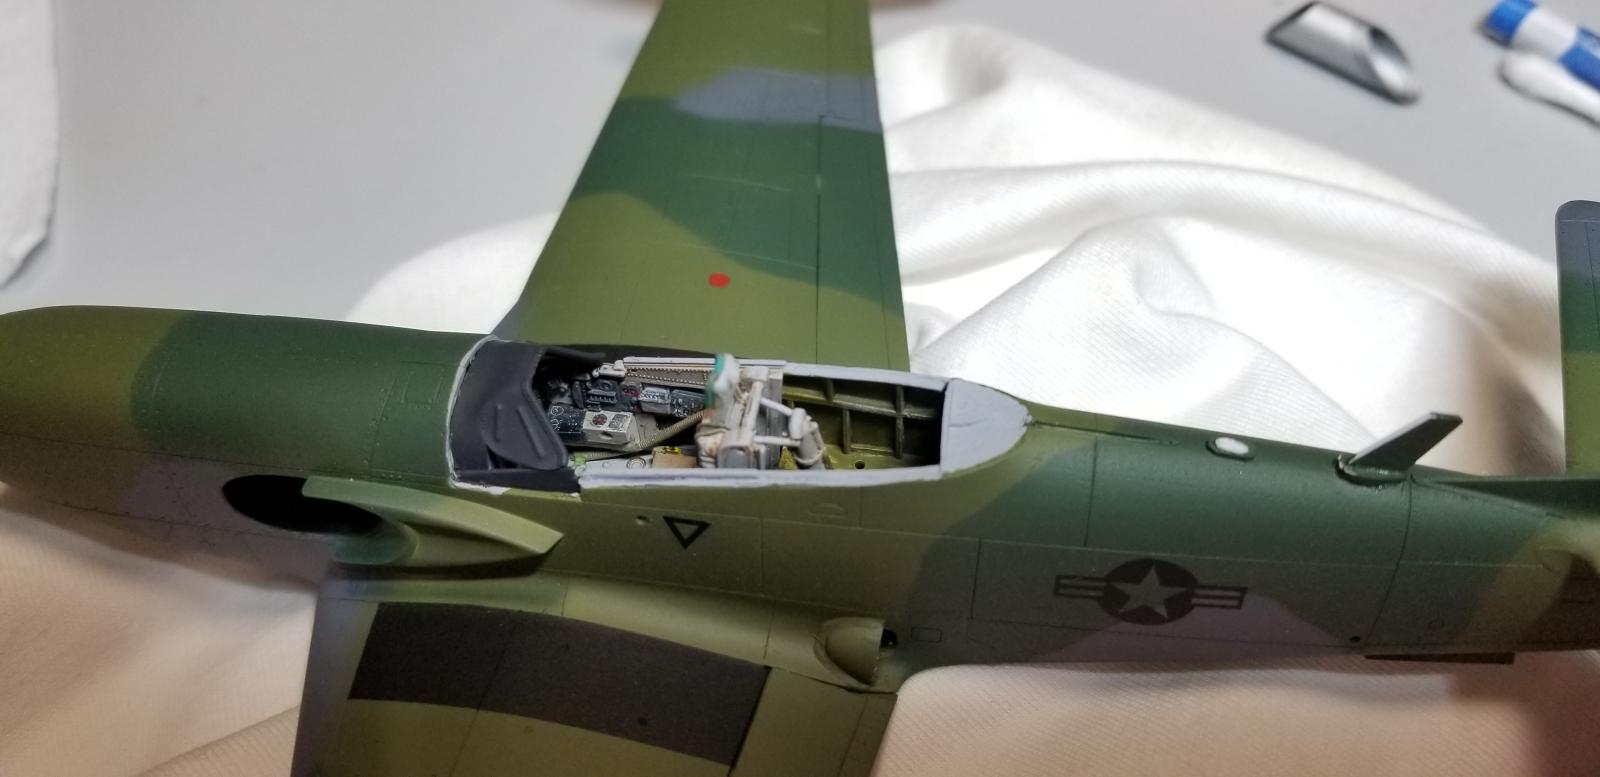
Markings:
The star-bars insignias and the empennage registration numbers were masked off and painted. All the masks were created in Inkscape and cut with a Cricut cutter on frisket paper.
Canopy:
Because the PA-48 canopy does not have a wire aerial entry point, as modeled on the Eduard kit part, I decided to switch the canopy out with a Tamiya part instead of removing this form the Eduard part.
After assembly the model was primed and damaged panel lines were restored by re-scribing.
The tri-color camo scheme was painted.
Next the low vis markings were masked off and painted.
The under-wing pylons and propeller assembly were painted separately.
The turbine exhaust was primed with Vallejo Black/Grey, thin stripes inside and out were masked off and then painted with Floquil Old Silver.
A semi-gloss clear coat was painted over the entire model prior to accenting/weathering.
Accenting/weathering was done with an overall burnt-umber artist oil wash and light dry brushing with artist oil paints and various shades of Tamiya weathering pigments.
Final assembly included adding the under wing armament pylons, propeller assembly, turbine exhaust, landing gear/wheels and tank tip probe.
Paints:
Mr Surfacer 1500 primer
Mr Color 303 Green FS34102
Mr Color 302 Green FS34092
AK Real Colors RC295 RAF Extra Dark Sea Grey
Mr Color 329 Yellow FS13538
Mr Surfacer 1500 Black
This was a fun project and I was able to use, and practice, some “out of the box” techniques, including casting resin parts, soldering parts, creating paint masks and scratch building/revamping parts. The final result is a bit rough around the edges but, overall, I'm pleased with the results.
Until next time, as always KEEP IT FUN!


What a great project Gary, really nice work IMHO. Well done buddy.
Thanks, Tom!
A wonderful build, Gary! What a conversion! what a departure from the Mustang!
Congratulations!
Thanks, Spiros!
That is a lot of work well done. Really an excellent build resulting in a great looking aircraft. I remember when pictures of this plane showed up in some of the publications. I thought it was a great idea and looked pretty damn cool. You definitely captured it with your build. Definitely liked!
Thank you, Walt!
Very cool! Wasn't aware of the Enforcer, but it is a good looking aircraft, and you did an excellent job on the model. Well done!
Thanks, Greg!
Looks great! I remember the aviation magazines of the time covering these designs.
Thanks, Robert!
Now that is cool Gary! 😎 An interesting and unusual project that turned out beautifully! 👍
Thank you, Gary. It was a fun and learning project.
Excellent conversion. I ordered from Halberd the Cavalier 3 with the Rolls Royce Dart turboprop and I hope it turns out as well as yours.
Thank you, Dan! I had no issues with the Halberd kit/resin. Good luck with yours.
Wow, what a cool bird, Gary. Nice and clean build too!
Thank you, Alfred!
Excellent post! No way I would be brave enough to undertake this. What you have done is super special and shows how skilled you are- great job. Thanks for sharing this!
Thank you, David.
What a great project - well done!
Thank you, Chas!
Beautiful conversion Gary, love the lines of this rare bird (in fact I had no knowledge of it prior to Halberd set being advertised). Great job overall, thumbs up!
Thanks, Pedro. It's too bad it never made it to full time production.
Excellent work Gary! I love that you made the effort to the additional changes, as well as the extra details like the IP. Looks great put together and under paint.
Speaking to the conversion, I've got two Halberd sets on the bench (Turbo 3 / SC-1) and this one in the lineup. They are excellent kits and the resin detail and quality is excellent, as you have expressed.
Thanks, Andrew, for your comments! Good luck with your builds. Can't wait to see them.
A lot of work which clearly paid off, Gary @gwskat
An excellent result.
Never saw this aircraft before but it has beautiful lines.
Thanks, John! Certainly has the beautiful/classic lines of a Mustang.
Nice work, Gary. Halberd has certainly got some nice conversions. I have the Cavalier III with the other turboprop here to do.
Too bad Helberd didn't do the canopy, which is just different enough from a P-51 canopy to be really noticeable. Their SC-1 shows they can do cast clear resin canopies with no problem.
Again, great work on this.
Thanks, Tom.
Gary, A really great looking model. I have pictures of the actual aircraft in a book and have always thought they looked really cool. Nice to see a well done model of them !
Thank you, Terry
Wow! What an awesome model, gary (@gwskat). I knew of this plane, but I had no idea there was a kit of it. I have never built an all-resin kit before, but you really did an amazing job on it. Well done.
Thanks, George! I believe this kit was just issued via Halberd Models just a few months ago. And this is a partial resin conversion kit to be used with the latest Eduard P-51 kits.
Amazing work and it looks great. Well done!
Thanks, Bob!
A very cool model of a very cool looking plane, great conversion work. You must have been brave to convert an Eduard kit.
Thanks, George! Extra parts in the box when I finally get to the Eduard Mustangs.