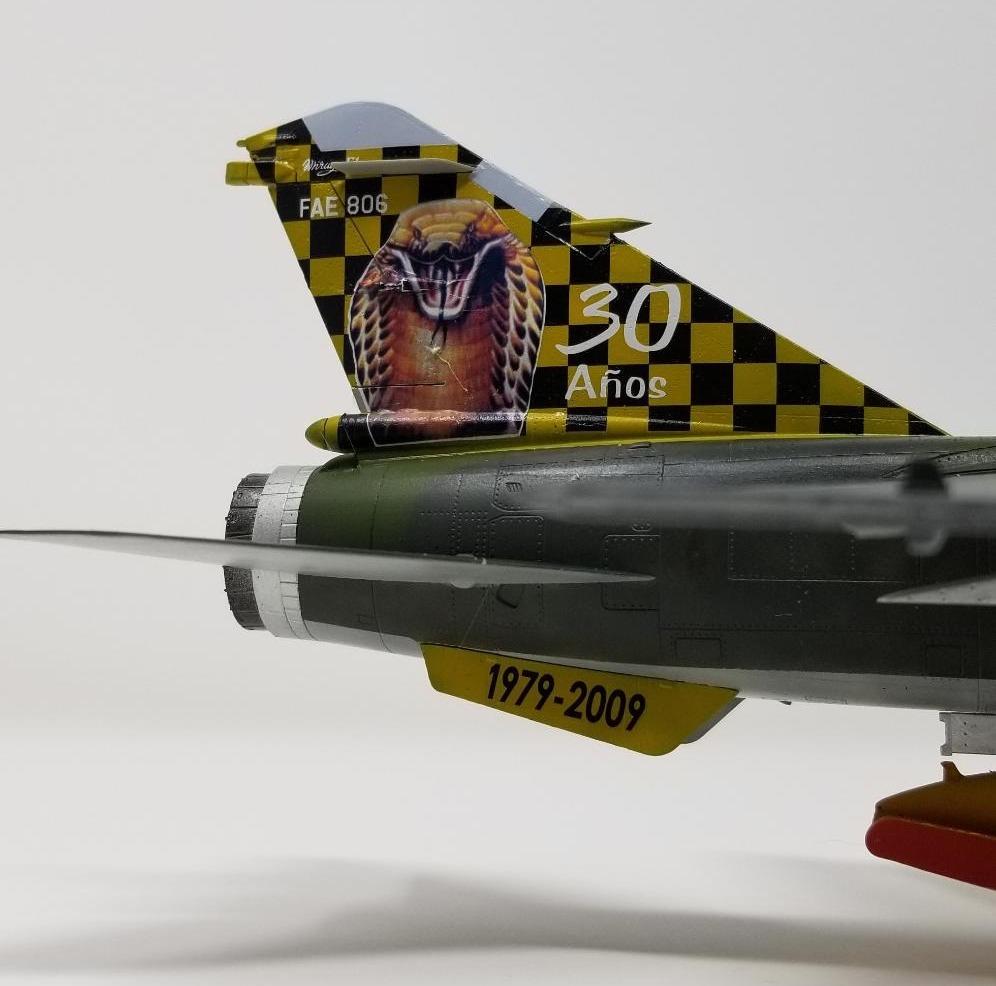
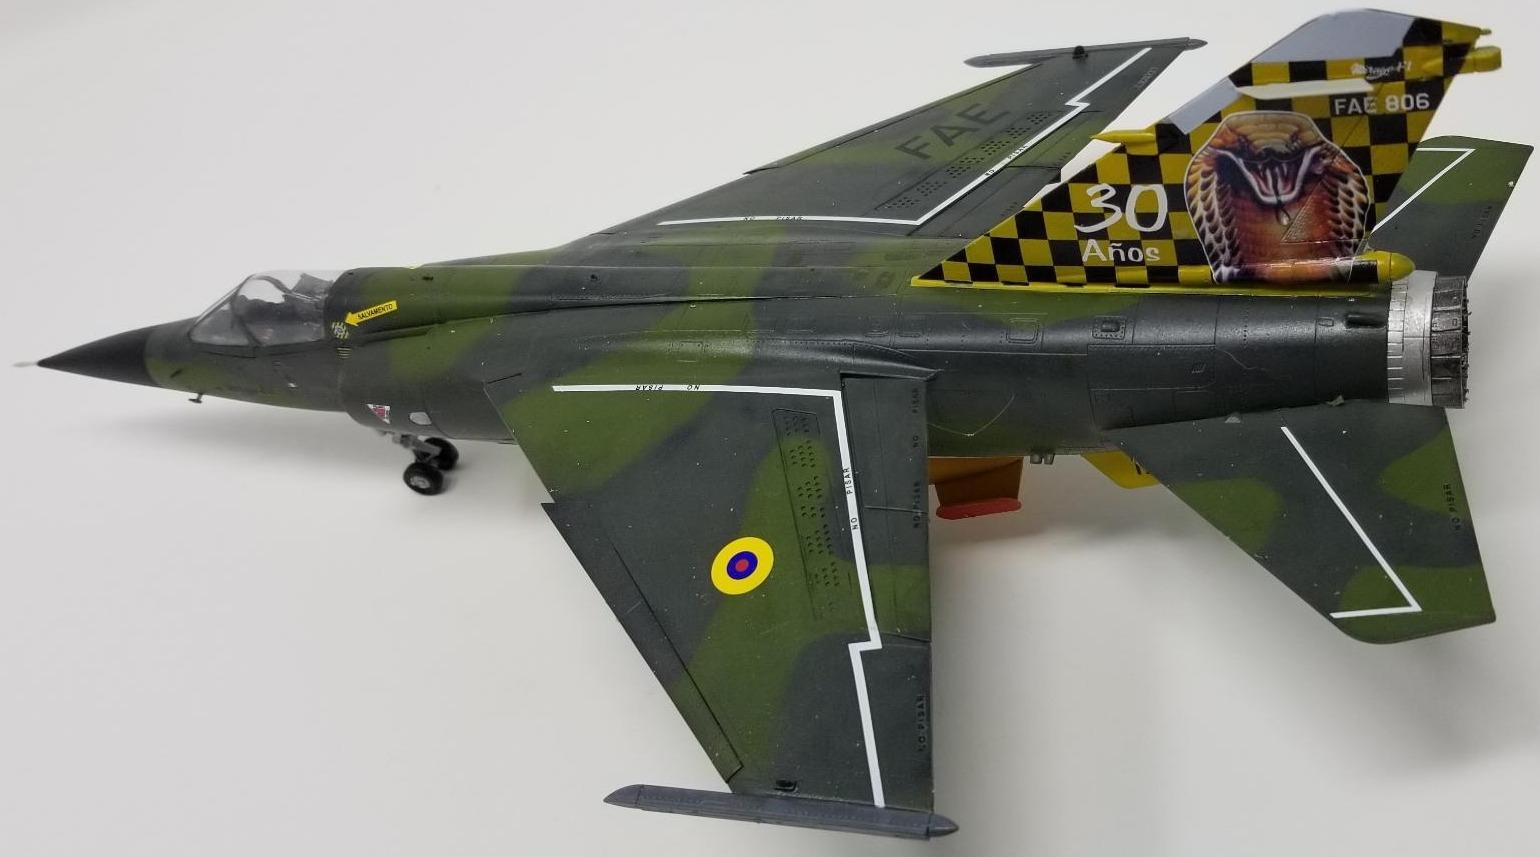
Ecuadorian Cobra, 1/48 Mirage F-1JA
Or, "Now I know why they named it S*****hawk."

Oh god, why am I doing this to myself? I swore I'd never buy a Kitty Hawk kit but as far as reviews go this one seems to be one of the better ones (not made out of ABS, acceptable fit, few complex and unnecessary subassemblies) and it's not the shudder Fonderie Miniatures kit, so the odds are in my favor. Maybe. Possibly. Theoretically.

The Mirage F1 was Dassault's attempt to wring more performance out of the Delta-winged Mirage 3/5 platform and it was wildly successful, with better short field performance, longer range and greater carrying capability. Export customers were wide, varied and happy, using the F1 in interceptor, combat air patrol, strike and anti-shipping roles where it toted the feared Exocet. Flight characteristics are typical of low aspect ratio, high speed aircraft: stable and smooth above mach 1, snappy and unforgiving at lower speeds and higher angles of attack. The F1 has a nasty habit of falling out of the sky in high-G turns if the rudder isn't used to maintain the angle of attack, and sustained negative-G tend to cause the engine to flame out. The F1 doesn't have a CCIP pipper, so bomb runs need to be flown at precise altitude and speed parameters.
The F1 has a myriad of designations that can get confusing, so let's try to untangle the mess. There are five variant "trees": A, B, C, D, and E, and those carry secondary suffixes that refer to their export customer, intended role or both. In many cases-- but not all, I must stress-- there are virtually no differences between the export variants of the sub-types. The primary difference between the C's and E's is a different instrument panel and switch layout that better handles the E's duties as a multi-role strike fighter. The kit claims to provide you the options to build a Spanish "C" (actually a -CE), and French -CT and -CR variant. The -CTs are French strike aircraft fitted with a refueling probe. The -CR is the tactical reconnaissance variant, with the port cannon deleted to make space for an IR camera and the Cyrano-IV radar upgraded with extra modes. The centerline pylon is also plumbed to accept a variety of podded sensors. As with the Mirage 2000-C, the F1 does carry laser-guided bombs but does not carry a targeting pod, relying on another aircraft or ground-based units to designate the target.
From this kit, you can build any C variant and almost any E variant aside from the EM-VI-- also known as the MF2000-- which is a specialized Moroccan variant that has the airframe of an E and all of the avionics and sensors of the Mirage 2000. The instructions make no mention of this (a common refrain as you will discover) but you need to remove the port cannon and fair it over yourself if you're making a -CR
Kitty Hawk provides you with an ATLIS pod, but this was only ever carried by -EQ variants and the MF2000. Kitty Hawk also provides you with two bits to go under the nose and marks them both as for the CR. This is wrong. The more angular of the two (part B14) is a laser rangefinder for the -CT, while the smoother and more rounded one is the panoramic camera for the -CR. You are also provided with an AS-30L, but again, this was only carried by -EQs. The kit provides you with badly warped Magic 2s (mine were bent like bananas) and Python 4s, which is lucky for me because the Fuerza Aerea Ecuatoriana is the only air force that used Python 4s on its F1s, but they only used the E model. Not that it mattered in my case, because THOSE were all warped beyond use as well. Oh well. You are provided two AS37 "Martel" missiles, and these were carried by all marques. A further word about the -E series: the -EQ as used by Iraq during the Iran-Iraq war featured the widest variety of pods and ordnance, and I think that's what Kitty Hawk may have been thinking of when they made this kit, with a lot of the weaponry being wholly unsuitable for a -C series. Later in the war as supplies of French munitions dried up, the Iraqis wound up mounting the Soviet Kh-29 on the inner pylons in place of the Martel. In any event, the last remaining -EQs are now in the possession of the Iranian Air Force and I doubt they're going to be amenable to people taking detailed reference pictures of their aircraft no matter how old it may be.
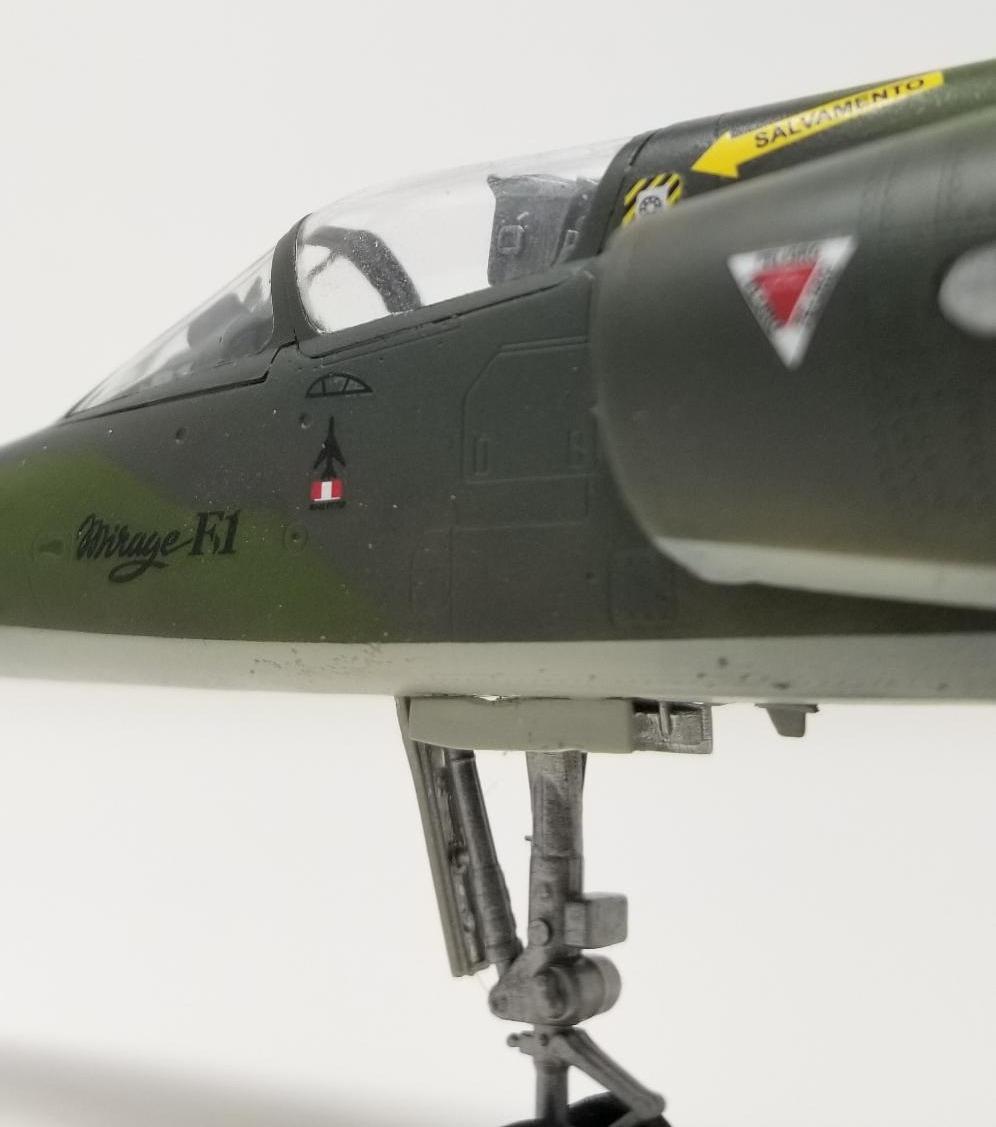
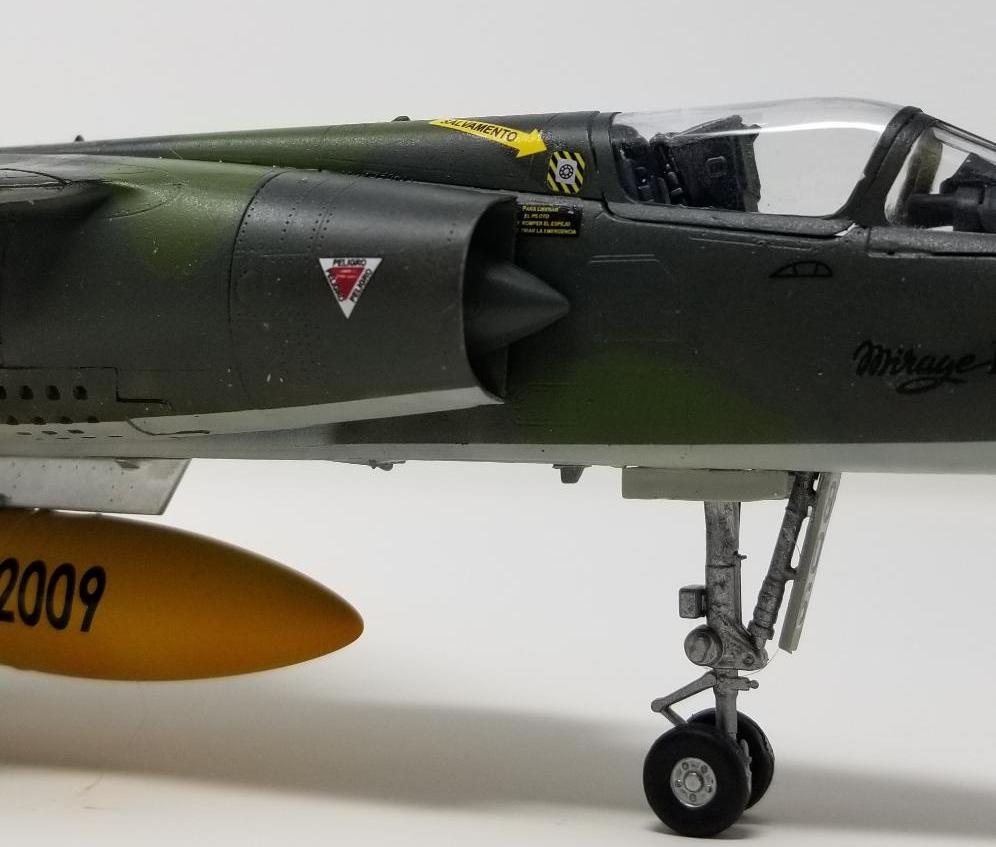
You can paint the cockpit any color you like as long as it's black. The only colors that you'll see when the airplane is powered off are the artificial horizon, throttle and ejection seat. It's very cramped (at least in VR in DCS it is, anyway) and even if you pose the canopy open you'll be hard pressed to see anything, so don't worry about super detailing it. All of the radar-equipped variants have a prominent hood over their scopes; the Kitty Hawk kit omits this feature. I made one out of a plastic tube. The kit radome is a bit off on the "top" which can be solved by sanding. Don't worry about detailing the interior of the nose gear bay either; its door is always shut when it's on the ground except during maintenance. You are provided with both Martin-Baker Mk.4 and Mk.10 ejection seats, but things get a little murky here; as best as I can determine, all of the F1s were originally fitted with Mk.4s, then eventually only the French aircraft were upgraded to the Mk.10.
Kitty Hawk didn't pull a Trumpeter here and force you to build up a whole mess of tubing and appliances that don't fit into the fuselage halves that you won't see again, which is nice. They provide you with more of the engine bits that extend into the fuselage, which you don't have to paint and will ultimately serve as a convenient handle for painting. That's not so bad. What's infuriating is the exhaust petals. These instructions are very badly laid out so if you'd like to avoid having your significant other poke their head into your modeling hovel to ask if you're OK, do this:
-Assemble the unnecessarily long engine halves as instructed.
-Put the exhaust petal ring onto the engine halves and fit the tab into the slot.
-The 3-part petals have a miniscule "lip" on the inner face of the petal. This goes over the lip on the outside of the petal ring.
-carefully trim any flash and sprue nubs away from the petal assemblies and fit them around the outer lip of the petal ring.
-You should have a small gap between the petal ring and the petals. This is NOT where the photoetched actuator ring goes. The actuator ring sits on the ledge between the engine halves and the petal ring. If you flood this area with plastic weld (NOT CA GLUE) it will act as a lubricant to ease the process of coaxing the photoetched actuators into a rough alignment with the grooves on the petals.

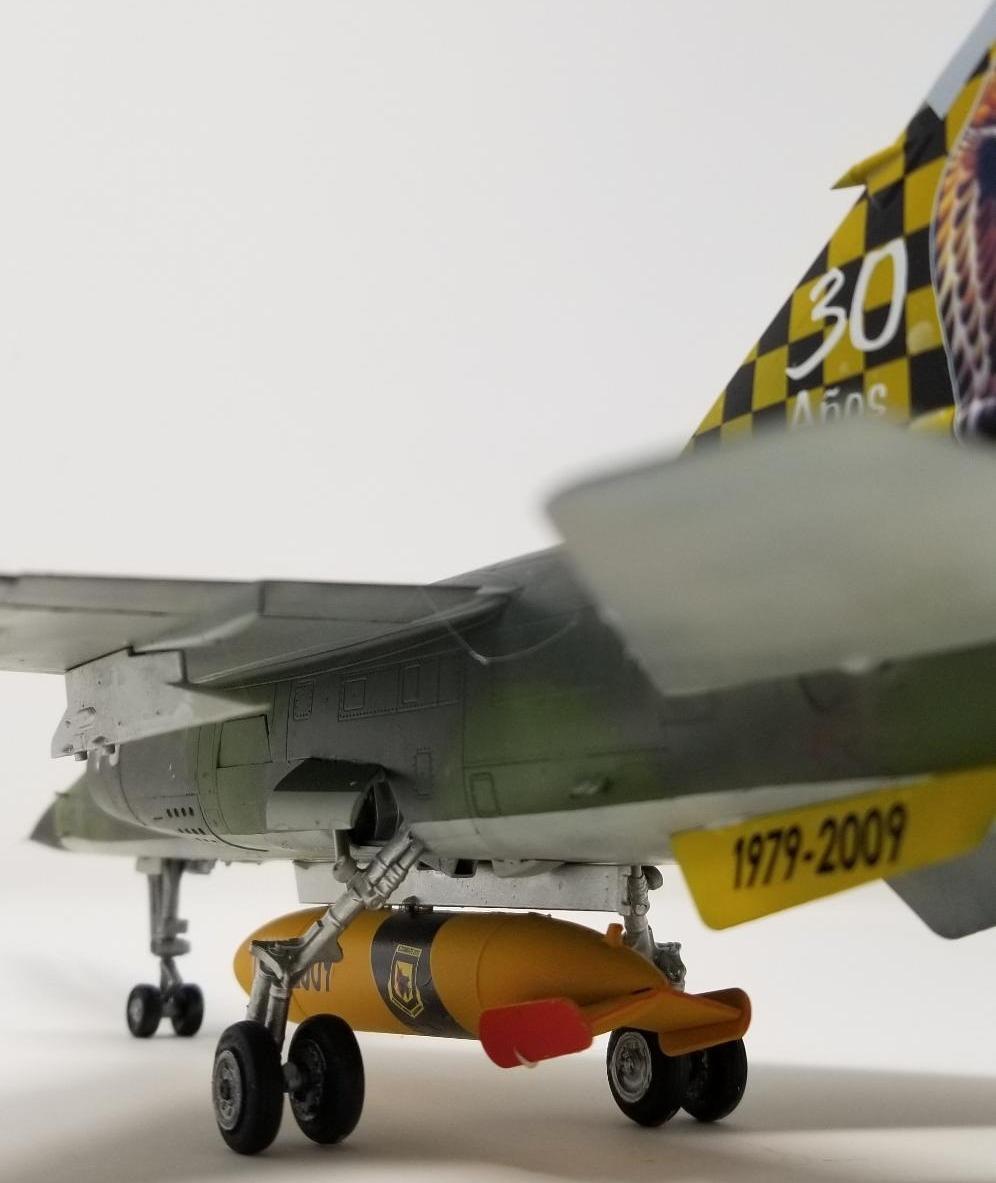
You are provided with separate airbrakes for both the wings and fuselage, but no actuators. Glue them shut. That's a bit of a pity, but the correct procedure is to have them shut when on the ground, so no huge loss. There is a raised seam extending from the rear of the wing root, down the fuselage and terminating right before the engine nozzle. This should be removed and polished. The main gear wheel bays are locked very snugly into place. All but the smallest gear doors are locked shut except during cycling, so you need to modify the kit parts so you can glue these shut. Thankfully, they're sized right so you can (carefully) cement them shut with minimal filler. The main gear legs have huge ejection pins that need to be removed, and a sink hole near the articulation knuckle. The front fuselage is held in place with stout lockable tabs that are overkill for the purpose of joining the fore and aft halves together, but it actually works. I slapped dissolved putty on that seam.

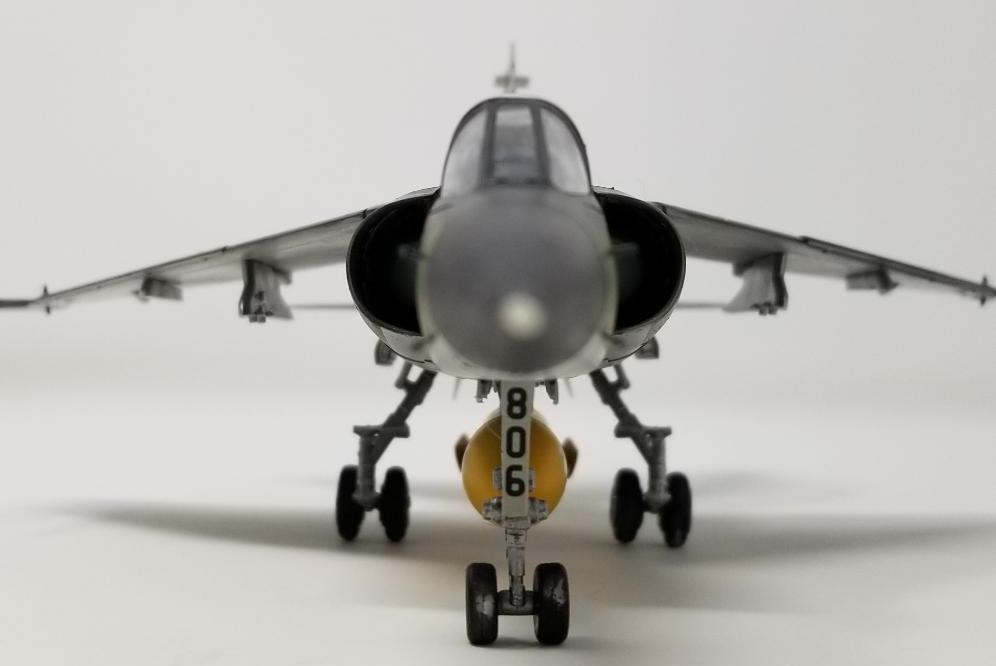
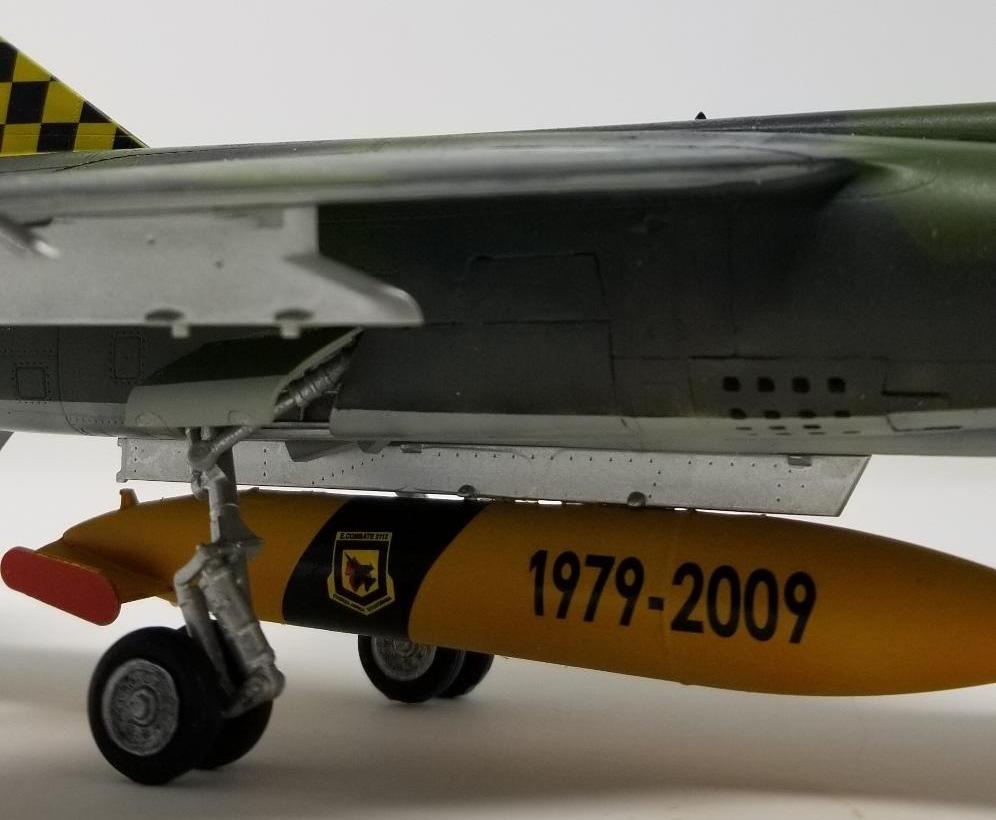
The most obvious error is that the Kitty Hawk F1 sits perfectly flat and level, while the real thing has a subtle "squat" backwards. This is caused by the keyed mounting hole for the main gear being cut at the wrong angle. Internet consensus seems to indicate that the fix for this is to trim the mounting hole so the main gear can be "pulled" forward by about five degrees. If this is an issue for you, this is how to fix it, but I didn't because it's more trouble than it's worth. The instructions omit the gear retraction struts (H32 and H33) which is a pretty big deal. If you glue the gear doors shut, the strut will not clear the doors. So do this instead: After the gear doors, bays and main legs are glued and dry, take either retraction strut and snip off the beveled end at the first "ring" near the bevel. It may take a little wriggling but it will seat into place both on the locating post on the leg, and in the fuselage.
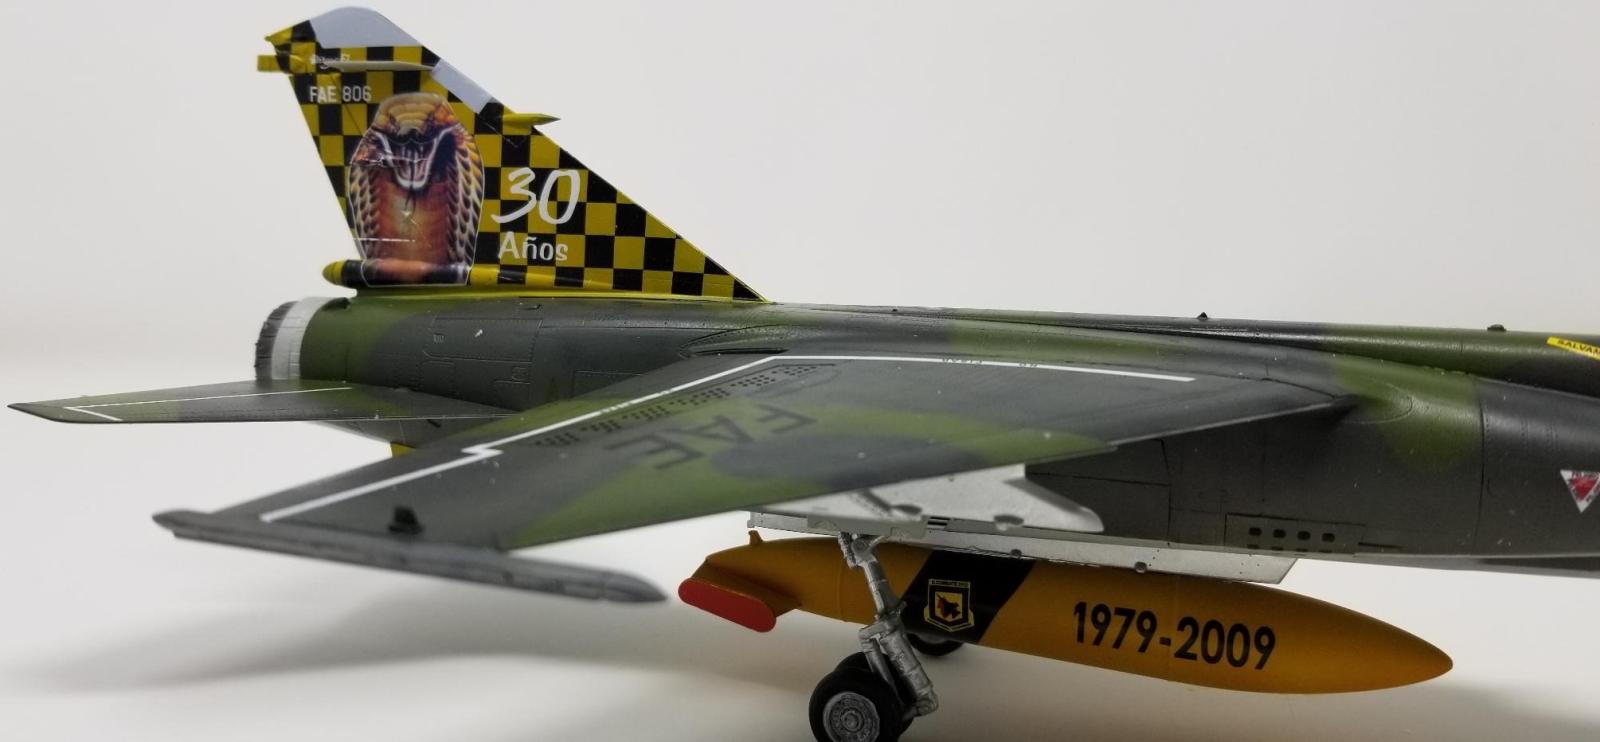
Wheels are overscale, use the ResKit replacements instead. If you use the ResKit main wheels and the kit nose wheels, this improves the "sit" somewhat. The intake cones and outer halves are swapped in the instructions, but do fit well. The Ecuadorian Mirage that I am portraying does not have a small circular hatch on the rear of the dorsal spine, nor does it have a VHF blade antenna, so they were deleted. The kit provides you with two lights on the spine, but you only need the aft one. This specific Mirage has its port wing inspection light on the side of the intake removed and faired over. The cutouts for the spine appear to not be perfectly square, which requires you to sand down the edges of the spine to get it as flush as possible, and then fill in the gaps.
Wings are bafflingly provided with a 2/3 upper/lower part and a 1/3 lower insert which accomplishes nothing of any utility aside from causing fitment problems because either the lower wing insert is too thick or the upper wing opening isn't deep enough. Kitty Hawk "opens" all of the underwing pylon slots, but thick flash here means they're practically half-filled. Flaps are separate and positionable, while the slats are not; the real thing has the flaps and slats extended at the same time when it's on the ground. The real flaps are double-slotted while the kit flaps are solid. A further complication is that the real wing has inner and outer slats; the kit only provides for positionable outer slats, which is incorrect. The slats have locating tabs which need to be sliced off and the inner face of the slat sanded down so the trailing edge of the slat is razor-thin. The slots in the leading edge of the wing all have a weird ridge around them that looks like a molding artifact which will need to be removed. The flaps can be positioned up if you snip off the locating tabs but here you will discover that the flaps have cutouts so they can be positioned down, which necessitates even more filler. There will either be a gap at the wing root or between the inner and outer flaps, I chose to have the gap at the wing root. The wings have locks bizarrely added to the mounting tabs. This is silly and doesn't provide any extra structural strength to the wings.
The vertical stabilizer can allegedly be constructed in such a way that it allows the rudder to move freely, which is another baffling choice considering the mounts for it are extremely thin. Don't do that. The vertical stabilizer halves in my kit were warped. It is supposed to fit snugly into a recessed area into the rear fuselage, but here again, it sits far too proud so you'll need to fill and chisel it down so it's flush.
Clear parts are not fogged-- at least-- but they do have a uniform "wavy" texture that prevents them from being perfectly clear. There are reports that a great deal of F1 kits come with their canopies cracked due to the box being crammed with parts; my example did NOT exhibit this. The windscreen is too small and sits proud of of the fuselage, so you need to pull it down and fill the edges. The horizontal stabilizers are one piece, but instead of a typical mounting point they have a lockable post that... no, actually, this part works very well and it's a good innovation.
Markings are provided for ER 1/33 Belfort (reorganized in 2010 to fly the MQ-9 Reaper), EC 2/30 Normandie-Nieman (now flying the Rafale) and 142 Esc. Ala 14 (NATO "Tiger" squadron, now flying the Eurofighter). Decals were disappointing which meant it was a great excuse to patronize the fantastic Syh@rt decals again with their Ecuadorian F1. I used my usual stock of Stynylrez primer and Vallejo paints.
If you really really want a F1 and don't want to re-scribe the Esci/Itaelaerei/Italeri kit, this is your only hope. The instructions are abysmal but if you follow my warnings you should have an easier time of it. You're absolutely out of luck for replacement parts as Kitty Hawk has gone out of business and I would not recommend buying a second kit just for the canopy only to lose that gamble and get another kit with cracked clear bits. Unless Modelsvit (they of the exquisite Twin Mustang and who are currently working on a 1/48 Mirage IV) decide to jump into the deep end on the F1, the (thankfully) dwindling stocks of the Kitty Hawk kit are all you have as far as "modern" F1 kits go. If you look at this as a limited run kit put out by someone using resin molds in their basement, it's not that bad, but in the context of modern injection molded kits, it's an infuriating disappointment. The kit instructions actively prevent you from assembling the kit correctly, the engineering is inconsistent, the research is slipshod and the reliance on absurd gimmicks (Wings with unnecessary inserts! An engine you can't see! Moveable rudder with mounting lugs that are as thin as a human hair!) seems to be a hallmark of Kitty Hawk kits and this one did not deviate. Phew. I need a drink.
OMG what an ordeal, most modelers would have launched it into the trash can. Triumph over adversity Wes, and she looks good to me. Well done.
I finished it purely out of spite. I will not allow a pile of styrene to beat me, no matter how unpleasant the build may be.
And you know what? I think I'm good for models for the next month or so. Maybe I'll clean up my workbench. Maybe.
@avispa93 - Wow Wes, what a story. I've never heard of Kitty Hawk as a manufacturer, but I know not to buy one if I ever come across one of their kits. The finished piece looks great, so hopefully it was worth the effort. Seems as though your modeling skills are better than their molding/manufacturing skills. And quite amazing that you actually knew/researched the F1 to the level necessary to build it correctly!
They put out some subjects that were seldom touched before-- and that was nice-- but it felt like they had one team working on the geometry of the plastic, another team working on the engineering, a third team working on the instructions, none of them talking to each other and one person doing quality control for the entire line of kits they put out. This is the only Kitty Hawk kit I've attempted, but I've chewed through a bunch of Panda armor kits (same company) and I only ever finished one (a BMD-2).
I'm teaching myself how to fly the F1 in DCS, which (assuming the developers get them right) is a great wealth of information for anyone wanting to build a model. Lots of times they mash several variants together for gameplay purposes, like their Apache, for example; it apparently combines external features from various production blocks and models so you get a generic 'Apache' rather than one specific airframe. I don't use DCS as a reference tool unless real pilots get their hands on the sim and give it their stamps of approval.
But when they get it right they REALLY knock it out of the park. For example, Escadron de Chasse 2/5 Île-de-France let the developers of the DCS Mirage 2000 crawl all over and inside their Mirage 2000-Cs and had a direct hand in developing the avionics for the simulator, so it's as close to the real thing as you can get without smelling like jet fuel. Same with the F1. At some point an F-4E is going to be released by the same team that put together the astonishing F-14, so I'm already excited about that one.
Wow, looks fantastic. Tried three different times to build a KittyHawk kit, all three ended up in the round file.
Absolutely awesome, Wes @avispa93
Your persistance and skill got the absolute best out of this challenging kit.
Great background article as well.
An amazing triumph of skill, talent and stubbornness over plastic!
The only good KittyHawk kits are the FJ-2 and FJ-3 Furys. Which are now going for north of $140 on EvilBay.
I not only tossed my kit of this model, I stomped it into its component electrons and then tossed it. So good on you for winning the battle.
A triumph over a most challenging kit, Wes!
Congratulations!
VERY fun read. I love sarcasm. Oh the model looks pretty good too.
Great work on this, Wes, it’s a shame about Kitty Hawk, they chose some interesting prototypes to make kits of.
You ended up with a great-looking F-1 at the end of it! Great effort!