Kinetic 1/48 Mirage 2000B/D/N

Started by Wes Pennest · 37 · 3 years ago · 1/48, Kinetic, Mirage, mirage 2000N
  • Profile Photo
    Wes Pennest said 3 years, 3 months ago:

    I rarely like to admit that I've been bested by a pile of styrene, so I'm having a go at this kit. I REALLY like the Mirage. I fly the 2000C in the DCS "Georgia At War" multiplayer server and it's just perfect. So I snapped up the 2000C and B/D/N kit a few years ago when they were on sale. Last year I finally chewed through the C and while the end result was... fine... the kit's got a lot of really nasty surprises lurking inside it that made me want to trash it and the B/D/N kit. From an instruction sheet riddled with errors, ejection towers, bizarre styrene blobs, and compound engineering flaws, you have to fight to extract a Mirage out of this kit. Fight's on!

    I'm going to build a 2000N because if this is going to be a painful experience I'm going to go all in.

    1 attached image. Click to enlarge.

  • Profile Photo
    Wes Pennest said 3 years, 3 months ago:

    I made a list of problems and inaccuracies while I was going through the C kit, which I will go through in that kit's article (which will eventually be posted here) and there are a lot of commonalities of errors with the B/D/N kit as well. I'll just touch on a few of them here:
    -The open afterburner cans are mirror smooth on the inside. That's unacceptable, so I'll be replacing the entire assembly with Aires resin.
    -The closed afterburner cans have little raised triangles on the inside, which is also unacceptable.
    -The instructions have you build the main gear doors open, as if they droop as the hydraulic pressure bleeds. This is incorrect: the main gear doors are physically locked shut unless the gear is being cycled.
    -The elevons, however, DO droop when there isn't any hydraulic pressure, so if your plane is "off" they should be drooped.
    -The 2000B/D/N kit doesn't give you an ASMP, which is like giving you a pastrami sandwich without any pastrami. So I'll have to source an ASMP elsewhere.
    -The B/D/N kit gives you three vertical fins to choose from, but the B uses the same fin as the N, which means you have two D fins. uh... thanks?


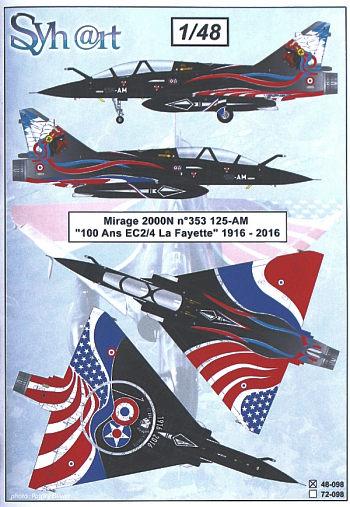
    I chose the Syhart n°353 125-AM "100 Ans EC 2/4 La Fayette" 1916 – 2016 bird because the majority of the plane where much of the filler and reshaping exists is gloss black, masks and masking application instructions are provided, and the only part of the livery that involves blending or gradation is in the rear and largely covered up by decals. If this is going to be a battle, then I will give it such a battle as to be worthy of rememberence!

    Nasty ejection towers. These and pin marks are common all over the place. Out comes the dremel...

    Now, the first half of my biggest headache from the C kit: there's Terrible, Horrible, No Good, Very Bad engineering with regards to the join between the fuselage, upper wings and intakes.


    See that gap? That's with the wing halves perfectly aligned. The problem is with the fuselage. You can do like I did with the C and try to fill it with every single filler material you can think of, which means you will obliterate those big bolt heads. The bolt heads are there on the real thing, so you CAN'T lose them.

    Here's how to fix it:
    Cement the lower wing and forward under-fuselage plate into place. Take whatever steps are necessary to reduce the step in the joint between the rear of the lower wing and the fuselage. The only place you should have cement are this rear joint between the lower wing and fuselage, the joint between the lower wing and the forward plate. Cement one of the top wings into place but use no cement between the fuselage and the wing joint. After the top wing has dried, use your finger to provide positive outward pressure so the fuselage meets the wing. NOW you may cement it in place. Alternatively, you can use small dots of cyanoacrylate glue and an accelerator to tack it into place, and then flood the joint with cement. This is entirely the fault of the fuselage halves bowing inwards. You can't really use a section of sprue to spread the fuselage halves apart here, because doing so will foul the insertion of the engine and afterburner. But it can be done!

    The same bad geometry affects the joint between the fuselage, the intake halves and the wing assembly.
    But that's another post. Ughhhhhhh whyyyyyyyyy

  • Profile Photo
    Spiros Pendedekas said 3 years, 3 months ago:

    This is a wonderful subject, Wes @avispa93!

    Who wouldn't love a quarterscale "biplace" M2000?

    Pity that Kinetic's modern kit (2010 is modern, isn't it?) has those fit issues AND fictitious details/oversimplifications. All it needed was good research and good kit design/engineering. Both are not that difficult in our modern times...

    Good news is that with your skills, a wonderful model will be produced.

    Looking really forward to it!

  • Profile Photo
    Tom Cleaver said 3 years, 3 months ago:

    Oh yeah! That decal sheet is great! I was going to get one to do my kit with. I'm going to be watching this like an instruction manual, @avispa93. Thanks for joining.

  • Profile Photo
    Wes Pennest said 3 years, 3 months ago:

    hello, today we are going to look at the intakes and...


    uh oh

    oh dear

    oh no

    oh come on

    Mind you, these are only dry-fits but these are fit problems common to the C kit as well. In the second picture, I left a lot of the parts near the mating surfaces unglued so they can move around a bit more freely in order to minimize steps, but the gap on the underside exists after having the top of the intake flush with the fuselage, as you see in the next picture. There WILL be gaps and steps, but if I can choose where those gaps and steps will be I will be better off.

    as for the port intake... that's a 1mm, right-angle gap between a thin, curved part and a flat face. The inside of the curved part is silver (I assume) and the flat face is a blanking plate that would normally lead into the fan. On the C, I just used bondo to bridge the gap and sanded it smooth as best I could, but I could still see bits of the red peeking out inside the intake if I looked carefully enough. So I may do that again, or I might use some plastic strip, or I might try to back it with tape from the inside and fill it like you would patch drywall. A puzzler to be sure.

  • Profile Photo
    Spiros Pendedekas said 3 years, 3 months ago:

    I can see some big gaps there, Wes @avispa93! Inevitably some surrounding detail might be lost.
    The intakes innards are aluminum color.

  • Profile Photo
    Wes Pennest said 3 years, 3 months ago:


    Thanks to Spiros, I learned that the large window on the port-side intake is actually a spotlight used to illuminate planes being intercepted. It's called a "police light," which makes sense for a 5, C, B and even D model Mirage to carry. But the N is a dedicated nuclear strike aircraft, not an air policing aircraft. The real plane has a blank plate where the police light should be. I glued the clear "window" in place and puttied it over.

    This is also a test of Vallejo Plastic Putty, which comes in the same little plastic dropper bottle as the rest of their paints, which makes it somewhat easier to work with than a small jar of Mr. Dissolved Putty. It's apparently marble dust suspended in acrylic resin, so this is a fine place to test it out. I put some on earlier today and I'll give it 24 hours to dry and cure.

  • Profile Photo
    Spiros Pendedekas said 3 years, 3 months ago:

    I had no idea the nuke M2000s had no police light! Live and learn! That's another reason I love modeling!

  • Profile Photo
    Wes Pennest said 3 years, 3 months ago:

    Well, it's been 24 hours and the putty hasn't fully solidified yet. It's almost there, but it's still pliable enough that instead of feathering it rolls up into little balls. I'll give it some more time to harden and cure.
    Today the Aires replacement engine came in the mail. I'll let photos do the rest of the talking.


    kit "open" exhaust

    kit burner face

    kit "closed" exhaust

    Aires replacements (less PE which is still in the packet)

  • Profile Photo
    Spiros Pendedekas said 3 years, 3 months ago:

    A light year ahead of the standard kit offering, I might say. This is especially true for the very characteristic looks of the inner part of the exhaust cone, with the double row of actuating flaps, a very delicate looking and difficult to depict area, the looks of which are very convincigly represented by the Aires offering.

  • Profile Photo
    Wes Pennest said 3 years, 3 months ago:

    Here we are with much of the major airframe assembled. And a fair amount of putty and carving.


    Not much going on underneath. One gap needed to be addressed with plastic strip, the other with bondo.

    There's a gap at the base of the vertical stabilizer that needs to be filled. There is a HUGE step where the spine insert meets the fuselage. The spine insert is just too wide, so I fished out a new #11 blade and started whittling down the spine so that it blended with the profile of the fuselage. I'll be happy if you can't tell where the step was.

    ERE WE GO. Here's the 1mm gap on the port side. Backed with some strip plastic and filled over with bondo. The "police light" didn't fit well to begin with, but that was fine because it served as a good backing for yet more bondo.

    And here's the starboard gap. Backed with numerous strips of strip plastic and backfilled with, yes, bondo again.

    Everything was re-profiled with an xacto blade, then smoothed into shape with foam-backed fine-grit sanding pads. The hardest part of all of this was getting the masking tape to sit right on the edge of the rivets. After poring over the model under a strong key-light, I filled in pinholes and wavy areas with Mr. Dissolved Putty, let it harden for about an hour and then ran a q-tip dipped in rubbing alcohol over it all to smooth it all out.

    I think I'm coming to a point where work will have to stop until the Syh@rt decals come in, because I have a feeling I'll have to leave off some parts for painting. I haven't even started with the forward fuselage yet, and if it's anything like the 2000C I might need some power tools.

  • Profile Photo
    Spiros Pendedekas said 3 years, 3 months ago:

    Looking great, Wes @avispa93!
    You are abrave man, trying to preserve those rivets!

  • Profile Photo
    Wes Pennest said 3 years, 3 months ago:

    Folks, I still can't find the words to express my disappointment with this kit and Kinetic for allowing this thing out of the factory. Well... I CAN... but they're all expletives.

    Kinetic didn't just omit the ASMP from the kit, they also omitted something else which they neglect to tell you about:

    THE HUDS.

    No, it's not just another case of it being left out of the instructions, the parts aren't even there on any of the sprues! The 2000C/5 kit has them, but the B/D/N kit doesn't. WHY!? All of the variants have HUDs! The plane can't operate without one!

    There's NO excuse for this. There's NO excuse for any of the other myriad problems in this kit!


    Here's another one: the rear of the underside of the fuselage where the ECLAIR-M countermeasure suite is usually located has a slot and a hole for a part to be placed into it. But the instructions, again, don't tell you what part that is, nor do they even imply that anything should be fitted there. It's easy enough to find on the sprues, but your worries aren't over. The mating pegs for this part don't actually fit it correctly into the space, so you need to cut them off and buttjoin it. Then you need to carve and file it down AGAIN because the part sits EXTREMELY proud of the surface!

    I'm just going to plow through this because-- like I said at the beginning-- I'm not going to let a pile of styrene beat me, no matter how obviously cursed this kit is. With that said, I'm also not going to drop ANOTHER 30 dollars on kit for the sole purpose of buying a resin aftermarket cockpit set just so I can rob it of its tiny photoetch HUD frames.

    The canopy will be getting its standard bath in Future, but as the distortion you're seeing there is from the mold itself, I don't know what good it will do.

    I'm NEVER buying a Kinetic kit EVER AGAIN after this gigantic, festering pile of garbage. I don't care how good of a deal a 30 dollar kit may seem, because if you have to blow 60+ dollars to FIX WHAT SHOULD BE INCLUDED IN THE KIT IN THE FIRST PLACE it's a horrible deal! No wonder this kit was being offered on clearance!

  • Profile Photo
    Tom Cleaver said 3 years, 3 months ago:

    Wes, this is an OLD Kinetic kit. You shouldn't judge the newer kits on this. Their Harrier series is really nice, as are their F-104s. I say that from experience. And yes, this kit is a dog. I say that from experience, too.

  • Profile Photo
    Spiros Pendedekas said 3 years, 3 months ago:

    Pity about this kit's quality, Wes @avispa93.

    Regarding the HUDs, the front one is the same as the one of the single seater. At the rear, there's a screen that projects the data of the front HUD, called "Repeater" (for obvious reasons). The Repeaters of the old "B" and -5 dual seater differ, the newr one being more beefed up. I havent' seen the -N repeater. If you decide to fabricate the HUDS and need any pics, please let me know.

    You do a great job on this.