1/48 Hobbycraft de Havilland Vampire FB52, Iraq, 1955

Started by Spiros Pendedekas · 104 · 3 years ago · 1/48, de Havilland, Hobbycraft, Iraq, Vampire
  • Profile Photo
    Spiros Pendedekas said 3 years, 6 months ago:

    Hi everyone!

    First, congratulations to my friend Erik @airbum, for the conception and GB organization!

    Her is my first entry to this fantastic GB: the 1/48 Hobbycraft de Havilland Vampire FB9 in Iraqi markings, year 1955.

    Had this kit in my stash for a while, sneeking at it frequently, as I always love "out of the ordinary" schemes, trying to find an opportunity to build it.

    Well, here it is!

    The kit itself looks good, the decals look useable.

    It will look nice in the brown/sand over light blue colors.

    I cannot comment about the accuracy of the kit (I am not sure if I've heard some moaning about it...); I don't mind a lot of such things: I bet it will look like a Vampire at the end.

    As common as it sounds...I have to clear some bench space, in order to start this beauty up.

    I'll do my best to happen very very soon (as the late Great Benny Hill used to say)!

    Looking forward to follow this great GB!

  • Profile Photo
    Erik Gjørup said 3 years, 6 months ago:

    Welcome aboard Spiros! I shall be strapped in on this one whenever the bench may choose to open up some space my friend 🙂

  • Profile Photo
    Spiros Pendedekas said 3 years, 6 months ago:

    Famous last words...

    As common as it sounds……I have to clear some bench space, in order to start this beauty up.

    I’ll do my best to happen very very soon (as the late Great Benny Hill used to say)!

    Well, I could not resist the temptation this exciting GB created upon me, so, here we go...

    Glued the basic cockpit elements at the tub and glued the tub at the upper fuselage half. Also glued the NLG wheel well at the lower half fuse:

    .Instructions wanted me to trap the delicate exhaust between the two halves. To avoid it and add it at later stages, I glued two pieces of styrene at both fuselage halves, to act as a stopper, upon inserting the exhaust. The exhaust's rear protrusion will have to be cut.
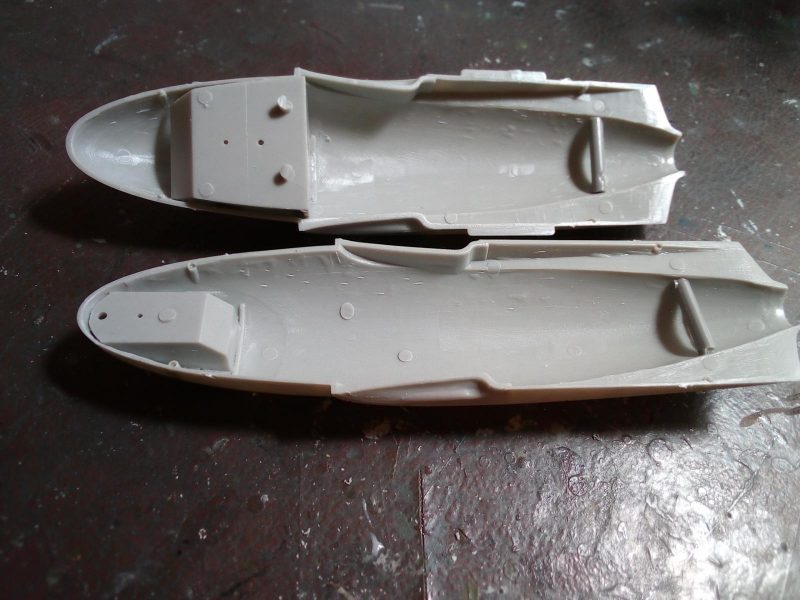
    Vampires ARE tail sitters, so I made a clay base at the front top part and inserted quite a few lead pieces and sealed them with some more clay
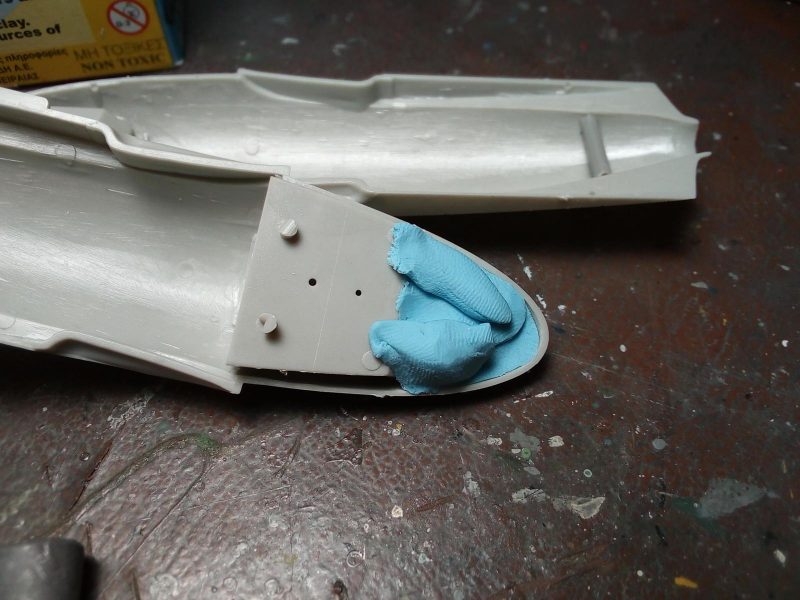
    The two fuselage parts were joined. Fit is ok - not Tamiya...

    Wings and tailbooms were assembled...

    Then the wings were attached to the fuselage...

    The tail was assembled...

    And was attached to the wings...
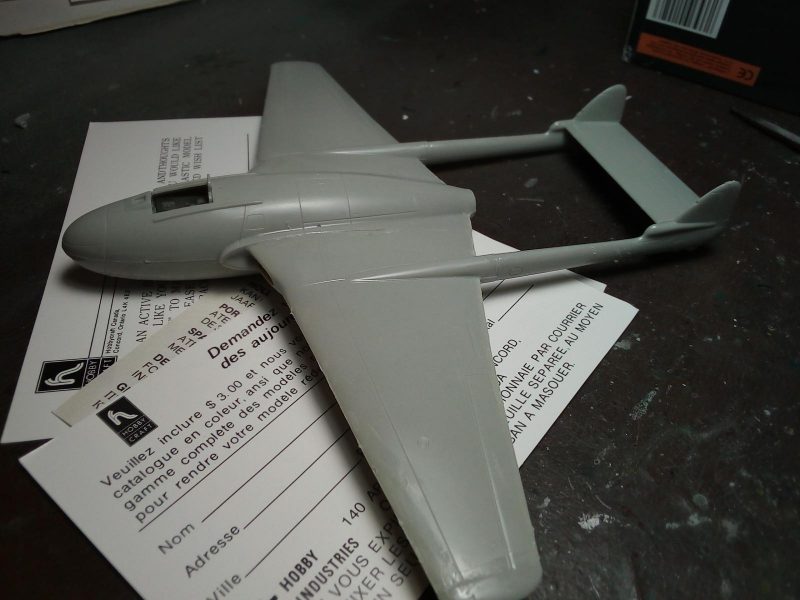
    As per my beloved phrase: Please take your quality time here, in order to align everything correctly, as long as the glue hasn't cured and the joints are "workable".

    The drop tanks were also assembled, but I am not sure if I will use them...the petit Vampire is so beautiful in its (her) clean configuration!
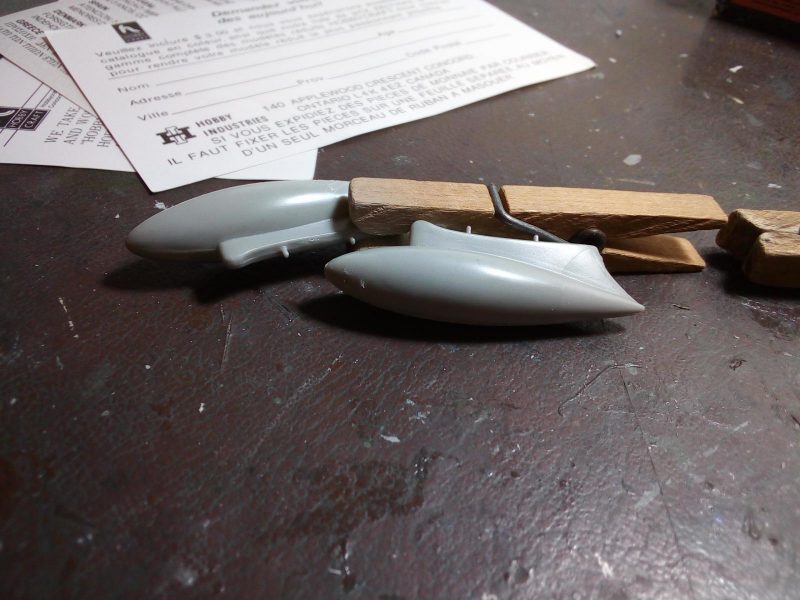
    All the best, my friends!

  • Profile Photo
    Erik Gjørup said 3 years, 6 months ago:

    Spiros (@fiveten), you are a pure buildingmachine! The Vampire is roaring down the assemblyline, and in true 50's style, briebing is involved 🙂

    I have to agree on the tank, but without it, range is somewhat limited.


    I would look a lot better "clean" though, no doubt there.

  • Profile Photo
    Spiros Pendedekas said 3 years, 6 months ago:

    Definitely agree with the range issue, my friend @airbum, even if this beauty is depicted "clean" at the boxart (artistic reasons I guess?)
    Thanks for liking!
    This build and this GB are addicting!

  • Profile Photo
    Chuck A. Villanueva said 3 years, 6 months ago:

    Spiros, like Louis you got the iron works factory at full production with all you builds going on. But I am the same as well with several projects at various stages of assembly, And you just had to get the Vampire started, Lol, no worries, i did the same by just bringing down the Monogram B-26B and decided you know why not 2 Invaders to build. So I know the feeling. And you know that is really not bad details on the interior, that is one of the criticism directed at the Hobby Craft kits were the cockpits being bare minimum in details and what was given was often not correct. But the Vamp looks ok so far. And it builds rather quickly. Love it! Haven't decided as yet to what to build. You know a Mosquito is obvious but we all know there will be a few of those in all scales.

  • Profile Photo
    Spiros Pendedekas said 3 years, 6 months ago:

    A Mosquito will always be fantastic, no matter how obvious, especially with your skills Chuck @uscusn!

    But any choice will he good and have its own significance.

    Surprisingly, the Hobbycraft cockpit walls are busy ish, which is not bad at all! I might beef up the seat a bit and also scratchbuilt a couple of mini details, but that will be it. I usually close my canopies "to preserve the aerodynamic lines" (translation: I am lazy super detailing the cockpit and I can also hide my lousy cockpit jobs - lol).

    As for the full production "Iron Works" line, I have found myself being surrounded by all those great GBs and , most importantly, by all these wonderful friends here...

    I cannot, and, most importantly, don't want to resist!

    Thanks for kind words!

  • Profile Photo
    Spiros Pendedekas said 3 years, 6 months ago:

    I did same initial smooth scraping:


    The port intake was sitting too low. Nothing I could do but break it and reinstall it at the proper height...
    Also the starboard winglet was resting at an awkward down angle: I detached it and reinstalled it, the gap taken care of my buddy, Mr Liquefied styrene...

    Next, I am going to spruce up the wheel wells a bit with stretched sprue, as they look too obviously toyish.
    Cheers!

  • Profile Photo
    Erik Gjørup said 3 years, 6 months ago:

    Now, why haven't I made a pot of liquified styrene yet? - that will definitely be one for the week-end! perhaps. . . . maybe. . . .

    Coming down the fast-track vere nicely Spiros!

  • Profile Photo
    Spiros Pendedekas said 3 years, 6 months ago:

    The wingtip was sitting at a negative angle; did not want to file it down, as the correct width was the top one, so I just detached it and bent it upwards, leaving the inevitable well sized gap underneath: this is liquefied styrene's breakfast!

    As saying goes, I have noticed similar discrepancies at a few Hobbycraft/Academy kits: nothing too serious; in fact I have fun fixing such small bugs, but it may understandably not be fun for most other normal (not like me...) modelers...

    Thanks for liking, Mr Admin @airbum!

  • Profile Photo
    Spiros Pendedekas said 3 years, 6 months ago:

    Initial coarse sanding done, all is looking ok!

  • Profile Photo
    Erik Gjørup said 3 years, 6 months ago:

    Unmistakably Vampiry shape!

  • Profile Photo
    Louis Gardner said 3 years, 6 months ago:

    This is already an incredible build... To quote Count Von Count from the kid show Sesame Street... who is supposed to be a vampire.


    One ! One seat fighter...
    Two, Two fabulous tail booms...
    Three ! Three... landing gear struts... ah ah ah... How wonderful and correct ! OK now you know why I don't work as a comedian...

    Looks good my friend. I see you have incorporated the liquefied styrene... man I like that stuff. I don't know how I managed without it over the years. Thanks again for the tip.

    The "Iron Werkes" style of building has suited you well.

  • Profile Photo
    Spiros Pendedekas said 3 years, 6 months ago:

    Indeed the "Iron Werks" style is amazing, my friend Lewis @lgardner!
    Liquefied styrene is our problem solving friend!
    Thanks for liking!

  • Profile Photo
    Spiros Pendedekas said 3 years, 6 months ago:

    Had a look at the Classic Airframes Vampire instructions and used them as a guide, in order to beef up some Hobbycraft areas that are on the "simple' side and which are pretty visible once the Vampire is finished.
    I started by enhancing the MLG wheel wells with stretched sprue and drilled some blind holes at the inside of the NLG side door:


    Looking busier and more believable now!
    Next is NLG wheel well.