1/48 Hobbycraft de Havilland Vampire FB52, Iraq, 1955

Started by Spiros Pendedekas · 104 · 3 years ago · 1/48, de Havilland, Hobbycraft, Iraq, Vampire
  • Profile Photo
    Spiros Pendedekas said 3 years, 5 months ago:

    Thanks Allan @kalamazoo!
    I think Mr Mark Softer is solid and efficient, not too aggressive at the start, bringing nice results the next day!
    Glad he is our common friend!

  • Profile Photo
    Erik Gjørup said 3 years, 5 months ago:

    What a great pair of updates since my last visit. As usual PFP impresses with small details and smart solutions to improve everything here and there.

  • Profile Photo
    Spiros Pendedekas said 3 years, 5 months ago:

    Thanks, my friend @airbum!
    Actually a PFP QC Audit took place this morning, by QC1...


    QC Result: Proceed
    QC Comment: Those Hobbycraft decals could be better...
    Cheers!

  • Profile Photo
    Erik Gjørup said 3 years, 5 months ago:

    No VNE test this time?

  • Profile Photo
    Spiros Pendedekas said 3 years, 5 months ago:

    No, not at the Vampire this time, but at my poor Vautour...my friend @airbum!
    Surprisingly, my Vautour feelings rose again after the VNE test!...O tempora, o mores!

  • Profile Photo
    Erik Gjørup said 3 years, 5 months ago:

    Phew - happy to hear the outcome of that VNE-test. - and indeed my friend, indeed.

  • Profile Photo
    Spiros Pendedekas said 3 years, 5 months ago:

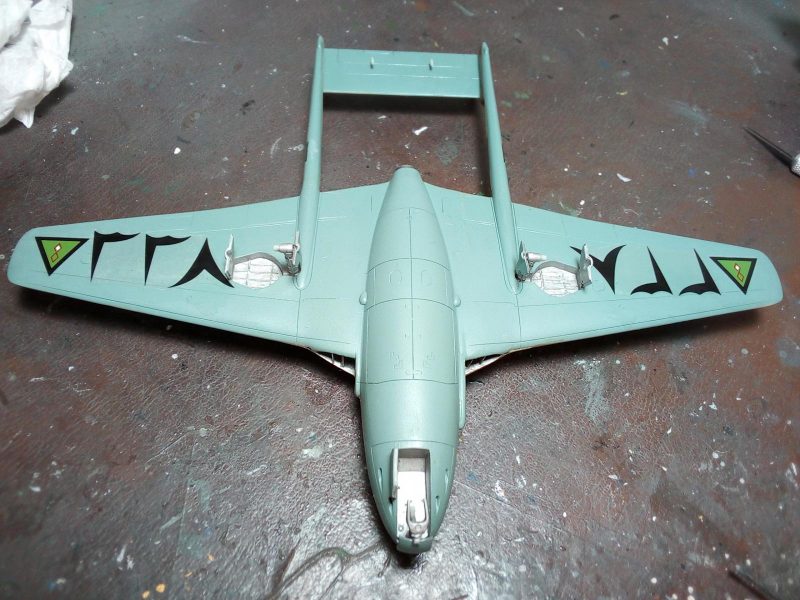
    Cockpit is almost ready, missing only some details to be highlighted and a gunsight (from clear acetate...yes, from my sons' ice cream cups...) to be fitted after the final clear coat. Looks busyish with the scratchbuilds I applied. Seat belts are made from masking tape and miss their buckles (to be done with my PILOT fine silver pen):

    I then proceeded to the landing gear.

    Hobbycraft's offering parts are solid, but are simplified and/or ficticious looking. This is especially true for the front door retraction mechanism.

    To present a passable result, I studied some detail walkaround pics and proceeded as follows:

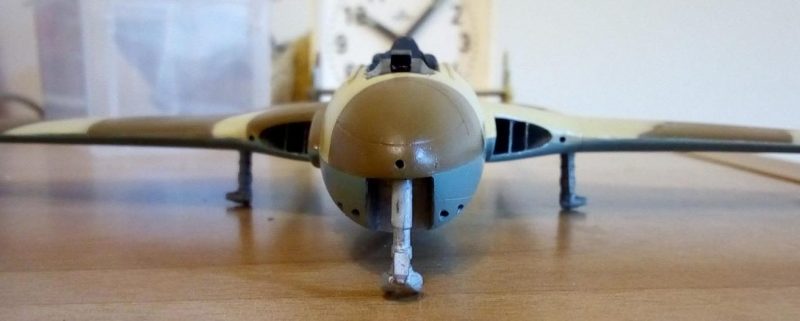
    • I cut the main landing gear struts about 3mm short (as they were too long, resulting in an unnatural Vampire posture) and glued them at a slight outward angle, as per pics.

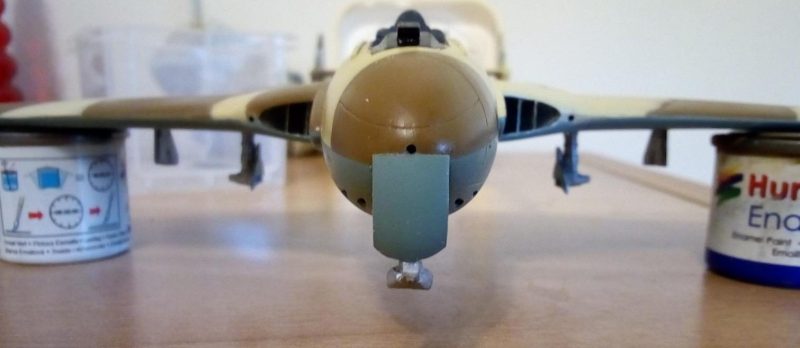
    • I glued their dragged doors lower than Hobbycraft recommended.

    • The outer doors were glued with a slight inward angle, again as per references. Before I had drilled two holes at each of them, in order to attach a scratchbuilt "H" retracting mechanism that is prominent in reality):
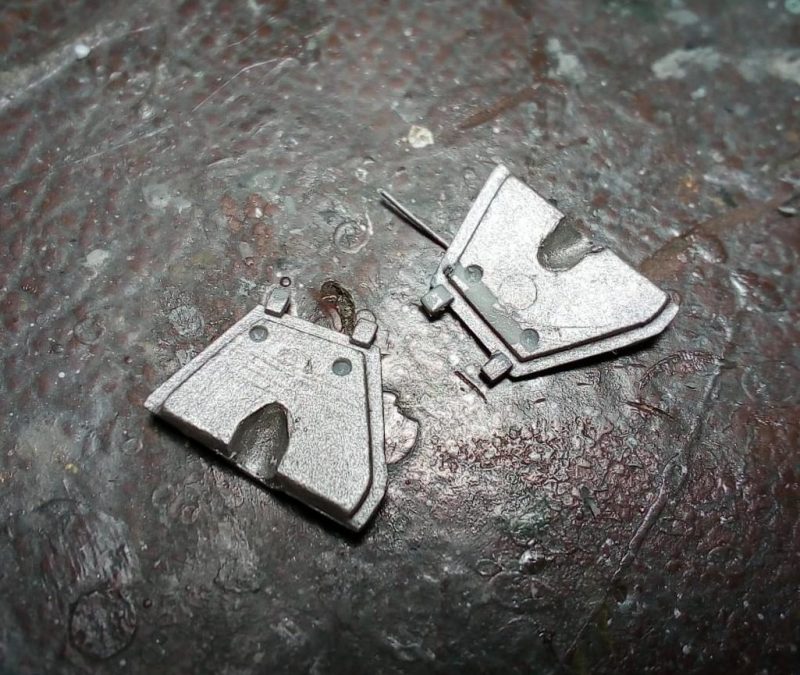
    • I reduced the front door height and glued it at a position as indicated at the refpics:

    Its Hobbycraft retraction strut will not be used as it has nothing to do with reality; instead, rods, made of stretched sprue, will be added at the correct spots.

    Here is the result so far, missing the retracting mechanisms stated above, to be installed hopefully tomorrow:

    Cheers, great DH100GB!

  • Profile Photo
    Spiros Pendedekas said 3 years, 5 months ago:

    Busying the landing gear...

    Nose LG: I added two front door retraction struts, one at the side door and some "ribbing" to busy up the wheel well; all made out of stretched sprue:

    Main LG: I added a main strut retraction "cylinder" and an "H" shape external door retraction strut, all made of stretched sprue, as well:

    This is how they look painted:

    I noticed that the side nose gear door's height is unrealistic and must be reduced to resemble the real thing AND provide more ground clearance:

    More to follow...

    Cheers DH100GB!

  • Profile Photo
    Erik Gjørup said 3 years, 5 months ago:

    WOW - great scratchbuilt details my friend! (the paintedge looks a bit excaggerated due to the angle of the light, but some light sanding. . .

  • Profile Photo
    Spiros Pendedekas said 3 years, 5 months ago:

    Thanks, my friend Admin @airbum!
    And an update:

    Standing on her feet!


    I glued the wheels and let this beauty to rest on them.
    Some solid percentage of the unmistakable Vampire posture has emerged...I gave it a "pass".
    Some more scratchbuilt stuff has to be added (ie the fibal curved brake line from the strut to the brake housing).
    Cheers!

  • Profile Photo
    Erik Gjørup said 3 years, 5 months ago:

    Right side up!

  • Profile Photo
    Klavs Nielsen said 3 years, 5 months ago:

    Wauw - great looking scratchbuilt details my friend!
    Looking forward to some more details...

  • Profile Photo
    Spiros Pendedekas said 3 years, 5 months ago:

    Thanks, my friend Klavs @klavs1972!
    Some more finishing details hopefully tomorrow!

  • Profile Photo
    Spiros Pendedekas said 3 years, 5 months ago:

    Some (final?) details:


    The kit provided pitot located on top of port fin has little to do with reality, so I fabricated one from stretched sprue:

    Canopy is almost ready:

    Ceneral touchup is in progress...

    Next is panel washing and weathering...
    Cheers!

  • Profile Photo
    Erik Gjørup said 3 years, 5 months ago:

    The pitot looks a lot nicer Spiros.