Final Countdown -F14A VF-84 Jolly Rogers, A6m Zero

Started by Chuck A. Villanueva · 141 · 3 years ago
  • Profile Photo
    Chuck A. Villanueva said 4 years, 10 months ago:

    With the factory going full tilt, time to get back to the Zero assembly line. Will add the final detail bits in the cockpit before installing the clear copy and windscreen.

    The headrest is painted Brown leather and then attached to the rear pedestal mounted on the rear deck. Then the loop antenna is painted steel and installed onto the rear deck.

    Next the 3 parts that make up the canopy are removed off the sprue. Nicely moulded, however the framing is not so prominent and will be a bit harder to mask. Not bad clear bits from Hasegawa, though not as crystal as Tamiya. After some test fitting. They fit very well. Too many times run into issues where the clear parts don't quite align properly. Fortunately not the case for the Hase Zeke. The sliding section is on temporary for painting purposes. It will be displayed opened at the final detail step.

    Now to build the prop. The back of the blades are painted Red Brown. The front of the blades will be aluminum finish, as well as the spinner. Hase has this kit with separate blades that will attach to the rear hub of the spinner. Just add each blade to the hub. And I have done this before, make sure you clean the stubs and enough glue keep them in place.

    Once assembled, I will airbrush aluminum on the front faces of the blades and spinner.

    What I love building the Betty, the Zero and the upcoming Dinah, is the separate engine cowlings, You can install them later once the airframe is painted.

    Next up masking time...

  • Profile Photo
    Michel Verschuere said 4 years, 10 months ago:

    Great work Chuck, keep it up!

  • Profile Photo
    Chuck A. Villanueva said 4 years, 9 months ago:

    Thanks Michel, I appreciate the encouragement. I do hope you will enjoy this build.

    Next I will work on RIO's rear compartment starting with the instrument panel. The IP in the kit detail wise is not bad. In my younger days I would just detail it out with pins and needles literally. But has not as steady, and eyes not as sharp will have me use the Eduards PE enhancements.

    Starting from top to bottom. One thing is to make sure to cut off the PE tabs to insure alignment. The PE bits at times tend to be a bit wider which can lead to fit problems when installing the panel into the cockpit, and also interfere with closing up the fuselage halves. Test fit and check to avoid those issues. The radar scope is installed along with the side panels around it.

    Next the center screen is installed along with the side panels in this section.

    Next the lower panels are attached and then the whole IP is set aside to let it set before installing it into the cockpit. It does take some handling, so you want it all set or you will be knocking PE bits off the panel otherwise.

    While that is setting up, will assemble the rear bulkhead and part of the canopy lift mechanism.

    Then install it into the rear of the cockpit floor.

    After a couple of hours I then install the IP into place. Then the control sticks are attached as well.

    Next up is to finish the pilots IP and close it up. More to follow.

  • Profile Photo
    Robert Royes said 4 years, 9 months ago:

    Nice progress!

  • Profile Photo
    Chuck A. Villanueva said 4 years, 9 months ago:

    Thanks Robert. Back to the Zero. This step I start to mask the canopy using Tamiya tape. Being a fighter I didn't use a masking set. Though even Japanese fighters tend to have more panels on their canopies than their US counterparts. Which I kind've wished I went with a set. Reason being is the Hasegawa framing is not as prominent to mask as let say Tamiya or Monogram.

    So the process was a bit more tedious than normal. And of course this is the part of building is the process I dread. At times I would have to put it down and work on something else.

    So it took a whole weekend just to mask it off.

    Once I got that done. Next is to spray the interior color over the framing before applying the final coat. Using Tamiya XF-71 interior green.

    Next up a couple of sub assy's to attach and then paint the overall Japanese Lt Grey.

    More to follow.

  • Profile Photo
    Paul Barber said 4 years, 9 months ago:

    Masking can only be described as a necessary evil. Having a go at a Zero without a pre-cut mask is a big ask, Chuck! Well done - loving the thread (I come back about once a week to have a look at the youtube clip!).

  • Profile Photo
    Erik Gjørup said 4 years, 9 months ago:

    Coming along nicely Sir! Masking is also one of my most dreaded things, but the reward of a proper one is well worth the work. I have used masking sets, but find thet they still need a lot of work, so I also tend to make my own masks. Thanx for sharing - really interesting series!

  • Profile Photo
    Chuck A. Villanueva said 4 years, 9 months ago:

    Thanks Paul, it is the least most not fun to do for me is masking the canopy. Masking a paint scheme is different this I do enjoy, as I cannot wait to unmask painted areas like wing and rudder tips, stripes, wing leading edges, etc.
    Yes Eric true that, a proper masking job reveals a sharp edge where colors meet, if a demarcation line to a anti glare panel. It takes a while, but the end result can be quite fulfilling.

  • Profile Photo
    Chuck A. Villanueva said 4 years, 9 months ago:

    Next to build the nose gear bay compartment.


    Hasegawa has 4 parts to assemble the bay. Already pre painted Tamiya Gloss White.

    Everything fits very well, nice well done details moulded in the bay. Some detail painting here will enhance the details.

    The final parts are assembled and put aside for the next step.

    More to follow.

  • Profile Photo
    Chuck A. Villanueva said 4 years, 9 months ago:

    Time to paint, I will be using for the first time. Mission Models Acrylic J3 IJN Lt Grey with the correct greenish tint. And it did spray very well out of my Paasche H model single action air brush. Then I attached the drop tank.

    This is a Mitsubishi built A6m2. So the wheel wells are painted the same color as the under surfaces.

    i did not pre shade the Zero this time. The aircraft used for the Pearl Harbor mission were either new or low time air frames. So they were still glossy and very little weathering.

    Next to install the engine and cowling.

    First I attach the engine to it's spot on the forward section of the nose.

    Then finally attached the cowling.

    Decal time. More to follow.

  • Profile Photo
    Erik Gjørup said 4 years, 9 months ago:

    Great progress - followed with interest! I like the fact that you will chose not to weather the Zero as it is near-new.

  • Profile Photo
    david leigh-smith said 4 years, 8 months ago:

    Just catching up...Love the shots of your bench showing your other works in the background. As Erik says, I like the minimal approach to weathering. Great work.

  • Profile Photo
    Chuck A. Villanueva said 4 years, 8 months ago:

    With the nose wheel bay completed now time to attach it to cockpit floor.

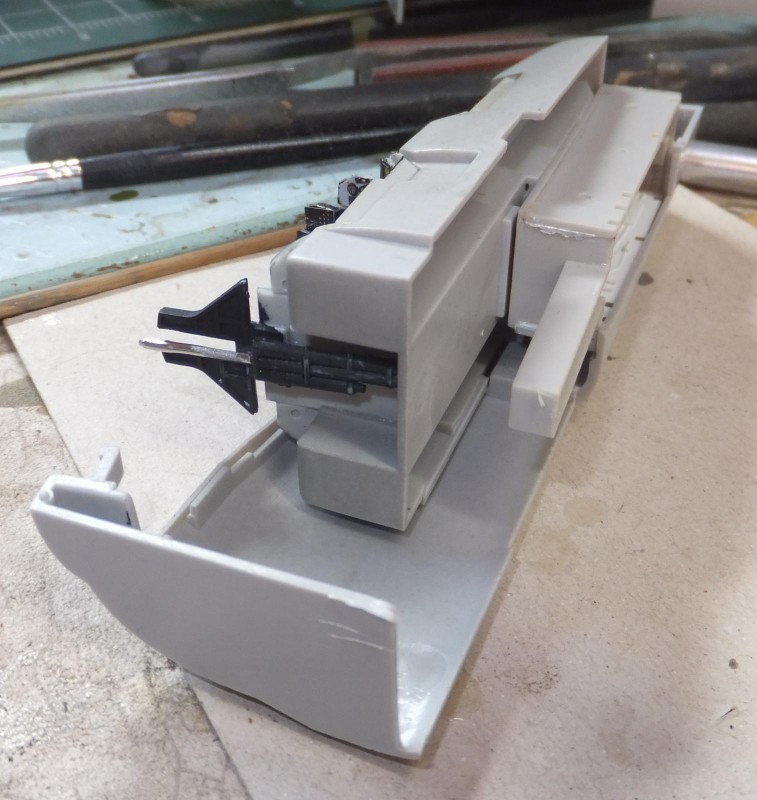
    The canopy lift shock actuator is painted black and molotow chrome for the piston.

    Now the part of the build that is notorious for headaches on the Hase Tom. Read the horror stories with the Aries resin pit for this cat. Thd kit parts are good enough for me and even then with the base kit parts I still had to wrestle in getting the halves to close. Even after several test fits before final. Once I got them closed I wrapped it up with tape and rubber bands and let it sit overnight.
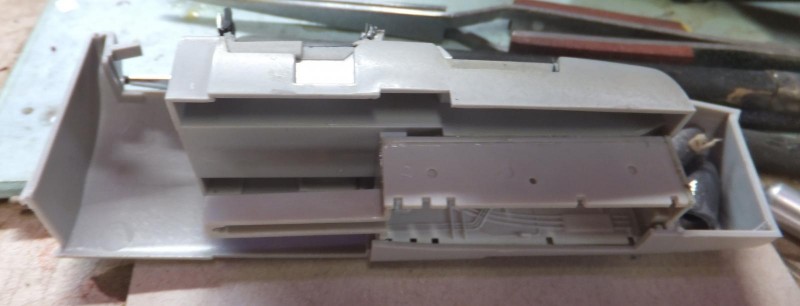
    Next were in the instrument panels coamings. These are black and tan. First with the rear panel over the Rio's IP.

    Then the pilots panel is checked for fitment and set aside while I enhance the IP with PE bits.

    Next to work on the IP. Prepping it to attache the various PE bits.

    1st I attach it to the coaming and work my way from top to bottom attaching the PE.

    The bits always seem to be a bit wide, so have the coaming attached helps trim them a bit to make them fit better and aligned.

    The I put that aside and let the cement set as these get knocked off quite easily with simple handling and installation.

    I remove the rear decking from the sprue and attach it to the rear of the cockpit. It is white at the moment, but will be black once everything is in place.

    Once the Ip has set, I install the IP carefully into the forward section of the cockpit. Whew it went in with room to spare.

    Next to attach the nose and start working on the rear section. More to follow.

  • Profile Photo
    Chuck A. Villanueva said 4 years, 8 months ago:

    Of course the Zero is much easier and a faster build compared to the complicated Tomcat which still has a long ways to go. Using the nice Techmod sheet for the scheme that is similar to the one that appeared in the movie.

    Decals are nice and thin and in register. React well to the Microscale decal system of Micro Set and Micro Sol. Starting with the lower wings.

    Some stencils applied under the horizontal stabs.

    The decal sheet has yellow Id stripes to go with the squadron code on the tail. For this scheme I removed them as these stripes were not applied in the movie. Just the red single stripe wrapped around the rear fuselage. This stripe was designed not to wrap all the way around underneath.

    Again not much in stenciling top side. Other than the wing walks and one on the LH side right near the wing root.

    Don't forget about the gear doors.

    Once the decals are applied they really do pop on this color scheme. Even though it is a single overall color. I really like it. This is the first Japanese fighter I have had the opportunity to paint this more accurate looking IJN Lt Grey (Amber) with the blue black cowl.

    Next up to remove the masks and start adding the final bits. More to follow.

  • Profile Photo
    david leigh-smith said 4 years, 8 months ago:

    Beautifully done, Chuck. Love this build log all day long. So looking forward to seeing these aircraft come together.