Revell / Monogram 1/48 Ju-52 3M

Started by Louis Gardner · 102 · 1 week ago
  • Profile Photo
    Pedro L. Rocha said 2 years, 9 months ago:

    @lgardner
    Louis, I’m with Spiros on this one. Scratch building an entire passenger section is a complex and quite probably also a lengthy project on its own. Some semi-closed curtains would do nicely and a really doubt that unless you got an open passenger door anything would be visible inside

  • Profile Photo
    John vd Biggelaar said 2 years, 9 months ago:

    It is more than just close enough, Louis @lgardner.
    To me it looks superb. Barely noticeable that a panel has been placed.
    Like you said, after painting it will be recognizable anymore.
    Looking forward if you will create some curtains and how you are going to do that.

  • Profile Photo
    Erik Gjørup said 2 years, 9 months ago:

    Louis, you know my opinion on airliner interiors I think?

    I would make seats - especially in 1/48. The easy solution is to make the seatbackshape and let it go to the floor, then a seatpan and a triangular support underneath as the legs will not be all that visible, but if the windows are anywhere near clear this will make a realistic interior.

    Anyway you're the boss on this one and your call is law! Looking forward to whatever you come up with my friend.

  • Profile Photo
    Louis Gardner said 2 years, 9 months ago:

    Late last night I did some research online, and found out there are a lot of differences between the "Civilian" Ju-52 and the military version as far as this kit is concerned. Apparently there are at least two, (three if you count the clear parts tree) plastic sprues that are different.


    These parts included a new fuselage roof section, (which I have already modified), a completely different fuselage Starboard side, with two additional side windows, and a different lower fuselage section, that does away with the panel lines for the ventral "dust bin" and bomb bay openings. There is also a very prominent molded on line that runs under the lower fuselage part that is not present on the military version.


    The new addition of a clear plastic tree is for the change in number of fuselage side windows. There are seven on each side of the fuselage in the civilian kit. The military kit has five on the Starboard side, and is likely the most visible difference.

    Then there are multiple seat parts to be used for accommodating the passengers. There's even a sink / lavatory and a separate "smoking section" available which is included in the "Civilian" model version of the Revell Ju-52.


    This kit is not currently in production but I did manage to find two that were for sale on EBay. These two kits were well out of my price range...

    These box art pictures were found online on other plastic modeling websites, where they were used as part of a kit review.

    There was also another version of this kit according to Scalemates. It had a different box art. It was part of the "Icons of Aviation" series.


    The "Civilian" Junkers 52 kit also offered a tail skid in place of the tail wheel assembly. Fortunately for me, I have found several pictures of D-2600 online that show this plane was upgraded with a tail wheel.

    This is way too much scratch building for my tastes. So I will likely opt to simply modify the Starboard side of the fuselage similar to how I have done to the upper section with the railroad corrugated patch. I will then make some sort of curtains to cover the windows from the inside and call it a day...

    However, part of me wants to make a simplified interior by adding 12 identical seats. I have found a good picture of the seating arrangement.

    It was posted earlier. Here it is again.


    Time will tell what actually happens.

    John, @j-healy
    Spiros, @fiveten
    Pedro, @holzhamer
    John, @johnb
    Erik, @airbum
    I sincerely appreciate your thoughts on how the interior should be dealt with.

    As usual, comments are encouraged.

  • Profile Photo
    George R Blair Jr said 2 years, 9 months ago:

    Great info, Louis (@lgardner). I had always thought the military Ju-52 was basically identical to the civilian version. As far as the interior, I suspect I would choose not to add too much detail to the passenger section. I have jumped down the detailing rabbit hole a few times, and it can become a soul-sucking endeavor. Looking forward to the rest of the build.

  • Profile Photo
    Spiros Pendedekas said 2 years, 9 months ago:

    Thanks for all this info, Louis @lgardner! Like our friend @gblair, I also thought that both versions were more or less identical. As proved, this is not the case! Looking forward to see this bird progressing!

  • Profile Photo
    John vd Biggelaar said 2 years, 9 months ago:

    Thanks for updating us, Louis @lgardner
    Likely in week 31 I will be visiting an aircraft museum where a Ju52 is present.
    If I can be of any help by taking pictures of specific parts, please let me know.
    Not sure if the interior of this plane can be photographed.

  • Profile Photo
    Louis Gardner said 2 years, 9 months ago:

    George, @gblair
    I too always thought these kits were identical. Then I started digging and found out they actually made a dedicated civilian version, with several different plastic sprues from the military kit. As far as the military kits go, I have three of them, and the plastic is the same on all three. Each one of these have a set of wheel spats, trousers, pants, whatever you want to call them, a "dust bin" gondola, and they also share the military interior. There is an option to cut open the various cargo doors, including the one that is overhead. I am very pleased with the quality and fit of this model so far. As far as going crazy with the interior, chances are I will not. If I do anything at all with this portion of the build, it will just be constructing the seats. I think it will be too hard to make any of the overhead storage racks simply due to how the fuselage is constructed, with 4 large parts that make up the main portion of the fuselage.
    Thanks for following along, and I don't expect to lead us into a rabbit hole... 😉

    Spiros, @fiveten
    Thank you for your continued support with everything. I do sincerely appreciate this, and hope to accomplish something here soon. I have been too busy with other obligations lately, and have not had much bench time.

    John, @johnb
    Thanks for the very kind offer to take pictures. If you are able to take pictures of a Ju-52 for me, that would be most appreciated. Thank you for the kind offer. As far as any specific areas, anything you can get will be of value. Landing gear, engines, flap and aileron hinges and so on... If they allow pictures to be taken inside, that would be even better. Thank you very much for the kind offer. I will respond to your PM soon. Things have been very busy here at home, and I have not had much spare time.

    Take care my friends, and stay safe.

  • Profile Photo
    George R Blair Jr said 2 years, 9 months ago:

    I don't remember ever seeing either of these two civilian versions, Louis (@lgardner). I also checked Ebay and found them to be well out of my price range. A few weeks ago I did manage to find a military version on Ebay for a reasonable price, so I picked it up. I'm not sure how much work I would do on the interior since most of it will be hard to see.

  • Profile Photo
    Colin Gomez said 2 years, 9 months ago:

    This has been a great GB article up to this point, Louis. I will join with the others and encourage you to soldier on with the civilian Ju-52. Very few modellers or model show attendees would know the precise ways the military and civilian aircraft differ. I am enjoying the very successful mods you are making so far. Expanding you repertoire of modeling techniques is motivation enough to make it a great project, even if attempting to scratchbuild all the "required" details is prohibitive.

  • Profile Photo
    Louis Gardner said 2 weeks, 1 day ago:

    Wow. This one has been stalled for at least two, more like closer to three years now. Crazy how fast the time flies by.

    The main reason why I quit working on the project was because it was too much work for me to scratch build everything that was needed to make it look like it was an accurate representation of the civilian version.

    There was just too much work to do and to be honest about it, I didn’t really think my skills were that good. Chances are that I would have destroyed the kit in the process.

    So I have been looking for something that would work in place of the military version of “Tante Ju”.

    Occasionally I would see a civilian kit that would be for sale on eBay….. but at astronomical prices. Stuff that I could never afford and would have been in the dog house if I had spent that much money on a single item.


    Not giving up, I found the model you see here and thankfully I was the only person who was willing to bid on it. I’m thinking that it was meant to be, because not only did I get the kit for a very reasonable price……


    But I was shocked to discover the box was still factory sealed and that it was never opened.

    Now I can definitely build an accurate version of the Lufthansa D-2600 aircraft.

    I have taken the opportunity to show the difference between the two versions. So I will be posting the results in a series of pictures in my next entry.

  • Profile Photo
    Louis Gardner said 2 weeks, 1 day ago:

    Here are some pictures showing the difference between the two models.

    I will describe them as I go.


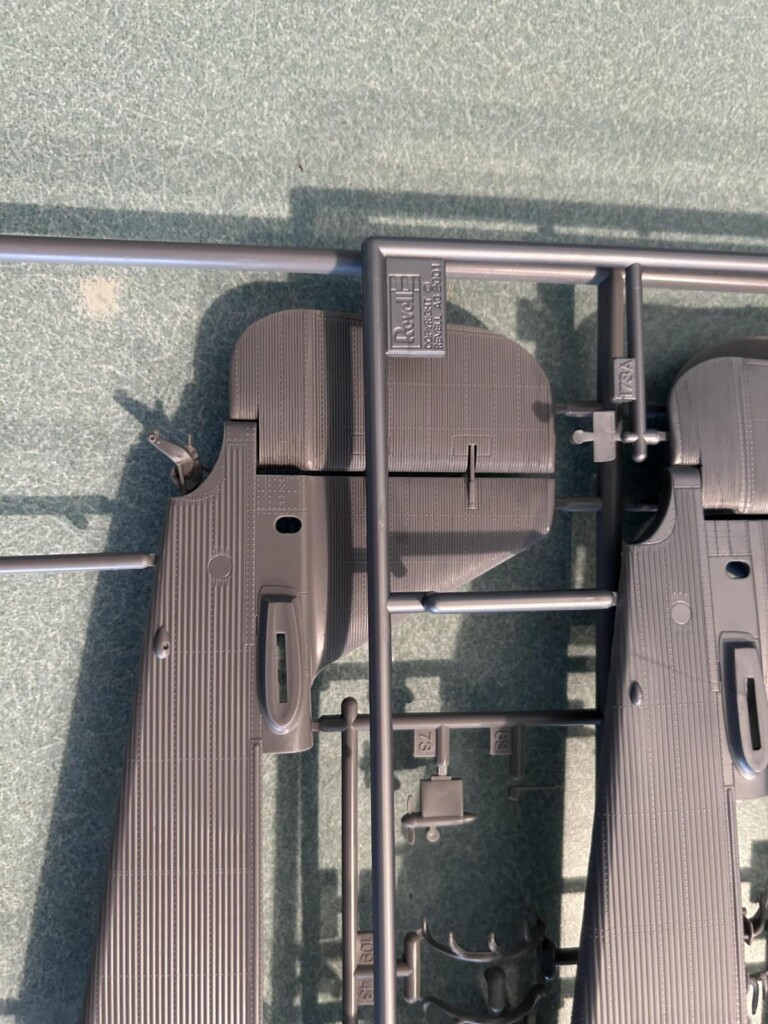
    This first photo shows the doors and how much different they are. The military version is on the left, and the civilian on the right. You can also see the cabin windows are arranged differently, and the military kit has a large cargo door visible as an outline. This deleted two of the side windows.

    The civilian plane has a small crew entry door close to the cockpit as well. This front door is not present on the military version kit.


    The military kit is again on the left, with the civilian version on the right side. Here you can see how the military plane used a tail wheel, while the earlier civilian model had a tail skid.

    This next photo again has the military plane on the left, with the civilian on the right. I have shown the outline of the large cargo door that can be cut apart and displayed opened up. The military plane has two less cabin windows on the Starboard side of the fuselage because of the cargo door.

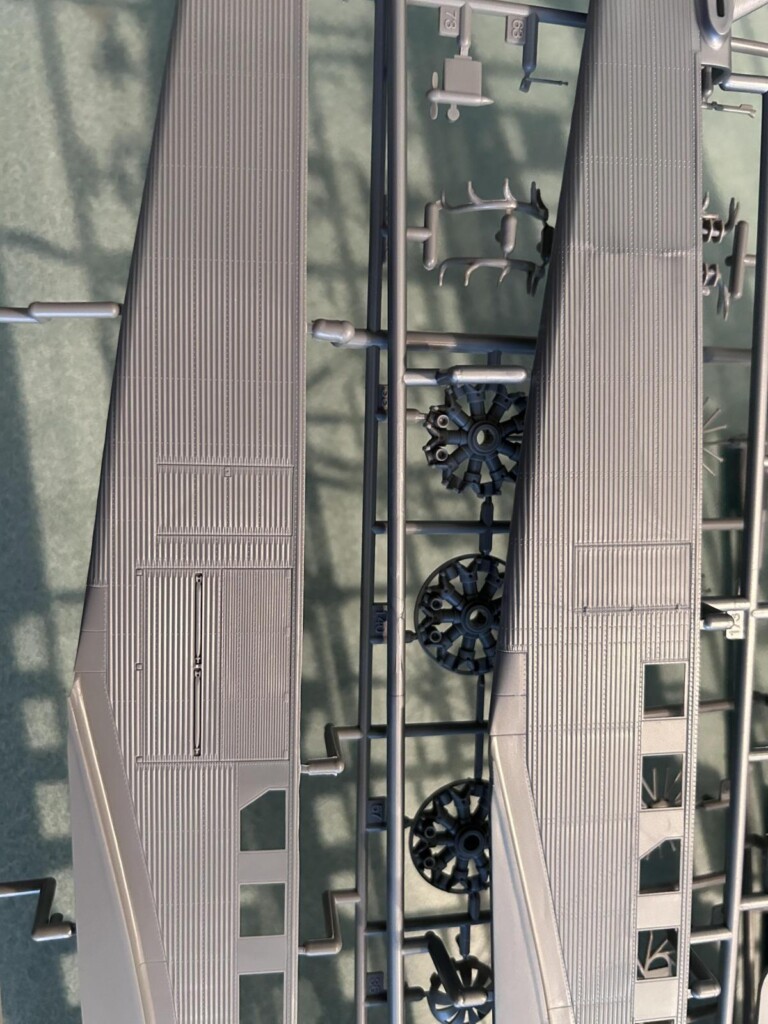
    This time things are reversed. The civilian plane is now on the left side.
    You can see how the airframe structure is present on the military version of Tante Ju, while the civilian form has been covered with upholstery.

    This theme will carry on throughout the rest of the fuselage...

    You can also see the large cargo door, on the military plane, with a simulated plywood veneer.


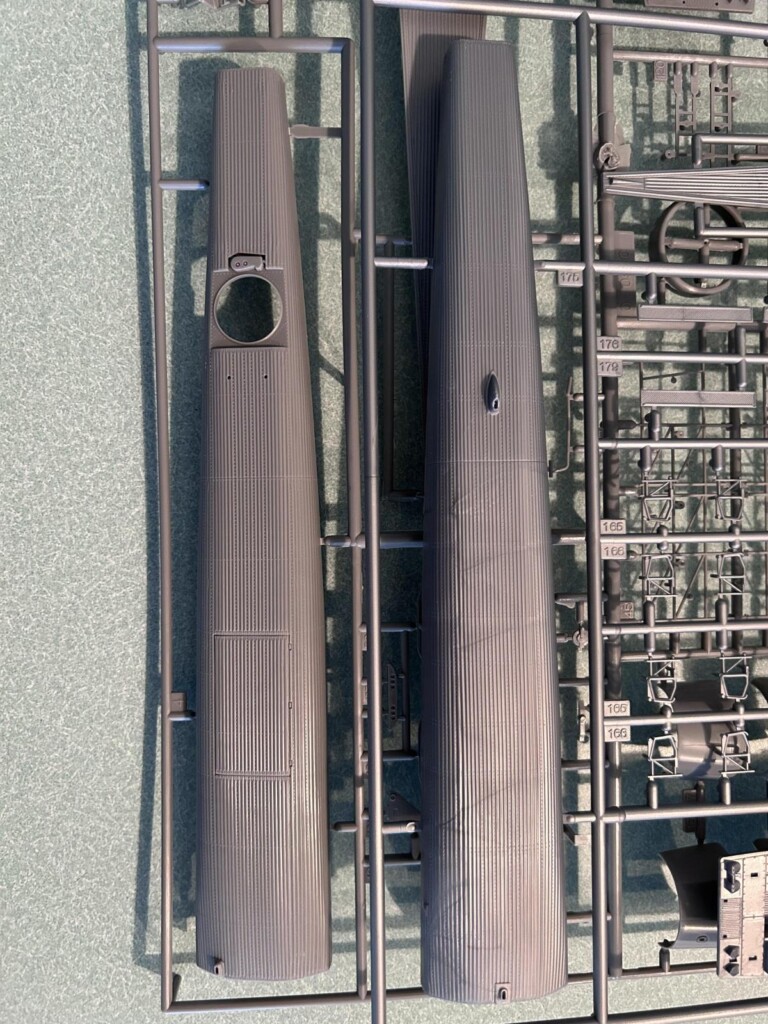
    The military plane is now back on the left side. You can see the bare uncovered airframe very well on the parts that will eventually be the roof part of the fuselage / cabin areas. The civilian plane also has a row of lights running right down the center, along with more upholstery coverings.

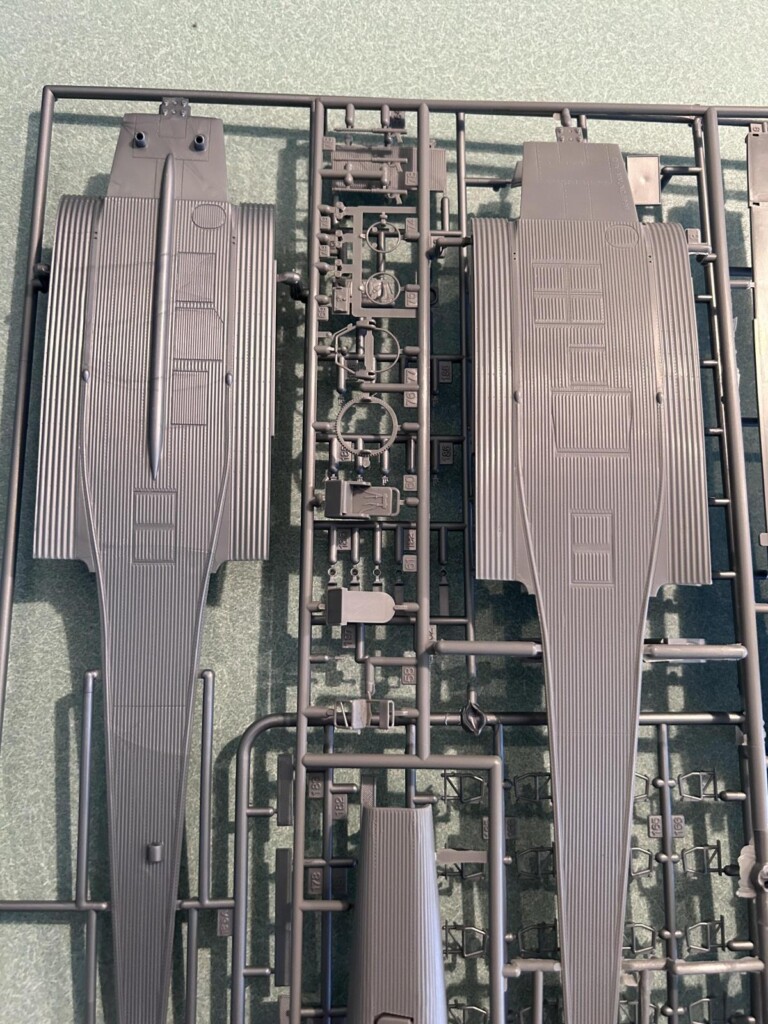
    In the next picture we can see the outside of the upper fuselage decking. Here the military plane is again on the left side. It has an open area where the dorsal gunner would have been standing.

    The civilian plane has a cabin vent molded in.


    This time around the civilian plane is on the left side of the picture. This shows the bottom side of the fuselage. The civilian plane has a large ridge that runs down the center of the fuselage and also something that looks like some sort of vent. keep in mind the restroom / "toilet" would have been back here... I'm just saying... 😉

    The civilian plane is on the left this time. It has some areas sectioned off as if they were private or semi private seating areas. These short walls are depicted as molded into the floors. I don't think they extend all the way to the ceiling.

    While the military version has a smooth floor... more room for cargo.


    Here you can get a better look at these short walls... and all of the passenger seats. Which look more comfortable than what was in the "simplified" military version.


    These are the two dedicated plastic trees that contain the necessary parts to make the civilian conversion from the standard military kit.

    Now you can understand why I decided to wait until I got one of these true civilian kits.


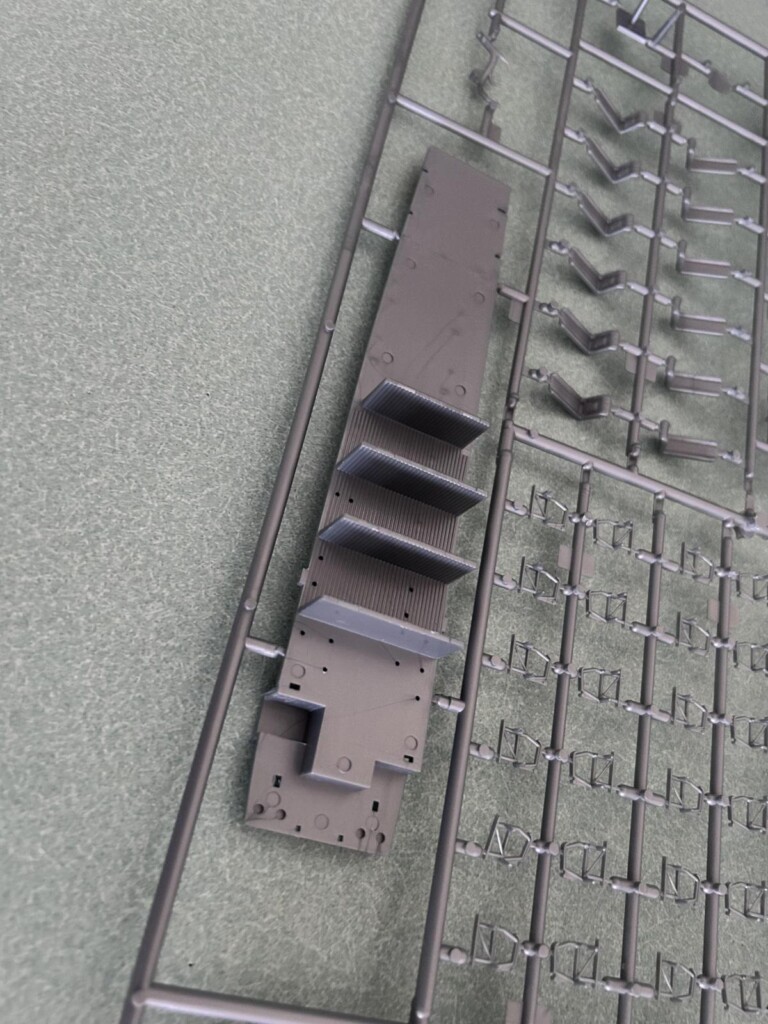
    This is the plastic tree for the military version. Notice the absence of the seats and other parts...


    These are the seats which are molded in several parts for the civilian version. You are to glue them in a different arrangement if you want to build a smoker or a non smoker version.


    These next two photos show more details of the upper fuselage deck cover for the civilian plane. I wanted to show the amount of work involved that would have been necessary to make an accurate model.

    This last picture shows everything that came in the sealed box...

    I have to finish up several builds before I can get back to work on this project.
    George R Blair Jr (@gblair)
    Maybe by the time I start working on this one, you could join me and build yours too ?

    Thankfully I saved the part I cut out of the ceiling where the rear / dorsal gunner is located. So I should be able to glue it back in place with a little work, then built that model as it was originally intended... as a military plane.

    A Spanish Civil War plane sounds like a good subject for this one... or possibly if I can locate the markings for the one that is in the museum where
    Spiros Pendedekas (@fiveten)
    lives... that would be another good one to make.

    John
    John vd Biggelaar (@johnb)
    sent me some excellent pictures of the Ju-52 in the museum he visited several years ago as well.

    So the final choice of markings for the military version will be a hard choice to make.

    In true "Iron Werke" fashion, I will be building both kits at the same time now...

    As always, comments are encouraged.

    Thanks for stopping by.

    As always, comments are encouraged.

  • Profile Photo
    Spiros Pendedekas said 2 weeks, 1 day ago:

    You are very lucky to find this kit, my friend @lgardner! Thanks for the kit presentation and explaining the differences between the two versions!

  • Profile Photo
    John vd Biggelaar said 2 weeks, 1 day ago:

    Great you have found this civilian one, Louis @lgardner
    Thanks for sharing the difference between both variants, very helpful.
    Would love to see the progress on both of them in parallel.

  • Profile Photo
    Stephen W Towle said 2 weeks ago:

    Playing catch up with, "The Life and Times of Louis" and being Tail End Charlie. Thankyou, Louis for reaching out to the community with regards to your family situation. I've taken in several family members who have chemical addiction problems and behaviors. You can't always fix birds with broken wings and then you have to go back to charity starts at home.

    With regards to Iron Annie, I too have had the opportunity to see that aircraft and of course have a kit in the stash. Its always fun and interesting to learn about history not only the subject matter but, the history of the kit manufacture and its efforts to serve the modeling community. The Monogram Ju-52 and the Catalina were one of Monogram's efforts to reach out to modelers and provide something that was at the top of everyone's wish list. In the mind of modelers it was a must have kit. Like you have stated earlier on your blog, man this thing is big and everyone soon discovered that their eyes where bigger than their wallets and ambitions. Only the true believers bought this kit off the shelf and then the kits became shelf sitters. But, what a kit and for Revellogram or Monogram to really produce what amounts to two different kits with one being a civilian version and the other being a military version of the same speaks to how dedicated the company was. At the time these kits represented the Eduard of their times. I've noticed that Eduard now has a board for sounding off on what modelers want and need in new kits. With several requests for those off beat kits or the fruit bats that our near and dear to the true believer. Which may or may not be a wise business move.

    Keep up the good work. Your efforts our always appreciated and serve to prove that modeling therapy is good vehicle for keeping your sanity together in life's journey.