1/35 Dragon M-26 Pershing

Started by Louis Gardner · 7 · 11 months ago
  • Profile Photo
    Louis Gardner said 11 months, 2 weeks ago:

    This is a project I started building many years ago when my Dad was still alive. I wanted to give it to him as a present. However, when I offered to take him to see the Korean War monument in Washington DC, he flat out refused to go. He told me that he didn't want to see anything that reminded him of his wartime experiences. So I thought I had better re evaluate my gift for him. I decided not to give it to him.

    Later on, in his last days of life, while lying in his hospital bed, he told about some of what he and his fellow soldiers went through. Now I completely understand why he didn't want to go...


    So I decided I would simply build it for myself. I was almost to the point where it was close to being completed...

    I had it painted, and I applied a set of fictitious markings for a tank assigned to the 6th Medium Tank Battalion, 24th Infantry. This is one of the units that Dad was assigned to at one time while he served in Korea. I didn't have a clue as to what Platoon or Company he was in.

    So I winged it, and added some decals that I thought were appropriate.

    Fast forward, I was at the point to where the tracks were almost all I had left to install...

    Had I heeded the instructions, I would have installed them prior to gluing the upper hull in place.

    But who needs instructions right ?

    Now you know why this tank model has been sitting on the shelf of doom for SO long, at least 12 or 13 years maybe even more.

  • Profile Photo
    Louis Gardner said 11 months, 2 weeks ago:

    So you see where this is going... We don't need no steenking instructions !

    As luck would have it, I recently discovered that the 6th medium Tank didn't use M-26 Pershing's. Instead they had M-46 Patton's and M-4 Sherman's, both of which Dad crewed while serving in Korea.

    Our good friend and fellow Imodeler,
    @michel-verschuere Michel Verschuere
    had originally wanted to build up a Pershing for the group.


    He wanted to build a vignet of the same photo I have used for the group, where a Marine M-26 is driving through the snow, as it is being "escorted" by Marine Infantry.

    Freedom Is Not Free - Korean War Veterans Memorial in 1:48 (Scratchbuild)
    Instead he ended up building a magnificent diorama of the Korean War monument I was talking about earlier in my opening post about my Dad. Thanks again Michel ! Your work looks INCREDIBLE. So I decided to go ahead and finish up this build now. There is no better time than the present. I started off by carefully cutting off the front fenders. Next I used some Molotow chrome to mark the headlights. Since this was now going to be a USMC tank, off came the fictitious markings I had previously applied. The main problem I had with this model was that once I had fully assembled the hull, the tracks would not fit in between the fenders and return rollers. I had assembled the tracks for one side, but still hadn't added the center guides. You can see how small these parts are. I can tell you this: the carpet monster was well fed ! Going a different route way back then, I thought it might actually work if I got a set of AFV Club individual track links, and try to slide them in place once assembled... This didn't work either. So this weekend I added the center guides one at a time to the track assembly. I had to take my time and eventually this was done. Here you can see the finished track assembly for one side... One side down, one to go ! The other side still needs the tracks assembled. Because I had now cut off the front fenders, I was able to carefully slide the finished track in place. Once it was done, the tank's hull looked like this. I accidentally spilled a little of the Molotow chrome, and since the original bumper numbers have been removed, this will definitely need some touch up painting done. It will also need some gear added, and some "dirtying up" before I can call it done. As always, comments are encouraged. Thanks for stopping by.
  • Profile Photo
    Spiros Pendedekas said 11 months, 2 weeks ago:

    Superb entry and ditto progress, my friend @lgardner!
    A tribute to your Dad, who, understandably, did not want to be reminded of the terrible time he had there.
    Instructions? Instructions?
    No, we don't need no!

  • Profile Photo
    John vd Biggelaar said 11 months, 2 weeks ago:

    Great entry and an excellent start already, Louis @lgardner
    A great remembrance to your dad. And ofcourse fully understandable that he didn't want to get remembered about that difficult time he had.

  • Profile Photo
    Louis Gardner said 11 months, 2 weeks ago:

    Thanks Spiros Pendedekas (@fiveten)

    John vd Biggelaar (@johnb)

    I sincerely appreciate your kind words.

    I was not really happy with how the tracks were looking as they rounded past / over the sprocket assembly at the rear of the tank hull.

    These are the individual track links that Dragon has provided in this kit, and not a one piece assembly as you might find in other kits. Dragon has molded the end connectors in place on the track blocks.
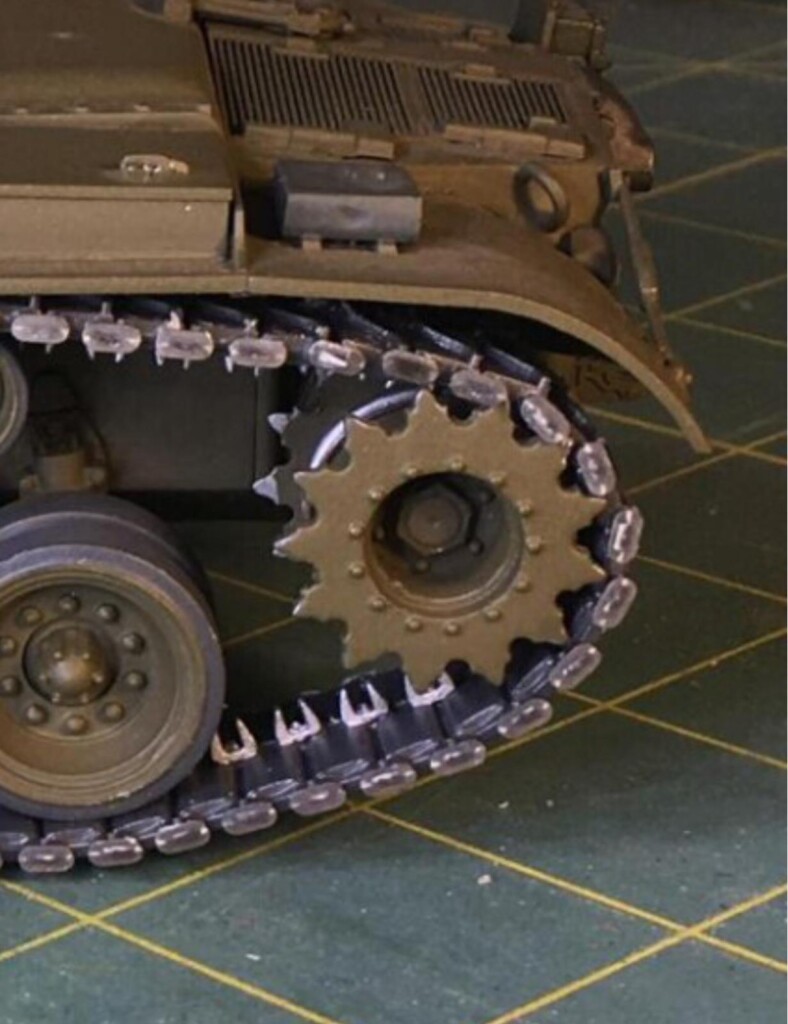

    This looks really good as long as the track is on a straight run, with no bends. But you can see how the end connectors are not laying down into the sprocket teeth as they were on the real thing.

    This was bothering me. So I came up with a fix using some of the AFV Club tracks I have.


    Carefully I cut away the Dragon kit supplied tracks from the sprocket. It looks like this at this point.

    This is what I removed from the track assembly. Notice the individual track link, as there’s more on that in a few.

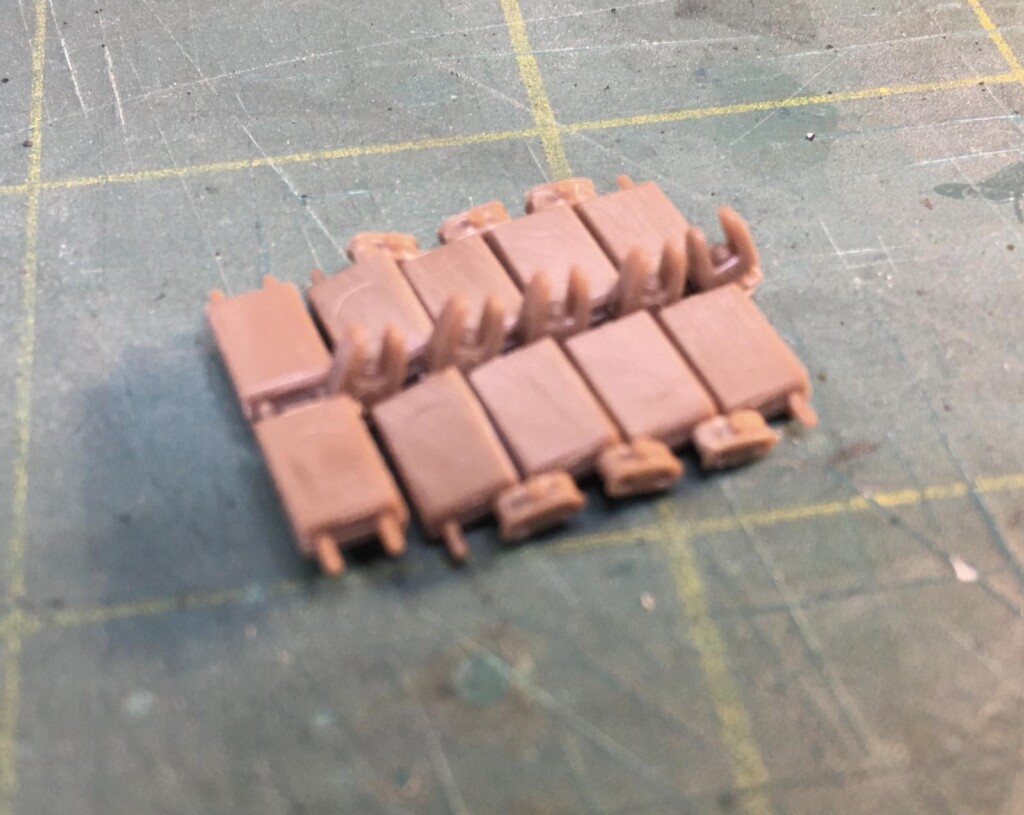
    This is what I made up using the AFV Club individual track links. Notice how the center guides and end connectors are not perfectly in line with the track blocks.

    This is exactly what the real track is like.

    I added a few drops of Tamiya Thin glue to keep them together because they are very fragile and I have to get them installed on the sprocket. I’m sure that they would fall apart if not glued together while this was happening.


    After some careful maneuvering around the sprocket I was able to get them installed and glued in place permanently.

    Remember that individual track link ?

    As it turns out, I had one too many of them. This was also a part of the problem. By removing this single track block and then by replacing the original kit supplied tracks I was able to get the track tension set to where it was looking like it should.

    American tank tracks do not have any slack in them. If they have excess slack they are more prone to being “thrown” as we called it in “tanker language” or being tossed off for the civilians.

    We used to have a saying that “tight was right”, and we made sure that our tank’s tracks were always properly tensioned. I have bragging rights because during the 2,000 plus miles that I have personally driven a tank, I have never thrown a track.

    Other tank crews can’t say that. Believe me when it happens, you will definitely do what you can to keep it from happening again. Working on the tracks in the field isn’t too much fun.


    After these track blocks were replaced, this is what they look like now.

    Chances are I will go back and trim the end connectors off the front compensating idler wheel and then replace them with ones from the AFV Club parts there too.

    These end connectors are used to hold the track blocks together on the real full scale tracks. They have a wedge bolt that is tightened down against the track pins, so they follow the track pins as they bend around things.

    Clear as mud right ?

    Anyhow as always comments are encouraged.

    Thanks for stopping by.

  • Profile Photo
    John vd Biggelaar said 11 months, 2 weeks ago:

    Quite a lot of work done on those tracks, Louis @lgardner
    Definitely starting to look much better.

  • Profile Photo
    Spiros Pendedekas said 11 months, 2 weeks ago:

    Brilliant way to fix the tracks issue, my friend @lgardner!
    Looking forward to the next steps!