1/48 Tupelov Tu-2 "Bat" N. Korea

Started by Chuck A. Villanueva · 99 · 5 months ago
  • Profile Photo
    Chuck A. Villanueva said 11 months ago:

    Hi Spiros it is my first foray of a Xutong kit, and there isn't really much to read about how it goes together, so basically I'm on my own and will hopefully detail any roadblocks along the way.
    Tom, not only lots of bits and pieces, I can see that getting some off the sprue with out breaking some of them may be a challenge.
    John any model has some form of challenge even Tamiya, this one only because of not being familiar in Xutongs ways of doing things.

  • Profile Photo
    Chuck A. Villanueva said 10 months, 3 weeks ago:

    So finally getting into this kit, Xutong starts with making any modifications to some of the parts that pertains to the version that is on the box cover. Though it shows cutting a section of the glass nose to fit on this version, that has already been provided in the kit, whew, I was not looking forward if I had to do that. Cutting clear parts don't end well most of the time.

    Here for example is one of the engine cowl covers having the cowl vents sanded off.

    Next is my usual process of pre-painting the interior components while still on the sprue. Now being the first WWII Soviet aircraft build, I was still pondering the interior color of this era of a Tu-2, grey green? a variation of Interior green, no It was a grey close to RAF Medium Sea Grey. A shade darker. And close to the grey in the set of Eduards painted PE detail set. So starting with the seats and interior airbrushed the grey components.

    The interior of the fuselage halves are also airbrushed the grey from stem to stern.

    Wheel bay, inside the engine cowl covers, wheelbay doors all painted.

    Next up is to start in the cockpit,

    more to follow.

  • Profile Photo
    Spiros Pendedekas said 10 months, 3 weeks ago:

    Great job on what seems to be a challenging build, my friend @uscusn!

  • Profile Photo
    John vd Biggelaar said 10 months, 3 weeks ago:

    Not an easy but very interesting kit, Chuck @uscusn
    Looking forward to see you tackle those challenges

  • Profile Photo
    Chuck A. Villanueva said 10 months, 2 weeks ago:

    Spiros, the challenge really is taking this step by step, while enjoying the build process.
    John, haven't run into any difficulties as yet, but will notate any issues as the build progresses.

  • Profile Photo
    Chuck A. Villanueva said 10 months, 2 weeks ago:

    Okay lets get starte. the steps on the instructions are not marked as such, each build step is simply the diagrams in order to proceed, so step 1 is to start on the RH side of the fuselage interior components.

    The first thing to do is to remove a section of the side rear of the canopy opening. Xutong has scored a line in where to cut to remove this section. Easily done with a sharp knife.

    Next is to install an Eduards PE side panel into the indentation that moulded into the front cockpit interior.

    Next a gauge panel is cleaned up and then attach that above the side electrical panel in the slot

    Next a rather unique instrument panel arrangement the Tu has. A panel juts out from the RH side of the cockpit. It's attached.

    An access panel is then installed under the RH wing root.

    The RH IP has set and painted Tamiya Semi Gloss Black

    Next the PE panels are attached after sanding off the details.

    The IP gauge cover and more PE bits are attached.

    Next is to assemble the bomb and tail wheel.

    More to follow.

  • Profile Photo
    Spiros Pendedekas said 10 months, 2 weeks ago:

    Great job on the interior, my friend @uscusn!

  • Profile Photo
    John vd Biggelaar said 10 months, 2 weeks ago:

    Nice improvement on the interior, Chuck @uscusn

  • Profile Photo
    Chuck A. Villanueva said 10 months, 1 week ago:

    Thanks Spiros and John,the kit does provide a lot of details for the interior, fair, but enhanced with the Eduard's PE.

  • Profile Photo
    Chuck A. Villanueva said 10 months, 1 week ago:

    Next is to continue work along the RH side fuselage, assemble a bomb.

    More control boxes are installed on the RH side cockpit wall.

    The bomb is quite large and one is carried with in the bomb bay.

    The halves are assembled one half has the tail fin moulded in, once assemble, the 2nd fin is attached.

    The fin support braces are then attached, a total of 8 braces.
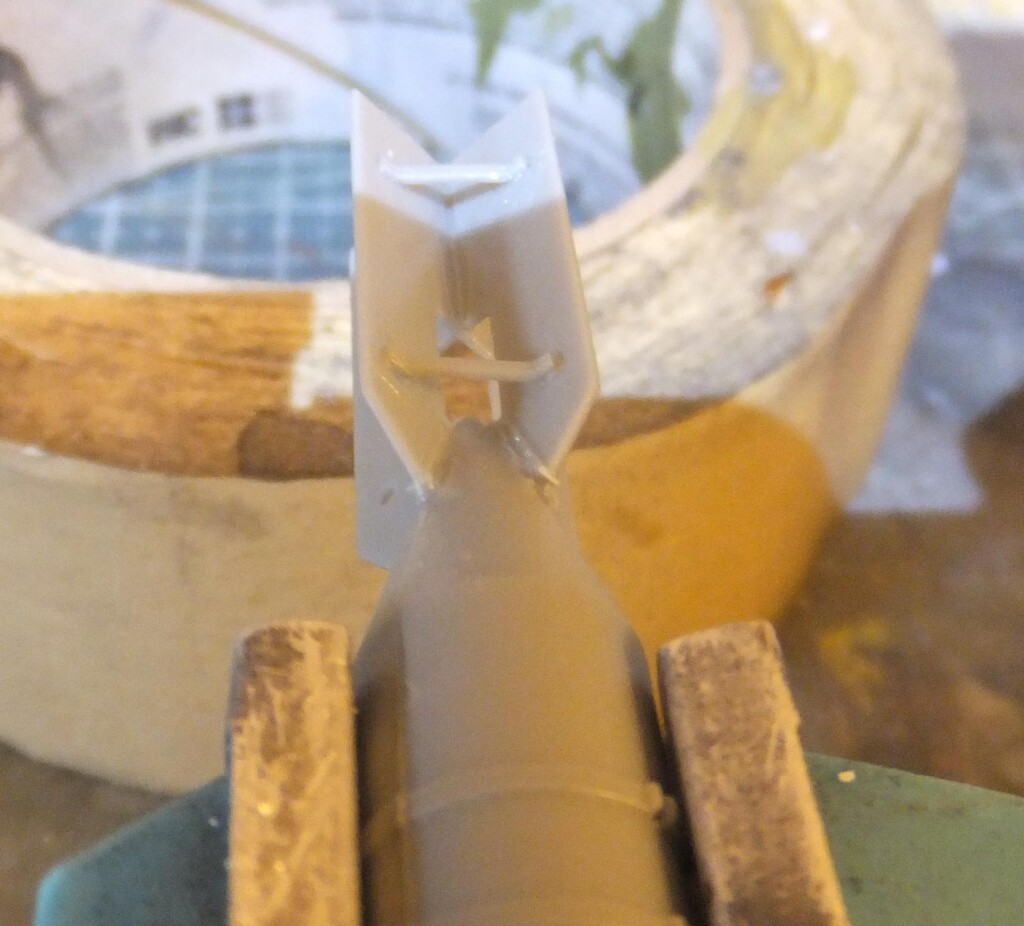
    Still on the RH side fuselage, the tail wheel assy and minor details.

    First a pair of 02 bottles are painted Blue and attached to their racks on the RH side rear operator compartment.

    Then a set of 3 port hole windows are installed toward the RH quarter side of the fuselage.

    Next to assemble the tail wheel. Normally I would wait to install this later in the build process, but I am not to familiar with Xutong and decided to proceed and assemble and install, I am normally careful not knocking it off due to handling, and there is stilll a long ways to go.

    The tail wheel compartment bulkhead. Installed to the RH side rear of the fuselage.

    The wheel is Russian Hub Green, Tire is painted Testor Rubber, the strut is Lt Grey.

    First the strut is attached to the actuator, then the wheel is sandwiched between the two spindles and left to set, the attachmenet point is not the greatest.

    Next up is to start work on the LH side of the fuselage details,

    more to follow

    1 additional image. Click to enlarge.

  • Profile Photo
    Spiros Pendedekas said 10 months, 1 week ago:

    Superb progress, my friend @uscusn!

  • Profile Photo
    John vd Biggelaar said 10 months, 1 week ago:

    Nice result, Chuck @uscusn
    Quite a complex construction on that tailwheel.

  • Profile Photo
    Chuck A. Villanueva said 10 months, 1 week ago:

    Thanks John and Spiros, working on a rather unique kit, Soviet design of the aircraft, plus working with a new kit design by a relative new company their first effort. Just a step by step methodical process.

  • Profile Photo
    Chuck A. Villanueva said 10 months, 1 week ago:

    Next is to work on the LH side fuselage interior details, starting at the cockpit working back.

    1st like on the RH side, is the service panel is attached in place on the LH side.

    Next an electrical box is place on the LH side cockpit wall. Pretty drab in appearance, An Eduards PE part really helps here.

    The LH console panel is attached to the LH side wall.

    The radio set is place a bit aft on the LH side rear compartment.

    The unique style of LH/RH side instrument panels the Tu-2 design bureau has come up with. The LH side IP is attaced just ahead of the console.

    PE detail part which is what I believe is a small extension that serves as a table to write down information as recieved through the radio set, compass points, while in flight.

    Console control panel plate is attached to the LH side console.

    The IP gauge panel is is installed then the cover over the gauges. So far everthing is fitting well, contact points are good, not to fiddly yet.

    Now working back into the rear gunners compartment. Several control electrical boxes will be attached along the rear side wall.

    Next set of boxes may be for intercommunication with the pilot and crew.

    Finally that last box is attached and dry brushed, a wash is applied to the interior to enhance the stringers along the side of the fuselage.

    Next up is work on the flight deck, seats,

    more to follow,

  • Profile Photo
    Spiros Pendedekas said 10 months, 1 week ago:

    The interior looks better and better, my friend @uscusn!