Thanks, Erik. I felt I had put in some time but only inched forward in progress with my relatively small update. I am happy the details were worthwhile to follow, anyway.
Thanks, Spiros. The fiddly bits are done and the next update below allows me to finally surge forward on the build. Glad you like it so far.
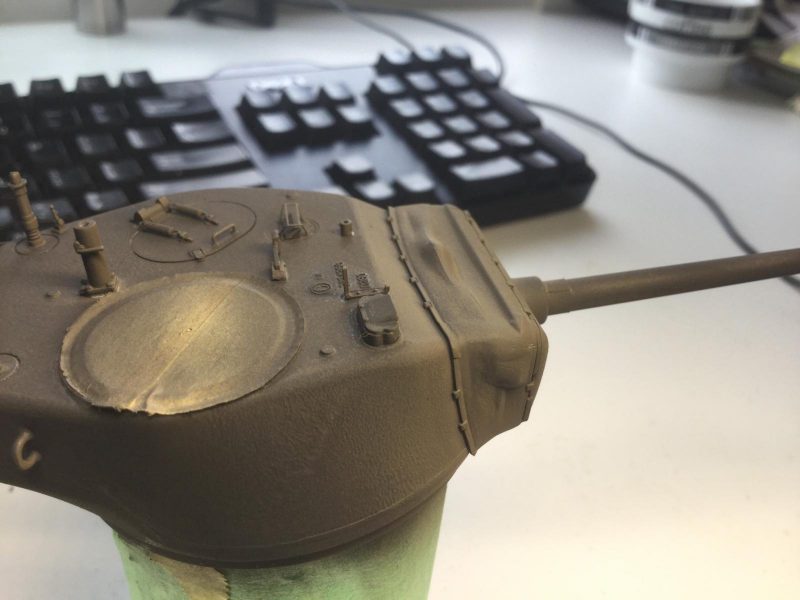
Thanks, Louis and thanks again for the insight on the cupola. I am lucky with this model to be using an RB productions metal barrel so I have no seam to worry about. You will see in the next photo set that I just have to mask the natural metal to have it come out accurately. I used to think that metal barrels were a waste of money but now I use them whenever I can on all my tank models.
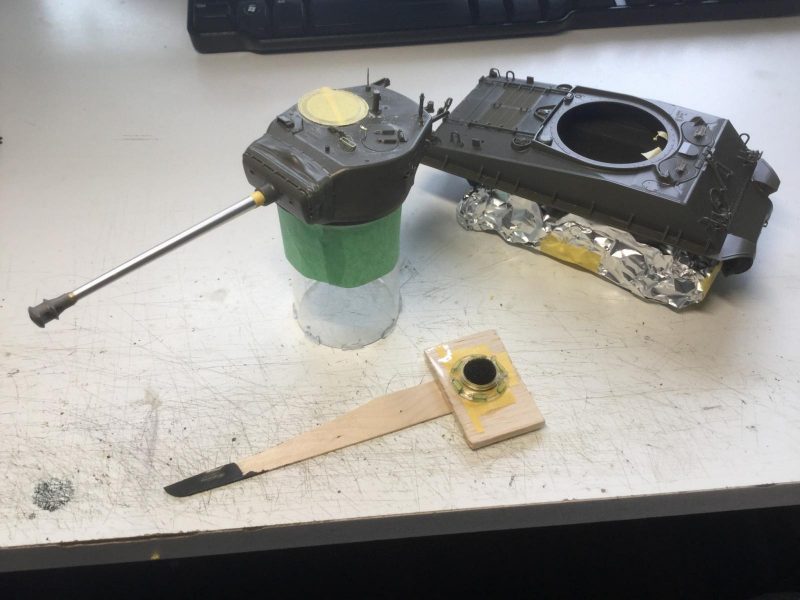
Here is the latest on the Easy Eight. I started by masking off the bogies with tin foil and covering the ring for the cupola with masking tape.
-
1. The base of the barrel on the M4A3E8 is metal so easily done by simple masking I guess this detail has something to do with accommodation of recoil but I have not seen it on other tanks.
-

1. Foil is any easy and flexible way to mask bogie wheels when they are not removable (as in the cassettes for Sherman tanks)
2. masking tape used inside to stop the driver's hatches from falling off during painting - wouldn't want to mangle the fragile photo-etch.
I then painted the canvas mantlet cover with Gunze OD #1 for aircraft (tinted with a bit of Gunze Dark Earth).
-
1. Note distinctly brownish tinge of Gunze OD #1 - good for canvas covers - a pre-shade of black under this adds depth to folds
Gunze OD #1 is authentically brown in tone, which distinguishes it from the green Tamiya OD for the turret and hull. After it cured, I proceeded to mask the mantlet cover.
-

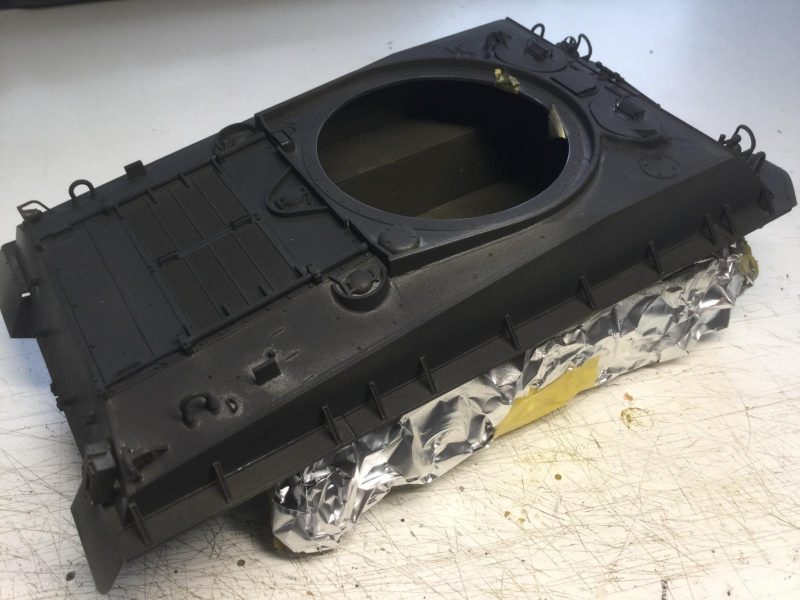
1. I opened up hatch to paint inside and rim in OD.
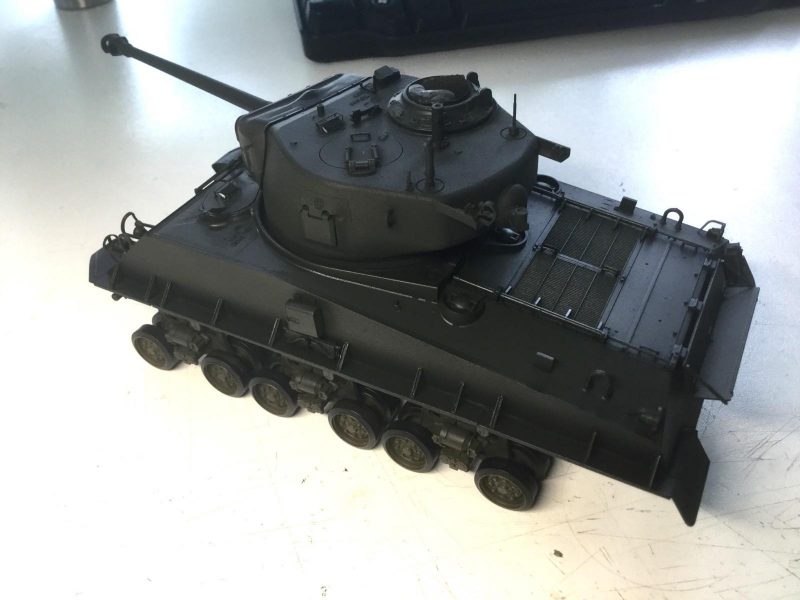
Next was a pre-shade of flat black for the turret and hull.
-
1. Flaws in the black pre-shade were filled in with more black later.
As with my T-72, this will deepen shadows, bring out details and add some authentic color tone variation and interest (hopefully) Please note that I can only show you the first pre-shade flat black coat with flaws and blank spots in airbrushing. I filled in the shadowed areas with a second coat of black followed by the first Tamiya OD coat in the next complete painting session.
-

1. Strong contrast in OD for canvas cover. I will adjust the tone of this with oils and pigments - it looks a bit ugly to me at this stage
The unmasked mantlet looks pretty good in the all flat paint stage. I next sprayed some Tamiya OD touch ups and a layer of Tamiya clear prior to decaling oil washing and mud-effects.
-
1. Tracks were also pre-shaded flat black and then Tamiya XF-10 Flat Brown for rust/mud undercoat which is appropriately reddish out of the bottle IMHO
-
1. You can't see very well but the preshading has added quite a bit of tonal variation. The clear coat makes the OD extremely dark but this will lighten up again after oil and pigment weathering.
-

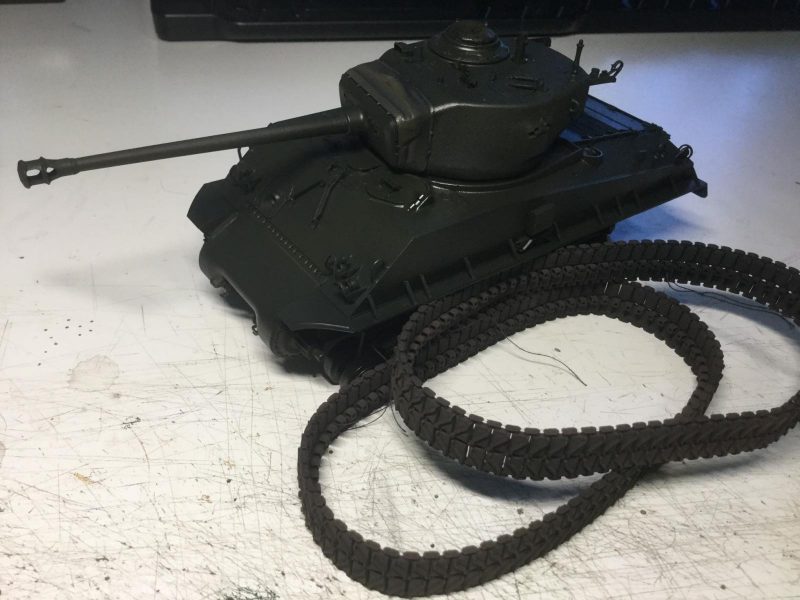
1. Note that I have dry fitted the painted cupola to the turret before weathering
The weathering stage with oils and pigments will take me 3-4 days to experiment with now. I need to see it cure and dry in stages to get it to look right. This is the stage that is the most trying for me in that the weathering effects won't be clear until the final flat coat. I am happy with the painting so far, anyway. I have been looking at period color pics as well as video from the Tank Museum at Bovingtonand I like the darkness of the OD. Here is a sample of a Korean War tank which is one of my marking options with Bison decals.
I think it is a pretty good guide to weathering as well. Comments welcome, as always.