Neil Armstrong’s F9f-2 Panther
HISTORY
To know a little about the history of this plane and its famous pilot at Korea, see my previous article:
Neil Armstrong’s F9F-2 Panther – Hobby-Boss 1/72
THE KIT
Following my build of Neil Armstrong's Panther in 1:72, and in which I showed a letter he wrote to his father during the Korean War, I was kindly contacted by the present owner of the letter asking if I would make him the same model but in a bigger scale.
Since it is not possible to get it in 1:32 due to the end of Fisher Models, we decided it would have to be in 1:48, with the choice falling on the Trumpeter kit and some aftermarket goodies (masks, seat belts and decals) as well as some scratch build parts and a few home printed decals.
BUILDING
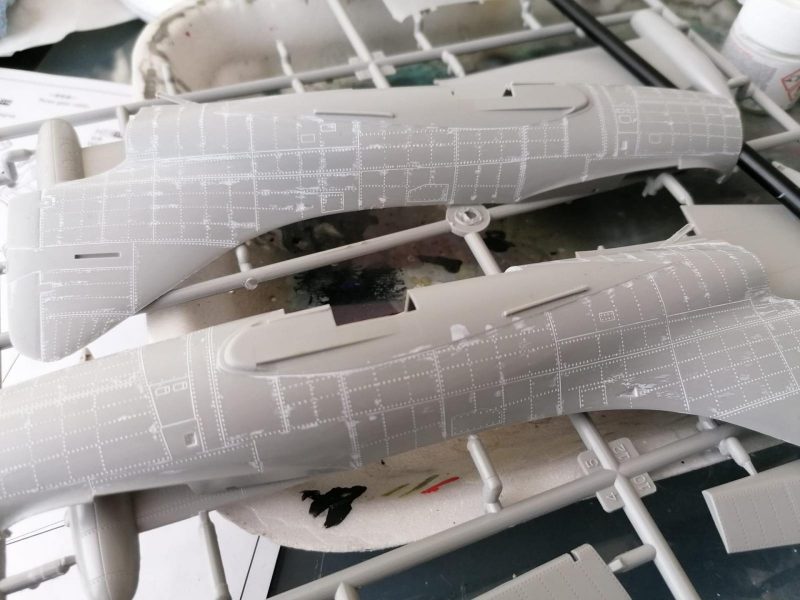
The build was quite straightforward as the kit has no major problems. Of course, it is necessary to make some adjustments and improve some parts, such as the landing gear pit, the speed brakes pit (in which it is necessary to build the entire interior in scratch), improve the cockpit especially the seat because it does not have belts or ejection handles. The speed brakes themselves had to be completely rebuilt as they had neither the holes nor the interior structure, and so on.
The weapons also needed some attention, such as drilling the rockets exhaust.
It is also necessary to be careful, as the kit also allows the reconnaissance version to be made and the instructions are not always correct, for example, by placing an antenna that only exists in that version and not in the combat version. Another incorrect item is the area behind the seat, as there are no canopy rails, nor obviously any detail that needs to be scracht builted.
PAINTING AND DECALING
As usual, I used Mr.Color aqueous paints.
Caution: as usual, extensive research is needed, especially when the instructions are clearly wrong regarding wheel well colours, etc.
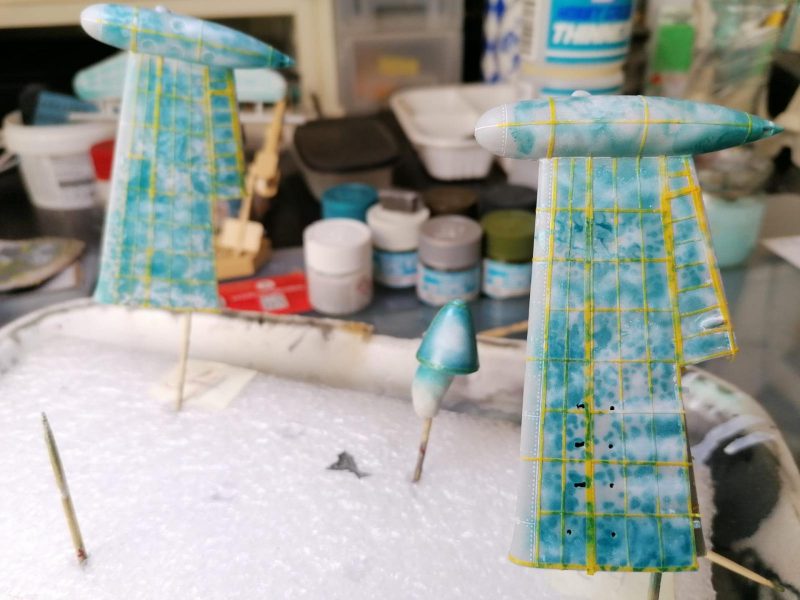
Having seen some photos of the war in which the panel lines and the rivets were lighter than the painting, I opted for a different approach than the one I usually use, applying these details before and not after.
After applying all the lines and rivets in white, I masked them and applied a marbling in a much lighter blue. This was followed by a coat of the very diluted final blue, after which the masks were removed and another coat, also very diluted, was applied. This procedure allowed to obtain well demarcated panel lines and rivets as well as a subtle stained painting.
-
-
Then I applied a layer of gloss varnish, after which I demarcated the areas to be painted in silver, thus using the dark blue gloss as a base to obtain a very shiny and deep silver.
At this point let me give a word of appreciation to MR.COLOR SUPER METALLIC 2 SUPER FINE SILVER 2 what a good paint!
Taking advantage of the gloss base, I applied the decals that consisted of a mix of box decals, aftermarket and home printed in order to create the necessary to exactly reproduce Neil's plane.
This was followed by a new layer of gloss, over which some weathering was applied to the decal area in order to unify the entire plane.
I finished by applying a layer of semi-gloss and then the matte pieces were placed, the masks removed from the canopy and AK Gauzy Agent applied.
AFTERMATH
After shipping it to the new owner, he kindly sent me some photos of his model along Neil’s letter and will. Thank you, Sir!
Hope you like,
Cheers,
Manuel
1 additional image. Click to enlarge.