USAF Monogram 1/48th B-26B Invader

Started by Chuck A. Villanueva · 76 · 1 year ago
  • Profile Photo
    Chuck A. Villanueva said 3 years, 3 months ago:

    Thanks Eric, I do miss those Pro modeler/Monogram instructions. As a whole Monogram was one of the top kit producers in the late 20th century coming out of the US. After merging with Revell, just no the same. The factory still plugging along. Hopefully will have both Lightnings finished by the end of the month.

  • Profile Photo
    Chuck A. Villanueva said 3 years, 2 months ago:

    Now to get back to work on the Invader. Will build the engine nacelles.


    LH/RH halves with nice internal details with in the side walls. The forward wall as well well defined details.

    Assembly is straight forward, typical Monogram, some work will be needed to clean up the seams.

    The rear wall of the gear bay has good details, and is inserted in the back of the wheel bay. Given a bit of wash to enhance the details.

    Some lead sinkers are super glued in place in the cavernous nacelles. Plenty of room for a pair in each side.

    Then each completed engine/wheel bay nacelles are attached to the wings. Thank fully the design allows to install the landing gear after the paint/decal process is finished.

    Next the engines...more to follow.

  • Profile Photo
    Erik Gjørup said 3 years, 2 months ago:

    Suppose those sinkers will let it keep its feet on the ground. As has been mentioned some filler will be needed, but overall it looks like a pleasureable build. Thanks for sharing Chuck @uscusn.

  • Profile Photo
    Spiros Pendedekas said 3 years, 1 month ago:

    Great steps, my friend @uscusn!
    I remember when doing my A-26 that I glued the lead weights at the same manner as yours.
    Looking forward to your progress!

  • Profile Photo
    Stephen W Towle said 3 years, 1 month ago:

    Chuck, since your doing a WWII bird/Korean bird and looking at some of photo's you have posted are you planning on using the Eduard wheel set? I believe that the mains where also , used on B-25s and P-61 and they'd add a little detail to what is looking real good.

  • Profile Photo
    David Mills said 3 years, 1 month ago:

    Enjoying this build immensely Chuck - nice work!

  • Profile Photo
    Chuck A. Villanueva said 3 years ago:

    Thanks Eric, with a bit more in the solid gun nose when I get there. Just to be sure.
    Spiros building the other Monogram kit a few years ago does jar some memories in the weight placement it seemed to work as the model sat on her nose wheel.
    Yes Stephen I am using the Squadron TD wheels for this kit and the Eduard's Brassin wheels for the ICM Invader.
    Thanks David, enjoy the ride. There is more to come.

  • Profile Photo
    Chuck A. Villanueva said 3 years ago:

    Now to work on the engines. The whole kit so far has been good on the details except for the engines, they are not very good. So I ordered a set of Quickboost resin engines to replace them.


    Comparing the QB resin engine to Monogram's

    The provided resin cowl ring is also a nice feature with the exhaust tips drilled out. Though once installed you won't see them.
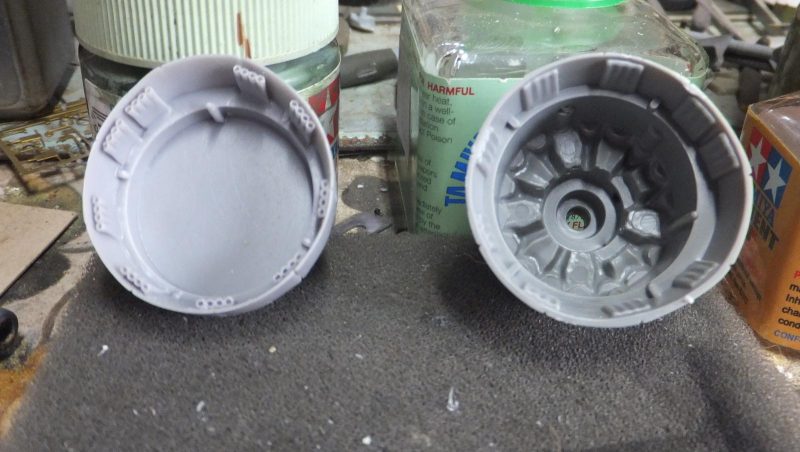
    While the cyano cement set, worked on the seams under the tail.

    The cylinder heads and crankcase cover are well defined and a vast improvement over the base kit engines.

    Here sitting with the engine from the ICM Invader, nice little gem.

    Test fitting the engine cowl over the engines. So far so good.

    The dremel will be a big help in grinding down the blocks. Wear a mask doing this.
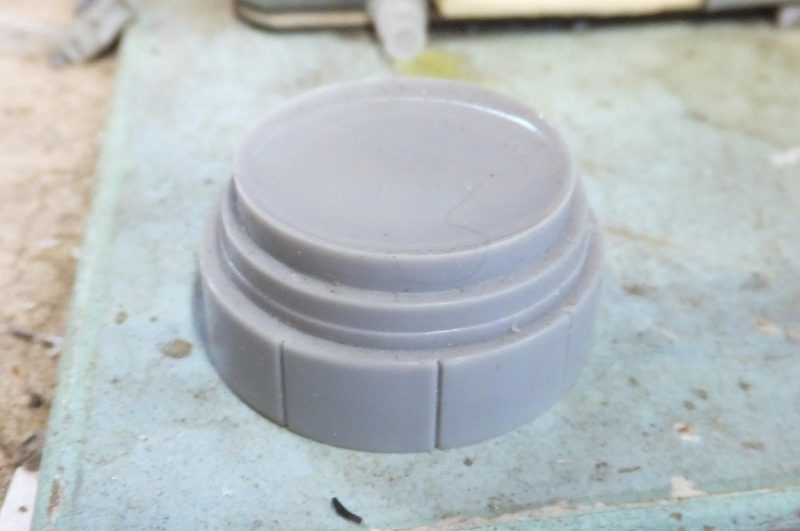
    Removing the excess resin to get the engine to fit within the cowl at the correct position.

    Results a good fit and attach to the resin cowl rings.

    The engine are first painted black and the Vallejo steel.
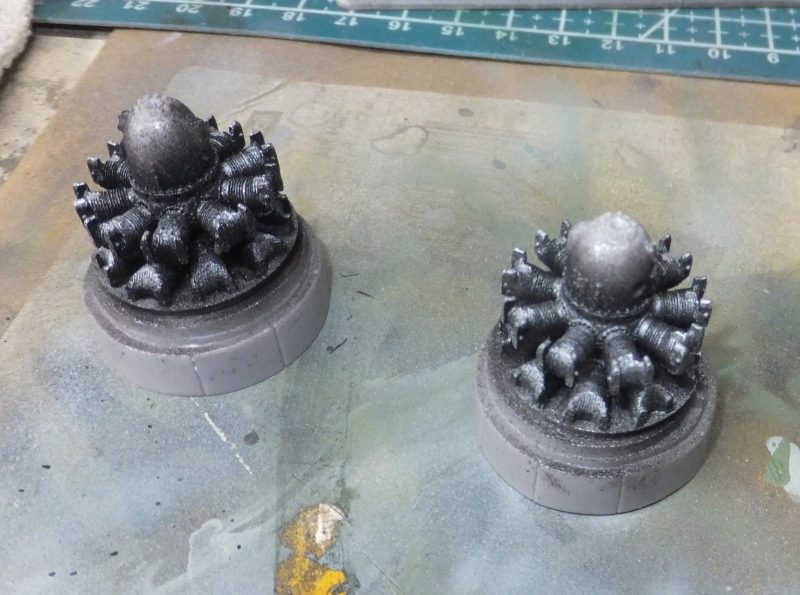
    Then the crankcase is painted RLM75 Grey

    Next is to remove the provided resin magnetos. Painted black.

    Then attached to the crankcase.

    The LH/RH side magnetos are also installed.

    Then some grime wash, oil streaks are washed over the engine assemblies.

    Silver pencil used to pick out the bolts on the crankcase cover.

    Then the engines are attached to the nacelles.

    A shot with the ICM engine

    The fit to the nacelle is very good and really a vast improvement over the kit engines.

    A bit more grime added and next is to prepare the engine cowls.

    Next is to some seam work and work on the gun nose.
    More to follow!

  • Profile Photo
    Spiros Pendedekas said 3 years ago:

    Those are some amazing engines, my friend @uscusn!
    Indeed, a vast improvement over the Monogram ones!

  • Profile Photo
    Erik Gjørup said 3 years ago:

    This is absolutely a case of vast improvement! Those QB replacements really stand out, and the paint and weathering you've done on them just do the trick big time!

  • Profile Photo
    Chuck A. Villanueva said 2 years, 8 months ago:

    Thanks Spiros and Erik, it is the one detail that Monogram really fell short on for this kit. The rest otherwise is well done throughout.

  • Profile Photo
    Chuck A. Villanueva said 2 years, 8 months ago:

    Finally got motivated and ordered the correct style 8 gun nose for the Mono Invader.


    Next is to prepare the front part of the fuselage to accept the resin nose. A bit of modification, removing the forward bulkhead and trimming the leading edge of the fuselage.

    Next is to remove the resin plug from behind the nose. The Dremel will come in handy for this.

    10 minutes later and resin dust all over the place. (wear a mask) resin is extremely dangerous breathing the remnant dust created by the Dremel.

    After a few test fits, a bit more trimming got the nose to where it fits just about right. It is a butt fit to the leading edge of the nose of the Invader. Gorilla cyno attaches it the air frame. It sets quickly so don't dilly dally when getting it aligned with the gun ports are level.

    Fortunately it looks good and now the fun part of blending it into the nose.

    Will let it sit for a week and then apply the putty and start the clean up. As well as work over the rest of the airframe with some body work.

    Next up more putty work around the nose and other areas that needs attention.
    More to follow...

  • Profile Photo
    Spiros Pendedekas said 2 years, 8 months ago:

    That's some awsome job on the nose, my friend @uscusn!

  • Profile Photo
    Erik Gjørup said 2 years, 8 months ago:

    That is a very fine nose you got there! A bit late for this question, but would the resin not fit as a plug too? That would have given it a bit more glue-surface? (and less dust). The few AM noses I have built did fit as a plug, saving the trouble of preparing a butt fit.

  • Profile Photo
    Chuck A. Villanueva said 2 years, 8 months ago:

    Thanks Spiros, surgery like this you have to be careful.
    Erik, was hoping that I could use the plug for a better fit. However no matter how much I trimmed it would just not fit right. So I finally decided to trim all the resin plug off. I am using Gorilla Glue cyno and this stuff really bonds very well. So turned out the resin nose will fit well enough and fill the attachment point.