Team Suzuki ECSTAR GSX-RR '20 - Tamiya 1/12

Started by John vd Biggelaar · 221 · 10 months ago
  • Profile Photo
    Anthony Ricco said 1 year, 2 months ago:

    Wow @johnb, this is looking phenomental, the bike engine detailing is beautiful, and the Blue and silver paintwork is on point, looking amazing.

  • Profile Photo
    John vd Biggelaar said 1 year, 2 months ago:

    @anthonyricco, thanks a lot, Anthony. The details on this bike also surprised me. Tamiya did some great work.

  • Profile Photo
    Spiros Pendedekas said 1 year, 2 months ago:

    Awesome painting results, my friend @johnb!

  • Profile Photo
    Anthony Ricco said 1 year, 2 months ago:

    Yes Tamiya's quality on the bikes is really something amazing.

  • Profile Photo
    John vd Biggelaar said 1 year, 2 months ago:

    @fiveten, thanks a lot, Spiros

  • Profile Photo
    John vd Biggelaar said 1 year, 2 months ago:

    Not everything goes well, but what went wrong is caused by myself.

    Worked on the "tail" section of the Suzuki today and applied the decals, as advised by George @chinesegeorge, prior to the mounting. This worked out very well and looked very nice after mounting.
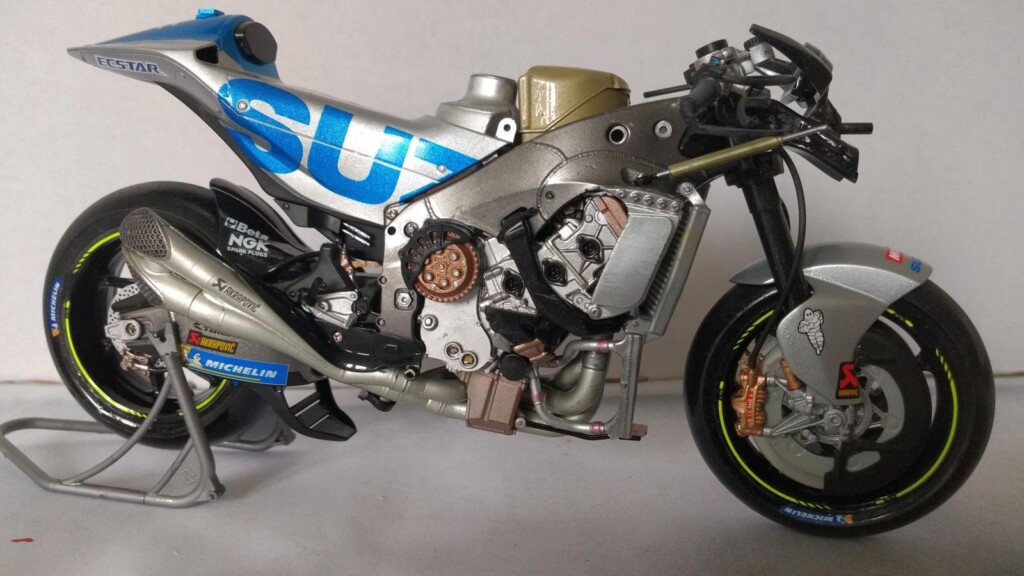
    Unfortunately while preparing some other parts, I accidently hit the left side of the rear part with masking tape and it got stuck to the large decal. Although I tried to remove the tape as gentle as possible, a part of the decal come of. Yes, I know I should have applied a clear coat prior to working on the rear part. Too late now. Looking for a solution, I'm thinking about, after a clear coat, mask it and spray with the mica blue rattle can, or go for the safe approach and cut it straight and leave it as is. Another option, using a spare decal is not possbile since there are no extra blue decals present in this kit. Any other idea is welcome of course.
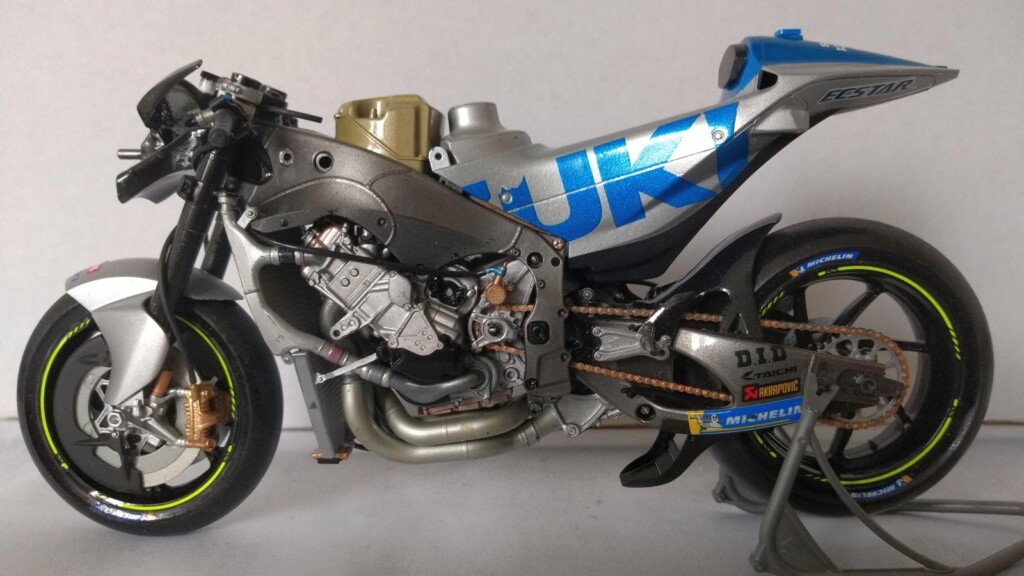
  • Profile Photo
    George Williams said 1 year, 2 months ago:

    These things happen, @johnb, I’m sure you’ll find a solution to this problem, perhaps decant some of the mica blue and touch it up by hand?

  • Profile Photo
    Rory Wilson said 1 year, 2 months ago:

    Hi John, the bike looks amazing... the Mica blue is superb!
    Maybe for the repair you could clear coat first to seal in the decal and then cut a mask to complete the letter and spray it with the blue can. The colours will be very close to perfect... then seal again with clear over all the bodywork. You can even trace the missing part from the other side of the "U".

  • Profile Photo
    Spiros Pendedekas said 1 year, 2 months ago:

    Pity this happened, my friend @johnb. Retouching with mica blue is the way to go.

  • Profile Photo
    John vd Biggelaar said 1 year, 2 months ago:

    @chinesegeorge, thank you, George. At least that will be the best color matching, not sure if my hand is that stable to create brush paint results.

    @rory, thanks a lot, Rory. This is the approach that I was also thinking off, although I'm a bit afraid to put tape over the decals, even after clear coat. Will need to cover up the entire bike to prevent overspraying.

    @fiveten, thank you, Spiros. Retouching will definitely look the best afterwards.

  • Profile Photo
    John vd Biggelaar said 1 year, 2 months ago:

    @chinesegeorge, there are a few transparant "pads" that need to be mounted to the fuel tank. What kind of glue did you use to get those fixed. I was thinking about using clear coat, first apply it to the "pad" and then fix it to the tank. I do have clear glue (as proposed by the instructions) from Revell but are affraid that it still might be visible afterwards.

  • Profile Photo
    George Williams said 1 year, 2 months ago:

    Hi @johnb, you need to use something that dries clear. Sometime ago I bought a Microscale product called “Micro Metal Foil Adhesive” for a different project, it smells like PVA white glue, as I had it in stock that’s what I used, I’ve also used it for attaching clear parts such as light lenses, aircraft canopies, etc in the past. I suspect that whatever you’ve used for attaching aircraft canopies before would work just as well. Hope this helps.

  • Profile Photo
    Spiros Pendedekas said 1 year, 2 months ago:

    I agree with our friend @chinesegeorge, my friend @johnb. Actually, your Revell Contacta Clear sounds ideal! I would not put too much of it, just "pin" a small amount at 4-5 points or so of every clear part and then attach: this way, chances of the clear glue overspilling underneath will be minimized. Also, clear glue is easily removable, if thinks go wrong, just lightly rub away.

  • Profile Photo
    John vd Biggelaar said 1 year, 2 months ago:

    @chinesegeorge, @fiveten, thanks for those helpful words, George and Spiros. I might give it a try first on some transparant leftover and see how the Revell Contacta clear behaves.

  • Profile Photo
    John vd Biggelaar said 1 year, 2 months ago:

    Transparant pads are glued to the fuel tank. At a very close look you can observe some glue marks but minimal.