AMT 1/48 Douglas P-70 Night Fighter

Started by Spiros Pendedekas · 140 · 1 year ago · 1/48, A-20, AMT, Douglas, Night Fighters, P-70
  • Profile Photo
    Spiros Pendedekas said 3 years ago:

    Hi everyone!

    First, I would like to congratulate Jeffrey @421stwidow , our Admin, for the conception of this great GB!

    Here's my first entry for this great GB! The Douglas P-70 Night Fighter.

    The P-70 was the night fighter version of the A-20 Havoc. Here's a short intro story on the type (praise wiki):

    In October 1940, the USAAC felt a need for long-range fighters more than attack bombers. As a result, sixty of the production run of A-20s were converted to P-70 night fighters, all delivered by September 1942. They were equipped with SCR-540 radar (a copy of the British AI Mk IV), the glazed nose often being painted black to reduce glare and hide the details of the radar set, and had four 20 mm (.79 in) forward-firing cannon, each provided with 120 rounds, in a tray in the lower part of the bomb bay, while the upper part held an additional fuel tank with a capacity of 250 US gallons (950 l; 210 imp gal). In 1943, between June and October, 13 A-20Cs and 51 A-20Gs were converted to P-70A. Differences were to be found in the armament, with the 20mm cannon package replaced by an A-20G gun nose with six .50 caliber guns installed, the SCR-540 radar installation being carried in the bomb bay with the vertical-plane, twin-dipole "arrowhead" transceiving antenna protruding between the nose guns. Further P-70 variants were produced from A-20G and J variants. The singular airframe P-70B-1 (converted from an A-20G) and subsequent P-70B-2s (converted from A-20Gs and Js) had American centimetric radar (SCR-720 or SCR-729) fitted. The P-70s and P-70As saw combat only in the Pacific during World War II and only with the USAAF. The P-70B-1 and P-70B-2 aircraft never saw combat but served as night fighter aircrew trainers in the US in Florida and later in California. All P-70s were retired from service by 1945.

    The AMT kit is an old friend from the 1995 era. It is a nice, solid kit, marred by a few issues (as I've heard),mainly wrong exhausts and the like, but otherwise I've heard it's a good kit. It is based on the AMT's A-20 kit, with seemingly a few extra parts, to account for the type differences.

    Here's a look at the still bagged sprues:

    And the transparencies:

    Instructions are a big two sided pamphlet, all nice and clear:

    Decals seem very good

    Two options are provided: the famous "Dusty", and another "simple" one.

    I will do the "Dusty", of course (?)

    Our friend @tom-bebout has done an amazing "Dusty" out of this kit, saw his review here in iModeler. I will definitely use his model as a reference!

    After clearing up some bench space, I will jump into this one.

    Thanks for stopping by!

  • Profile Photo
    Jeffrey Kolln said 3 years ago:

    I actually have this kit in the closet, which you reminded me of here. It is interesting that this is, pardon the phrase the "ignored step-child" of the Night Fighters. I suppose your going to have a few issues with an older kit, but looking forward how yours come out. Keep us informed. If you can get a copy look up "Queen of the Midnight Skies" by Garry Pape there are some color shots of "Dusty" in there. Garry also does a good job covering the P-70, if your interested in the history.

  • Profile Photo
    Erik Gjørup said 3 years ago:

    Spiros, you never let us down, pulling yet another trick from your seemingly limitless stash! When the time comes that you do make some space for it, I shall try to keep up with your postings.

  • Profile Photo
    Spiros Pendedekas said 3 years ago:

    Thanks my friends @421stwidow and @airbum!

    Jeffrey, those seem great references, will try to check on them!

    Well, I could not hold myself and started to cut and assemble some sprue..

    Here is the fuselage put together, the wheels and the non transparent nose:

    The wings were assembled as well, pic at my next post!

    The tires are possibly the wrong type, have to check on it...

    So far it looks a nice, solid kit. Fit is not bad, but there's some serious assembly in front, so we'll see...

    More to come!

  • Profile Photo
    Stephen W Towle said 3 years ago:

    I can say like Jeffrey I 've got that kit in the stash too. AMT/ ERTL unfortunately, entered the aviation end of modeling either at a bad time or just found out it was easier to do cars. More folks where buying car kits. They stop making airplane kits. Regardless, they where smart about making this kit for its time like Hasegawa manage to get the most out of the molds with several versions of type. aIt's a solid kit. All of the Allies flew the type, the Russians, English, Free French and the Americans. They saw combat in many theaters. The out lines appear to be accurate. Excellent choice Spiros will being watching with a keen eye towards learning how to this kit right with your building experiences.

    Doing a all Black paint scheme and making it interesting is not a easy thing to do.

  • Profile Photo
    Jeffrey Kolln said 3 years ago:

    Glad to read your step by step of this, let's me know what I am in for. I am trying to build all the Night Fighter aircraft. I have done most, still need to do this one, the Ju-88, TA-154 and I am sure a couple others. Looks like you got a great project going!

  • Profile Photo
    Spiros Pendedekas said 3 years ago:

    Thanks my friends @stephen-w-towle and @421stwidow.

    I definitely agree with you, Steven. Judging form this kit, (which is not "modern" "Tamiya", but not bad at all, just some "mistakes" are present, due to AMT's non deep commitment, most of them seeming not that difficult to fix), I believe AMT/ERTL should have continued investing in aeroplane kits. They might have given some mainstream companies a run for their money!

    Jeffrey, the Night Fighters is such an exciting area! So many great planes there! Glad you like my sort of step by step posting style;

    So here we go!

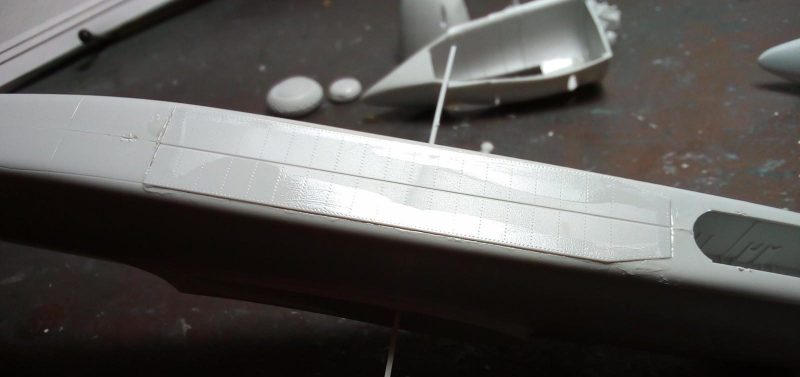
    I assembled the wings and attached the top air intakes, that contain a part of the wing. It's a strange approach, prone to gaps creating; might I suppose it is supposed to account for other variants? Gaps were faired with liquefied styrene (LqS)

    The engines were assembled; they are quite nice! I believe some wiring harness must be added to boost their looks, as they are quite prominent at the model:
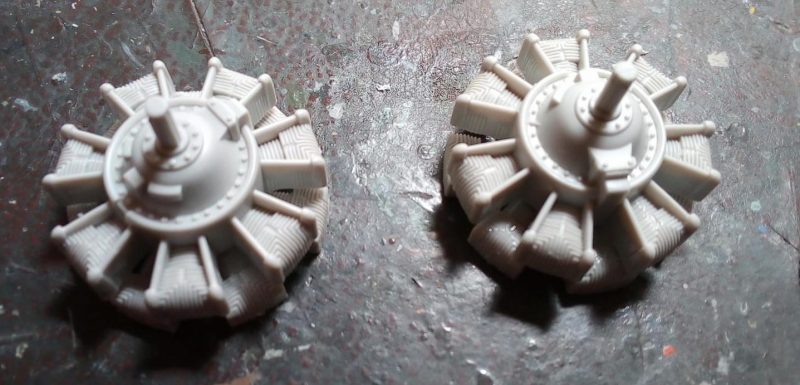
    The horizontal stabilizer comes in a single top and two bottom halves. Instructions want you attach the bottoms and then attach the whole assy onto the rear fuselage, but this will almost definitely result in root gaps. Instead, I used a trick that our friend Louis @lgardner taught me: I first attached the top part onto the fuselage Having removed the locating pins, as to allow free "floating" I attached the two bottom halves, taking care to have gap free root joints, then allowed them to touch the tip area of the top half. Voila! Gap free joint! Once again, many thanks, my good friend Louis! 
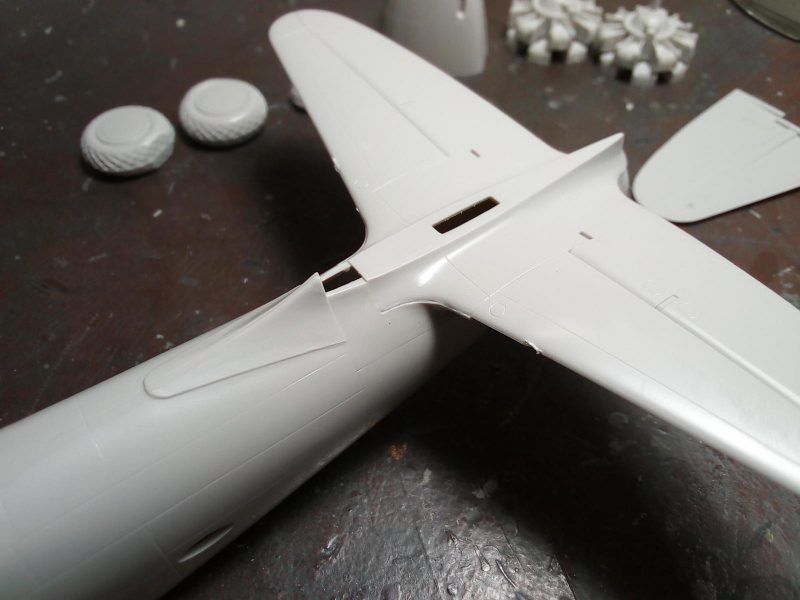
The two piece fin was then assembled and attached. Some gaps emerged. . I don't know why AMT provided the fin separately...different versions maybe? Have to check.

    It was then nacelles time: look at the flash!
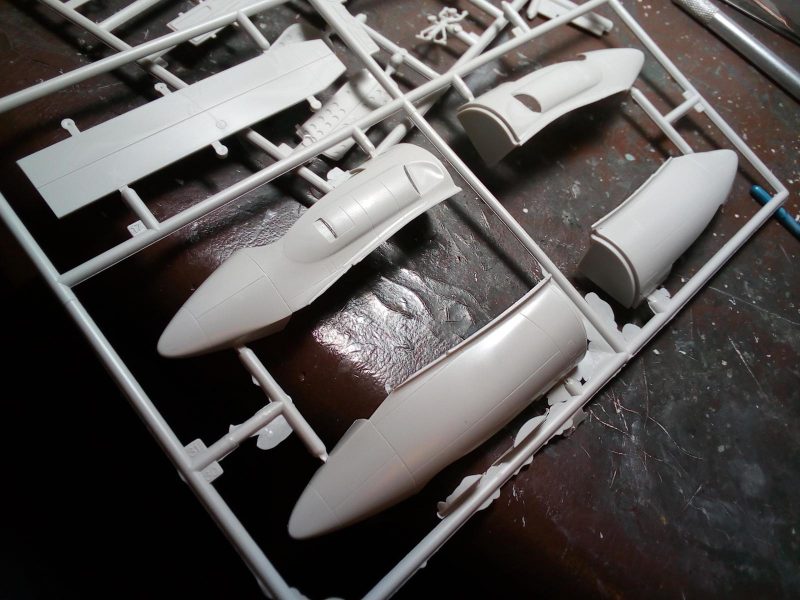
    Anyway, they were assembled and attached at the wings. Gaps were experienced:

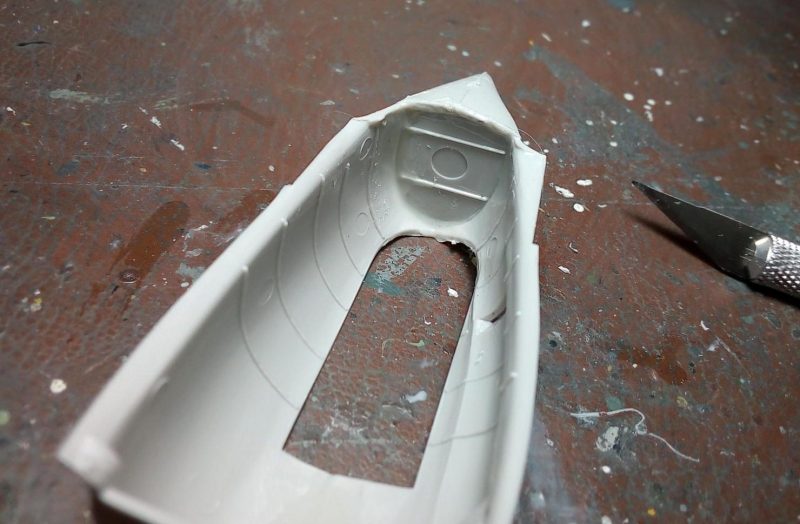
    Then the underbelly (ex) bomb bay cover was attached. I used liquefied styrene to fair and reinforce the joint, as the assembly has a lot of flimsyness, and I do not want to counter unplesant surprises at later stages, when everything will be painted and the cover "pops"...

    I then attached the wings. Fit was positive, some alignment performed, and the gorgeous P-70 shape emerged!:

    Here is the progress so far:

    All gaps were treated with Liquefied styrene. Now everything is drying...

    Thanks for stopping by!

  • Profile Photo
    Tom Cleaver said 3 years ago:

    To paraphrase a line from "The Treasure of the Sierra Madre":

    Fit? Fit! We don't need no stinking fit, stinking modeler!

  • Profile Photo
    Stephen W Towle said 3 years ago:

    Spiros, something to consider about this kits placement of the main landing gear, some folks say that the mains are mounted too far back.

    1 attached image. Click to enlarge.

  • Profile Photo
    Spiros Pendedekas said 3 years ago:

    Thanks my friends @tcinla and @stephen-w-towle!
    Yep, Stephen, I may have to relocate the MLG attaching points...

  • Profile Photo
    Spiros Pendedekas said 3 years ago:

    Diamonds are forever


    ...but need to be subtled down, in my P-70 case!
    Some (and rightly so) net moaning exists about the diamond main tires overly heavy pattern. I thus heavilly sanded the pattern down to looking more subtle. Here's how the main whhels look now, closer to reality than before (nose wheel has been sanded smooth, too...
    Thanks for stopping by!

  • Profile Photo
    Erik Gjørup said 3 years ago:

    Spiros my friend, what sort of booster are you on? It cannot be all coffee - perhaps some chocolate too? Once again the PFP project manager is locked in the fast lane and speeding a nice kit through the process. I shall try to keep up with the updates @fiveten 🙂

  • Profile Photo
    Spiros Pendedekas said 3 years ago:

    Thanks my friend @airbum!
    It must be the enamel thinners!

  • Profile Photo
    Spiros Pendedekas said 3 years ago:

    Small steps...

    AMT's weight suggestion is very small. Together with the fact that the MLG is to be placed more forward, as our friend @stephen-w-towle pointed out, this means some serious weight is needed, but not more (!) as I don't want to stress the weak NLG. I thus kind of calculatrd the weight needed...

    ...and secured it with sprue pieces in the nose When the weight could not be seen anymore, I stopped securing!

    The kit provded cowlings are wrong for the P-70

    They should look like this

    I thus sanded all exhaust mini bulges and pressed the two bilateral big bulges in with a pair of pliers I admit, it was brutal, but I somehow wanted to keep the exidting plastic...), "reinforced" them with liquefied styrene, waiting for it to cure, so I can sand the outers smooth.

    Thanks for stopping by!

  • Profile Photo
    Stephen W Towle said 3 years ago:

    Quick Boost used to make a pair of cowlings for the P-70 but, using modeling skills, gray matter and little sleuthing is as good and perhaps better and has its rewards too. Spiro's it looks like your photos are of an a/c taken from a Russian museum. The wheels and the engines look a tad off. Chuffed to see this build progressing .