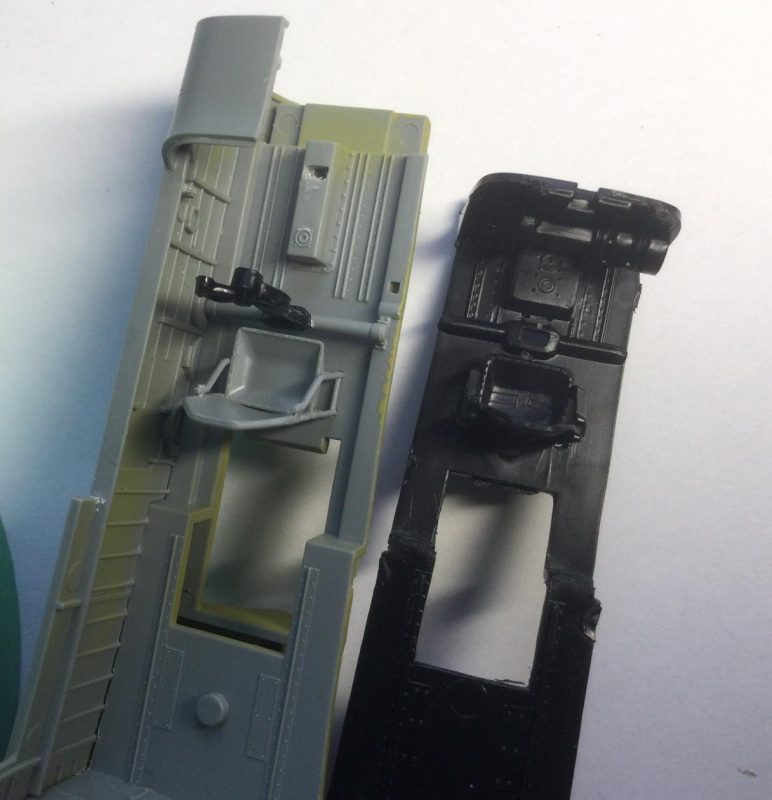
Well, I have been working through a few more issues with the Black Widow. I started by test fitting and painting the lower and rear interior Zinc Chromate Yellow, thinking it would all be smooth sailing.
As I worked through stuff, some concerns arose. My policy is not to complain about an accuracy or fit problem until I have a solution to share. I also need to feel it is a big enough personally to warrant "fixing". So, here goes. Some reviewers, such as our own Tom Cleaver, have noted that the control column is too large. I checked this out against photos of the real thing, looking to the relative size of the wheel and control panel.
As TC pointed out, the wheel and column are out of scale, but the Monogram version can be used instead.
Pics show how I attached it to the horizontal control bar. The kit column mounting point is also too close to the seat and too far from the IP, given human anatomical demands.
-
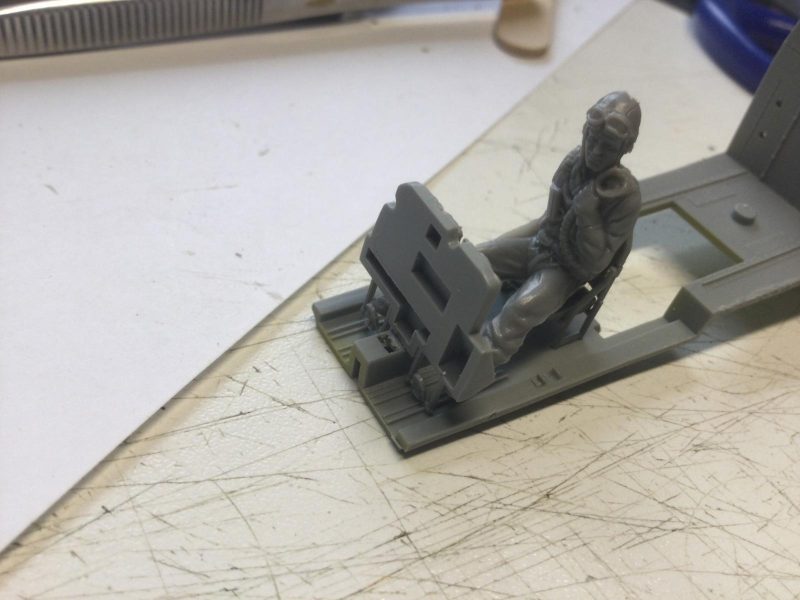
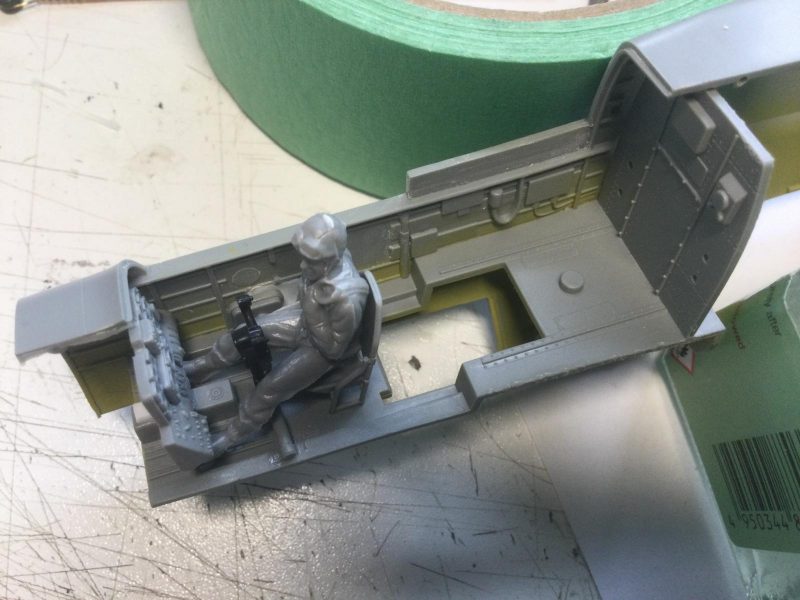
1. Here you can see how remote the rudder pedals are from the seat if the IP is fitted in this slot -as GWH designed it.
2. monogram cockpit assembly
Monogram has this better, again. Actually, the GWH seat is too far from the IP, and that is the most "serious" issue, IMHO (and according to others online). Basically an accurate kit cockpit should be proportioned and spaced so that an imaginary pilot could actually fly the thing. I had a hard time coming to the right look until I placed a Monogram P-51 pilot in the seat, to see if "he" could reach the rudder pedals mounted under the IP.
-
1. This slot is where GWH would have you put the control panel. The pics here show it moved back so the "pilot" can actually reach the pedals.
-
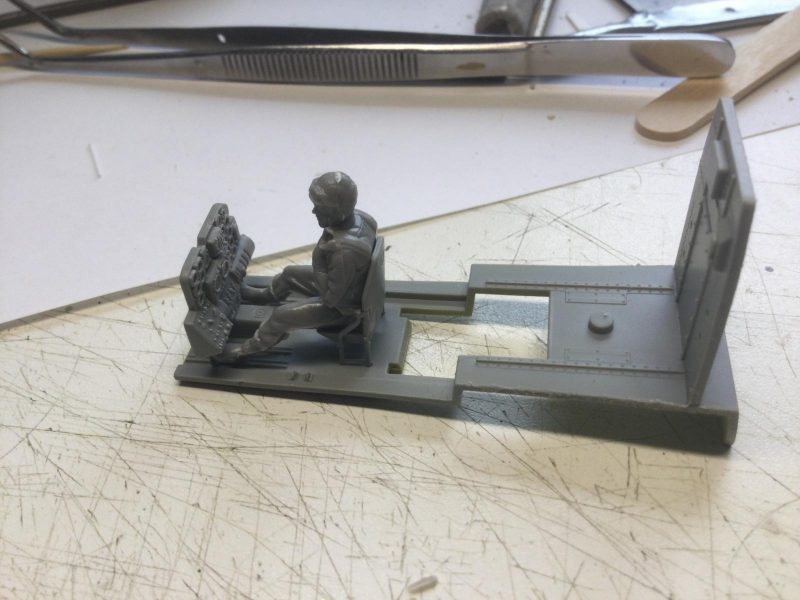
1. Again, this is the correct IP position and the pilot reaches the rudder pedals.
To reiterate, if you put the IP assembly where GWH suggests, he definitely can't reach the pedals and fly the plane. Unless he is Yao Ming. Putting the IP back 1-2 mm solves this - as the figure proves. The pilot figure also shows how much the control column must go forward towards the IP.
This is much trickier to fix, because detail on both sides of the cockpit fit around the horizontal bar for the control column. It's easy on just the cockpit floor, as in the following pics.
-
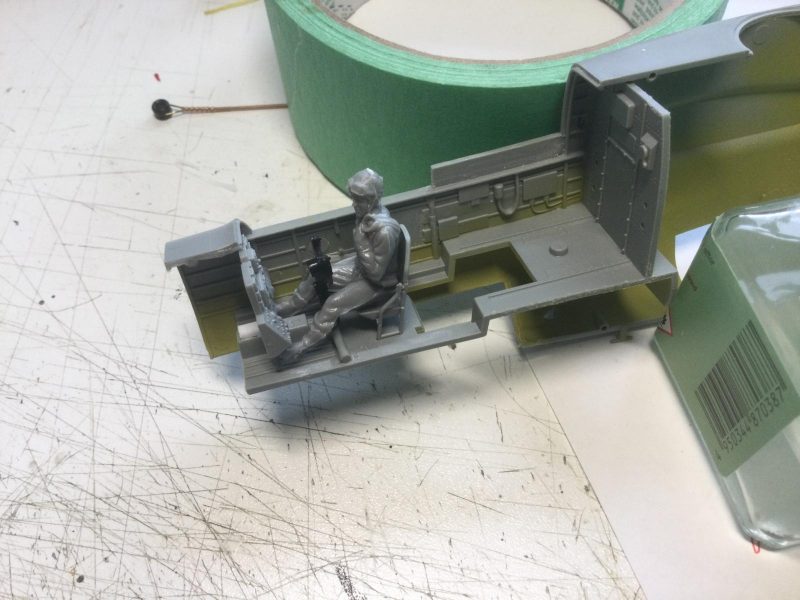
1. Control column and bar is fixed here - moved forward of the seat. (not glued yet)
-
1. This sidewall piece becomes an issue.
But you have to adjust the sidewall detil and mounting point like this:
Anyway, I fixed all of this with filling and sanding so that I am happy with the results. BTW, some modelers have worried that the seat is too small or too low, relative to the control column. The seat is, in fact, perfect, if you compare the seated figure with a wartime pilot pic.
The real seat back is quite low, giving the illusion that the control column is too high if no pilot is seated.
Moving on to other detail, I wanted to replace the oxygen hose molded on to the sidewall piece. It has no ribbing detail and looks pretty lumpy as molded. I cut the plastic off and substituted a steel guitar string, cut and bent to shape.
Some other surgery was needed to make it attachable later, after the part and hose are painted separately. I have also shortened it since the pic was taken. You may notice some ugly ejector pin marks in the fuselage halves pictured earlier. I thought I could live with these when I painted, thinking they would be hidden by the ribs and detail I intend to add. I changed my mind and sanded them out or covered over the more complex ones with sheet styrene.
A couple of other things might be worth sharing. Many of the kit parts are VERY finely molded and easily broken when detached from the sprue trees.
-
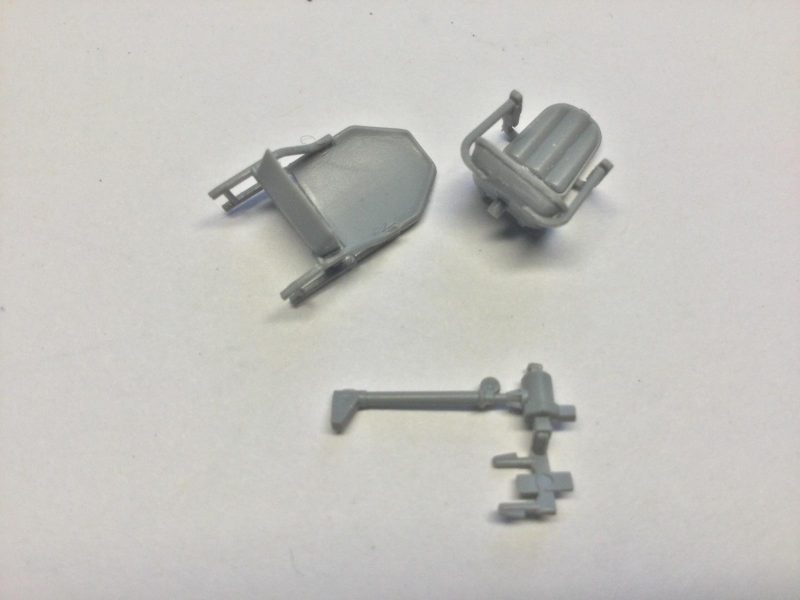
1. Super thin and fragile parts for the seats and other details
I resorted to a technique I usually reserve for clear parts by cutting them free with a razor saw.
This worked very well. Few broke. A second thing is that I plan to use the Eduard set for the Monogram P-61 for further interior detail. The bits fit very well and will really enhance the very visible interior.
-
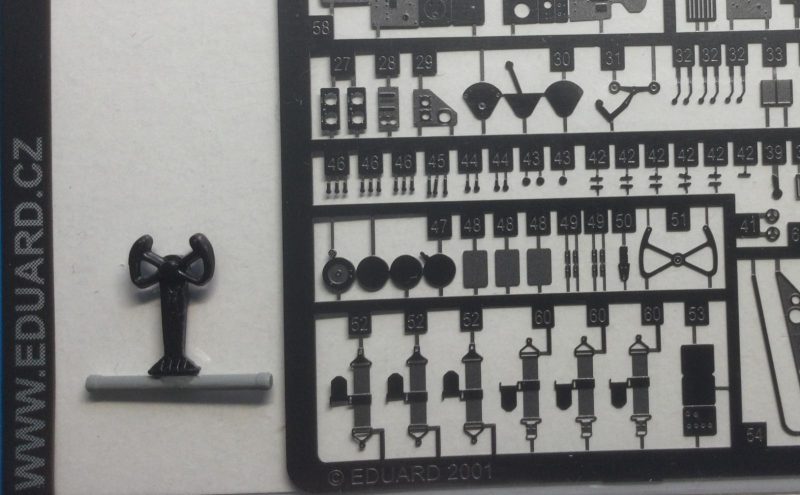
1. Control yoke is very nice - maybe a bit too thin though?
The etch control wheel may replace to Monogram piece in the end.
So, that's it for now. I think th issues are now solved and it is on to painting and assembly. Still really liking this model. It will definitely be worth the extra time to build and detail carefully.