Parts arrived
Some more parts has arrived for this build
And so I can delve a bit further into this off-the-beaten-track plane
Amongst the parts I bought there is – yep you saw it – a 1/72 Nanzan. I was curious how Tamiya tackled making their smaller Seiran into a Nanzan, and have to say they took the easy route. No changes to the interior what so ever!
How about the wings?
-
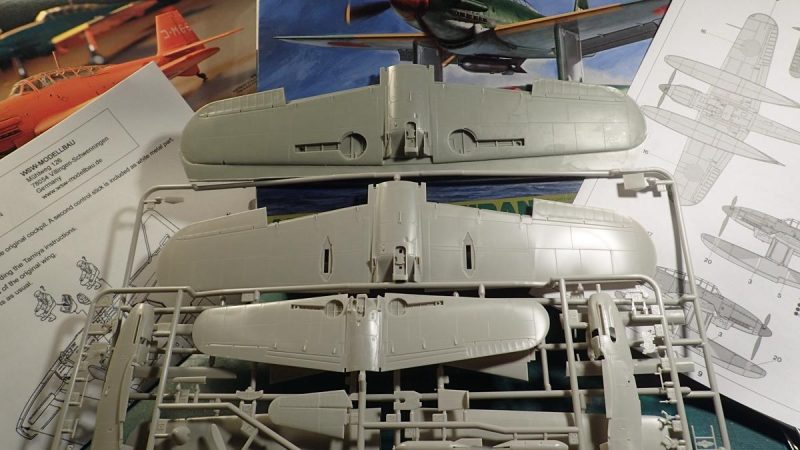
1. WSW resin wing - hefty part!
2. Original Seiran wing in 1/48
3. Tamiya 1/72 Nanzan wing
Well, they have changed that into something that I can understand – very nice indeed from what I have found on-line so far. I have bought the WSW-modellbau conversion, and the differences between the three can be seen in the picture.
As goes for the conversion, this is what is in the pack
-
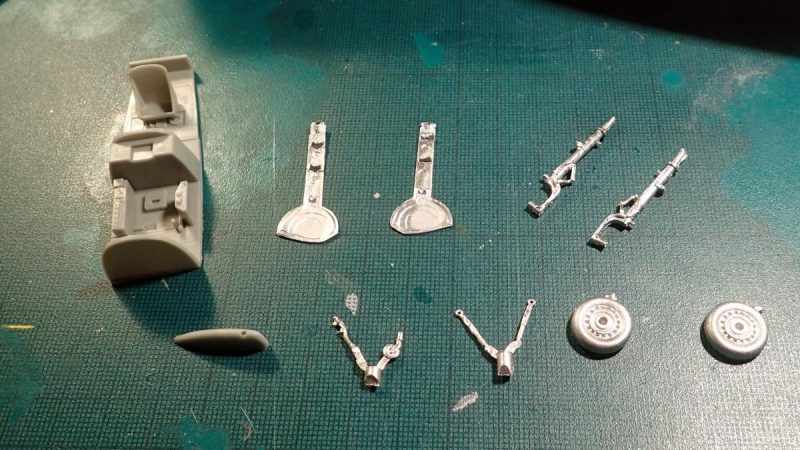
1. Will be my first go at white metal
Now, I have to say that I am a bit disappointed, but then again, not dissapointed after all. It is actually a very nice kit once you dive into it. One let-down is the hefty wing, but at least that will be a rather easy one to include as opposed to having to saw things off. (I may have fears that the gear may bend under the load)
The cockpit – well, I have not been able to find anything on that one, and here you do have something that is a good guess, even though it is “just” kit parts that has been moved around to make the rear look busy, like the floor being brought up, and the IP glued to the divider.
-
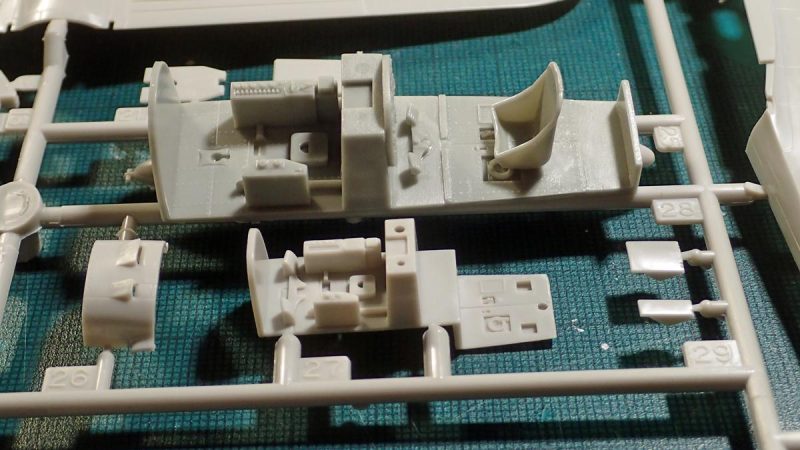
1. WSW 1/48 M6A1-K cockpit
2. Tamiya 1/72 M6A1-K cockpit
-
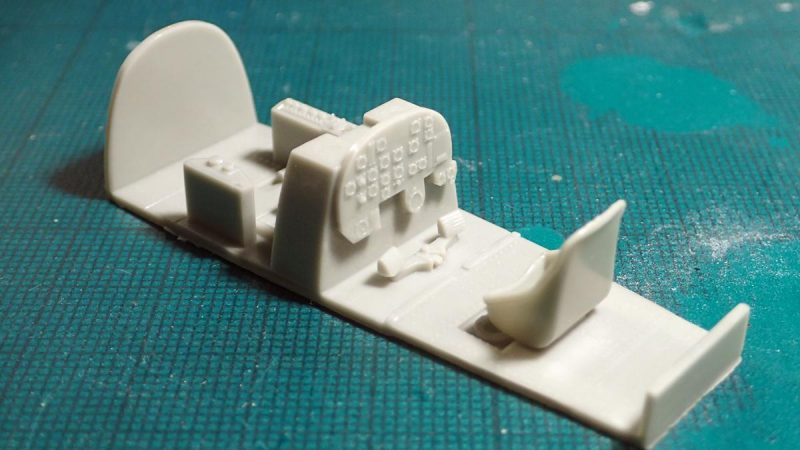
1. you will need to grow very long arms to reach the knobs on the instrument panel when seated
The IP on the divider will be a problem, as it will be way too far from the rear seat. In the Tamiya 1/72 offering there is no changes from the rear-gunner/radio operator position, so at least there is something different.
I may bring out the cutters and start on the build, but would love to find more info specific to the Nanzan. I have amongst other stuff bought a eduard PE kit for the Seiran wich will give me an extra seat and IP along with some superb details for the exterior
Whats in a name?[/i]
I just paid j-aircraft a visit, and fell over an interesting article about the designation system as used by the IJN. The one in question – M6A1 would then be M = Special Floatplane, 6 = 6th of that kind, A = Aichi and 1 = the first special floatplane made by Aichi. There is by then the –K, and that addition is used as the M6A1 in question needed a land-based trainer, the letter K being just that if used as first letter, but when the M6A1 had already been built, the trainer version got the letter assigned after the original combination. Now, this one was also used as a test-plane, but there does not seem to have been a need to use the MX for Special Purpose aircraft – or should this really be a MX6A1? Other people with deeper knowledge to IJN planes, please step forward! For now, I shall call it the M6A1-K
And finally a picture of the real deal from wickicommons.
next up I may just have something build – stay tuned to check