Fujimi Aichi Type 99 D3A1 Val 1/48

Started by Chuck A. Villanueva · 52 · 3 years ago
  • Profile Photo
    Louis Gardner said 3 years, 10 months ago:

    This is a great update. You are well on your way to the finish line now. It's always a good sign when your airplane looks like it does on the model box, and it can stand on it's own feet for the first time. It shouldn't be too long and you will be spraying on some paint. The bomb trapeze definitely looks fragile...and right at home once installed.

  • Profile Photo
    Chuck A. Villanueva said 3 years, 9 months ago:

    Thanks Louis, yes almost there, so much to do so little time. Feels like it was yesterday I posted the last update but it has been 3 weeks, is it Christmas yet?
    This step is to finish up the rest of the lower components.
    A pair of intake scoops are cleaned up and attached below the engine cowling.


    Next the dive brake spoilers are next to be place under the wing just outboard of the main gear spats.

    Before attaching the glass panel. Which is pretty clear. Just a lot of glass to mask..!

    I rob a search antenna from the Jill kit and place it on the center deck behind the pilot.

    Just to add a visual aid to what is already a bare bone interior.

    Next is to place the windscreen/canopy on the Val.

    I will use for the first time a masking set from Dead Design. It is actually for the Hase Val, but they work, just some trimming. Otherwise not bad using Kabuki tape that is similar to what Eduard's uses. Save a lot of time applying each mask to the glass panels. about 30 minutes to do the process.

    Next was to airbrush the interior color over the framing. Using Tam XF-71.

    More to follow.

  • Profile Photo
    Pedro L. Rocha said 3 years, 9 months ago:

    Good progress Chuck! I used Dead Design masks also, in this case also for mine EoJ GB entry. Found them very good, accurate in the matching size of each window pane and the glue is sufficient to get the mask without residuals after peeling them off

  • Profile Photo
    Spiros Pendedekas said 3 years, 9 months ago:

    Nice progress, Chuck @uscusn!
    Your Val looks great, glad to see your update!
    Liked the antenna "robbing" and the masks!

  • Profile Photo
    Erik Gjørup said 3 years, 9 months ago:

    Actually @uscusn, it is closer that you think - christmas in danish is "Jul", and soon it will be the 24th og JULy. - that aside, nice progress here with robbing spareparts modified masks and all.

  • Profile Photo
    Chuck A. Villanueva said 3 years, 9 months ago:

    Thanks Pedro, first time using them, also got a set for the Nichimo Nick. Kabuki tape, Tamiya tape, easy to work with and trim. When the early masks were out from even Eduard's and a couple of others, the issue was leaving residue on the panels after removing the masks. Extremely difficult to remove. At the time the only masks I would use was EZ masks. I never had an issue with those.

    Spiros, just needed to add something on that shelf. Even with that part of the canopy closed it is quite viewable through the glass.

    Thanks Erik, interesting I did not know that. In fact wondering how come I didn't know that. Thanks for sharing that, now I am going to look it up.

  • Profile Photo
    Louis Gardner said 3 years, 9 months ago:

    You have made some excellent progress since the last time I checked in... It shouldn't be much longer and this one will have a nice coat of paint on it. You probably mentioned it earlier, (I just don't remember, lots going on right now) but what color scheme have you chose for this build ? I'm very curious.
    Thanks !

  • Profile Photo
    Chuck A. Villanueva said 3 years, 9 months ago:

    Thanks Louis, it will be a Pearl Harbor Val, in that amber grey. But not so amber. Will use this Light Grey, paint code J3 from Mission Models. Not as dark as the Zero.

    First starting with the under surfaces. This is an overall Lt Grey with a Blue Black cowling and anti glare panel.

    The paint dries rather quickly and with the wheels already mounted, it was easy to go over the top with the grey.

    For now will mask off the grey and shoot the Blue Black over the nose and top anti glare in front of the windscreen.

    more to follow

  • Profile Photo
    Louis Gardner said 3 years, 9 months ago:

    This Val is really starting to look complete, even more so now that you have sprayed on the base color. I have always liked the way this plane looks. It's very elegant with the elliptical wing and full wheel spats. That's a very good choice of color you picked out.

    It probably didn't look so appealing if you were on the business end of it 75 years ago...

  • Profile Photo
    Spiros Pendedekas said 3 years, 9 months ago:

    Your Val looks better and better, Chuck @uscusn! This grey looks absolutely spot-on. Looks will definitely be enhanced, once you spray the blueblack at the cowling area.

  • Profile Photo
    Erik Gjørup said 3 years, 9 months ago:

    Might I follow along and praise the good looks with the paint on? I'll do it then - darn it looks great in the grey, it really makes the shape shine!

  • Profile Photo
    Chuck A. Villanueva said 3 years, 8 months ago:

    Masking off the cowl to prepare the cowling and anti glare panel Blue black.


    Using Mission Models to airbrush the cowling and anti glare panel.

    Once the paint sets. Future (Pledge) clear coat is applied for the decal process.

    Will have it sit over the week. Will start decaling it next weekend.

    More to follow.

  • Profile Photo
    Spiros Pendedekas said 3 years, 8 months ago:

    I love your Val Chuck @uscusn! What a great scheme, tempting me to build a same scheme Val too!
    Waiting for your decalling!

  • Profile Photo
    Erik Gjørup said 3 years, 8 months ago:

    Those big grey shiny wings really look nice. Looking forward to specks of red 🙂

  • Profile Photo
    Chuck A. Villanueva said 3 years, 8 months ago:

    Thanks Spiros, though a one color scheme it does have some character with the black cowl.

    Eric the Red is coming up.

    Pearl Harbor scheme from the carrier Shokaku. Will mask off and paint the tail red.

    After masking the tail, red is applied on the rudder, upper and lower surfaces of the horizontal stabs.
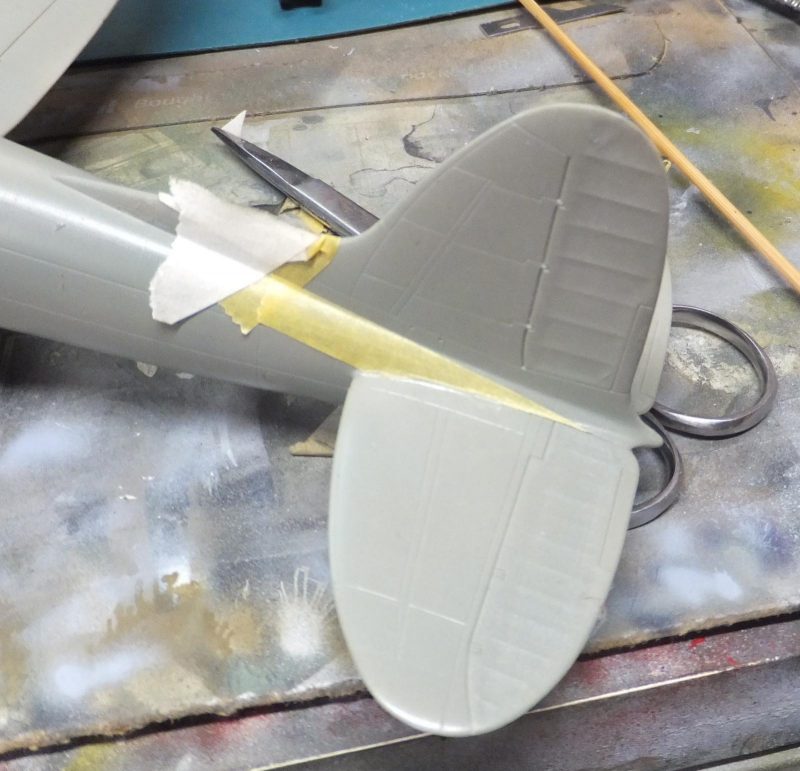
    Then Future clear is applied on the rudder for the decals. Using Aeromaster decal set 48-117C

    Starting with the lower Hinomaru's. These are the kit decals which are still good and settled nicely into the rivets and panel lines.
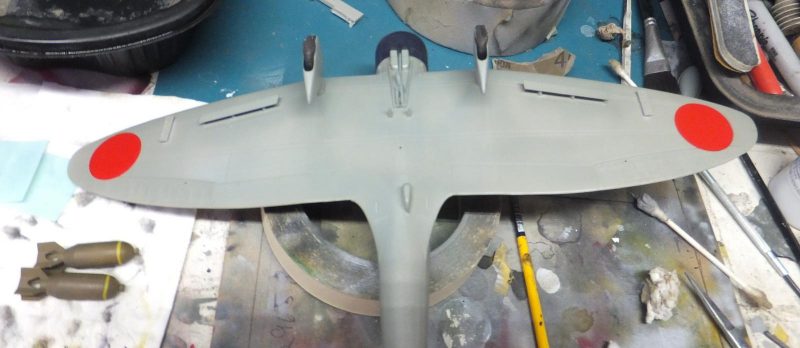
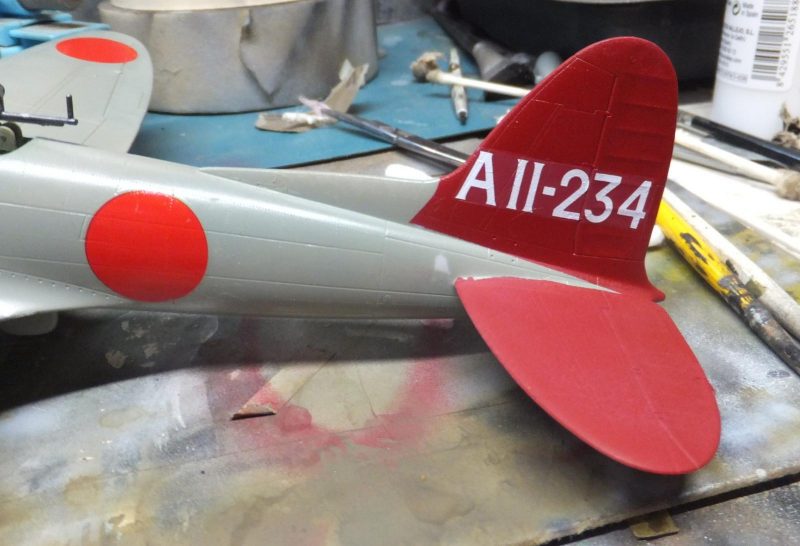
    There is no stenciling at all on this scheme. Just the national markings, squadron stripes and tail code.

    The double red stripe is one decal and went on with very little difficulty. I was wondering if these were sized for the Hasegawa kit, but they worked fine over the tail fillet and met perfectly underneath.

    Once the decals were applied and set overnight. A final coat of Micro Scale Satin clear finish was applied to leave a semi gloss finish.

    Almost there, more to follow.