Nakajima B6N2 Tenzan (Jill) 1/48th Hasegawa

Started by Chuck A. Villanueva · 89 · 3 years ago
  • Profile Photo
    Chuck A. Villanueva said 3 years, 11 months ago:

    The next aircraft to start on this Epic GB is Hasegawa's Jill. This will be a first for me and to fill a gap among the Zekes, Heins , Dinah's, a Betty and a Raiden. So let's see what is in the box.


    Typical well laid out instructions. Unfolds to reveal the number of steps to construct the Jill which also contains the paint call outs using Gunze paint codes. Also the two schemes that are available in a Green to choose. What I found so far is nothing in the way of aftermarket decals for the Jill. Maybe someone may know.

    The decals with some stenciling as well as the squadron markings and codes.

    Molded in typical Hasegawa grey plastic, easy to work with, nice details. A few smaller sprues to go along with the larger mains sprues are in this kit in 2 bags. The clear parts are in one of the bags.
    The first one out of the baggie is the sprue that contains the torpedo and parts to assemble it. The next sprue contains sway braces and brackets.


    The next sprue is one of two with a sub sprue attached. contains the wheels and more braces and brackets. The wheels are ok, the tires are flattened to show weight. 7.7MM defensive gun is ok as well.
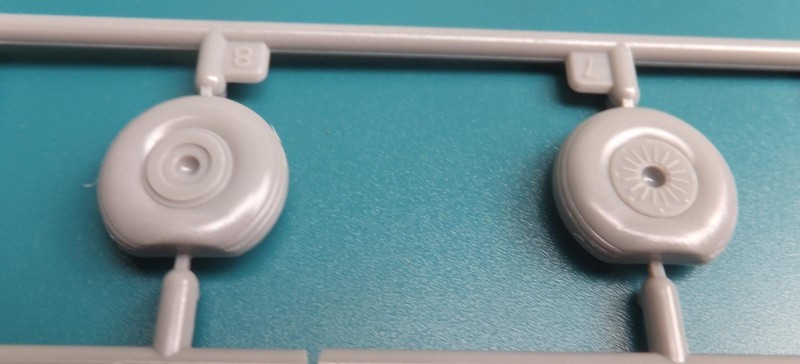
    The next sprue has the landing gear and tail wheel parts.
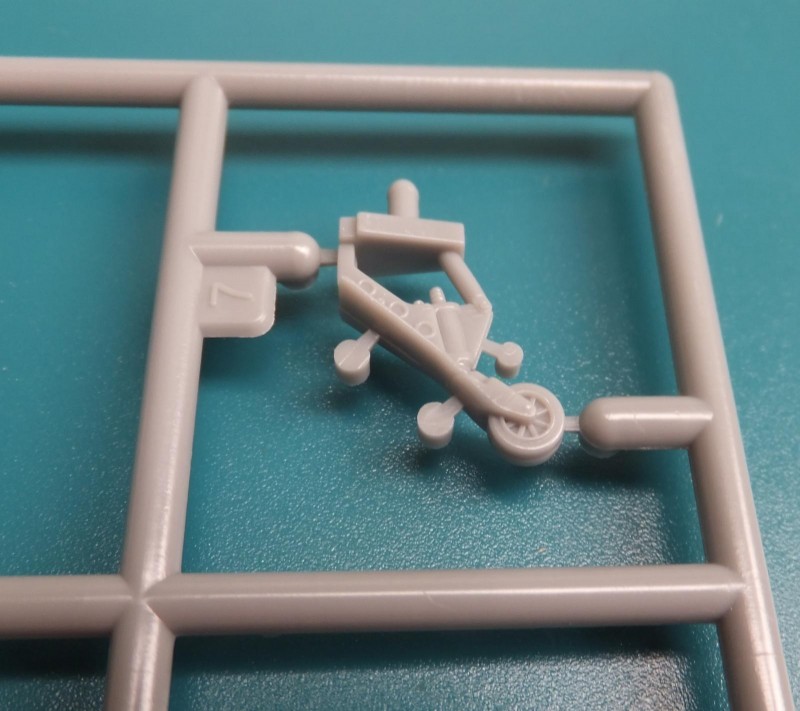
    Hasegawa provides clear and brown push in grommets. This is a first with the clear and will see how these come into play in the build process.

    The next sprue contains some interior components, bulkheads, braces, the prop spinner, backing plate and the unique style of exhaust manifolds.
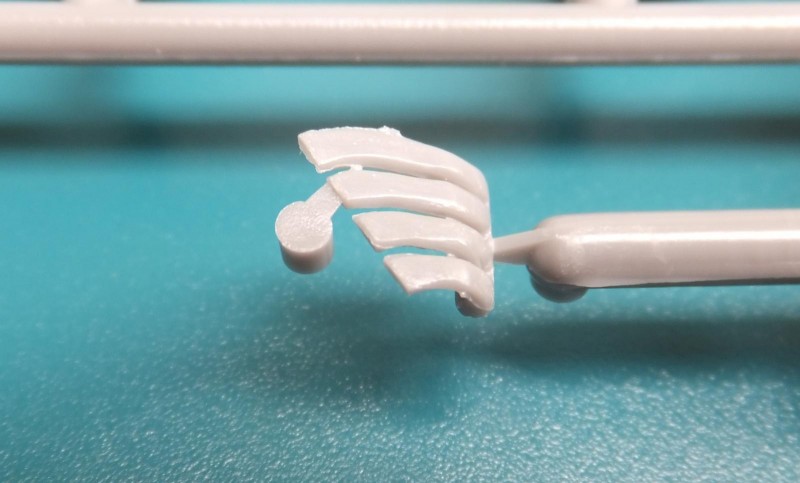
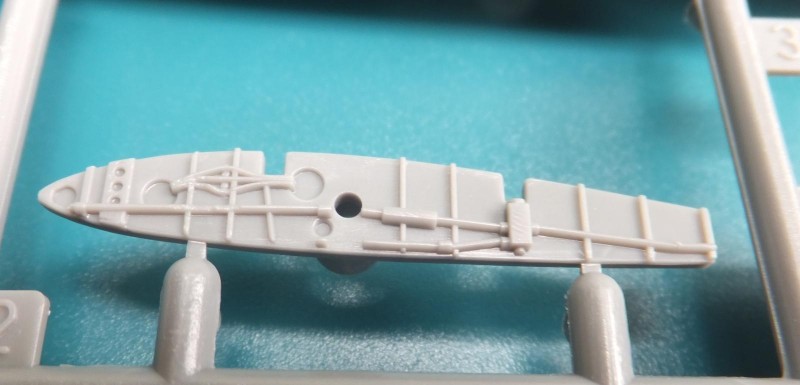
    Next sprue contains the interior detail parts, flight deck, radio sets, bulkheads and instrument panel. Also the wingfold parts.
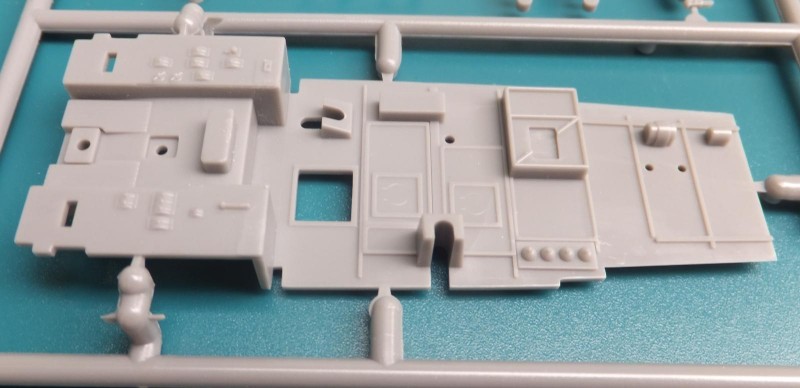
    Finally the fuselage, has some internal details, not much as most are provided with the inner panels. Just the spare gun rounds on the rear section. The butterfly flaps, The 4 bladed prop, IP and the radio set.
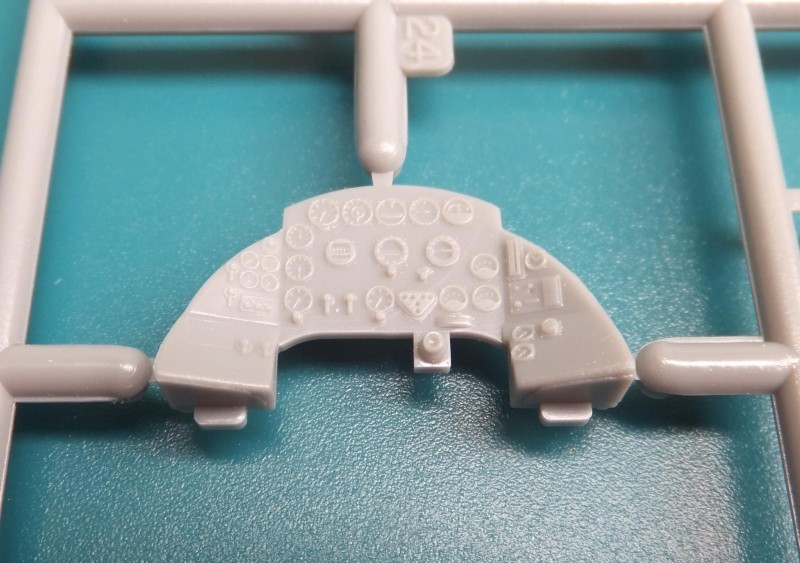
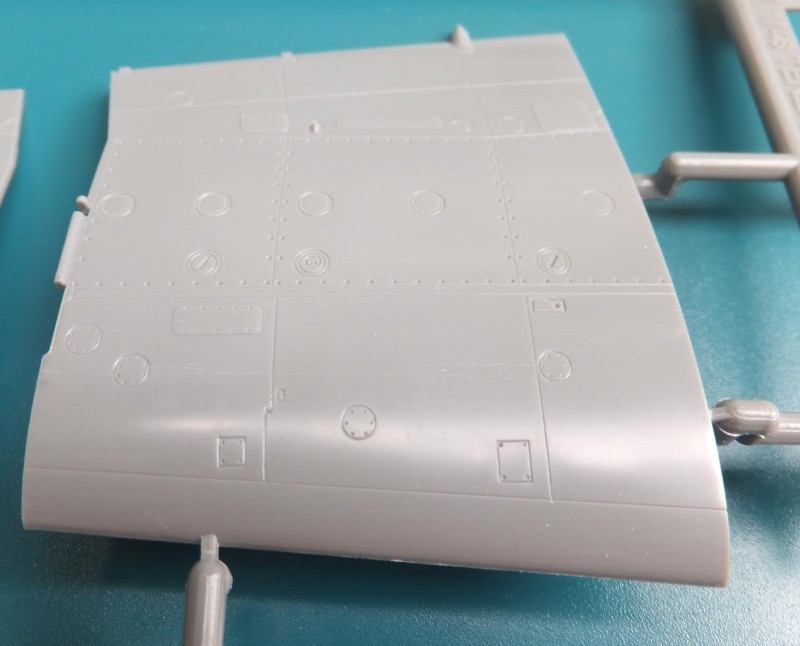
    The next sprue contains the other half of the fuselage. Gear doors, interior side panel, horizontal tail.
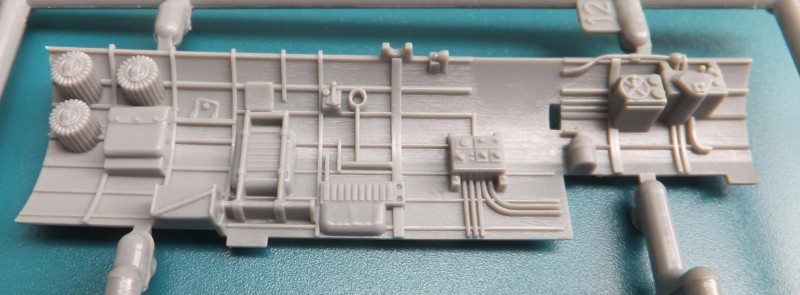
    The engine sprue also has the cowl and firewall parts.
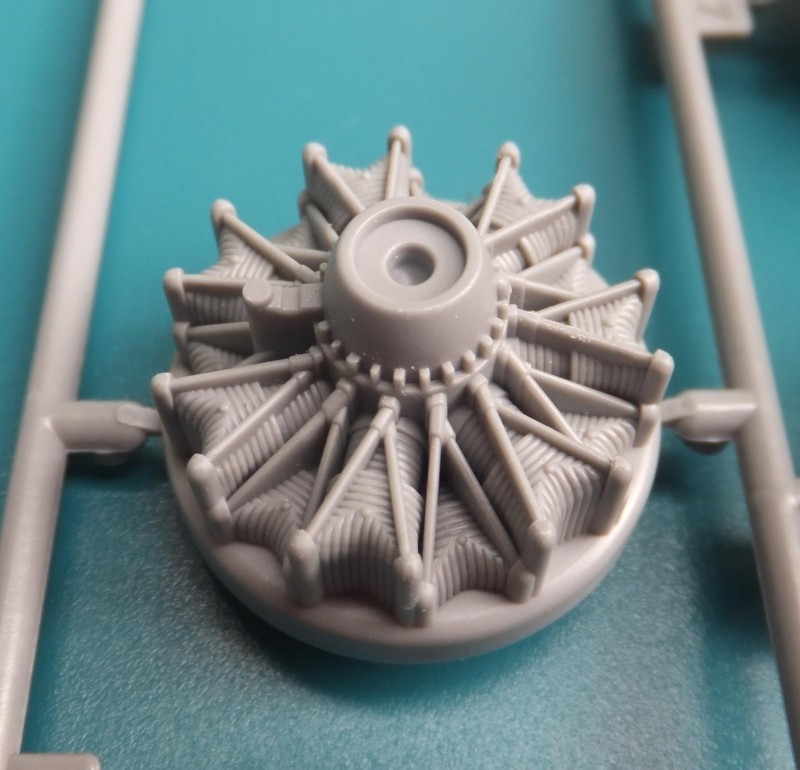
    The last grey plastic sprue is for all the upper and lower wing components. This provides a folded wing option which will come in handy for shelf space. Unlike the Zeke variants these are a bit larger in size.
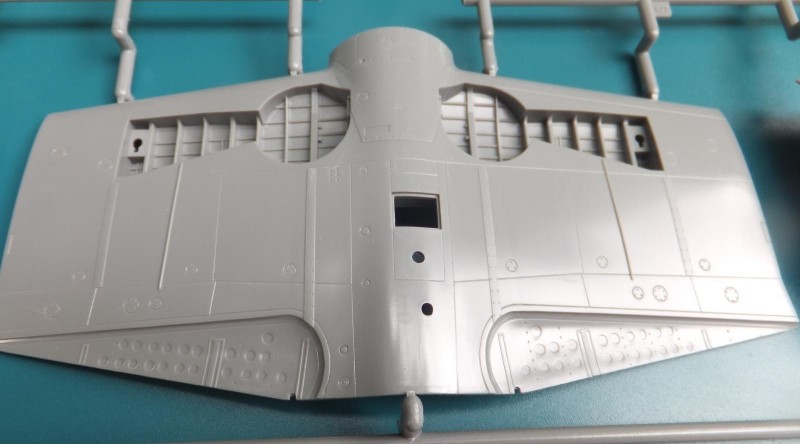
    The clear parts is the 1 piece center and forward section of the canopy, too bad really I wish it was separate panels. The observation windows, 3 on each side I may forego and just use Testors clear to replace them.
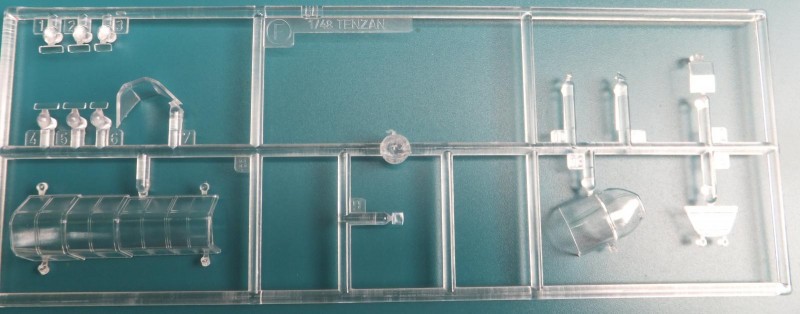
    The kit has a large parts count but not like let say a Hobbyboss or Trumpeter which at times are a bit over engineered. This kit should be a good build and look forward in getting started.
    More to follow.

  • Profile Photo
    Spiros Pendedekas said 3 years, 11 months ago:

    Great choice and stunning kit presentation Chuck! This is going to be super!

  • Profile Photo
    Paul Barber said 3 years, 11 months ago:

    Looks like a stunning kit, Chuck - some lovely detail. And as ever a very detailed review for us to get excited over! Looking forward very much to seeing this come together!

  • Profile Photo
    Chuck A. Villanueva said 3 years, 10 months ago:

    With the Val getting close to the paint stage, just need to mask all that glass. I decided to pre paint the parts on the Jill using Tamiya XF71 Cockpit Interior Green.


    The fuselage inner side interior panels as well. A wash here will make the details pop a bit more when I get into the building process.

    Under the flight deck this panel is painted as well as a portion will be viewable from under the fuselage.

    Components are painted while still on the sprue.

    Parts of the PE fret are painted as well, as this set is the older Eduard's unpainted version.

    The seats and Ip.

    The flight deck is well detailed and will be fun to really get into highlighting these points.

    The is part of the wing is also Green

    The inner side panel walls provided by Hasegawa are well done.

    Once the Green portions are painted, next Aotake is airbrushed into the wheel wells, dive flaps wells and the wing fold panels.

    Nexty up is to start work in the cockpit. More to follow.

  • Profile Photo
    Spiros Pendedekas said 3 years, 10 months ago:

    That's great stuff, Chuck!
    Cockpit turns out super!
    Aotake painted parts look very good too.

  • Profile Photo
    Chuck A. Villanueva said 3 years, 10 months ago:

    Thanks Spiros, 3 Japanese war birds all of the surface attack variety. Dive bombing Val, torpedo bomber in the Jill and the Judy can do either. Fun stuff

  • Profile Photo
    Chuck A. Villanueva said 3 years, 9 months ago:

    With the Val almost finished. It was able to get some time into the Jill and get started. So did some work in the cockpit.

    The cockpit floor has all kinds of neat areas to enhance and lay a good foundation for some details.

    Starting with the instrument panel which has excellent details. In my younger days I could just detail this with paint. Very nice as provided from Hasegawa. Shame sanding it off to accept the PE bits.

    First to paint white the rear backing of PE film supplied by Eduards.

    The center panel is cut out of the film and placed on the center panel of the dash. Let set for 20 minutes.

    Next the center metal panel is layed over the gauges and dials.

    ]

    Next the LH gauge panel is placed on the LH side of the IP.

    Then the RH upper gauge panel is place on the RH side of the IP.

    Finally the RH lower gauge panel is placed on the RH lower portion of the IP. Then the panel is put off for about 20 minutes to set.

    In the meantime I throw a wash over the floor of the cockpit and go over the wear areas with a Prisma silver pencil.

    Back to the IP, the LH outer face panel is placed over the gauge and dials.

    While that sets, I remove and prepare to attach the pedals.

    The remaining panels over placed on the IP and then the assy is attached to the side consoles. Excellent fit here.

    The control stick is next is attached in place on the cockpit floor.

    Next is the bulkhead behind the pilot,

    A rod or probably the bomb release lever? is attached to the bulkhead before installing it into the flight deck.

    Next the bulkhead is place behind the pilot on the floor.

    [PIC28]

    Next is the radio set and panel to attach to the forward bulkhead.

    The radio panel again great details to pick out.

    This may be the bomb sight that attaches on a base on the cockpit floor and rests on a bracket on the radio panel.

    Everything aligns in place and set. So far just the forward section of the cockpit is partially completed, more to follow. A vast difference compared to the Fujimi Val which is very basic.

    more to follow

    1 additional image. Click to enlarge.

  • Profile Photo
    Spiros Pendedekas said 3 years, 9 months ago:

    Those panel enhancements look wonderful, Chuck.
    Nice progress!

  • Profile Photo
    Chuck A. Villanueva said 3 years, 9 months ago:

    Yes they do Spiros, but if I could still be able to without messing it up with detail painting I would've preferred to that which such excellent detail that comes in the kit. Hasegawa provides a lot more parts in the cockpit. Working front to back.

  • Profile Photo
    Spiros Pendedekas said 3 years, 9 months ago:

    True that this (and many others) Hasegawa cockpit is nicely represented OOB, Chuck @uscusn.

    And this is my usual route: OOB.

    However the panelling is a big step forward and I deeply admire such works.

    Regarding your detail painting, I (and I am one of the very many), find it extremely well done, with trully excellent results.

    All the best, my friend!

    Cannot wait to see this bird coming along!

  • Profile Photo
    George Henderson said 3 years, 9 months ago:

    Good stuff Louis. I built this four years ago but the bomber version. A few points from my build. The first was the inner wing/fuselage join; gaps on both sides. There's no room for a spreader bar as the cockpit tub hangs down. I added thin plastic card to one side and this sealed the gaps. A bit of mud was needed. There was a small gap at the top of the cowl/fuselage joins and plastic card was use here as well. You are correct about the fuselage windows. Mine were slightly over-size and impossible to resize so I used this to make new windows

    I found some info about the MG magazines and this is how I painted mine

    I purchase the Eduard canopy mask set and believe me, well worth it

  • Profile Photo
    Colin Gomez said 3 years, 9 months ago:

    Nice paintwork on the cockpit, Chuck. I like the way you used a light wash to bring out the floor details (at least that's what it looks like). I also like using a Prisma color silver pencil for highlighting and chipping effect, as you describe.

  • Profile Photo
    Chuck A. Villanueva said 3 years, 8 months ago:

    There is a lot of cockpit on this Jill. Hasegawa has really stepped up on their interiors on these newer Japanese naval bombers. Night and day compared to the Fujimi Val. But your comparing 1970 tech to late 90's moldings. Thanks George for sharing your cockpit images, big help and inspirational in moving forward. Colin I used Mig washes and tried and true dirty thinner to dirty things up on the inside as well as the reliable silver pencil to represent traffic wear within.
    Except for the pilots seat, the front pilot's compartment is done. Now working in the bombardier and navigator's flight deck.


    I believe this is the compass that mounts on the bombardiers station above the radar
    set panel.

    Next a PE rack base is built and placed over the molded section on the floor. The instructions call to remove a section to place this part. Which is flimsy.

    It is better to use the existing section to help support the PE and the radio set that will be placed upon it. It will likely not come loose during handling or down the road just sitting on the shelf.

    The radio set is assembled and carefully attached in place on the PE rack.

    The LH side interior side panel and console is painted. No wash as yet.

    Next is to build and paint the bombardiers seat. Add lap belts as well. Put aside for now once completed.

    Next is to assemble and detail the navigators seat. It is a folding seat that is stored to the right inside interior side panel. Once finished it is also put aside to install later.

    The bomb aiming device is trimmed and attached in place in the bombardiers station.

    Just like on the recent Hurricane, I used the PE seat for the Jill instead of the kit provided one. Much better in scale thickness. Moving right along, I was going to have the kit seat next to the PE seat for comparison, forgot.

    Attached the navigator seat in place in the navigation station.

    The RH side interior panel has very good details. Using Nato Black, Vallejo Steel, MM Brown to paint some of the details. Mig Brown wash to dirty things up a bit and highlight the components and stringers.

    Both side panels detailed and weathered a bit more to show some wear.

    Next up is to add the final bits in the cockpit and buttoned it up.

    More to follow..

  • Profile Photo
    Louis Gardner said 3 years, 8 months ago:

    Chuck, @uscusn
    The cockpit details are amazing in this model. Hasegawa packed a lot in this one... Your skills have brought it to life, and the seat belts are an added bonus. I'll be watching for another update... It looks as if you will be buttoning up the fuselage soon. Keep on Rocking !

  • Profile Photo
    Erik Gjørup said 3 years, 8 months ago:

    Busy interior! Looking great - I really like the pragmatic approach, keeping the support of the plastic and adding the detail of the PE. Done like this it makes the good look magnificent. Well done - I'm strapped in for the next installment Chuck (@uscusn)