Thanks, Spiros and Tom. Yes, it is great having the Internet to check things. I think I have spent more hours staring at pics of cockpits from the Net this week then actually building. As you might guess from this intensity of research, I have decided to take the plunge in super detailing the SHAR. I am starting with the cockpit, which also necessitates getting the fuselage insert grafted on permanently. I have now got it attached on both sides and nicely lined up with no bends.
I don't want to find it banana shaped after the interior detailing is done and have to saw it apart then. The instructions say to do the insert separately and then glue it on after it's fully painted and assembled, but that make no sense to me and is asking for trouble.
So this week was all about the joys of scratch-building. I started with the instrument panel. The resin piece is pretty crude, with murky detail and quite a bit of fictional composition of dial and switches. There are surprisingly few good interior views on the internet and in books of the 1982 FRS 1 cockpit. After studying and comparing, I have figured out the differences between FRS 1 and FA 2. Here are two shots of the FRS 1, the first minus the Blue Fox Radar scope on the right side
-
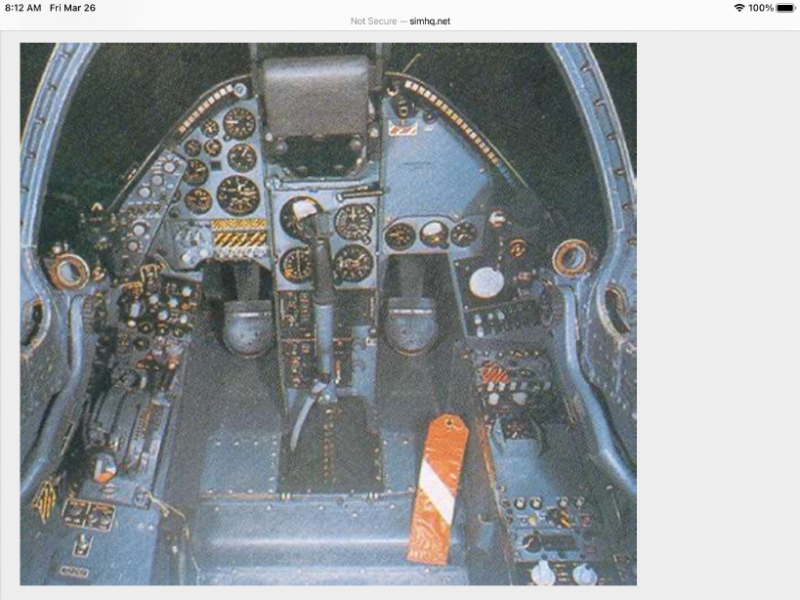
1. No radar scope here but the pic is in color
2. Note warning stripes for weapons control panel (a cool detail not too difficult to reproduce in 1/24th)
-
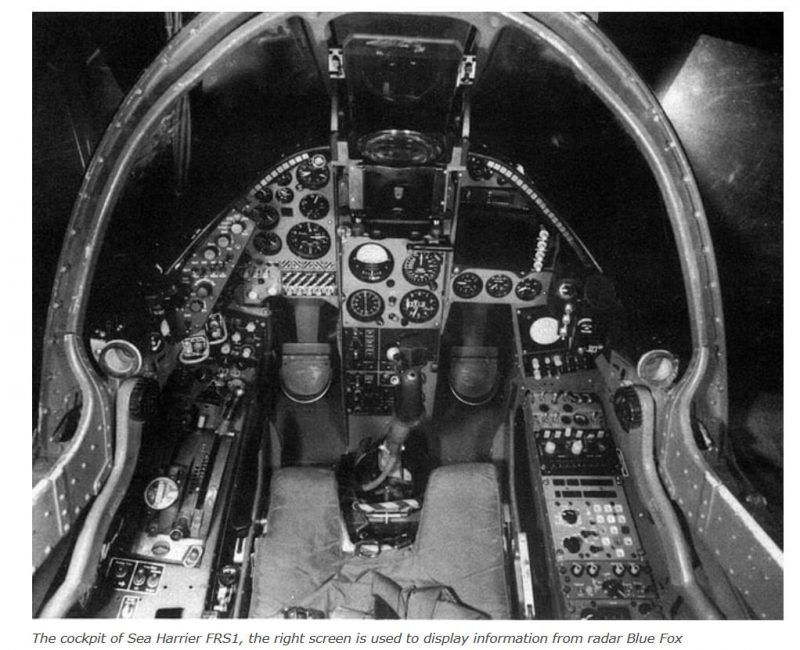
1. Note how the attitude direction indicator is larger than 3 other instrument in the cluster
2. Balanced asymmetry of dials is a challenge when scratch building.
Here is the FA 2 pit with two screens.
-
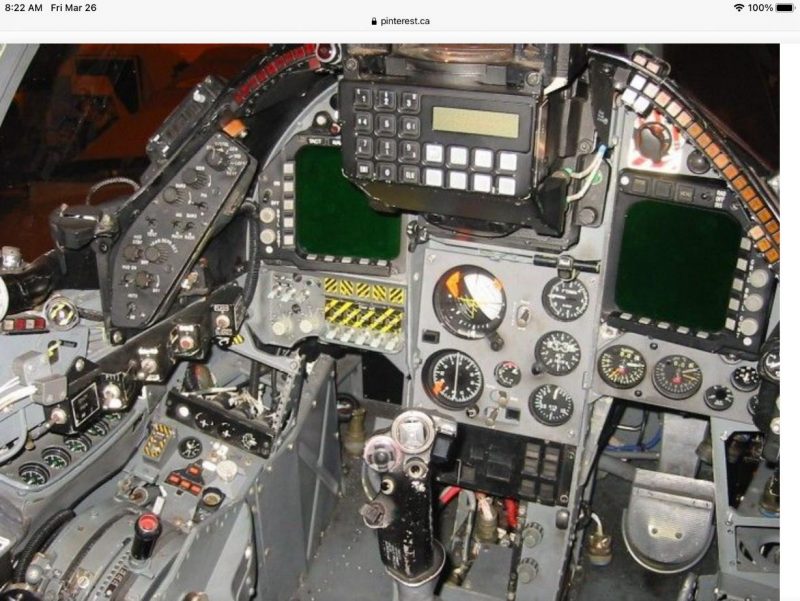
1. Same stripey weapons panelin FRS 1 And FA 2.
Thus, for most details some well-photographed FA 2 pits are OK for key elements of the FRS 1 (except that the original Blue Fox radar arrangement is quite distinctive). I also recently found some great shots of the Indian Navy HAL version of the FRS 1, even better and very close to the Falklands era version (the radar screen is a bit larger and some dials therefore displaced, etc.).
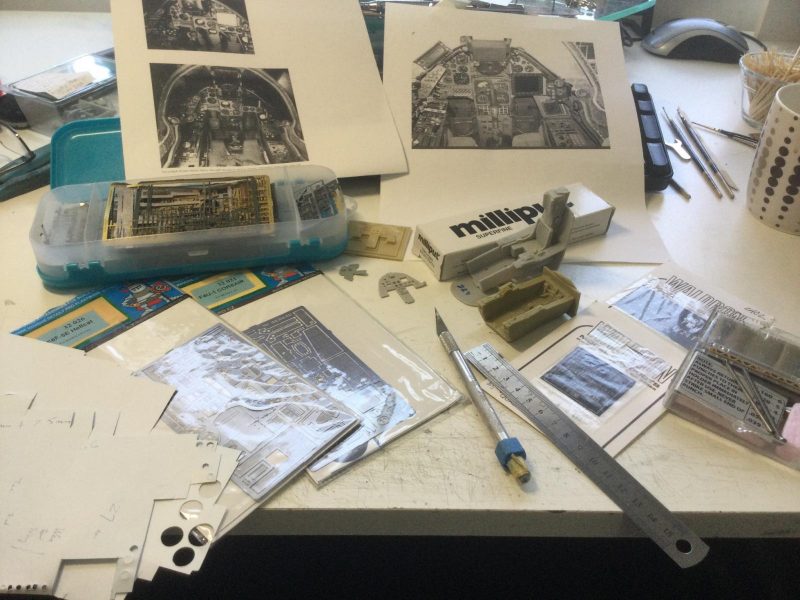
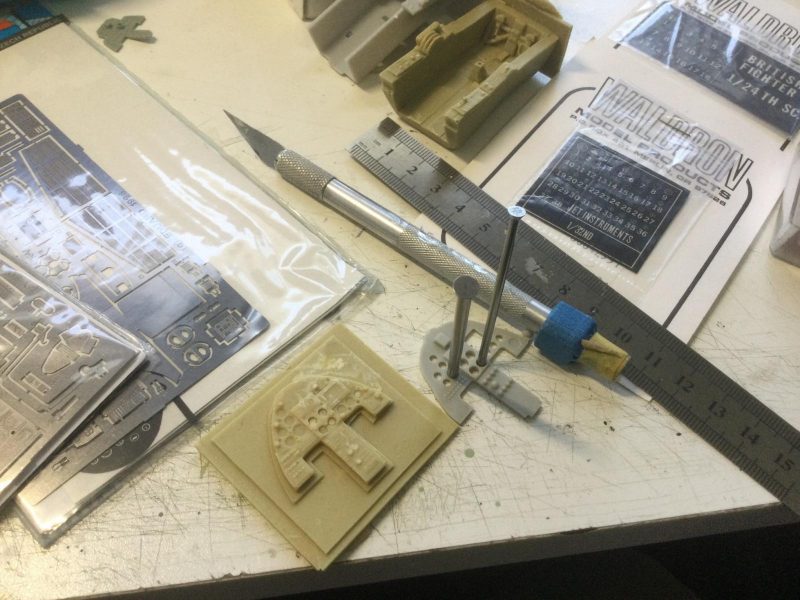
Anyway , it is clear that the only way to get an authentic '80s era FRS 1 cockpit in 1/24th scale is scratch building. The first stage for me after research and thought is to gather tools and materials, including sheet styrene, Waldron punch set, Waldron instrument dials, Airscale cockpit placards in 1/24th and 1/32nd scale, scrap photo-etch and large scale photo etch sets that I won't be using for their designed purpose.
-
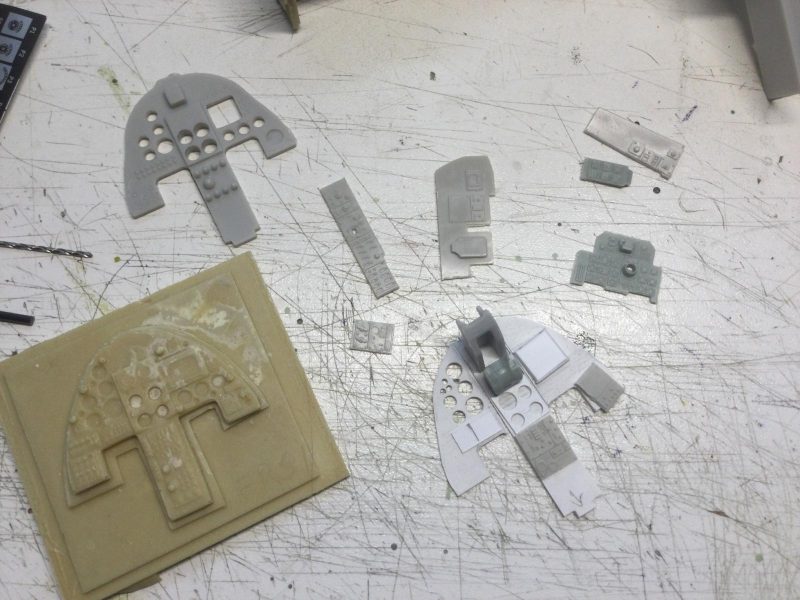
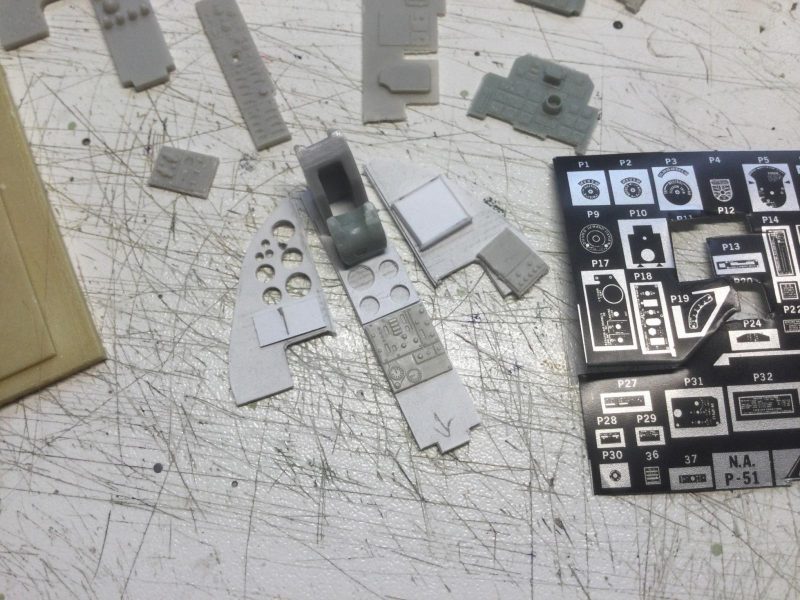
BTW, I like to look for useful shapes on photo-etch frets, especially very small and delicate detail elements in well laid out sheets. It is sometimes easier to find what you need on a full fret (repurposed) than in the scraps box. Airfix's main control panel for the SHAR is so poor, thick and featureless that it is best to start completely from scratch with sheet styrene. I traced around the outline of Airfix's version to cut out the new panel I then began punching out the dials with my Waldron punch and die set. I used photos of real panels plus the kit and resin versions to judge how large to make the holes for the instruments. I actually inserted the punches in the holes of the kit panel and Heritage's version to check the approximate diameter of some dials.
-
Even though I am using what I have in this basic way, almost all of the holes for dials in the kit AND resin panels are inaccurate in relative proportion and patterned arrangement. As a result, I have to enlarge some holes carefully and create my own grids to line things up accurately.
-
1. NOte that the attitude direction indicator is much larger than the other three dials
2. These three dials are all different sizes on the real panel and my panel (vertical alignment is "right justified")
There is a lot of balanced asymmetry in the real SHAR instrument panel which kit makers have tried to simplify (see previous pics). I have gone for accuracy in my version with, for example, a larger bezel for the attitude direction indicator in the central cluster of four. In some cases, I have drilled smaller openings or sanded out smaller ones which do not match the punch sizes I have. I am pretty happy with the results so far. Interestingly, Airfix and Heritage have made the central panel stick out ahead of the side panels but a careful look at photos show it should be recessed back. I therefore sliced of the "wings" of my new version, crafted wedges as inserts and recreated the correct form in miniature.
-
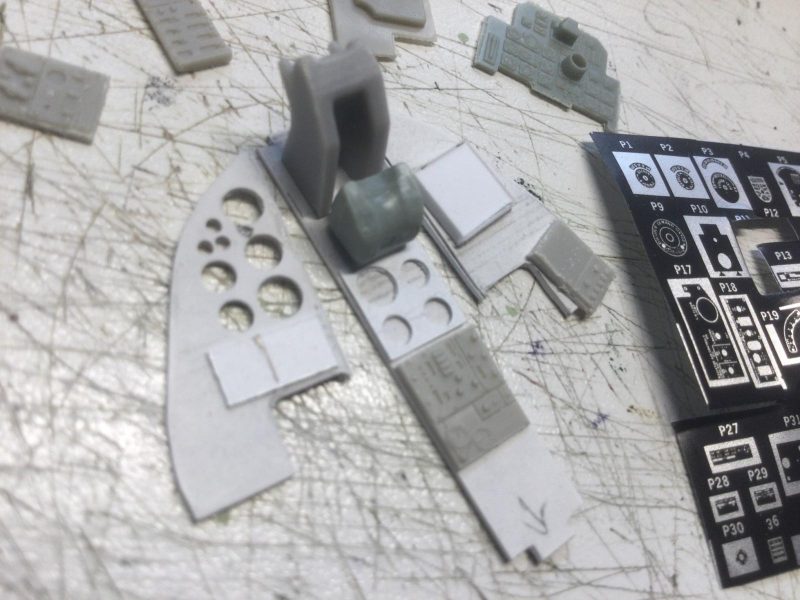
1. Just working on the HUD with more scraps, Nothing is glued together yet at this stage (before painting)
2. Waldron foil backed instruments to be canabalized for the SHAR
3. Wedge crafted and glued on here to recess center panel.
Here is the original as reference:
-
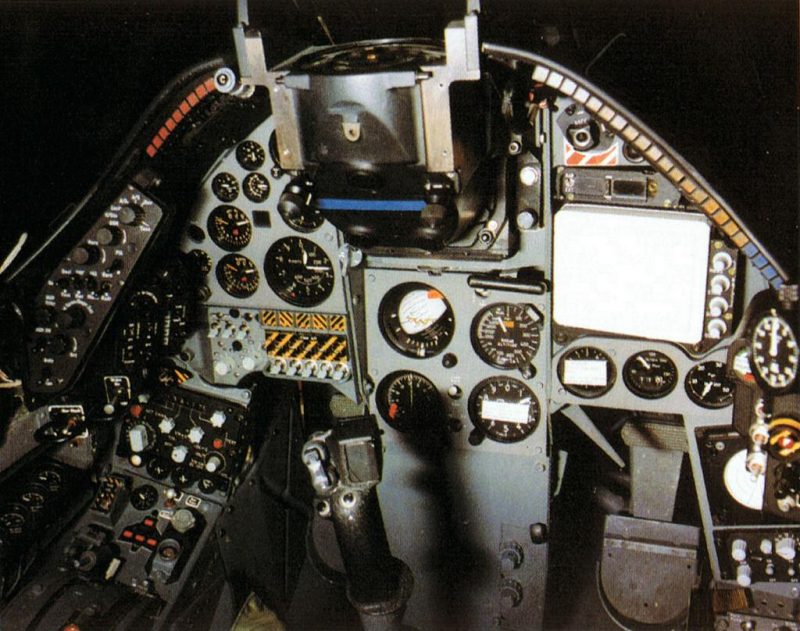
1. Wedge shows how centre panel is angled back not thrust forward I represented this with surgery on my panel.
I have good dials in my generic Waldron Jet Aircraft Instruments set which even at 1/32 scale are exactly the right sizes for the SHAR panel. I also have the perfect decals from Airscale for the zebra earning stripes on the weapons panel (again in 1/32 but just right for this 1/24th pit).
I will place the Waldron dials on white styrene covered with clear styrene sheet and then glue the panel piece I have crafted over top, just like doing an Eduard photo-etch panel. I will also pre-paint all elements before assembly. This will help with realism by not slopping on paint over the piece after assembly. Another thing I am doing is detailing some parts of the main panel and side consoles using scraps from the spares box.
-
1. This panel is from a Tamiya F-4C - cut out from a larger console, thinned down to fit and rpresent a surprisingly similar looking panel on the SHAR
2. Other trimmed and thinned panel bits from the 32nd scale F-4C and an old Academy MiG-21 in 1/48
I have taken some parts from a Tamiya F-4C (extra to the F-4J boxing) to simulate some switches and dials on the central instrument post. I sanded these down drastically from behind first to thin them down. Using bits and pieces like this is sort of like they way they build miniatures for the movies, using discarded bits of diverse kits to create authentic looking detail. In this case, the old F-4 bits match quite closely with the photos of real SHAR equipment and looks better then anything I could make from scratch.
-
1. Just working on the HUD with more scraps, Nothing is glued together yet at this stage (before painting)
2. Waldron foil backed instruments to be canabalized for the SHAR
3. Wedge crafted and glued on here to recess center panel.
Finally, I have some printed placards on foil backing that I can carve up to make cockpit switch panels and placard (as seen in several of the previous pics). It is hard to make such details by painting or building them up so the printed bits will be useful and pleasing to the eye.
That's it for now for the SHAR. This is fun work but tiring on the eyes.
With enough detailing done for today, I have to get back to my Buffalo for a painting session tomorrow. More updates on that other project soon.